Architect Design Building Need
criticising a building from the point of view of an architect unrelated to the building\’s design i need this so i need a expert at architecture. I need this done within 24 hours will explain more detail when selected it more like a essay that 2 pages long. pay is 20.00 for this.
Author: Blancer
Programming Project 1270693248
Programming Project 1270693248
Hello,
I’m looking for a programmer to spider an online store. The spider would need to gather and store all of the products and product attributes into a MySQL Database. The product images would also need to be gathered and saved to disk and a way to link a product with its corresponding image(s). There are roughly 500,000 products in the online store. All images would need to be saved in their highest resolution with no manipulation done to the images.
The MySQL database should have at least two tables, one storing the product and its core details, and another table to store attributes in key/value pairs.
Once you spider the data you would compress a MySQL database dump file of the product data along with all of the images and send it over. We would need to see a sample of the database before payment is sent over along some statistics of the data, including database rows, size, and image size.
Please add something in your bid description that proves you read the full description of this job listing.
Thanks
PS We can provide a server if needed.
WordPress Theme 2
WordPress Theme 2
Hi there
I require the design and installation of a custom WordPress theme. I know what I want, I just need someone to create the code and make it look good!
The project details are as follows:
– WordPress design and installation (3 design options required)
– Shopping cart plugin
– Recommendation for site functionality and other plugins (SEO package, sitemap etc)
– basic logo design
– unlimited revisions (within reason)
– ownership of source code
Fluency in English is important because I’m not particularly techy, but it’s a fairly simple project. I have included the layout of the landing page for reference.
Many thanks and happy bidding.
Sal
Fix Contact Form
Fix Contact Form
I have a contact us form. It is in a flash page, but the form submits to a PHP page. The info is not getting emailed correctly.
It could be as simple as a mis-spelled email address. It could be a php error, or it could be a problem of the Flash form not passing the info correctly. I think it will be an easy project but whatever the problem is, I will need for you to fix it.
It is using a custom PHP script.
I will not send the page URL until I award you the project. At that time you can look at the website before accepting the project.
After you accept, I will give you FTP login info and you will need to fix it whatever the problem is.
Here are some screenshots:
http://174.132.166.251/~outsourc/Screenshots/Public/2010-04-07_2033.png
http://174.132.166.251/~outsourc/Screenshots/Public/2010-04-07_2034.png
I just do not have time to do this myself.
Thanks,
Daniel
Writer: Energy Efficiency Site
Writer: Energy Efficiency Site
We are in need of a strong yet fast writer. We just launched our site, and it is time to generate some buzz. We’d like about 20 short articles discussing different parts of our site.
The ideal writer for us has a:
– exceptional ability with pithy marketing speak
– familiarity with SEO and the keys to successful blog writing
– comfort with technology and business topics (although this is not technical writing)
– facility with posting articles online using a content management system like WordPress or Joomla.
To work with us, please send a proposal including rate to write a single 300 word article. Also, send a writing sample addressing the following topic: What is a commercial lighting retrofit, and how does it benefit businesses. (200 word max)
Here’s a page on our site that can help you: http://greenzu.com/assessment-tools/energyover/lighting.html
Image Uploader For WordPress
Image Uploader For WordPress
I am looking for a ‘plugin’ I guess of somesort that would allow visitors to upload a picture to my wordpress website.
The uploader would show the original pic as found on the users computer, then allow for the user to move the picture to be resized and show only the area of the picture specified in the ‘target area’ (ex. target area could be 150X550px)
*Something similar to http://cheezburger.com/FlashBuilder/TotallyLooksLike
Also would need a couple simple ‘details to be added for the ‘post’ like name, City, Country and Age.(I’m not sure if this would need to be added through the image uploader/cropper or can be done through another area in WP??)
The uploader/cropper would need to then allow the visitor to upload the picture to the wordpress website as a post after entering email etc.
This should be simple for someone who knows their flash stuff well!
++++++++++++++++++++++++++++++++++++++++++++++++++++++++++++++++++++
* PLEASE READ MY COMPLETE DESCRIPTION OF THIS JOB! DO NOT OVER BID ON MY BUDGET–THIS ONLY SHOWS YOU DID NOT READ MY ENTIRE JOB DESCRIPTION & WASTES YOUR TIME & MINE! ====================================================================
Quick Joomla Page Corrections
Quick Joomla Page Corrections
I have a few quick changes that need to be made to the following page:
http://www.macromarketingsolutions.com/new/68-Site-Evaluation.html
This is of course built on a Joomla platform.
here is what I need done:
1. Remove the “Marketing News for…” box that is on the right.
2. Center the page content.
3. Place a graphic behind the web-form at the bottom of the page.
4. Change the submit button image.
5. Change the font color of the form.
6. Have the 5 logo images that are on the page link to a shadow box pop-up that will display a pdf or other format. This MUST be easily managed from the backend of Joomla (no HTML or other direct coding please. If plugin is required, then we can install).
Graphics will be provided in any format requested (pdf, jpg, png, etc).
JOOMLA EXPERTS ONLY PLEASE!
Thanks!
Accnt Creator Blogger&wordpres
Accnt Creator Blogger&wordpres
I need a simple multi threaded bot in which I will add a list of gmail accounts and a list of proxies, and give username/password. This will start creating account on blogger and wordpress, it will use 1 email for ceating 1 account on both wordpress & blogger.. after account creation is finished, it will have a button to VERIFY emails, it will login to GMAIL through pop and click verification link for all accounts.. thats it for now, but I will need more features later…
Hyip Design & Script Instal
Hyip Design & Script Instal
Need Hyip Design. I have the idea with full design of the first page.
Template and Script installation ( Hyip Manager 2009 pro)! Uploading it to server.
Some other features like live chat, Flash banners etc. Need someone who have experiences working with hyips.
Will give total list of jobs showing interest.
Site With Events + Data Import
Site With Events + Data Import
I have a basic skeleton of the site done in html which I will provide so it will be clear what needs to be done.
Scripting must be done in php5.x, for ajax preferably latest jQuery. Site will use Mysql5.x
also htacess must be used for nice looking URLs
Site’s elements:
— Register —
registering with e-mail, pass, captcha (captcha from recaptcha.net)
(with sending e-mail with activation link in it)
ajax checking if e-mail exists and if passwords match
— Login —
e-mail, pass (after few bad tries, show Captcha as anti abuse), remember user, recover password
— Associate user(s) with account —
(much ajax here)
user name, user continent, user country (drop down list for cont. and country) => check if it doesn’t exist, then import his info by extracting a few text strings from an external site
* User is asked to modify some info on that external site
* User clicks Verify button
* After that we import the info from external site and check if it’s correct
* If it’s successful we store all his data in our database and associate this user with his account
— Add an event with a “Bad Guy” — (temporary name)
(much ajax here)
each account with associated user can add a new event with a Bad Guy
* select one of the associated users, after that get his info from database and show below (with ajax)
Date, Bad Guy name, Building, Room (list of Buildings and Rooms to choose from are taken from our database)
Verify button, when clicked we retrieve 2 data strings from 2 external sites and verify if they match
Product ID (user enters a product ID, this can be entered in various formats so we convert to proper ID if needed. We then import the Product’s name based on the ID from our database. If not present in database we import it from an external site and save to our database. When product ID submited we show the product’s name and display another field for next Product ID (with ajax))
Add photos: (user adds a photo, which we convert to previously set quality and resolution as well as generate a thumbnail and store them. After it’s submitted we use ajax to show the submitted photo’s thumbnail and show next field for another photo)
Add comment:
[Submit]
// Submitting stores all the data above in our database
— Search Bad Guys —
Search for Bad Guys (visitors can search for all events which a Bad Guy took part in)
(we display results as Bad Guy and Events, with multiple info taken from our database)
— Browse Bad Guys —
After choosing Continent and Country we display all Bad Guys from that Continent and Country and events associated with them)
— Viewing an Event and adding data to it —
Rating (1-25 scale, based on user votes)
Bad Guy info, Continent, Country
Event added by – user who added event and when added
Date & time of event, Building, Room, Products, Screenshots, Comments
Fields for adding/removing score for Rating, comments by other users, screenshots by other users (additional check required using data from external site to see if current user can post comments)
Report – a message reporting to admin if something’s inappropriate in this event
— Tracking change of Name, Country —
Every successfully added Event adds a Bad Guy to a special list in admin panel. Admin uses it to retrieve “additional data” about each Bad Guy from an external site and store it into database.
After that if users suspect Bad Guy’s data changed (name, country) and know the new info, they can use a form to submit it to our site and we compare if the “additional data” matches. If it does, Bad Guy is stored with a new name and new other info from now on. But we still store his old info somewhere.
— Bad Guy profile —
display name, Continent, Country and other data as well as old name, Country and others if any
and display all events in which this Bad Guy took part in
There’s a Report new data form for users (explained in “Tracking change” section)
— Account settings —
change password, change e-mail (new confirmation e-mail), list associated users with the option to remove them.
— Admin panel —
* list of events (with sorting, able to delete)
* import country lists into database (from textarea or input file)
* import building and rooms list into database (from textarea or input file) along with their desired names on our site. For example if on the external site one building is called “shop5” and I want it to be shown as “Shop number 5” then I want to include it on the list.
* import “additional data” of Bad Guys (with sorting)
* reports (show messages list, with sorting)
* ban list (list of banned users with sorting and form to ban users that abused the site disallowing them from adding events/comments)
Also admin must be able to edit/remove any of the comments, screenshots, events
Hiring A Writer
Hiring A Writer
Hiring a writer for 90 500 worders. Topics vary and articles must be original, passing copyscape.
The articles must include an original title, and have keyword placement. They must be delivered at a rate of 5 a day.
Can pay up to $4 per article. Payment made weekly through paypal.
Best bids will be considered first.
Price and payment frequency can not be negotiated.
Serious bidders only please.
Immediate start wanted.
WordPress Layout And Plugin
WordPress Layout And Plugin
I need a simple wordpress layout/theme created and a custom php plugin for photo viewing. Simple quick project.
I have included a screen shot of an example site, i need the same layout and photo viewing script.
only bid if you can start right away
Thanks
Word Press Minor Code Change
Word Press Minor Code Change
I need a Word Press Code Expert to modify an embedded code in a Word Press Template.
The person we select for the job could be used for other Word Press code projects if the quality is good enough. This means we need a serious Code person with a good work ethic and who is flexible. If you have a lot of work on our hands and cannot devote the necessary time to this type of project, please do not bid.
This project should not take a Word Press Code Expert more than 30 minutes to complete.
Thank you for your bid.
How To Build a Widget to Display your Buzzing
How To Build a Widget to Display your Buzzing
A couple months ago, Google released a new Twitter-like service, called Buzz. We can use this service to display our latest buzzes on any site. So, in this tutorial, I’ll guide you through the process of building your own Buzz widget.
Step 1. Reading Public Updates from Buzz
At the moment, there’s no API to work with the Buzz service; Google is expected to provide one within the next several months, however, for now, the public updates are available as Atom feeds.
First, we need to get the data from the Buzz service. In order to do so, we’ll setup a PHP script that reads the data from the Buzz service. This script will be a kind of proxy that we’ll use to retrieve the data. By doing this, we can make an AJAX request, and get an XML document that contains desired updates.

Here’s the initial PHP code:
header('Content-type: application/xml');	 //Setting up the response content type to XML
$handle = fopen($_GET['url'], "r");		//Open the given URL

if ($handle) {
    while (!feof($handle)) {
        $buffer = fgets($handle, 4096);		//reading the data
        echo $buffer;
    }
    fclose($handle);
}
Save this file as “readfeed.php,” and remember that this is just an example. In a real world project, you should clean the url parameter, and make sure the user is not opening something important on your file system.
Step 2. Creating the Structure of our JavaScript Object
Once we can read this data, we need to build an object that holds our code in JavaScript. Create a new file and name it “buzz-widget.js”. To extend an object, we need to use the “prototype” property; if you have questions about this you should watch the tutorial where Jeffrey shows us how this works with native objects.
The structure of our object will be something like this:
var BuzzReader = function(options){	//Step 1
	//code for the constructor
};

BuzzReader.prototype = {			//Step 2
	renderTo: "",
	proxy	: "readfeed.php",
	user	: "",
	url		: "",
	items	: 10,
	onLoad	: function(){},
	onRender: function(){},

	render	: function(element){

	},

	read	: function(){

	},

	parse	: function(xml,success,response){

	},

	format		: function(date){

	},

	createDate	: function(str){

	}
};
In step one, we created the constructor function for our object. Now, we’re going to check for the required configurations, and read the updates from our proxy.
- renderTo : the element where the widget will be rendered; this property can be a jQuery selector too.
- proxy : the URL where we’ll make an AJAX request call to retrieve our data. We already created the PHP file that reads the information from the Buzz service; by default it is “readfeed.php”.
- user : the Buzz user we want to get the updates from.
- items : the number of updates we are going to display in the widget.
- onLoad : an event we’re going to trigger when the data is loaded into the widget; by default, this is an empty function.
- onRender : this event is triggered when the widget is about to be rendered in the page; empty function by default.
Step 3. The Constructor
Let’s work on the constructor function of our widget.
var BuzzReader = function(options){
	var url = "http://buzz.googleapis.com/feeds/{user}/public/posted";	//Step 1
	jQuery.extend(this,options || {});			//Step 2

	if(this.user === "") throw "The 'user' property is required";	//Step 3
	if(this.renderTo === "") throw "The 'renderTo' property is required";

	if(this.url === "")this.url = url.replace(/{user}/g,this.user);	//Step 4

	this.read();		//Step 5
};
In step one, we defined the URL of the Buzz service from which we are going to retrieve the data. We’ll replace the “{user}” string with the user configuration (see step 4).
In step two, we overrode the default properties with the given options; we used jQuery.extend to do that.
In step three, we checked for the required configurations, one of them is the “user” and the “renderTo”. If one of these is missing, we throw an exception. This will be useful for the developer who uses our plugin.
In step four, we searched for the “{user}” string in the variable “url”, and replaced it with the user whose buzzes we wish to display in our widget.
The last step is very important. Here, we start the process of reading and displaying the information.
Step 4. Reading the Information
We’ve setup the PHP script that pulls the data to our server. Now, we only need to make an Ajax request to retrieve the data with jQuery; let’s look at the following code:
read	: function(){
	this.el = jQuery(this.renderTo);		//Step 1
	this.loader = this.el.append("<div class=\"buzz-loading\"></div>");
	jQuery.ajax({				//Step 2
		url		: this.proxy,
		data	: "url="+this.url,
		context	: this,
		success	: this.parse
	});
},
In step one, we appended a new element to the container, informing the viewer that we’re currently processing information.
In step two, we made the Ajax request. The most important thing is the “context” property; this configuration will allow you to change the context of the function that is called when the server responds. Finally, we set the context to “this” which is the BuzzReader object.
Remember that the PHP script expects the “url” parameter. so don’t forget to send it; when the server responds, the method “parse” is executed.
Step 5. Parsing the XML Document
The Buzz service delivered the data in an Atom feed format, so we need to parse and extract the information we need.
This is an example of the XML document that is returned from the Buzz service:
<?xml version="1.0" encoding="utf-8"?>
  <feed xmlns="http://www.w3.org/2005/Atom"
        xmlns:thr="http://purl.org/syndication/thread/1.0"
        xmlns:media="http://search.yahoo.com/mrss"
        xmlns:activity="http://activitystrea.ms/spec/1.0/">
    <link rel="self"
          type="application/atom+xml"
          href="http://buzz.googleapis.com/feeds/117377434815709898403/public/posted"/>
    <link rel="hub" href="http://pubsubhubbub.appspot.com/"/>
    <title type="text">Google Buzz</title>
    <updated>2009-12-14T20:04:39.977Z</updated>
    <id>tag:google.com,2009:buzz-feed/public/posted/117377434815709898403</id>
    <generator>Google - Google Buzz</generator>
    <entry>
      <title type="html">Buzz by A. Googler from Mobile</title>
      <published>2009-12-14T20:04:39.000Z</published>
      <updated>2009-12-14T20:04:39.977Z</updated>
      <id>tag:google.com,2009:buzz/z12bx5v5hljywtfug23wtrrpklnhf3gd3</id>
      <link rel="alternate"
            type="text/html"
            href="http://www.google.com/buzz/117377434815709898403/DmuNZHSfZ7t/buzz-buzz"/>
      <author>
        <name>A. Googler</name>
        <uri>http://www.google.com/profiles/a.googler</uri>
      </author>
      <content type="html">Bzz! Bzz!</content>
      <activity:verb>http://activitystrea.ms/schema/1.0/post</activity:verb>
      <activity:object>
        <activity:object-type>http://activitystrea.ms/schema/1.0/note</activity:object-type>
        <id>webupdates:[email protected]</id>
        <title>Buzz by A. Googler from Mobile</title>
        <content type="html">Bzz!  Bzz!</content>
      </activity:object>
      <link rel="replies"
            type="application/atom+xml"
            href="http://buzz.googleapis.com/feeds/117377434815709898403/comments/z12bx5v5hljywtfug23wtrrpklnhf3gd3"
            thr:count="0"/>
      <thr:total>0</thr:total>
    </entry>
  </feed>
Once we know the response, we can parse the document quite easily with jQuery.
parse	: function(xml,status){
	var that = this;
	var nodes = jQuery("entry",xml);	//Step 1
	this.el.empty();
	var info = [];
	nodes.each(function(){			//Step 2
		var date = that.createDate(jQuery("published",this).text());
		info.push({
			title		: jQuery("title",this).text(),
			author		: jQuery("author > name",this).text(),
			uri			: jQuery("author > uri",this).text(),
			summary 	: jQuery("summary ").text(),
			content		: jQuery("content:first",this).text(),
			published	: that.format(date),
			updated		: jQuery("updated",this).text(),
			date		: date,
			reply		: jQuery("link[rel=replies]",this).attr("href")
		});
	});
	this.data = info;				//Step 3
	this.onLoad.call(this,info);
	this.render(this.renderTo);		//Step 4
},
We received two arguments: the first is the data, in this case a XML document; the second argument is the text status of the request.
In step one we got all the “entry” nodes; this is the place where our Buzz updates and all the information we need is located. Next, we emptied the container of our widget and created an empty array to store our data as a JavaScript object for each node.
In step two, we iterated through the “entry” nodes and extracted the “title”, “author”, “content” and so on. This is a really simple process; all we have to do is write the selector and set the root for the search, in this case the root is the node “entry.”
I’d like to point out the line where we are extracting the “reply” attribute – the selector looks something like this:
link[rel=replies]
We specified that we want the node “link”, that has an attribute “rel” equal to “replies”. This is important because there are many “link” nodes within each “entry.”
In step three, we created the “this.data” reference to the array that contains our data. After that, we executed the event “onLoad” and passed the information we extracted.
In step four, we executed the render method.
Before we continue with the “render” method, let’s review the “createData” and “format” methods. We call these methods for each entry.
In the “createDate” method, we’re only going to create a new Date object with the given string. The string has the format “2009-12-14T20:04:39.977Z” so we can create the Date object as follows:
createDate	: function(str){
	var date = new Date();
	date.setDate(str.substring(8,10));
	date.setMonth(str.substring(5,7) - 1);
	date.setFullYear(str.substring(0,4));
	date.setUTCHours(str.substring(11,13));
	date.setUTCMinutes(str.substring(14,16));
	date.setUTCSeconds(str.substring(17,19));
	return date;
}
Or we can use a simple regexp to format the string and give it to the Date constructor:
createDate	: function(str){
	//str = '2009-12-14T20:04:39.977Z'
	str = str.substring(0,19).replace(/[ZT]/," ").replace(/\-/g,"/");
	//str = '2009/12/14 20:04:39'
	return new Date(str);
}
In the format method we are going to use the date object we just created, and return the time that is between the publication date and the system local time – for example “11 minutes ago” or “3 hours ago.”
format		: function(date){
	var diff   = (((new Date()).getTime() - date.getTime()) / 1000),
		days   = Math.floor(diff / 86400),
		months = Math.floor(days / 31);

	if (isNaN(days) || days < 0)return date.toString();

	if(days == 0){
		if(diff < 60)return "Just now";
		if(diff < 120)return "1 minute ago";
		if(diff < 3600)return Math.floor( diff / 60 ) + " minutes ago";
		if(diff < 7200)return "1 hour ago";
		if(diff < 86400)return  Math.floor( diff / 3600 ) + " hours ago";
	}else if(days < 31){
		if(days == 1)return "Yesterday";
		if(days < 7)return days + " days ago";
		if(days < 31)return Math.ceil( days / 7 ) + " weeks ago";
	}else{
		if(months == 1)return "A month ago";
		if(months < 12)return Math.ceil( days / 31 ) + " months ago";
		if(months >=12)return Math.floor( days / 365 ) + " years ago";
	}
},
The previous code, though a bit tedious, is pretty straight forward. First, we obtained the difference between the current time, and the publications date in minutes, days and months. After that, we simply compared the results, and returned a string in the correct format.
Now let’s review the “render” method.
Step 6. Creating the GUI
Until now, we’ve only pulled the data from the Buzz server, and parsed the XML document. That means that we are ready to display the information on the screen.
render	: function(element){
	this.onRender.call(this,this);		//Step 1

	var html = [];				//Step 2
	html.push("<ul>");

	for(var i = 0; i < this.items || i < this.data.lenght;i++){
		html.push("<li><strong><a href=\""+this.data[i].uri+"\">"+this.data[i].author+"</a></strong><span>"+this.data[i].published+"</span>"+this.data[i].content+"</li>");
	}
	html.push("</ul>");

	this.el.append(html.join(""));	//Step 3
},
In the first step, we triggered the event “onRender,” this, again, will be useful for the programmer who uses our plugin.
In the second step, we created an array to store our dynamic HTML. After that, we created a list “ul” and then we iterated through our data, creating the “li” node for each item; you probably noticed that the “for” condition has an “or” operator; this allow us to stop the iterations when the array of data ends, or when the index “i” has reached the “items” property defined by the developer who is going to use the plugin.
In the last step, we inserted the HTML into the container using the “append” method.
Step 7. Using the Widget
In order to use our widget we need to create an instance of our class “BuzzReader”, but, before doing so, let’s define where we want to render it. Create an HTML file, and, within the body element, and add the following:
<div id="buzz">
<div>
	<div class="reader"></div>
</div>
</div>
We are going to render our widget inside the div with the class “reader”, let’s create the instance of our widget as follows:
$(function(){

	new BuzzReader({
		renderTo	: "#buzz .reader",
		user	: "nettutsblog",
		items	: 3
	});
});
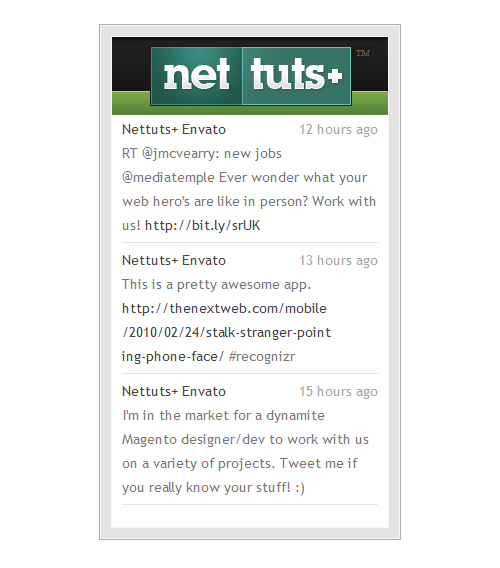
Don’t forget to import the jQuery library and the “buzz-widget.js” into your HTML file. If everything was configured and coded correctly, you should see something similar to the following image:

Step 8. Styling the Widget
Well, we can now see the updates, but it doesn’t look very pretty; we need to style it a bit.
/* step 1 */
body{font-family:"Trebuchet MS",Arial,sans-serif;line-height:24px;font-size:14px;}

/*Step 2*/
#buzz{width:300px;margin:100px auto;border:1px solid #AFAFAF;}
#buzz > div{background-color:#E4E4E4;border:1px solid #F6F6F6;padding:10px;}
#buzz .reader{height:350px;overflow:auto;border:1px solid #F6F6F6;padding:80px 10px 10px 10px;background:#fff url(title.jpg) center 0 no-repeat;}
/* Step 3 */
#buzz ul{margin:0;padding:0;}
#buzz ul li{list-style-type:none;color:#A3A3A3;border-bottom:1px solid #E4E4E4;margin-bottom:5px;padding-bottom:5px;}
#buzz ul li div{color:#777;}
#buzz ul li a{color:#444;text-decoration:none;font-weight:normal;}
#buzz ul li a:hover{text-decoration:underline;}
#buzz ul li span{float:right;}

/* Step 4*/
#buzz .buzz-loading{position:absolute;margin-left:240px;width:16px;height:16px;background:transparent url(ajax-loader.gif) center center no-repeat;}
In the first two steps, we centered the widget on the screen, and set the size, borders and colors for the container; we also added the logo as a header for the widget.
In the last two steps, we set the styles to the dynamic list, we changed the color of the fonts, and we added some margins, borders and paddings to our links.
As a result we have a much more appealing product.
Step 9. Creating the Plugin
The last step in this tutorial is to create the jQuery plugin. Let’s modify the “buzz-widget.js” file, adding the following code to the end of the file.
jQuery.fn.buzzReader = function(options){  	//Step 1
	return this.each(function(){
		var opts = options || {};		//Step 2
		opts.renderTo = this;
		new BuzzReader(opts);		//Step 3
	});
};
In the first step, we simply named our plugin.
In step two, we created the configuration object if the argument “options” is empty. Next, we defined the property “renderTo” to the actual element.
In step three, we created a new instance of our widget.
Now, we can use our plugin in our HTML, like this:
$(function(){
	$("#buzz .reader").buzzReader({
		user	: "nettutsblog",
		items	: 3
	});
});
Conclusions
I hope you’ve learned a bit about how to extract data from XML documents, and display your latest Buzzes on any website. Any questions? Thanks for reading!
Icon Designer Needed Asap
Icon Designer Needed Asap
Hello –
We currently have several Icons for our membership site home page but we want to add some more and change current ones. So we need appx. 10 Icons for designed that look like they came from the same set ASAP.
i.e.
Customer Support
Internet Forums
Capture Page System
Internet Marketing Training
Advertising Resources
Getting Started
My Account
Etc…..
Please have excellent ICON portfolio and
ability to follow instructions.
Only bid if you can start and finish quickly.