Job Portal
A job portal for job seekers to browse jobs posted by companies.
Will require payment gateway integration – Paypal.
Simple Php Script Modification
Simple Php Script Modification
Overview:
I have a .PHP Script & some .HTM files that needs some simple modifications.
Not too difficult – so should take a good programmer
1-3 hours at the most.
I have included a copy of the script for your review
… and a copy of my requirements.
I do some programming myself… but havnt got time today
to do this … so If interested please take a look at
my requirements ..and PM me if you can do this today.
Before bidding
1. Read the overview & requirements.
2. Good English understanding necessary
3. Do not bid over the max allotment.
4. Please give realistic timeframe and any suggestions at time bid.
Successful programmer WILL be awarded Immediate
long term *very* similar projects starting today.
Thanks.
-Jamie Dunne
Customize Photo Rate Script
Customize Photo Rate Script
Hello!
I just purchases the K-Rate, photo script, it has problems, and I cannot get support to respond. When you click on a link on the index page, i.e., “About Us”, the script is SUPPOSED to dynamically create that page, (i.e., about.html). However, it doesn’t do that. No matter what link you click, it says page, (i.e., “about.html”) not found on this server. This needs to be fixed.
Second … In the ADMIN area, the script provides a “CREATE PAYMENT TYPE” feature, so you can set up all of your MEMBERSHIP types/levels. HOWEVER, it ALSO offers a “CREATE MEMBER TYPE” feature, and when you use it, basically what you create, is the CATEGORIES for the images that will be rated. And appropriately, these “types” show up on the front page. This is fine in theory, but it’s limited, not to mention confusing. So … I WOULD LIKE the “MEMBER TYPE” feature changed, specifically, to reflect what it truly is, which is “Image Categories”. In addition, I WOULD LIKE a “subcategories” feature added to that, so I can create sub-categoriesat least FOUR levels deep.
I also need to ADD a feature or two as follows …
I had originally picked up yet another photo rating script, because I really liked one specific feature it had that none of the others had, only to find that it lacked too many OTHER features I needed. So it got tossed out of running. BUT, I’m (HOPING), you might be able to ADD that ONE specific feature to the K-Rate script I chose, and that feature is, the ability to ACTUALLY CREATE MONTHLY CONTESTS complete with description, duration and first, second and third prize listings, along with various little trophy and medal icons, etc., from the ADMIN panel. Now, you’ll need to look at that script too, so you can see specifically what what I’m looking for.
The THIRD addition I WOULD LIKE to have …As it stands now, K-Rate has it set up so that once people sign up, they have a “profile”, and ADMIN can edit/custom create those fields/questions. That’s great, BUT, because of the SPECIFIC PURPOSE of my site and use of this script, I really need THE IMAGE SUBJECT to also have a profile, whose fields/questions I can custom create. You see, in this site, members won’t be entering pics of themselves, but other people, places and things. Consequently, I need them to be able to add INFO OF MY CHOOSING for each image, to be shown under the image on display.
ONE LAST THING … K-Rate allows for BOTH photos and VIDEOS to be entered/uploaded for rating, which I love, BUT as it stands right now, there is NO “separation” … Meaning, all down the left side of the front page, you’ve got links like “rate photos” and “rate videos” and/or “see all photos or videos”, etc., I absolutely HATE this! I want to be able to have a “video” contest one month, a”photo” contest the next, and MAYBE at some point we’ll do both at the same time. BUT, if there are only PHOTOS one month, I don’t want thereto be “see video” links displayed. Conversely, if there are only videos one month, I don’t want “see photo” links displaying.
So, to summarize, I would like …
#1.) Fix dynamic page generation.
#2.) Change “Member Type” feature to “Image Categories” feature.
#3.) Add four level “subcategory” feature to that.
#4.) Add “Monthly Contest” creation feature exactly like other script has.
#5.) Add “Custom Profile/Description” fields feature for images.
#6.) Dynamic content link generation.
You can check out the K-Rate Demo at http://turn-k.net/k-rate/demo
You can see the other script with the “contest” feature I want at … http://petphotocontest.honeysmarketplace.com/siteadmin/index.php
admin/Nakima Once inside admin area, click on “contest in top menu.
THIS IS TIME SENSITIVE AND NEEDS BE DONE ASAP! THANK YOU!
Creating a document centric iPhone/iPad application with own file format using ZipArchive
Creating a document centric iPhone/iPad application with own file format using ZipArchive
If I need to predict one thing about where the App Store is heading to, now that the iPad has been released, I would say “It’s going to be less about farting apps and much more about productivity apps” Yes – the iPad has already changed the game drastically – with an almost real life size keyboard, large beautiful screen and file sharing direct in iTunes you can achieve much more than before. But hey, iPhone OS 4.0 is just around the corner, and I bet one of those new features will be the same file sharing you get on the iPad.
The problem
Assuming you are already familiar with Objective-C and Cocoa Touch, today I’ll be discussing how to create a productivity application which can read and write multimedia files – custom format files which will be a mixture of image and text data. If you look at the most of the Apple’s productivity applications you’ll notice they all use bundles as their output format. For those not familiar with the concept – the bundle is an actual file directory, which then holds different files, but to the user it’s presented as a single file – easier to copy around and in general to work with. I am going to be doing the same today by making my example application create different text and image files and then zip them together in a single file – this way the user could then copy this single file over trough iTunes via the file sharing feature.
ZipArchive overview
The star of today’s article is ZipArchive – the Objective-C library I’m going to use for compressing and uncompressing my custom zip files. It is completely free and you can download it from : http://code.google.com/p/ziparchive/
To use ZipArchive I download the library and add it to my Xcode project.
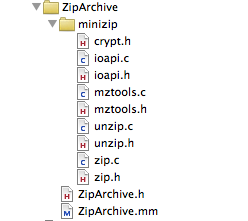
Now that I added the ZipArchive sources I am almost ready to create and extract zip archives. In fact ZipArchive uses the libz framework, so I need to add this framework to my XCode project too. Add->Existing Frameworks and I choose “libz.1.2.3.dylib”

ZipArchive is very straightforward to use, also because it offers just a handful of methods, let’s have a look together at what’s inside:
Creating a ZipArchive instance is super simple.
#import “ZipArchive.h”

ZipArchive* zip = [[ZipArchive alloc] init];
Create zip archives
Call CreateZipFile2: to create an empty zip archive file, or call CreateZipFile:Password: to create an empty zip archive which is password protected (the latter makes creating encrypted files really easy). NB: If your application is creating password protected zip files in general it uses encryption, so you would need to tick the encryption checkbox when you submit it to the App Store.
Once you create a zip archive you can add as many files as you like by calling addFileToZip:newname: and when you are done call CloseZipFile2. Or as they say “a line of code is worth thousand words”:
ZipArchive *zip = [[ZipArchive alloc] init];

[zip CreateZipFile2:@”archive.zip”];

[zip addFileToZip:@”photo1.png” newname: @”photo1.png”];

[zip addFileToZip:@”photo2.png” newname: @”photo2.png”];

[zip addFileToZip:@”../../test/IMG_0001.png” newname: @”photo3.png”];

[zip CloseZipFile2];
Now I really don’t think creating a zip archive gets any simpler than that. All of those methods return a boolean result, which you can check to see if the operation was successful, so you can implement also your error handling code along. To create a password protected file call:
[zip CreateZipFile2:@”archive.zip” Password: @”plaintextpassword”];
(I should really admit that ZipArchive’s the naming convention is strange: some names are CamelCase: , some camelCase:, some camel:Case: , some camelCase:case:, and sometimes a capital in the middle of the word “overWrite” – and this is a class with only 8 methods :)
Extracting zip archives
Extracting files from a zip archive is as simple as creating one. You open an archive using UnzipOpenFile: or UnzipOpenFile:Password: Now pay attention to the result of that operation- if the file exists, but UnzipOpenFile: returns NO, it might mean the archive is password protected. If the archive file has been successfully opened it means ZipArchive can read the contents and you can proceed to extracting the files to a destination of your choice by using UnzipFileTo:overWrite: If you pass YES as the second argument, the extracting operation will overwrite files at the target location.
ZipArchive *zip = [[ZipArchive alloc] init];

if ( [zip UnzipOpenFile:@”archive.zip”] ) {

[zip UnzipFileTo:@”tempFolder” overWrite:YES];

}

[zip UnzipCloseFile];
To gain a bit more control over what ZipArchive does you can set a class of yours as a delegate, here is the ZipArchiveDelegate protocol:
@protocol ZipArchiveDelegate <NSObject>

@optional

-(void) ErrorMessage:(NSString*) msg;

-(BOOL) OverWriteOperation:(NSString*) file;

@end
So as the method names suggest if you want to get more information about the errors happening let your delegate implement ErrorMessage: and if you want to be more flexible which files gets overwritten during archive extraction implement OverWriteOperation: (return YES to overwrite the given file)
Now that you know everything there is to know about ZipArchive, I can start with my super duper productivity application …
Creating simple custom file format with ZipArchive
I’ll first create a class called CustomFile, which will be my data model – it will be responsible for reading and writing data to the file system. I’ll need few ivars and properties for them:
NSString* filePath;

//the file contents

NSString* title;

NSString* text;

UIImage* photo;
In filePath I’ll keep the absolute path to the location the file will be written to or red from. The rest of the ivars will be my file contents – 2 texts and 1 image. Now let me explain what this custom file format will be about – I will want to store in my files short articles – much similar to blog posts – my files will hold the title, the full text and a photo (if attached) of an article.
Some of you will ask why do I need a custom format for my files … can’t I just save a text file with the text and the image somewhere on my disk and then save their names in a sqlite database and done ? Nope, think trends, think iPad / iPhone 4.0 and think file sharing: as I said things are moving beyond apps which sole purpose is to amuse their users for about 5 to 10 minutes. If my app saves separate files of text and images, when the user wants to copy them from his iPad to his wife’s iPad he might miss one of those files and that will ruin the integrity of his document… So let’s look further what I have in mind:
My model’s initializer:
-(id)initWithFilePath:(NSString*)initPath

{

self = [super init];

if (self != nil) {

//set the file path

if (initPath != nil) {

self.filePath = initPath;

}

}

return self;

}
Nothing special, just making sure every instance of the model is related to a file path. So since all the file contents are also class properties, I can use them to fill in my file’s instance with content and then I will need a save method to save to the file system. And what I’d need is create a temp folder, save all my data as files there, and them zip’em! If you have a look in the code below, now that you know how to use ZipArchive the code is actually very straightforward:
-(void)saveFile

{

//create a temp directory

NSFileManager* fileManager = [NSFileManager defaultManager];

NSString* documentsDir = [filePath stringByDeletingLastPathComponent];

NSString *tmpPath = [documentsDir stringByAppendingPathComponent:@"tmp"];

[fileManager createDirectoryAtPath:tmpPath attributes:nil];

ZipArchive *zip = [[ZipArchive alloc] init];

[zip CreateZipFile2:self.filePath];

//save the texts

NSDictionary* texts = [NSDictionary dictionaryWithObjectsAndKeys:self.title,@"title",self.text,@"text",nil];

NSString* textsFile = [tmpPath stringByAppendingPathComponent:@"texts.plist"];

//save the image and add them to the zip file

if (self.photo!=nil) {

NSString* photoFile = [tmpPath stringByAppendingPathComponent:@"photo0.png"];

NSData *imageData = [NSData dataWithData:UIImagePNGRepresentation(self.photo)];

[imageData writeToFile:photoFile atomically:YES];

[zip addFileToZip:photoFile newname:@"photo0.png"];

[fileManager removeItemAtPath:photoFile error:NULL];

}

[texts writeToFile:textsFile atomically:YES];

[zip addFileToZip:textsFile newname:@"texts.plist"];

[fileManager removeItemAtPath:textsFile error:NULL];

if( ![zip CloseZipFile2] )

{

// error handler here

}

[fileManager removeItemAtPath:tmpPath error:NULL];

[zip release];

}
I am just putting the texts in a NSDictionary and saving it as a plist file, and then saving the image as a separate PNG file. Then I zip everything and remove all traces. Note how I create my temporary folder in the same location where the file is going to be saved (assuming it is indeed writable) Your own document centric application is probably much greater than putting together some texts and an image, but I’m sure this example already gives you the right direction.
Now that I have already my saving method, it’s very easy to put together also the one that reads the data from the file system.
-(BOOL)loadFile

{

//create a temp directory

NSFileManager* fileManager = [NSFileManager defaultManager];

NSString* documentsDir = [filePath stringByDeletingLastPathComponent];

NSString *tmpPath = [documentsDir stringByAppendingPathComponent:@"tmp"];

[fileManager createDirectoryAtPath:tmpPath attributes:nil];

ZipArchive *zip = [[ZipArchive alloc] init];

BOOL result = NO;

if([zip UnzipOpenFile:filePath]) {

//zip file is there

if ([zip UnzipFileTo:tmpPath overWrite:YES]) {

//unzipped successfully

NSLog(@"Archive unzip Success");

result= YES;

} else {

NSLog(@"Failure To Extract Archive, maybe password?");

}

} else  {

NSLog(@"Failure To Open Archive");

}
To load the file contents I have very similar approach: I get the directory of the file and create a temp folder in the same place and then I unzip it inside. Spoiler alert: All my documents are going to be saved in the Documents folder which is always writable, so no worries whether this little temp folder of mine can be crated or not. I chose for the Documents folder as this is the folder which you application can share with your computer via iTunes (in OS 3.2+)
Then onwards is also very simple, now the contents are extracted just load them back into the class instance:
if (result==YES) {

NSString* textFile = [tmpPath stringByAppendingPathComponent:@"texts.plist"];

NSDictionary* texts = [NSDictionary dictionaryWithContentsOfFile:textFile];

self.title = (NSString*)[texts objectForKey:@"title"];

self.text  = (NSString*)[texts objectForKey:@"text"];

NSString* tmpPhotoPath = [tmpPath stringByAppendingPathComponent:@"photo0.png"];

if ( [fileManager fileExistsAtPath:tmpPhotoPath] ) {

self.photo = [UIImage imageWithData: [NSData dataWithContentsOfFile:tmpPhotoPath] ];

}

}

//do cleanup

[fileManager removeItemAtPath:tmpPath error:NULL];

[zip release];

return result;

}
Now that I have my model working (a simple class to read and write my custom file format) I’ll create also the GUI of my example application – I assume you are already familiar with creating UITableControllers and binding GUI elements to your classes so I won’t go into details about those. I’ll just quickly make a resume of the app’s idea and let you dig into the source code, which is available for download at the end of the article.
I’ll create my main view controller to load the names of all files in my Documents directory which have extension “.mtt” – those are the files my application create and show them in a table:

My second view controller will be the application work area – a screen where you can load an image from your photo gallery and enter some texts (again if you are not familiar with the techniques to do all these, read a more introductiory article about iPhone programming)

So the idea of the demo app is simple, initially shows you a list of the available documents, if you click on one of them, the CustomFile class unarchives it and loads its contents into the second view controller, there you can change the contents and hit Save Document. If you want to create a new document you just choose the “New Document …” item from the list and this will just load the details view controller empty, so you can edit and save. Just download the source and run the app to get a feeling of the app and make sure to check the source to see how ZipArchive is being used.
Wrap up
I hope this article has been useful – I showcased ZipArchive and also did put some ideas together on how to create more elaborate document centric applications. The custom file format can be developed a lot further and the interface for editing multimedia contents could be improved dramatically on the iPad’s big screen.
The full source code of the demo application you can download here.
If you have comments or questions, please write in the comments below or ping me in twitter!
I wish you happy iCoding !
Marin Todorov
iPhone OS 4.0: The death of the 3G
iPhone OS 4.0: The death of the 3G

Hey Blancer readers. If you were on the internet this morning you most likely saw mention of the iPhone 4.0 preview. We did a predictions post yesterday and actually faired pretty well with our guesses.
- MultiTasking (No 3G) – CHECK
- iAd – CHECK
- iBooks – CHECK
- Folders – C?HECK
- Application Switching Update – CHECK
Lots of good news here, except for the lack of multitasking on the 3G. 3G owners shouldn’t expect to be getting any more of the features coming into major updates of the iPhone OS. The big news rests is all the new API’s though. With over 1500 new API’s being delivered to developers, we are sure to see another year of compelling and effective apps being brought into the app store. Lets look at a few of the specific API’s that are going to lead to some awesome apps!
Event Kit
The Calendar has always felt like an underdeveloped component of the iPhone operating system. It looks ok, syncs with my comp and MobileMe, Exchange and CalDev is cool too I suppose. But why can’t the Local Concerts app in the app store add actual calendar events reminding me of upcoming show I want to attend? Also, Apple has their calendar app, which is fine. But I’m sure there are some better UI’s that developers can come up with. I am excited to see how the developer community will leverage access to this section of the operating system.
Audio Visual Access
Apple has really opened up the doors to the camera on the 3GS. Some of the new API’s include a huge addition to AVFoundation. Things like AVAssetExportPreset1920×1080 are mentioned signaling the emergence of HD video output from application, which is going to really add a lot of functionality to iPhone and iPads.
Regular Expressions
This one is for all my computer science and math nerds out there. Whole new data type NSRegularExpression! This is going to be awesome for developers that are going to be making custom data detectors. Not necessarily something you will notice when being used in apps, but developers are going to have their lives made a little bit easier.
XML Parsing
Here at iCodeBlog we have done demos parsing XML using NSXMLParser. We have also mentioned the superior TouchXML classes. Apple is doing a lot of work to get NSXMLParser work better in iPhone 4.0. NSXMLParser is finally getting a delegate so that it conforms to the design patterns of the other classes within the OS. The delegate methods are still kind of dumb in my opinion but at least no more confusion because of the lack of delegate in that class!
Game Kit
Game Kit is impressive. It could very well become the only way games interact with the cloud, similar to xBox Live. Folks over at OpenFeint probably are not happy.
Map Kit
Map Kit got a HUGE update too. Draggable annotations, overlays, lots of added helper functions to calculate distance and position. Between this and background position tracking, position aware apps are going to get a lot better with this update.
Other Points Of Interest
Local Notifications are going to be awesome for some apps, especially third party reminder or to do apps. The page curl transition is now built in, which always adds a nice bit of flair to UI and will allow competition ebook readers a chance. Also the most mysterious possibly of the additions is QuickLook. How is this working? Will update once I get come code rolling and check it out. Any thoughts, comments, opinions, shot out in the comments section!
The final and maybe most missed point of today was Steve giving us developers a whole new method of getting work and revenue. Not only does iAd look like a killer new way to make some money with your free apps, it seems like the companies who are going to have ads in iAd will need us to make them. I can’t wait till I make my first bit of money displaying an ad I made in a free app I made. Talk about making money coming in and going out!
iPhone OS 4.0 Predictions
iPhone OS 4.0 Predictions
Wow, April is a big month for Apple. iPad release on the 3rd, probably laptop debuts later this month, and iPhone 4.0 announcement coming up on the 8th. Lots to cover. In the spirit of iCodeBlog I present to you a list of stuff to look for in iPhone OS 4.0.
Syncing
- Wi-Fi Syncing – This is something I would love, but as anyone with an iPhone knows, USB syncing takes forever as it is…So this might not happen
- iBooks on iPhone – Amazon has the books you buy from them viewable on Mac Computers, iPads and iPhones, Apple is going to address this almost certainly.
- iTunes Home may be enhanced. An underdeveloped feature in the previous version of iTunes and something people will be using more and more with iPad apps being more expensive.
Interface
- Home Screen enhancements. Look at the home screen on my iPad. What an incredible waste of space! I need to see upcoming appointments, the weather a twitter feed, incoming emails. But right now when my iPad is locked I see 900 x 700 of background art. This seems like it is a hint that Apple will be making their lock screens more customizable to me.


- Spotlight. To give credit where it is due, my brother originally (twitter @sruffenach) mentioned this, now it is all I think about when I use spotlight. Once again there is a huge waste of space. When you ender the spotlight view (iPhone or iPad) once again there is a huge amount of wasted space. At the very least your dock applications should slide up and be available until you type something into the search. I think this is an underused section of the iPhone and iPad OS and we shall see if Apple enhances it.
- New interface elements. The iPad introduced a few new view controllers to the SDK. Things like UISplitViewController, MPMoviePlayerViewController are as of now iPad only. It doesn’t seem to make a ton of sense for some of these UI elements to be on a screen as small as the iPhone, so I think we are going to see the separation of the iPhone and iPad OS’s. Apple is going to need to be careful here on how is makes the SDK’s distinct, as developers will want to have as much time saved developing for either iPhone or iPad. I think we will see Apple’s position on this evolving echo system of SDK’s.
- Application Switching – This speaks to the idea of multi tasking, which I will talk about in a minute. But I see the iPhone OS gaining more rapid application switching mechanisms in coming releases. Right now to go from any one app to any other there are 2 methods; 1. Go to homescreen, pick another app 2. Click a link in an app that automatically brings up another. Applications are going to reach the complexity where several apps on one iPhone or iPad will be able to handle file types like .PDF. I imagine Apple introducing a mechanism to choose the app which you want to handle the file.
- Once again, looking at the iPad, it is likely that Apple pushes the idea of the iPhone working in any orientation. The homescreen is likely to change now when the device is tilted into landscape mode.
Multitasking
- Everyone talks about this, so it seems like will need to mention it somehow. With Android attaching Apple specifically in the Droid commercial this is something Apple will likely tackle. I have a feeling it won’t be complete multitasking. But I most certainly could imagine some tests that an app would need to pass to be “multi task” approved. We’ll see how Apple handles it.
- If this muti tasking thing does happen expect to see the iPhone version of Expose. Apple has already brought aspects of the OS X desktop to the iPhone with spotlight. Expect to see more of thi
Ads
- Apple bought Quattro, an ad company a few months back. Apple already has a choke hold around iPhone app distribution, but no control of ads. With Google buying AdMob, this will most certainly be a topic of discussion.
Misc
- People have been talking printers
- Extended video streaming API in preparation for vid chat stuff
- Faster, faster, faster. As you may have seen, dismantling the iPad reveals a chip very similar in design to the iPhone 3GS chip. The responsiveness on the iPad is much better then that of the iPhone and I imaging that general speed of apps will be a big component of 4.0, as it was for 3.0 and the 3GS.
Thats all I got for now. If you guys have any tips, hunches or dreams about iPhone OS 4.0 let us know in the comments.
Follow me on Twitter! @cruffenach
iPad Programming Tutorial – Hello World++
iPad Programming Tutorial – Hello World++
Introduction
Now, that the iPad has been released, I’m sure you are all scrambling for ideas on how to snag a piece of the maket in the imminent gold rush. iCodeBlog is going to help you on your journey with a series of iPad tutorials to come.
Since the iPad uses the same SDK as the iPhone, all of the code under the hood is almost identical. Actually, when looking at the new and changed API classes, you will realize that most of them are user interface related. This is good news for us since we have already been coding iPhone.
While this tutorial is called “Hello World”, it is really much more than that. I assume you already have working knowledge of iPhone/Objective-C programming.
What We Will Be Creating
In today’s tutorial, I will be showing you how to create an iPad project that uses the UISplitViewController to display content in 2 separate panes. We will also be touching on some of the new design/UI patterns and giving an overall introduction to iPad programming.
The project will be based on one of my earliest tutorials that displayed a list of fruit in a UITableView and drilled down when they were selected. We will be expanding on that example and creating something that will look like this.

It uses a UISplitViewController to display a UITableView on the left and a UIView with a UIImageView subview on the right. This project is actually quite simple to create as the template code provides much of the code we need to get started.
Getting Started
1. Make sure you have downloaded the 3.2 SDK form http://developer.apple.com/ipad/. The iPad simulator will come with this download.
2. Download the resources needed for this project and unzip them iPadHelloWorldResources.zip . (contains image files and a plist we will be using to load the images)
Creating The Project
Starting a project for the iPad is no different than starting one for the iPhone. When you open XCode and select File->New Project, you should notice the addition of a Split View-Based Application. Select this and name it iPadHelloWorld.

This will create a basic application with a UITableView on the left and a UIView on the right. It will even populate the table with some sample elements. It will add the following files to your project.

Here is a brief description of each of these files:
- iPadHelloWorldAppDelegate – This is similar to every app delegate. If you look in the application:didFinishLaunchingWithOptions method, you will see that the UISplitViewController is being allocated with the MasterViewController and DetailViewControllers.
- MasterViewController – A UITableViewController, nothing fancy. It will be handling the view on the left hand side.
- DetailViewController – This handles the content view that you see on the right hand side. We will be updating this as the user selects different rows in the table to the left. This simply houses a single view.
Go ahead and press Build and Run to check out the application. If you haven’t already done so, play around with the iPad contacts and settings apps as well.
Note: When you launch the application, you will only see the main view since the simulator runs in vertical mode. To see the views side-by-side, rotate the simulator by clicking “Hardware -> Rotate Left/Right”. You can also press CMD->Arrow Left/Right on the keyboard.
Importing The Project Images
Once you have had some time to play with the new iPad project, you will now need to import the images needed for this project. After downloading and unzipping the files in from this tutorial, drag them into the project folder called “Resources-iPad”.
XCode will prompt you to copy the files, check yes and click OK.

Make sure you include all 4 images files as well as the file named fruits.plist.
Displaying The List Of Fruits
Displaying our fruits list is no different than displaying data in any other UITableView. Let’s begin by opening MasterViewController.h and adding a declaration for our fruits array.
#import

@class DetailViewController;

@interface MasterViewController : UITableViewController {
    DetailViewController *detailViewController;
    NSArray * fruits;
}

@property (nonatomic, retain) IBOutlet DetailViewController *detailViewController;
@property (nonatomic, retain) NSMutableArray *fruits;

@end
As you can see, there is nothing new here. We simply declare our fruits array and create a property for it.
We will be loading the fruits from the plist file that you imported into your project in the last step. Loading content from a plist file is a very quick and easy solution when you don’t require a database.
Open up MasterViewController.m and add the following line of code to your viewDidLoad method.
- (void)viewDidLoad {
    [super viewDidLoad];
    self.fruits = [[NSArray arrayWithContentsOfFile:[[NSBundle mainBundle] pathForResource:@"fruits" ofType:@"plist"]] retain];
}
The file fruits.plist is essentially an array that has been written out to a file. If you open it up, it looks very similar to XML. Now that our fruits array has been populated, let’s implement each of the UITableView delegate and datasource methods to populate the table.
UITableView datasource methods
- (NSInteger)tableView:(UITableView *)aTableView numberOfRowsInSection:(NSInteger)section {
    // Return the number of rows in the section.
    return [fruits count];
}

- (UITableViewCell *)tableView:(UITableView *)tableView cellForRowAtIndexPath:(NSIndexPath *)indexPath {

    static NSString *CellIdentifier = @"CellIdentifier";

	// Dequeue or create a cell of the appropriate type.
	UITableViewCell *cell = [tableView dequeueReusableCellWithIdentifier:CellIdentifier];
    if (cell == nil) {
        cell = [[[UITableViewCell alloc] initWithStyle:UITableViewCellStyleDefault reuseIdentifier:CellIdentifier] autorelease];
        cell.accessoryType = UITableViewCellAccessoryNone;
    }

    // Get the object to display and set the value in the cell.
    cell.textLabel.text = [self.fruits objectAtIndex:indexPath.row];
    return cell;
}
Nothing special… We first tell the tableview that we want fruits.count (4 in this case) number of rows.
Next, we display the name of the fruit in each tableview cell. If you want to learn more on UITableViews, read this tutorial.
UITableView delegate methods
- (void)tableView:(UITableView *)aTableView didSelectRowAtIndexPath:(NSIndexPath *)indexPath {

    /*
     When a row is selected, set the detail view controller's detail item to the item associated with the selected row.
     */
    detailViewController.detailItem = [self.fruits objectAtIndex: indexPath.row];
}
Here, we are simply setting the detailItem property of the detailViewController to the selected fruit. We will discuss this property later in this section, but for now all you need to know is that its type is id.
At this point, go ahead and press Build and Run to see your code in action. You should see something that looks like this:

It displays the list of fruits, but nothing happens when you select a cell (well the title of the detailView may change).
Now that we have our list of fruits displayed, we now need to implement the code to display their corresponding image.
Displaying The Fruits
Displaying the selected fruit is actually quite simple. The first thing we need to do is add a UIImageView to our detailView.
Start by adding the IBOutlet for the image view. Open up DetailViewController.h and add the following code:
@interface DetailViewController : UIViewController  {

    UIPopoverController *popoverController;
    UINavigationBar *navigationBar;

    id detailItem;

    IBOutlet UIImageView * fruitImageView;
}

@property (nonatomic, retain) UIPopoverController *popoverController;
@property (nonatomic, retain) IBOutlet UINavigationBar *navigationBar;

@property (nonatomic, retain) id detailItem;

@property (nonatomic, retain) IBOutlet UIImageView * fruitImageView;

@end
All of the code here comes with the template except the code to add the IBOutlet UIImageView. Once you have added this open up DetailView.xib in interface builder.
Add a UIImageView on to the view and size it to 500×500.

Now, click on the File’s Owner object and open the connection inspector (Tools -> connection inspector).
Drag from your imageView IBOutlet to the UIImageView and release. The UIImageView is now connected to your outlet.
Note: If you want the images to not skew, set the content mode of the image view (in the attributes inspector) to Aspect Fit.
Now that the imageview has been connected, it’s time to write the code that updates it. Close Interface Builder and open the file DetailViewController.m and add the following lines to the setDetailItem method:
- (void)setDetailItem:(id)newDetailItem {
    if (detailItem != newDetailItem) {
        [detailItem release];
        detailItem = [newDetailItem retain];

        // Update the view.
        navigationBar.topItem.title = detailItem;
	NSString * imageName = [NSString stringWithFormat:@"%@.png",detailItem];
	[self.fruitImageView setImage:[UIImage imageNamed:imageName]];
    }

    if (popoverController != nil) {
        [popoverController dismissPopoverAnimated:YES];
    }
}
Most of this code has been added by the template and I won’t discuss it too much in this tutorial. But for now, the important additions are the lines that load the image based on the name of the fruit and the one below it that sets the image property of the image view.
There you have it! Build and go and the application should function as mentioned. Here is another screenshot of the final product.

Another Cool Feature Of SplitViewController
When in vertical mode, the SplitViewController gives you another new UI element called the UIPopOverView. Collin will have a tutorial up soon on this view, but the figure below shows you what I’m talking about.

When the device is vertical, it will automatically rotate your view and provide a UIPopoverView when the “Master List” button is pretty. (BTW this button is also customizable).
You may download the source for this tutorial here iPadHelloWorld.zip.
Blancer IPhone IPad Tutorials!!
Pick Your Own Adventure iPhone Edition
Pick Your Own Adventure iPhone Edition
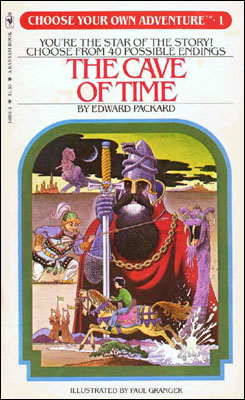
A few days ago I came across this cool Pick Your Own Adventure game on Twitter from user Peretti. I decided to make a quick renewable application that used UIAlertViews and UIActionSheets to tell the story. We are going to implement the UIAlertView and UIActionSheet protocol methods in order to get the functionality we are looking for. This will be a short project but will show the important methods associated with these views.
Step 1
Start a new view based project called CYOA. If you want to add a background image you can add a UIImageView to your CYOAViewController.xib. You can get the one I used here. But that is not necessary.
Step 2
In your project we are going to create a new object to hold the pieces that compose and given “frame” of a pick your own adventure. A frame of a pick your own adventure game is composed of 6 things as far as I am concerned.
- Prompt/Title
- Choice 1 Text
- Choice 2 Text
- Choice 1 Tile
- Choice 2 Tile
- isEnd
Through the use of these 6 objects we will be able to create a network of what I have called “AdventurePieces”. Create a new file. Make a subclass of NSObject and call it AdventurePiece.
Open AdventurePiece.h and input the following.
#import

@interface AdventurePiece : NSObject {
	NSString *message;
	NSString *choice1;
	NSString *choice2;

	AdventurePiece *choice1Piece;
	AdventurePiece *choice2Piece;

	BOOL isEnd;
}

@property (nonatomic, retain) NSString *message;
@property (nonatomic, retain) NSString *choice1;
@property (nonatomic, retain) NSString *choice2;

@property (nonatomic, retain) AdventurePiece *choice1Piece;
@property (nonatomic, retain) AdventurePiece *choice2Piece;

@property (assign) BOOL isEnd;

-initWithMessage:(NSString*)_message
	 firstChoice:(NSString*)_choice1
	secondChoice:(NSString*)_choice2
	  firstPiece:(AdventurePiece*)_choice1Piece
	 secondPiece:(AdventurePiece*)_choice2Piece
		   isEnd:(BOOL)_isEnd;

@end
Step 3
We are now going to implement the initialization method that we defined in our header. Open up AdventurePiece.m and input the following.
#import "AdventurePiece.h"

@implementation AdventurePiece

@synthesize message;
@synthesize choice1;
@synthesize choice2;

@synthesize choice1Piece;
@synthesize choice2Piece;

@synthesize isEnd;

-initWithMessage:(NSString*)_message
	 firstChoice:(NSString*)_choice1
	secondChoice:(NSString*)_choice2
	  firstPiece:(AdventurePiece*)_choice1Piece
	 secondPiece:(AdventurePiece*)_choice2Piece
		   isEnd:(BOOL)_isEnd
{
	if(self = [super init])
	{
		message = _message;
		choice1 = _choice1;
		choice2 = _choice2;
		choice1Piece = _choice1Piece;
		choice2Piece = _choice2Piece;
		isEnd = _isEnd;
	}

	return self;
}
@end
All we need to do in this initialization method is fill in our object parameters appropriately.
Step 4
Now that we have made the object that will facilitate our story we need to go about making the logic to automate bringing up the adventure pieces in the right order. First we are going to define one object in our view controller header. Go to CYOAViewController.h and input the following.
#import
#import "AdventurePiece.h"

@interface MakeMyOwnAdventureViewController : UIViewController <UIActionSheetDelegate, UIAlertViewDelegate>  {

	AdventurePiece *currentPiece;
}

@end
Step 5
With that done we need to do the following final steps.
- When the app launches a method should be called that creates a bunch of connected adventure pieces and sets the currentPiece instance variable to the one we desire to start on.
- Tell the app to show the currentPiece adventure tile.
- Respond to users pushing buttons on the adventure tile by resetting the current piece instance variable.
Pull up a different view when the end of the chain is reached.
For our purposes we will be have UIAlertViews show the parts of the story before the end. And the final piece of our story will be shown in a UIActionSheet. Lets look at each of the code pieces required to finish off our last four steps.
1. When the app launches a method should be called that creates a bunch of connected adventure pieces and sets the currentPiece instance variable to the one we desire to start on.
-(void)makeTheStory {

	AdventurePiece *successPiece = [[AdventurePiece alloc] initWithMessage:@"Sparks fly from the red wire but no explosion! Kim Jong Il’s evil plot is foiled!" firstChoice:@"YAY" secondChoice:nil firstPiece:nil secondPiece:nil isEnd:YES];
	AdventurePiece *failPiece = [[AdventurePiece alloc] initWithMessage:@"Cutting the blue wire begins a chain reaction - omg that is bad. Like really bad..Kaboom! What went wrong!?!" firstChoice:@"Too Bad" secondChoice:nil firstPiece:nil secondPiece:nil isEnd:YES];
	AdventurePiece *failPiece1 = [[AdventurePiece alloc] initWithMessage:@"Bad Choice. You Die" firstChoice:@"Too Bad" secondChoice:nil firstPiece:nil secondPiece:nil isEnd:YES];
	AdventurePiece *middlePieceA = [[AdventurePiece alloc] initWithMessage:@"You parachute to North Korea, sneak past guards to a live nuclear bomb. Do you" firstChoice:@"Cut Red" secondChoice:@"Cut Blue" firstPiece:successPiece secondPiece:failPiece isEnd:NO];
	AdventurePiece *middlePieceB = [[AdventurePiece alloc] initWithMessage:@"As you are leaving you notice trained assassins behind you" firstChoice:@"Run" secondChoice:@"Fight" firstPiece:failPiece1 secondPiece:failPiece1	isEnd:NO];
	currentPiece = [[AdventurePiece alloc] initWithMessage:@"You are assigned to a dangerous mission." firstChoice:@"Accept" secondChoice:@"Vacation" firstPiece:middlePieceA secondPiece:middlePieceB isEnd:NO];
}
In this method we make 5 total adventure pieces. This specific pick your own adventure is quite short. It as 3 prompts, 2 choices each with a total of 4 end points. You can see what I mean in this diagram here. The white square are the prompts, the green squares are the choices and the red squares are the final results. We fill in the current piece instance variable as the top most piece and we are done here.

2. Tell the app to show the currentPiece adventure tile.
- (void)viewDidLoad {

    [super viewDidLoad];
	[self makeTheStory];
	[self showStoryForCurrentPiece];
}
-(void)showStoryForCurrentPiece {

	if([currentPiece isEnd]) {
		UIActionSheet *actionSheet = [[UIActionSheet alloc] initWithTitle:[currentPiece message] delegate:self cancelButtonTitle:nil destructiveButtonTitle:nil otherButtonTitles:[currentPiece choice1],@"Retry",nil];
		[actionSheet showInView:self.view];
	}

	else {

		UIAlertView *alert = [[UIAlertView alloc] initWithTitle:@"Your Message" message:[currentPiece message] delegate:self cancelButtonTitle:nil otherButtonTitles:[currentPiece choice1],[currentPiece choice2],nil];
		[alert show];
	}
}
This method should be called every time a new current piece is set. If checks to see if the adventure piece is an ending piece, if it is then an action sheet it created. If it is not an alert view is created. The button titles, and prompts are filled in appropriately.
Respond to users pushing buttons on the adventure tile by resetting the current piece instance variable.
- (void)alertView:(UIAlertView *)alertView willDismissWithButtonIndex:(NSInteger)buttonIndex {

	if(buttonIndex == 0)
	{
		currentPiece = [currentPiece choice1Piece];
		[self showStoryForCurrentPiece];
	}

	else
	{
		currentPiece = [currentPiece choice2Piece];
		[self showStoryForCurrentPiece];
	}
}
When an alert view button is pressed this method will be called. An adventure piece that brings up an alert view should always have connected adventure pieces for both of the possible answers it as. This resets the currentPiece adventure piece and show the current piece again.
Pull up a different view when the end of the chain is reached
- (void)actionSheet:(UIActionSheet *)actionSheet clickedButtonAtIndex:(NSInteger)buttonIndex {

	if(buttonIndex == 1)
	{
		[self makeTheStory];
		[self showStoryForCurrentPiece];
	}
}
If this method is called that means that a action piece that was at the end of a chain was brought up. If the users hits the second button (button id == 1) that means they want to reset the story. This can be performed by building our story again showing the current piece again.
You can change the makeTheStory method to be whatever type of story you want. You can download the project here.
iPhone Coding – Turbo Charging Your Apps With NSOperation
iPhone Coding – Turbo Charging Your Apps With NSOperation
Introduction
So, let’s face it, MANY applications in the app store are “Clunky”. They have jittery interfaces, poor scrolling performance, and the UI tends to lock up at times. The reason? DOING ANYTHING OTHER THAN INTERFACE MANIPULATION IN THE MAIN APPLICATION THREAD!
What do I mean by this? Well, I am essentially talking about multithreading your application. If you don’t know what is meant by multithreading, I suggest you read up on it and return to this post OR don’t worry about it because you don’t need much threading knowledge for this tutorial. Let’s dig in and I’ll give you an example of the problem.
The Problem
When you create an application, the iPhone spawns a new process containing the main thread of your application. All of interface components are run inside of this thread (table views, tab bars, alerts, etc…). At some point in your application, you will want to populate these views with data. This data can be retrieved from the disk, the web, a database, etc… The problem is: How do you efficiently load this data into your interface while still allowing the user to have control of the application.
Many applications in the store simply ‘freeze’ while their application data is being loaded. This could be anywhere from a tenth of a second to much longer. Even the smallest amount of time is noticeable to the user.
Now, don’t get me wrong, I am not talking about applications that display a loading message on the screen while the data populates. In most cases, this is acceptable, but can not be done effectively unless the data is loaded in another thread besides the main one.
Here is a look at the application we will be creating today:

Let’s take a look at the incorrect way to load data into a UITableView from data loaded from the web. The example below reads a plist file from icodeblog.com containing 10,000 entries and populates a UITableView with those entries. This happens when the user presses the “Load” button.
Wrong (download this code here to see for yourself)
@implementation RootViewController
@synthesize array;

- (void)viewDidLoad {
    [super viewDidLoad];

    /* Adding the button */
    self.navigationItem.rightBarButtonItem = [[UIBarButtonItem alloc] initWithTitle:@"Load"
        style:UIBarButtonItemStyleDone
        target:self
        action:@selector(loadData)];

    /* Initialize our array */
    NSMutableArray *_array = [[NSMutableArray alloc] initWithCapacity:10000];
    self.array = _array;
    [_array release];
}

// Fires when the user presses the load button
- (void) loadData {

    /* Grab web data */
    NSURL *dataURL = [NSURL URLWithString:@"http://icodeblog.com/samples/nsoperation/data.plist"];

    NSArray *tmp_array = [NSArray arrayWithContentsOfURL:dataURL];

    /* Populate our array with the web data */
    for(NSString *str in tmp_array) {
        [self.array addObject:str];
    }

    /* reload the table */
    [self.tableView reloadData];
}

#pragma mark Table view methods

- (NSInteger)numberOfSectionsInTableView:(UITableView *)tableView {
    return 1;
}

- (NSInteger)tableView:(UITableView *)tableView numberOfRowsInSection:(NSInteger)section {
    return [self.array count];
}

- (UITableViewCell *)tableView:(UITableView *)tableView cellForRowAtIndexPath:(NSIndexPath *)indexPath {

    static NSString *CellIdentifier = @"Cell";

    UITableViewCell *cell = [tableView dequeueReusableCellWithIdentifier:CellIdentifier];
    if (cell == nil) {
        cell = [[[UITableViewCell alloc] initWithStyle:UITableViewCellStyleDefault
                reuseIdentifier:CellIdentifier] autorelease];
    }

    /* Display the text of the array */
    [cell.textLabel setText:[self.array objectAtIndex:indexPath.row]];

    return cell;
}

- (void)dealloc {
    [super dealloc];
    [array release];
}

@end
“Looks good to me”, you may say. But that is incorrect. If you run the code above, pressing the “Load” button will result in the interface ‘freezing’ while the data is being retrieved from the web. During that time, the user is unable to scroll or do anything since the main thread is off downloading data.
About NSOperationQueue And NSOperation
Before I show you the solution, I though I would bring you up to speed on NSOperation.
According to Apple…
The
NSOperationandNSOperationQueueclasses alleviate much of the pain of multi-threading, allowing you to simply define your tasks, set any dependencies that exist, and fire them off. Each task, or operation, is represented by an instance of anNSOperationclass; theNSOperationQueueclass takes care of starting the operations, ensuring that they are run in the appropriate order, and accounting for any priorities that have been set.
The way it works is, you create a new NSOperationQueue and add NSOperations to it. The NSOperationQueue creates a new thread for each operation and runs them in the order they are added (or a specified order (advanced)). It takes care of all of the autorelease pools and other garbage that gets confusing when doing multithreading and greatly simplifies the process.
Here is the process for using the NSOperationQueue.
- Instantiate a new NSOperationQueue object
- Create an instance of your NSOperation
- Add your operation to the queue
- Release your operation
There are a few ways to work with NSOperations. Today, I will show you the simplest one: NSInvocationOperation. NSInvocationOperation is a subclass of NSOperation which allows you to specify a target and selector that will run as an operation.
Here is an example of how to execute an NSInvocationOperation:
NSOperationQueue *queue = [NSOperationQueue new];

NSInvocationOperation *operation = [[NSInvocationOperation alloc] initWithTarget:self
    selector:@selector(methodToCall)
    object:objectToPassToMethod];

[queue addOperation:operation];
[operation release];
This will call the method “methodToCall” passing in the object “objectToPassToMethod” in a separate thread. Let’s see how this can be added to our code above to make it run smoother.
The Solution
Here we still have a method being fired when the user presses the “Load” button, but instead of fetching the data, this method fires off an NSOperation to fetch the data. Check out the updated code.
Correct (Download the source code here)
@implementation RootViewController
@synthesize array;

- (void)viewDidLoad {
    [super viewDidLoad];

    self.navigationItem.rightBarButtonItem = [[UIBarButtonItem alloc] initWithTitle:@"Load"
       style:UIBarButtonItemStyleDone
       target:self
       action:@selector(loadData)];

    NSMutableArray *_array = [[NSMutableArray alloc] initWithCapacity:10000];
    self.array = _array;
    [_array release];
}

- (void) loadData {

    /* Operation Queue init (autorelease) */
    NSOperationQueue *queue = [NSOperationQueue new];

    /* Create our NSInvocationOperation to call loadDataWithOperation, passing in nil */
    NSInvocationOperation *operation = [[NSInvocationOperation alloc] initWithTarget:self
        selector:@selector(loadDataWithOperation)
        object:nil];

    /* Add the operation to the queue */
    [queue addOperation:operation];
    [operation release];
}

- (void) loadDataWithOperation {
    NSURL *dataURL = [NSURL URLWithString:@"http://icodeblog.com/samples/nsoperation/data.plist"];

    NSArray *tmp_array = [NSArray arrayWithContentsOfURL:dataURL];

    for(NSString *str in tmp_array) {
        [self.array addObject:str];
    }

    [self.tableView performSelectorOnMainThread:@selector(reloadData) withObject:nil waitUntilDone:YES];
}

#pragma mark Table view methods

- (NSInteger)numberOfSectionsInTableView:(UITableView *)tableView {
    return 1;
}

- (NSInteger)tableView:(UITableView *)tableView numberOfRowsInSection:(NSInteger)section {
    return [self.array count];
}

- (UITableViewCell *)tableView:(UITableView *)tableView cellForRowAtIndexPath:(NSIndexPath *)indexPath {

    static NSString *CellIdentifier = @"Cell";

    UITableViewCell *cell = [tableView dequeueReusableCellWithIdentifier:CellIdentifier];
    if (cell == nil) {
        cell = [[[UITableViewCell alloc] initWithStyle:UITableViewCellStyleDefault reuseIdentifier:CellIdentifier] autorelease];
    }

    [cell.textLabel setText:[self.array objectAtIndex:indexPath.row]];

    return cell;
}

- (void)dealloc {
    [super dealloc];
    [array release];
}
As you can see, we haven’t added much code here, but we have GREATLY improved the overall user experience. So, what did I do exactly?
- Moved all of the processing (downloading) code from the loadData method to another method that could be run asynchronously
- Created a new instance of NSOperationQueue by calling [NSOperationQueue new]
- Created an NSInvocationOperation to call our method loadDataWithOperation
- Added the operation to the queue
- Released the operation
- When the Data has been downloaded, we reload the table data in the main thread since it’s a UI manipulation
One thing to note here is we never actually tell the operation to run. This is handled automatically in the queue. The queue will figure out the optimal time run the operation and do it for you.
Now that you have your downloading and processing in a separate thread, you are now free to add things such as a loading view.
I will be expanding on this tutorial in the coming week and showing you how to cache data and display old data to the user while the new is loading. This is a popular technique used in many Twitter and News applications.
That concludes today’s tutorial.
Post questions in the comments or Ping me on Twitter.
Happy iCoding!
Adding TwitPic to your Application
Adding TwitPic to your Application

Introduction
Back in July of last year. Brandon put up a post showing you how to integrate twitter into your application. Today I am going to take the class he made last year and add a new class which will let you post to twit pic. First lets do a little overview of what tools we need for this.
Required Tools
Twit pic is an awesome service. They have created a whole public API, that anyone can use to host a picture and post a tweet with a link to it. You can see the TwitPic API, and all its functionality here.The API is pretty simple, with only 2 methods.
- uploadAndPost
- upload
We are going to only be implement access to the uploadAndPost method. In order to use the API we need to use an HTTP POST method. While Apple provides NSURLConnection to take care of operations like this, we are going to use a better third party framework called ASIHTTPRequest. You can find ASIHTTPRequest to download here. I will go over the steps to get it installed. Just download the files for right now. You will also need to download some utility files that Apple created for users called Reachability. You can find those files here.
Preparing a project to use ASIHTTPRequest
- Before we add the method into out TwitterRequest class, we have to do a bit of preparation with a project we want to use this framework witb. First think to do is to add ASIHTTPRequest and the Reachability classes into your application.
- Now we have to add some frameworks to out project by “Editing the active target”. Go to Project -> Edit Active Target “TwitPic”
- Add in the following targets: CFNetwork.framework, SystemConfiguration.framework and libz.1.2.3.dylib

Using ASIHTTPRequest to contact TwitPic
Now if we compile we should see no errors, and we will be able to use ASIHTTPRequest in our new method in out TwitterRequest class. The method to communicate with TwitPic is actually going to be very short. We need to create the method to send the picture and fill in the methods to handle the response. Lets take a look at what these methods look like.
Method to send picture to TwitPic
Here we are going to pass in the photo for twit pic along with the delegate that is using out class. This pertains back to the design decision made when developing the original TwitterRequest class. Look back at the first post for expansion on this. Here we create an instance of an ASIFormDataRequest. request is an instance variable I declared in the TwitterRequest header. Pass in the proper values for the proper keys, following along with the TwitPic API. We are going to start and Asynchronous request here, so the UI does not freeze while the picture is being uploaded.
-(void)statuses_update:(NSString *)status withPhoto:(NSData*)photoData delegate:(id)requestDelegate requestSelector:(SEL)requestSelector {
     isPost = YES;
     // Set the delegate and selector
     self.delegate = requestDelegate;
     self.callback = requestSelector;
     // The URL of the Twitter Request we intend to send
     NSURL *url = [NSURL URLWithString:@"http://twitpic.com/api/uploadAndPost"];
     // Now, set up the post data:
     request = [[[ASIFormDataRequest alloc] initWithURL:url] autorelease];
     [request setDelegate:self];
     [request setData:photoData forKey:@"media"];
     [request setPostValue:username forKey:@"username"];
     [request setPostValue:password forKey:@"password"];
     [request setPostValue:status forKey:@"message"];
     // Initiate the WebService request
     [request startAsynchronous];
}
Methods to handle response
We need to handle two types of response from TwitPic. Either the request will finish, or the request will error. If the request finishes the following will be called. We check that the delegate set for the TwitterRequest class is present and that is responds to the selector that was passed in. If it does, the TwitterRequest class will respond back to the class using it.
- (void)requestFinished:(ASIHTTPRequest *)request {
NSLog(@"%@", [request responseString]);
// do something with the data
     if(delegate && callback) {
          if([delegate respondsToSelector:self.callback]) {
               [delegate performSelector:self.callback withObject:receivedData];
          } else {
               NSLog(@"No response from delegate");
          }
     }
// release the connection, and the data object
     [request release];
}
This is the class that should be used to handle errors. This for example could display a UIAlertView saying that an error occurred.
- (void)requestFailed:(ASIHTTPRequest *)request {
     NSError *error = [request error];
}
You can download the Header and Main for the updated TwitterRequest class here.
iPhone Coding Recipe – Shortening URLs
iPhone Coding Recipe – Shortening URLs
I had some a to shorten URLs for an in-application Twitter client I’m working on and thought I would share my simple solution with you guys.
It’s actually pretty straight forward and can be done in 1 line of code. I have broken it up into several for clarity.
NSString *url    = @"http://brandontreb.com";
NSString *apiEndpoint = [NSString stringWithFormat:@"http://api.tr.im/v1/trim_simple?url=%@",url];
NSString *shortURL = [NSString stringWithContentsOfURL:[NSURL URLWithString:apiEndpoint]
		 encoding:NSASCIIStringEncoding
		 error:nil];
NSLog(@"Long: %@ - Short: %@",url,shortURL);

// Outputs Long: http://brandontreb.com - Short: http://tr.im/MRDd
Pretty easy huh?
The magic here is in a method that Apple gave us as part of NSString. This method is called stringWithContentsOfURL. It will easily allow you to grab the text of any remote source.
I have used Tr.im as an example here because their service is very easy to use and has little overhead. I would have used bit.ly but they return a JSON string which would then have to be parsed. Tr.im’s trim_simple service simply outputs the string of the shortened URL.
Sure Twitter may shorten links for you automatically, but what if you want to use a custom service? Or,…wait for it… use it for something other than Twitter (please post in the comments if you do. I would love to hear some other uses ![]() )
)
Questions? Comments? Complaints?
Happy iCoding
Who’s Up For Some iPad Coding?
Who’s Up For Some iPad Coding?

Apple’s developer center is down for now. But, I can assure you we will be downloading the SDK as soon as it goes live.
Get ready for some iPad dev tutorials!
App Store Overpopulation
App Store Overpopulation
 The number of applications in the app store is approaching 100,000. The quality of applications in this massive of a marketplace is hard to measure. Apple provides the star ratings for applications but I like to have a few more sources. Check out:
app.itize.us
app.itize.us is a site highlighting the best of emerging apps in the store. The site is really well categorized and will surely show you some hidden great apps.
Fresh Apps
Fresh Apps is a user driven review site to supplement the star and comment sections of the App Store which was created by iCodeBlog contributor Brandon Trebitowski (brandontreb). User can get an account and set apps as “Fresh” to boost their popularity on the site.
Touch Arcade
Touch Arcade is a very popular iPhone game review and preview site. The site was created by the founder of Mac Rumors and is a one stop show for a look at the most quality games on or coming to the store.
Five things you should know for building iPhone applications
Five things you should know for building iPhone applications
Five things you know before you start developing iPhone applications:
1. You need a mac os x( mac mini, or mac book or mac pro, anything you like)
2. To submit your work to apple you need a apple developer license as well.
3. The SDK is free to download, so you can build you application and
test it on simulator without any cost. But if you want to test it on
your iPhone/iPod touch or submit it to apple store, you must have a
developer license.
4. To test your application, you must have either iPod or iPhone
because Simulator and device behaves differently on some features like
memory. So I highly recommand you to buy one device as well.
5. Programming language is Objective – C and its very similar to
C/C++, even a Java developer like me didnt spend much time to understand
the language.
Basic Questions before You start iPhone Development
Basic Questions before You start iPhone Development
One person from India asked me few question for iPhone development and below you can find answer’s to those questions. If you have any question regarding iPhone Development, please add in comments and I will try to response them.
1) i am not registered developer so far, i will be registered with in 2,3 dayes.. so […]
Related posts:
- Bypass Code Signature & Published Your Application on Cydia Published iPhone Application On Cydia. Build your application for jail…
- iPhone Video Tutorial: Bypassing Code Signature in Xcode & Installing jail-break application to iPhone Video Tutorial to bypass code signature in Xcode and installing…
- Five things you should know for building iPhone applications Five things you know before you start developing iPhone applications:…