News Panel: The Only Thing That Can Stop The iPad Is Apple

Today at TechCrunch Disrupt in New York, we had a panel entitled “Does The iPad Change Everything For News, Or Is It Still All About The Web?” The New York Times’ David Carr moderated the panel which included angel investor Ron Conway, Huffington Post CEO Eric Hippeau, and Bloomberg chief content officer Norm Pearlstine. The common theme? The only thing that can stop the iPad is Apple.

While that may sound confusing (since, of course, Apple makes the iPad), everyone seemed to agree that Apple’s restrictions could end up hurting the device in the long run. Apple is in control right now because they’re the first to market with a killer product, but others will emulate them, reasons Pearlstine. He believes a lot of the content on these type of tablets will eventually be web-based rather than app-based (similar to an argument Google co-founder Sergey Brin made last week).

Carr extended on that question, asking if maybe the iPad itself would just be a device where you consume content on the web rather than through apps?Hippeau says that’s up to Apple. Clearly they want to push people towards apps, behind their wall, he believes. The problem with this is that Apple doesn’t give back nearly as much data as having your own website would, Hippeau says. He thinks Apple will have to learn that media organizations live  off of this data. “They’ll have to open it up more,” he says.

Pearlstine agrees, saying that the key for traditional publishers is their lists of subscribers. More importantly, they have their payment information. With iPad apps, Apple has that information, and that will be a problem for a lot of media companies. “There will be other providers that won’t do it the Apple way,” he says. That, again, is implying that while Apple may have jump-started the industry, if they don’t open up a bit more, a competitor will beat them.

Of course, that hasn’t happened with the iPhone yet. But Android is charging fast.

Conway believes that Apple has a good lead for now though thanks to its “fantastic user interface.” He sees publishers flocking to it just like the music business did to the iPod/iTunes combo. “It’s a better model than free,” he says.

Watch live streaming video from disrupt at livestream.com


The GTD Implementation System

David Allen, the “Godfather of Getting Things Done”, has just released a new product that’s ideal for those who have a basic understanding of the popular methodology.

The GTD Implementation Guide goes through the system in a step-by-step fashion, allowing you to get into things quickly and effectively.  You can check out more on the latest addition to the GTD product line here.

GTD and Getting Things Done are registered trademarks of David Allen & Co.

CSS DIY Organization


I detest looking at code or mark-up that I’ve written in the past, which I don’t understand right off the bat. I’m surely no different from you in that I want to be able to come back years later, pick the code up, and understand exactly what is going on. I don’t want to dissect the simplest concepts, where the brackets are located, or even how the mark-up is indented. I have created habits to help me with rapid development, which have kept my sanity somewhat intact. I will be honest though, I have never given much thought to how I write and organize my CSS until recently, and that is what I am sharing today.


Introduction: Why Bother?

There are plenty of ways to do what I am suggesting with CSS. Let me be the first to say, don’t use anything that I am writing about today if your comfort level is not high with my concepts. Instead, think about the concepts, and improve on the solutions I am writing about. Share your own insights. I won’t argue with you if you think there is a better way to organize style sheets, as in the end there is no right or wrong way. However, I believe the more structure you add, the better off you are in the end when working with CSS.

“How easy is it for us, as developers, to rapidly find, understand, repair or add-on to a given code base? The easier that task is, the better the internal usability.”

There are a couple of concepts that I want to cover now in general to get the brain juices working. First, there is a concentration on usability with web development. We want the users of our websites to find things quicker, navigate more naturally, and overall intrinsically understand the concepts of our applications. That’s a very worthy use of time and energy. What is sometimes forgotten is the internal usability in all of the planning and discussions for our projects. How easy is it for us as developers, to rapidly find, understand, repair or add-on to a given code base? The easier that task is, the better the internal usability. In my opinion, that concept is as worthy of our time and thought as the front end usability.

Second, remember there is a C in CSS. It’s the cascading part. The method I use might fly in the face of some conventional thoughts, but when you back yourself into a corner for only using a certain aspects of CSS, you lose out on the power. When I am planning a large project, I think of the id selectors as “explain the entity”, class selectors as “describe the entity” and style attributes as “override what I just said”. I cascade the properties down to lessen the code, and give a little method to the madness. Again, there are no right or wrong ways, but when you have no plan, you are setting yourself up for a lot of extra work, not to mention extra overhead.

Finally, remember there are always tradeoffs in development. The most elegant ways of doing things aren’t always the most efficient.

Sometimes, the most efficient ways of doing things cost you down the road when you have to pick the code back up for support.

No one can make these choices for you, but you need to consider the tradeoffs while you write. Sometimes you have to bite the bullet just a little bit, perhaps to add an additional HTTP request to make the end result internally usable. Other times, you need to add a good comment to remind yourself of the choice that you made, and move on.


A Couple of Choices: Frameworks or The Wild West

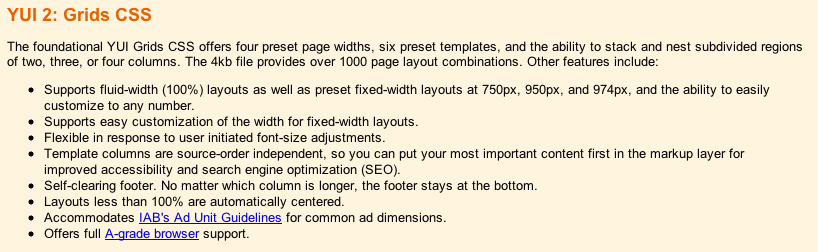
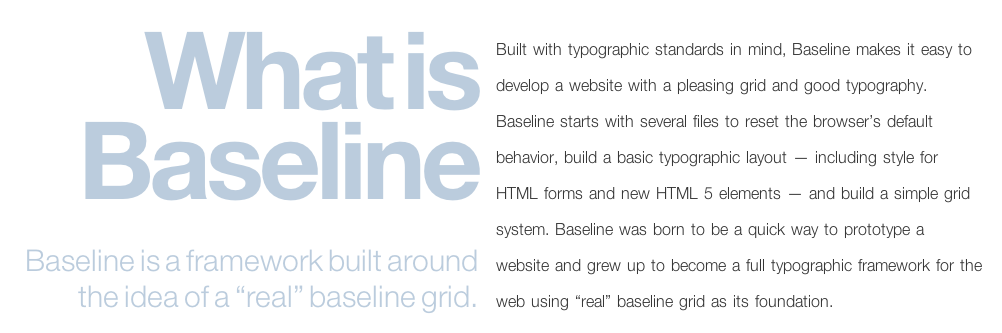
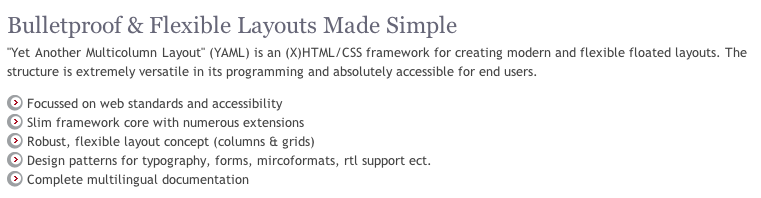
Chances are, you are using either a framework to handle your CSS or you are adding your styles in a manner that you have grown accustomed to, but without much of a structure. Both have there upsides and downsides. Let’s look at a few CSS frameworks first, from the horse’s mouths:

Blue Print

YUI 2

Baseline

YAML

There are a numerous more, and just like a frameworks for your server side language of choice, each have their advantages over one another, and each have their drawbacks. I am not here to steer you away from a framework, as I have used them in the past and I believe in the concepts. I think when you are working on a large team, there is no better choice as it standardizes your styles and it lessons the voice of the individual developer and designer. That said, I do believe there are some drawbacks from using a CSS framework, as it adds to the overhead particularly with styles you aren’t using, and the learning curve is rather high. This can be a bit frustrating particularly with projects that have strict schedules. That said, the learning curve is just that, a curve, and over time you will master whichever project you deem best. The advantage of using a framework is that you now have improved your internal usability, as you are using a set method paradigm, although that method is something that is most likely outside of your control.

Wild West

The other solution is what I call the “Wild West” where anything goes. I’ll be honest and say there are many times I have just pushed something out the door without much thought to the future, or in the case of a very small project where the CSS is not very substantial. The learning curve here isn’t so bad, because you are writing your CSS as you go. You have complete control over your style’s destiny. Pretty cool so far! The problem is the internal usability. Come back to that project after it is no longer fresh in your mind, and there will be some problems. “Why the heck did I write this like this” or “I have no idea what I meant by this comment” or “Why is that input not changing styles” or “what is this big chunk of chum controlling” are common responses after the style sheet is no longer fresh in your mind.


My Choice: The Hybrid Solution

If I could put the framework solution on a sliding scale with the wild west solution on the other end, I think I would prefer something just in the middle. While one bed is too hard, and the other bed is too soft, I want to find the bed that is just right. That’s what I call the hybrid solution. It shares traits with both the wild west and frameworks. On the one hand, I have control over my styles, and with that the learning curve is rather low. On the other, I want to give a little structure to what I write, so that when I come back to it later, I have at least a familiarity of the structure because I build onto my methods which each project.

It’s a bit of a DIY project like in home improvement. You are trading the structure and cost of a professional for the convenience and familiarity of using your own hands to do the work. What you hope for in the end is the same finished project, but one without the learning curve or foreign ideas and concepts from the industrial strength version.


File Naming Convention

Thinking back on the choices that we have to make as developers, I make the choice of increasing the HTTP requests for a little better organization. I know I am costing myself a little bit of performance but what I get in the end is CSS that is easier to understand when I have to look at them next. You may make a different choice here, and you won’t get much argument from me. I just prefer smaller file sizes organized in a consistent manner over the one large CSS file or header in my HTML.

Here’s what works for me:

  • reset.css : A reset css is one that sets all or at least of the majority of browser styles to nullify. I use a reset css so that I can battle some differences with browsers, and I see the value when dealing with cross browser issues. It’s not Nirvana, and there are some that prefer no reset, or what I recently read, a soft reset. I prefer to reset everything, and I use the Eric Meyer flavor of resets.

  • forms.css: I segregate my form styles from the rest of my CSS. I want to know when I am working on forms, and they aren’t quite appearing as I wish exactly where to go.

  • global.css: My global css file is something that I use for each larger project that I write. What is contained in this small file are small classes which I might use over and over again in projects. My rule of thumb is, if there is a shortcut for the property, then it probably doesn’t belong in the global file. I wouldn’t use the font property. For instance:

/* Colors */
.red {
    color: red;
    background: inherit;
}

.blue {
    color: blue;
    background: inherit;
}

.highlight {
    color: black;
    background: yellow;
}

/* Lists */
.horizontal {
    list-style-type: none;
    display: inline;
}

.vertical {
    list-style-type: none;
    display: block;
}

/* Text */
.small {
    font-size: small;
}

.large {
    font-size: large;
}

.bold {
    font-weight: bold;
}

Notice that these are very specific classes, that add to the cascading rules of styles. While none generally will be used as the only style for an element, they add to the description of the element that they class is applied.

  • style.css: My style.css is my main controller of my style. If you think in terms of OO for CSS, my style.css is my class, while the other files extend my class (somewhat anyway) and add to the inheritance of my main objects. I use my style.css to import my other files, and to define my local, project only, id selectors and classes.


ID and Class Selectors: Think a Little Differently

My hybrid method diverges here from most people, as my general rule with ids is merely to explain the element in question. ID Selectors are only used once per page (including GET processes), so I want these to be very specific in nature. In order to really maximize the reuse of code, any property outside of that explanation of an element, I really would prefer to use a class selector. Since this ID is unique to the page, I only want to use unique explanations for this selector.

For instance, my width would be somewhat unique. My padding and margin would be somewhat unique. My position would be somewhat unique. You could argue that the display for this selector would be somewhat unique. My color for the element; not really unique. My background, again not really unique. For the not really unique items, I think of these as “describe the element” for which I use class selectors.

Let’s illustrate this with a little code. For ease, I am using a recent tutorial by Jeffrey Way titled Quick Tip: Practical CSS Shapes. What if we took the original CSS:

#container {
	background: #666;
	margin: auto;
	width: 500px;
	height: 700px;
	padding-top: 30px;
	font-family: helvetica, arial, sans-serif;
	}

h1 {
	 background: #e3e3e3;
	 background: -moz-linear-gradient(top, #e3e3e3, #c8c8c8);
	 background: -webkit-gradient(linear, left top, left bottom, from(#e3e3e3), to(#c8c8c8));
	 padding: 10px 20px;
	 margin-left: -20px;
	 margin-top: 0;
	 position: relative;
	 width: 70%;
	 -moz-box-shadow: 1px 1px 3px #292929;
	 -webkit-box-shadow: 1px 1px 3px #292929;
     box-shadow: 1px 1px 3px #292929;
	 color: #454545;
	 text-shadow: 0 1px 0 white;
}

and transformed to this:

#container {
	margin: auto;
	width: 500px;
	height: 700px;
	padding-top: 30px;
	font-family: helvetica, arial, sans-serif;
	}

#heading-one {
	 padding: 10px 20px;
	 margin-left: -20px;
	 margin-top: 0;
	 position: relative;
	 width: 70%;
}

.norm-background {
        color: #fff;
        background: #666;
}

.heading-fancy {
	 background: #e3e3e3;
	 background: -moz-linear-gradient(top, #e3e3e3, #c8c8c8);
	 background: -webkit-gradient(linear, left top, left bottom, from(#e3e3e3), to(#c8c8c8));
	 -moz-box-shadow: 1px 1px 3px #292929;
	 -webkit-box-shadow: 1px 1px 3px #292929;
	 color: #454545;
	 text-shadow: 0 1px 0 white;
}

So far, all I have really done is added two new classes from the unique h1 selector and abstracted that h1 out to a unique ID. I haven’t gained anything for the moment, and in actuality I have added just a whee bit more overhead to my file. Where’s the advantage then?

If you think for a moment that you might reuse these descriptions somewhere else, perhaps for a sub-heading, then we have some code reuse. Let’s look to see what we can do now. Here’s how it originally looks:

Heading

and here is how it looks with a sub-heading:

Subheading

I only added a new definition now:

#heading-two {
	 padding: 10px 20px;
	 margin-left: -20px;
	 margin-top: 0;
	 position: relative;
	 width: 30%;
}

Along with a little HTML:

    <h1 id="heading-one" class="heading-fancy"> My Heading <span class="arrow"></span> </h1>
    <h2 id="heading-two" class="heading-fancy small"> My Sub-Heading <span class="arrow"></span> </h2>

We have code reuse, and we have a method which is consistent. If you take this method and apply it, you will reduce the number of styles (or objects if you prefer) that you write. Less code with a method means easier support at a later date. Really, nothing earth shattering here, but when you begin to explain your ID selectors but describe your classes it’s an easy method to add a little sanity to your code.


Style Attributes

I’m sure someone, somewhere, has told you to never use the style attribute. I am also sure that some of you will disagree with me, and that’s OK, I can take it. I am going to break that rule just a bit with a caveat. Never use it without a little thought to what you are doing. There are legitimate uses for the style attribute, particularly when working with complex applications using AJAX calls, but those uses come from your behavior layer.

When you should use the style attribute, is when you need to make a quick final call to override something in the cascade display for the element which wouldn’t make sense to add to your global.css file. For instance, you might need to override a style from your behavior layer based on an user action. It does add to the complexity just a bit, but it adds to the cascade. I wouldn’t use multiple properties, as this is a quick override, or rather, “forget what I just told you, do this instead”. It’s a cascade, and you should treat your CSS as such, in my opinion.


Indentation, Layout and Comments

We spend a lot of time putting emphasis on our indentation in our code and HTML, but I don’t often see the same emphasis in our CSS. It makes the world of difference. Let’s take our working example again:

<div id="container" class="norm-background">
    <h1 id="heading-one" class="heading-fancy"> My Heading <span class="arrow"></span> </h1>
    <h2 id="heading-two" class="heading-fancy small"> My Sub-Heading <span class="arrow"></span> </h2>
</div>

If we indent that in our markup, why not indent it the same way in our CSS:

#container {
	margin: auto;
	width: 500px;
	height: 700px;
	padding-top: 30px;
	font-family: helvetica, arial, sans-serif;
	}

    #heading-one {
         padding: 10px 20px;
         margin-left: -20px;
         margin-top: 0;
         position: relative;
         width: 70%;
    }

    #heading-two {
         padding: 10px 20px;
         margin-left: -20px;
         margin-top: 0;
         position: relative;
         width: 30%;
    }

It adds just a little more emphasis as to what is going on with these ID selectors. I understand now that they are children to the container div without comparing my mark-up.

When deciding on the layout of your style file, this is the rule of thumb that I use. You have to @import your additional CSS files first starting with the reset.css file, and then the rest. Define your elements next such as h1, anchors, etc. Next, define your ID selectors in your style.css. If you are working with multiple pages, comment the start of each new page within your indentation. For instance, #container is probably an element of the layout which is the container for each page, so start there with your indentation and work out commenting where you are using each element. Finally, define your classes. I don’t normally indent my classes, due to the fact that they are often reused, and the indentation doesn’t show where they are used.

Finally, and probably most importantly, comment your CSS just as you would your server side code. If there is any context that you can give to a class, such as elements that it is used, or ID that it matches, comment it. Any context that you give your future self is like having a time machine. Marty McFly might not have knocked that creepy guy out of the way of oncoming traffic if he had just read the Flux Capacitor comments first.


Conclusion

I am relatively sure my methods will not have a new dance move named after it, nor will it cure cancer. I am not even sure if they would be adapted by a single person outside of my immediate family. That said, I really hope you take the concepts away from this and build methods that work for you. Development usability is a goal that we should all be striving to achieve. When you create a methodology, you increase your internal usability exponentially as you are developing habits which you reuse and share with your team and others. It fixes development problems, increases productivity, and decreases the overall cost of development. It is one of those rare win / win propositions that you encounter in your daily development life.

Thanks for reading, and please share your ideas.

Finding Your Hand Drawn Lettering Voice


Learning to letter by hand is a journey, or at least it has been for me. Starting with a passion for letters and typography, I experimented with tracing type, fitting letters into unusual spaces, and discovering how to pull words and styles together cohesively. It can take quite some time for your compositions to come together, your focus tighten, and your voice to develop.

Continue reading “Finding Your Hand Drawn Lettering Voice”

Inspiration: 40 Bold, Bright and Beautiful Shape Based Illustrations


At Vectortuts+ we love colors and shapes! From round and cheerful to pointy and moody, we love them all. This post showcases 40 great illustrators from around the globe, each have mastered the art of composing shape and color perfectly to make stunning creations. Venture with us into the glorious world of color and shape, beginning with fiery yellow and red, moving on to soothing pink and purple and ending with mysterious blue and black.

Continue reading “Inspiration: 40 Bold, Bright and Beautiful Shape Based Illustrations”

Recording the Drums – Part 4 – Audio Premium

In this week’s Audio Premium content, Bobby Owsinski continues his series on how to record the drums.

To learn more about what you get as part of Audio Premium, read this.

In Part 4 of my drum miking series we’re going to look at a couple of ways to do overhead miking, the philosophy and placement of the sometimes mysterious room mics, and some surprising and interesting alternative miking techniques. Don’t forget, as I’ve stated in the intro of every part of this series, the real key to a great drum sound is a great drummer or a great sounding kit (preferably both in that order). These two items will make just about any engineer look like a genius to his or her clients.

Table of Contents

  • The Two Philosophies Of Overhead Microphones
  • Using Room Mics
  • Miking The Room With A Single Mic From The Front
  • Miking The Room Using A Stereo Mic Overhead
  • Parallel Room Mics
  • Using Three Room Mics
  • Alternative Miking Techniques
  • The Single Mic Technique
  • The Two Mic Technique
  • The Three Mic Technique – Option 1
  • The Three Mic Technique – Option 2
  • The Three Mic Technique – Option 3
  • The Four Mic Technique – Option 1
  • The Four Mic Technique – Option 2

Existing Premium members can log-in and download. Not a Plus member? Join now.


Workshop #74: Just Win by Villains Inc.

At Audiotuts+ we irregularly put up a reader track for workshopping and critique (find out how to submit a track). This is how it works: you upload your song, and every week or so we’ll publish one here and step away from the podium. The floor is yours to talk about the track and how the artist can fix problems in and improve upon the mix and the song.

This track has been submitted for your friendly, constructive criticism. They have put their track (and their heart and soul) in your hands to learn and get useful feedback.

  • Do you enjoy the song or track itself? Does it have potential?
  • Can the arrangement be improved?
  • How did you find the mix? What would you do differently?
  • What do you enjoy about the rhythm track? What can be done to improve it?
  • Is the choice of instruments relevant and effective for the style/song?
  • Are the lyrics (if any) effective? Does the style, arrangement and genre of the song suit them?
  • Can you suggest any specific techniques that might improve the track?
  • Do you have any other constructive feedback?

Just Win by Villains Inc.

Artist’s website: www.fliptheu.com

Description of the track:

t1mp – music, mixing, arrangement
jim settle – arrangement,mixing
mick leonardi – vocals, lyrics

Download audio file (Justwin.mp3)

Terms of Use: Users can stream the track for the purposes of giving feedback but cannot download or redistribute it.

Have a listen to the track and offer your constructive criticism for this Workshop in the comments section.


Submit Your Tracks for Workshopping

Need constructive criticism on your own tracks? Submit them using this form.


Open Mic: Tell Us Which Music Magazines You Read

Magazines tend to be more up-to-date than books, but lag a little behind the immediacy of the Internet. Do you read music or audio magazines? Which do you find most helpful?

Each Tuesday we open our mic to readers and lurkers alike to come out of the woodwork and tell us your thoughts and opinion, your experiences and mistakes, what you love and what you hate. We want to hear from you, and here’s your chance.


How often do you buy audio magazines? Which do you find most helpful?

Or has the Internet completely replaced books and magazines for you?


Adding an Artist’s Touch to Your Photographs – Psd Premium Tutorial


Today, we have another Psd Premium tutorial exclusively available to Premium members. If you want to improve your photo manipulation skills, then we have an awesome tutorial for you. Learn more after the jump!


This Premium Tutorial is Filled with Creative Tips

As an artist, I love working with great imagery, especially when the project involves collaborating with talented photographers and art directors. Starting out with a great, well-lit shot makes my job much easier. But every now and then the project involves taking something more ordinary and turning it into something special.

While it can be more of a challenge to create something special from an ordinary shot, the artist side of me loves that challenge. And it was while working on one such project that I got the idea for creating this tutorial. In this tutorial we’ll go through the steps I used to turn the shot below to the one you see above. Along the way you’ll learn about manipulating depth of field, creating lighting effects that give the image a little bit of ‘bling’, how to create a split toning color effect and finally how to apply a texture and color treatment to the image to give it a cool, vintage look.

By the end you’ll see some new ways of working that you can vary and apply to your images adding that special touch of your own. Let’s get started!


Professional and Detailed Instructions Inside

Premium members can Log in and Download! Otherwise, Join Now! Below are some sample images from this tutorial.


Psd Premium Membership

As you know, we run a premium membership system here that costs $9 a month (or $22 for 3 months!) which gives members access to the Source files for tutorials as well as periodic extra tutorials, like this one! You’ll also get access to Net Premium and Vector Premium, too. If you’re a Premium member, you can log in and download the tutorial. If you’re not a member, you can of course join today!

Fetish: Build a Lamborghini Supercar Out of Legos

Product: Lamborghini Gallardo LP560-4 Polizia

Manufacturer: Lego

Wired Rating: 0

If only the two Lamborghini Gallardos owned by the Italian State Police were made of Legos. Sigh. Then it wouldn’t have been a big deal when a cop disassembled one in a smackdown with a car pulling out of a gas station. Fortunatamente, you can reenact this scene over and over again with the 1/17-scale Lego Lamborghini Gallardo LP560-4 Polizia. What this Lego-ghini lacks in horsepower it makes up for in detail — 801 pieces of it. Starting with a miniature replica of the Gallardo’s 5.2-liter V-10 engine, it has everything you need to play polizia, including a radio, a radar gun, and a cooler for high-speed donor-organ deliveries. There’s even an onboard defibrillator, presumably for restarting the tickers of bad guys who get cardiac-arrested when the 5-0 appears behind them in a $225,000 road rocket.

product image

Saving Face: Bluetooth Headsets Skew More to Cool Than Tool

Product: Face Savers

Manufacturer: Roundup:

Wired Rating: 0

Strapping on a Bluetooth headset doesn’t have to mean casting off dignity. We put 4 to the test to find which skew more cool than tool (you know, relatively speaking).

1. Aliph Jawbone Icon
Headsets don’t have to be hideous. Just ask Yves Béhar, whose handsome design for the original Jawbone has been further refined in the Icon. It sounds great, too: Noise filters eliminate virtually all external racket—wind, gunfire, loquacious hobos. The folks at Aliph are also apparently BFFs with Apple; a separate battery indicator for the headset appears onscreen when you pair an Icon with an iPhone.

WIRED Syncing requires zero thinking. Got a BlackBerry and a Nexus One? Icon can be paired with both simultaneously. Four solid days of battery life. Fits perfectly in ear despite lack of pinna-anchoring loops.

TIRED Sticky rubber earpiece gets dirtier than ODB’s debut album.

$100, jawbone.com

2. Plantronics Explorer 395
Plantronics has serious geek cred. Neil Armstrong wore one of its headsets during the 1969 moon landing. Too bad the Explorer 395 has all the visual panache of the crew in Mission Control—you know, short-sleeved shirts, black glasses, and pocket protectors. But solid audio quality makes up for the weak design. In addition to the usual digital tricks, Plantronics’ engineers created a specially shaped mic port to mask outside noise. It picks up voices perfectly while ignoring anything short of a hurricane-force gust.

WIRED More lightweight than Heidi Montag’s summer reading list. The price is right, Bob.

TIRED Houston, we have a fashion problem—makes you look like a pre-bubble I-banker.

$50, plantronics.com

3. Motorola Endeavor HX1
This whopping, tanklike hunk of plastic requires Paganini-level fiddling to position correctly in your ear. But once inserted, it operates like a sonic sponge, soaking up every sound within 40 yards. It offers some cool features, too. Passing on trade secrets at work? Just hit a button to activate stealth mode, which captures vocal vibrations and translates whispers into (somewhat garbled) speech.

WIRED Stealth mode makes you slightly less annoying on public transit. Low on juice? The HX1 gently chirps a reminder in your ear.

TIRED Flimsy ear loop barely supports the headset’s bulk. Burns through battery life: Even Emperor Palpatine didn’t have this much appetite for power.

$130, motorola.com

4. Jabra Stone
Most Bluetooth headsets are Frankenstein monstrosities of rubber and plastic. Not the Stone. This little shaving of sheer elegance has no moving parts and nestles into your auditory canal rather than violating your ear. But awesome design is where the good stuff ends. The Stone choked on nearly every task we set for it. Syncing stinks, battery life is anemic, and audio is as mellifluous as a blender filled with tenpenny nails.

WIRED Superb packaging. Egg-shaped charging base is as pretty as the headset.

TIRED Most of the outward-facing side of the Stone is one big End Call button. Press it by accident and you’ll cease transmission. No charging port on headset—you have to plug into the base station to juice up.

$130, jabrastone.com

product image

Boulder Dash: Radio-Controlled Rock Crawlers Take Toys to New Heights

Product: Boulder Dash

Manufacturer: Roundup:

Wired Rating: 0

With high-torque electric motors, low gear ratios, and wildly articulating suspensions, radio-controlled rock crawlers venture where no toys have gone before.

1. RC4WD Killer Krawler

This 1/5-scale truck should be called the Overkill Krawler. Its CNC-milled aluminum chassis provides 5 inches of ground clearance and a rigid frame to support its contortionist suspension, dual electric motors, and twin computerized speed controls. Weighted pendulums inside the wheels boost traction by keeping pressure on the rocks below. But you need serious skill to make this beast behave; reprogramming your brain to steer front and rear wheels is tricky.

WIRED So well engineered and built it could be drafted into military service. When you’re not duking it out with rocks, mount this machined beauty on the wall—it’s that gorgeous.

TIRED All that pretty metal jacks up the weight, which weighs down battery life. Krazy expensive.

$1,500, rc4wdstore.com

2. Losi Night Crawler
To tackle jagged rocks and steep slopes, you think ahead and go slow. That means you may have to park in a precarious spot while you sort out your strategy. The 1/10-scale Night Crawler encourages this strategic approach with a worm-gear drive that can apply just enough torque to hold the truck steady. Once you’ve chosen a path, the 45-degree steering angle and 4-inch aluminum shocks let you take the route you want, not just the path of least resistance.

WIRED Accepts powerful, long-lasting lithium polymer cells for extended missions. Or you can keep it cheap and go with standard NiMHs.

TIRED LED lights, intended to help you crawl around at night (hence the name), aren’t quite bright enough to make that possible. Worse, they only point downward.

$500, losi.com

3. Axial SCX10 TR
Realism runs high in Axial’s 1/10-scale Trail Ready crawler: Its tunable suspension, solid rear axle, and bead-lock wheels—which cinch the tires onto the rims so they don’t slip while you’re grinding up a steep rock face—faithfully replicate a real-life crawler. And its smoother tires and less extreme gear ratios help you squeeze more meters out of each battery charge. Just don’t go trying to scale the woodpile.

WIRED When the sun drops below the horizon, LED headlights brightly illuminate the trail ahead of you. It’s also faster on flat surfaces than the rest of this convoy.

TIRED Doesn’t scoff at gravity like the Krawler or the, uh, Crawler. Abundance of plastic components might add up to dubious durability—even in miniature, this sport is brutal.

$299, axialracing.com

4. Traxxas Summit
The Summit’s waterproof electronics open up oceans of new challenges: Rocky streams and snowy slopes will no longer be off-limits for fear of damaging your $500 toy. But the fan-cooled motor drinks a lot of juice—two sets of seven-cell NiMHs. On the plus side, that amplitude of amps, combined with a smart transmission, lets this 1/10-scale truck wear two hats: deft climber one minute and flat-out trail runner the next.

WIRED Transitions from high-speed bashing to methodical ascents at the flick of a switch. (Well, two switches, actually: One changes your gearing and the other locks or unlocks your differentials.)

TIRED Plastic wheels have fake bead-locks—a deadly sin to purists. Suspension articulation not on a par with the other crawlers here.

$569, traxxas.com

product image

How To Ask Your Boss To Work From Home

I’m writing this article from home – where I’d love to do all of my work.  Much of my writing is done here, but my day job doesn’t afford me the ability to enjoy the same “luxury.”  That’s not to say I don’t do some of my work for my day job at home – that does happen from time to time.  Actually, the separation of the two pursuits makes not only for a clear set of responsibilities depending on where I am (for example, I can leave my work at the office should I choose), but it makes for more productivity on the whole.

But many of you have one job.  One that you could do just as easily from home.  One that you know you could do better from home.  So why not do that?  How can you go from working at the office to working at home?  Here’s a step by step method to get your boss to say “yes” to your request to work from home…

Establish Trust

You may have been at your current employer for a while – and if you’ve been in your current position, even better.  Gaining the trust you’ll need to have in order to pull this off shouldn’t be as difficult as it will be for some.  Timothy Ferris of The Four-Hour Work Week points out that this should be done in small steps regardless…so the trust you have (or will have) established is key in getting the process of working from home underway.  You’ll know your situation best – and you’ll know deep down whether or not you have the trust of your boss to a level that enables you to take it to the next step.

Think Small First

You’ll be tempted to go all out at first – after all, you’ll be excited that you’re even considering the notion of working from home.  You need to take this slowly.  Again, since you know your work situation best, decide whether or not shorter work days is the approach you should take or if you should ask for one less day in the office per week.  The latter is the most ideal, because it opens doors to asking for additional days down the road.  Shaving hours off the workday only gets you so much further in terms of productivity.  Explain to your boss that an entire day at home will work best – but if you know that won’t fly start with less hours per day at the office.  As your productivity increases, you’ll be able to ask for more as the results of the experiment work in your favour.

Get To Work

You’ve managed to convince your boss that you can work just as (if not more) effectively from home.  Now do it.  Show them you were right.  Prove it to them on an ongoing basis.  No slacking.  This will require discipline.  Set office hours for yourself.  You’re at home to work, so keep your eye on the prize.

Go Back To The Well

One day at home has proven to be successful – now go back and ask for more.  You’ve got a precedent your arsenal now, so that should help your cause.  Again, don’t get greedy.  The worst thing you can do is overestimate the situation because you’ll likely end up back where you started.  Knowing when to ask for what is a delicate matter.  Don’t lose sight of that.

If All Else Fails

None of this may work in succession – or at all.  If you’ve miscalculated your boss’s willingness to allow you to work from home, you’re going to be facing an uphill battle going forward – because your boss may sense an apparent unhappiness on your part.  It’s likely a perception, but we all know what they say about perception.  You’d better be sure about your status in the workplace before pursuing this – or be sure that you may not want to be there in the long run.

Things To Keep In Mind

  • Be prepared with a list of how working from home will benefit your boss and the organization (lowering carbon footprint, no commute means more time to work, morale boosting, less downtime, etc.).
  • Be ready to move on.  This could all go over like a lead balloon if you’re not prepared – and have misread your working situation as well.
  • Be sure that you have all the fortitude needed to work from home.  Some people need to be at an office to do their best work.  Some people prefer not to bring their work home, regardless of how passionate they are about it.
  • Be ready to work.  The success of the venture is all on you and how you make it work.  Be ready to take that on.
  • Be dressed for work.  A Skype video conference call won’t go over so well if you’re in your pajamas.

Working from home can be the ideal situation for many of us – and for the companies we work for.  It can be the ultimate win-win.  Just remember that what looks good on paper doesn’t always look good in practice.  Telecommuting can be the best way to be more productive at what you do…as long as you tell yourself that it’s up to you to make that happen.