Today we are going to present the second part of “Photography Technique for People & Portraits”. In this article we focus upon the methods and techniqes for taking exellent photos of kids, groups, and more candid images.
Create a Nice Day
Whether it’s Murphy’s Law or just unfortunate scheduling, oftentimes the weather you have when shooting people is more gloomy and overcast than what you were hoping for. Pictures without sunshine, however, can still look good if you know a few quick techniques.
The first thing to look for is some sort of contrasting background, such as the light sweater and dark green foliage of 2-1. This contrast helps to separate the subject from the background. The next thing is to set the white balance to cloudy, giving the image a neutral or warm tone in an overcast situation. It might be necessary to either use a manual white balance setting to further warm the scene, or to use some of the color enhancements in Photoshop Elements.
Additionally, by over exposing 1/3 to 2/3 of a stop, you can brighten an overcast scene enough that it does not look gloomy.
Setting the camera manually to +2/3 over the meter reading, to 1/250 sec. at f/4 at ISO 250, helps an overcast scene overcome a gloomy look.
Using black and white is also a great way to deal with overcast situations. In 2-2, the kids have very light skin tone and hair, so putting them against the sky complements them. Adding a very small amount of fill flash can also just add a little life to an overcast portrait.
The fill flash was set to –1 2/3, which is just enough light to add a sparkle to the kids’ eyes. The exposure was 1/125 sec. at f/6.7 at ISO 200 using a manual exposure.
Kids, Candids, and Environmental Photography
This might appear to be a wide-ranging section, but these topics are more related than you might think. A large part of shooting people when you are out and about – either for candid shots or environmental shots – has to do with being ready for anything.
Making certain that the camera is set to do what you want it to do before you even sling the camera strap over your shoulder saves a lot of time and allows you to get the shot, instead of missing it because you were fiddling with your camera. Working with kids is much the same, but having patience as well as forethought is immensely helpful.
In 2-3, an overcast day makes the light rather flat, but with a camera already with a telephoto lens, the white balance set to cloudy, and the exposure set correctly in Aperture Priority mode, when the little cowboy takes a stroll over the small bridge, everything is ready without having to give him any direction.
Exposure was set to f/3.5 in Aperture Priority automatic, which allowed for the background to be slightly out of focus, letting the subject pop out of the background. The shutter speed is 1/250 sec., which stopped his movement.
Having the camera already set makes it easy to capture far more beautiful light when the sun pops out unexpectedly, like it did a few minutes later. Notice in 2-4 that the foreground is dark, meaning that he is in the sun, but just outside of the shade in front of him. The only difference in the settings between the two images was that the aperture was set to f/4 in 2-4 as opposed to f/3.5 in 2-3 in order to get slightly more depth of field with the lens zoomed to a longer telephoto.
The exposure in this image was f/4 at 1/750 sec. Using Aperture Priority allows you to control the depth of field, quickly maintaining the correct exposure by letting the camera determine the shutter speed.
When shooting candid photographs it also is very important to recognize the importance of the moment that you are photographing and be ready to capture it. Legendary Photographer Henri Cartier-Bresson called this “the decisive moment.”
Now that you have looked at so many lighting situations, you should be able to read what the light is doing and already have in mind what you and the camera should be doing to capture the light as needed to create your image.
In creating more of an environmental portrait, waiting for the moment, and waiting for the lighting at that moment is just as important. When the subject just sits comfortably in a favorite chair and the light from a large picture window lights up the subject’s face, don’t hesitate for one moment. In trying to capture people’s nature and their essences, it is important that they are comfortable. This is far more important than making sure that the subjects have big smiles.
Being comfortable with the camera allows you to work quickly so that the subject doesn’t lose interest or the look that first captivated you. In 2-5, using a thumb switch to quickly access the spot meter in order to capture the delightful window light on this subject’s face happens in a snap. The result tells a far bigger story of who this man is than if he were posed and directed.
A spot meter determined that an exposure of 1/40 sec at f/4 was correct to capture the light on this subject’s face. The texture of the face, hands, and shirt is a result of light from a big window.
Using the different exposure modes, Aperture Priority, Shutter Priority, Program, or Manual has a lot to do with personal preference and how things work best for you in each situation. Each exposure mode has its own advantages and disadvantages. No matter which one you select, make sure that you monitor what choices the camera is making as it corresponds with the decisions that you make. If you use Aperture Priority, make certain that you still have a fast enough shutter speed to stop your action, and if you use Shutter Priority, make certain that you have the depth of field that you need.
When shooting people, the situation is often dynamic. A very posed portrait quickly becomes a great candid look at a couple as they react to their kids hamming it up in 2-6. Being able to keep your eye in the viewfinder to capture priceless moments that can never be reposed is a great skill to develop.
The exposure for this image was set to 1/125 sec. at f/4, using ISO 400. The meter reading was taken with the center-weighted meter set to Manual exposure mode.
When the focus of the image is a person, capturing even just part of the face can be an effective way to get a sense of the essence of the subject. Using a telephoto lens helps to limit the depth of field. In 2-7, the background becomes totally obscured. The telephoto lens in this case was a 200mm, and the lens along with the aperture of f/2.8 keeps the depth of field very shallow.
This is useful when the subject is against a distracting background and keeps the distractions to just background shapes. This shallow depth of field situation is particularly demanding on the focus, so make sure that your focus is locked on and that you refocus the camera often when shooting that tightly. Any camera or subject movement could result in out-of-focus images.
With the brim of his hat blocking quite a bit of light from his face, it was important to set the exposure correctly. This exposure was 1/250 sec. at f/2.8 with the exposure compensation set to +1/2.
The same situation crops up with kids even more frequently. Shooting children is challenge enough, but they also work against photographers by being happiest where there is the most clutter. By getting a child close to a window to create nice, soft light and then using a shallow depth of field and a telephoto lens to eliminate any clutter, you can create great images of kids, as in 2-8.
A large window on the shady side of the house makes for great soft light, and getting tight with a telephoto lens eliminates distractions. 105mm Nikon Macro with an exposure ISO 200 at 1/250 sec., f/3.2.
Working With Groups
When lighting groups, you face a number of challenges. Photos of one person can use very shallow depth of field, but even one other person can change the amount of depth of field necessary for an image. Furthermore, getting good light on everyone in the group is always a challenge. People can cast shadows on one another if the scene is side-lit, or if in the shade, almost invariably one tiny ray of light is hitting one person, causing him to be washed out while everyone else is properly exposed.
So working with groups can be just as much about location as it is about lighting. Finding the location with even or flat light can be a challenge, but when the groups are large, you need light that covers all the people in the group so that you can see everyone’s face.
The obvious problem is that when the light is shady or overcast, you have less light and, thus, less depth of field. Using a wide angle lens can help with depth of field because there is more inherent depth of field as the lens gets wider.
Increasing the ISO is another way to increase the depth of field. In order to get the most people in focus, increasing the ISO from 100 to 200 allows for an aperture of f/8 as opposed to f/5.6 to be used in 2-9. This small increase in ISO really does not change the image quality substantially, but increases the depth of field a fair amount. Even increasing the ISO to 400 is acceptable in most cases, unless you know the image will be printed extremely large.
Large groups like this often cause a photographer to split some differences in order to get the best possible shot. Trade-offs between image quality and depth of field, and between depth of field and the risk of blur, are all things to weigh into your photography.
Getting everyone in the shade and setting the white balance for shade was the best way to have the whole group evenly lit. f/8 at 1/45sec. at ISO 200 with the fill flash set to normal.
Remember to shoot a lot when it comes to large groups. Blinks often ruin great group photos. According to the Commonwealth Scientific and Industrial Research Organization, for groups of fewer than 20 people, if you divide the amount of people by three, and take that many shots, you have a 95-percent chance of getting at least one shot without blinks.
When shooting smaller groups, lighting can be more creative and dramatic. But remember it is still important to make sure that light is on everyone in the scene. Using a large white reflector next to the camera brightens up everyone’s face quite a bit, even though everyone is in shadow in 2-10. Having the subjects in shadow and the background lit up so brightly can cause the meter to underexpose the subject too much. Make sure that you get your meter reading from the light hitting the subject, by either zooming in close on one of their faces or using the spot meter.
Using an exposure of 1/60 sec. at f/5.6 in the Manual exposure mode after metering for their faces, the brightness of the background was disregarded. ISO was set to 100, and the white balance was set to shade.
If you have something to bounce the light off of, using a strobe unit for a group shot is helpful in making sure that any deep shadows are filled in. The light in 2-11 is a dappled sunlight, making the light slightly different on each girl. Using the ceiling of the gazebo, the light from an on-camera strobe is bounced up, softening the strobe and evening out the light. When you don’t have anywhere to bounce the light, but you still want to soften it, you can buy a light modifier for your on-camera strobe.
The strobe was bounced up into the ceiling, which evened the light from the faces that were in shadow and the faces that were in sunlight. Exposure of 1/60 sec. at f/5.6 at ISO 100.
A light modifier can be anything from a 3 × 5 index card to a very expensive piece of plastic that is designed and shaped to fit directly onto your strobe. These modifiers all do essentially the same thing – redirect and diffuse the light, so that it doesn’t appear like such a harsh blast. There are a number of companies that make light modifiers, including Lumiquest, Sto-Fen, Chimera, and Gary Fong.
Most of these still work with the TTL sensor in the camera so that your exposure is accurate, and most camera shops have these accessories. If none of those are available, and you are trying to avoid the harshness of direct strobe, you can use tissue paper or even copy paper loosely taped over the flash head in a pinch to help diffuse the strobe light.
When composing groups, one thing to keep in mind is to try to keep the faces in triangles. This is easy when you are shooting a group of three or six, but when you have four faces, it becomes harder. By composing the faces in triangles, the image becomes more dynamic and balanced. In 2-11, the triangle created by the faces is obvious; in 2-12, the diamond shape created by the faces is made up of a number of triangles: mother, father, and baby; mother, father, son; and so on.
The flash came through an umbrella, creating nice side light. The exposure was set to 1/40 sec. at f/5; the slow shutter captures the fire light; and a gel placed on the strobe balances the ambient color temperature.
It is also important to get the faces close to the same plane for two reasons; the first is to keep everyone in focus, especially when dealing with shallow depth of field or telephoto lenses. The second reason is to keep everyone in the same light, and shadows often happen with sidelight. Make sure to get as much of everyone’s face out of the shadow and into the light as possible.
Some digital cameras now have the ability to fire their strobes without being attached to the camera. This usually entails a camera with an attached strobe to be the master or commander unit, and a second strobe to be the remote unit. The light from the master strobe can be turned up, down, or off, as can the remote unit. These strobes are all connected through an infrared sensor system that is wireless, so the “Through The Lens” metering system still works, making this system seamless and easy to use (see 2-12).
Taking a Candid Shot
Taking a candid photo can be challenging because you might have to take a few to get just the right shot. You can’t easily tell your subject to move into the right light, because the image would no longer be candid.
I took this picture under a shady tree at a park at noon. Almost any time of day you can shoot photos of people in the shade. Some dappled light is on his hair, and the background is bright. Make sure to get your exposure from the subject, not from the background. The exposure here was ISO 200 at 1/80 second at f/6.3. I used the evaluative meter and the shade white balance. Another tip is to get lower when taking photos of kids; get on their level. They behave better, and your photos turn out better.
Getting the Flash Off Your Camera
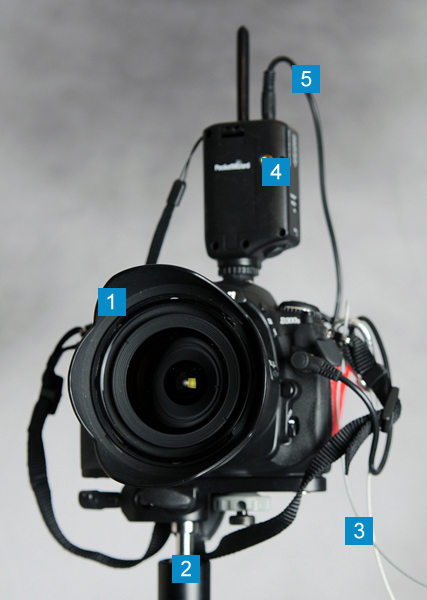
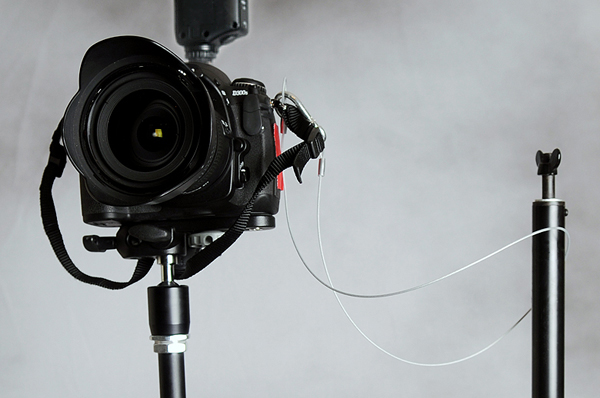
If your digital camera does not have the capability to be fired via a wireless remote system, you have other ways to get your flash off of the camera. The first thing that is needed is some way to sync the camera and the flash together. The cheapest thing to get is a sync cord. A sync cord is connected to the PC socket. PC does not mean personal computer in this instance, but stands for Prontor Compur – an industry standard compact electrical socket that connects the camera to the flash.
Not all cameras have PC sockets, but if your digital camera has a hot shoe to place a strobe, you can get an accessory PC socket adapter to put on the hot shoe for $10–$20. Most large on-camera strobes have a PC socket. Take your camera and flash to the camera store to make sure you get the cord with the correct connections needed.
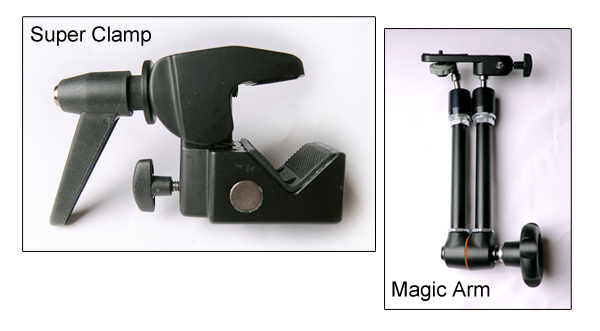
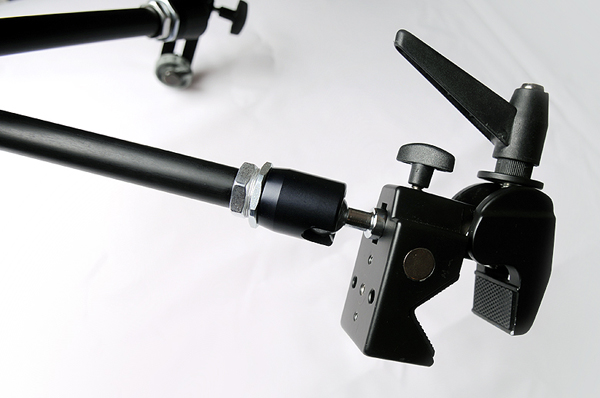
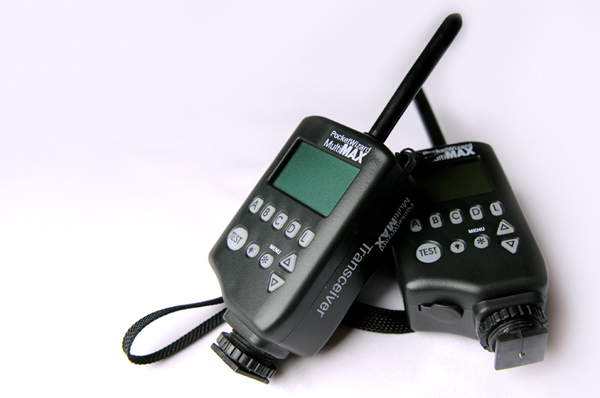
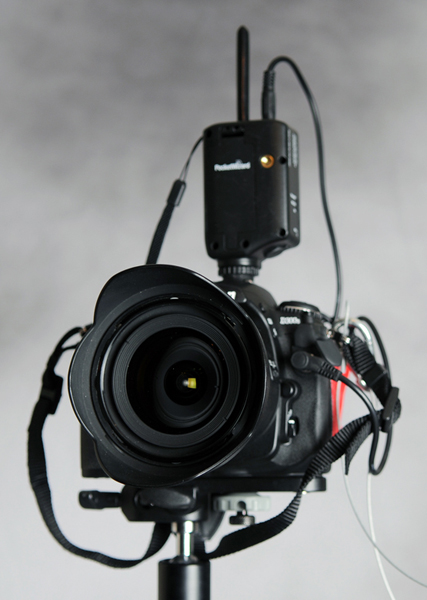
If you don’t want to use a cord, you can use a number of wireless sync solutions that use either radio signals or infrared signals, such as Quantum’s Radio Slave, and the Pocket Wizard family of products. These units have a transmitter that attaches to the hot shoe of your camera and a receiver that attaches to your flash via a very short PC/sync cord.
Thanks for Reading!
I hope you enjoyed this two part series on lighting for people and portraits. We’ve covered quite a bit of ground, and shared plenty of useful information. If you have any tips or suggestions of your own, I’d love to hear them in the comments!