Looking to capture action in two places at once? Need to place a camera somewhere hard to shoot handheld? This article will give you step-by-step tips to setting up a remote camera using professional practices for safety and control.
A remote camera allows photographers to capture action in different ways than a traditional handheld camera.
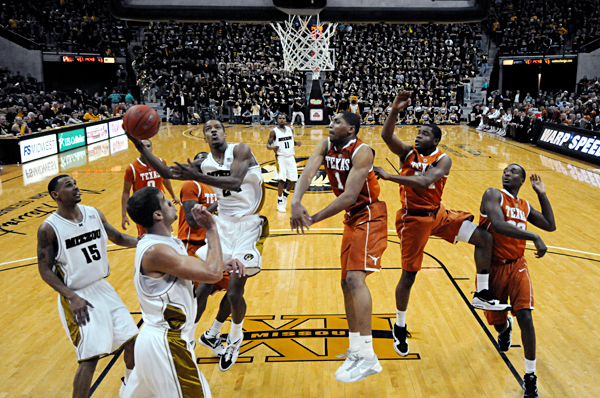
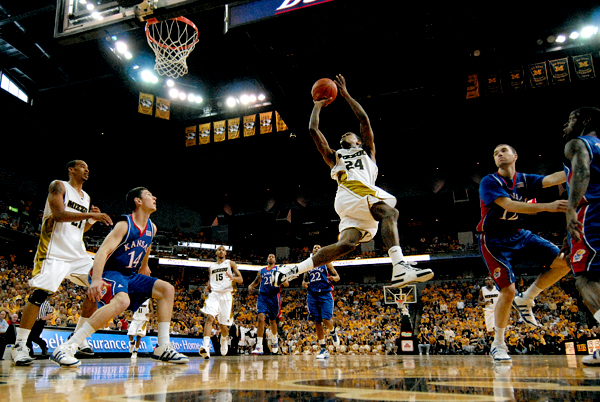
Remote cameras are mainly used by sports photographers, nature photographers and event photographers. For example, remote camera setups are typically used at basketball games behind the backboard to capture impressive shots of players dunking. Nature photographers use remote cameras to capture animals such as hummingbirds appearing at a feeder.
Step 1: Equipment
Remote cameras take some specialized equipment to trigger the camera and ensure its stability.
DSLR Camera
Any type of DSLR camera will work for a remote camera as long as it has a motor drive connection (usually mid-range cameras).
For the lens, I personally like to use a wide angle for my remote cameras, such as a 12-24.
Camera Support
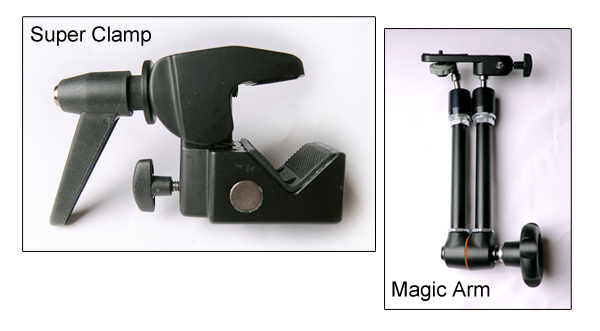
First, you’ll need some kind of camera support. Depending on your situation, I’d recommend a tabletop tripod or a Manfrotto Magic Arm and Manfrotto Super Clamp.
The Magic Arm and Super Clamp allow you to place your camera in almost any location, as long as you can clamp it onto something. This is the typical setup for sports photographers, as it can hold a large amount of weight and provide security for your camera. You can also use a tabletop tripod to put the camera low to the ground.
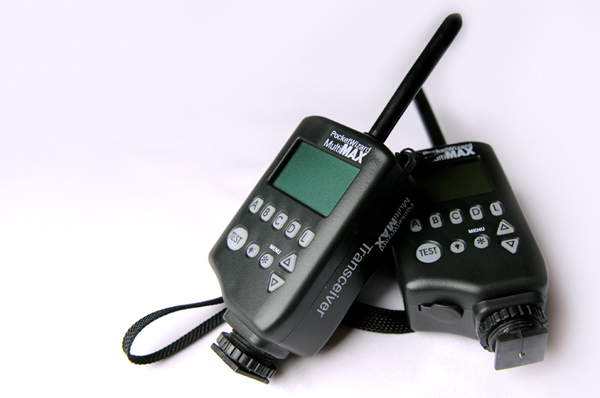
Camera Trigger
Along with support for your camera, you’ll also need a triggering device. Pocket Wizards are the industry standard for wirelessly triggering your camera. You can also use a remote shutter cable or a “eBay trigger.”
Along with the camera trigger, you’ll need a motor drive cable to connect the triggering device to the camera.
Safety Cables
Finally, you’ll need safety cables. Safety cables are a must to protect your property, others’ property and to prevent personal injury. It will ensure your camera stops if it falls. Some locations require them, along with proof of liability insurance.
Gaffers Tape
It’s always nice to have a roll of gaffers tape handy to control loose cables and cords.
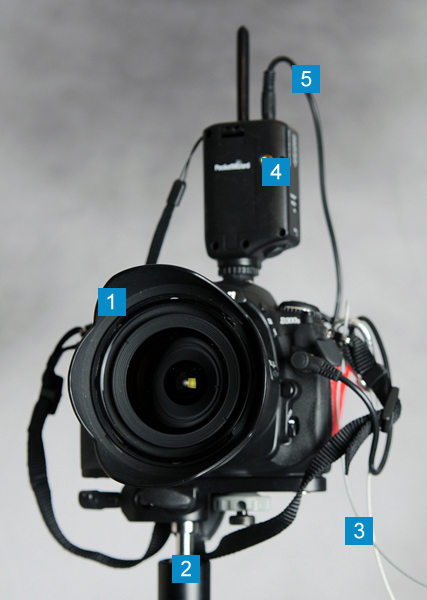
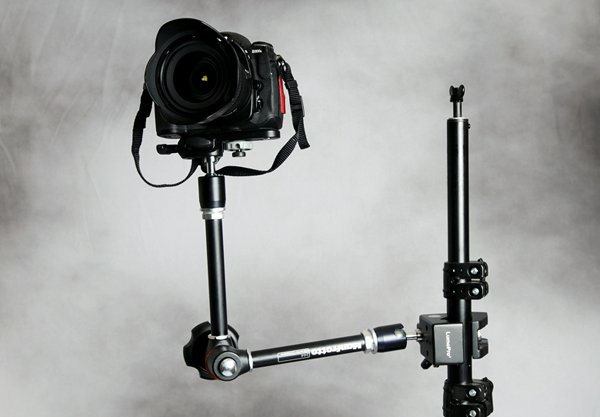
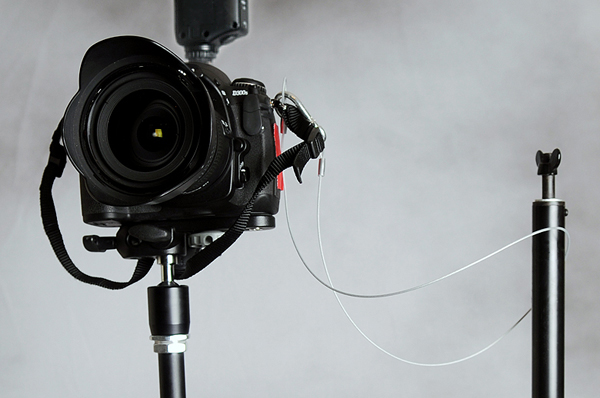
How It All Fits Together
Below is a view of the final setup, here’s how the equipment breaks down:
- 1 – DSLR camera
- 2 – Magic Clamp and Super Arm
- 3 – Safety Tables
- 4 – Pocket Wizard (or other triggering device)
- 5 – Motor drive cable
Step 2: Find the Perfect Setup
Remotes are often used where photographers normally wouldn’t be able to be.
With this in mind, look for something very low or in a unique position. For basketball games, for example, remotes are typically behind the backboard, on the stand or padding. For horse racing, remotes are typically placed low to the ground near the finish line to capture the winning shot.
You may also want to use a remote to camera a scene that you’re already capturing with another camera, such as at a wedding. For example, you could place a remote camera upstairs in the church pointing towards the altar.
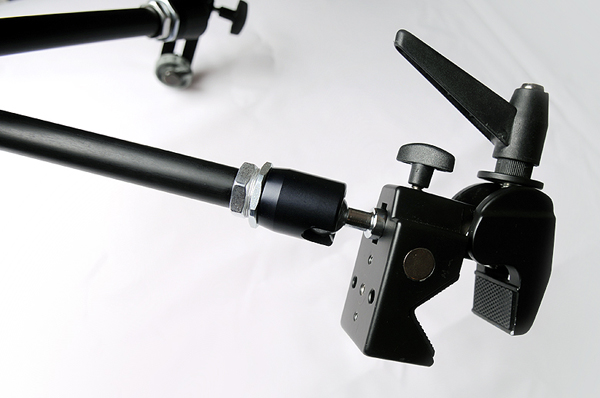
Step 3: Connect the Magic Arm to Super Clamp
For the rest of this article, I’m assuming you’re using a Magic Arm and Super Clamp. If you’re using a tabletop tripod, it’s very simple – just place the camera on the tripod and secure; and, of course, ensure the area around the tripod is clear and make sure it can’t easily be knocked over.
When you first use a Magic Arm it can be a bit of a pain. First, loosen all the screws and flex it around a bit. Then, attach the Magic Arm to the Super Clamp. Make sure you securely fasten it.
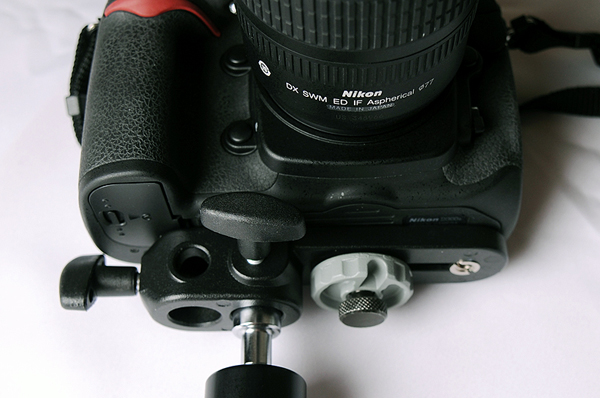
Step 4: Attach Your DSLR to the Setup
Once your Magic Arm and Super Clamp are connected, attach your DSLR to the setup. Make sure to fully tighten all screws.
You can also attach the camera after Step 5 – it depends all on your personal preference. I prefer to attach it before the setup is fully in place.
Step 5: Find the Surface You Want to Mount the Camera to and Mount
Before you mount the camera, apply some gaffer tape to the surface to prevent the Super Clamp from peeling any paint or causing any damage. Gaffer tape is made to control cords at events and leaves very little residue.
Now, attach the Magic Arm and Super Clamp setup to the surface. Once it’s securely on the surface, you can begin to move it to find the perfect placement for your camera. This may take some time to get perfect and level, so allow plenty of time for these adjustments.
For the purposes of this tutorial, I’ve mounted the remote camera to a lighting stand.
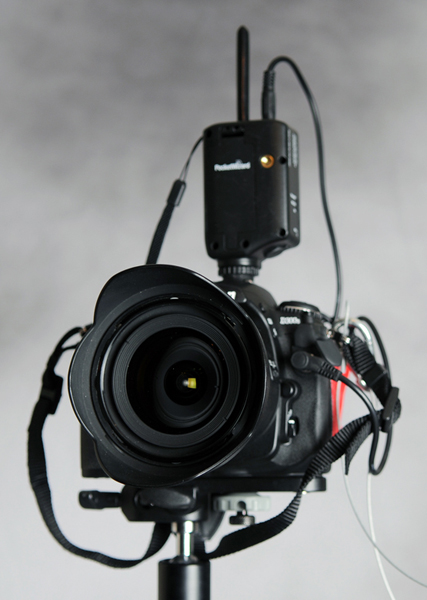
Step 6: Configure Your Trigger
As mentioned in Step 1, for your setup to work as a remote you need a trigger.
Pocket Wizards are easy to configure: simply select a channel on each one and attach one to your primary camera and the second one to the remote camera. Each Pocket Wizard will need to be set in “Transmit” or “Receive” mode depending on its use. If you’re shooting in a large venue, make sure the channel you use isn’t being used by another photographer.
On the remote camera, you attach the trigger via a motor drive cable. This attaches differently on each camera, so make sure to check your manual. You can then place your trigger in your flash shoe for easy holding, or can mount it beside the camera.
On your primary camera, the trigger will typically go into your flash shoe and no separate cord will be needed.
Step 7: Attach Your Safety Cables
One of the most important steps comes near the end, in which you will need to attach the safety cables. Safety cables come in many shapes and sizes, but all of them make sure your camera is secure and safe.
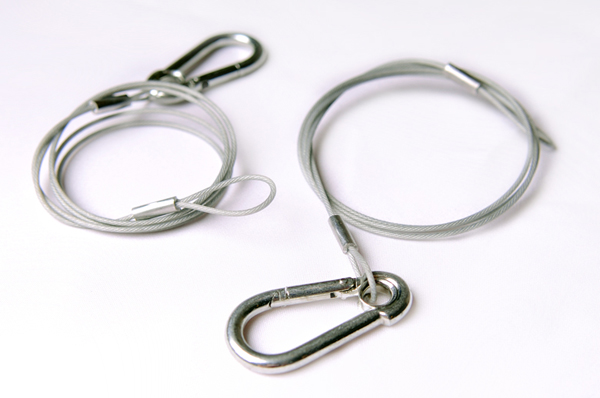
Most cameras come with a great place to attach these cables: where the shoulder strap connects.
Step 8: Set Your Focus
Setting your focus can be a challenge depending on the sport or event.
You’ll have to manually focus everything and then put a piece of tape over the controls and focus ring to ensure the camera doesn’t accidentally change focus. This varies by sport and event, so make sure to allow time to test first.
Step 9: Test Everything
Now that it’s all set up, take some test shots and make sure it works! Some things you may have to adjust include focus and the level of your camera.
Step 10: Shoot and Enjoy
Once everything is set and tested, and tested again, shoot and enjoy!
Conclusion
Here are a few links to help you setup your remote camera.
Pocket Wizard makes the industry standard remote trigger.
PShizzy talks in-depth about setting up a floor level remote camera at basketball games.
Strobist explains in detail how Pocket Wizards work with a camera.
A remote camera is a great way to be in two places at once and grab a unique view of an event. Have any questions or want to share an experience you’ve had? Leave a comment below!