People have mixed opinions over watermarking photographs, and whether it’s really necessary. The fact remains that it’s a good way to prevent your images being copied without attribution and many photographers find it incredibly reassuring. Although several photo-management apps such as Lightroom and Aperture have in-built watermarking functionality, today I’ll be showing you how to quickly automate the process in Photoshop!
Step 1. Choose Your Watermark
When I do choose to watermark images, I go down the route of a simple written copyright notice in the lower corner of a photograph. It’s possible to do far more advanced and thorough watermarking, but I feel this often distracts from the image itself.
The first step is to choose the text you’d like to be replicated on each image. For my example, I’ll be using Copright © David Appleyard

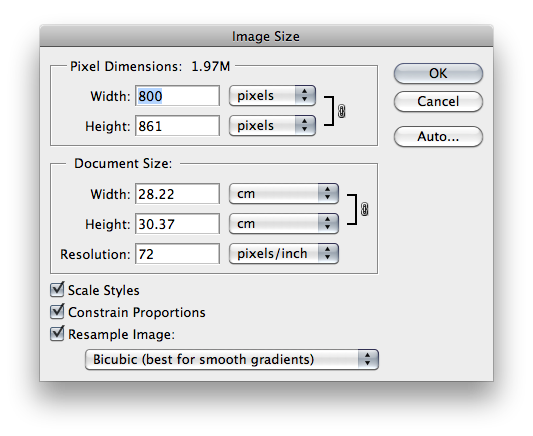
Step 2. Open and Resize a Photo
Next, open a sample photograph in Photoshop and resize it to the dimensions that you most commonly work with. I’m going with 800px wide.
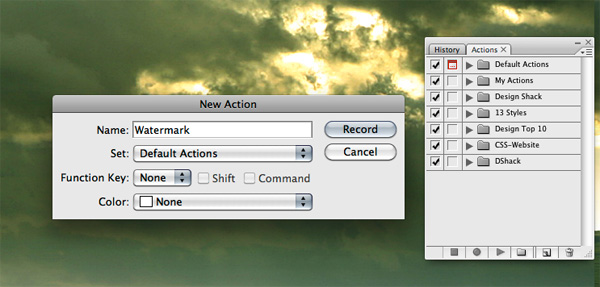
Step 3. Start Recording a New Action
We’ll be using Photoshop’s “Actions” panel for this. It should be visible towards the right of your screen – if not, click Window > Actions to show it. We want Photoshop to essentially record the steps we make from this point on, to be able to replicate them in the future.
To create a new Action and start recording, click the “New” button and give your action a name. From this point on, be sure to only follow the instructions given here, and don’t click anything else!
Step 4. Type & Format Your Watermark
The next step is to type your watermark, as you’d like it to appear on every photo. When you’ve done that, format the text to look as you’d like – bold, italic, colour, opacity etc. When done, click another tool to finish editing the text layer.
Step 5. Position the Watermark
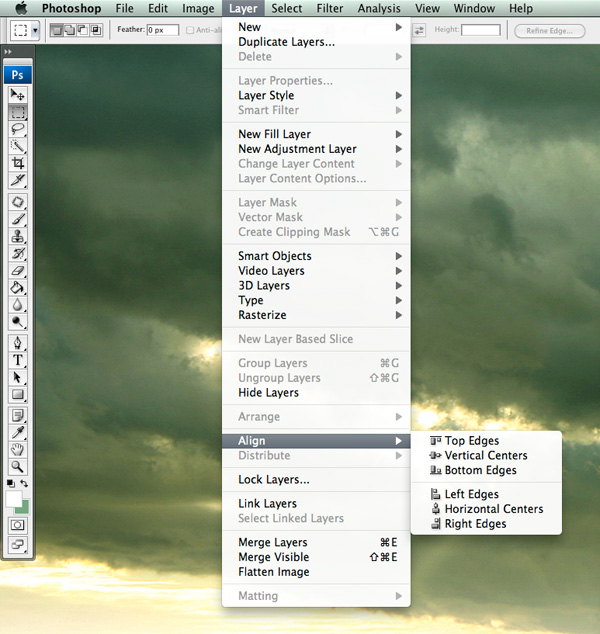
I’m going to assume that you’d always like the watermark to appear in the lower right corner of the image. To do this, take a look at the Layers palette and select both your photography and text layer (Ctrl-Click or Command-Click both layers to select them both).
Then, look to the top menu and select Layer > Align >Right Edges, followed by Layer > Align > Bottom Edges. Your watermark should snap to the lower right-hand edge. You’ll probably want a little padding, so proceed to select only the text layer, then just nudge it 20px left and 20px up with your keyboard arrow keys.
Step 6. Stop Recording
You’re all done, so click the square button just below your current Action to stop the recording process. You should now be left with an Action that you can re-use time and time again! Just open an image and hit the “Play” button. If you’d like to automate the process for a folder of images, you can do so using File > Automate > Batch.

Have fun, and do share your own methods and tips for watermarking in the comments!