{excerpt}
Read More
Category: Tutorials
Tutorials,freelance,projects,joomla,php,mysql,wordpress,blancer.com
How to Use Outline Stroke in Illustrator

Wondering
what an outline stroke is in Illustrator and what it’s used for?
Well,
outline stroke is a simple way to convert a path with a thick stroke
into an object and then use it as a building block in your designs.
Adobe
Illustrator turns your object’s stroke value into the dimensions of a
new shape.
In
this tutorial, you’ll learn more about outline stroke and how you
can use it for various purposes in your designs like creating
decorative borders, masking specific elements in your design, or
creating shadows. You will also learn how to make new Illustrator
brushes that we will then use to create a beautiful winter holiday text effect. Learning how to install brushes in Illustrator is an
important step, and I will show you how to successfully do this for scatter and pattern brushes in order to obtain a great final result
of the text design.
Expand
your brush library by going to GraphicRiver,
where you’ll find a great selection of Illustrator brushes
in
various styles, shapes, and themes. Also, check out the text
effects section,
where you’ll find plenty of inspiration and resources for your
projects.
Tutorial
Assets
To
complete the tutorial, you will need the following assets:
1. How
to Open a New Document
Launch
Illustrator
and
go to File
> New to
open a blank document. Type a name for your file, set the
dimensions, and then select Pixels
as the
Units
and
RGB
as the
Color
Mode.
Next,
go to Edit
> Preferences > General and
set the Keyboard
Increment to
1
px and, while there, go to Units
to
make sure they are set as in the following image. I usually work with
these settings, and they will help you throughout the drawing process.

2. How
to Create the Text
Step
1
Let’s
obtain the letters that we need to create this text effect. Grab the
Type Tool (T) and write “NOEL” on your artboard using the
Comfortaa Font, Bold, Size of 190 pt. Under Tracking, choose a value of 75 or 100 in order to get more
space between the letters (1).
While
the text stays selected, apply a 12 pt Stroke using any color (2);
then drag the bounding box upwards a little to make the text taller
(3).

Step
2
Keep
the text selected and go to Object > Path > Outline Stroke to convert the stroke into a shape and to get the letter
shapes (1). Now, select only the two shapes that make up the first
letter, and press Unite in the Pathfinder panel to merge them into a
new shape. Continue to do the same thing for the other letters (2).
This is a good example of how to use outline stroke to obtain thicker and
bolder text when this version is not available for your preferred
font or when you need a bigger surface to apply textures and details to your Illustrator effects.

Step
3
Fill
the newly obtained letters with the color indicated; then grab the Ellipse Tool (L) and draw two 35 x 37 px ellipses above the letter “E” as the umlaut. At this point,
we are ready to create the text design.

3. How
to Create the Colored Stripes Design on the Text
Step
1
Grab
the Line Segment Tool (\) and use it to draw a 400 px line at a 135-degree Angle. Give it a 16 px red Stroke and place it on the bottom
left side of the first letter. Make a copy of it and move it to the
upper right side of the last letter of the text (1). We are focusing on the letters for now and will take care of the umlaut later.
With both paths still selected, go to Object > Blend > Blend Options
and choose 13 Specified Steps. Hit OK and then go back to Object >
Blend > Make (Alt-Control-B). As a result, your text will be
covered with red stripes at an equal distance (2).

Step
2
We
will use the same technique to create the green lines in our text
design. Use the Line Segment Tool (\) to draw another 400 px line at
a 135-degree Angle. Give it a 2 pt green Stroke and then place it in
front of the first red line. Make a copy of it and move it after the
last red line (1).
Blend
these two lines using 14 Specified Steps, and you will get the rest of
the green stripes between the reds (2).
Note:
Increase the number of steps used to blend the red and green stripes
if your word is longer and you have more letters to work with.

Step
3
Select
the four letters and then Copy and Paste in Place (Shift-Control-V)
to make copies of them in front of everything. Set the copies to
stroke-none and fill-none; then go to Object > Compound Path >
Make (Control-8) to obtain the “Noel compound path” (1).
Now,
select the two blend groups along with the “Noel compound path” and go
to Object > Clipping Mask > Make (Control-7) (2).

Step
4
Select
the “Noel compound path” again, and Copy and Paste in Place
(Shift-Control-V) to make a copy of it. Give it a 5 pt Stroke in
green, and press the Align Stroke to Outside option in the Stroke
panel. This will create a green border around the text.

Step
5
Copy
and Paste
in Front (Control-F)
the “Noel compound path” again, and color it with white. Go to Effect >
Stylize > Inner Glow and apply the settings shown to create a
shadow inside the edges of the letters. Set the Blending Mode to
Multiply to make the white fill transparent while the shadow remains
visible.

4. How
to Create the Stripes Border Around the Text
Step
1
Let’s
learn how to make a brush in Illustrator that will help us add more
stripes to the design, but more quickly and easily. Grab the Line Segment
Tool (\) and draw a 40 px line on your
artboard at a 45-degree Angle. Give it an 8 pt black Stroke and then drag it into the
Brushes panel to save it as a New Pattern Brush.
In
the Pattern Brush Options window, type “Stripes Border Pattern
Brush” as the name, and choose Auto-Between for the Outer Corner
Tile (1) and Inner Corner Tile (2) in order to define the way the
brush will act in the corners. Also, choose Tints as the Colorization
Method so the brush will change color each time we change the stroke
color. Hit OK.

Step
2
Select
the “Noel compound path” and then Copy and Paste in Place
(Shift-Control-V) to make a copy of it in front of everything. Stroke
it with the Stripes Border Pattern Brush, change the stroke color to
red so the stripes become red, and then reduce the Stroke Weight to
0.5 pt. You now have short stripes all around the letters.

Step
3
Select
the green border made earlier in the tutorial, and
then Copy and Paste in Place (Shift-Control-V) to make a copy of it
in front of everything. Go to Object > Path > Outline Stroke to covert it to a border shape (1).
We
are going to use this border shape to mask the short red stripes
around the letters, and this is another good example of how you can
use an outline stroke to mask edges or specific elements in your design,
especially when it comes to Illustrator effects.
Keep the border shape selected along with the stroked path, and go to
Object > Clipping Mask > Make (Control-7). Now, the short red
stripes are only visible on the outer green border as an extra detail
in our text effect (2).

Step
4
Copy
and Paste in Place (Shift-Control-V) the “Noel compound path”
again and give it a 1 pt white Stroke. Next, go to Object > Path >
Offset Path and apply an Offset of 2.5 pt to move the white
stroke to the middle of the green border (1). Set the Blending Mode
to Overlay, and this will highlight the striped border (2).

5. How
to Create and Apply a Holly Leaf Pattern Brush
Step
1
Let’s
learn how to make a brush in Illustrator. The first one is a holly
leaf turned into a simple pattern brush.
First,
use the Pen Tool (P) to draw the shape of the leaf, as shown in the image
below, and color it with dark green (1). Continue to draw a similar
but smaller shape inside, and color it with light green (2). Keep
these two shapes selected, and go to Object > Blend > Blend
Options. Choose Smooth Color and hit OK; then go back to Object >
Blend > Make (Alt-Control-B) (3).
Now,
grab a copy of the first leaf shape; move it a little to the right,
and change the fill color to a darker shade of green. This will
create a small shadow on the right side (4).
Finally,
draw the shape of the main vein going through the middle of the leaf,
followed by three thinner veins on each side. Use the color indicated
to fill them (5).

Step
2
Learning
how to save a brush in Illustrator is the next important thing.
Group
(Control-G) all the shapes that make up the holly leaf and Rotate -25 degrees in the Transform panel. Now, drag it into the Brushes
panel to save it as a New Pattern Brush.
In the Pattern Brush Options
window, type “Holly Leaf Pattern Brush” as the name and choose
Auto-Between for the Outer Corner Tile (1) and Inner Corner Tile (2)
from the drop-down menu. Hit OK.

Step
3
You
have learned how to install a brush in Illustrator successfully, so
now let’s incorporate it into our text design.
Select
the letter “N” and then Copy and Paste in Back (Control-B) to
make a copy of it. Stroke it with the newly saved Holly Leaf Pattern
Brush; then go to the Appearance panel and open the Stroke Options
window. Scale the brush 40%, and also set the Spacing to 20%. Hit OK.
At
this point, the holly leaves are not entirely visible, so we need to
fix this. With the letter still selected, go to Object > Path >
Offset Path and apply an Offset of 7 px to move the stroke
more towards the outside.

Step
4
Repeat
the same process and apply the Illustrator brush to the other
letters. If you get an empty space in a corner, just grab a copy of
the holly leaf that you drew earlier and arrange it in that
place. Send it to the back.

6. How
to Create and Apply a Holly Berry Scatter Brush
Step
1
Grab
a copy of the holly leaf that you drew earlier and rotate it as shown
in the image below. Select the veins and change the fill color to
light green (1). With the leaf still selected, go to Object >
Transform > Reflect, check Vertical, and hit Copy to get a copy.
Move the second leaf to the right; then select only the shadow shape
from inside the group and change the fill color to light green (2).
Now,
let’s create the berry. Use the Ellipse Tool (L) to draw a circle
filled with dark red followed by a smaller circle filled with lighter
red on top. Keeping both circles selected, go to Object > Blend >
Blend Options, and choose 6 Specified Steps. Hit OK and then go back
to Object > Blend > Make (Alt-Control-B) (3). Finalize the
berry by drawing another small circle on top, filled with burgundy
(4).
Draw
two more berries in the same way, or just make copies of the one we
just finished, and arrange them as shown below (5).

Step
2
Group
(Control-G) all the shapes that make up the holly berry and drag it
into the Brushes panel to save it as a New Scatter Brush. In the
Scatter Brush Options window, just type “Holly Berry Scatter Brush”
as the name and leave the other settings as they are for the moment.
Hit OK.

Step
3
You
have saved the brush in Illustrator, and it’s ready to be used.
Select the letter “N” and then Copy and Paste in Place
(Shift-Control-V) to make a copy of it in front of everything. Stroke
it with the Holly Berry Scatter Brush; then go to the Appearance
panel and open the Stroke Options window. Change the settings as
shown below, and set the Rotation relative to Path. Hit OK.
We
need to move these leaves towards the outside a little to make them more
visible. We did this earlier for the other brush. With the stroked
path still selected, go to Object > Path > Offset Path and
apply an Offset of 10 px.

Step
4
Repeat
the same process and apply the Holly Berry Scatter Brush to the other
letters to complete the Illustrator effect.

7. How
to Create Highlights on the Text Effect
Step
1
Use
the Pen Tool (P) or the Line Segment Tool (\) to draw a straight path
on the letter “N”, as shown in the image below. Give it a 10 pt Stroke
and select Width Profile 4 in the Stroke panel, with the tip going
downwards. Use a transparent white to white linear gradient at a 90-degree Angle for the stroke; then go to Effect > Blur >
Gaussian Blur and apply a Radius of 3 px to make it smoother.

Step
2
Use
the technique explained above to create more highlights on the
letters. This will make them shinier.

8. How
to Create a Shadow Under the Text Effect
Step
1
In
the next steps, we are going to use an outline stroke to obtain a
shadow. Simply applying the Drop Shadow effect to the letters will
not work well in this case because of our complex edges.
Select
the copy of the letter “N” that was stroked with the Holly Leaf
Pattern Brush, and then Copy and Paste in Place (Shift-Control-V) to
make a copy of it. Go to Object > Path > Outline Stroke to get
the individual leaves (1).
With
the group of leaves still selected, press Unite in the Pathfinder
panel, followed by Object > Compound Path > Make (Control-8). As
a result, you will get the orange compound path shown in the image
below (2).

Step
2
Now,
select the copy of the letter “N” that was stroked with the Holly
Berry Scatter Brush, and then Copy and Paste in Place
(Shift-Control-V) to make a copy of it. Go to Object > Path >
Outline Stroke to get the individual holly berry groups. In each of
these groups, there is a rectangle with no stroke and no fill at
the bottom. You need to remove all of them before you continue (1).
With the group of holly berry leaves still selected, press Unite in the
Pathfinder panel, followed by Object > Compound Path > Make
(Control-8). You will get the blue compound path from the image below
(2).

Step
3
Keep
the orange and blue compound paths that you obtained in the
previous step selected, and press Unite in the Pathfinder panel
followed by Object > Compound Path > Make (Control-8) (1).
The
newly obtained shape is exactly what we need to create the shadow for
this text effect. Send it to the back by going to Object > Arrange >
Send to Back (Shift-Control-[); then go to Effect > Stylize >
Drop Shadow and apply this effect twice (2).

These
are the settings for the Drop Shadow effects:

Step
4
Use
the technique explained above to obtain the shadow compound path for
the other letters and, once done, apply the Drop Shadow effect with the same settings.

Step 5
Let’s get back to the umlaut so we can finalize the text effect. Apply all the techniques that you’ve learned so far to the two ellipses, and you will get the same look.

Congratulations! You’re Done
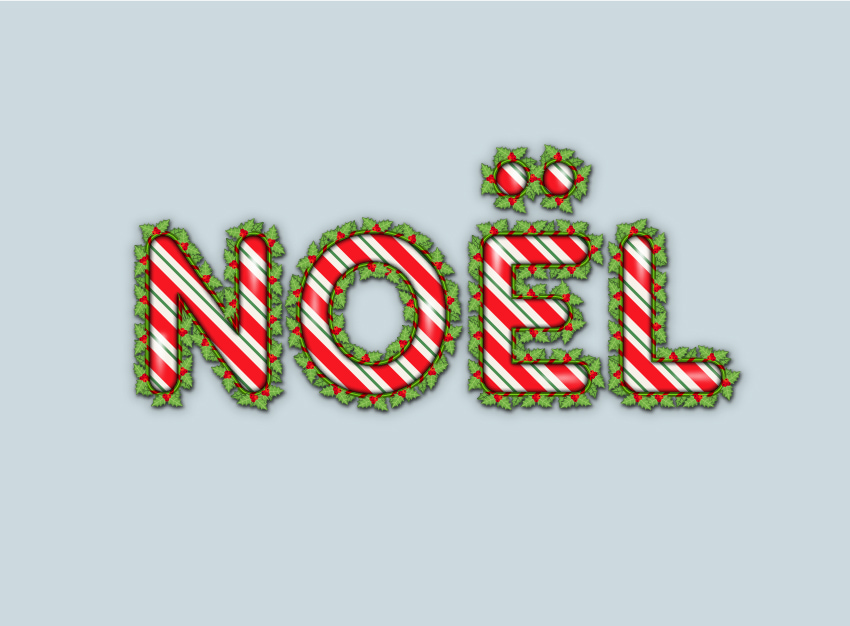
Here
is the final image of the winter holiday text effect. I hope this tutorial was
fun for you and that you learned some new things today. Now you know how to use outline stroke for various purposes in your designs
and how to create and install brushes in Adobe Illustrator.
Expand Your Text-Effect Designing Skills!
Keep drawing and learning with these recommended tutorials:
-

How to Make a Brush in Illustrator
Learn to create a custom paint brush, a scatter brush and a texture brush in Adobe Illustrator, using nothing more than some basic geometric shapes and effects. -

Quick Tip: How to Create a Pencil Pattern Brush in Adobe Illustrator
In the following steps you will learn how to create a pencil pattern brush in Adobe Illustrator. -

How to Make a Texture Brush in Illustrator
Have you always liked to draw using texture or grunge brushes? Why not create your own vector Illustrator brush? What if I’ll tell you that it’s easy and… -

How to Create a Flag Bunting Pattern Brush in Adobe Illustrator
In the following steps you will learn how to create a flag bunting Pattern Brush in Adobe Illustrator. -

How to Make a Pickle Pattern Brush in Illustrator
Learn how to make a creative pickle pattern brush in Adobe Illustrator and give it a special twist inspired by Pickle Rick. -

How to Create a Coconut Text Effect in Adobe Illustrator
Learn to create a fun coconut text effect that will make you dream of a tropical vacation. -

Use a Pattern Rope Brush to Create a Rope Text Effect in Illustrator
In the following steps, you will learn how to create a pretty simple rope brush in Illustrator and how to use it to create a nice text effect. -

How to Create a Multi-Layered Text Effect in Adobe Illustrator
In the following steps, you will learn how to create a fully editable, multi-layered text effect in Adobe Illustrator.

{excerpt}
Read More
How to Make an Intro in After Effects
{excerpt}
Read More
How to Design a Romance Book Cover

Romance books are infamous for their corny covers. Such a cover shouts in
your face that the book is all about passion.
But love stories can be
more complex than that—they can tell us about the struggle to
find a special connection with another human. If this is what your
romance novel is about, the cover should reflect that. In this tutorial, I’ll show you how to design such a cover in Adobe Photoshop.
And if you want to create a book cover in minutes, consider an alternative—the book cover maker on Placeit. You’ll find more info at the end of this tutorial.
Follow along with us over on the Envato Tuts+ YouTube channel:
What You Will Need
You will need the following resources in order to complete this project:
1. Prepare the Workspace
Step 1
First, download the assets. We’re going to need a photo of the
couple, a background, some flower petals for decoration, and a
distinctive font for the title.

Step 2
Open Photoshop and create a New File. There are many formats for
book covers, but B-format is among the most popular, so let’s try
this one. Make the image 129 mm wide and 198 mm high. If you want the
cover to be suitable for print, use a resolution of 300 DPI and CMYK
color mode.

Step 3
Use the Crop Tool (C) in the Rule of Thirds view. Then press Control-R
to show the rulers and drag them to the lines. This way, you’ll
create your own rule of thirds grid. You can turn its visibility on
and off by using the Control-; shortcut.


2. Add the Photos
Step 1
The workspace is all set up, so now we can add the photos. Go to
File > Place and select the photo of the couple. Align it with the
grid. In the rule of thirds, the areas of focus should be near
where the lines cross.

Step 2
Use your favorite selection tool to select the outline of the
couple. Then go to Select > Refine Edge. Check Smart Radius and
use the Refine Radius Tool (E) to paint over the edge. This will help you
get some hair back into the selection without adding the background.
You can also adjust the edge for the best effect. When you’re done, set the Output to Layer Mask and click OK.


Step 3
Place the background image into the scene, below the couple layer.
Resize it to fill the canvas and move it so that it doesn’t
interfere with the foreground.

3. Adjust the Photos
Step 1
The photos are all there, but they don’t look that good together
yet. Let’s work on that! Go to Filter > Blur > Gaussian Blur.
Adjust the Radius to make the background seem more distant.


Step 2
Go back to the couple image and apply a Gaussian Blur to it as
well. Then click on the Smart Filter mask and paint with a soft,
black brush to reveal the faces.


Step 3
Press Control-G to place the layer into a group. This will allow
you to add another Layer Mask to it. Paint on this mask with a soft,
black brush to blend the lower part of the photo with the background.


Step 4
Let’s adjust the colors now. Add a Selective Color adjustment.
Clip it to the layer below. Select Blacks and make them warmer by
playing with the sliders. The point is to make the shadows more
similar to the colors in the background.


Step 5
The woman on the right is closer to the cooler colors of the
background. We can accentuate this contrast by removing the warming
effect of the Selective Color adjustment from her face.


4. Add Decorative Petals
Step 1
Our cover looks quite good already, but we can make it even better
with a certain accent. What do you say we add flower petals flowing
across the cover?
Open the petals image as a separate file. Use the
Magic Wand Tool (W) to select the white background, and then Invert the
selection (Control-Shift-I) and refine the selection by selecting Refine
Edge. Set the Output to Selection.

Step 2
Copy the petals and Paste them into the main file. Place them in the
lower part of the scene.

Step 3
To adjust them to the composition, select one of the petals, Copy it,
and Paste it on the right. This will make the petals flow diagonally
across the scene. Merge the petals by pressing Control-E.

Step 4
The petals have their own shade of red, so we need to adjust it to
the scene. Add a Hue/Saturation adjustment. Clip it and Colorize the
petals.


Step 5
Now add a Levels adjustment. Clip it and drag the black marker to
the right to increase the contrast of the petals.


Step 6
Group the petals and their adjustments. Then right-click >
Merge Group.

Step 7
Let’s add some motion to the petals. They’re supposed to be
flowing, after all! Go into Quick Mask Mode (Q) and paint with a
big, soft brush over some petals.

Step 8
Go out of the mode (Q), Invert the selection, and go to Filter >
Blur > Motion Blur. Select an Angle fitting the direction of the
flow, and adjust the Distance.


Step 9
Deselect (Control-D) and repeat the process, this time selecting a
different area. Use a slightly different angle to make the effect
more natural. Now it looks as if these petals were here from the
start!

5. Add Special Effects
Step 1
We’re almost done, but there are still a couple of things we can
do to make the cover even more appealing. Let’s add a trendy bluish
tint to the scene. Add a Photo Filter adjustment with a Blue filter.


Step 2
Add a black and white gradient to the mask of the filter, to keep
the top from being too blue.

Step 3
Now, press Control-Alt-Shift-E to copy and paste the whole
composition onto a new layer. Add a strong Gaussian Blur to it.


Step 4
Hold Control and click the thumbnail of the layer to select
it. Then go to Select > Transform Selection, and hold Alt to
move the selection away from the borders.

Step 5
Invert the selection and add a Layer Mask. Then add a Gaussian
Blur to the mask. This will create a nice mist around the cover.


6. Add the Text
Step 1
For now, the cover looks just like a beautiful poster. Let’s add
the text to turn it into a real book cover! Use the Type Tool (T) to add
the title over the petals. I used the Rachelle font, white, with the
first line of the title bigger than the second. You can adjust the
settings in the Character panel to make the text look the best it
can.

Step 2
Select the text and the background layer. Align Horizontal Center.

Step 3
Add the author’s name on top. I used the Trajan Pro font,
smaller than the title, and I colored it with the color of the
woman’s shirt. Don’t forget to align it as well.

Step 4
Let’s add a snippet of an encouraging opinion in the empty area
of the background. It should be smaller, but still visible. The red
color of the font links nicely to the warmth of the lower half of the
cover.

And the cover is done! Doesn’t it look beautiful? Now you can go and see how it will look in reality by using the Placeit book mockup generator.

Romance Book Cover Designs
Designing your own book cover in the way presented here requires a lot of work, but did you know there’s another way? On Placeit, you can choose from hundreds of book cover templates and then modify the one you like using the book cover maker. This way, you can create your own unique cover in minutes!
Here are a few examples of templates that you can use for romance novels.
Classic
Big, bold letters over a dreamy, romantic scene is a perfect recipe for a romance book cover. You can use your own photo, or choose one of the propositions.

Modern
Photos look great on book covers, but today covers without them are very trendy as well. Use a composition of colors and fonts to bring attention to your book!

Minimalistic
Sometimes less is more! A subtle pattern in combination with a bold font will make the cover stand out among more flashy ones.

Straightforward
If you still prefer covers with a photo, this design combines the simplicity of the text with the beauty of the background.

Simple
This design is simple, yet definitely eye-catching! It’s like a neat packaging for your book.

Good Job!
As
you can see, nothing’s stopping you from designing a romance book cover
that is both tasteful and clear about the theme.
If you want to learn more about designing book covers, try one of these tutorials:
 Book CoverHow to Make a Fantasy Book Cover (With a Book Cover Maker)Monika Zagrobelna
 Book CoverHow to Design a Vintage Book CoverGrace Fussell
 Book CoverHow to Design a Classic Book Cover With a Modern Twist!Grace Fussell
 Book CoverHow to Create a Vintage-Inspired Clothbound Book Cover in Adobe InDesignGrace Fussell
 Print DesignDesign a Crime Thriller Book Cover in Adobe InDesignGrace Fussell

{excerpt}
Read More
How to Make a Business Flyer (Using a Flyer Generator)
Creating beautiful and effective business flyers doesn’t have to be a challenge when you use Placeit’s flyer creator.

The Placeit flyer creator, also known as the flyer generator, is a terrific app that offers one of the largest collections of flyer templates on the internet and makes it easy for large and small businesses to create perfect business flyers quickly and easily. Let me show you how.
How to Make a Business Flyer (Using a Flyer Generator)
Let’s say you work in real estate. You have a gorgeous house you’d like to put up for sale, and you need to make your own flyer to get potential buyers interested. Well, all you need to do is follow these simple steps to discover how to make a flyer online in a matter of minutes.
Step 1
Go to Placeit and, under the Design tab in the header, select Flyer. You will see tons of wonderful flyer templates for all sorts of purposes.

Step 2
To find ones that are designed specifically for real estate, type “real estate” in the search bar at the top of the page and hit Enter.
Now you will see a number of terrific flyer ideas and templates. Look through the selections until you find a template that appeals to your taste.

Step 3
When you see a flyer design template that you like and that is appropriate for your purpose, click on it. This will open up the online flyer creator.

Step 4
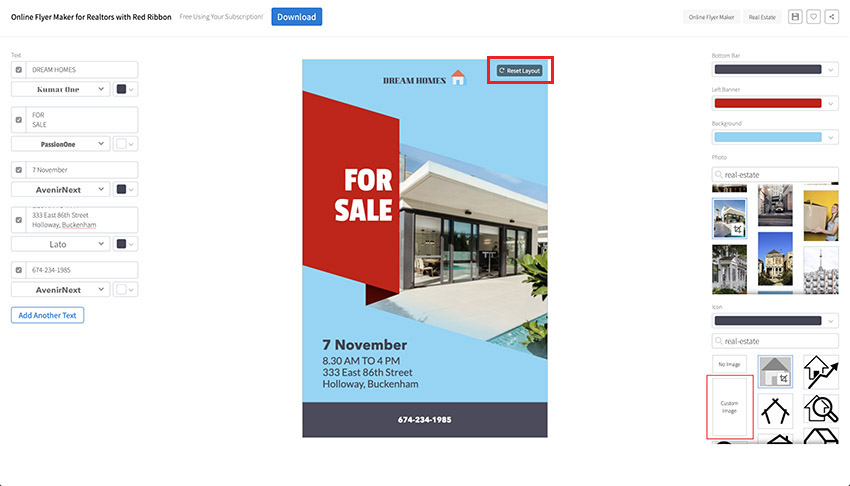
You can now customise your flyer creator template as much or as little as you like.
Starting with the controls on the left and working your way down from the top, you can add your text to various parts of the image. For example, I changed the name of the real estate company at the top of the flyer template from “Best Homes” to “Dream Homes”. I kept the “For Sale” text but changed the dates, times, address, and telephone number. You can also change the font styles and colour here to match your brand.

Step 5
Moving to the controls on the right and working from the top, you can change the colours of the bottom bar, the left banner, and the background.
In our example, I left the colour of the bottom bar and left banner, but changed the background colour to a brighter shade of blue that’s consistent with my imaginary business’s brand identity.

Step 6
Moving down the controls, you can now change the photo that appears on your flyer by choosing one of the photos provided or uploading your own. I chose one of the gorgeous photos to represent the building for sale.

Step 7
Moving to the next controls, you can now change the logo that appears on your flyer by choosing one of the icons provided or uploading your own. For our real estate business, I uploaded the business house logo, which you can now see at the top of the flyer template.
You can move around any and all elements of your design as needed, and if you decide to go with the original layout, you can hit the Reset Layout button to return to the default layout.
Step 8
Scrolling down the page, you have two additional options. If you get stuck while you’re customising your design, you can try one of the presets on offer. They are all different versions of the flyer generator template you chose, and they can help you see how your template would look with different settings applied.

Step 9
Best of all, as you make your own flyer online, you can use Placeit’s state-of-the-art mockup tool at the bottom of the page, which shows your flyer in a range of real-life scenarios.

Step 10
Once you’re satisfied with your design, hit the Download button at the top of the screen and download your design for a small fee. So now you know how to make a business flyer online quickly and easily.

12 Best Flyer Ideas and Templates
Now that you know how how to make a flyer online using Placeit’s flyer maker, these 12 flyer ideas and templates will get you even more excited to make your own flyer.
Financial Tech Online Flyer Template

Financial businesses need to communicate responsibility and professionalism, and that’s just what this template communicates to your prospective clients. The template has the ideal combination of fonts, colours, graphics, and background images to inspire confidence in your brand. But if these don’t quite resonate with your brand, you can customise the template as much as you need.
Flyer Maker for Professional Cleaning Services

If you’re starting out in house cleaning, you need a template to let people know what services you provide. Placeit’s clean, modern designs are easy to adapt to communicate your message, and if you ever get stuck, just help yourself to one of the beautiful presets which give you many more flyer ideas.
Auto Repair Flyer Maker for Auto Shops

No matter what kind of automotive business you’re running, this template will help you make your own eye-catching flyers online. The template is incredibly versatile, with extensive controls for changing the text, images and icons, background, and more.
Flyer Design Template for a Recruitment Company

Human resources firms or departments will love this template dedicated to recruitment drives. Though the template and its presets communicate trustworthiness and professionalism, they’re by no means staid. That’s because they employ cool images combined with modern design, fresh colours, and fonts that’ll make your business stand out.
Electrician Flyer Maker with Large Electrical Graphics

This flyer template is perfect if you’re trying to figure out how to make a business flyer for your electrical business. Just add your text and use as is, or if you’re feeling creative, use the ever-so-easy flyer creator to design your very own unique flyer. Either way, you’ll have a business flyer ready to use in no time at all.
Online Flyer Maker for a Barber Shop

This is one of the best flyer templates for barber shops needing to create a flyer for expos and trade shows or to hand around the neighbourhood to alert residents of their grand opening.
Aside from the great images and large font selection, the template includes a number of cool frames which add a bit of flair to the design.
Flyer Design Template to Create Contractor Flyers

Whether you’re running a construction business or are an architect, contractor, sub-contractor, or carpenter, this template will help you create a stunning flyer for your business.
What makes this template incredibly versatile is the extensive number of frames and icons available, including construction workers, hardhats, gears, blueprints, hammers, homes, and more. There’s also an excellent range of images, appropriate for any business involving construction.
Flyer Maker for a Catering Service Company

Design an attractive flyer for your catering business in minutes with this gorgeous template. Whether you’re looking for a flyer to hand out at a trade show or to leave in various venues, the Placeit online flyer maker with photos is the perfect tool to use in order to get your message across.
Store Opening Online Generator

Do you want to create a stunning flyer for your store opening? The Placeit Flyer Creator has you covered. Not only are the images that come with this template stunning, but the graphics and fonts will make your flyer stand head and shoulders above the competition.
Don’t forget to check out your design in the lifelike mockups at the bottom of the page. You’ll be thrilled to see how your flyer will look in real-life situations.
Flyer Maker for Pool Builders

Pool builders and maintainers will be delighted with this flyer template, which offers a wonderful selection of photos and customisation features. Just add a photo from one of your jobs or choose one from those provided, and then add your business details. Change the colours to reflect your brand or taste, and your flyer is ready to download and send off to the printer.
Flyer Template for a Roofing Installation Company

This template takes all the work out of designing a professional flyer for your roofing business. With endless customisation possible and a number of presets to choose from, this should be the go-to template for any business that regularly needs to make flyers and needs a reliable source for flyer ideas.
Flyer Maker for Nature Cosmetics with Nature Images

Need help creating the perfect flyer for your natural cosmetic company, makeup classes, special beauty deals, and other beauty-related services? You’ll be more than happy with this flyer template, which offers a number of wonderful photo backgrounds, font styles, and colour customisation options. Try it. We think you’ll like it.
Create Your Own Flyer Online Today
We hope you’ve found a bunch of great flyer ideas you can use and that you understand how to make a flyer online in no time at all. Get to work making your own flyer, and share your creation with us in the comments below.
Also, remember, these 12 terrific flyer ideas are just a fraction of the awesome designs available at Placeit, so if you haven’t found exactly what you need here, head on over to the site and browse the large collection of flyers to be found there.
If you’re interested in other kinds of designs and mockups, here are some great suggestions for you:
-

20+ Social Media Image Maker Templates for Instagram, Facebook + More
Do you need a regular supply of fresh social media graphics to help you stand out from the crowd? Here is a great social media image generator that’s easy to… -

13 Best Movie Poster Templates
Want to know how to make an awesome movie poster? Check out this list of the13 best movie poster templates. -

27 Album Cover Art Templates Using an Album Cover Maker
If you want to know how to make an album cover, this article will give you plenty of album cover ideas and show you how to make your own album covers quickly… -

Best of 2018: 20+ Online Flyer Maker Template Designs
Looking for an amazing flyer design template? Check out this list of 2018’s 20+ best designs for flyer templates. -

24 Best Gaming YouTube Banners Made With a YouTube Banner Maker
If you’re a gamer looking to make a banner for your video channel, this list of the 24 best gaming banner designs is perfect for you. -

20+ Online Ad Banner (Maker) Template Designs to Customise Now
If you need a fabulous ad banner template to increase engagement, promote your products and generate sales, this list of the 20+ best online ad banner…

{excerpt}
Read More
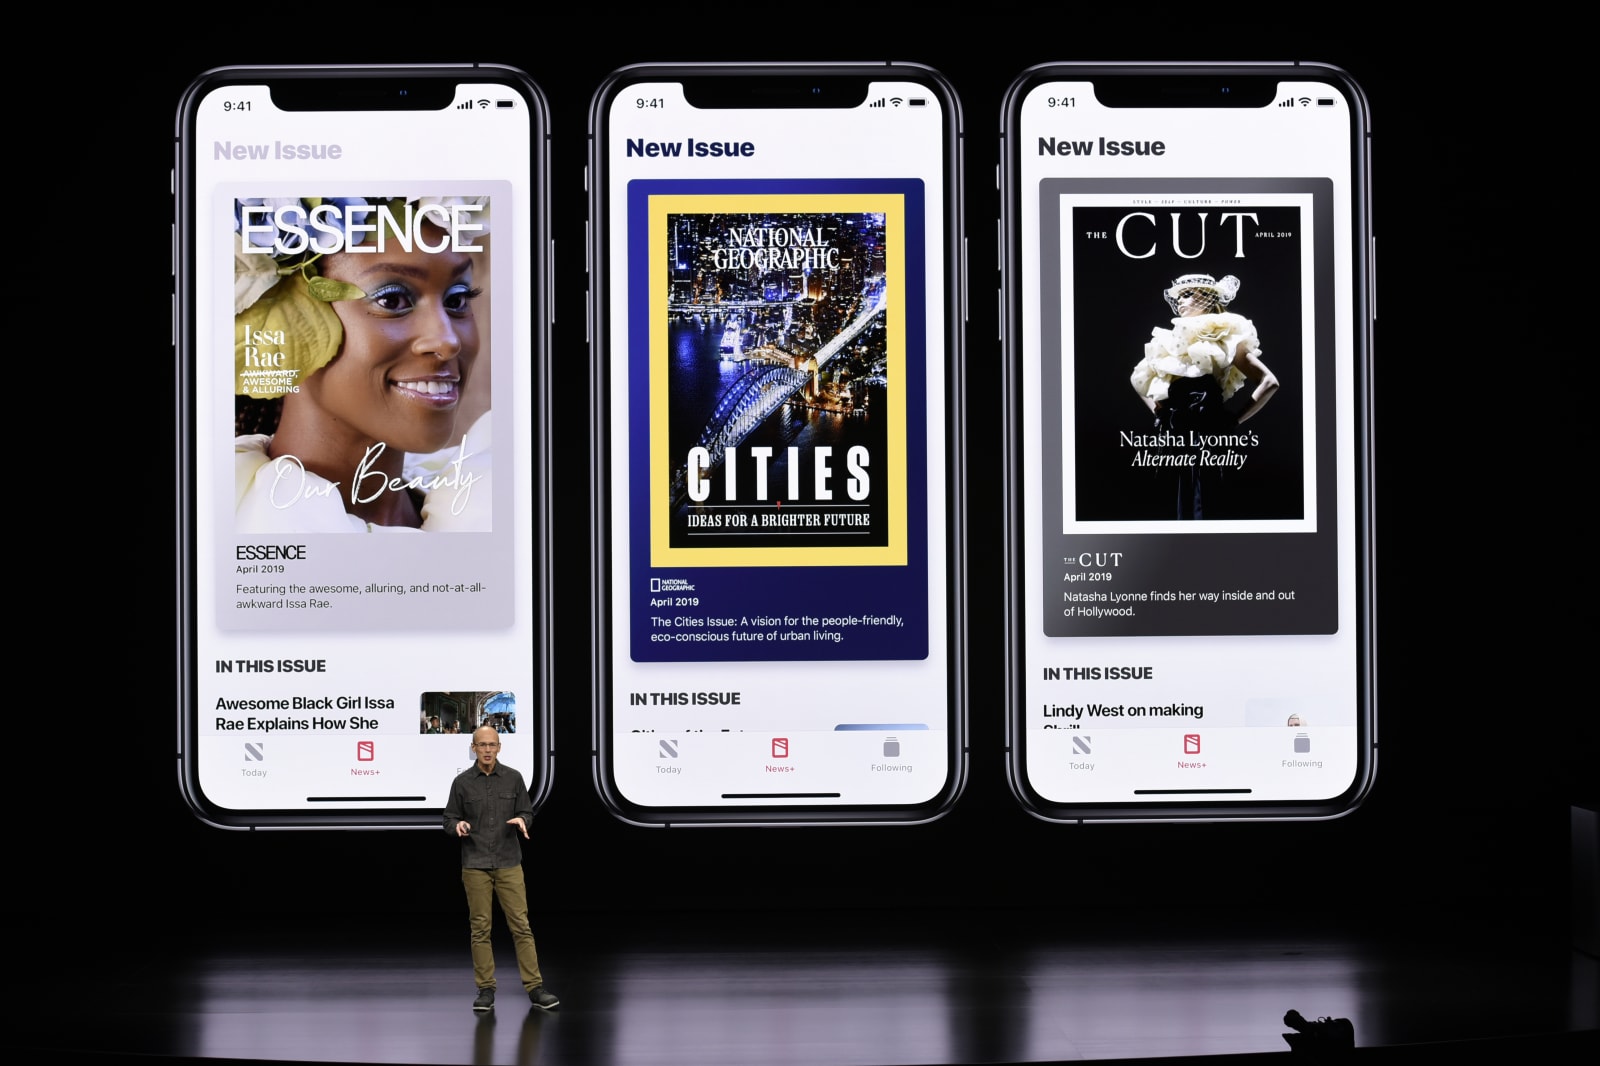
Apple offers three-month News+ trials through Black Friday weekend
Twitter bans House candidate who suggested Ilhan Omar should be hanged

EU investigates Google data collection practices

Strawberry-flavored HIV medicine could save thousands of children

3 Top Video Templates for New Years 2020
{excerpt}
Read More
TunnelBear discounts a year of VPN service to $50

Facebook labels a post as false to obey Singapore misinformation law

Apple will take a ‘deeper look’ at disputed borders in Maps

How to Create a Template With Premiere Pro for the Essential Graphics Panel
{excerpt}
Read More
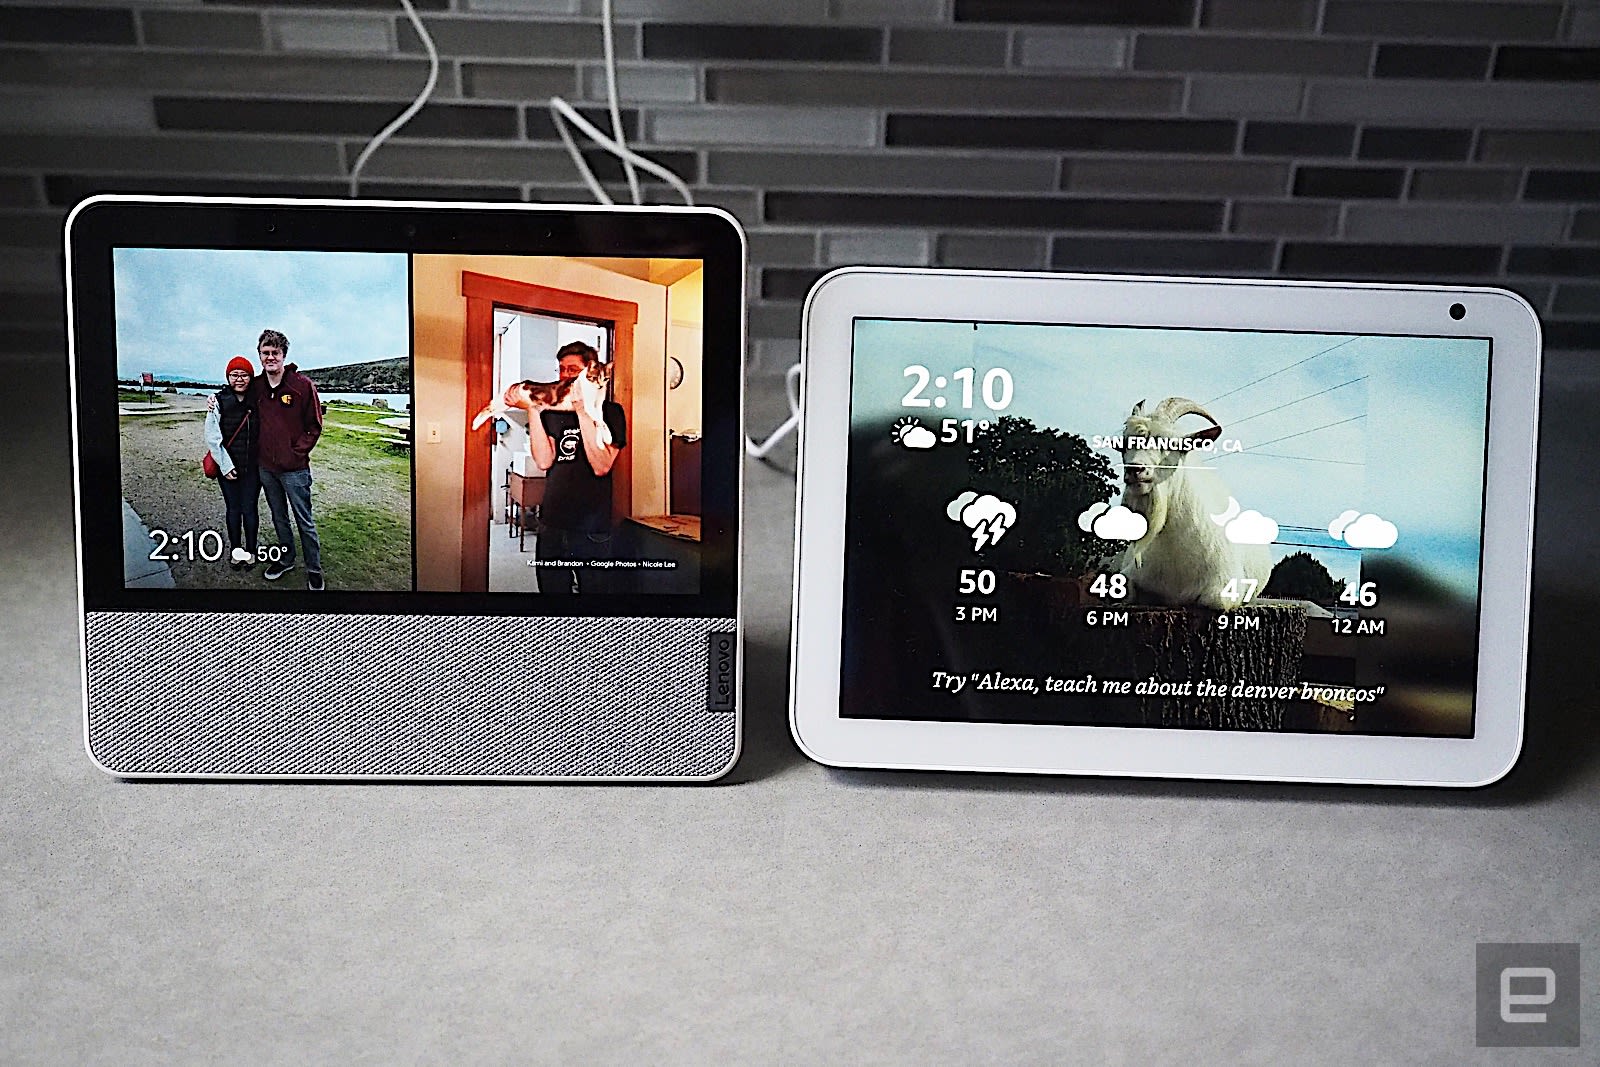
Battle of the smart screens: Lenovo and Amazon’s latest compared