Make A Phpbb Forum Bridge

Make A Phpbb Forum Bridge
Hi

I’m looking for forum integration PHPBB with my website.
I want user to use the same username and passwords for both the forum and the website(php). My website login system will be the one to be used. I already have a DB and I would like users to be able to connect to PHPBB. All new users that register, will do so on my website as well. No registration in PHPBB(we can easily deactivate sign ups in phpbb)

Phpprobid Website Custome

Phpprobid Website Custome
I am looking for a reliable programmer to change the skin/template of my phoprobid auction website. I like the look of ubid.com and function of ebay with different colors of course. I like the style of ubid though and how the main categories and subcategories in addition to other things appear on the main page.

I want to hire this programmer to customize my website in a way that looks professional. I want to create one more category that is unique and so I would have to discuss this with you in private.

this is what I want for now, if whoever I hire is responsible, reliable, and works fast, I will hire you for future customization.

Please do not bid more than my bidding maximum, I will not hire you if you do. Only serious people please.

Clickable Webpage

Clickable Webpage
What i need is a web-based application that behaves kind like a Google earth linkage.
Take reference from the attachment where I show what I want. So, it’s a webpage and the user will be prompted to chose a point inside the shape and when he does that a pop-up window prompts for him to paste a web link, a location, a embed code. After that the page is going to display his and others additions to that page. No login should be required, but the page is meant to be saved for further access.

After having this working I must get more services to complete the other parts of the future application

Articles Wanted

Articles Wanted
I want someone to add an article to 2 blogs of mine every day for 14 days… So you will need to write the 2 articles ( they need to be 100 words long and unique — I will check and you will not be paid if they are not….. )

You will be adding the articles direct to a wordpress blog, so would be good if you know the basics.

So I am paying for 28 100 articles in effect…

The articles are in 2 sectors… Golf and diet..

remember they need to be added every day

Clone Of Wp Template

Clone Of Wp Template
Hi
i wont the clone of this website http://bit.ly/cEiQee and i wont a wordpress theme, with same thinks.

An home page like that one (possible of change twitter account from admin part)and the page for article. (the comment part became an logo of my activities)

I wont a wordpress theme only css, all browser compatibile, seo optimizzed, w3c valid, ecc

David

Sms Plugin

Sms Plugin
I need my plugin to work, in wp-admin if you go to the settings it says:

Warning: /home/uta/public_html/wp-content/plugins/sms-text-message//b939749eebb2ae71d663ab35c79d1381.spc is not writeable in /home/uta/public_html/wp-content/plugins/sms-text-message/simplepie.inc on line 1773

Also, need it moved down, and font changed on it.

Fast Site Tweak Needed

Fast Site Tweak Needed
I already have a full template done. I just need someone to update a few images, a few links and add some text to it.
This is a very quick project and I will be available any hour of the day to help get it done.
I expect this to be done quickly as I need to get my website up fast!


Bid Now

Winner Announced – Freebie: $50 Amazon Gift Card

Winner Announced – Freebie: $50 Amazon Gift Card

Nettuts+ is a success solely because of the fantastic community. Today, we have a $50 Amazon gift card to give away to say thank you for sticking with us as long as you have!

Winner Announced!

Winner

Congratulations to “jamelb” for being randomly selected, via Random.org, as the winning commenter. Thanks so much to everyone who entered. Your feedback will be used to further improve the video tutorials on Nettuts+.

Jamelb, please contact us at [email protected] to claim your prize.

How to Enter

This one is exclusive to iTunes users. Simply visit the Nettuts+ Vodcast page on iTunes, leave a comment, and write what you think – whether negative or positive. Just be truthful, and as constructive in your criticism as you wish! Even just a few words will do. That’s it!

I’ll then, on Monday morning, randomly select one of the new comments from that list, and announce the winner on this page!

We also won’t squawk should you use choose to subscribe to that feed while you’re there. :)


Quick Tip: JavaScript Event Delegation in 4 Minutes

Quick Tip: JavaScript Event Delegation in 4 Minutes

Event delegation can be a confusing topic for those who are unfamiliar with the concept. But, luckily, it’s really simple. In this quick tip video tutorial, I’ll demonstrate the concept in just under four minutes.

Imagine that you have five hundred anchor tags on your page. As you might imagine, adding a click event to every one of those would be time consuming, and unnecessary. On top of that, what happens if, once you click on those anchor tags, we add additional anchor elements to the page? Would those new anchors be bound to the click event as well? The answer is no. You would then have to reattach a listener to those newly created elements.

Enter Event Delegation

Instead, with event delegation, we simply add a single event listener to an ancestor element, maybe something like a “ul.” Then, when the user clicks on one of its child elements, like an anchor tag, we only check to see if the target of the click was, in fact, an anchor tag. If it was, we proceed per usual.

$('ul').click(function(e) {

	if ( $(e.target).is('a') ) {
		alert('clicked');
	}
});

Advantages

  • Only attach one event listener to the page, rather than five hundred (in our example)
  • Dynamically created elements will still be bound to the event handler.

Why Does this Work?

It works because of the way elements are captured (not IE) and bubble up. For instance, consider the following simple structure.


When you click on the anchor tag, you’re also clicking on the ‘li’ and the ‘ul’ and even the ‘body’ element. This is referred to as bubbling up.

Notes About this Screencast

Please keep in mind that this is just a simple example to explain the functionality. We used jQuery, only because I had four minutes to record! In that particular example (watch the screencast first), we could have used two alternative options:

  1. Pass true as a parameter of the clone() method. This would then clone the element, as well as any event handlers.
  2. Use the live() method instead. However, be careful when using this method: it reattaches the event handler X times. This may not necessarily be needed.

Mostly, this was meant to demonstrate the idea. With regular JavaScript, you could do something like:

// Get some unordered list, which contains anchor tags
var ul = document.getElementById('items');

// Quick and simple cross-browser event handler - to compensate for IE's attachEvent handler
function addEvent(obj, evt, fn, capture) {
	if ( window.attachEvent ) {
		obj.attachEvent("on" + evt, fn);
	}
	else {
		if ( !capture ) capture = false; // capture
		obj.addEventListener(evt, fn, capture)
	}
}

// Check to see if the node that was clicked is an anchor tag. If so, proceed per usual.
addEvent(ul, "click", function(e) {
  // Firefox and IE access the target element different. e.target, and event.srcElement, respectively.
  var target = e ? e.target : window.event.srcElement;
  if ( target.nodeName.toLowerCase() === 'a' ) {
     alert("clicked");
     return false;
  }
});


The Easiest Way to Build your First iPhone App

The Easiest Way to Build your First iPhone App

Mobile websites have come a long way, but if you want to take full advantage of a smartphone’s hardware, or get listed in the iTunes App Store, you need to compile your code. In this tutorial, we’ll show you how to create a mobile web app with an iPhone look and feel using jQTouch, then turn it into a native iPhone app using Phonegap. No Objective-C necessary.

Tutorial Details

  • Program: Phonegap
  • Version: 0.80
  • Difficulty: Intermediate
  • Estimated Completion Time: 1 hour

Requirements

To complete this tutorial, you’ll need the following:

Introduction to PhoneGap

PhoneGap is an open-source framework that can turn any web app into a native app for iPhone, BlackBerry and Android. It pulls off
this trick by running your web code in a UIWebView, an embedded instance of Safari without the
toolbars and buttons of the standalone Safari app. PhoneGap then extends this basic functionality by mapping features of the
iPhone SDK to JavaScript objects you can call in your web code, so you can easily add features like GPS, camera, contacts, vibration,
SQLLite and accelerometer support. And when you’re ready to distribute your app, PhoneGap 0.80 is Apple-approved!

Included in the PhoneGap distribution is everything you need to build and run an iPhone app. The included XCode project is bundled
with a sample code showing how to use many of the native features, and all the supporting files necessary to compile the app and
run it in the iPhone Simulator or on your phone.

Building and Running an iPhone App

To test whether you’ve got your Mac ready to run your code, let’s try out the sample project included with PhoneGap.

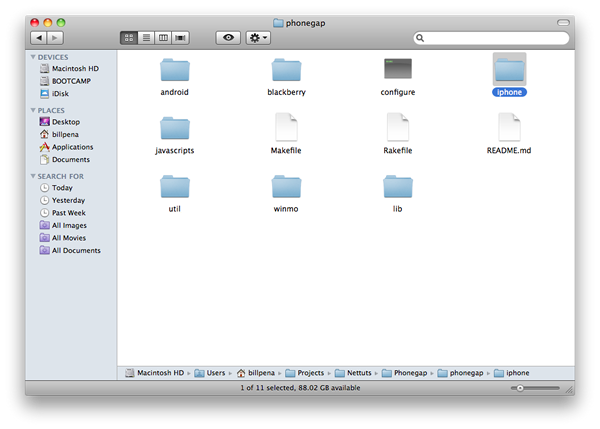
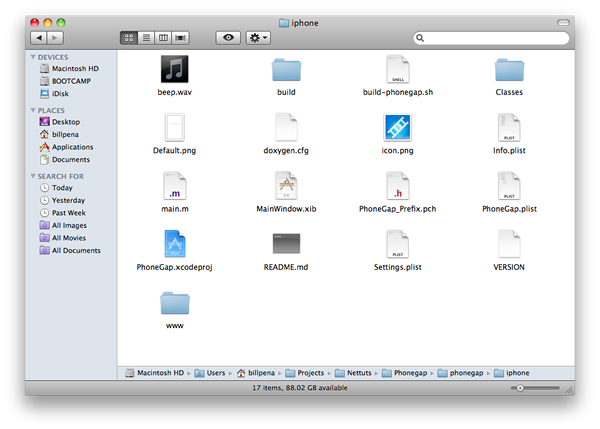
First, open up the iPhone folder, and double-click on PhoneGap.xcodeproj:

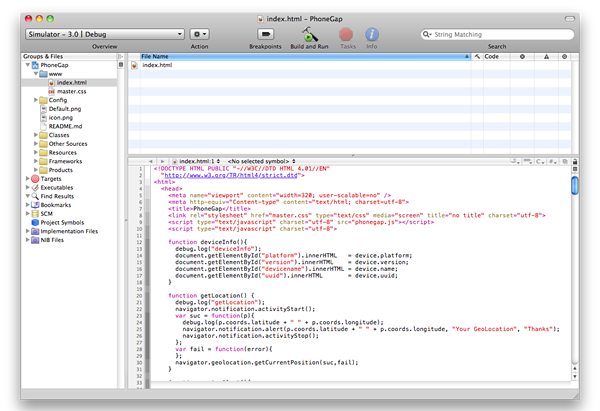
This should open XCode with your project loaded. Although there’s a lot going on here, we as web developers only need
to concern ourselves with the www folder. This contains the web code that will become the interface and logic of
our app.

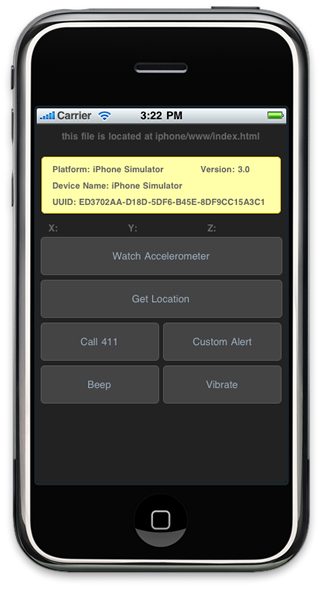
Now that we’ve got our project loaded, it’s time to take it for a spin. Bundled with the iPhone SDK is an iPhone Simulator that
hooks right in to XCode. All we have to do is click “Build and Run.”

Building Your Web App

For the sake of this tutorial, I’ve put together a simple, native-feeling app that displays my Tumblr feed with a slide-up “About”
screen. This app is based on the excellent jQTouch framework, a jQuery-based library of UI
elements, animations, and extensions that let you rapidly develop mobile web apps with native look and feel. Let’s take a quick look
at putting together a web app using jQTouch before we import this app into our Phonegap project.

First, we load jQuery, jQTouch, and some bundled theme files in the <head> tag; these will style our elements to look like
native iPhone UI widgets:

	<head>
		<script src="jqtouch/jquery.1.3.2.min.js" type="application/javascript" charset="utf-8"></script>
		<script src="jqtouch/jqtouch.min.js" type="application/x-javascript" charset="utf-8"></script>
	    <style type="text/css" media="screen">@import "jqtouch/jqtouch.min.css";</style>
	    <style type="text/css" media="screen">@import "jqtouch/themes/apple/theme.min.css";</style>
	    <style type="text/css" media="screen">@import "master.css";</style>

		<script type="text/javascript">
	        $.jQTouch();
	    </script>
	</head>

Then we build out the skeleton of our app:

	<body id="stage" class="theme">
        <div id="home" class="current">

        </div>
        <div id="about">

        </div>
    </body>

jQTouch takes any direct descendent of the <body> tag and converts it into a full-screen “view”. This means every
<div> in the code above will take over the entire screen, and changing screens means swapping between <div>s by linking
to them by their id:

	<a href="#about">About</a>

JQTouch includes a variety of cool ways to transition between these screens, and they and can be enabled simply by adding CSS classes.
For example, to turn that link to the About page into a slide-up transition, we add the following:

	<a class="slideup" href="#about">About</a>

Then, in the About page itself, we add a button to “close” the panel by sliding it back:

	<a href="#" class="grayButton goback">Close</a>

On the default screen, we’ll add a toolbar with the aforementioned “About” button, and a spot to embed a Tumblr feed:

    <div class="toolbar">
        <h1>Home</h1>
        <a class="button slideup" href="#about">About</a>
    </div>
    <h2>Live Stream</h2>
    <div id="timeline">
        <script type="text/javascript" src="http://YOUR_TUMBLR_USERNAME.tumblr.com/js">
        </script>
    </div>

Lastly, a few CSS classes that will style the output of the Tumblr feed to match our “Apple” theme:

	ol {
	    color: black;
	    background: #fff;
	    border: 1px solid #B4B4B4;
	    font: bold 17px Helvetica;
	    padding: 0;
	    margin: 15px 10px 17px 10px;
	    -webkit-border-radius: 8px;
	}

	ol > li {
	    color: #666;
	    border-top: 1px solid #B4B4B4;
	    list-style-type: none;
	    padding: 10px 25px 10px 25px;
	}

That’s it! After adding some content to our About page, we replace the files in our Phonegap project’s www folder
with our new web app, and run it again:

Conclusion

Our web app is now compiled, and from here can be packaged up for distribution in the iTunes Store. It’s a simple start, but
in very little time we’ve got a native app that looks like Apple’s own, runs on any iPhone, and can be extended to a variety of uses.

I’ll be covering how to extend your app with support for cameras and geo-location in future tutorials. In the meantime, you can
read more about Phonegap at the Phonegap Wiki. Documentation is not fully fleshed out,
so you may find yourself digging through git repositories after the end of a long hunt.

To submit your app to the iTunes App Store, register for the iPhone Developer Program.
Once you’re registered, you’ll be given the tools to digitally sign and submit your app to the iTunes Store.

Write a Plus Tutorial

Did you know that you can earn up to $600 for writing a PLUS tutorial and/or screencast for us? We’re looking for in depth and well-written tutorials on HTML, CSS, PHP, and JavaScript. If you’re of the ability, please contact Jeffrey at [email protected].

Please note that actual compensation will be dependent upon the quality of the final tutorial and screencast.

Write a PLUS tutorial


Scheduling Tasks with Cron Jobs

Scheduling Tasks with Cron Jobs

Cron Jobs are used for scheduling tasks to run on the server. They’re most commonly used for automating system maintenance or administration. However, they are also relevant to web application development. There are many situations when a web application may need certain tasks to run periodically. Today we are going to explore the fundamentals of Cron Jobs.

Definitions

First let’s familiarize ourselves with the terms related to this subject.

“Cron” is a time-based job scheduler in Unix-like operating systems (Linux, FreeBSD, Mac OS etc…). And these jobs or tasks are referred to as “Cron Jobs”.

There is a cron “daemon” that runs on these systems. A daemon is a program that runs in the background all the time, usually initiated by the system. This cron daemon is responsible for launching these cron jobs on schedule.

The schedule resides in a configuration file named “crontab”. That’s where all the tasks and their timers are listed.

Why Use Cron Jobs?

Server admins have been using cron jobs for a long time. But since the target audience of this article is web developers, let’s look at a few use cases of cron jobs that are relevant in this area:

  • If you have a membership site, where accounts have expiration dates, you can schedule cron jobs to regularly deactivate or delete accounts that are past their expiration dates.
  • You can send out daily newsletter e-mails.
  • If you have summary tables (or materialized views) in your database, they can be regularly updated with a cron job. For example you may store every web page hit in a table, but another summary table may contain daily traffic summaries.
  • You can expire and erase cached data files in a certain interval.
  • You can auto-check your website content for broken links and have a report e-mailed to yourself regularly.
  • You can schedule long-running tasks to run from a command line script, rather than running it from a web script. Like encoding videos, or sending out mass e-mails.
  • You can even perform something as simple as fetching your most recent Tweets, to be cached in a text file.

Syntax

Here is a simple cron job:

10 * * * * /usr/bin/php /www/virtual/username/cron.php > /dev/null 2>&1

There are two main parts:

  1. The first part is “10 * * * *”. This is where we schedule the timer.
  2. The rest of the line is the command as it would run from the command line.

The command itself in this example has three parts:

  1. “/usr/bin/php”. PHP scripts usually are not executable by themselves. Therefore we need to run it through the PHP parser.
  2. “/www/virtual/username/cron.php”. This is just the path to the script.
  3. “> /dev/null 2>&1?. This part is handling the output of the script. More on this later.

Timing Syntax

This is the first part of the cron job string, as mentioned above. It determines how often and when the cron job is going to run.

It consists of five parts:

  1. minute
  2. hour
  3. day of month
  4. month
  5. day of week

Here is an illustration:

Asterisk

Quite often, you will see an asterisk (*) instead of a number. This represents all possible numbers for that position. For example, asterisk in the minute position would make it run every minute.

We need to look at a few examples to fully understand this Syntax.

Examples:

This cron job will run every minute, all the time:

* * * * * [command]

This cron job will run at minute zero, every hour (i.e. an hourly cron job):

0 * * * * [command]

This is also an hourly cron job but run at minute 15 instead (i.e. 00:15, 01:15, 02:15 etc.):

15 * * * * [command]

This will run once a day, at 2:30am:

30 2 * * * [command]

This will run once a month, on the second day of the month at midnight (i.e. January 2nd 12:00am, February 2nd 12:00am etc.):

0 0 2 * * [command]

This will run on Mondays, every hour (i.e. 24 times in one day, but only on Mondays):

0 * * * 1 [command]

You can use multiple numbers separated by commas. This will run three times every hour, at minutes 0, 10 and 20:

0,10,20 * * * * [command]

Division operator is also used. This will run 12 times per hour, i.e. every 5 minutes:

*/5 * * * * [command]

Dash can be used to specify a range. This will run once every hour between 5:00am and 10:00am:

0 5-10 * * * [command]

Also there is a special keyword that will let you run a cron job every time the server is rebooted:

@reboot [command]

Setting Up and Managing Cron Jobs

There are a few different ways to create and manage your cron jobs.

Control Panels

Many web hosting companies provide control panels for their customers. If you are one of them, you might be able to find a section in your control panel to manage your cron jobs.

Editing the Crontab

Running this command will launch vi (text editor) and will let you edit the contents of the crontab:

crontab -e

So it would help to be familiar with the basic vi commands as it is quite different than any other text editor you might have worked with.

If you would just like to see the existing crontab without editing it, you can run this command:

crontab -l

To delete the contents of the crontab:

crontab -r

Loading a File

You can write all of your cron jobs into a file and then push it into the crontab:

crontab cron.txt

Be careful, because this will overwrite all existing cron jobs with this files contents, without warning.

Comments

You can add comments followed by the # character.

# This cron job does something very important
10 * * * * /usr/bin/php /www/virtual/username/cron.php > /dev/null 2>&1

Setting the E-mail

As I mentioned earlier, by default the output from the crons get sent via e-mail, unless you discard them or redirect them to a file. The MAILTO setting let’s you set or change which e-mail address to send them to:

MAILTO="[email protected]"
# This cron job does something very important
10 * * * * /usr/bin/php /www/virtual/username/cron.php > /dev/null 2>&1

Using the PHP Parser

CGI scripts are executable by default, but PHP scripts are not. They need to run through the PHP parser. That’s why we need to put the path to the parser before the path of the script.

* * * * * /usr/bin/php [path to php script]

Sometimes it might be under another location like: “/usr/local/bin/php”. To find out, you can try running this in the command line:

which php

Handling the Output

If you do not handle the output of the cron script, it will send them as e-mails to your user account on the server.

Discarding Output

If you put “> /dev/null 2>&1? at the end of the cron job command (or any command), the output will be discarded.

The closing bracket (>) is used for redirecting output. “/dev/null” is like a black hole for output. Anything that goes there is ignored by the system.

This part “2>&1? causes the STDERR (error) output to be redirected to the STDOUT (normal) output. So that also ends up in the “/dev/null”.

Outputting to a File

To store the cron output in a file, use the closing bracket (>) again:

10 * * * * /usr/bin/php /www/virtual/username/cron.php > /var/log/cron.log

That will rewrite the output file every time. If you would like to append the output at the end of the file instead of a complete rewrite, use double closing bracket (>>) instead:

10 * * * * /usr/bin/php /www/virtual/username/cron.php >> /var/log/cron.log

Executable Scripts

Normally you need to specify the parser at the beginning of the command as we have been doing. But there is actually a way to make your PHP scripts executable from the command line like a CGI script.

You need is to add the path to the parser as the first line of the script:

#!/usr/local/bin/php

Also make sure to set proper chmod (like 755) to make the file executable.

When you have an executable script, the cron job can be shorter like this:

10 * * * * /www/virtual/username/hello.php

Preventing Cron Job Collision

In some cases you may have frequent running cron jobs, and you may not want them to collide if they take longer to run than the frequency itself.

For example, you may have a cron job running every minute. Yet, every once in a while it may take longer than one minute to run. This can cause another instance of the same cron script to start running before the previous one finishes. You can create too many busy processes this way and possibly crash the server if they keep slowing down each other, and cause even more processes to be created over time..

This problem can be addressed via file locking, and more specifically the non-blocking (LOCK_NB) type of file locks. (If you are not familiar with file locking, I suggest you read about it first.)

You can add this code to the cron job script:

$fp = fopen('/tmp/lock.txt', 'r+');

if(!flock($fp, LOCK_EX | LOCK_NB)) {
    echo 'Unable to obtain lock';
    exit(-1);
}

/* ... */

fclose($fp);

With regular file locks the flock() function call would block the script if there is an existing lock. And it would release once that lock is gone. However, with a non-blocking lock, such as in the code above, the function call does not stop the script, but it immediately returns FALSE if there is an existing lock. So in this case, we can immediately exit the script when we see there is an existing lock, which indicates that another cron job is currently running.

Blocking Web Access to Cron Jobs

When you write a cron job in a web scripting language like PHP, you may want to make sure that nobody can execute it by just loading it from their browser. One easy option would be to store these script outside of your web folder. However this may not be practical or preferable for some developers, if they want to keep their cron job scripts right within their web application folders.

If you put all of the cron job scripts in a folder, you block access by putting this line in an .htaccess file:

deny from all

Or you can also deny access to scripts on an individual basis by putting this line at the beginning:

if (isset($_SERVER['REMOTE_ADDR'])) die('Permission denied.');

This will ensure that, when the script is accessed from the web, it will abort immediately.

Conclusion

Thank you for reading. Even though cron jobs just seem like a tool just for system admins, they are actually relevant to many kinds of web applications.

Please leave your comments and questions, and have a great day!


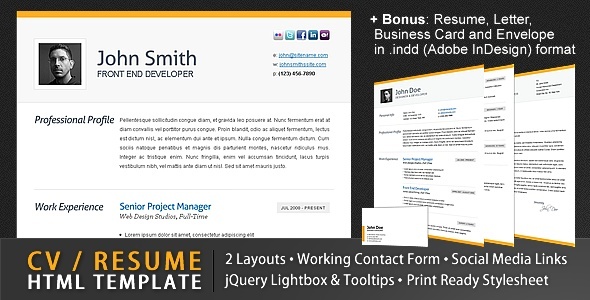
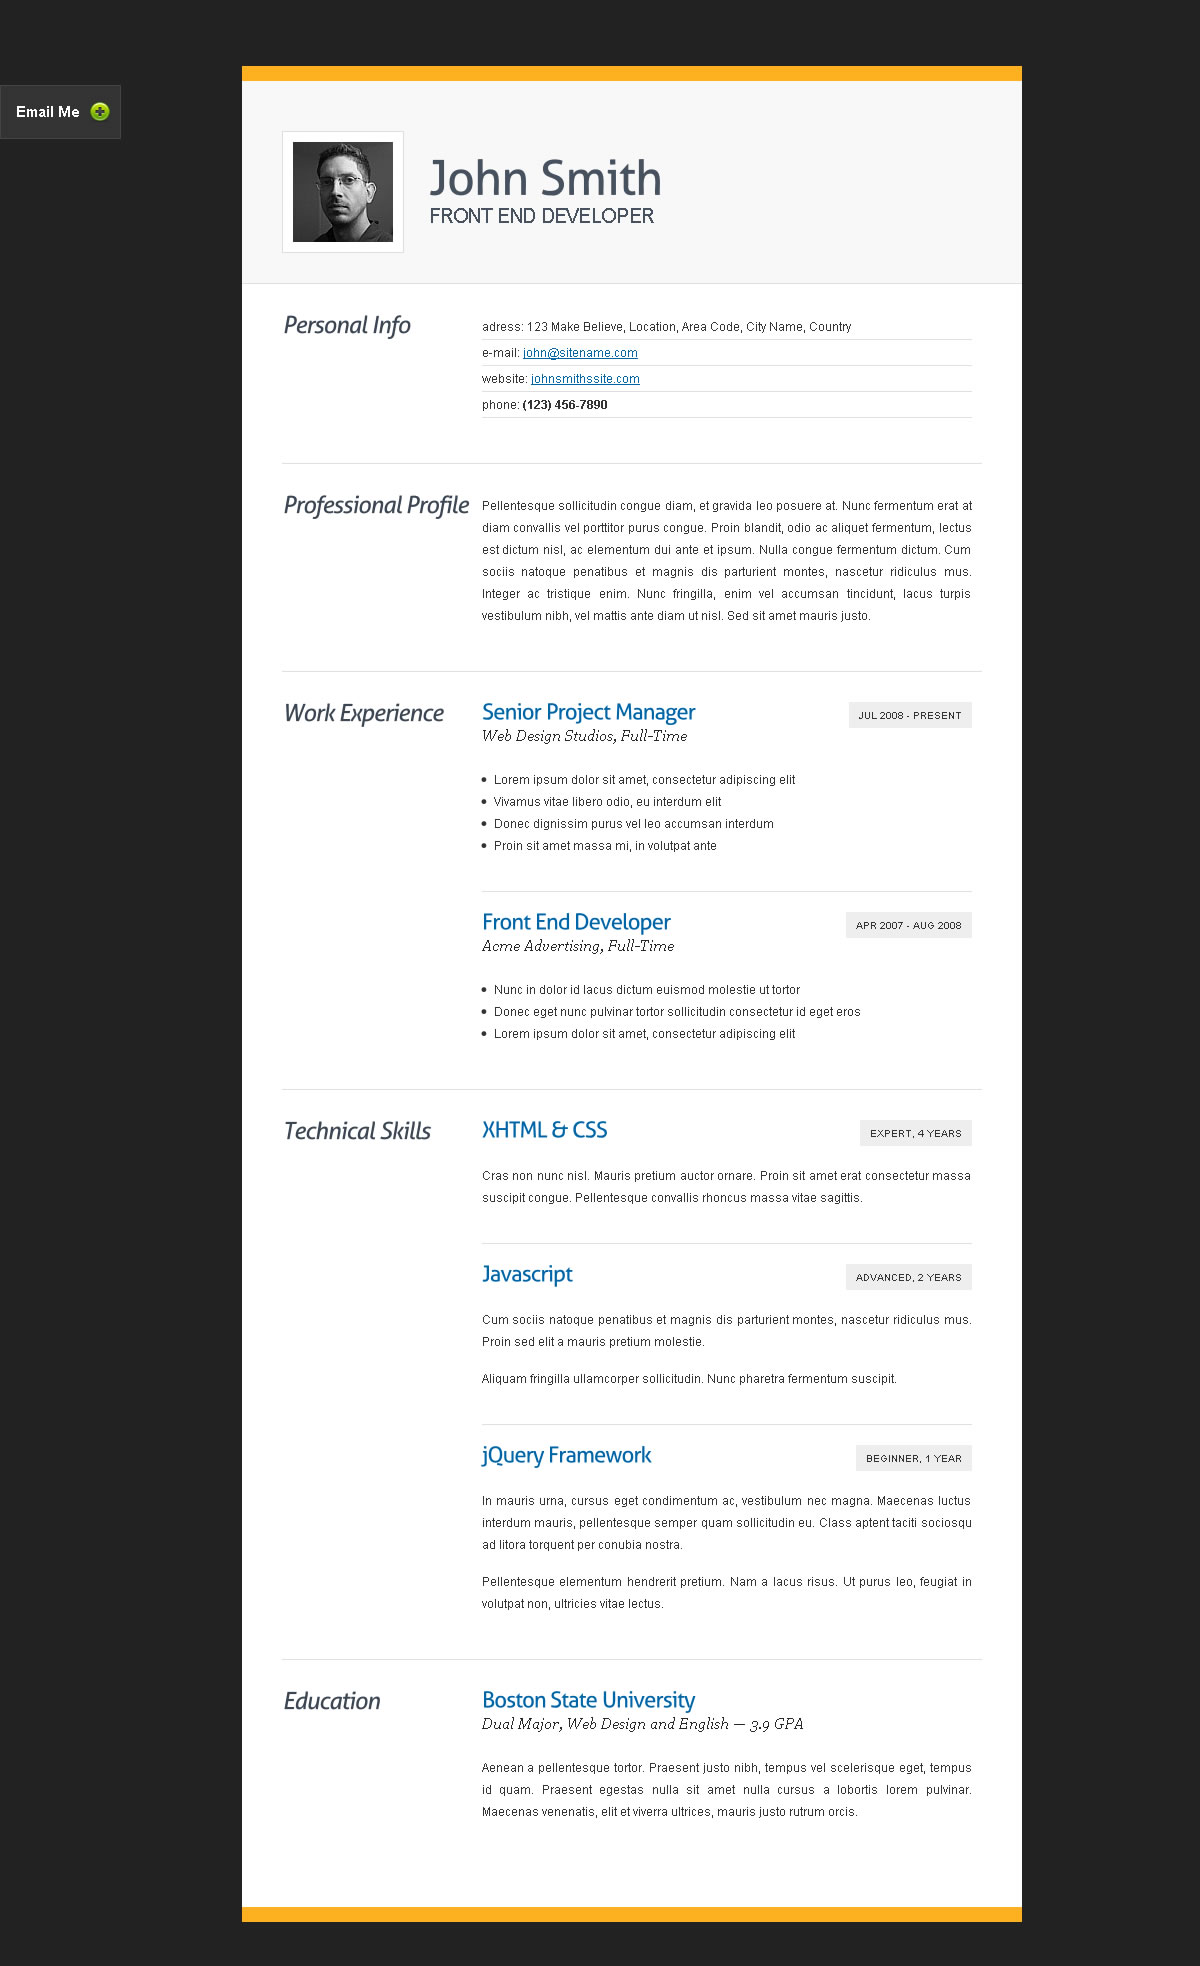
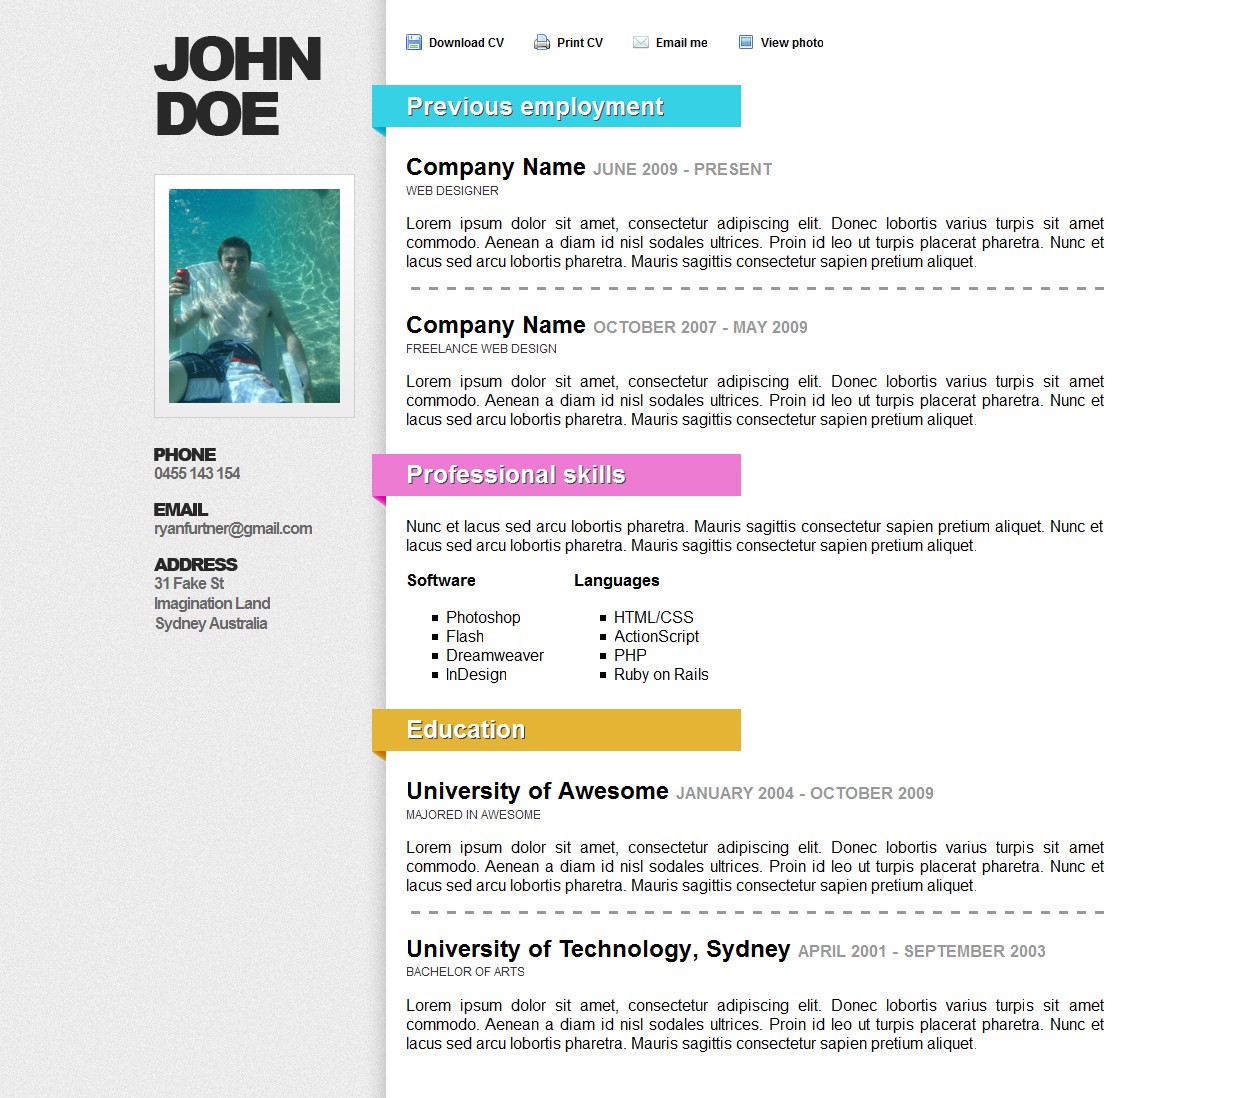
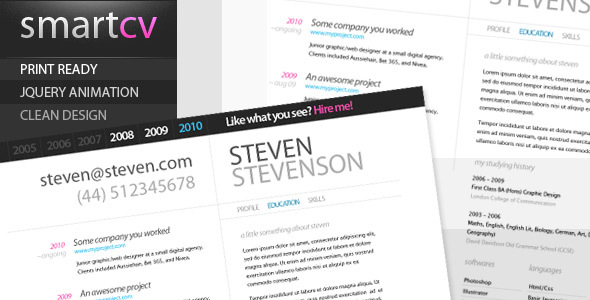
5 Examples of Beautiful Resume/CV Web Templates

5 Examples of Beautiful Resume/CV Web Templates

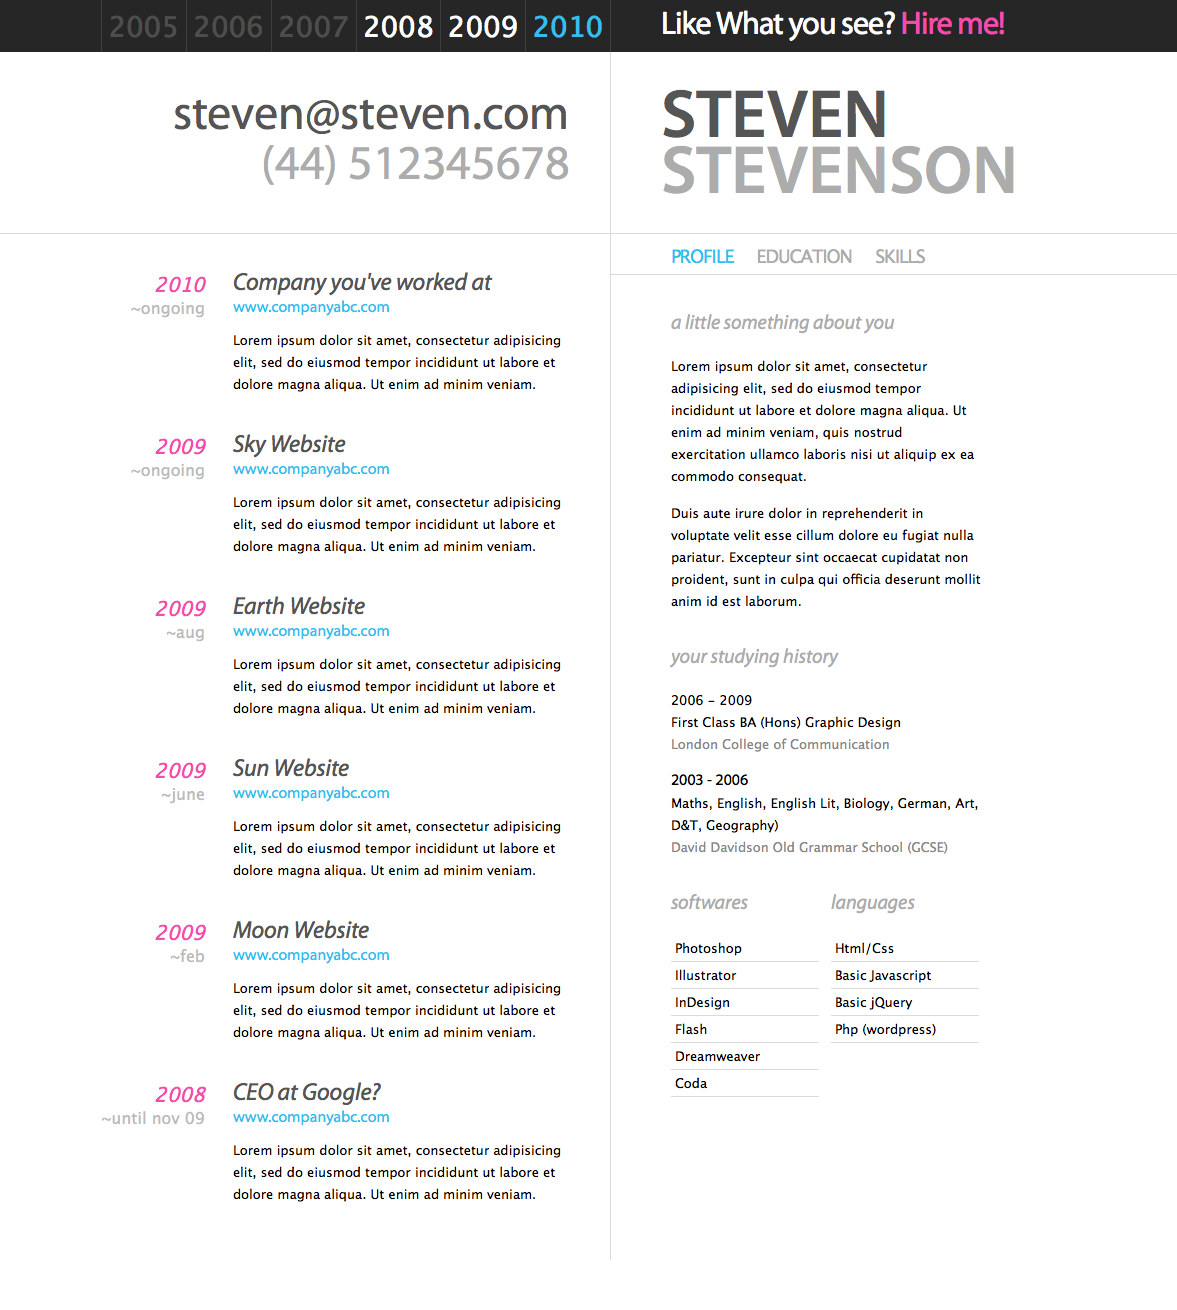
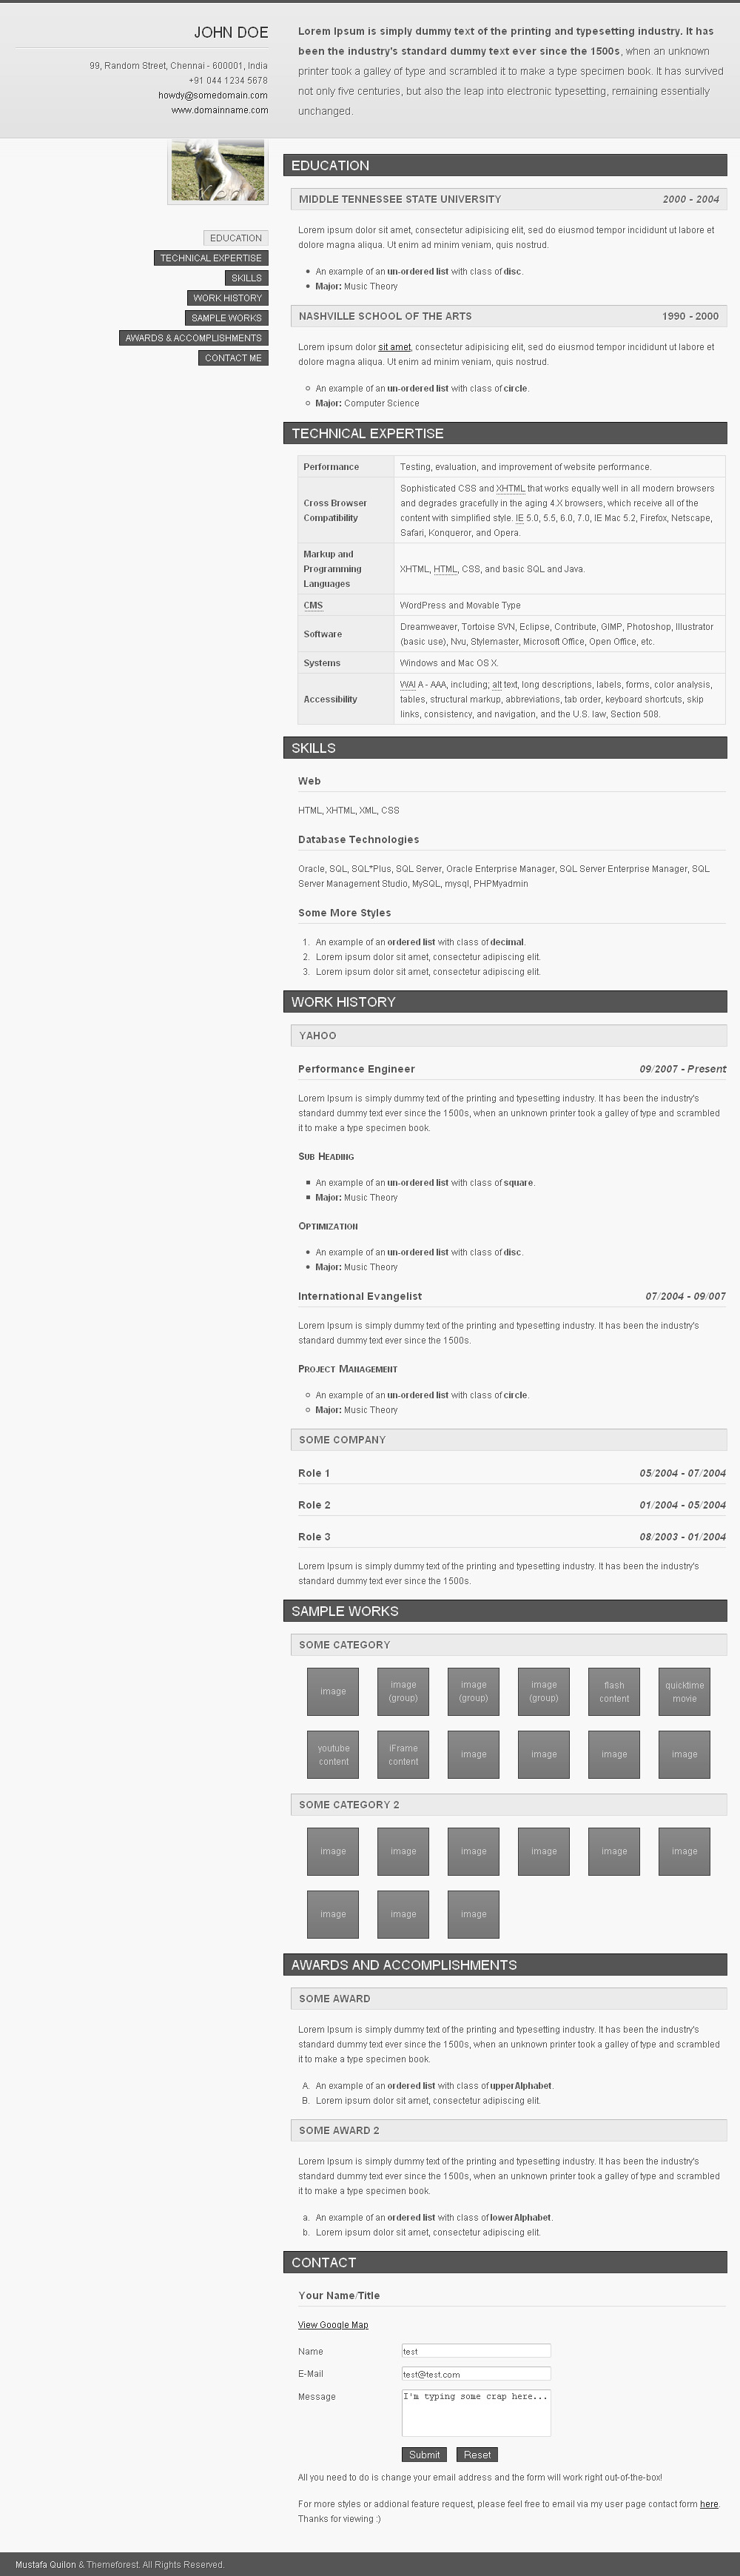
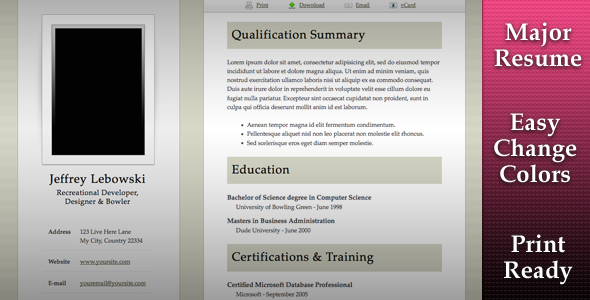
Did you know that we recently launched a new sub-category on ThemeForest, specifically for resumes/CVs optimized for the web? It’s becoming more and more common for potential employers to simply request a link to your website, rather than a sheet of paper. Though the category only launched a few weeks ago, we’ve already received a handful of beautiful designs.

1. Clean CV / Resume Html Template + 4 Bonuses

2. Awesome Online Resume/CV

3. Smart CV – Resume Theme

4. Resume (CV) Perfecto

5. Major – Resume Template

Think you can do Better?

If so, why not head over to ThemeForest and submit your own design? There’s a lot of money to be made, but you have to submit something first!!


JavaScript from Null: Chapter 5 – Events

JavaScript from Null: Chapter 5 – Events

As we move forward with JavaScript University, today, we’ll learn how to add event handlers to elements on the page. Unfortunately, this can be more cumbersome than we’d hope, due to the fact that Internet Explorer must always be the black sheep. Nevertheless, we’ll learn how to abstract these inconsistencies away to our custom utility function.

As with every JavaScript from Null screencast, it’s not essential that you view the previous entries in the series before watching.

Catch Up

In this Screencast, you’ll Learn About:

  • Working with .addEventListener
  • Working with IE’s .attachEvent
  • Differences in the way browsers handle events.
  • Capturing phase vs. event bubbling
  • Building a utility function to abstract our cross-browser event handling.

Chapter 5: Events

Other Viewing Options

Ready to take your skills to the next level, and start profiting from your scripts and components? Check out our sister marketplace, CodeCanyon.

CodeCanyon


Quick Tip: How to Create a Theme-Switcher in 200 Seconds

Quick Tip: How to Create a Theme-Switcher in 200 Seconds

Have you ever seen sites that offer some kind of “color-switcher” within the header section? Want to know how easy it is to replicate? I’ll show you in 200 seconds, using jQuery.


The Screencast

Granted, this is a very simple example. What more do you expect in 200 seconds! :) But, this can easily be extended to import new stylesheets, if you wish.

The Final jQuery

var colorOptions = 'black, blue, orange, red, green'.split(', '),
	colorDivs = [],
	colorsContainer = $('#colorsContainer');

for ( var i = 0, len = colorOptions.length; i < len; i++ ) {
	var div = $('
').css('background', colorOptions[i])[0]; colorDivs.push(div); } colorsContainer.append(colorDivs); $('#header').hover(function() { colorsContainer .fadeIn(200) .children('div') .hover(function() { $('h2').css('color', $(this).css('backgroundColor')); }); }, function() { colorsContainer.fadeOut(200); });

Conclusion

I had to zoom through this screencast, so feel free to discuss/ask questions in the comments! I hope you enjoyed it! Are you liking the “two-a-week” quick tips that all of the Tuts sites are now doing?