The Easiest Way to Build your First iPhone App
Mobile websites have come a long way, but if you want to take full advantage of a smartphone’s hardware, or get listed in the iTunes App Store, you need to compile your code. In this tutorial, we’ll show you how to create a mobile web app with an iPhone look and feel using jQTouch, then turn it into a native iPhone app using Phonegap. No Objective-C necessary.
Tutorial Details
- Program: Phonegap
- Version: 0.80
- Difficulty: Intermediate
- Estimated Completion Time: 1 hour
Requirements
To complete this tutorial, you’ll need the following:
- Mac OS X
- XCode (included with Mac OS X, but installed separately)
- iPhone SDK (registration required)
- PhoneGap 0.80
Introduction to PhoneGap
PhoneGap is an open-source framework that can turn any web app into a native app for iPhone, BlackBerry and Android. It pulls off
this trick by running your web code in a UIWebView, an embedded instance of Safari without the
toolbars and buttons of the standalone Safari app. PhoneGap then extends this basic functionality by mapping features of the
iPhone SDK to JavaScript objects you can call in your web code, so you can easily add features like GPS, camera, contacts, vibration,
SQLLite and accelerometer support. And when you’re ready to distribute your app, PhoneGap 0.80 is Apple-approved!
Included in the PhoneGap distribution is everything you need to build and run an iPhone app. The included XCode project is bundled
with a sample code showing how to use many of the native features, and all the supporting files necessary to compile the app and
run it in the iPhone Simulator or on your phone.
Building and Running an iPhone App
To test whether you’ve got your Mac ready to run your code, let’s try out the sample project included with PhoneGap.
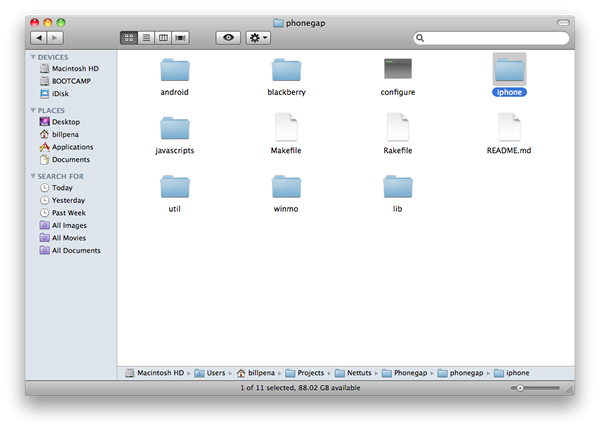
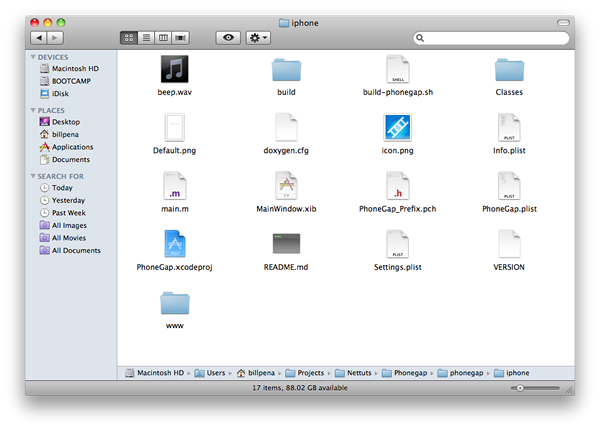
First, open up the iPhone folder, and double-click on PhoneGap.xcodeproj:
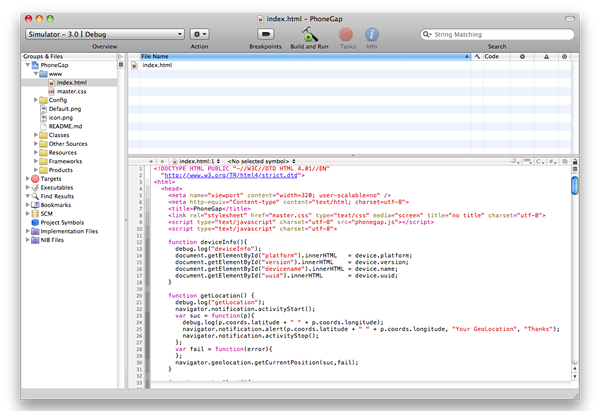
This should open XCode with your project loaded. Although there’s a lot going on here, we as web developers only need
to concern ourselves with the www folder. This contains the web code that will become the interface and logic of
our app.
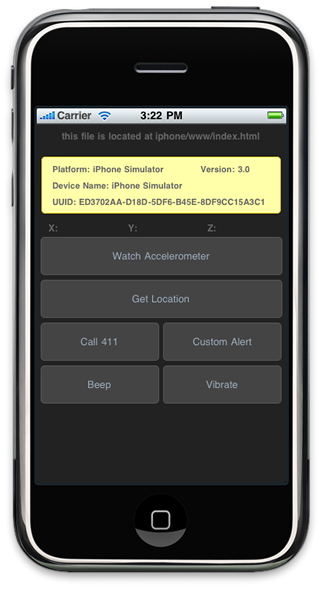
Now that we’ve got our project loaded, it’s time to take it for a spin. Bundled with the iPhone SDK is an iPhone Simulator that
hooks right in to XCode. All we have to do is click “Build and Run.”
Building Your Web App
For the sake of this tutorial, I’ve put together a simple, native-feeling app that displays my Tumblr feed with a slide-up “About”
screen. This app is based on the excellent jQTouch framework, a jQuery-based library of UI
elements, animations, and extensions that let you rapidly develop mobile web apps with native look and feel. Let’s take a quick look
at putting together a web app using jQTouch before we import this app into our Phonegap project.
First, we load jQuery, jQTouch, and some bundled theme files in the <head> tag; these will style our elements to look like
native iPhone UI widgets:
	<head>
		<script src="jqtouch/jquery.1.3.2.min.js" type="application/javascript" charset="utf-8"></script>
		<script src="jqtouch/jqtouch.min.js" type="application/x-javascript" charset="utf-8"></script>
	    <style type="text/css" media="screen">@import "jqtouch/jqtouch.min.css";</style>
	    <style type="text/css" media="screen">@import "jqtouch/themes/apple/theme.min.css";</style>
	    <style type="text/css" media="screen">@import "master.css";</style>

		<script type="text/javascript">
	        $.jQTouch();
	    </script>
	</head>
Then we build out the skeleton of our app:
	<body id="stage" class="theme">
        <div id="home" class="current">

        </div>
        <div id="about">

        </div>
    </body>
jQTouch takes any direct descendent of the <body> tag and converts it into a full-screen “view”. This means every
<div> in the code above will take over the entire screen, and changing screens means swapping between <div>s by linking
to them by their id:
<a href="#about">About</a>
JQTouch includes a variety of cool ways to transition between these screens, and they and can be enabled simply by adding CSS classes.
For example, to turn that link to the About page into a slide-up transition, we add the following:
<a class="slideup" href="#about">About</a>
Then, in the About page itself, we add a button to “close” the panel by sliding it back:
<a href="#" class="grayButton goback">Close</a>
On the default screen, we’ll add a toolbar with the aforementioned “About” button, and a spot to embed a Tumblr feed:
    <div class="toolbar">
        <h1>Home</h1>
        <a class="button slideup" href="#about">About</a>
    </div>
    <h2>Live Stream</h2>
    <div id="timeline">
        <script type="text/javascript" src="http://YOUR_TUMBLR_USERNAME.tumblr.com/js">
        </script>
    </div>
Lastly, a few CSS classes that will style the output of the Tumblr feed to match our “Apple” theme:
	ol {
	    color: black;
	    background: #fff;
	    border: 1px solid #B4B4B4;
	    font: bold 17px Helvetica;
	    padding: 0;
	    margin: 15px 10px 17px 10px;
	    -webkit-border-radius: 8px;
	}

	ol > li {
	    color: #666;
	    border-top: 1px solid #B4B4B4;
	    list-style-type: none;
	    padding: 10px 25px 10px 25px;
	}
That’s it! After adding some content to our About page, we replace the files in our Phonegap project’s www folder
with our new web app, and run it again:


Conclusion
Our web app is now compiled, and from here can be packaged up for distribution in the iTunes Store. It’s a simple start, but
in very little time we’ve got a native app that looks like Apple’s own, runs on any iPhone, and can be extended to a variety of uses.
I’ll be covering how to extend your app with support for cameras and geo-location in future tutorials. In the meantime, you can
read more about Phonegap at the Phonegap Wiki. Documentation is not fully fleshed out,
so you may find yourself digging through git repositories after the end of a long hunt.
To submit your app to the iTunes App Store, register for the iPhone Developer Program.
Once you’re registered, you’ll be given the tools to digitally sign and submit your app to the iTunes Store.
Write a Plus Tutorial
Did you know that you can earn up to $600 for writing a PLUS tutorial and/or screencast for us? We’re looking for in depth and well-written tutorials on HTML, CSS, PHP, and JavaScript. If you’re of the ability, please contact Jeffrey at [email protected].
Please note that actual compensation will be dependent upon the quality of the final tutorial and screencast.

- Follow us on Twitter, or subscribe to the Nettuts+ RSS Feed for the best web development tutorials on the web.