Matchmoving has been discussed a lot these days and it has become accessible for more and more people. With the introduction of programs like Syntheyes, PFTrack, and The Foundry’s CameraTracker plug-in the reconstructing of a 3D camera move has been made easier. A lot of people however are not aware of other solutions that are available, like free software. Voodoo Camera Tracker is one of those pieces of software and today I´ll be showing you how to solve your shot and then create some awesome 3D stuff within After Effects!
Tutorial
Introduction To Matchmoving
For those of you who don´t know what matchmoving is, let me just explain it very quickly. When a director wants to have a 3D object integrated into a shot, the computer needs to know how to camera has moved on the set, what focals have been used, the focus distances, lens distortion and more metadata. Otherwise it´s impossible for the computer to know from what angle the 3D geometry should be rendered. Motion tracking is the process of recreating the original camera move that was created on set with software. This data can then be exported for 3D programs like Maya, 3dsMax but also for compositing programs like Nuke and AE. Today we will be taking a look at how to completely recreate a 3D camera movement and then export that to AE. As mentioned however, tracking programs can be expensive so until you have a budget set aside for them, this could be a temporary solution. The result may not always be as smooth as the result you would have using commercial software, but it’s still pretty cool! So let´s go ahead and get started.
Step 1
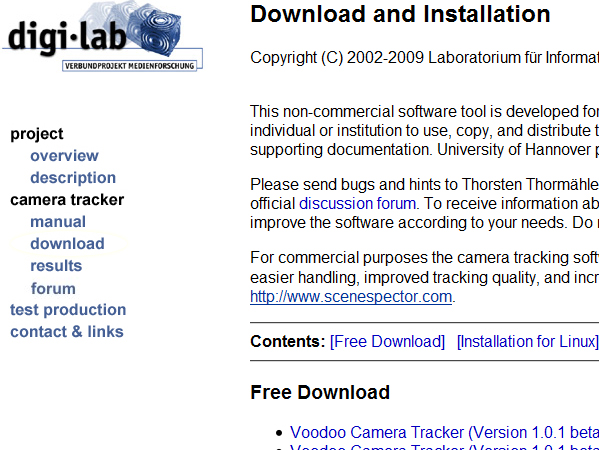
To get Voodoo Camera Tracker, the software we´ll be using to solve the cam movement, go to this page and download the software. You can also find some for info and examples on the site so if you are interested just go ahead and browse some stuff.
Step 2
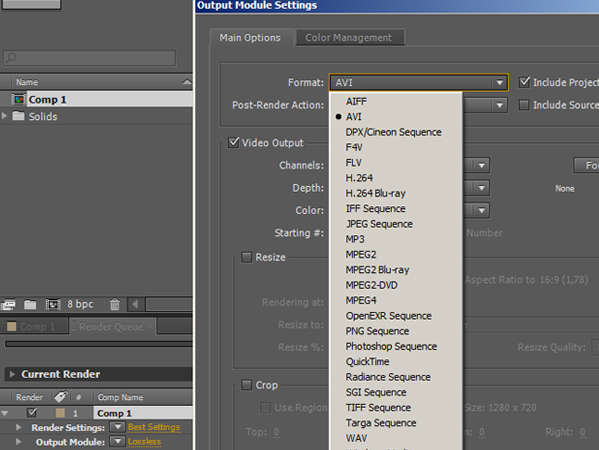
Just open up the software by executing the exe. Now, due to the fact that Voodoo only supportes the file formats .tga, .png and .jpg we´ll have to go in AE and export our footage as a sequence. This can be done in multiple formats but I like to use jpg because of the high compression quality. In AE, drop your footage into a new comp and cut it as you want. Now in the top menu go to Composition -> Add to Render Queue or hit Control, Shift, + and then / on your keyboard. Now go intro the Output Module Settings and change the file format to whatever you like (in my case JPEG Sequence). Make sure you don’t render all the pics on your desktop because you want to organize everything in a folder. Just create a folder and hit the render button.
Step 3
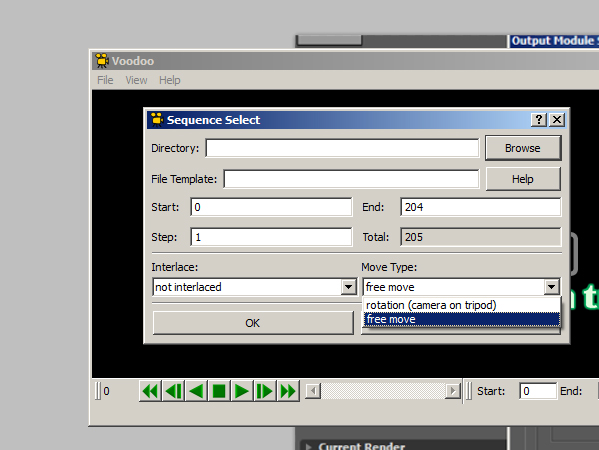
Now in Voodoo go to File -> Open -> Sequence or hit Control S on your keyboard. Now browse for your footage. As you may notice, the program automatically detects the amount of frames. Just browse for your first frame, select it and you’ll see a certain frame range. Be really sure to check this back in AE, you don’t want anything to go wrong. Do not click the OK button yet! First we’ve got to do something quite important. As you go to the Move Type tab you can choose between free move or rotation (camera on tripod). Just apply the correct setting so that it matches your scene. Now you can hit the OK button.
Step 4
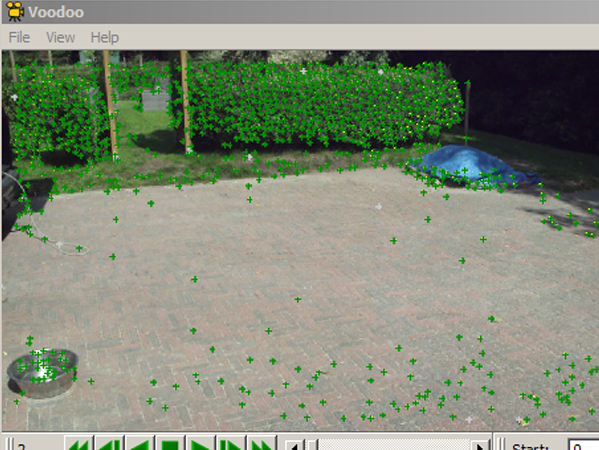
Now first you’ve got to do something really important. Before even start tracking what you must do is hit Control I or go to File -> Open -> Initial Camera. Here you can define your camera settings. First of all the focal length. This is really important as Voodoo makes weird tracks when not defining a proper focal length. To check this just look at the lens you’re using: the information should be on it. For the film back, just choose a preset from the preset list. Now that is done we can go ahead and hit the track button at the right button on the screen. This will probably take a long time if you have a shot with much depth and a lot of movement. So the interesting thing about Voodoo is that both the tracking and solving is done in one proces. When using most commercial software you first have to let it track the points in the scene and then make a calculation based on those points, the solving. As you watch the scene being tracked slowly you notice the points in the scene. Voodoo now recognizes points in your scene. Camera tracking works like this: when a point in your scene moves to the left, the software knows that the camera is in real life moving to the right. This applies to all axes.
Step 5
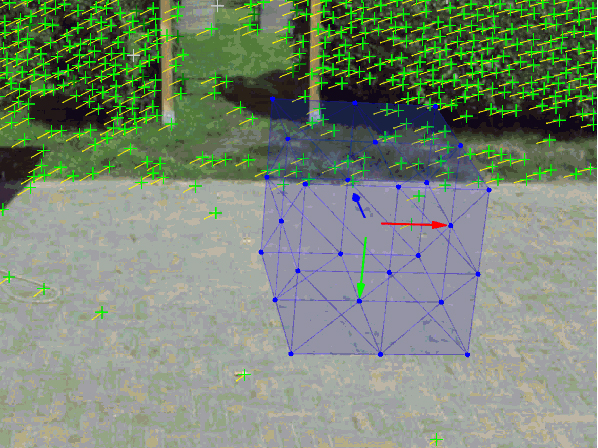
As the tracking is finally done you can still see the green dots. All these dots represent an actual point in your scene. This comes in really handy when we want to place some 3D geometry in the scene, we can look for a null object (the green points) close to where you want the geometry to be and then just copy the position and scale and then adjust the position. As you go to View -> 3D Scene Viewer you can see the scene in 3D and the position of the camera in comparison with the scene. This is quite amazing I think. What you can do now is add some geometry within Voodoo to make sure the track is proper. Go to View -> Modeling Tools. Select the cube and use the transform buttons to position the cube where you want it to be. Play the animation to see if everything works. Now that everything moves along fine we can go ahead and export our scene. This tutorial will focus on AE but you can also export to Maya, 3dsMax and more and use 3D objects from that software and then composite that in AE. For now, let’s just go to File -> Save -> Maya Script. This is because AE can also read .ma files.
Step 6
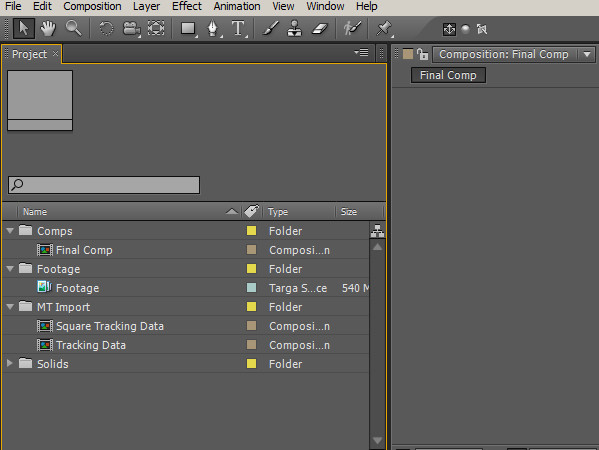
Now let’s open up After Effects. First import your exported targa, png or jpeg scene or work with your original project. Make sure you have a composition with only your footage on the timeline. Now import the motion tracking data. When importing you’ll see two things. First of all the Square Tracking Data. This contains the composition with the tracking data and the camera. The Tracking Data comp is just contains the Square Tracking Data as Pre-Comp, you can delete this composition. Now go into the Square Tracking Data comp and copy the camera to the main comp with the footage. Now you are ready with the basic setup. We can now add some wicked 3D stuff within AE!
Step 7
Now the tricky thing is to position the object right. In this example we are going to use a standard solid. Try to make the solid 3D. As you can see the plane disappears. This is because of the initial position of the Voodoo scene and the camera position. To view the camera position select the VoodooCam_Shape layer and hit P on your keyboard. You can see the camera is not in the exact middle of the scene. So as we move our solid forward on the Z-axes we can now see the plane. Try to play around with the position of the plane, having the position of the camera in mind. You should also dramaticly decrease the scale of the plane. A normal scene should have similar parameters like you can see in the animation below. You can also see that as I move the plane backwards it actually moves along with the ground.
End
This is pretty much the technique behind the preview you’ve probably seen at the top of the page. You can now start experimenting with cool things such as making text 3D and aligning textures with the ground plane. In the example below you can see another tracking scene with some stock footage from Action Essentials 2 from Videocopilot. As you can see I’ve put a burnmark texture on the ground and I’ve also added some foreground smoke. Now we’ve come to the very end of this tutorial. To get started I’ve provided some tips below. Thanks for reading and try to stand out and be creative!
- With Videocopilot’s Optical Flares you can link a flare to a 3D light as seen in the preview
- Adding both foreground and background objects increases the depth of the scene making it feel really 3D.
- To add shadows just duplicate the object and rotate it so that it aligns with the ground (or a wall or anything). Now fill it with a black color and apply a Gaussian blur.
Additional Resources
- Overview Of The Foundry’s New “CameraTracker” Plug-in
- Basic Match Moving with PFhoe
- Create a MoGraph Urban Jungle
- 28 Tracking and Matchmoving Tutorials