Unfortunately, Adobe Illustrator doesn’t come with a conical gradient setting, although some vector programs, such as Corel Draw do. Using features and tools found in Adobe Illustrator, you can create an adjustable conical gradient to use in your work, and it only takes two minutes!
Introduction
Adobe Illustrator contains two styles of gradients: Linear and Radial. Starting with Adobe Illustrator CS4 we have an opportunity to modify the radial gradient into an Elliptical one. Unfortunately, Adobe Illustrator does not contain a Conical gradient, so far, although some vector graphics editors such as Corel Draw do.
Step 1
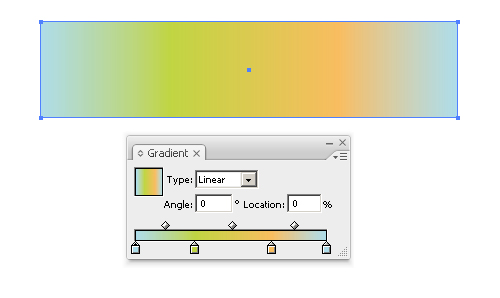
Using the features and tools found in Adobe Illustrator we will be able to create an adjustable conical gradient. To begin, create a rectangle of any size using the Rectangle Tool (M) and fill it with a multicolor linear gradient. Color banding on the gradient should be vertical, that is why the angle of the gradient should equal to zero.
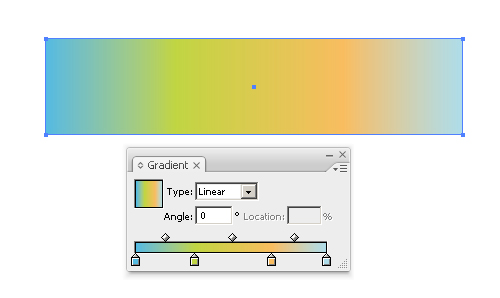
Since we are creating a conical gradient, the first color of the gradient should be the same as the last one.
Step 2
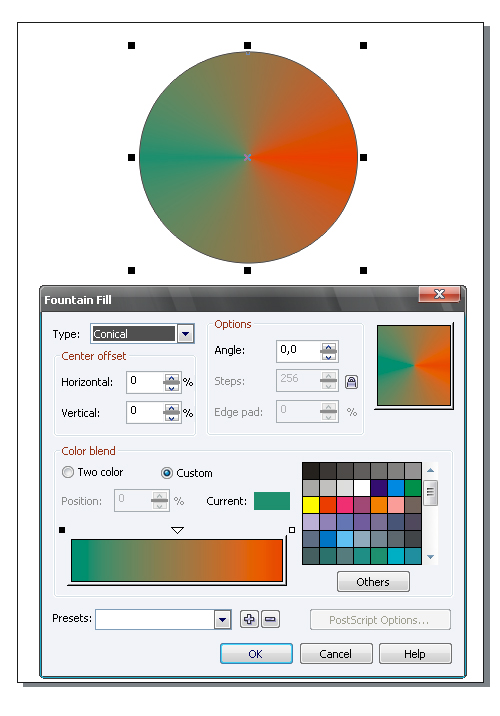
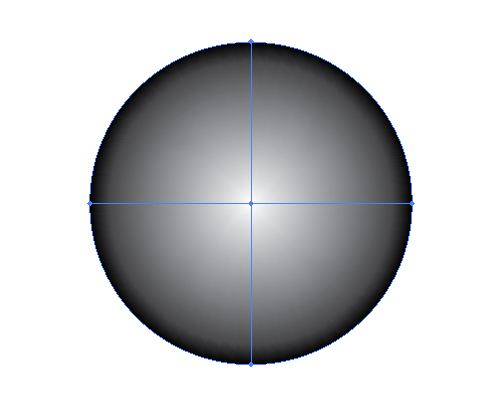
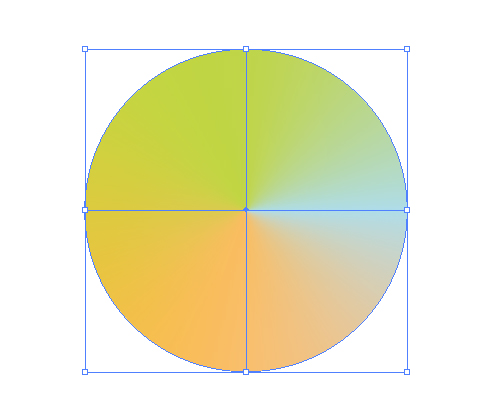
Create a circle of a random size using the Ellipse Tool (L) and fill it with a two-color radial gradient.

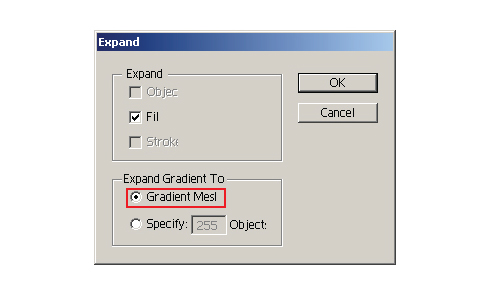
With the circle selected go to Object > Expand and set the Expand Gradient to Gradient Mesh.
Step 3
As a result of these actions, we now have a group consisting of two objects — the Clipping Path and Mesh.
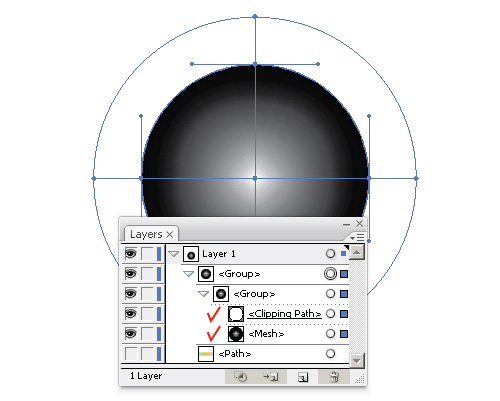
Select the sublayer containing the Clipping Path in the Layers palette, and delete it.
Step 4
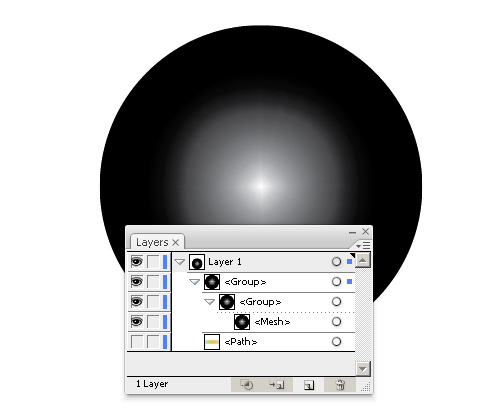
Now delete the inner circle of the gradient mesh. This can be done in two ways — 1. Select any point on this circle using the Direct Selection Tool (A) and press the Delete key, 2. Take the Mesh Tool (U) and click on the circle, holding down the Alt key.
Step 5
Use the Envelope Distort to create the conical gradient, first adjust the properties. Go to Object > Envelope Distort > Envelope Options. Use the settings in the image below.
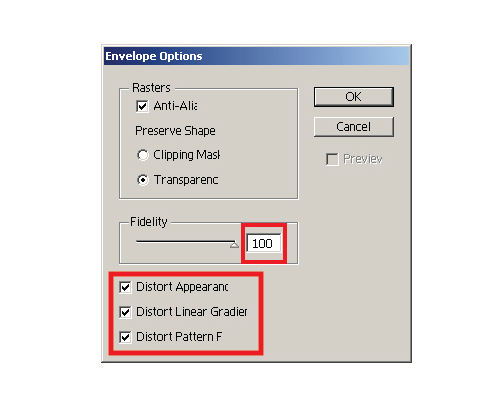
The bigger the Fidelity value is, the smoother the transition between colors will be. Now select the circle and rectangle and go to Object > Envelope Distort > Make with Top Object. That’s it — The conical gradient is ready!
Step 6
Creating a conical gradient will take no more than 2 minutes. A conical gradient made in this way is very easy to edit, I’ll show you how. Click on the Edit Content key on the top toolbar.
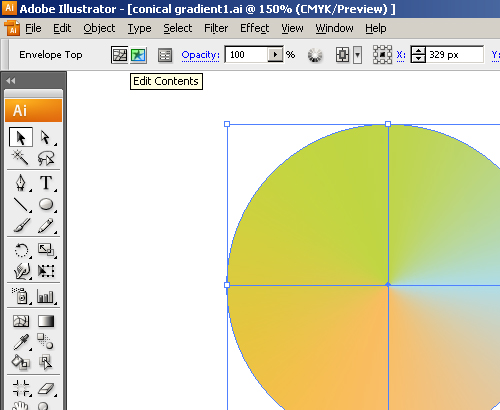
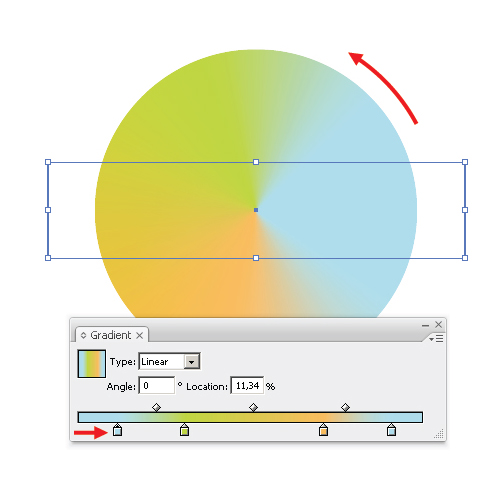
Now you can control the gradient by dragging the lower gradient sliders. This has a special feature — moving the upper gradient sliders will not lead to the expected result. I will now show you how to adjust the transition between the colors.
Step 7
Our conical gradient represents a gradient mesh. In order to edit it go to Object > Expand. As a result of this action, you should now have a group consisting of two objects: the Clipping Path and the Mesh.
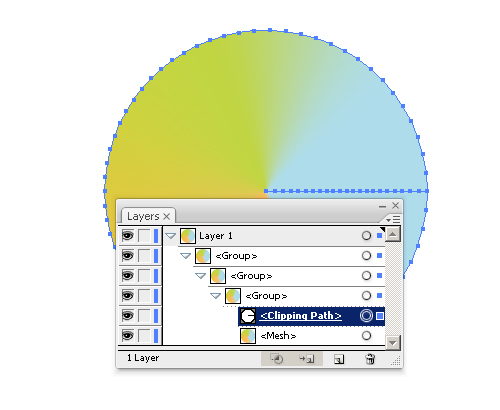
Select the sublayer containing the Clipping Path in the Layers palette, and delete it. As a result, you should now have a simple gradient mesh.
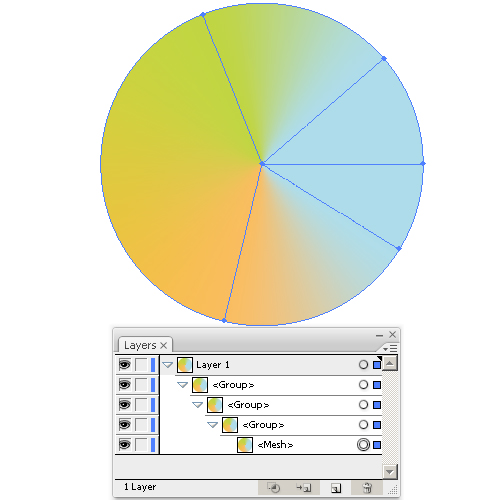
Step 8
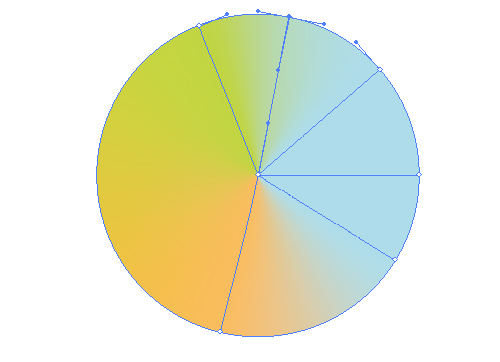
To make a smooth transition between the colors you can add new lines to the mesh using the Mesh Tool (U) and Eyedropper Tool (I) to add colors from the same object.
Conclusion
With enough experience you can create a conical gradient in 1-2 minutes. By expanding your knowledge of Illustrator, you will not only be able to save time, you can come up with some nice results.

This Quick Tip is available as a Free Download to all Vectortuts+ visitors, and is just a fraction of the content you can access via our Premium Membership System.
Tuts+ run a Premium membership system that costs $9 a month (or $22 for 3 months!). Members have full access to the hundreds of full length tutorials, professional source files and periodic extra tutorials available from all our Premium Program sites!
To join today and begin downloading High Quality Vector Resources and Tutorials visit Vector Premium.