Over the next month I plan to write about various items photographers often forget about taking on a shoot. These gadgets can often make all the difference, and make your life much easier! This week we look at the simple portable reflector and how it can save you the problem of harsh shadows on a subject.
What is a Portable Reflector?
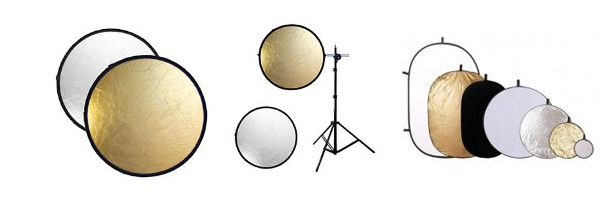
A portable reflector is simply an item that reflects light onto a object, but is compact enough to take anywhere. They are very useful in photography because you can easily give yourself more light to experiment with on a subject. Different coloured reflectors assist with changing the mood of an image.
An example of a use would be when shooting portraits outside. You may often see hard shadows across the face (often under the chin), but with the reflector you can reflect light onto these areas and instantly improve an image.
Are They Expensive?
Reflectors are really cheap to buy – costing as little as $15 for a double sided reflector. They often fold down into a smaller shape to make them easier to carry.
You will find they often come in a circle or square shape and there are many sizes for different styles of photography. For example, large objects such as cars need a bigger reflector than a plant. I would advice only picking the size you need – don’t go bigger just because you "might" need it in a few years time.
If you have no budget and would prefer to make your own, I’d recommend reading this tutorial.
Different Colours and Styles
Gold – Creates a warm feel to the image, best when shooting animals and people.
Silver – Just reflects the natural sunlight onto a subject. They do increase the specular highlights of your subject and will give the final image a higher contrast.
White – Again it simply reflects the natural light onto the subject, it is softer than silver and less likely to blind a model!
Translucent Fabric – Diffuses light and therefore it is perfect for outdoor portraits.
Black – Slightly saps colour from the image but produces a natural tone.
Blue – They are uncommon but they create pleasant cool tones.
You could try to buy a “5 in 1 reflector” which contains all the different types for any situation you find yourself in. These don’t cost much more, and save buying a number of seperate ones.
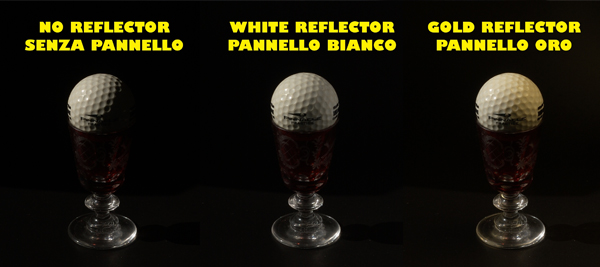
Image: Marco Bernardini
How to Use a Portable Reflector
General Photography:
- Get as close to the subject/person as you can without being in the shot.
- Its often a good idea to get a friend or co-worker to help hold the reflector.
- If you have no friends free to help, you can attach them onto a tripod.
- Aim for an even glow across the subject without any shadows.
- Pick the right reflector for the situation, think about the available light.
Outdoor Photography:
- Position the subject facing away from the sun, then reflect the sunlight coming from behind.
- When shooting people, focus on the shadows under the eyes and chin.
Indoor Photography:
- Use with an external flash or lighting gear.
- Bounce back light to illuminate the whole of an object.
- Hold at a 45 degree angle when shooting people.
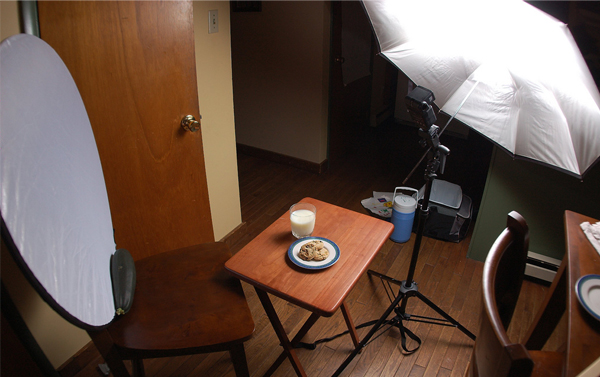
Image: John Flinchbaugh
A Few Other Uses!
These are other uses I have used reflectors for. These are un-common and you may not find them in any guide book!
- When dealing with smoke machines when filming a music video, I used the large shape to fan the smoke over the band.
- On a beach when changing a lens, I have often placed my items on top of a reflector so they don’t touch any dirt or sand.
- When working in hot conditions all day, a couple minutes with some makeshift shade from the reflector can do you good!
- They offer a good simple white background for portraits or objects.

How Do You Use Your Reflector?
Do you have any other related tips to share? Feel free to let us know in the comments!