ToonTrack EZdrummer is a great resource to obtain incredible drum sounds from a virtual instrument. But if we want to get more from this plug, we have to use the “multichannel function“, obtaining the possibility to mix and process each piece of our drum kit, like real “played“ drums. So let’s see how to do it.
Step 1 – Create Multioutputs EZdrummer Instance
First of all create a new EZdrummer instance, selecting “ Multioutputs“.
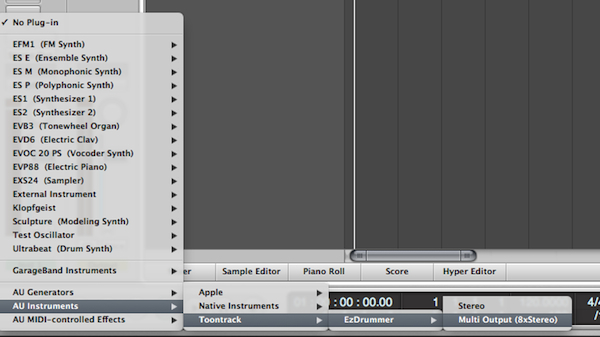
Now we’ll be able to divide our drum kit pieces in different channels.
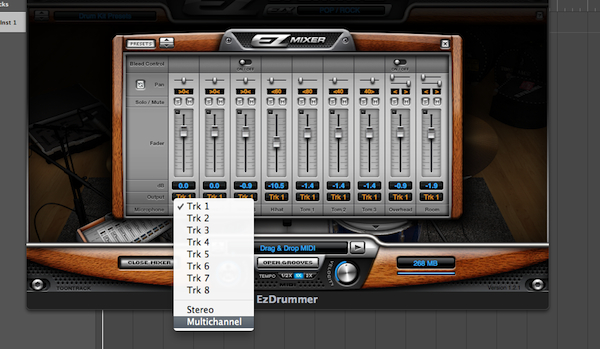
Step 2 – Choose Outputs for Each Piece of Drumkit
By opening the internal mixer of the EZdrummer plugin, click on the “Track Tab“, and choose
“Multichannel“ mode.
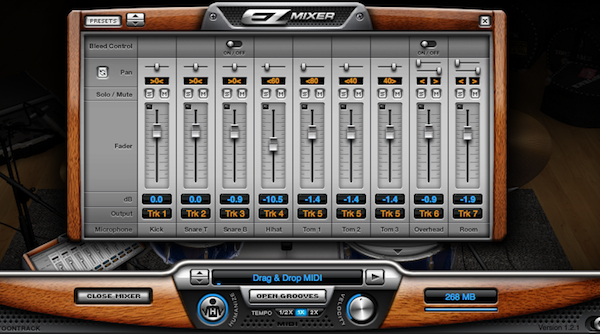
Step 3 – Check Drums Channel
How we can see, in multichannel mode each piece (except toms) has its channel, grouped in Channel 5. Remember that each EZdrummer kit has a particular channel, depending on the drum kit configuration.
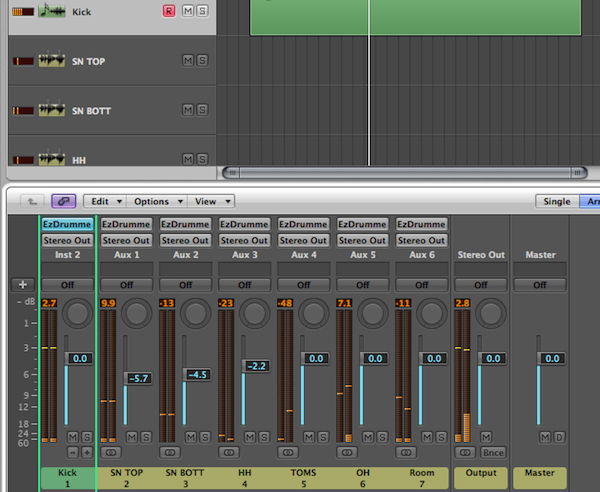
Step 4 – Expand EZdrummer Instance Channel on Logic 9 Mixer
This is the most important operation to do if we want to mix EZdrummer like a real drum kit. By clicking on the “+“ symbol at the bottom of the Instrument Channel, we have the possibility to expand the EZdrummer instance on different channels.
Step 5 – Creation of Auxiliary Channels that Contain EZdrummer Outputs
After you click the “+“ button, we see that Logic creates auxiliary channels, depending by the number of outputs of EZdrummer. Now we start to see our Multichannel Drum.
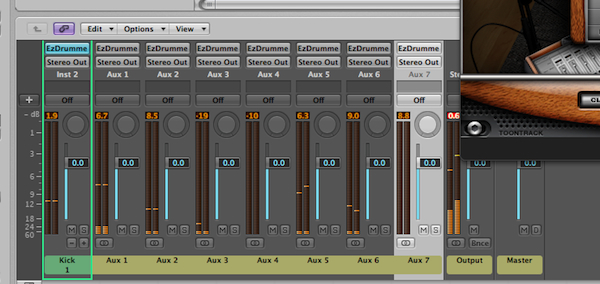
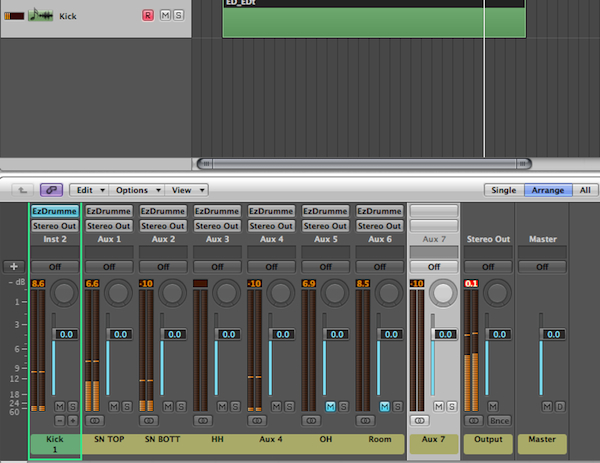
Step 6 – Rename Aux and Check Outputs
At this moment we’re able to rename each aux, dividing each piece of our drum kit like real drums. Check each sound and order your kit.
This is the default order of EZdrummer Studio Kit: Kick / Snare Top / Snare Bottom / HH / Toms / OverHeads / Room.
Obviously each kit has different outputs.
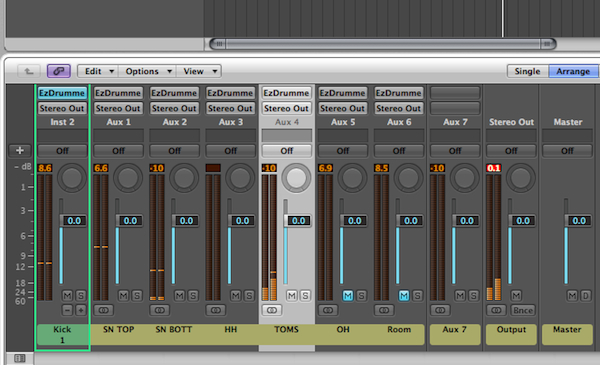
Step 7 – Check our Toms
As we can see, each piece (except toms) has its own channel, grouped together on Channel 5 of the EZdrummer mixer. In this case on Aux 4 of Logic 9. Check the auxiliary by playing each tom, and rename it.
Logic also creates by default Aux 7 (as we can see) but in this case we can delete it. It is used on other drum kit of EZdrummer for the “CompRoom” channel, that is not present on Studio Default Drumkit. So, pass over it.
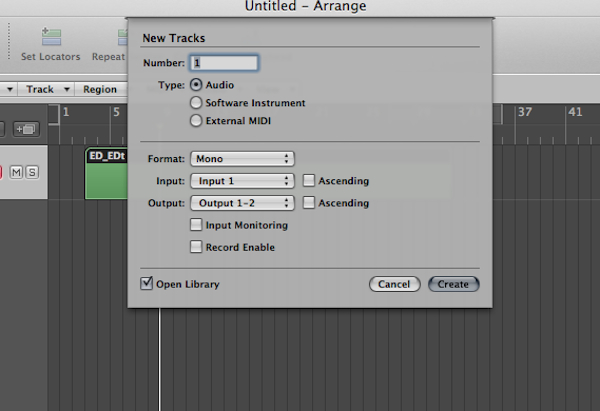
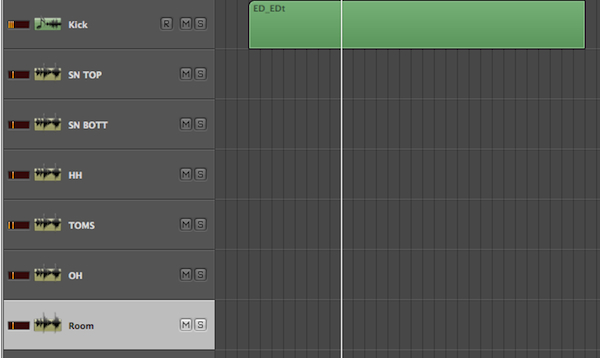
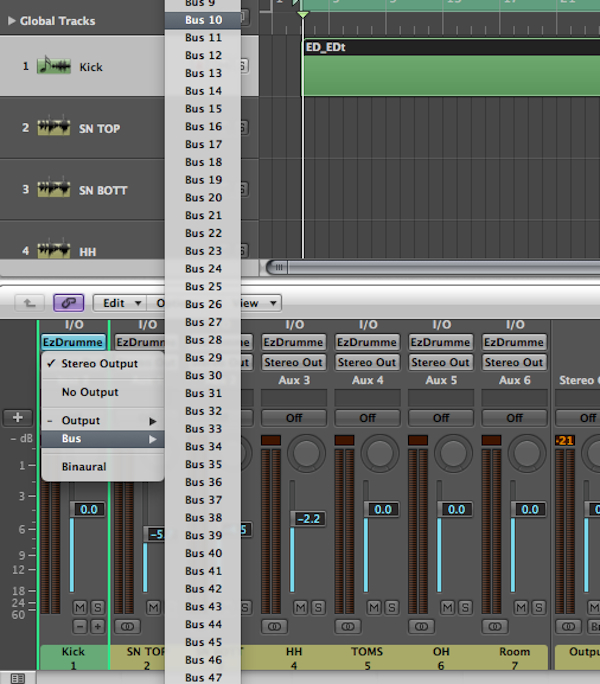
Step 8 – Create our Channels on the Arrange Windows of Logic 9
Our drum is ready, but now we want to see it also on our arrange window, to make operations like using a real drum. So close the Mixer Window and create a new audio ( remember – AUDIO ) track. Don’t worry about which type of track because we use it only to reassign our Auxiliary Channel.
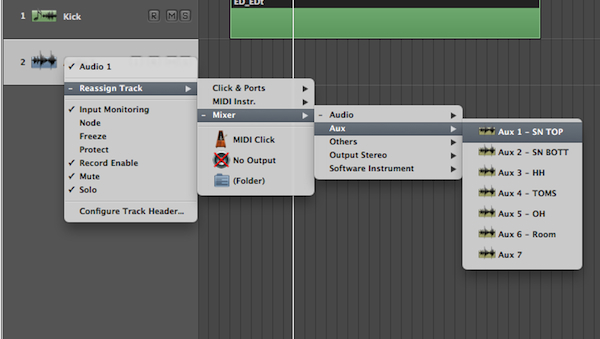
Step 9 – Reassign Audio Track to EZdrummer Instance Channels
Now we have to reassign our new audio track, Right click on it and choose
“ Reassign Track “ – “ Mixer “ – “ Aux “ and choose our Kit Channels.
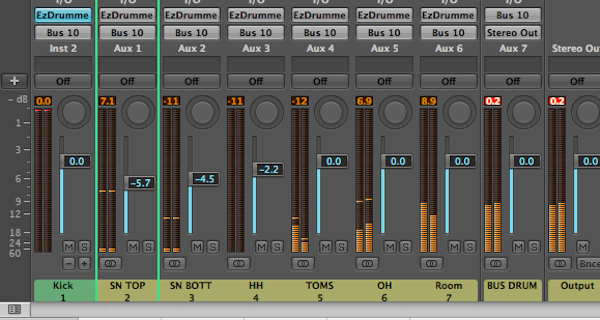
Step 10 – Repeat for Each Channel of our EZdrummer Kit
Very simple, repeat this operation for each channel of our drumkit and we’re ready to mix our virtual “real “ drum kit, just like an audio file.
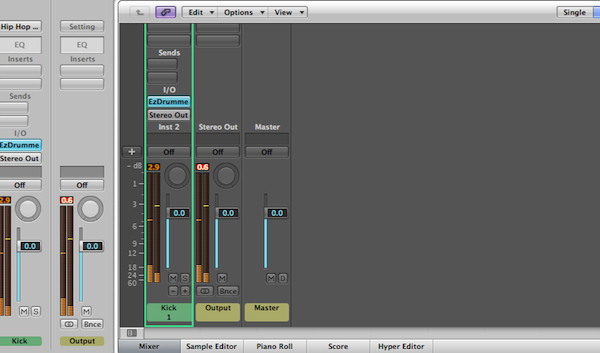
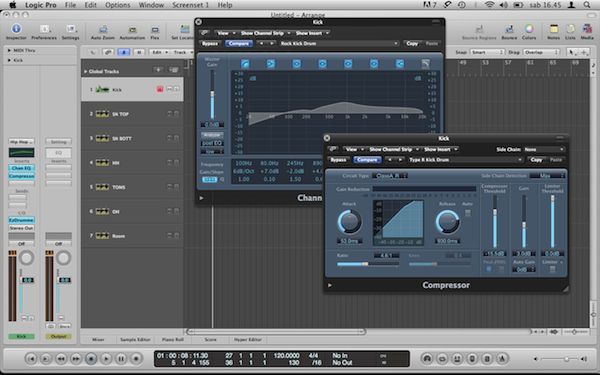
Step 11 – Start to Set Our Drum with EQ and Compression – First Channel – Kick
And here we are! Now start to add to our drum as we want. Remember the instrument track now contains only Kick Channel, so add EQ and compression as you like. Listen and check it, and pass over.
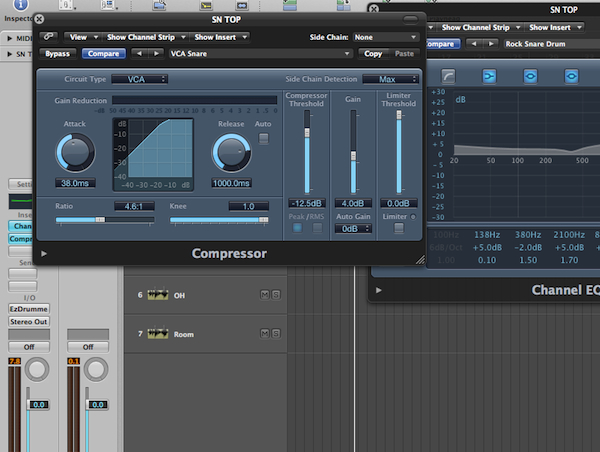
Step 12 – Snare and All the Rest
Go now on Snare Top channel, and process it as you like. Add EQ and compression. Finally you can mix you drum like a real pro, so enjoy yourself by processing each channel.
Step 13 – Levels on Mixer
Remember that now you’re using a real drum kit, so after you complete your operations on the Channel Strip, check and mix by using faders on the Mixer Window. This will help give you the feeling of a played drum.
Step 14 – Group your drum on a Stereo Bus to Control It On Each Moment By One Fader
Busses are very important on mixing a track, this because you can control your complete kit with one fader, without altering your channels balance. A useful trick is to put a limiter on your drum kit bus to pump it, but also to control it on the entire mix. So click on each channel’s output and assign it on a stereo bus.
Step 15 – Check and Rename Bus
Now each channel of your drum kit is assigned to one stereo bus. Play the drum part and check it. Rename your bus as “Drum“.
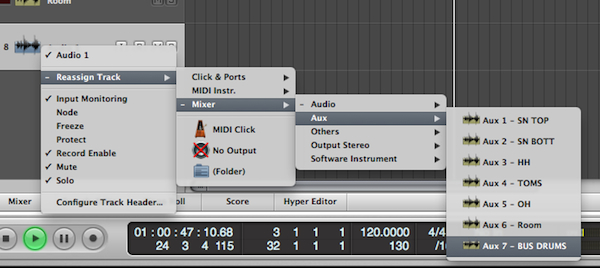
Step 16 – Display Drum Bus on Arrange Window
As for the drum’s channels, we want to display our bus on the Arrange Window, to control and change it in real time. So create another audio track

Step 17 – Assign Track to Bus
As in Step 9, assign it to Bus Drum Aux.
Step 18 – Clean Your Arrangement
It’s very important to clean and order your Arrange Window. So help yourself with colours and other “hidden“ function of Logic Pro.
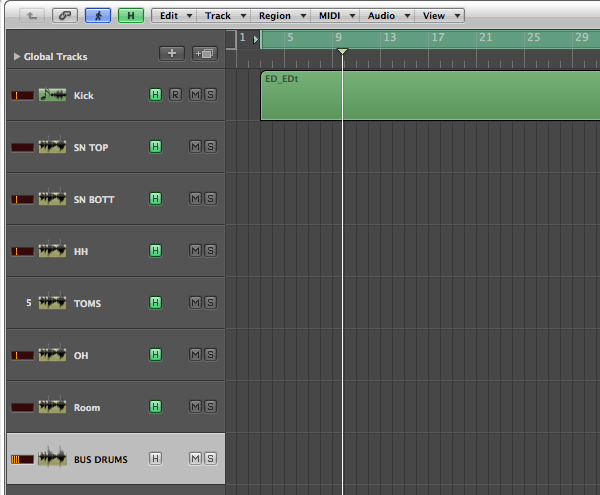
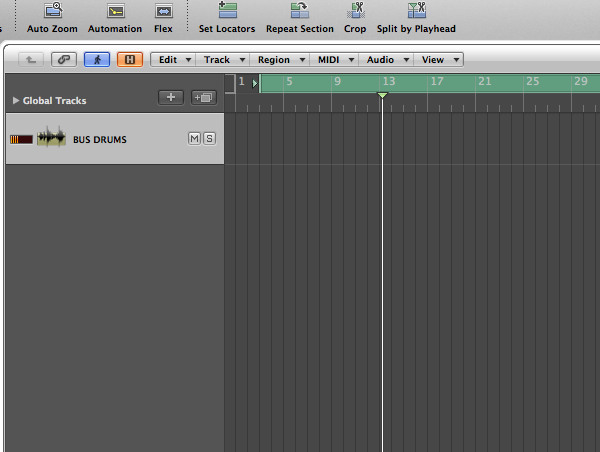
Step 19 – Check your Space
Click on H button of each track but Drum Bus. Now Logic Pro Arrange is clean, on your Bus Drum Aux you can control each channel of your drum kit. Just reclick the H button (displayed in orange ) to view each track again.
Step 20 – Make Your Choice and Enjoy your Drum Kit
Now you have all elements to mix, process, destroy (if you want) your drum kit. Make you choice of EQ, compression, and everything you can imagine. Give attention to velocity, length and quantisation of your MIDI track.
{excerpt}
Read More