Throughout the course of this two part rendering tutorial you will learn how to use the powerful render layers inside Maya 2010, and also how to output them and prepare them for compositing. In the second part, you will see how you can use After Effects to composite all of those rendered layers to achieve a more realistic look with custom depth of field.
This tutorial is Day 2 in a series. Go to Day 1.
Step 1
To continue from the last step of the previous tutorial you need to have 150 images rendered in the ambient occlusion and beauty pass folders, and 300 overall in the zdepth folder. Alternately, you can simply use the images provided in the Project Files download.

Step 2
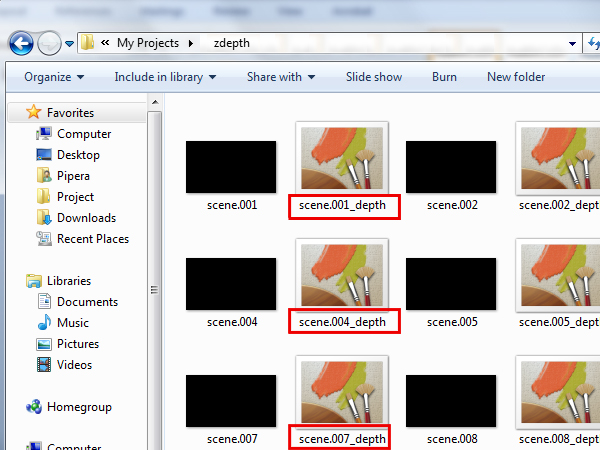
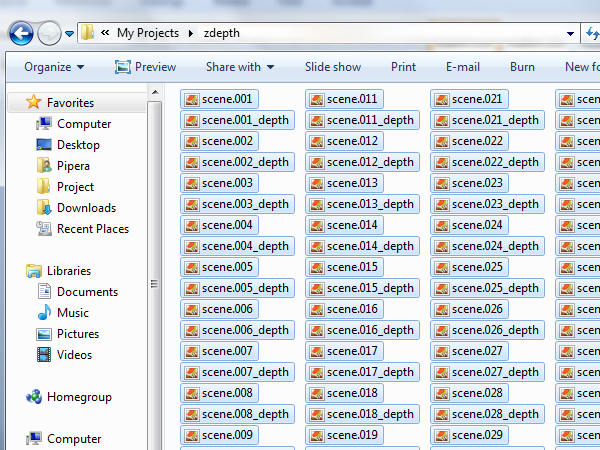
Open the zdepth folder and you’ll see two types of files. One is a TIFF format with no information in it, and the second one is TIFF format too, but with the zdepth information contained in it. You can easily see which one is the depth one because there is ‘_depth’ written at the end of every frame. You need the ones with the depth information.
Step 3
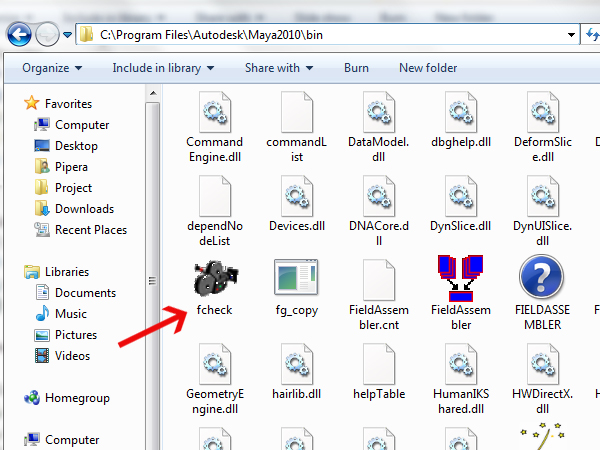
To open the files you need a viewer called fcheck which comes pre-installed with Maya. Go to the installation directory of Maya (usually is – ‘C:\Program Files\Autodesk\Maya2010’), then go to the bin folder and scroll down until see the fcheck program. Open it.
Step 4
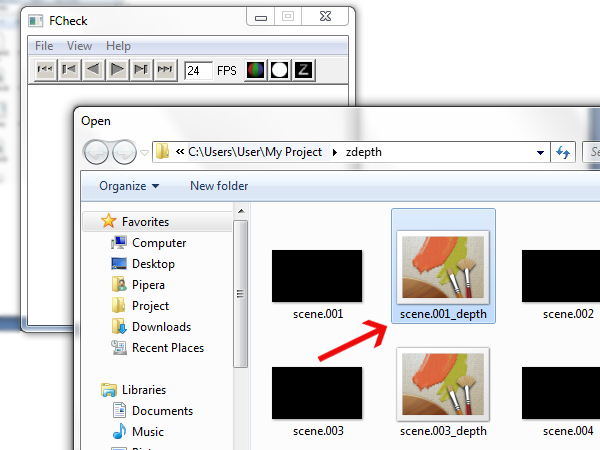
Now to check if the zdepth information is ok, open the first file from the zdepth pass. Go to ‘File -> Open Image’, navigate to your zdepth folder, and click on the first image that ends with ‘_depth’.
Step 5
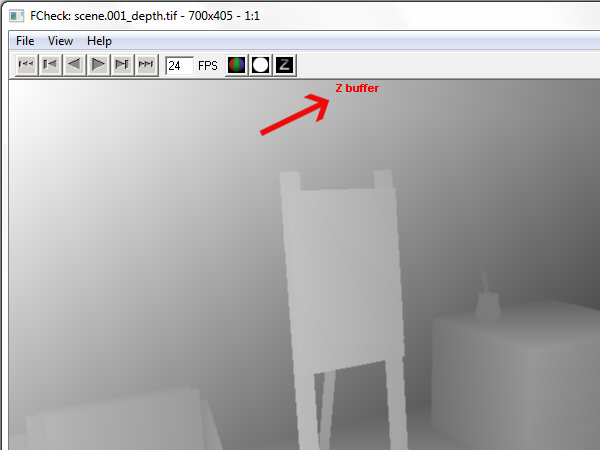
If everything is okay you should see a grayscale image of the zdepth pass and on top of the image there should be an indicator that you’re in the Z buffer channel.
Step 6
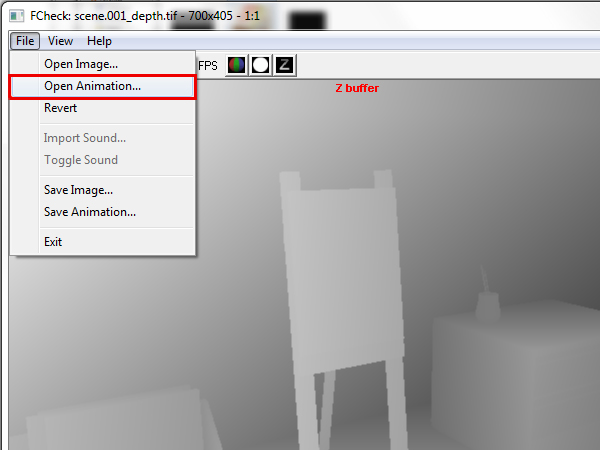
Go to ‘File -> Open Animation’ to load the whole render animation of the zdepth layer.
Step 7
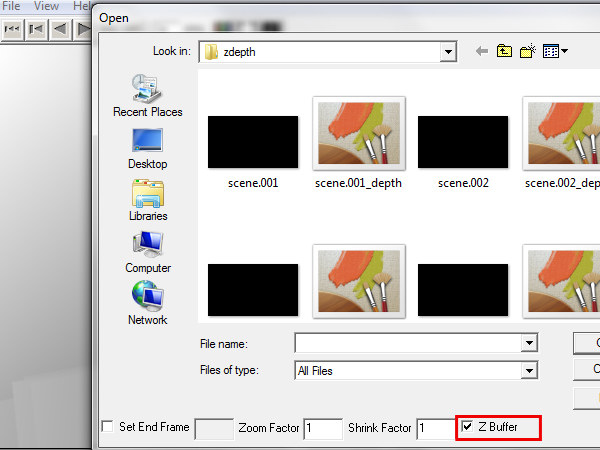
In the window that shows up, make sure that ‘Z Buffer’ is checked, otherwise you won’t be able to open your animation with the embedded zdepth channel.
Step 8
Open the fist file that contains the zdepth pass.

Step 9
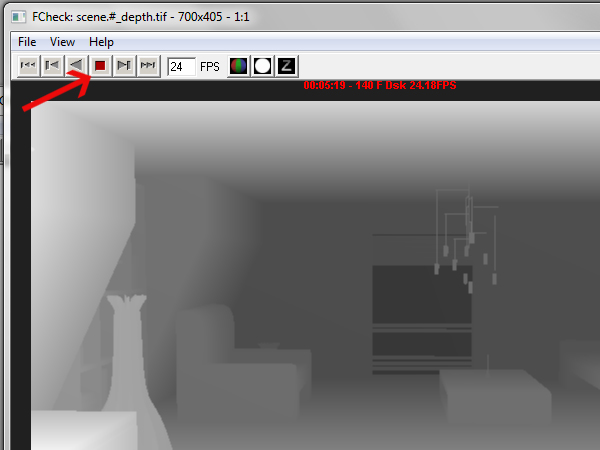
Your animation should now start to play. Press the ‘Stop’ button so that the program doesn’t take more CPU power.
Step 10
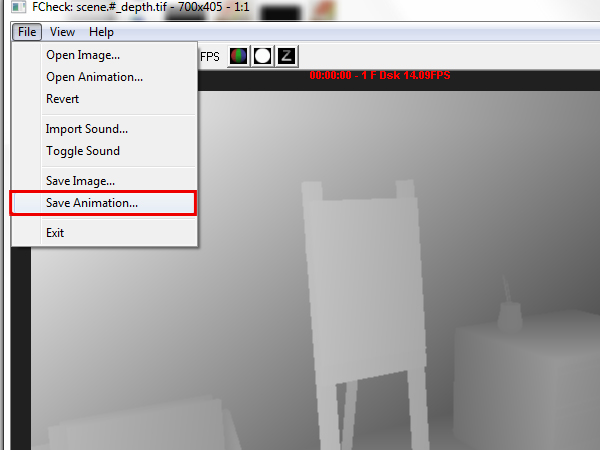
To export your zdepth animation to a TIFF that After Effects can read, go to ‘File -> Save Animation’.
Step 11
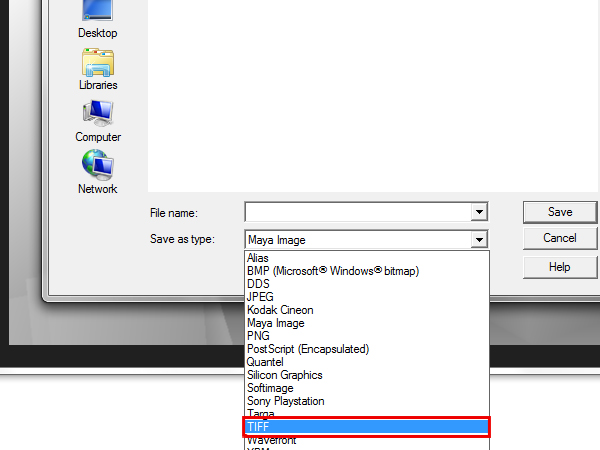
Select the ‘TIFF’ option from the ‘Save as type’ menu.
Step 12
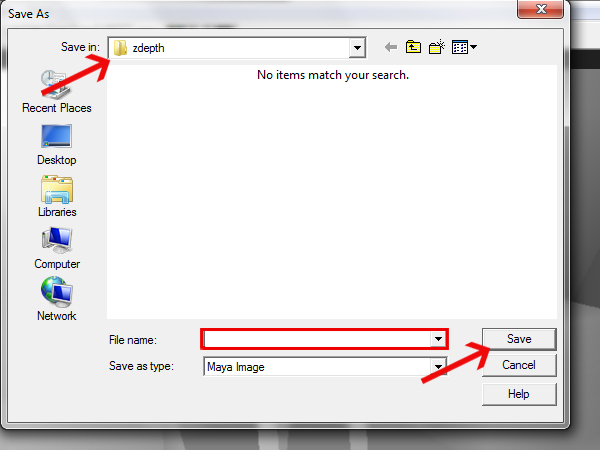
Make sure that you’re saving in the zdepth folder, and for the ‘File name’ type ‘zdepth_’. Click ‘Save’.
Step 13
Now delete all of the files from the zdepth folder, except the ones that you converted (which start with ‘zdepth_’).
Step 14
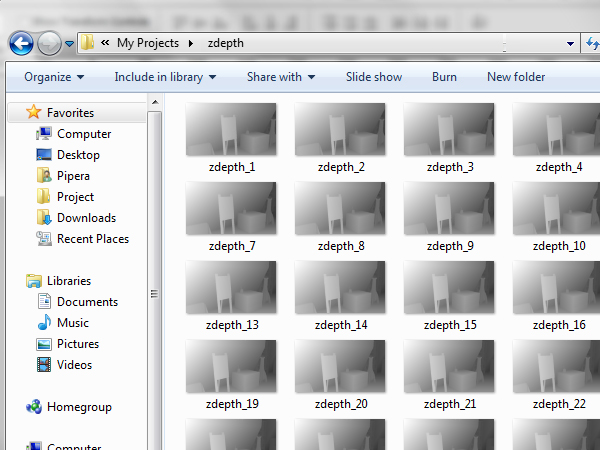
You should now have only the ‘zdepth_’ files in your zdepth folder.
Step 15
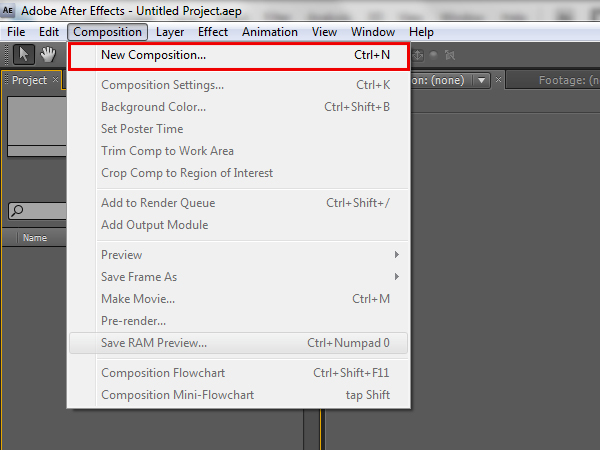
Run After Effects and go to ‘Composition -> New Composition’. This will make a composition that you can start adding the rendered layers to.
Step 16
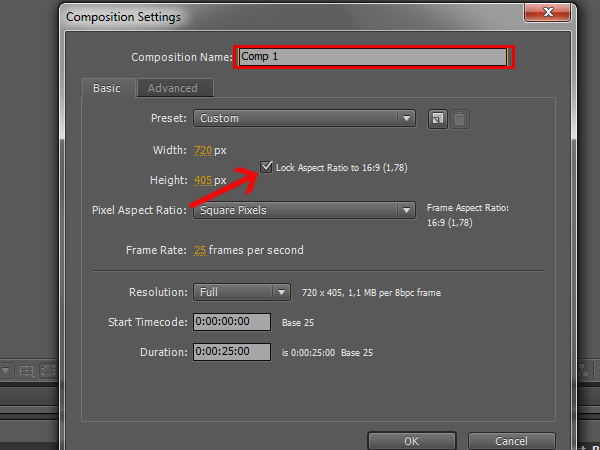
In the window that pops up, change the ‘Composition Name’ to ‘compositing_layers’. Then make the resolution of the composition the same as that of the rendered layers. To do this, un-check the ‘Lock Aspect Ratio’ checkbox.
Step 17
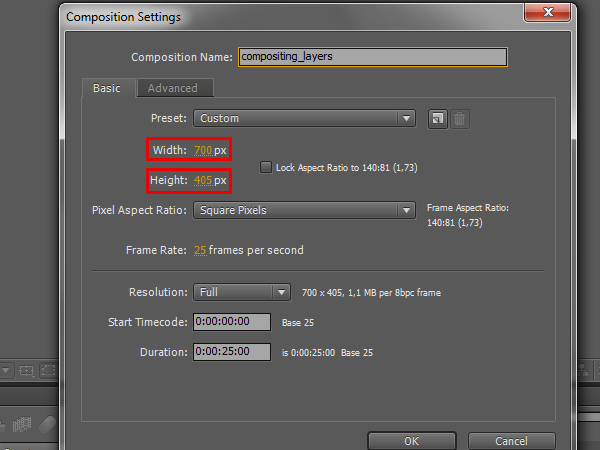
Now change the ‘Width’ to 700 and the ‘Height’ to 405, so it matches the resolution of the rendered images.
Step 18
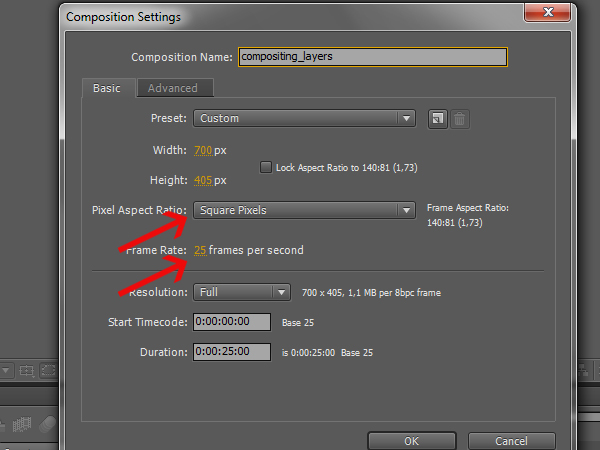
Also, make sure that ‘Pixel Aspect Ratio’ is set to ‘Square Pixels’, and the ‘Frame Rate’ is 25. This is so the video won’t have any stretching and will run smoothly.
Step 19
Now you need to set the duration of the composition. To do this, simply divide the total number of frames by the number of frames per second that your frame rate is set to. In this case you have 150 frames, and a frame rate of 25 frames per second, so 150 divided by 25 equals 6 seconds long.

Step 20
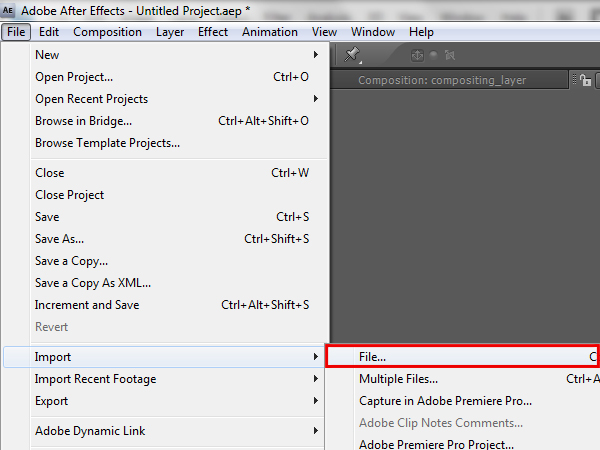
To start importing the render layers, go to ‘File -> Import -> File…’.

Step 21
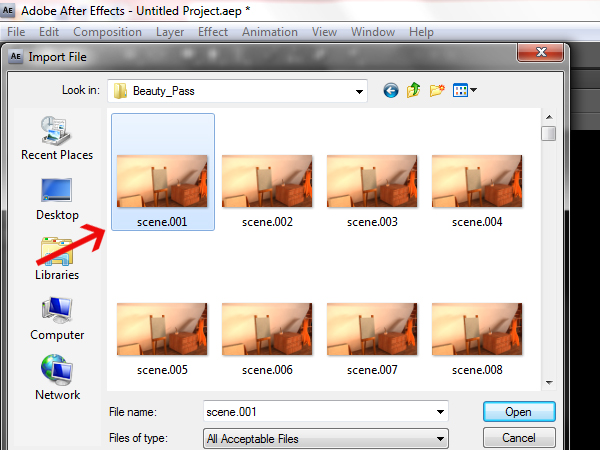
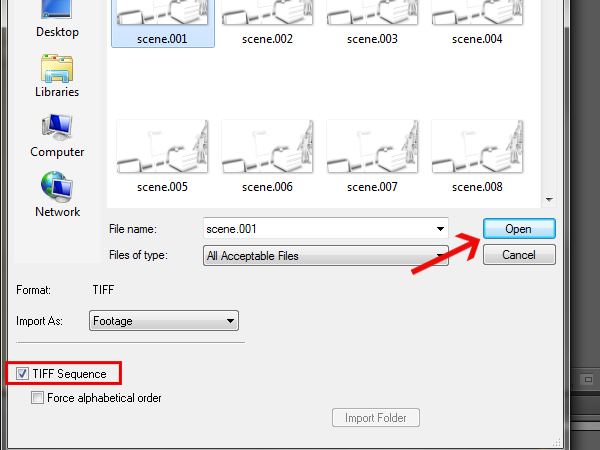
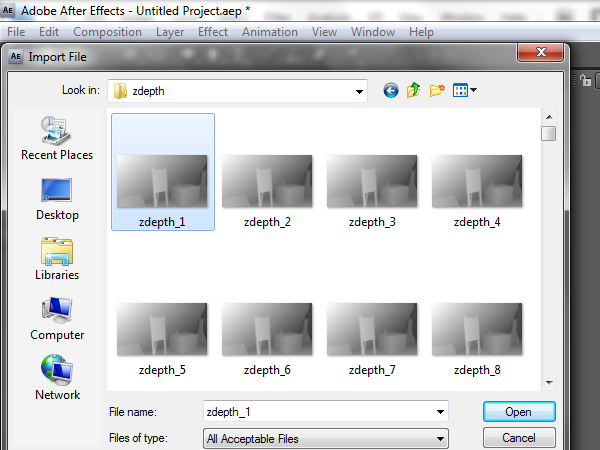
Locate your ‘Beauty_Pass folder and click on the first image of the sequence.
Step 22
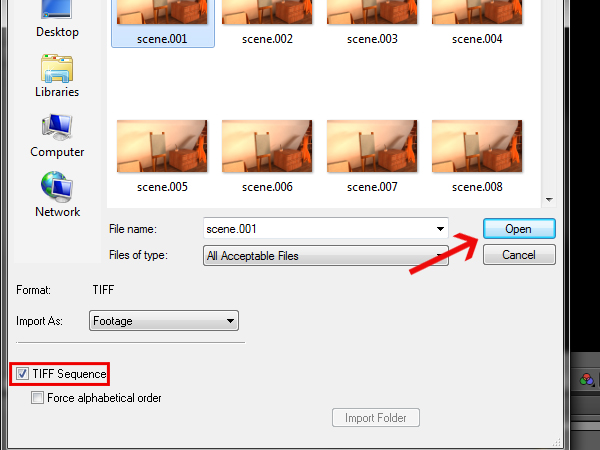
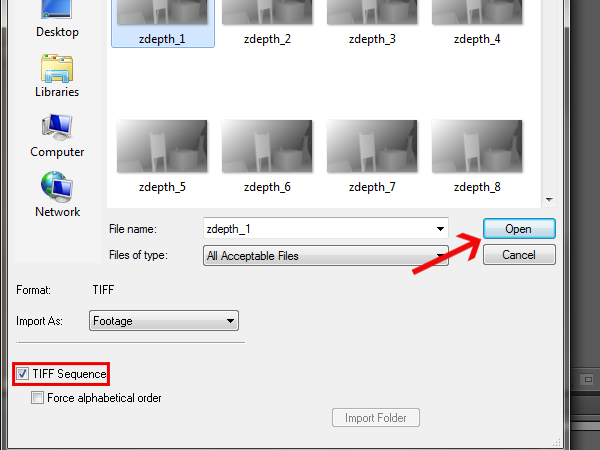
Check the ‘TIFF Sequence’ checkbox, so that it’ll load all of the frames in the folder at once, and then click ‘Open’.
Step 23
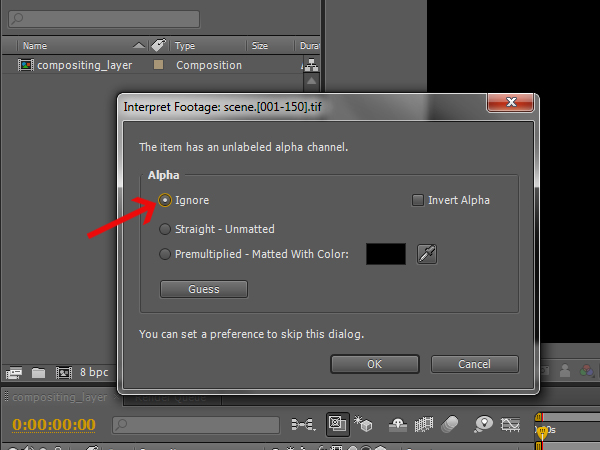
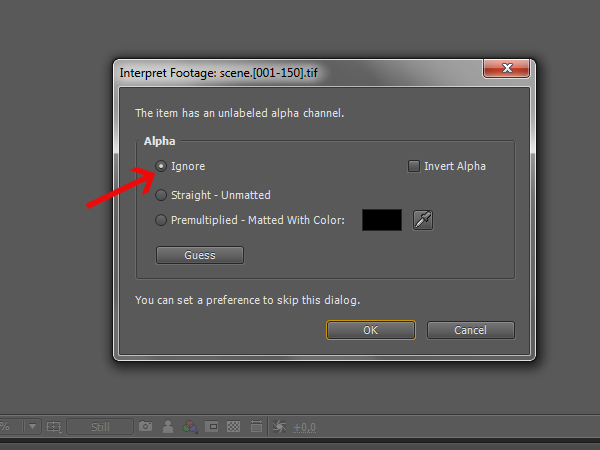
In the window that pops up, select the first option ‘Ignore’, because you don’t have an embedded alpha channel in your sequence.
Step 24
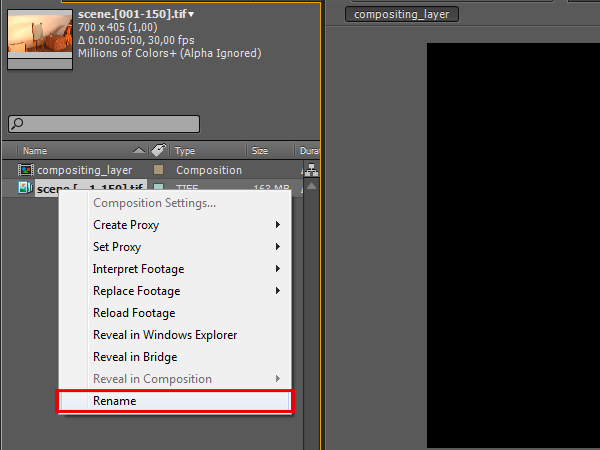
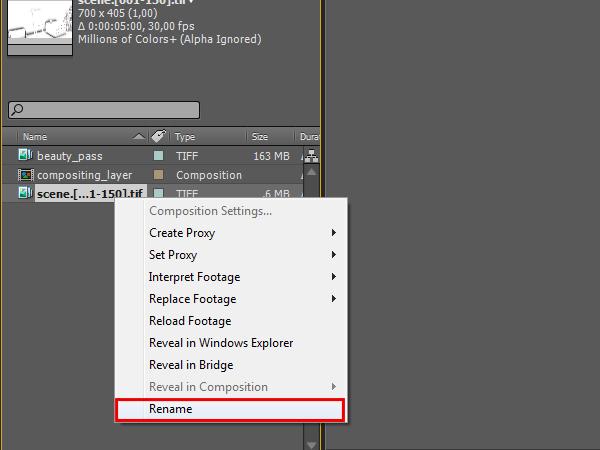
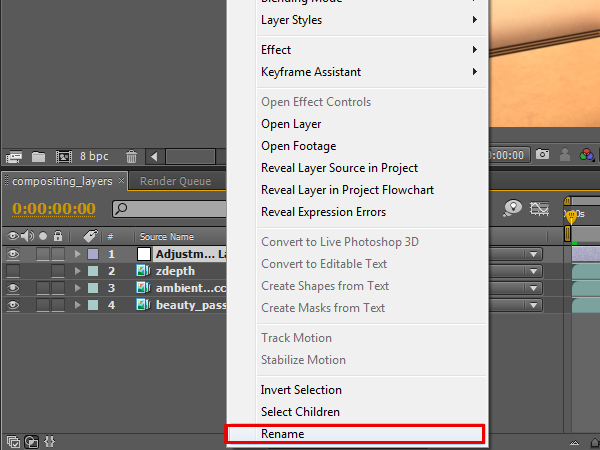
Now right click onto the newly imported sequence, click ‘Rename’, and then rename the sequence to ‘beauty_pass’.
Step 25
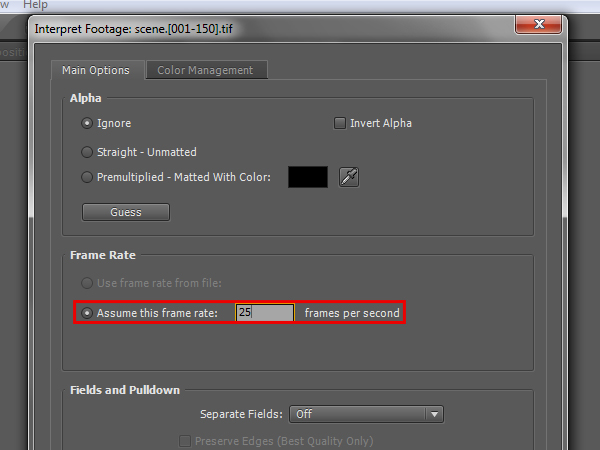
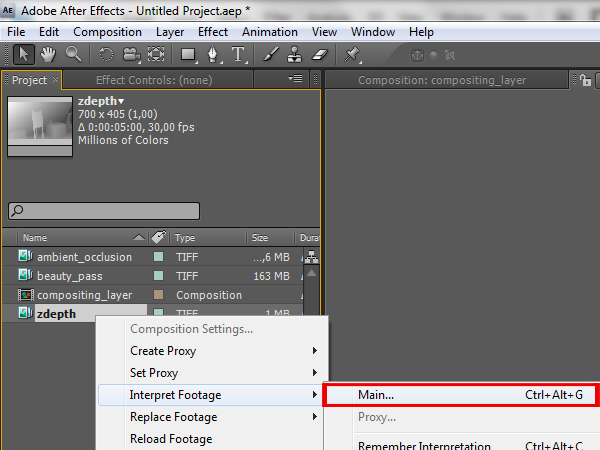
Right click it again and go to ‘Interpret Footage -> Main…’.
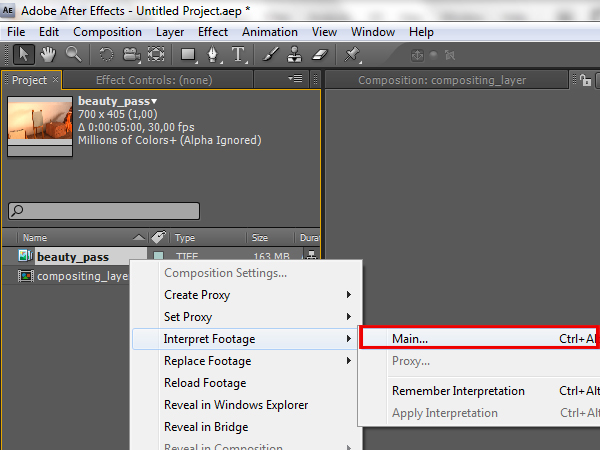
Step 26
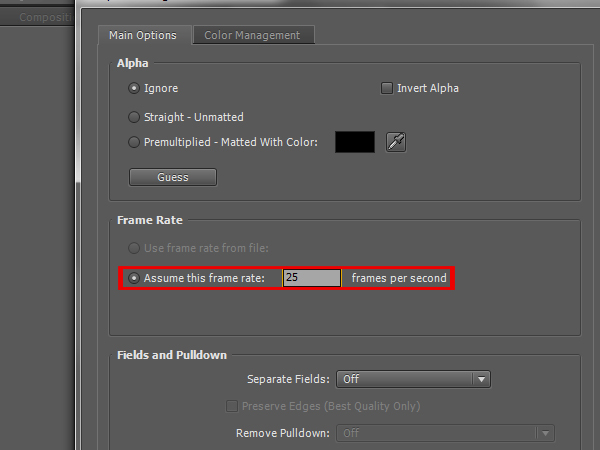
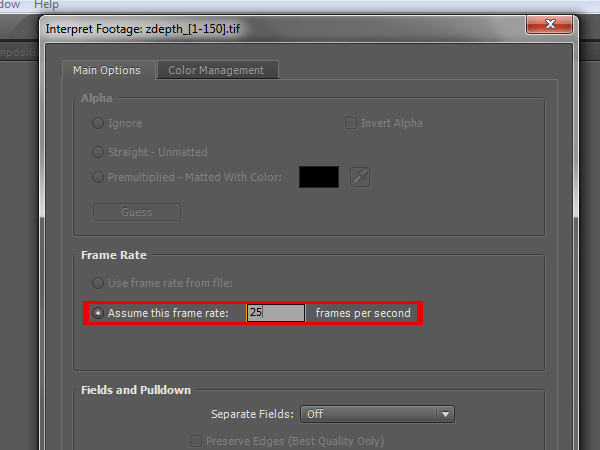
Here you need to set the ‘Assume this frame rate:’ attribute to 25 frames, otherwise the footage will be cutoff when you put it into the composition.
Step 27
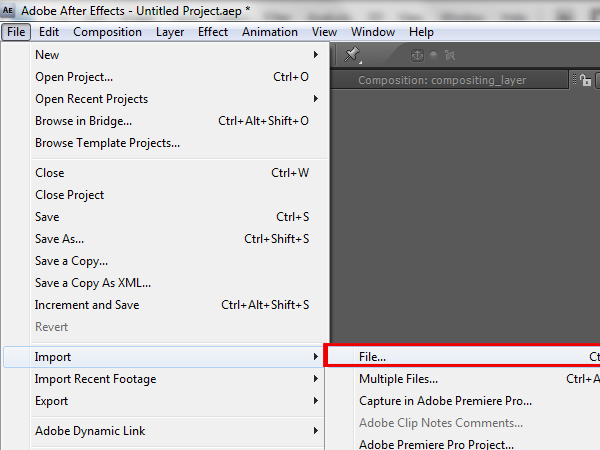
We will repeat this procedure for the remaining render layers. Go to ‘File -> Import -> File…’.
Step 28
This time navigate to your ‘Ambient_Occlusion’ folder and select the first frame.
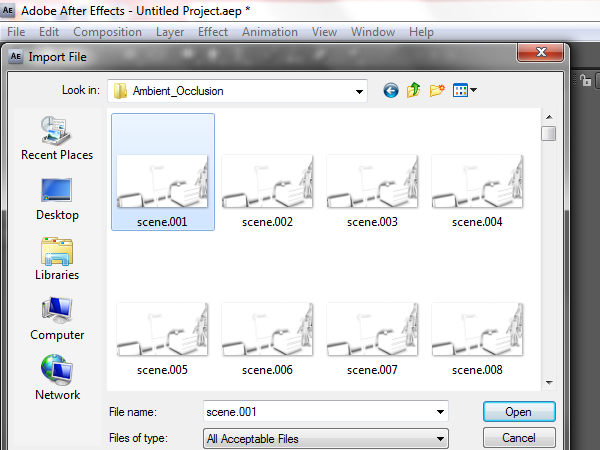
Step 29
Again, make sure that ‘TIFF Sequence’ is checked, and then click ‘Open’.
Step 30
Set the alpha to ‘Ignore’ again.
Step 31
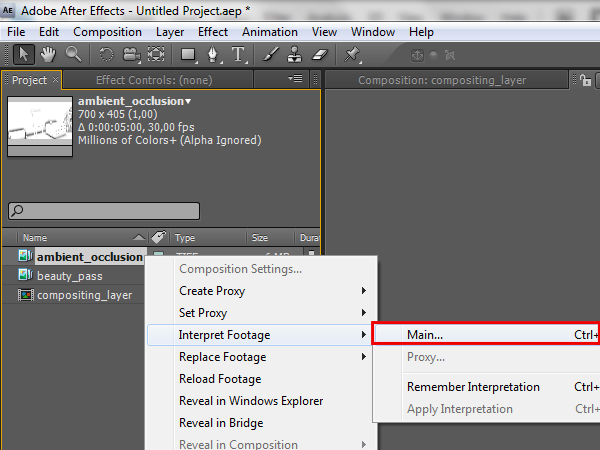
Right click on the sequence, click ‘Rename’, and this time rename it to ‘ambient_occlusion’.
Step 32
Right click on it again and go to ‘Interpret Footage -> Main…’.
Step 33
Set the ‘Assume this frame rate:’ to 25 again.
Step 34
Now to import the final render layer. Again go to ‘File -> Import -> File…’
Step 35
This time go to your ‘zdepth’ folder and select the first image.
Step 36
Check ‘TIFF Sequence’ and then open the image.
Step 37
Right click on the imported sequence, click ‘Rename’, and rename it to ‘zdepth’.

Step 38
Right click and select ‘Interpret Footage -> Main…’.
Step 39
Set the ‘Assume this frame rate:’ to 25 frames per second.
Step 40
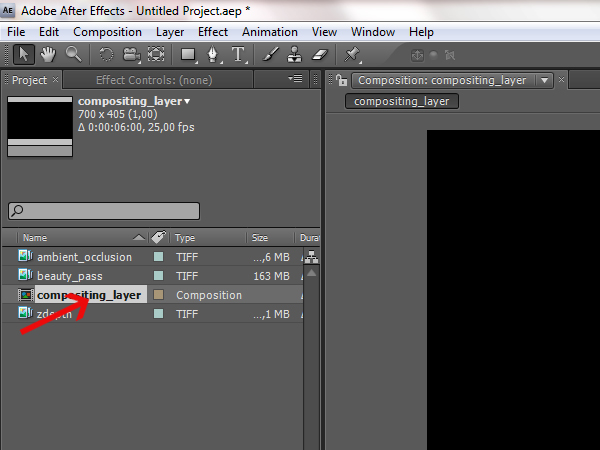
Now double click on the ‘compositing_layers’ composition to open it.
Step 41
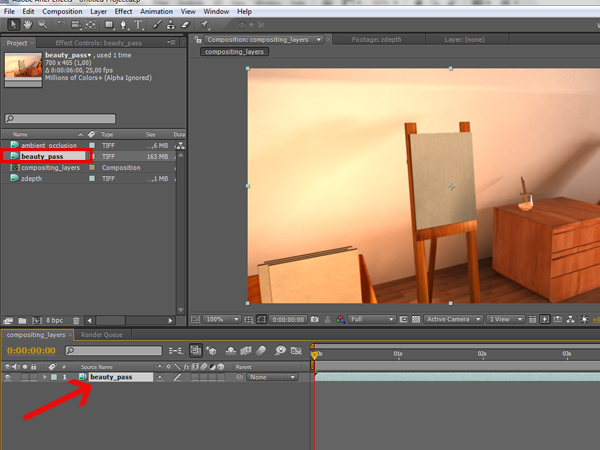
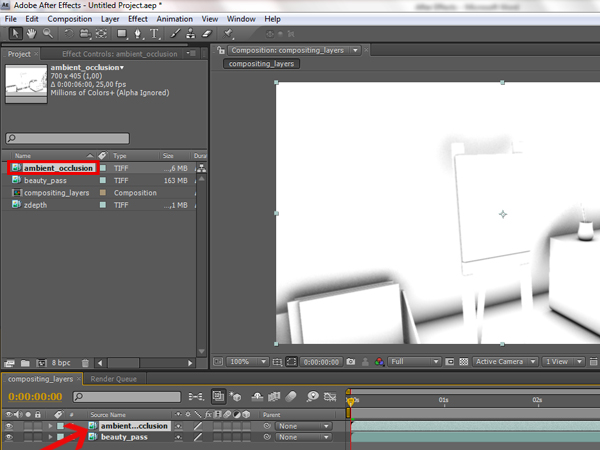
Click and hold on the ‘beauty_pass’ sequence, and drag it to the layers panel to import it in the ‘compositing_layers’ composition.
Step 42
Then click, hold, and drag the ‘ambient_occlusion’ sequence to the layer panel, but make sure that it sits on top of the ‘beauty_pass’ layer.
Step 43
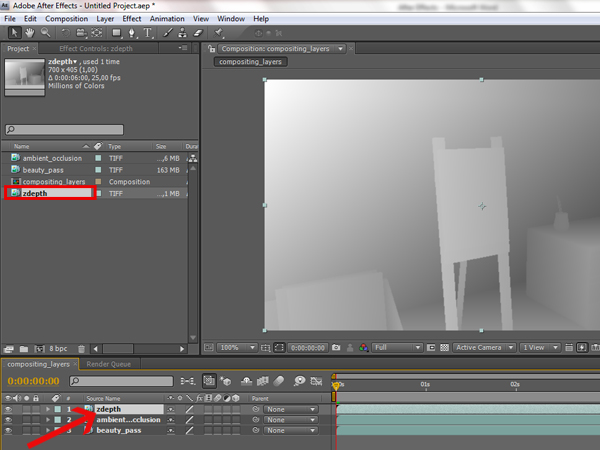
Click, hold, and drag the ‘zdepth’ sequence this time, and again place it on top in the layer panel.
Step 44
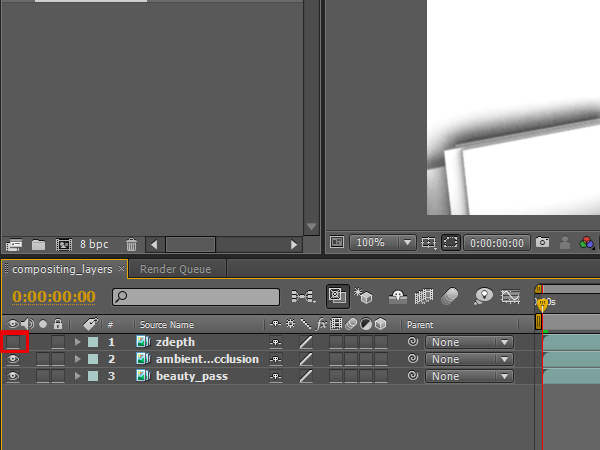
Un-check the layer visibility option for the ‘zdepth’ layer, because it is going to be used as information for the depth of field to calculate which objects are going to be blurred and which are not.
Step 45
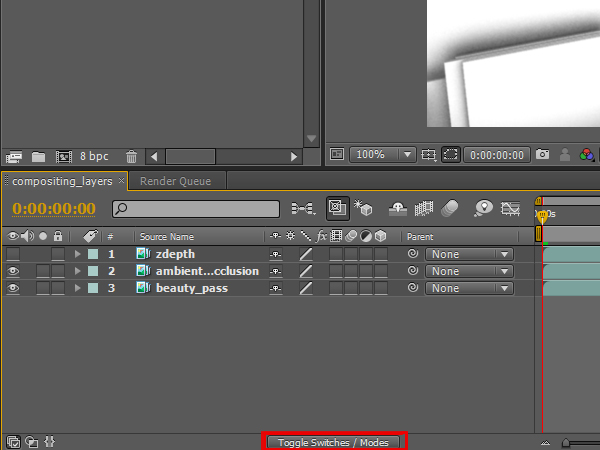
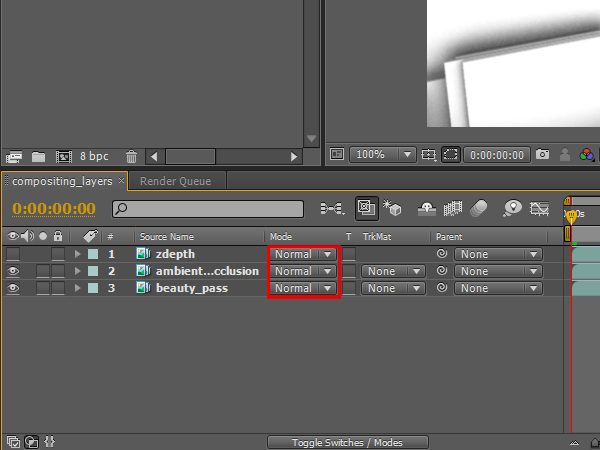
Press the ‘Toggle Switches / Modes’ button, so you can see the layer blending options.
Step 46
Now you should be able to see the blending options for the layers, and that all of them are set to normal.
Step 47
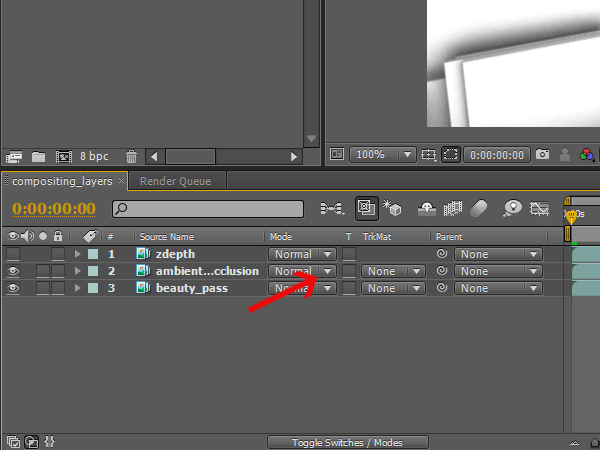
Click on the blending options for the ‘ambient_occlusion’ layer.
Step 48
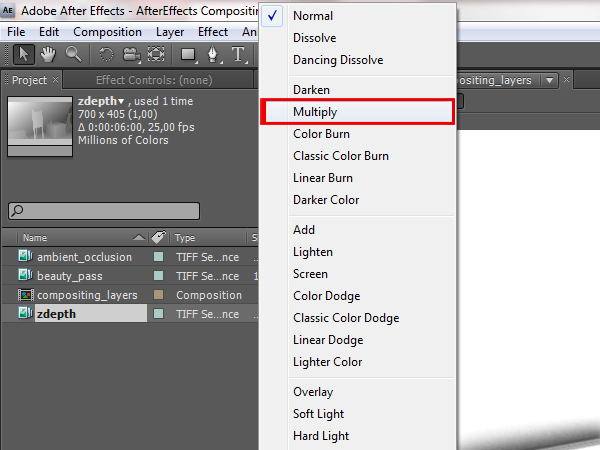
From the menu that comes up, select the ‘Multiply’ option, so that the white color from the ambient occlusion becomes transparent.
Step 49
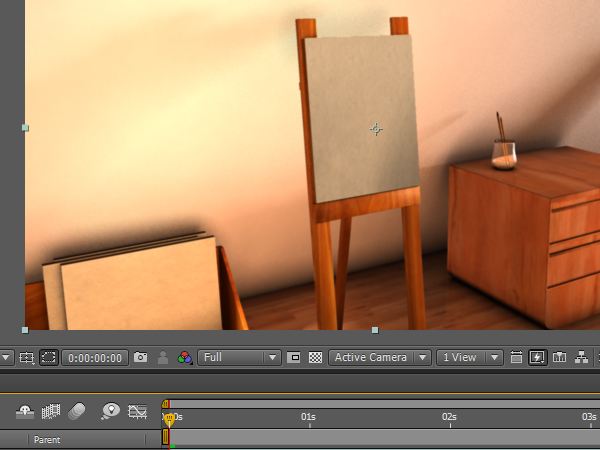
Now, only the shadow part of the ambient occlusion layer should be visible. The image should look much better already, but in this case the dark areas are a little bit too strong.
Step 50
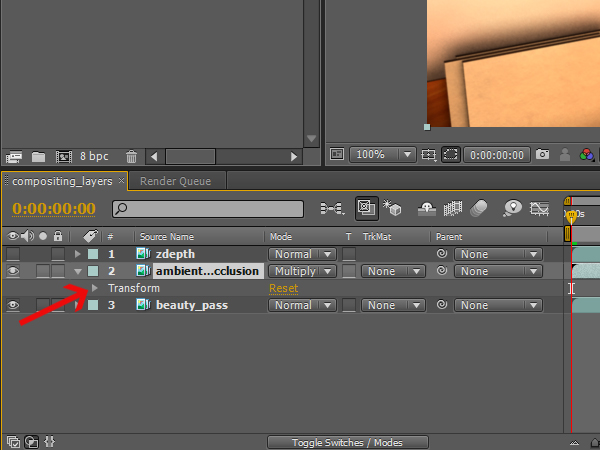
To make the AO effect a little less visible, you will need to change the opacity of the ‘ambient_occlusion’ layer. Click on the arrow next to the color tag of the layer.

Step 51
You should see the ‘Transformation’ attributes tab for the layer. Click its arrow to expand it.
Step 52
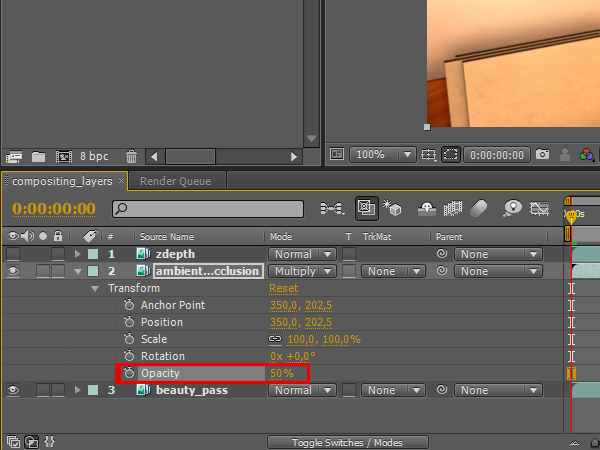
Then click on the opacity attribute, and change it to 50. Now the effects should be much more subtle.
Step 53
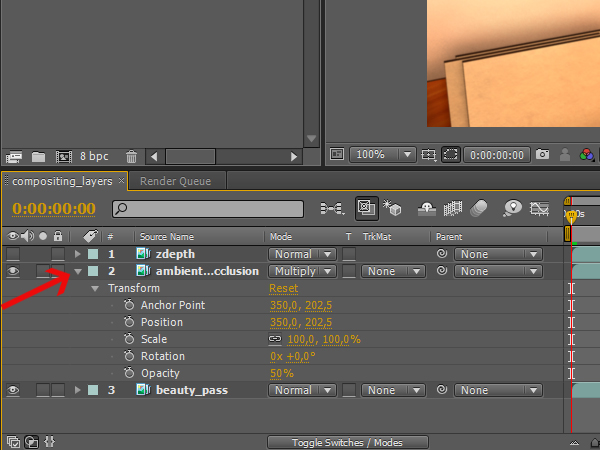
You can now click on the arrow for the ‘ambient_occlusion’ layer to close its attributes.
Step 54
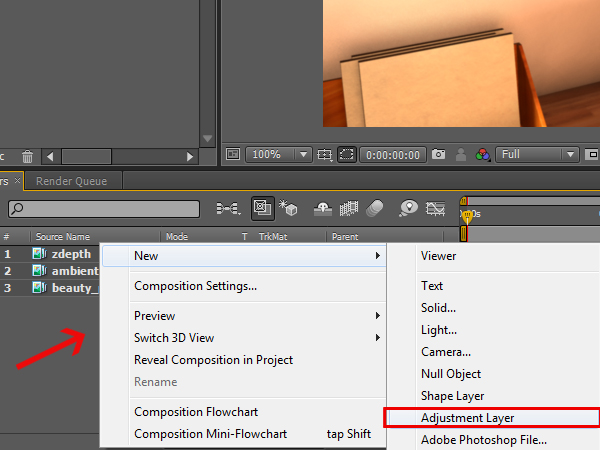
Now you need to create an adjustment layer, so that the zdepth pass can be applied onto all of the layers. Right click on the layer panel, and select ‘New -> Adjustment Layer’.
Step 55
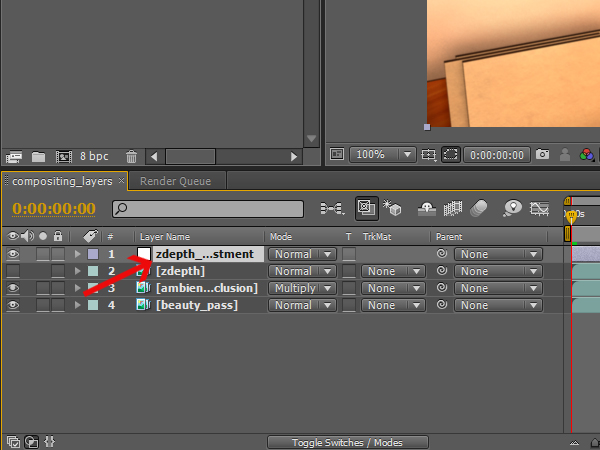
Right click on the new adjustment layer, select ‘Rename’, and rename it to ‘zdepth_adjustment’.
Step 56
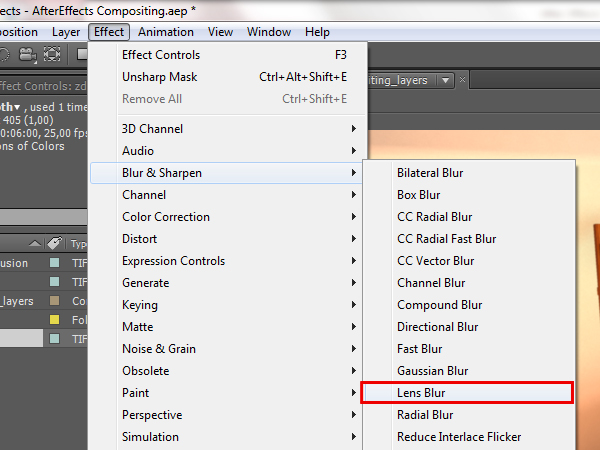
Select the ‘zdepth_adjustment’ layer.
Step 57
Go to ‘Effects -> Blur & Sharpen -> Lens Blur’. This will add the depth of field effect to your adjustment layer, which means it will be added to all of the other layers as well.
Step 58
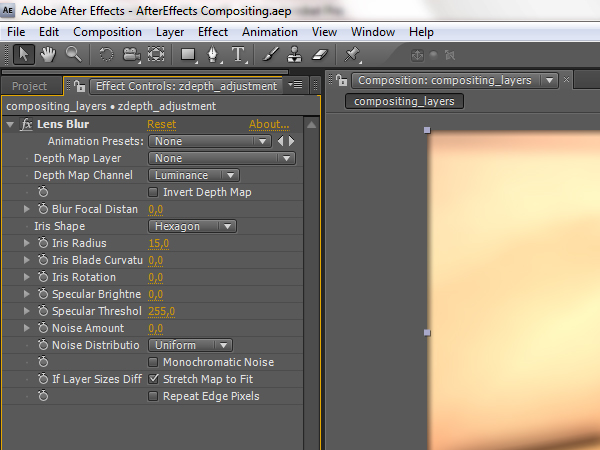
You should be able to see the effects controls in the top left of the screen. If not, right click on the ‘zdepth_adjustment’ layer, and select ‘Effects -> Effects Controls’.
Step 59
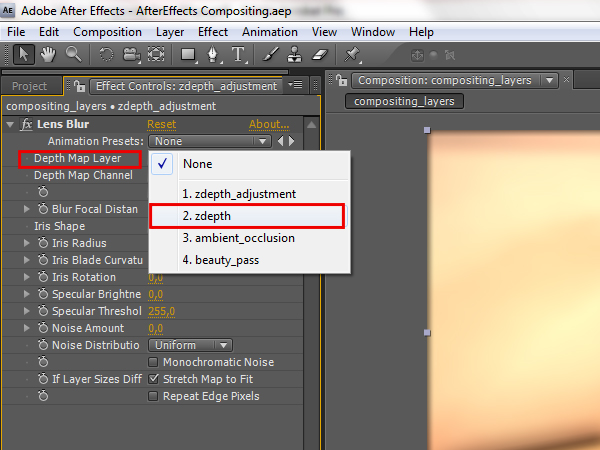
Now you need to select from which layer the depth information should be coming. Naturally, we want it to be coming from the ‘zdepth’ layer, so left click on the ‘Depth Map Layer’ attribute, and select the ‘zdepth’ layer.
Step 60
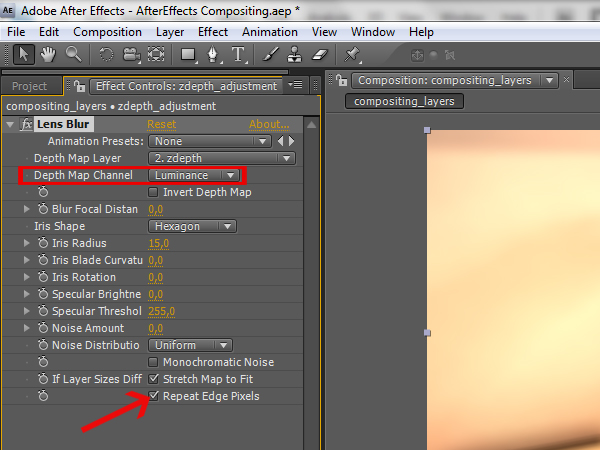
Make sure that the ‘Depth Map Channel’ is set to ‘Luminance’, so it will get the information from the zdepth layer correctly. Also check the ‘Repeat Edge Pixels’, so you won’t get any artifacts around the corners of the image.
Step 61
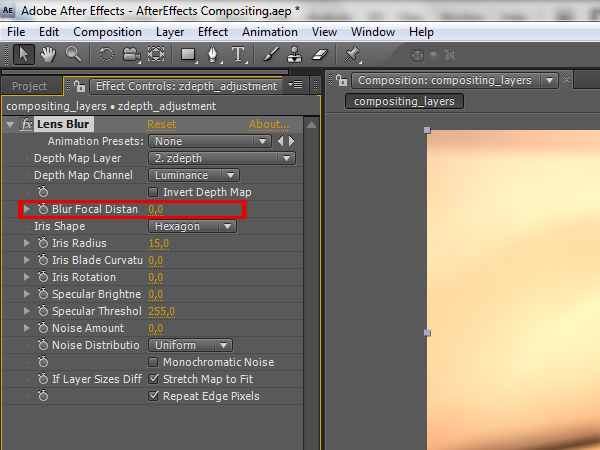
‘Blur Focus Distance’ is the main attribute that will help you adjust and animate the depth of field. Every step of the value represents different a color value of the grayscale zdepth image. So when you put a value for the attribute, only certain objects that correspond to that value in the grayscale range will be affected. Which values you will use depends on how wide is your grayscale range is, so it’s better to check first which values correspond best to your current situation.
Step 62
For the first frame, let’s say that you need the painting canvas to be in focus. The corresponding value for that would be 170, so put that in the ‘Blur Focus Distance’.

Step 63
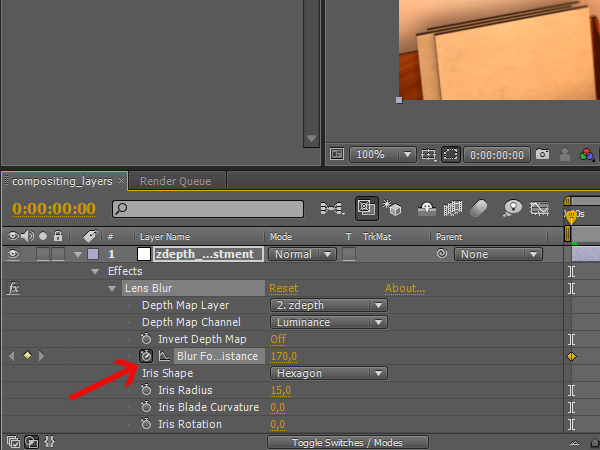
When the first frame is ready, you can start animating the depth of field effect. First you will need to expand the ‘zdepth_adjustment’ layer, so you can see the effect attributes in the time line. Click on the arrow of the zdepth adjustment layer, then click the next arrow that shows up next to ‘Effects’, and then expand the ‘Lens Blur’ effect if it isn’t already expanded.

Step 64
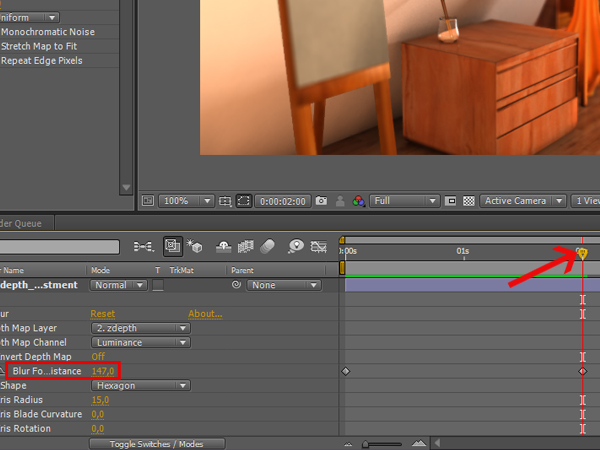
Now click the stopwatch, next to the ‘Blur Focus Distance’ attribute, so you can animate it.
Step 65
Drag the time slider to 2 seconds, and set the ‘Blur Focus Distance’ to 147. This will create a new key at 2 seconds, and will bring the drawer with the glass object into focus.
Step 66
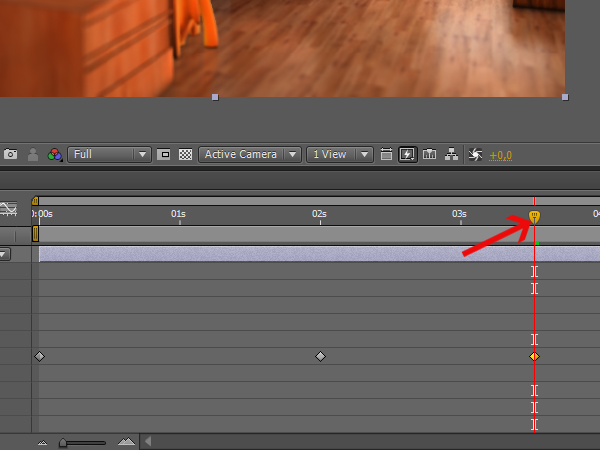
Now go to 3.5 seconds, and set the ‘Blur Focus Distance’ to 90. This will keep the table and couches in focus.
Step 67
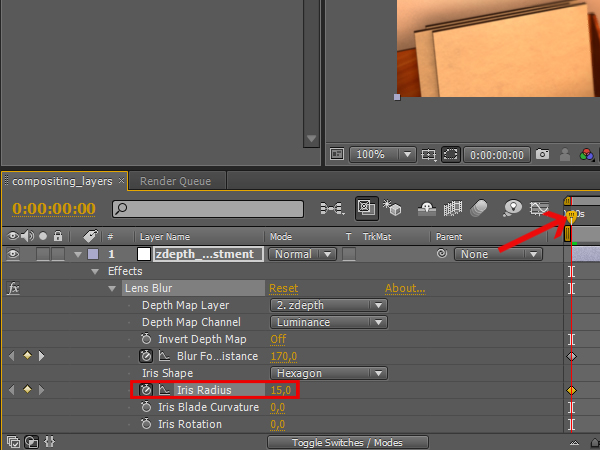
Go to the first frame again, but this time click the stopwatch for the ‘Iris Radius’ attribute. This will determine how blurred the depth of field will be. The initial radius of 15 is fine for this frame.
Step 68
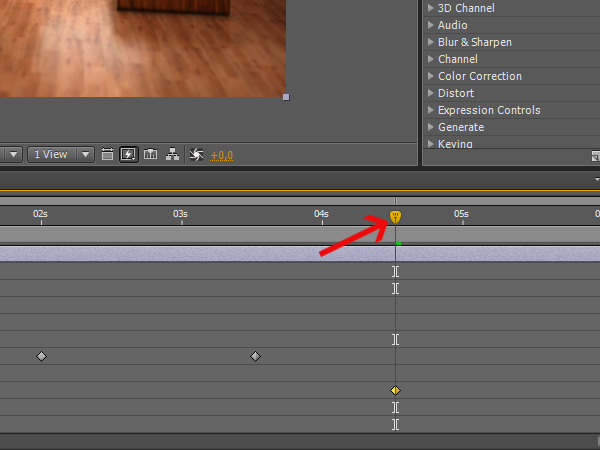
Now go to 4.5 seconds, and set the ‘Iris Radius’ to 7, to make things look more natural.
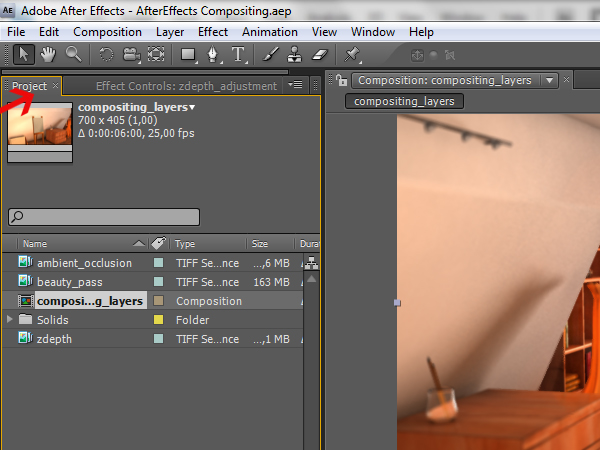
Step 69
You are now ready to render the composition with all of the layers combined! First switch to the ‘Project’ tab, so you can see your ‘compositing_layers’ composition.
Step 70
Next, open the ‘Render Queue’ tab, next to the layer panel. If you don’t see it press ‘Ctrl+Alt+0′.

Step 71
Click, hold, and drag the ‘compositing_layer’ composition into the ‘Render Queue’. You should see the output settings for the composition.

Step 72
Click on the ‘Lossless’ setting in the ‘Output Module’ attribute, to bring up the output file type settings.

Step 73
Click on the ‘Format’ options menu and select ‘Quick Time Movie’. You can use any format or compression settings that you want.

Step 74
Click on the ‘Output To:’ attribute, and select where you want the composition to be saved. Then click ‘Render’, wait until it renders out, and go to the output folder to view the final composition!!

This tutorial is Day 2 in a series. Go to Day 1.
Don’t miss more CG tutorials and guides, published daily – subscribe to Cgtuts+ by RSS.