Hello everyone! Today We’re gonna create a really nice number transition with Trapcode Form. This effects is quite cool because you can easily modify or change the characters to words, symbols, or shape layers..It’s up to you!
Tutorial
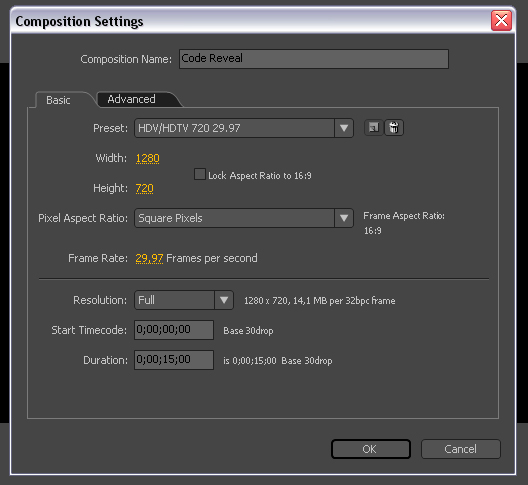
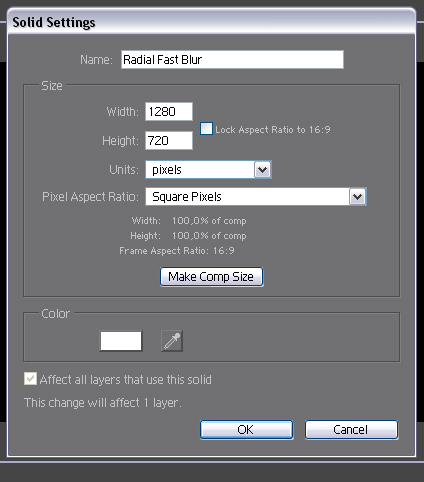
Step 1
I create a composition by clicking Menu-> Composition->New Composition. Make it 1280*720 square pixels 15 seconds long, name it as ‘Code Reveal’.
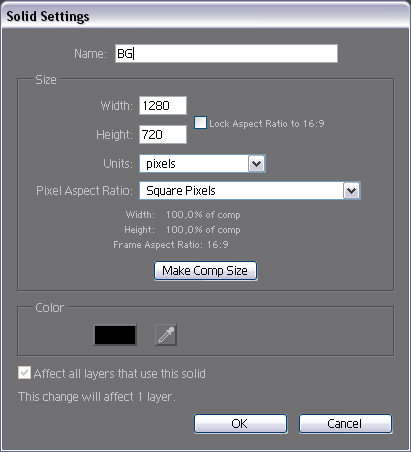
Step 2
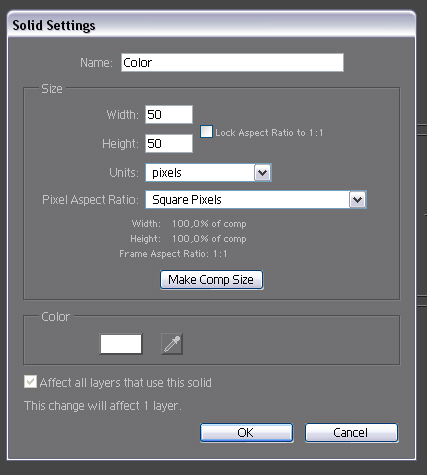
Create a new solid clicking by Menu->Layer->New->Solid. Change the color to Black. Make it comp size (1280*720) and name it as ‘BG’.
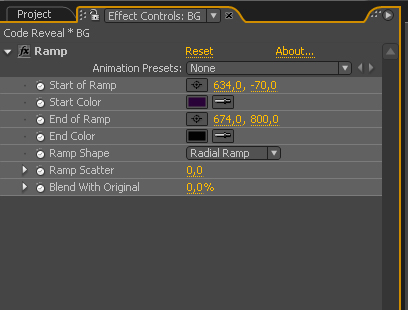
Step 3
Go to Effect->Generate->Ramp and set the following properties.Set the Start color to #27073A and the End Color to #040404
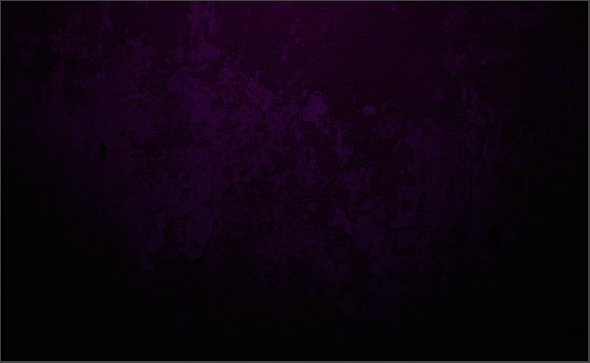
Step 4
I used this texture to create a much more dramatic look and change the blending mode to overlay.
Step 5
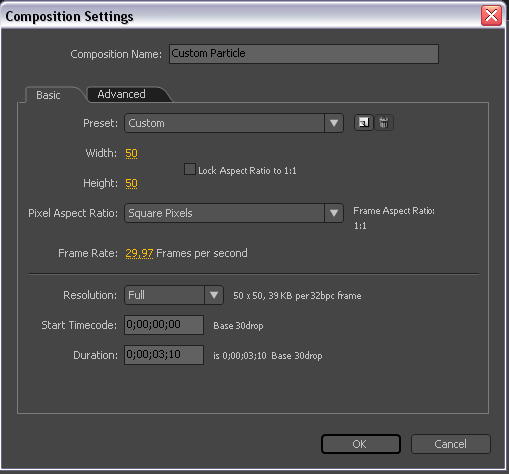
Let’s create a new composition for the custom particles by clicking Menu-> Composition->New Composition.Make it 50*50 square pixels 3 seconds long, name it as ‘Custom Particle’.Actually my first duration test was 10 seconds but I want much faster number changing so I lower the amount of the duration.
Step 6
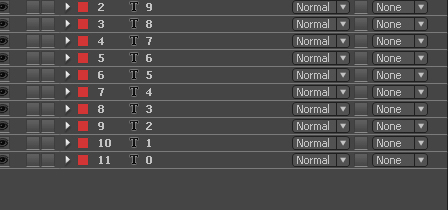
I used the Horizontal Type Tool (ctrl+t) to create the numbers. In this part you can use words,symbols, shape layers.Maybe if you use a heart icon then you can create a valentine’s day heart shape reveal or something like this.
Step 7
Let’s offset the layers. This is not the most elegant way but this will works fine.

Step 8
Create a new solid clicking by Menu->Layer->New->Adjustment Layer and name it as ‘Color’.
Step 9
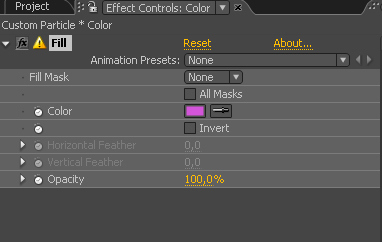
Go to Effect->Generate->Fill and set the following properties.Let’s set the color to #B956D4.This is an optional part too so if you want to use green numbers then change the colors to green.
Step 10
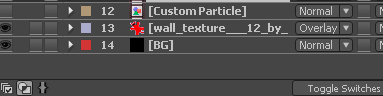
Let’s put the Custom Particle composition above the texture layer in the main comp(Code Reveal) and turn it off.
Step 11
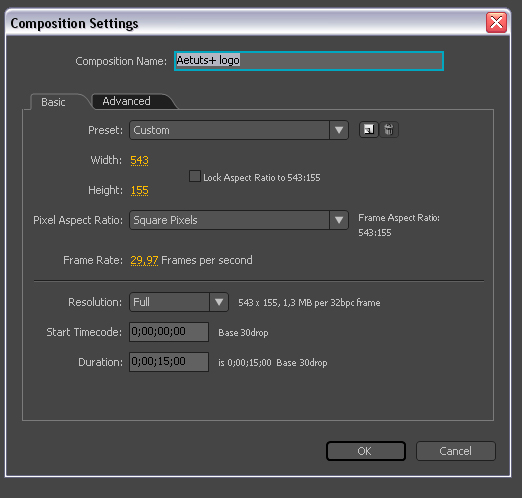
Let’s import the Aetuts+ logo (or your own company logo) and put it into a new composition by clicking Menu-> Composition->New Composition.Make it 543*155 square pixels 15 seconds long, name it as ‘Aetuts+logo’ If you like to use a custom text then create a new composition use the Horizontal Type Tool (ctrl+t) and use a grey or a white color as a textcolor.If you want to use your logo’s or text’s colors the you have to use white or grey color numbers,shape layers, words etc etc and in form under the Color and Alpha menu you have to use the RGBA to RGBA.
Step 12
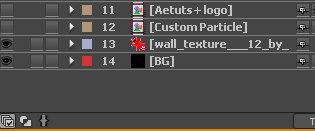
Let’s put this composition into the main(Code Reveal) composition and turn it off.
Step 13
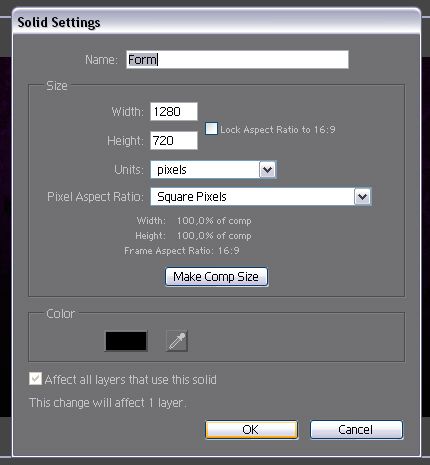
Create a new solid clicking by Menu->Layer->New->Solid and name it as ‘Form(The color is not important).
Step 14
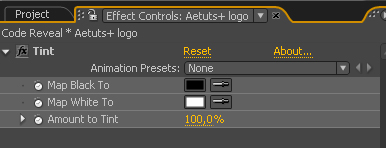
Select the Aetuts+ logo and desaturate it (Effect->Color Correction->Tint).
Step 15
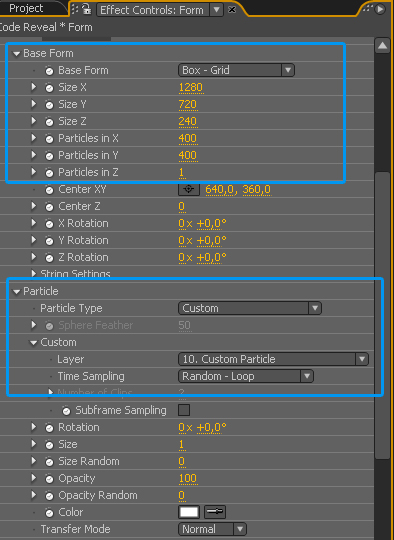
Now select the Form layer again and add Form(Effect->Trapcode->Form) and under Base form let’s change the following properties.The most important thing is that you have to set the particles in Z to 1 and do not use to many particles because this is a very render heavy process.In the particle section we have to change the particle type to custome and we have to select our custom particle composition layer and set the Time sampling to Random Loop.
Step 16
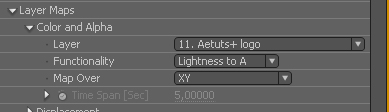
Under the Layer Maps properties let’s change the Color and Alpha properties to Lightness to A because we are working with a black and white image.
Step 17
I changed the Disperse and twist properties to achieve the flying number effect.If you skip this part then your custom particles won’t move.It’s useful if you wanna create a Matrix style look(if you skip this part).

Step 18
I also add Affect size which is a fractal noise style effect in the Aetuts+ logo wich you can see in the preview video at 0:09 sec.

Step 19
Let’s change the render mode to Full Render + DOF Smooth.
Step 20
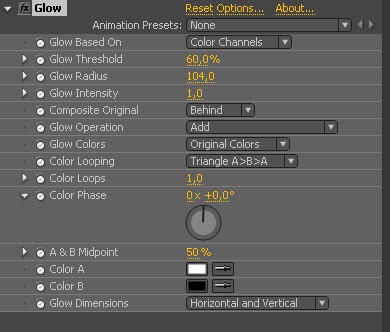
.Im also add a little glow effect (Effect->stylize->Glow) with the following settings.
Step 21
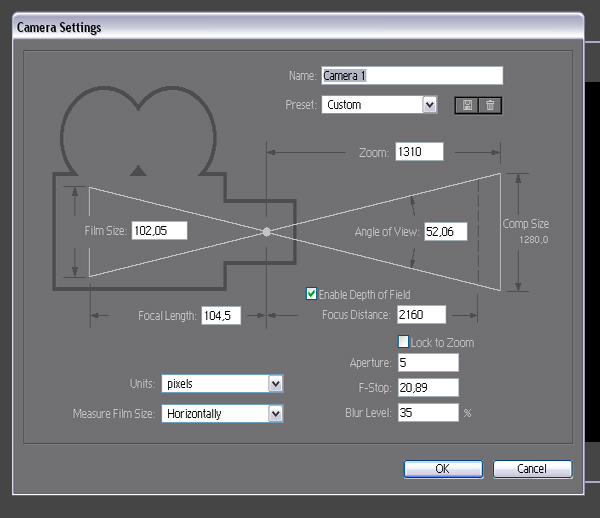
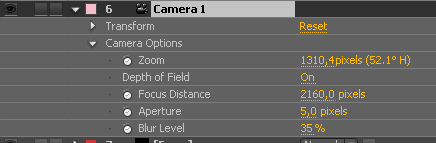
Go to Layer->New-> Camera and create a new camera with the following settings.
Step 22
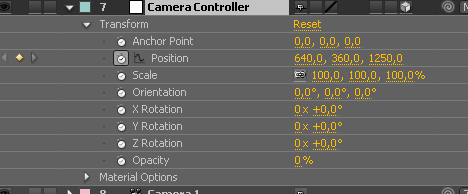
Create a null object(Layer->New->Null Object) turn into a 3d layer and parent the camera to the null.If you don’t see the 3d layer switch icon then press down the F4 button.
Step 23
Whit the null object selected(Camera controller) click on the little arrow icon to reveal the transform properties or just hit the "p" key on the keyboard and create a simple camera move.
Step 24
The first position value is 640 360 1250 and the second is 640 360 100.(x,y,z properties)
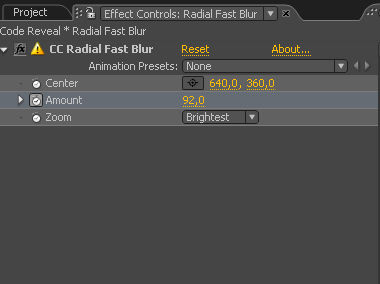
Step 25
Create a new solid clicking by Menu->Layer->New->Adjustment Layer and name it as ‘Radial Fast Blur’.
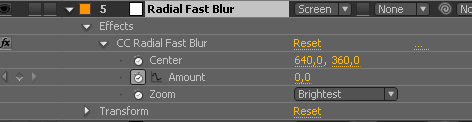
Step 26
Go to Effect->.Blur and Sharpen->CC Radial Fast Blur and change the Amount to 92 and the zoom propertie to Brightest and change the layer blending mode to screen.
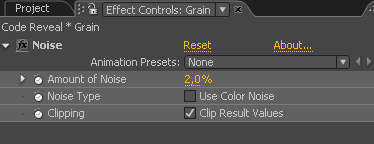
Step 27
Duplicate the Adjustment layer and rename it to Grain. Delete the Radial Fast Blur effect and turn off the 3d layer switch and go to Effect->Noise and Grain->Grain and set the following properties.
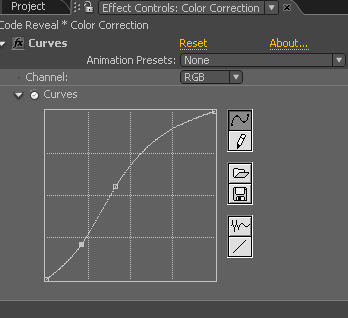
Step 28
Duplicate the Adjustment layer again and delete the grain effect rename the layer to Color correction and go to Effect->Color Correction->curves and set the following properties.
Step 29
Create a new solid clicking by Menu->Layer->New->Solid. Change the color to Black. Make it comp size (1280*720) and name it as ‘Vignette’.
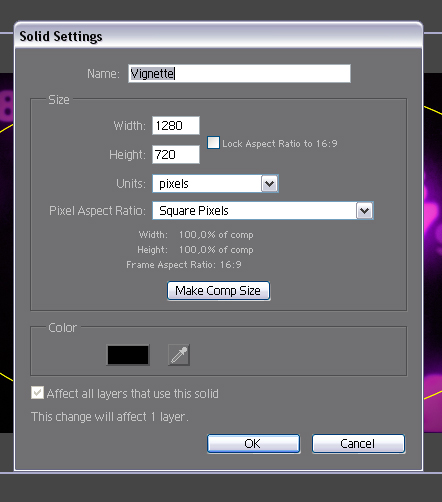
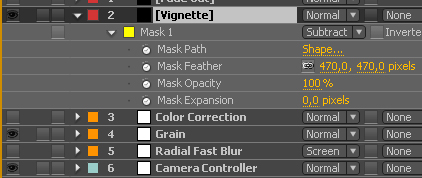
Step 30
With the Vignette layer selected let’s double click on the Ellipse Tool and create an elliptical mask with the following settings.
Step 31
Let’s play with the camera settings if you want to change the Depth of field effect.
Step 32
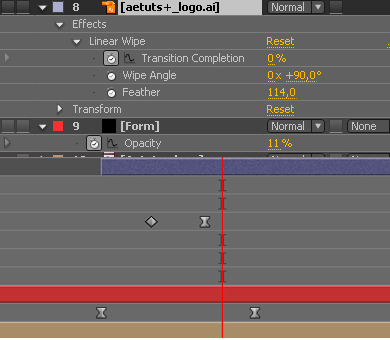
At the end of the video I used a simple Linear wipe effect with a big feather to reveal the original Aetuts+ logo and I lower the opacity of the Form layer as well.
Step 33
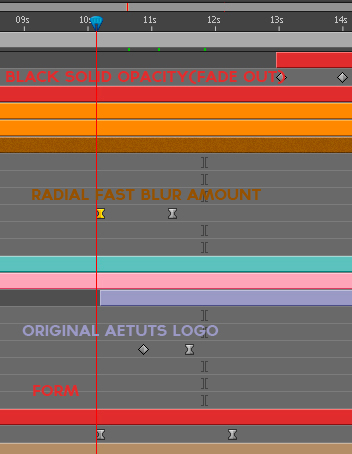
Also we have to lower the amount of the Radial Fast Blur effect.
Step 34
Also we have to lower the amount of the Radial Fast Blur effect and as you can see finally I add a new layer(Layer->New->Solid) and use this layer as a fade out effect so I change the opacity value 100 to 0.
Conclusion
As you can see this is a pretty useful technique so use your imagination and try to create something groundbreaking and don’t forget to share your ideas and videos with us. One again my name is Tibor Miklos and I hope you enjoyed the tutorial. Thanks a lot for your attention.