A simple and quick way to render a realistic looking cherry using 3D and mesh tools in Illustrator. This basic skill will also help you in become familiar with the 3D and mesh tool functions.
Step 1
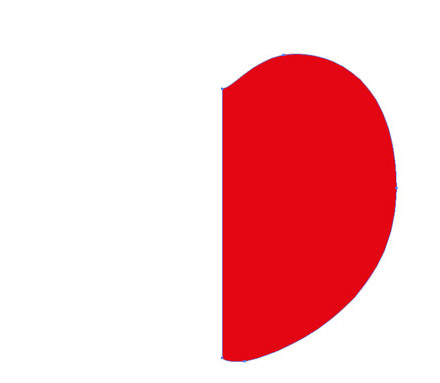
Start by selecting the Pen Tool (P), visualize and draw half of the Cherry. Fill it with a red color.
Step 2
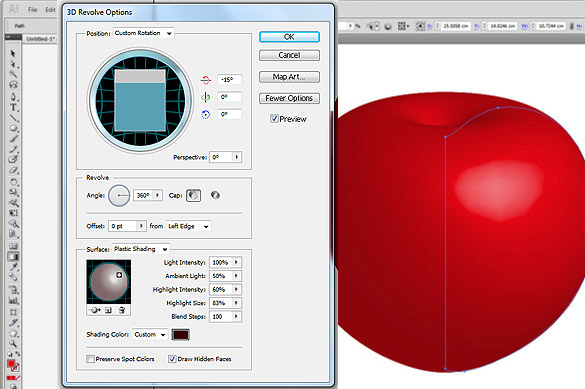
After you have made your drawing, go to the Main Menu. Choose "Effect > 3D > Revolve" Then tweak it to the same settings on the image below.
Position: Custom Rotation, for the x axis I have set it to -15. For the surface options I have set it to Surface: Plastic Shading, Light Intensity: 100, Ambient Light: 50, Highlight Intensity: 60, Highlight Size 83, Blend Steps: (the realism gets smoother as you increase the value, but I set mine to 100). Shading Color: Custom (#330303).
Don’t forget to click on "preview" button, so that as you tweak the options you get to see the adjustments on your work.
Step 3
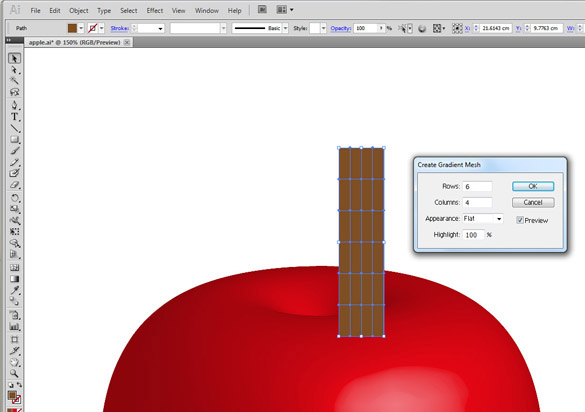
Now you will need to draw the twig. With the Rectangle Tool (M), position it on the Cherry and make a proportional rectangle. After that, go to the Main Menu and choose "Object > Create Gradient Mesh", an option window will pop-up. Enter the following, Rows: 6, Columns: 4, Appearance: Flat, Highlight:100 and again, make sure you have click on preview to see the tweaks you made.
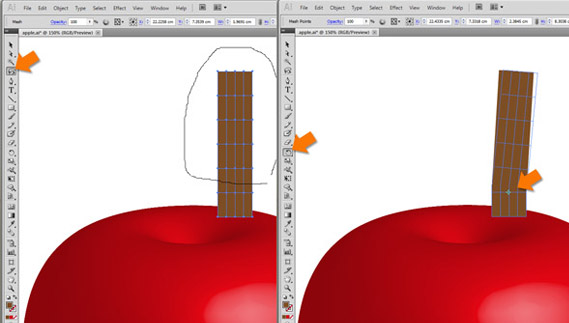
Step 3A
Select the upper 5 columns using the Lasso Tool (Q), you will notice all the unselected points will highlight. Click on the Rotate Tool (R), drag the anchor to the point you want to bend (see the arrow on the image below) then drag and rotate.
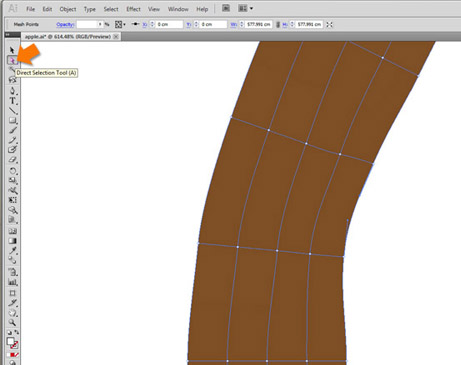
Step 4
Here comes the tricky part. You are going to shape the twig to the image you want. Click on the Direct Selection Tool (A), and select the nodes/points on the mesh and adjust to the shape you want.
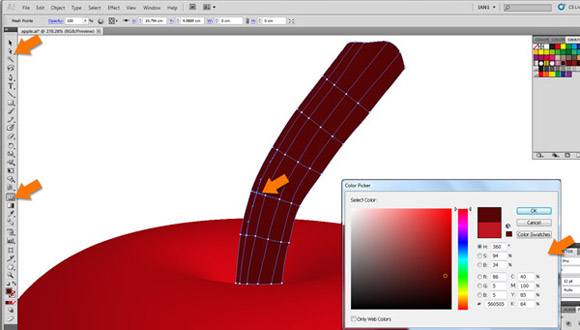
Step 5
After you have adjusted the mesh to the desired shape, select the entire twig and apply a base color (I opted for #560505). Then you apply the shades of gradient using the Direct Selection tool (A) or the Mesh Tool (U). To do this, click on the node/point then click on the color you want on the Swatches Palette window.
Tip: make all your gradient colors first and put it on the palette window, I use only 3 colors; #350000, #720C0C and #891616.
Step 6
Now you will need to make the shadow for your twig. Using the Pen Tool (P), draw a shadow like on the image below. Select black to white gradient on the Gradient Pop-up Menu, change the direction by pressing the "G" key on the keyboard. While the shadow path still selected, choose "Multiply" on the Transparency Pop-up Menu and set the Opacity to your desired amount, I set mine to 45. After you made your shadow transparent go to the Main Menu and choose "Effect > Blur > Gaussian Blur" and set the Radius to 5 pixels.

Step 7
For the shadow of the Cherry, apply the same method you made on the previous step (Step 6) and tweak the opacity and blur radius to the desired effect you want.
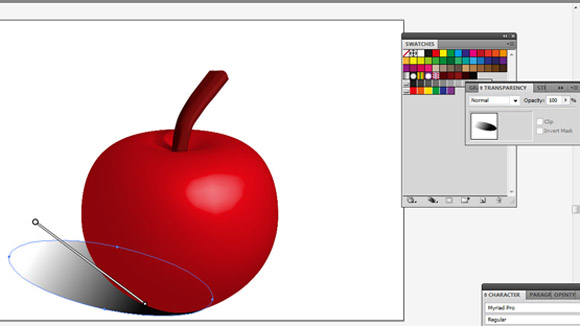
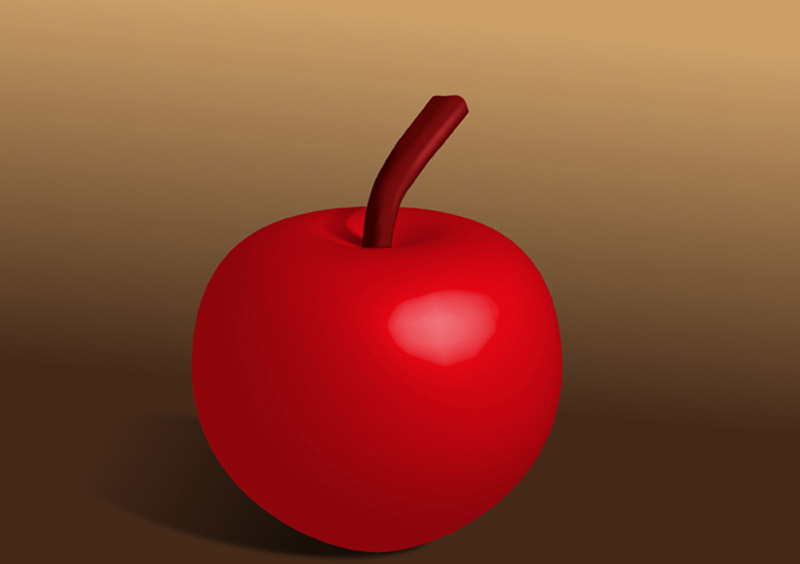
Conclusion
Apply a gradient rectangle for background, and you’re finished! Have a play around with the skills you have learned from this tut and see what other fruit you can make. I hope you’ve enjoyed this tut.