As you will have heard countless times, white space is a very important element to a successful layout. A large proportion of a white space will typically be occupied by margins. The purpose of this tut is to give new InDesign users the knowledge on setting up margins and their functions relating to two main layout types, which are single and facing page layouts.
Getting Started
Before the margins are defined, it is important to understand their function. Visually margins cage the content and support the structure of a layout. They provide a resting place for the readers eyes as well as supporting the tone of design. Also there are some common practical functions to consider:
- How much room is needed for holding the print, so the reader doesn’t obscure any content?
- How is the print going to be finished? ring bound, stapled etc
- Are there any safe zones set by the print house. One example would be a street poster/advertisement where the print is held in a large frame, requiring oversized margins.
- When designing training manuals and text books should room be left for notes to be made? By appreciating the affect your margins have on printing and finishing, you will instantly become your printers best friend.
OK, lets begin.
Facing Pages
When defining margins for facing-pages, the two pages should be treat as one document and appear together. This layout will typically be used for newsletters, reports, magazines etc. For this tut I will set a double page spread for a magazine.
As a starting point we will set the size of our margins in the following size order: inside (smallest), top, outside and bottom (largest).
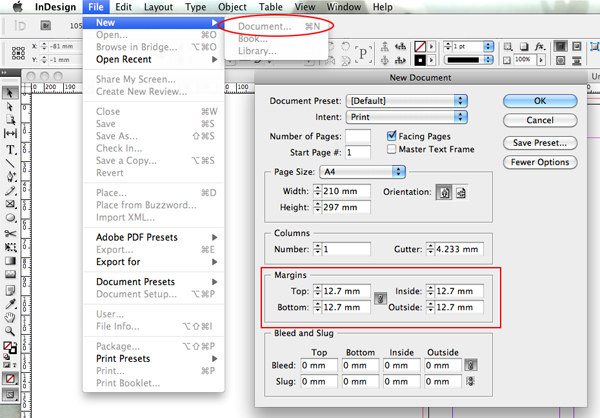
Start by going to File > New > Document. Within the floating palette three quarters of the way down is the margin section.
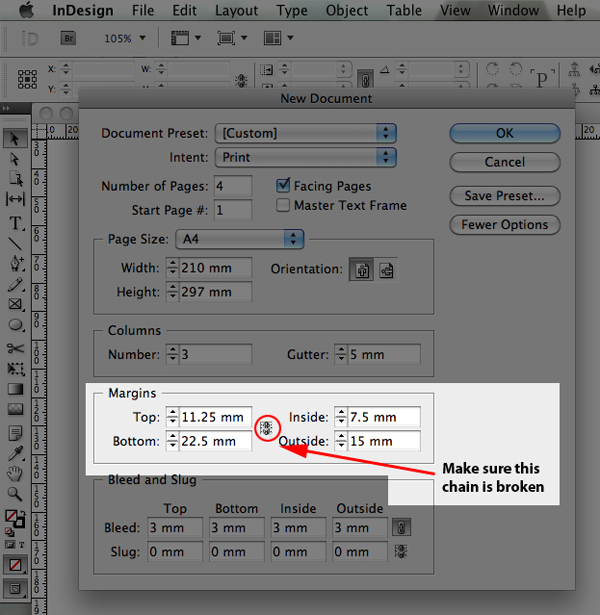
I am going to start by setting the outside margin to 15mm. The Inside margin will be half the size of the outside at 7.5mm. The bottom margin will be three times the inside at 22.5mm and finally the top is half the size of the bottom margin at 11.25mm. If the ‘make all the same’ chain is activated click it once to deactivate.
As a designer you should use this technique as a starting point only. Use these methods to find the best margin set up that fits your brief requirements and functions.
Single Page
A single page layout can be a poster, flyer, sign, advert or similar design. For the purpose of this tut I am going to set an A4 poster, which will be displayed within different sections of an large office on notice boards etc.
Again start by going to File > New > Document.
For the top margin I am going to be generous and give the reader a bit of lead in space, about 12.5mm. As this is a single page layout I want to retain the balance so I will set both the left and right margins at 15mm. Finally the bottom margin will be set at 25mm. These margins will act as a safe zone and I will not be placing any important information within this area. The safe zone will lend itself to practical use, for example the poster might be held up by drawing pins or clipped into a frame.
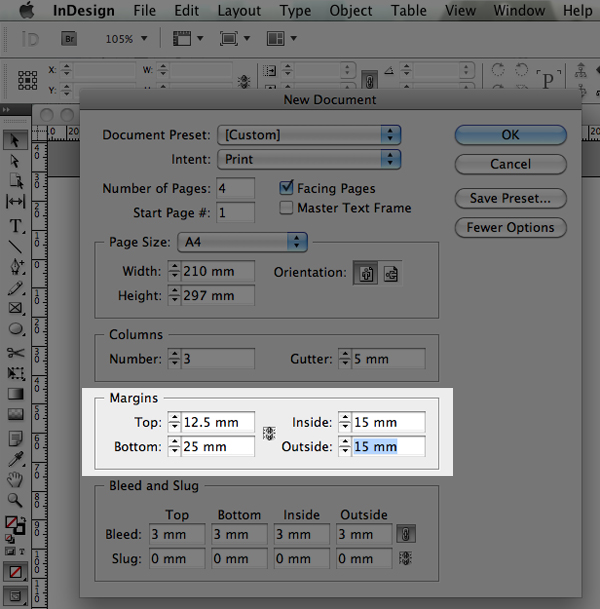
Once the margins are set, define the other boxes as I have done in the screen shot below or set them to your own requirements.
Changing Margins
Once you have set your margins using the new document palette, it is possible to redefine them. Make sure you select the pages you want to edit. Check this by opening the Pages palette, if it is not open go to Window > Pages.

Once the palette is open hold down Shift and click the pages you need and go to layout > Margins and columns. Within this option box you can edit your measurements. By using this method it is possible to have different margin setups on each individual page, just select one or a number of pages still holding down shift and go into the Margins and Columns palette. The pages which were not selected will remain the same.

Conclusion
Taking the points from this tut into account, it is ultimately up to you, the designer, to decide on the best structure for a project. Remember to give some careful thought to the function of the margins and in turn they will strengthen your designs.