InDesign can handle a variety of graphics including jpg, eps, pdf, tiff, psd and most Adobe formats to name a few. InDesign doesn’t actually place the graphic into the document. Instead it makes a link to the original file and generates a preview within the document. In this Quick Tip you will learn about the various ways you can import image files into an InDesign document and how to replace and re-scale them.
As InDesign is a layout and typesetting program you need to edit and prepare your files within another program, for example Photoshop or Illustrator. Before we start this tut make sure that you have a graphic ready for importing and also have a project open ready for use. To create a new document go to File > New > Document (Command + n).
Step 1
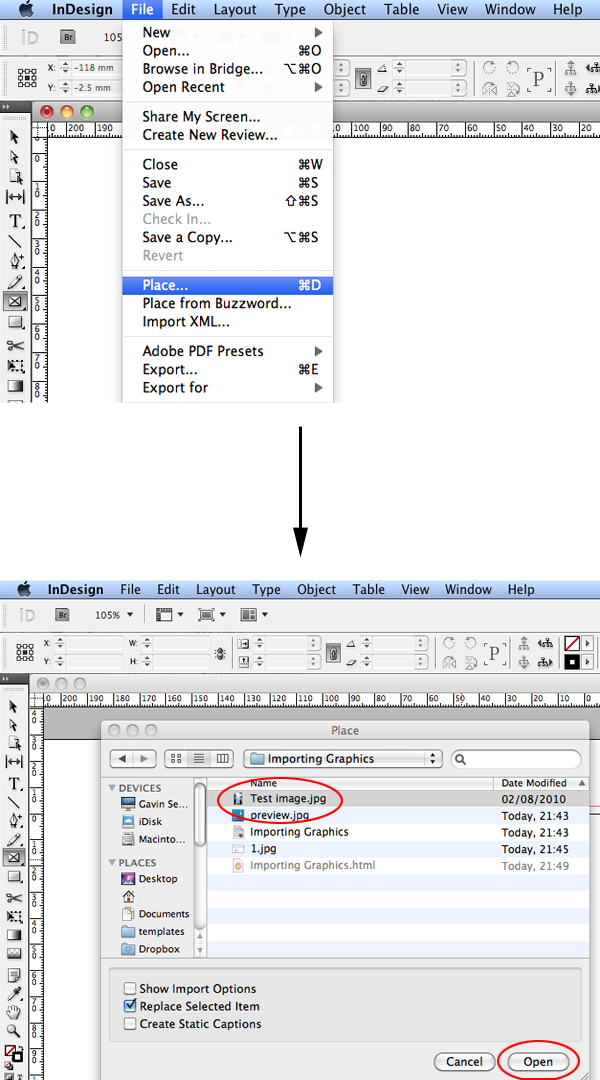
To start you need to prompt InDesign to place a graphic. Do this by File > Place (Command + d) navigate to where your graphic is located, select and click open. When importing graphics you can either import into an existing frame by selecting the frame with the Selection Tool (V) before starting step 1. Or import the graphic directly into the document, which will automatically create a frame for the graphic to sit in. I will explain both processes and the effect each of them will have on the imported graphic.
Step 2: Importing Directly into the Document
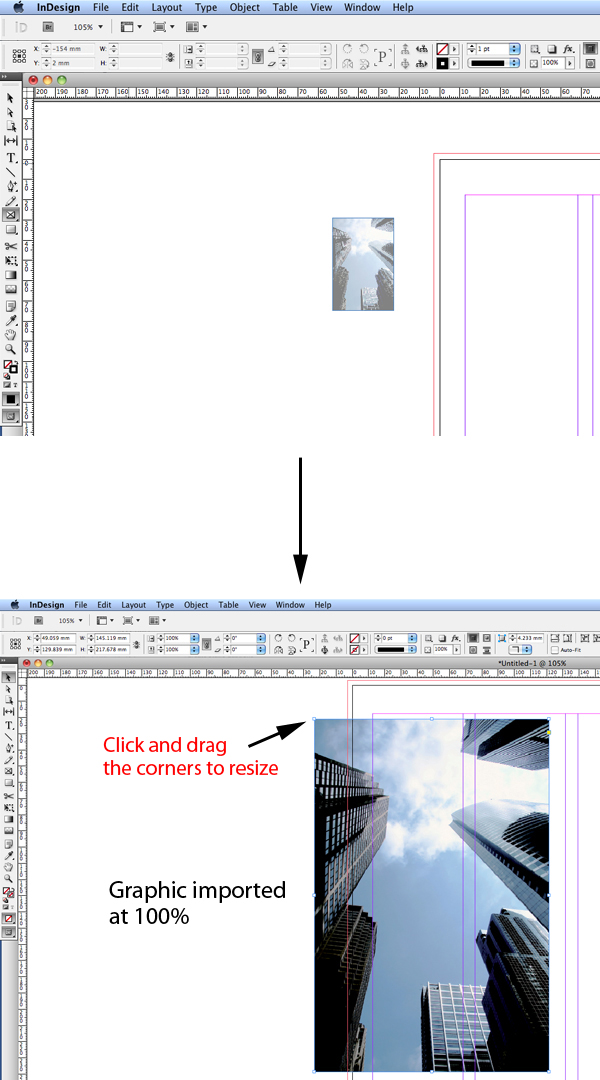
Within CS5, once you have clicked open and placed a graphic, a small transparent preview image will appear. You now have a couple of options. Firstly, clicking once will import your graphic at its original size (100%). If the frame is hanging over the edges of the working space use the Selection Tool to drag one of the corners to resize. Hold down shift to constrain the proportions.
Step 3
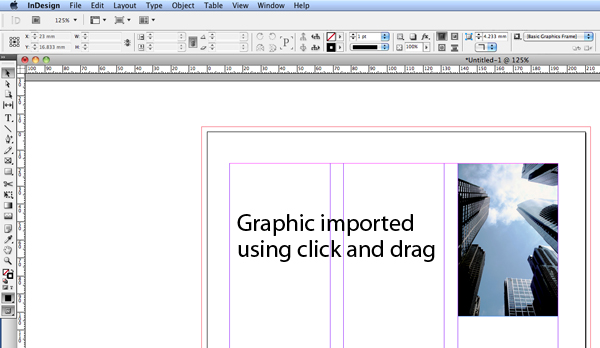
Secondly, by clicking and holding down your mouse button, you can size the bounding box to suit the layout. After selecting open, click on the document and don’t release the click. Drag your mouse to the required size and then release.
Tip: Holding down Command after you clicked once and while you are dragging will constrain the proportions.
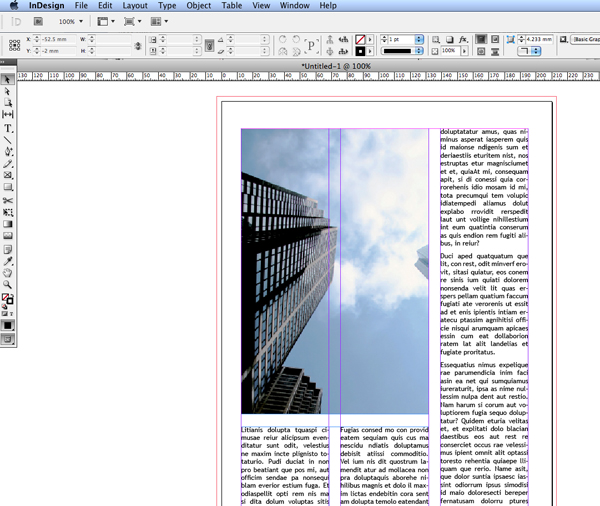
Step 4: Importing into an Existing Frame
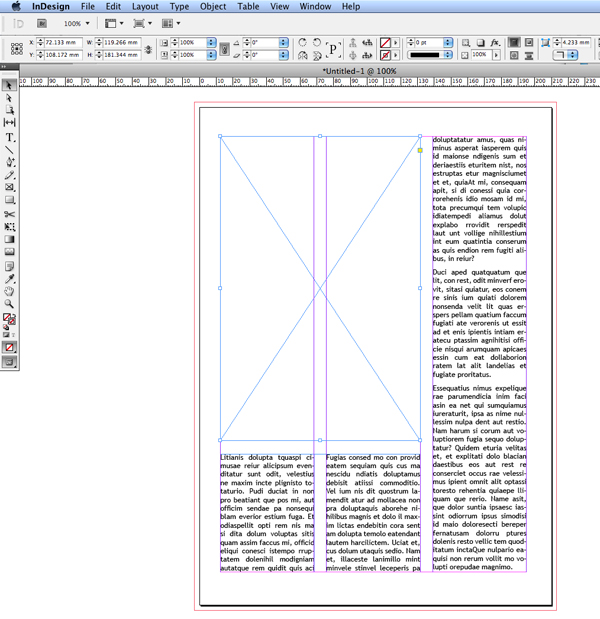
Lets say you have a frame sitting a the top of a column and spanning two column widths. Using your Selection Tool select this frame by clicking it once and follow the steps illustrated in step 1.
Step 5
You will notice that graphic has been imported and is cropped. InDesign has imported the graphic at 100%, which in my case is larger the frame you want to place it in.
Step 6
To fit the graphic correctly, activate the Control Dock by going to Window > Control. I have highlighted the buttons that are needed below. If they are not visible select your frame with the Selection Tool. The Control Dock sits at the top of your screen above your document.
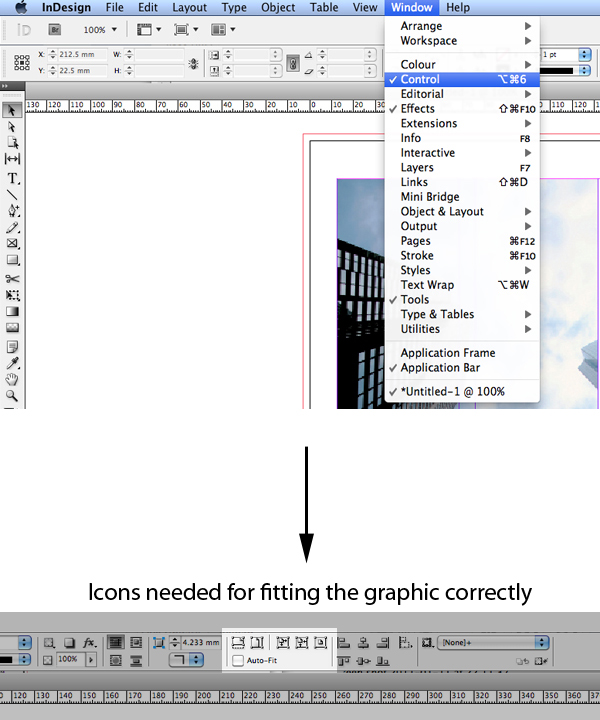
Tip: By hovering over each button with your cursor a text description will appear for each icon.
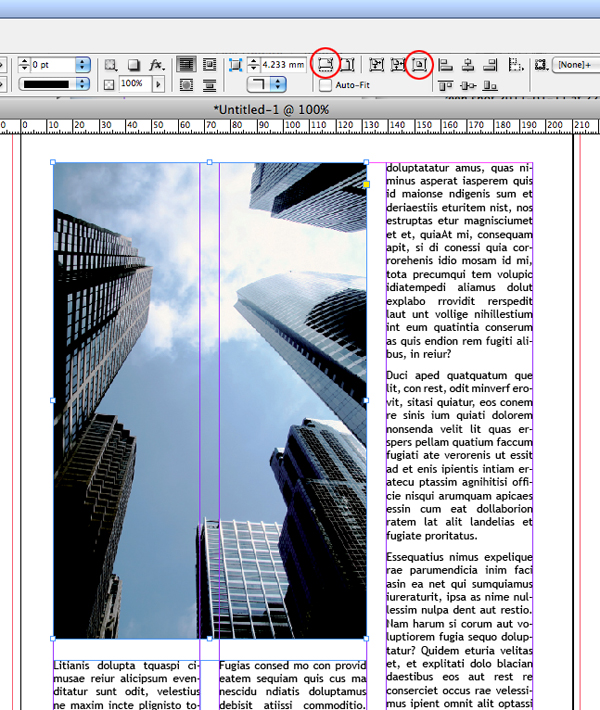
Step 7
To obtain a clearer view of the graphic I have opted to Fit Content Proportionally then Center Content. From here I can edit to suit my design.
Step 8
Once the graphic has been made easier to handle, the Direct Selection Tool (A) can be employed to move, resize and position the content within the frame. Select the Direct Selection Tool and click once inside the frame, you will notice that a brown frame will appear. This frame represents the bounding edges of the graphic you imported.

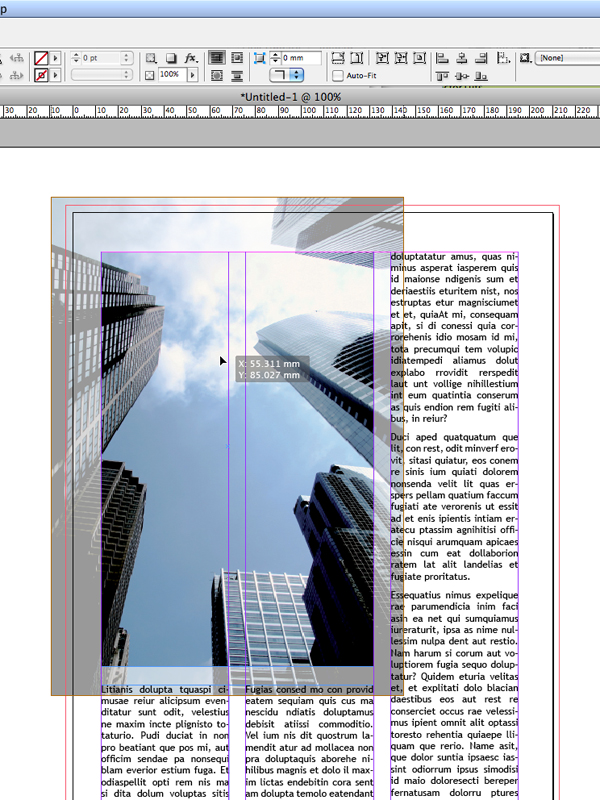
Step 9
Hover above the brown frame and the Hand Tool will appear. To edit, either click and drag to change the position, or resize by dragging on of the corners out or in.
Tip: Hold down shift to constrain the proportions. The image below is an example of clicking and dragging, notice how InDesign displays a preview of the graphic.
Conclusion
By following these steps you now have the basic knowledge to import and handle graphics. InDesign offers so much more than the basics and I intend on publishing a number of useful tuts on importing graphics in the coming months. I hope you have enjoyed this introduction to importing graphics into InDesign.