Today we’ll create a sparkling jeweled butterfly that will shine without using any gradients. We’ll use various path operations and the powerful extension “pattern along path” to reproduce shimmering gold. If you’re an Inkscape user, then follow along with this tutorial.
Step 1
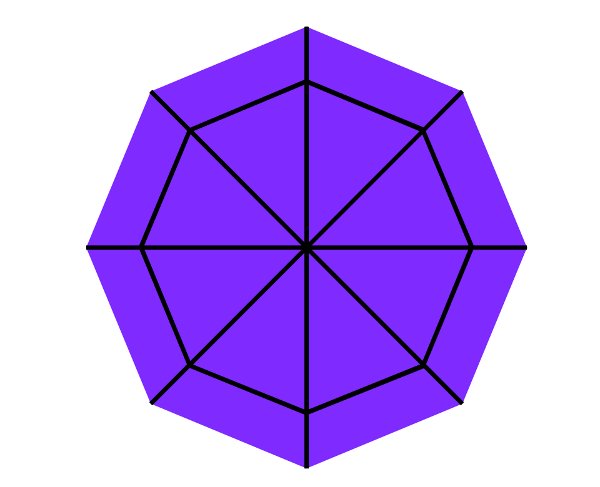
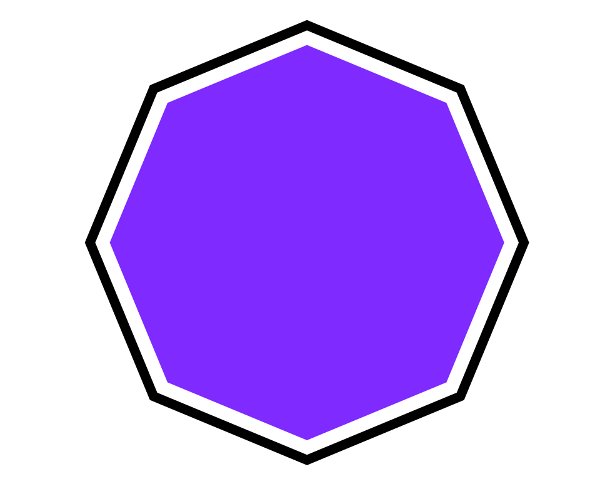
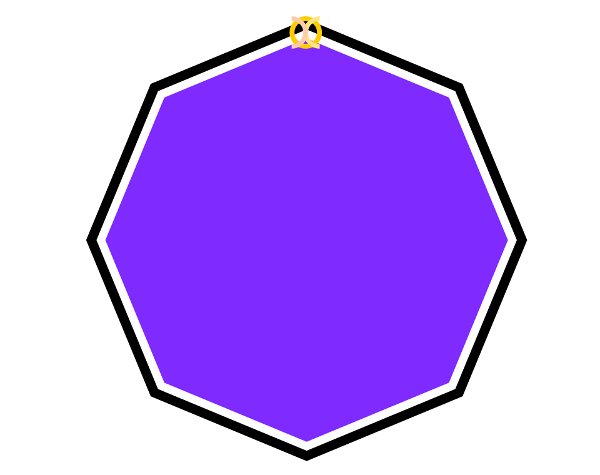
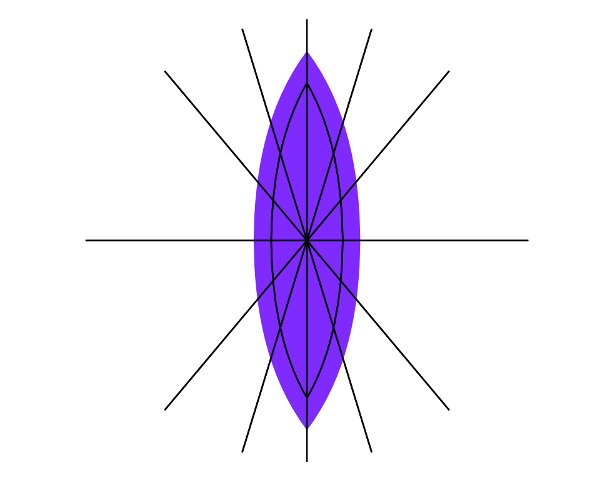
Create a new document, select the Star tool and draw a regular eight corner polygon. Press Command + D to duplicate it. Create a new layer "Gems" above the current one by pressing Shift + Command + N. Select one of the polygons and raise it to the layer “Gems” by pressing Shift + Page Up. Now make the new layer "Frames" invisible.
Switch to the layer “Gems.” We’re going to create the thorax of the jeweled butterfly. Select the Bezier tool and draw four straight paths from corner to corner of the polygon, make sure Snap to cusp nodes in the toolbar is enabled.

Step 2
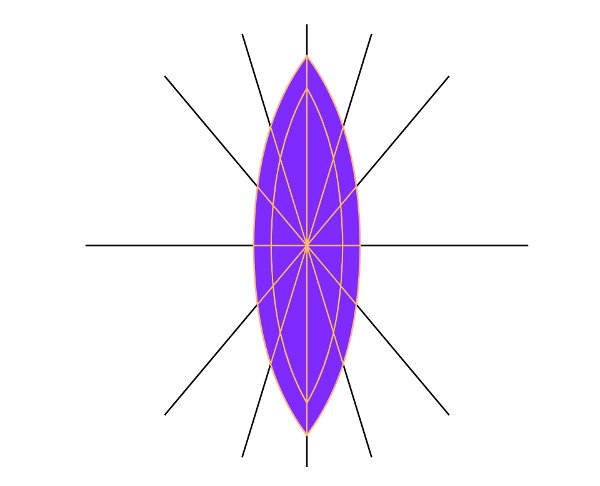
Select all four paths and duplicate them (Command + D). Convert their stroke to a path by pressing Command + Alt + C, then perform union by pressing Command ++. Select the polygon and press Command + D to duplicate it. Scale it by 75% using Object > Transform. Set the new polygon’s Fill to none, set the Stroke paint to black. Duplicate this new polygon by pressing Command + D.
Select the duplicated polygon and convert its stroke to path by pressing Command + Alt + C. Add to the selection the inner path and perform union on them by pressing Command ++. Now press Command + D to duplicate the original polygon, set its Fill to None, and its Stroke paint to black. Convert its stroke to path by pressing Command + Alt + C. Add to the selection the inner path and perform union by pressing Command ++.
Step 3
Now we need to clean up the edges of the previously created path.
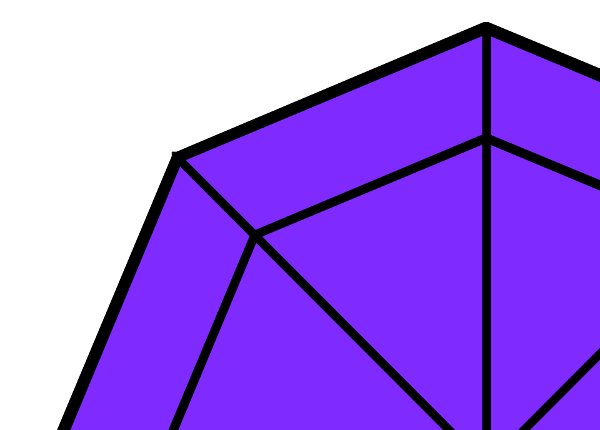
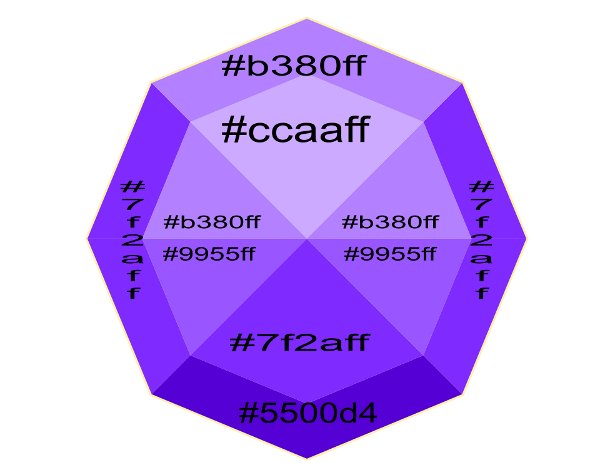
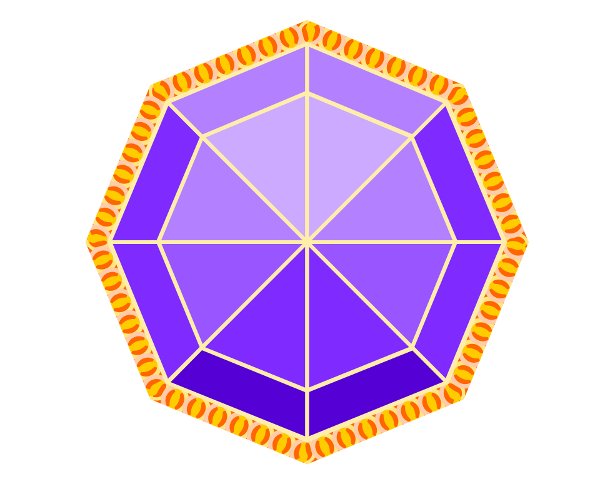
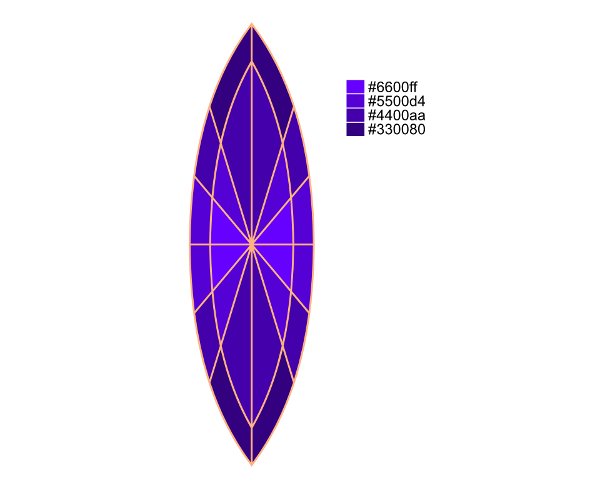
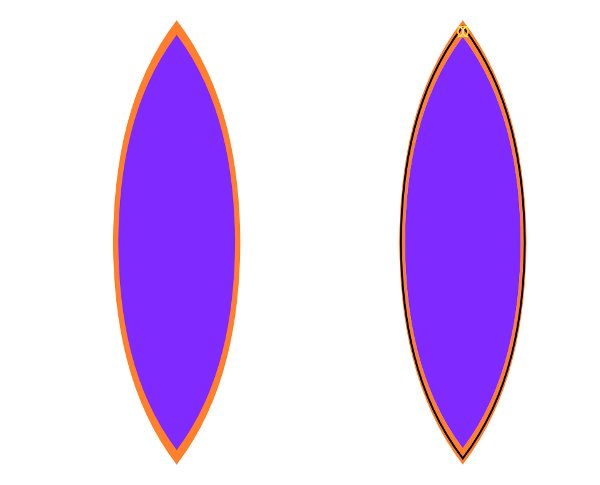
Press Command + D to duplicate the original polygon. Scale it by 101% using Object > Transform. Add to selection inner path and perform an intersection by pressing Command +*. Set the path’s RGB color to #ffeeaa. Press End to send the yellow path under the old polygon.
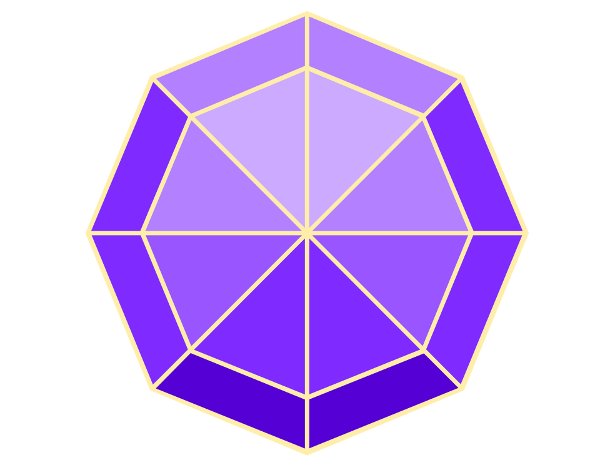
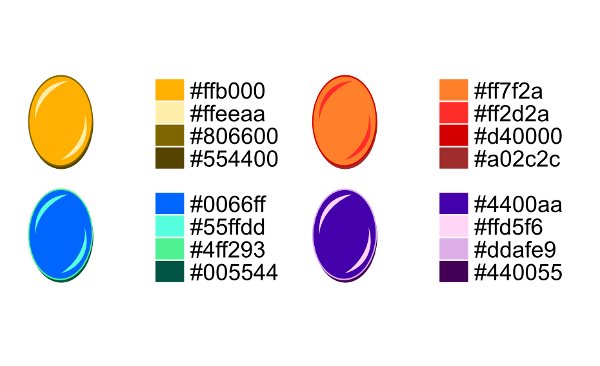
Select the previously duplicated four black paths and inner polygon, then combine them by pressing Command + K. Now select the resulting path and the original polygon and perform division by pressing Command +/. You will end up with sixteen paths, set their RGB colors as shown.
Step 4
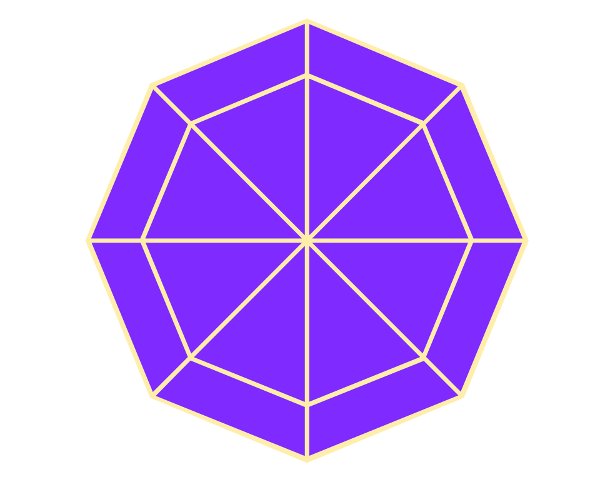
Alt-click to select under the yellow path, press Home to bring it to the Top. Now select all and press Command + G to group it. Make the “Gems” layer invisible, switch to the layer “Frames” and make it visible. We’re going to create the first frame. Select the polygon and scale it proportionally by 107% using Object > Transform. Set its Fill to None, set its Stroke Color to black.
Step 5
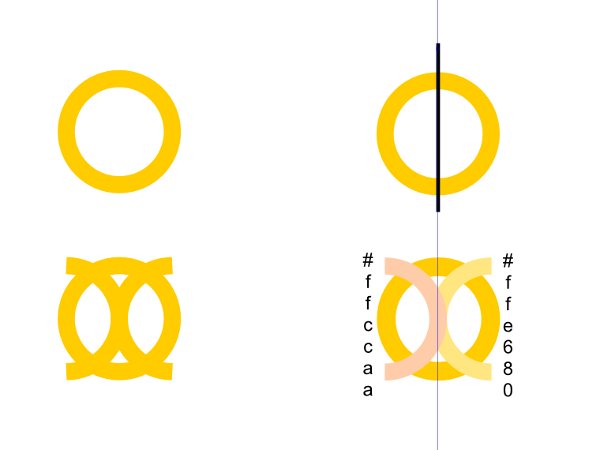
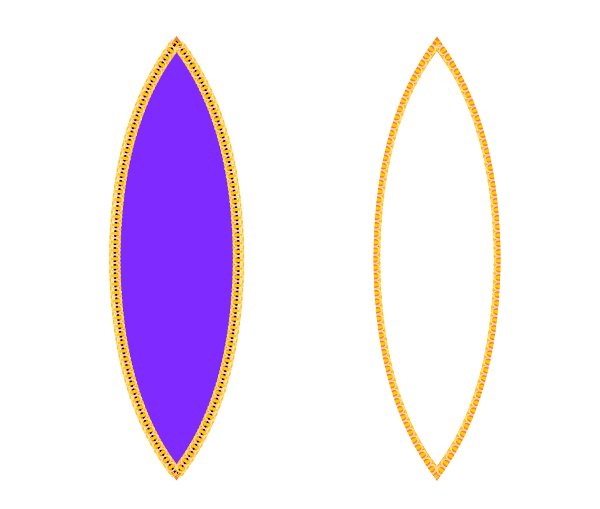
Select the Ellipse tool. Draw a circle while holding Command. Set its Fill to None and set its Stroke Color to #ffcc00.
Select the Node tool. Create a new vertical guideline and place it exactly on top node of the ellipse. Select the Bezier tool and draw a path from top to bottom of the circle. Duplicate the circle. Now select the path and the circle and perform Path > Cut. Flip two resulting paths horizontally. Select two paths and the circle, then convert their strokes to path by pressing Command + Alt + C. Set the half-circles color as shown.
Step 6
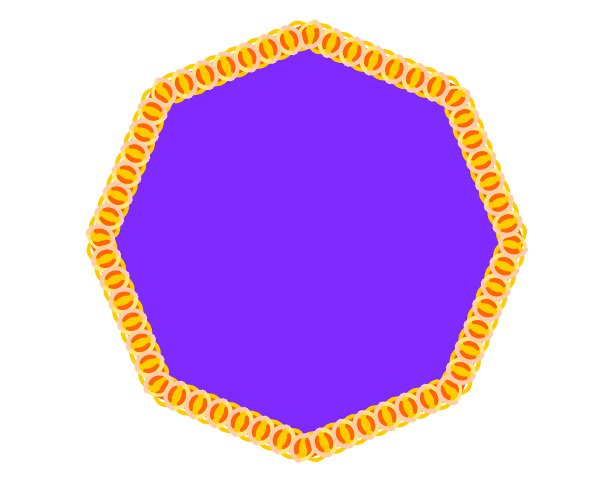
Press Command + G to group two half-circles and circle, press Command + C to copy it to Clipboard, we’ll need it later. Place the group on the bigger polygon. Select the group and the bigger polygon. Go to Extensions > Generate from Path > Pattern along Path and apply with the following settings:
- Copies of the Pattern: Repeated
- Deformation type: Snake
- Space between copies: -1.8
Step 7
Delete the black path under the pattern.
Select the original polygon and press two times (Command + D to duplicate it twice). Scale one of the new polygons by 112% using Object > Transform. Set its RGB color to #ff6600. Raise the new smaller polygon to the top by pressing Home. Select the two new polygons and perform difference by pressing Command +- to create the outline.

Step 8
Send the resulting path to the bottom by pressing End. Select the pattern and the orange path and press Command + G to group them. Scale the original polygon by 112% using Object > Transform. Select both the polygon and the group, then go to Object > Clip > Set. Our first frame is now ready.
Step 9
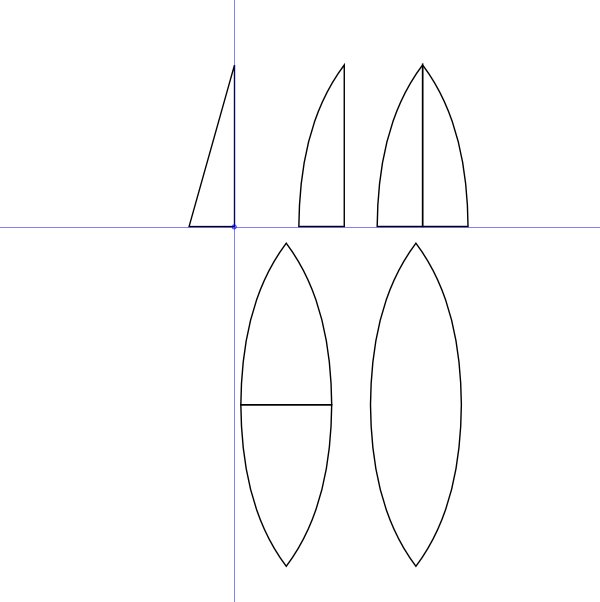
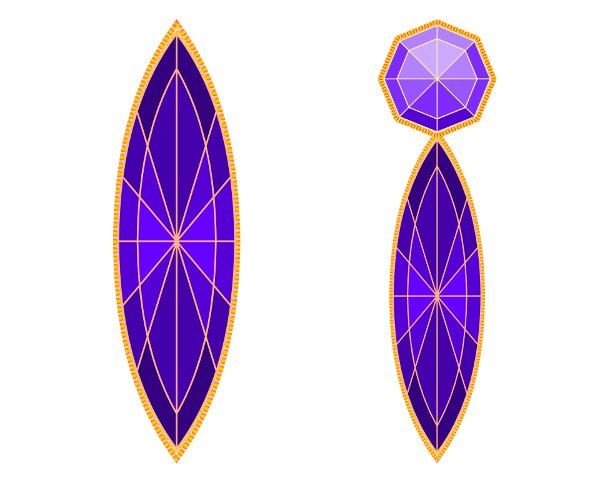
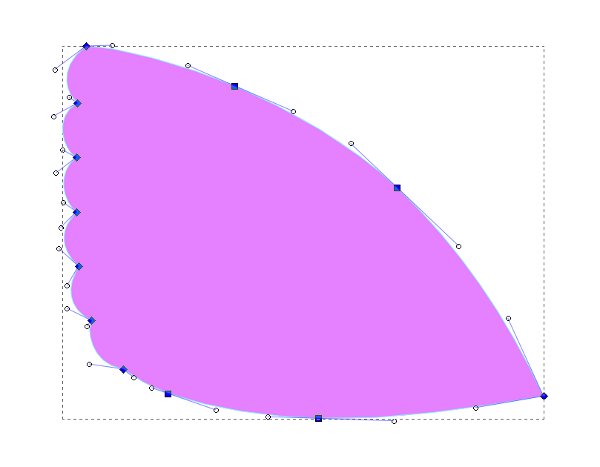
We’re going to work on the abdomen of the butterfly. Create two guidelines, select the Bezier tool and draw a triangle. Using the Node tool drag the left straight path to the left to create a curve. Press Command + D to duplicate the resulting path, flip it horizontally and place it next to the first path, make sure Snap to cusp nodes is enabled.
Select both paths and perform union by pressing Command ++. Press Command + D to duplicate the resulting path, flip it vertically, place it exactly under the first path and perform union of both paths again by pressing Command ++. We’ll call the resulting path “Shape 1.”
Step 10
Duplicate “Shape 1″ and raise it to the layer “Gems” by pressing Shift + Page Up. Make the layer "Frames" invisible. We’re going to work on the layer “Gems.” Select the Bezier tool and draw a path from top to bottom of “Shape 1.”
Now duplicate the path five times by pressing Command + D, rotate each of them using Object > Transform while setting the following angles: 17, -17, 40, -40, 90. Press Command + D to duplicate “Shape 1″ and scale it by 75% in Object > Transform.
Select five straight paths and then central contour path, then duplicate them by pressing Command + D. Convert their stroke to a path by pressing Command + Alt + C and perform union by pressing Command ++. Select “Shape 1″ and duplicate it by pressing Command + D.
Select the duplicated path and the inner path, then perform intersection by pressing Command +*. Press Command + D to duplicate “Shape 1″ and convert its stroke to a path by pressing Command + Alt + C. Select this path and the inner one and perform union (Command ++). Set its RGB color to #ffb380 and send it to the bottom by pressing End.
Step 11
Select the remaining inner paths and combine them by pressing Command + K. Select “Shape 1″ and the combined path, then perform division by pressing Command +/. You will end up with 24 paths, set their RGB colors as shown.
Step 12
Raise the path that was at the bottom to the top by pressing Home. Select all in this layer and group it by pressing Command + G. Make the "Gems" layer invisible and "Frames" layer visible. Switch to the layer “Frames.” We’re going to work on the second frame. Select “Shape 1″ and duplicate it by pressing Command + D. Scale it using Object > Transform with the following settings:
- Width: 110
- Height: 108
- Set its RGB color to #ff7f2a.
Step 13
Press Command + D to duplicate “Shape 1.” Select the duplicated “Shape 1″ and orange path, then perform difference by pressing Command +- to create an outline. Press Command + D to duplicate “Shape 1″ and scale it using Object > Transform with the following settings: Width of 107 and Height of 105.
Paste from clipboard the group out of circle and two half-circles, then scale it proportionally in Object > Transform by 105%. Place the group on the duplicated “Shape 1,” and go to Extensions > Generate from Path > Pattern along Path. Use the same settings as before.
Step 14
Delete the path along which the pattern was created. Select the pattern and the orange path and press Command + G to group them. Select the original “Shape 1″ and scale it using Object > Transform with the following settings: Width of 109 and Height of 107. Select the group and the “Shape 1,” then go to Object > Clip > Set. The second frame is ready. Make both layers visible. Place the abdomen directly under the thorax.
Step 15
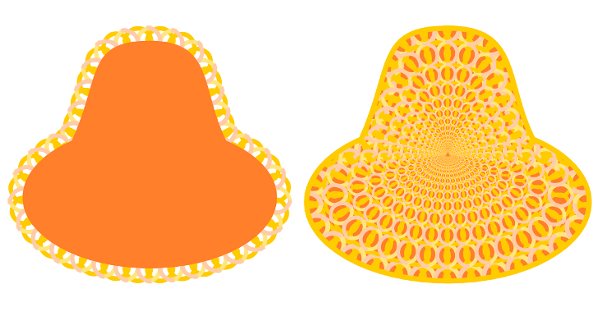
We’ll continue to work on layer “Frames.” We’re going to draw jeweled butterfly’s now. First, select the Ellipse tool and draw an ellipse. Go to Path > Object to Path. Select the Node tool and adjust the nodes so that the shape reminds us of a head of the butterfly. Set its RGB color to #ff7f2a. Paste a group from the clipboard and place it over the head shape. Go to Extensions > Generate from Path > Pattern along Path and apply with following settings:
- Copies of the Pattern: Repeated
- Deformation type: Snake
- Space between copies: -1.0
Note that the head shape isn’t absolutely symmetrical. It’s resulted however in even pattern with a jewelry feel to it. The symmetrical version of the head wasn’t that successful in my opinion. You may want to try for yourself with different settings.
Press Command + D to duplicate the resulting pattern path. Go to Object > Transform and scale it by 80%. Repeat duplicating and scaling 18 more times.
Step 16
Alt-click to select under the head shape. Press Command + D to duplicate it. Select everything except the duplicated head shape. Group it by pressing Command + G. Press Command + D to duplicate the remaining head shape. Select the head shape and the group, then go to Object > Clip > Set. Select the last head shape and set its fill to none, stroke to the RGB color: #ffcc00. Convert its stroke to a path by pressing Command + Alt + C. Select all of the created elements and group them by pressing Command + G.
Step 17
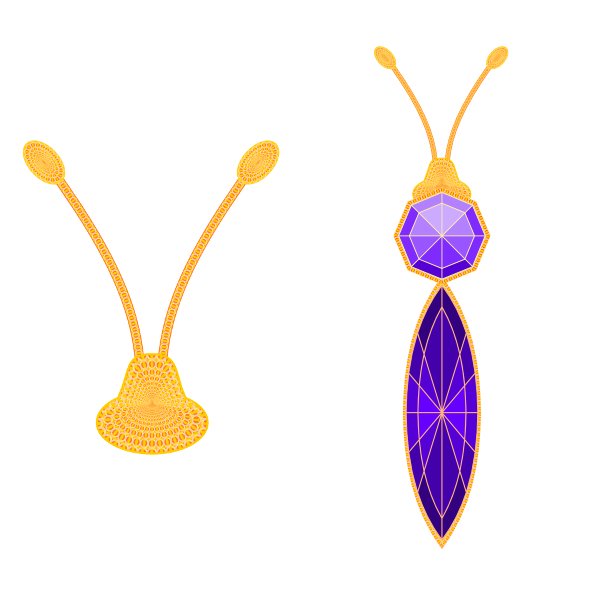
We’re going to work on the antennae next. Select the Ellipse tool and draw an ellipse. Set its RGB color to #ff7f2a. Go to Path > Object to Path. Press Command + D to duplicate the path.
Set its Fill to none, set its Stroke paint to RGB color #ffd42a. Convert its stroke to path by pressing Command + Alt + C. Paste from the clipboard the circle group and two half-circles. Scale it by 60% using Object > Transform. Place the group over the inner path and go to Extensions > Generate from
Path > Pattern along Path with the same settings as before.
Scale the resulting pattern using Object > Transform with the following settings: Width of 87 and Height of 84. Press Command + D to duplicate it and repeat this time with another settings: Width of 77 and Height of 74. Repeat duplicating and scaling nine more times with the last settings unchanged. Select all of the resulting elements and group them by
pressing Command + G.

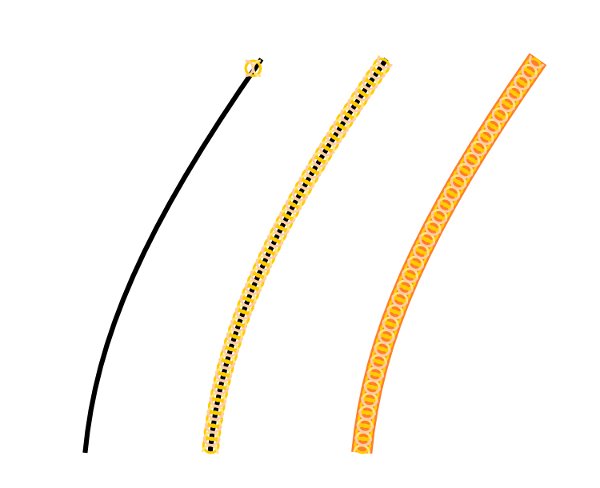
Step 18
Select Bezier tool and draw a two point path. Paste a group from the clipboard. Scale it by 60% using Object > Transform. Place it on the path, go to Extensions > Generate from Path > Pattern along Path using the same settings as before.
Select the path, set its RGB color to #ff7f2a, set its stroke width so that it becomes wider than the pattern above. Finally convert its stroke to path by pressing Command + Alt + C. Select all of the new elements and group them by pressing Command + G.
Step 19
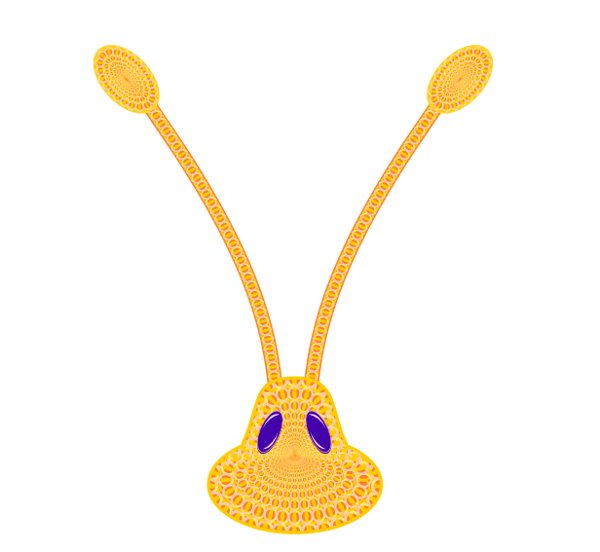
Arrange the two previously created elements as shown. Press Command + G to group them. Place it over the head group. Press Command + D to duplicate it, Flip Horizontally and move it to the left. Select the head group and raise it to the top by pressing Home. Select the three elements and group them by pressing Command + G. Place the head next to the body.
Step 20
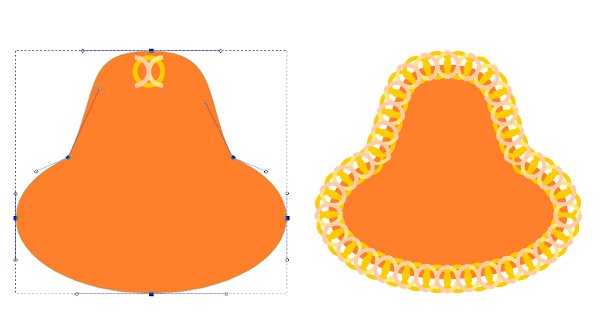
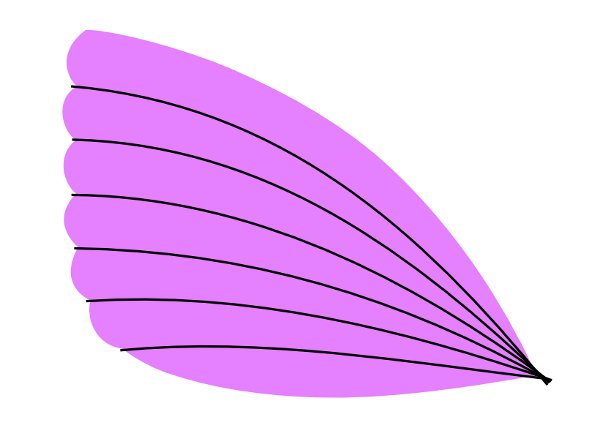
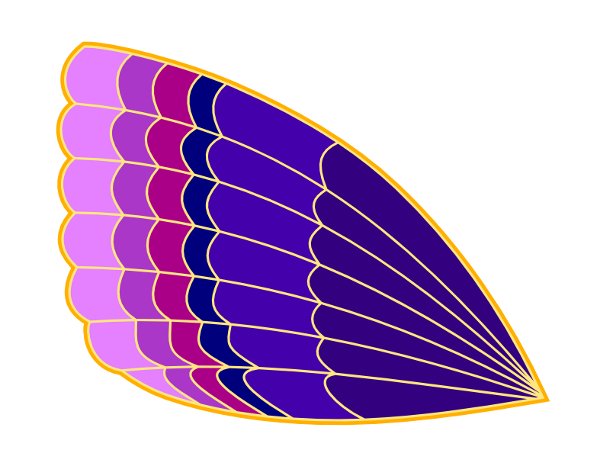
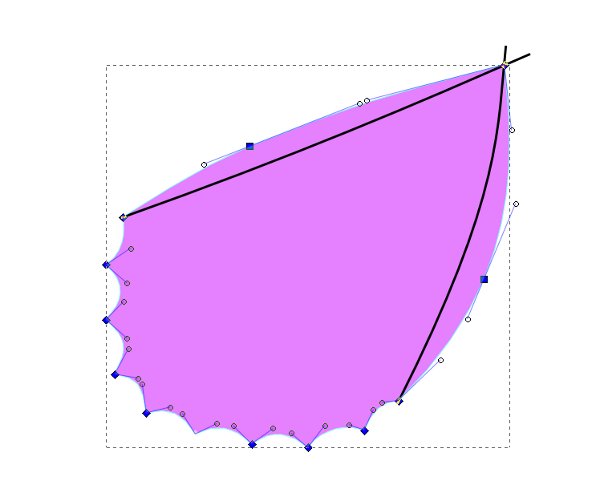
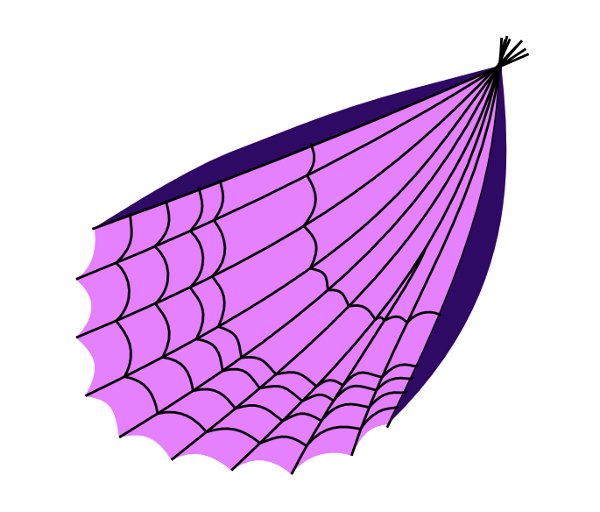
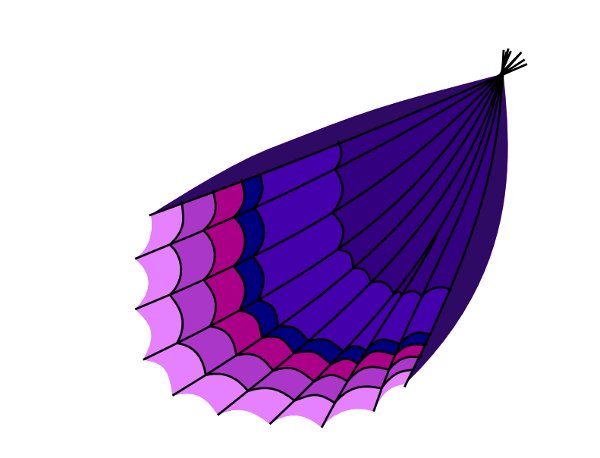
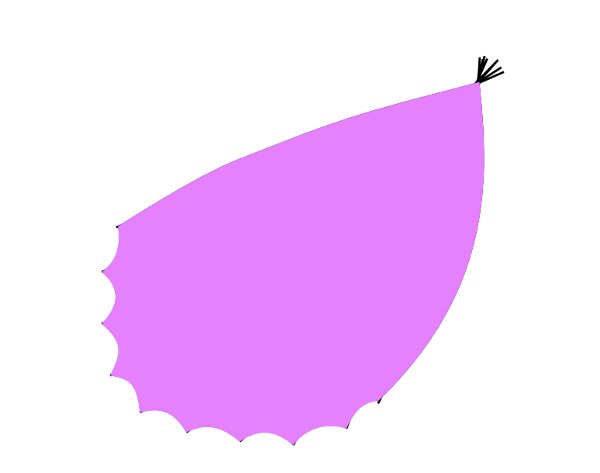
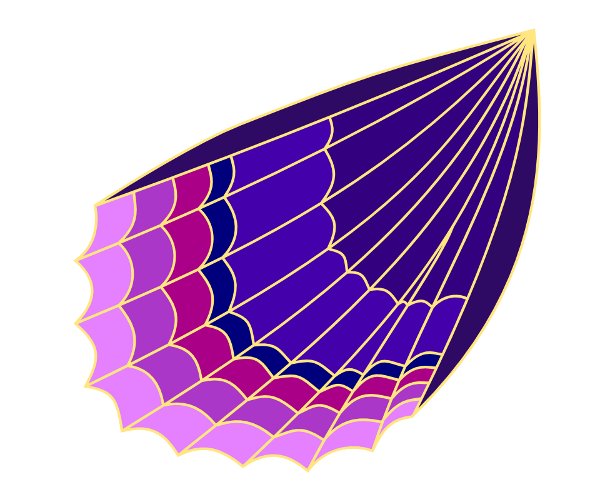
Create a new layer named "Wings" below the current one by pressing Shift + Command + N. Make the layer "Frames" and "Gems" invisible. Select the Bezier tool and draw a butterfly forewing. Use the grid or node aligning tool if needed. Fill it with any flat color.
Step 21
Select the Bezier tool and draw six two-point paths as shown. Select them all and combine them by pressing Command + K.
Step 22
Select the Bezier tool and draw a path from top to bottom of the forewing. Make sure Snap to Path is enabled. Press Command + D to duplicate this path four times and move each time to the right. Adjust the nodes so that they are on the horizontal paths. Select the vertical paths and combine them by pressing Command + K.
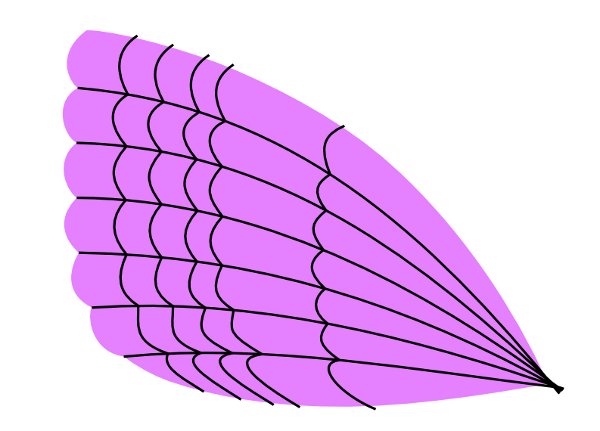
Step 23
Select the forewing and the vertical path and duplicate them by pressing Command + D. Select them both and perform division by pressing Command +/. Set
the resulting paths’ RGB colors as shown.
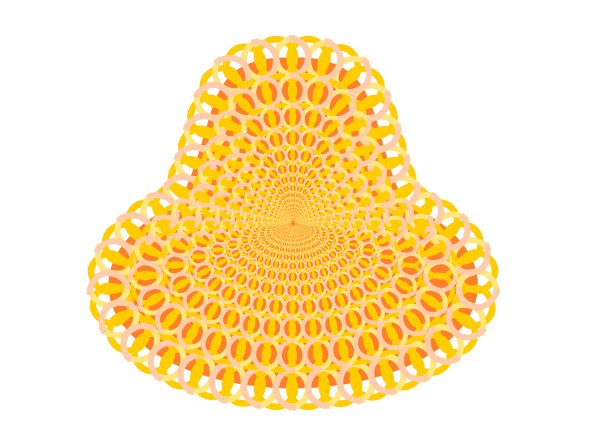
Step 24
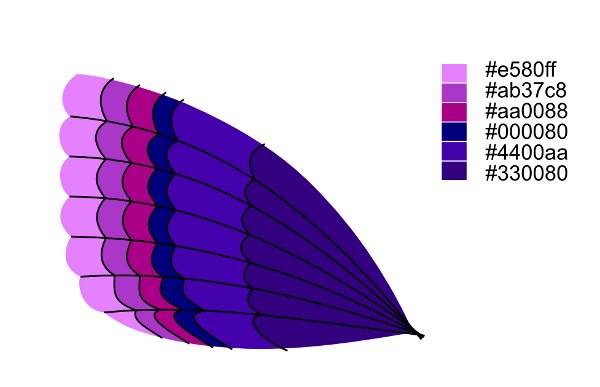
Select the vertical and horizontal paths and convert their strokes to path by pressing Command + Alt + C. Make sure their Stroke Width is the same. Select them both and perform union by pressing Command ++.
Now, alt-click to select under the previously duplicated forewing path. Press Home to raise it to the top. Press Command + D to duplicate it again. Select the forewing path and the inner united path and perform intersection by pressing Command +* to trim the inner path.
Step 25
Set the remaining forewing path’s Fill to None, set its Stroke Width to the same amount as the inner path’s was. Press Command + D to duplicate it. Convert its stroke to path by pressing Command + Alt + C. Select the resulting path and the inner path and perform union by pressing Command ++. Set the resulting paths RGB color to #ffe680.
Finally, set the remaining forewing path stroke wider than the one set for the inner path. Convert its stroke to path by pressing Command +Alt+C. Set its RGB color to #ffb000 and press End to send it to the bottom to serve as an outline. Select all of the created elements of the forewing and press Command + G to group them.
Step 26
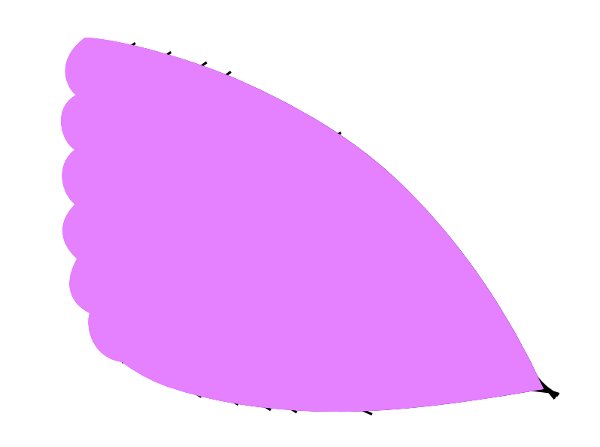
Select Bezier Tool and draw a hindwing. Fill it with any flat color. Press Command + D to duplicate the hindwing.
Draw two two-point paths. Press Command + D to duplicate them. Select one of them and the hindwing and perform division by pressing Command +/. Repeat operation for another path. Fill two resulting smaller paths with RGB color #2e0a64.

Step 27
Using the Bezier tool draw another eight paths consisting of two nodes. Select all of the black paths and combine them by pressing Command + K. Draw a perpendicular path. Make sure Snap to path is enabled.
Duplicate this path and move it slightly towards the upper part of the hindwing. Adjust the nodes so that they are on the path which they cross. Repeat the whole operation three more times. Select all of the five newly created paths and combine them by pressing Command + K.
Step 28
Press Command + D to duplicate the perpendicular path. Select the duplicated path and the inner part of the hindwing and perform division by pressing Command +/. Set the RGB colors of the resulting paths the same as before in the forewing.
Step 29
Select the perpendicular path and convert its stroke to path by pressing Command + Alt + C. Select the two side parts of the hindwing and duplicate them by pressing Command + D. Press Command + K to combine the duplicated paths. Select the combined path and the perpendicular one, then perform difference by pressing Command +- to trim the perpendicular path.
Select the horizontal path and convert its stroke to path by pressing Command + Alt + C. Alt-click to select under the original full hindwing. Press Command + D to duplicate it. Select the horizontal path and the duplicated full hindwing and perform intersection Command +* to trim the horizontal path.
Alt-click to select under the original full hindwing, duplicate it by pressing Command + D. Set its Fill to None, set its Stroke Width to the same amount as the inner perpendicular and horizontal paths were. Convert its stroke to path by pressing Command + Alt + C. Select the three black paths and perform union by pressing Command ++. Fill it with RGB color #ffe680.
Step 30
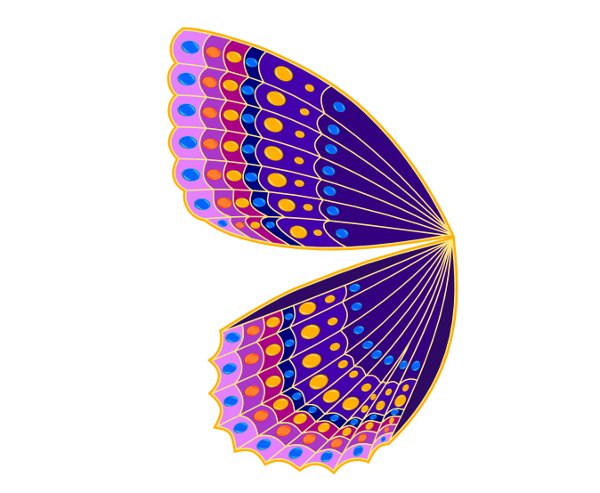
Alt-click to select under the original full hindwing. Set its Fill to None, set its Stroke Width to the amount that is larger than the one of the inner path to create an outline. Convert the stroke to path by pressing Command + Alt+ C. Fill the new path with RGB color #ffb000. Press End to send it to the bottom. Select all of the elements of the hindwing and group them by pressing Command + G. Place the hindwing under the forewing.
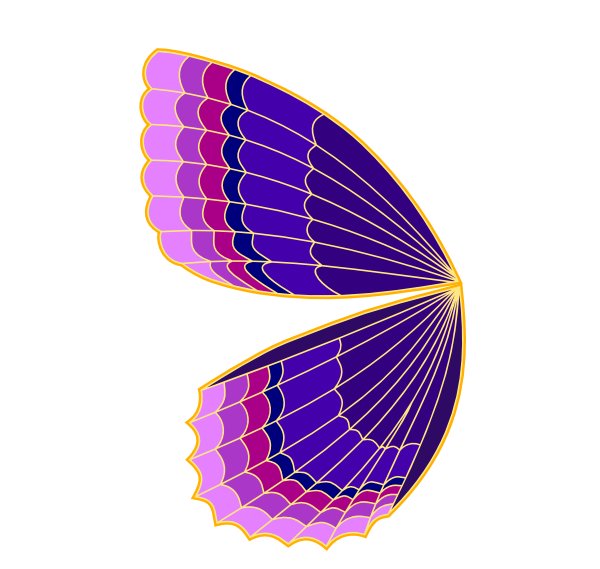
Step 31
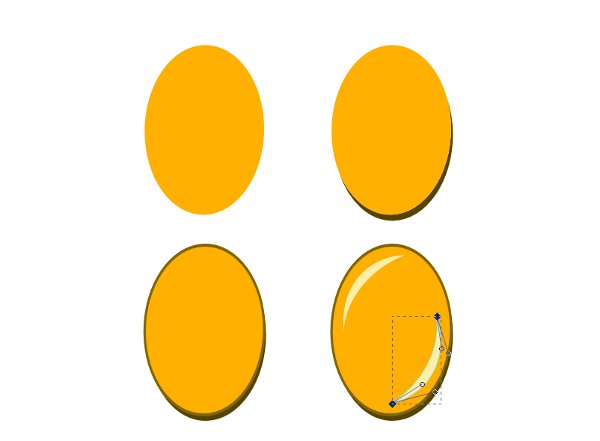
Switch to the layer "Gems" and make it visible. We’re going to work on decorating the wings and creating gems. Select the Ellipse tool and draw an ellipse. Press Command + D to duplicate it and move it slightly down and to the right as a shadow. Press Command + D to duplicate the original ellipse one more time.
Select the ellipse and the shadow ellipse and perform difference by pressing Command +-. Duplicate the original ellipse, set its Fill to None and the Stroke Color to darker shade. Convert the stroke to path by pressing Command + Alt + C. Using the Bezier tool draw a two-point path, duplicate it and flip it horizontally, place the highlights strategically.
Step 32
Set the colors of the elements as shown. Press Command + D to duplicate all of the elements and change their colors. Repeat two more times. Press Command + G to group each gem.
Step 33
Select the gem that will be an eye of the butterfly. Scale it using Object > Transform with the following settings: Width of 35% and Height of 55%, and in the tab Rotate set the Angle to -23 degree. Place the eye on the head, duplicate it by pressing Command + D, flip it horizontally and move it to the right.
Step 34
Decorate the wings with gems, scaling and rotating when necessary.
Step 35
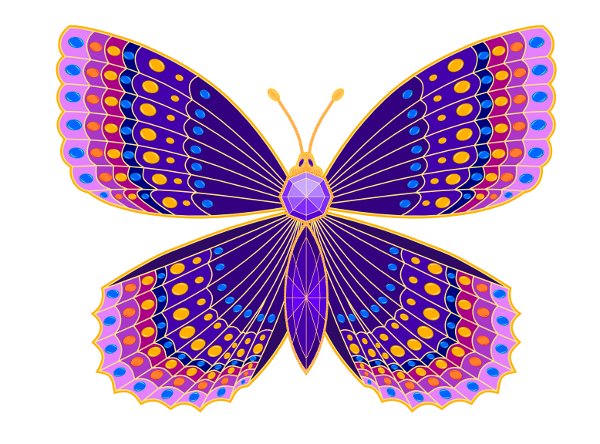
Select all of the gems and press Command + G to group them. Select the wings and gems and press Command + D to duplicate them, flip them horizontally, move them to the right so that the body part is right in the middle. You will end up with four decorated wings of the butterfly.
Step 36
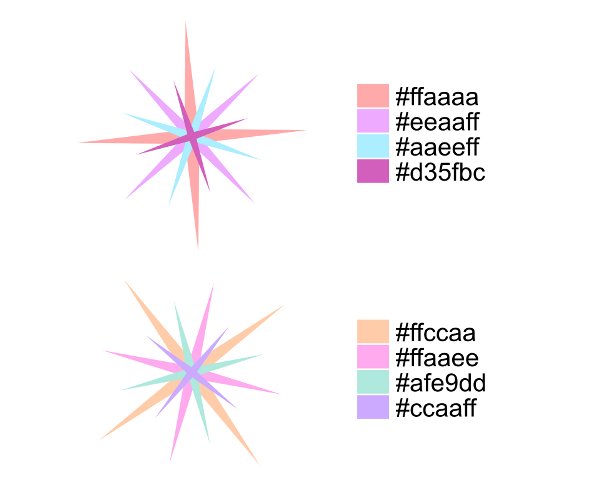
Create a new layer "Sparks" by pressing Shift + Command + N. Raise it to the top by pressing Shift + Command + Home. Select the polygon tool and draw a 4-verticle star. Press Command + D to duplicate it. Go to Object > Transform and scale it proportionally by 80%, rotate it by a 40 degree angle in the Rotate tab.
Press Command + D to duplicate the scaled polygon and scale it proportionally by 80%, rotate by 28 degree angle. Press Command + D to duplicate the duplicated polygon and scale it proportionally by 80% and rotate by 37 degree angle. Set the colors as shown. Select all of the elements of the spark and duplicate them by pressing Command + D. Rotate them all by an angle of -57 degree using Object > Transform. Set the new spark’s colors as shown.
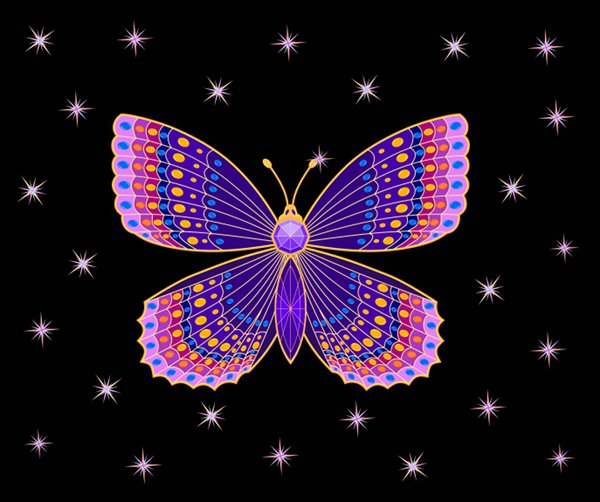
Conclusion
Create a new layer "Background" by pressing Shift + Command + N. Send it to the bottom by pressing Shift + Command + End. Draw a rectangle, fill it with a flat black color. Press Command + D to duplicate the previously created sparks and distribute them randomly around the butterfly, scaling and flipping horizontally when needed. Here’s our final result.