20 Free PowerPoint Templates that Don’t Suck

Not satisfied?

You can look for more free templates at these web sites (or if you’re game to design your own, here are some tips to keep in mind). If there are any sites that you like to use, don’t forget to post them in the comments section below!

  1. Presentations ETC
  2. Presentations Magazine
  3. TemplatesWise
  4. Templates Made Simple
  5. Free PowerPoint Templates
  6. OpenOffice
  7. PoweredTemplates

10 Rocking Drum Tuition Videos

Here are 10 rocking drum tuition videos that teach you rudiments, patterns and techniques. This is great information to know when you’re programming a realistic drum pattern for your track. And if you’re serious about learning how to play drums. Learn and enjoy!


1. How To Play Drums – Drum Lessons

“Are you ready to learn how to play drums? You can get started by watching Jared Falk’s video lesson above. It includes step-by-step training that will show you exactly how to play drums in no time.”


2. Hear and Play Drums 101


3. Hear and Play Drums 102: How to Play the Drums by Ear

“Enjoy learning various 4/4, cut-time, and off-beat patterns as he takes you through various genres: jazz, gospel, rock, funk, Latin, and others! You’ll also learn various fills and tricks to add to your playing almost immediately!”


4. Drum Lesson “The Doubling Technique”

“Learn a simple technique that will spice up your drum fills, beats, and overall drumming! More lessons on OnlineDrummer.com.”


5. Paradiddle-diddle Around the Kit


6. Intermediate Drum Fills


7. Pattern Drumming

“Learn a cool ‘Pattern Drumming’ beat and also learn how to develop your own rhythms and ‘druming brain’ with Pattern Drumming.”


8. Pattern Drumming 2: Expanding Rudiments

“Learn a couple of cool drum beats involving expanding drum rudiments. This is the 2 part of the “Pattern Drumming” series. Find more lessons, beats and videos at http://www.OnlineDrummer.com.”


9. John Bonham Triplets, Van’s Cool Drumming Tips

“Just some triplets between the bass and tom or snare. Inspired by John Bonham. Enjoy. RVP”


10. Building Hand Technique

“I have had several requests to discuss hand technique and stick control. Here are some basic things to get started. Enjoy, RVP”

Are you a drummer or drum programmer? Feel free to share your own tips or favorite videos in the comments.


Quick Tip: Using the External Instrument Plugin in Logic Pro

In this quick tip I’ll show you how to set up the External Instrument plugin. This handy little plugin allows you to integrate hardware synths into Logic and treat them just like a software instrument.

Introduction

As we move further into the depths of computer land it’s easy to forget about all those great hardware synths that are now probably gathering dust in the corner of your studio. There’s a great little plugin in Logic Pro called ‘External Instrument’ that allows you to integrate an external hardware synths outputs (say a Roland XV-5080 or something) straight into the Logic mixer.

The plugin also lets you transmit MIDI to the device and record it, all on a single channel. You can use a single MIDI channel or multiple channels depending on how you choose to set this up. All you need is a multi channel audio I/O box and a MIDI I/O port.

So dust off that Korg M1 and lets get going!

Step 1

Yep, you guessed it! Create a new Logic project and create a Software Instrument track.

step1


Step 2

Open the Environment (Command+8), select the ‘MIDI Instr.’ layer and create a new Instrument object from the New menu. Once you’ve done this name the object by double clicking the name in the Inspector. I’m going to call mine Virus TI as thats what I’m going to connect.

step2


Step 3

Make sure the MIDI in on the hardware synth is connected to the MIDI out of your interface. I’m using the MIDI ports on the MOTU 828mk3. Assign the port your going to use from the ‘Port’ drop down in the Inspector.

step3


Step 4

Go back to the Arrange page and on the Software Instrument track choose ‘External Instrument’ from the Instrument slot where you would normally load an ES2 etc. Make sure you have a Stereo instance.

step4


Step 5

This is a pretty bare bones arrangement with only three parameters. From the ‘MIDI Destination’ drop down choose the Instrument object you just created. In my case it’s ‘Virus TI’.

step5


Step 6

Next up, from the ‘Input’ drop down choose the inputs that the external device is plugged into on your Audio I/O interface. My Virus is plugged into ‘Analog 1-2′ which is ‘3-4′ on the input list.

step6


Step 7

If I play some MIDI with the track armed you can see I have the signal coming in from the Virus.

step7


Step 8

The great thing about this is that I can now process the external synth with lots of lovely plugins in the Logic mixer as well as automating too!

step8


Considerations

Multiple MIDI Channels

If your dealing with a multi channel device like an Roland XV-5080 just create a ‘Multi Instrument’ in the Environment. Give it a name and assign the Port. Make sure all the boxes for the channels are activated by clicking on them.

con3

Follow all the steps above as usual, in the ‘MIDI Destination’ box choose Channel 1 of the Multi Instrument. To get ‘MIDI Channel 2′ just create a new External MIDI track. Check ‘Open Library’.

con1

In the Library just choose ‘Channel 2′ from inside the Multi Instrument folder.

con2

If you need more MIDI channels just repeat the process.


Bouncing the External Device

You can’t Bounce offline as the real world device is not squashable! If you want to render the hardware synth just create an audio track with the correct inputs and record your synth to disk.

con4

Hope this brings some new life to your hardware synths. Till next time!


Quick Tip: Create a Bas Relief Effect With Photoshop’s 3D Tools


Hello everyone! In today’s quick tip tutorial I will demonstrate how to create a really nice bas relief effect using a texture, any picture, and Photoshop’s 3D tools. Let’s get started!


Resources Used

The following resources were used in the production of this tutorial:


Step 1

Create a New Document in any size you want, in this case mine is 1024 x 968 px at 72dpi, RGB. Fill the Background with any dark color (Black #000000 in this case) and create a new layer above it named "Plane", then fill this layer with another lighter color, like 50% gray.


Step 2

Select the "Plane" layer and go to 3D > Plane. This action will create a 3D Layer with the gray background as Diffuse texture.


Step 3

Select the "Plane" 3D layer and show the 3D Tools panel (Window > 3D). Select the Scene object and under Global Ambient Color set this one: #FFFFFF (White). You can change Anti-Alias to Best for a better rendering.


Step 4

Double click at the "Diffuse" Texture on the Layers Panel. A New window will appear showing the texture’s layers, then open the "Wood Texture", select it, copy it on the clipboard and paste it to the texture file into a new layer. Save the texture file and go back to your main document, you’ll see the texture applied to the "Plane" layer.


Step 5

Click on the "Materials" Button on the 3D panel, then, next to the Bump Strength box, click on the tiny button next to it and select New Texture. Make the size of the new Texture layer exactly the same than your document (1024 x 768 px) and hit OK to commit.


Step 6

Double Click on the brand new "Bump" texture layer created in the previous step and just like the diffuse texture, a new window will appear. On this new document paste the "Lion Statue" picture into a new layer, you can do further editing here such as removing the white borders but it’s optional since it has white background as well as the document background. Finally using the Hue/Saturation panel (Command + U) lower the saturation to -100 (you can use any other technique to make it 100% grayscale) and save it.


Step 7

As an additional detail I’m using a swirl brush to paint details around the Bump texture, remember to always use a gray color for best results. Save the texture document, close it and go back to the main document, and you’ll see the bump texture applied.


Step 8

Using the 3D transformation tools, rotate the layer a little bit (if you have doubts on how to use the 3D tools take a look at my Basic Guide to Photoshop’s 3D Tools). Then, on the Bump Strength box, change the value from 1 to 5 (this is very important, if you want more strength on the effect try with a larger number), and set both Glossiness and Shininess to 0% to remove undesired reflections.


Step 9

If you would like to try something different, change the Diffuse Texture (Double click on the Diffuse texture on layers panel) and on the texture file, add a new layer with another texture, in this case a brushed metal. After that, save the texture layer and you’ll see the bas relief effect applied to this new texture. You can also change the Glossiness and Shininess values on the material to add some reflections.


Conclusion

Really simple right? You can also try this effect with different materials and images.

.

Step-by-Step : How to Make an Animated Movie

In this in-depth article, Pratik Gulati walks us through the many stages involved in creating an animated movie from scratch, whether it be the next Hollywood blockbuster or the shortest of short films. So if you’re thinking about trying it yourself and want to know how it’s done, or even if you’re just curious about the process, this article is one you don’t want to miss.

The production pipeline of a typical animated short or a movie can be divided into three stages : pre-production, production and post-production. In this article we will be discussing these three key stages in detail.


Pre-Production

The first process in the animation pipeline, and also one of the most important, is pre-production. It begins with the main concepts which are initially turned into a full story, and then, once the story has been finalized, other things such as the script, shot sequence and camera angles are worked on.

Some major components of pre production are Story Boarding, Layouts, Model Sheets and Animatics.


…they also provide a visual reminder of the original plan; something that can be referred back to throughout the production.

Story Boarding

The Storyboard helps to finalize the development of the storyline, and is an essential stage of the animation process. It is made up of drawings in the form of a comic strip, and is used to both help visualise the animation and to communicate ideas clearly. It details the scene and changes in the animation, often accompanied by text notes describing things occurring within the scene itself, such as camera movements.

Not only can storyboards be especially useful when working in group environments (something quite common in the animation industry,) but they also provide a visual reminder of the original plan; something that can be referred back to throughout the production.


Layouts

Once the storyboards have been approved, they are sent to the layout department which then works closely with the director to design the locations and costumes. With this done they begin to stage the scenes, showing the various characters’ positions throughout the course of each shot.


Model Sheets

Model sheets are precisely drawn groups of pictures that show all of the possible expressions that a character can make, and all of the many different poses that they could adopt. These sheets are created in order to both accurately maintain character detail and to keep the designs of the characters uniform whilst different animators are working on them across several shots.

During this stage the character designs are finalized so that when production starts their blueprints can be sent to the modeling department who are responsible for creating the final character models.


Animatics

In order to give a better idea of the motion and timing of complex animation sequences and VFX-heavy scenes, the pre-visualization department within the VFX studio creates simplified mock-ups called “Animatics” shortly after the storyboarding process.

These help the Director plan how they will go about staging the above sequences, as well as how visual effects will be integrated into the final shot.


Production

Now that the storyboard has been approved the project enters the production phase. It’s here that the actual work can start, based on the guidelines established during preproduction. Some major parts are layout, modeling, texturing, lighting, rigging and animation.


[layout artists] produce the 3D version of what storyboard artists had previously drawn on paper.

Layout

Using lo-res models or blocks of geometry in the place of the final set and characters, the Layout Artist is responsible for composing the shot and delivering rough animation to the animators as a guide. What they produce is the 3D version of what the storyboard artists had previously drawn on paper.

During this stage the Director approves camera moves, depth of field and the composition of the models making up the set and set dressing. It is then the responsibility of the Modeling department to deliver these approved set, prop and character models in the final layout stages.


Modelling

Modelers are usually split into two or more departments. Whilst organic modelers tend to have a sculpture background and specialise in building the characters and other freeform surfaces, hard-surface modelers often have a more industrial design or architectural background, and as such they model the vehicles, weapons, props and buildings.

Working closely with the Art Directors, Visual Effects Supervisors and Animation Supervisors, modelers turn the 2D concept art and traditionally sculpted marquette’s into high detail, topologically sound 3D models. They then assist the Technical Animator and Enveloper as the model has a skeleton put in place and the skin is developed. Following this, the model may be handed back to the Modeler, who will proceed to sculpt facial expressions and any specific muscle tension/jiggle shapes that may be required.

Once the model is approved, it will be made available to the rigging and texture paint departments, who complete the final stages in preparing the model for animation and rendering. With luck, the model will move through the production pipeline without coming back for modeling fixes, although some amount of fixes are inevitable – problems with models sometimes don’t appear until the rendering stage, in which case the lighter will send the model back to be fixed.


Texturing

Whether creating a texture from scratch or through editing an existing image, Texturing Artists are responsible for writing shaders and painting textures as per the scene requirements.

Working hand-in-hand with the surfacing and shading departments, textures are painted to match the approved concept art and designs which were delivered by the art department. These textures are created in the form of maps which are then assigned to the model.


…lighting TDs combine the latest version of the animation, the effects, the camera moves, the shaders and textures, and render out an updated version every day.

Lighting

Not only does a Lighting Artist have to think lighting the individual scenes, they also have to consider how to bring together all of the elements that have been created by the other departments. In most companies, lighting TDs combine the latest version of the animation, the effects, the camera moves, the shaders and textures into the final scenes, and render out an updated version every day.

Lighters have a broad range of responsibilities, including placing lights, defining light properties, defining how light interacts with different types of materials, the qualities and complexities of the realistic textures involved, how the position and intensity of lights affect mood and believability, as well as color theory and harmony. They are required to establish direct and reflected lighting and shadows for each assigned shot, ensuring that each shot fits within the continuity of a sequence, all the while aiming to fulfill the vision of the Directors, Production Designers, Art Directors and VFX Supervisors.


Rigging

Rigging is the process of adding bones to a character or defining the movement of a mechanical object, and it’s central to the animation process. A character TD will make test animations showing how a creature or character appears when deformed into different poses, and based on the results corrective adjustments are often made.

The rigging department is also involved in developing cloth simulation – so as well as making a character able to clench their fist or rotate their arm, the rigging and cloth department is responsible for making their costume move in a believable manner.


…planning a character’s performance frame by frame uses the same basic principles first developed for 2D animation.

Animation

In modern production companies, the practice of meticulously planning a character’s performance frame by frame is applied in 3D graphics using the same basic principles and aesthetic judgments that were first developed for 2D and stop-motion animation. If motion capture is used at the studio to digitize the motion of real actors, then a great deal of an animator’s time will also be spent cleaning up the motion captured performance and completing the portions of the motion (such as the eyes and hands) that may not have been digitized during the process.

The effects team also produce elements such as smoke, dust, water and explosions, although development on these aspects does not start until the final animation/lighting has been approved as they are integral to the final shot and often computationally heavy.


Post-Production

Post-production is the third and final step in film creation, and it refers to the tasks that must be completed or executed after the filming or shooting ends. These include the editing of raw footage to cut scenes together, inserting transitional effects, working with voice and sound actors and dubbing to name just a few of the many post-production tasks.

Overall, however, the three main phases of post-production are compositing, sound editing and video editing.
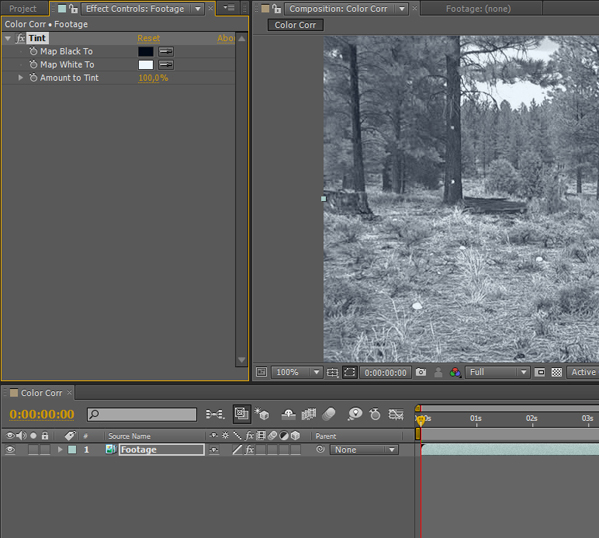
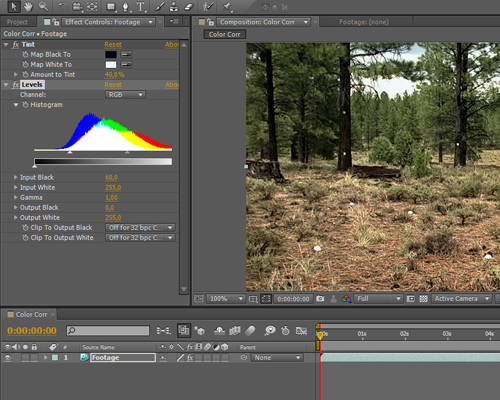
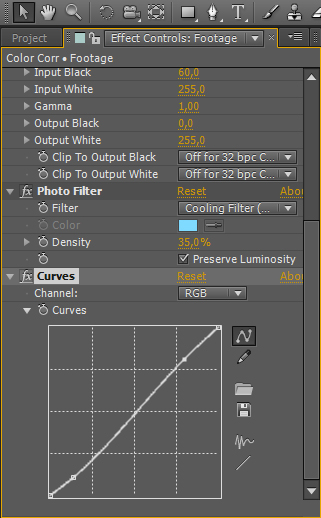
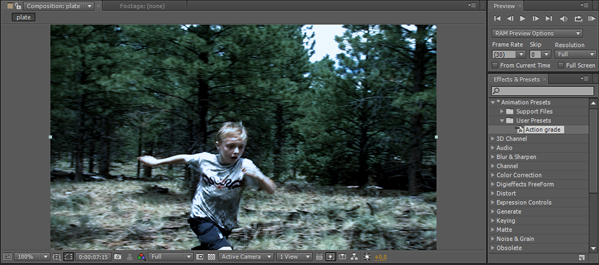

Compositing

The compositing department brings together all of the 3D elements produced by the previous departments in the pipeline, to create the final rendered image ready for film! Compositors take rendered images from lighters and sometimes also start with compositing scripts that TDs develope in order to initially comp together their dailies (working versions of the shot.)

General compositing tasks include rendering the different passes delivered by a lighting department to form the final shot, paint fixes and rotoscoping (although compositors sometimes rely on mattes created by a dedicated rotoscoping department), as well as the compositing of fx elements and general color grading.


Sound Editing

This department is responsible for selecting and assembling the sound recordings in preparation for the final sound mix, ensuring lip sync and adding all of the sound effects required for the final film.


Video Editing

Video editing is the process of manipulating and rearranging shots to create a seamless final product, and it is at this stage that any unwanted footage and scenes are removed. Editing is a crucial step in making sure the video flows in a way which achieves the initial goal. Other tasks include titling and adding any effects to the final video and text.


Conclusion

The production pipeline detailed above is broadly common in most studios, however each studio is likely to have a custom pipeline determined by the type of project they are currently undertaking. A 2D production pipeline starts with workbook and goes all the way through final checking, composting and film output, whilst the 3D CGI production process emphasizes the design, modeling and rigging and animation stages. Moreover, animation production is a very coordinated process where different teams of artists work together while utilizing optimum resources and achieving the initial goal in the time available.


Don’t miss more CG tutorials and guides, published daily – subscribe to Cgtuts+ by RSS.

Quick Tip: Shooting Derelict Locations

One of my favourite aspects of being a photographer is the opportunity to create something beautiful or interesting from something that would otherwise be disregarded. In this instance, we’ll have a quick look at capturing scenes from situations and objects considered broken, run down and unfit for their original use.


Finding a Location

You may know an ideal setting that you’d like to capture; maybe to tell it’s story, to preserve it before it gets destroyed, or just be somewhere that you pass on a regular basis that looks interesting.

It doesn’t matter what your form you inspiration comes in, but it is important to remember what inspired you to choose the location, as this will help shape photographic decisions on your shoot.


Safety First

It is vital to remember that there is a reason for this location being left derelict. Firstly, consider whether you have permission to enter the site, is it public or private land? It is illegal to trespass on private property, so please ask permission if you think it’s necessary. In the same vein, if you get asked to vacate the premises, do so quickly and politely!

Once you’re on site, be sure to be aware of your surroundings – derelict buildings can be particularly dangerous and depending on the state of the building, it may be a good idea to take a torch and hard hat.


Telling the Story

Once you’ve established your location and personal safety, it’s time to think about your shots. In this situation, I like to try and tell the story of the site.

Consider the history and activity that may have taken place in years gone by. Try to build up a selection of establishing shots, to set the scene, as well as focusing in on detail.


Focal Points

Keep your eye out for any defining features, is there anything particularly unusual about the place, or does it stir up a certain feeling or emotion in you? If so, consider how you might be able to represent that in the photos.

The location for this set of accompanying photos had a particularly eerie feel and the gun shot wound in the wall of this children’s play room really captured this unsettling feeling in me.


Being Creative

Don’t be afraid to experiment and be creative with your camera. It’s very easy to go into ‘documentary photographer mode’, trying to capture everything as it is, which is important if you’re trying to tell a story. Work with the surroundings and consider the lighting, angles and perspectives that may enhance your shots.

It may also add to your shots if you include a human element. This can add a sense of scale, but also represent the actions of the locations previous inhabitants.

Safari 5 – The World’s Most Productive Web Browser

Editor’s Note:  Peter North, one of WorkAwesome’s newest contributors, is at Apple’s WWDC all week.  He’ll provide little snippets for our readers to digest over the course of the week – to pass on what Apple and its developer community has to offer in terms of making all of us more productive.

Yesterday at Apple’s Worldwide Developers Conference, Apple introduced Safari 5, an upgrade that introduces some significant changes. It has special accommodations for Windows users, faster page loading, and a new developer program that allows programmers to tailor Safari to suit all of our needs. With its new features, Safari 5 could be the most productive browser ever.

Safari Speed

Safari 5 handily beat the latest versions of Firefox, Opera and Chrome in speed tests. In some extreme cases, it loaded pages over a half-second faster than other browsers. That may not sound like much, but if you’re visiting thousands of web pages with a slower browser, it could add up to a lot of wasted time. Safari 5’s quicker page loading could make you a top speed taskmaster.

Reader

Safari 5’s new “Reader” function allows the visitor to view a page’s main content without having to bother with ads and other visual distractions. It detects the real “body” of the page, and “cuts out” banner ads, navigation elements and page wraps. The result is a clean, streamlined, distraction-free browsing experience that keeps you focused on the content you came for. You no longer have to squint at the desired information while tuning out the ads in your periphery; Safari 5 can tune them out for you.

Safari Developer Program

Safari has finally released a developer program that allows programmers to build their own modifications and additions to Safari. These “add-ons” are part of what made Firefox such a popular browser, and there will soon be hundreds of Safari extensions to help users complete their web-related work much more easily. It’s hard to speculate what they will come up with, but surely there will be some powerful tools to help you get your web work done.

Enhancements Just For Windows

Although Apple and Microsoft are competitors, Apple has taken great care to optimize the PC version of Safari 5 for those who use Windows, particularly for rich media and interactive graphics. It’s not just a good browser for Macintosh computers; Safari 5 has been tailored to work well on Windows.

Future Proofed

Safari 5 is the leader in supporting HTML5, the latest version of hypertext that enables faster browsing with more vibrant experiences. Many major websites are already using HTML5 on their websites, and Safari is ready, ahead of anyone else, to display them optimally. Why let your older browser struggle with the latest hypertext?

Will you give Safari 5 a spin?  Does it have what it takes to usurp your current browser?  Let us know in the comments.

(Image courtesy of Apple)

Will You Buy The iPhone 4?

The big technology news this week (so far) is that the iPhone 4 will soon arrive.  After all the hype and, well…hyperbole, we’ve got a good idea of what it will and won’t do.

Smartphones and mobile devices have been long touted as a productivity savior or suck as the market has grown.  It’s been debated on both sides of the fence as to whether or not they help or hinder the user in terms of increasing their ability to be more productive.

So, are you going to buy the iPhone 4?  If so, why?  If not, why?  Let us know in the comments.

iPhone 4 Adds New Features – and New Distractions

Apple recently revealed some remarkable new features on the new iPhone 4. Some of the most noteworthy features include sharper images, faster processing, longer battery life and video conferencing. It could clearly be a an asset for increased productivity…or a debilitating source of endless distraction.

Its new innovations are as concerning as they are impressive. Video calls sound like a great tool, but are you ready for impromptu face-to-face conferences with your boss? Having a phone with a longer battery life, a sharper screen and more computing power sounds great, but is having a “pocket office” a gift of a curse?

A phone with a 40-hour battery life, an HD video camera and a screen with over a half million pixels is practically like having super powers in your pocket. But, as they say, “with great power comes great responsibility.” It could help you be more productive than you’ve ever been, but couldn’t it also turn you into a stressed, snarling super villain?

5 Excellent New Features in Safari 5


On June 7th, Apple released an update to their web browser, Safari 5. It includes a plethora of new features for web developers, including a faster JavaScript engine, better HTML5 support, extension support, and a great Web Inspector update. We will explore what these new features mean for web developers.


1. Improved Web Inspector

A good web inspector is extremely important to most web developers. Many people still prefer Firebug, which is an extension for Firefox, but the Webkit inspector has improved dramatically in the last few years.

CSS Inspector

In Safari 5, the web inspector has an improved CSS inspector panel, which lets you jump directly to a rule definition in the source file.

DOM Inspector

The DOM inspector is much improved, now allowing you to add attributes to DOM nodes in your document, remove nodes, and edit nodes as HTML, which lets you edit the entire tag as if it was a source file.

Resource Panel

The Resources panel is also improved, letting you see all HTTP redirects, along with full header information, including the HTTP status code.

JavaScript Inspector

The JavaScript inspector now lets you disable all breakpoints with a single click, and if you hover over an element while on a breakpoint, you can see the actual object values of what you are hovering over. This will be extremely useful for debugging purposes!

Timeline Panel

Safari 5 now has a new Timeline Panel, which provides information about everything that the browser is doing while you browse. This includes loading data, parsing it, laying it out on screen, and rendering it. Very cool for working on the performance of your website or application.

Audits Panel

Another added panel is the Audits panel, which much like the popular YSlow and Google Page Speed extensions for Firebug, suggests ways for you to improve the performance and compatibility of your site.

Console

The last change to the Web Inspector is that a separate panel for the JavaScript console has been created. This is nice because it allows the console to take up the entire height of the Web Inspector rather that the small part that it used to. It is still available in the old location, however, for convienent access while looking at another panel. For more information about the updates to the Web Inspector, check out this post on the Webkit blog.


2. Better HTML5 Support

Apple touts seventeen new HTML5 features in Safari 5, and you might have heard of their HTML5 showcase that they launched last week (it really contains more CSS3 than anything else, but that seems to be getting lumped under HTML5 as well!). Apple really seems to be pushing HTML5, and Safari 5 now has a score of 136 on html5test.com which is up from 113 in the previous release. Some of the new HTML5 features contained in Safari 5 include:

  • support for fullscreen video with closed captioning
  • geolocation
  • HTML5 AJAX History
  • drag and drop
  • nearly all of the HTML5 input types
  • official support for the new HTML5 elements such as <article>, <header> and <footer>.

Check out the complete list below.

Features For Realtime Webapps

Safari 5 includes two new HTML5 features for realtime webapps, like Friendfeed and Twitter. WebSocket is the first, and EventSource is the second. Now that three of the major browsers, Firefox, Chrome and Safari have implemented the WebSocket spec, writing realtime webapps using something like Node.js for a backend is becoming much more feasable.

WebSocket is essentially a two-way communication channel between your webapp in the browser and the server.

Since it is two way, you could write something like a Twitter client using it, and have new Twitter messages automatically appear as they are pushed from the server, and also push new tweets up as they are written. EventSource is a one way communication mechanism which allows the server to send events to the client but not the other way around. If you want to learn more about EventSource, check out this tutorial.


3. Extension Support

Because it is written using these technologies, it will be possible for someone to write a cross platform extension development library that works across Firefox (Jetpack), Chrome, and Safari 5.

There is now extension support in Safari, and, thanks to a new tool called Extension Builder in the already useful Develop menu, you can write your own. The extensions are written using standard web technologies, including HTML, CSS, and JavaScript and the Extensions API provided by Apple. Because it is written using these technologies, it will be possible for someone to write a cross platform extension development library that works across Firefox (Jetpack), Chrome, and Safari 5. All of them use web technologies to build extensions for their browsers. For security, all extensions for Safari 5 must be cryptographically signed by Apple through their Safari Dev Center.

Later this summer, Apple will open the Safari Extensions Gallery which will give users an easy place to find an install extensions. Panic is already showing off their extension called Code Notes, which, when it comes out, will allow you to add annotations to web pages by drawing and writing text notes directly on the site. The extension will then allow you to share your annotations via email. A very cool example of what the Safari 5 extensions API is capable of.


4. Faster JavaScript Engine

It wouldn’t be a complete browser upgrade if Apple didn’t tout their 30% faster JavaScript Engine. In the SunSpider JavaScript performance test, Safari ranks similarly to Google Chrome, and is still far ahead of the latest version of Firefox. While JavaScript performance is important, the real performance bottlenecks for web applications do not lie in the raw JavaScript language performance, but in the DOM API, which is notoriously slow in all browsers. I hope more attention is payed to DOM performance in the future.


5. Safari Reader

While not specifically a web developer feature, I’m sure you read a lot of articles like this one around the web. Safari Reader is essentally a way to get all of the destractions out of your way while you read just the article. Much like the Readability bookmarklet, Safari Reader auctomatically recognizes pages with an article in them, and presents a button in the toolbar that extracts the text and images from just the article section of the page and displays them in a nice readable font. It is also very nice that you can easily email and print just the article while you are looking at the Reader view. I’m sure that I will use this a lot!


While not a major release in terms of user features, Safari 5 is a very nice release for developers. With much better HTML5 support, increased JavaScript performance, and a better Web Inspector, Safari is now my development browser of choice. What about you?

How To Keep Your Color Presets

Have you always wanted to create your own color presets? Now you can! Make your own complete library of easily adjustable color effects with this new tutorial. From levels to hue and saturation, you can now have full control over the complete look of your scene. Do you want the scene to be a rainy day or a warm summer? Lets take a look!


Tutorial

Step 1

First of all, we need some footage to work with. The footage I will be using for this tutorial can be downloaded at here. Just go to the download section and go to tracking plates. Then download the T-Rex chase footage. Of course you can also shoot your own footage. For this example, we’ll be creating a action grade. The scene will be tinted with deep blue colors and will make the scene look cold but intense.

Step 2

Let’s import the footage as a JPEG-sequence. Then drop the footage into a new composition. Now, to keep things organized create two folders. Name the first one “Comps” and the second one “footage”. Drop the composition in the “Comps” folder and the JPEG-sequence into the “footage” folder. Now we are ready to go.

Step 3

Just as a tip, try this tutorial to understand bit depth so that you have full control over your color management:. The default settings are for this footage just fine though.

Step 4

Let’s start with the tint. Go to your Effects and Presets tab and type “tint”. Now select the tint effect under the “color correction” tab and drop it onto your footage. Map the black to a very deep blue color, something like #010816. Map the white to a very bright blue color, something like #EDF6FC. Now set the amount to about 40%.

Step 5

After that, apply a “levels” filter, also found under the color correction tab. Set the “input black” to about 60 to create a nice contrast. Leave the other settings as they are. However, you must be careful when adding contrast. Although it gives more depth and a nicer look to the footage, when applied to much it will destroy the details. Be sure to find a good balance between detail and contrast.

Step 6

Now, apply a “photo filter”. Just type “photo filter” in the Effects and Presets tab and drop it onto your footage. You can use any preset you want but for this purpose I like the “Cooling filter (82)” preset. Set the Density to about 35%.

Step 7

Next, apply a “curves” filter to the footage and create a very slight contrast. Then go to the red channel and remove some red from the footage. This will give the scene a nice blue-greenish look.

Step 8

Finally, apply a “hue/saturation” filter to the footage. Set the Master Hue to about 8 degrees to add a blue look and set the saturation to -5, to desaturate the footage just a little bit.

Step 9

Now, make a RAM-preview of the footage and make sure the color suites the scene. Depending on the scene, you can even keyframe most of the effects due to the fact that the light in the actual footage is constantly changing.

Step 10

To save your color correction as a preset, select all the effects (otherwise AE will just save the last one you’ve selected) and go to Animation -> Save Animation Preset in the top menu. Give your preset a name and hit save.

Step 11

Now After Effects should be reinitializing the effects and presets. This may take a moment. To apply your effect to other footage, just go to the *Animation Presets tab and then to User Presets. There you should find your grade. To test, just import the footage again and apply the effect.

Step 12

Even though the effects looks good on this scene, as soon as you import other footage the effect may look different. This particular original footage is very saturated and has a yellow tint (see the foreground grass). However, because we’ve created this effect ourselves we can easily adjust it. To match other shots, just play around with the settings. In most cases however, you will find that the effect can be applied to many shots without completely having to readjust all the effects.

Step 13

Now you’ve created your own action grade. However, of course you can always create more grades! If for example you want to give your footage a more warm and summer look, you can apply the same effects as for the action grade, but then instead of blue you can take a nice warm yellow color for the tint and the hue for example. The key is to play with the settings until you get the look that matches the feeling of your scene.

Step 14

That was it then. You can now create and save your own color presets! Premium members can download the scene file and the preset. Don’t forget to stand out, and be creative!


Inspiration: 35 Amazing Vector Landscapes


Landscapes aren’t necessarily the first thing that come to mind when one thinks of vector artwork. After all, landscapes are often very nuanced and hold a wide variety of shapes, colors, and patterns that can be difficult to mimic in a vector image. But that doesn’t mean there aren’t some incredibly talented vector artists out there creating beautiful landscapes, some of which are almost photo-realistic (especially if viewed from a distance).

Continue reading “Inspiration: 35 Amazing Vector Landscapes”

Quick Tip: Quickly convert CMYK to Pantone


Have you ever found yourself rushing a file for the printer but your client hasn’t specified a spot color for their design? Finding a spot color equivalent to CMYK can be difficult. What your client sees is often different to what you see. Here’s a quick way to find the Pantone© equivalent for a CMYK process color without the use of a color book. This tip is perfect for designers who need to use professional offset printing.

Continue reading “Quick Tip: Quickly convert CMYK to Pantone”

How to Work in Audio: Careers in Sound Part 2

Does a career in sound interest you? But do you also suffer from a heavy dose of ADD or ADHD? Do you need constant stimulation and things happening around as to not get bored with whatever it is you are doing. Then some of these careers in audio might be a perfect fit for you.

The next installment of How to Work in Audio: Careers in Sound is going to showcase the different types of sound engineers working in the field of live sound and broadcast work. These are the stressful and energetic careers where everything is happening right now and a minor mistake can result in something going terribly wrong.

If you missed the first part of the series, that demonstrated the differences between the engineers in the music industry, you can read it here. But read on for an overview of the different roles enthusiastic sound engineers can work in a constantly changing live situation.

http://www.sxc.hu/profile/1802


Live Sound Engineers

I like to think of the live sound engineer as a career that’s stuck somewhere between being artistic and blue-collar. We have both the artistic and musical appreciation by working with bands but at the same time we need to be aware of all the heavy lifting, dirty surroundings and grunt work we’re expected to do.

We can divide the live sound guys into three different categories. The front of house mixer, the monitor mixer and the roadie/stage tech.

Front of House Mixer – The live engineer that’s in charge of making the concert sound great for the audience. A whole lot of pressure is on the FOH mixer to make sure everything sounds good and nothing goes wrong. It’s a thankless job in the way that if the concert goes smoothly and the band sounds amazing, the band gets all the credit. But if the band isn’t tight or something goes wrong with the sound, it’s always the sound engineers fault.

Monitor Mixer – This guy resides at the back of the stage supplying the band with the necessary sound they want on stage. Whereas the front of house engineer mixes for the audience, the monitor mixer mixes for the band. A detailed overview of the monitor mixer can be found here.

Roadies – Most of the time you start off as a roadie or a runner of some sort before you “graduate” into doing more serious work, like mixing front of house or the monitors. It can involve a lot of heavy lifting and serious hours as they are most often in charge of putting together the stage, setting up the backline and p.a. needed. I’ve done some pretty rough work setting up sound systems in the wee hour of the morning and then working through the day supervising the stage or mixing the concert. If you want to be in the vicinity of great concerts and want to be a part of a great show without you needing any specific technical knowledge, then it’s a good idea to start off being a roadie of some sorts. Whether that’s directly working for a band or through a sound reinforcement company.

http://www.sxc.hu/profile/photos71


Different Phases of Live Engineering

There are a few different categories of being a live mixing engineer. You can either be a sound company engineer, a in-house engineer or a band touring engineer.

A sound company engineer is usually the engineer that a sound company provides when sound systems are being rented. For big company gigs sound systems are rented out and obviously there is a need for somebody to make the show go smoothly. This is a nice steady job with a salary from the sound company, although the gigs might be very random, boring or uninteresting.

An in-house sound engineer is somebody that has a steady job at a specific concert venue or club. The benefits include a steady stream of work if the venue is active but the salary might be a bit lower than if you were doing some high profile band work.

Being a steady engineer for a specific band while they are touring can be a pretty sweet gig if you like the hectic nature of touring. The pay is usually a bit better, especially if the band is big, but the work can be erratic and unsteady since it all depends on that one band you are working for.

You might end up doing some freelance work at the side if you do any one of these jobs as a career. Word usually spreads so even though you are an in-house sound engineer somewhere a band might like your sound that much that they end up soliciting you as the in-band engineer. Or if you are working for a sound company you might get plenty of extra work through the various venues that are always in need of random sound engineers to take care of their odd concert nights.


Broadcast Work

Working in TV or radio is a different facet to live sound engineering. It’s live sound at its most stressful since it involves many more factors than just doing plain concert work.

If you are interested in working in the technical side of television shows, making sure the audio feed reaches the whole way from Conan O’Brian’s microphone to the easily amused 18–25 demographic, then scurrying around the TV studio might be a great fit for you.

Also, being an engineer at a radio station helping out the DJ with all the technical aspects of broadcasting a radio show could be perfect for engineers interested in working in radio. Like being Roz helping out Frasier Crane with his self-help program. I’m actually not old enough to make a Frasier reference so let’s rather say that if you’d like helping out the alternative rock radio station with all their broadcast needs then you should think about applying to your favorite radio station.

http://www.sxc.hu/profile/Auroqueiro

Like the video here below demonstrates, there is a whole different side to the radio and television world that nobody sees, namely us engineers. Broadcast engineering can often involve a lot more technical work than just straight up audio engineering since in today’s world the heavy reliance on computers and other technologies create a demand for heavily specialized engineers. See the video below for a brief introduction to the various broadcast engineers, not only audio but also visual and computer operators.


On Location Recording

You’ve heard your favorite band’s live CD right? Well, who recorded it and how was it made? On location or live recording puts a whole other issue to deal with during live shows.

The live recording engineer takes the feeds from the stage, usually through a splitter before going to the mixer itself, or directly out of the mixing board itself, and records the live performance to disk. In addition to the feeds coming from the stage a live recording engineer usually puts up a few more microphones around the arena, such as at the mixing station.

Additionally, to capture the audience and ambience of the room, microphones are usually placed on either side of the stage pointing out into the audience. This give the engineer both the straight sounds from the stage itself as well as a few sound sources capturing the stadium, enabling him to create that live concert feel we all love.

The benefit of recording the band live, opposed to being the actual front of house engineer is that you don’t have to worry about mixing them until later. But be careful, you need to watch those pre-amps and make sure you aren’t overloading the signal coming into the disk since a digitally distorted signal is impossible to fix in the mix.

Recording live bands can give you a best of both worlds feel since you get to see a great live performance while recording, but you can also have the enjoyment out of taking your time mixing them in the peace and quiet of your studio.


Conclusion

If you like running around in an adrenaline filled situation where everything might go wrong at any time, then some sort of live sound is definitely up your alley. This is the field of sound engineering that Murphy’s Law applies to the most. If something can go wrong during a live concert or a broadcast radio show it most likely will go wrong at least once during your career.

But that shouldn’t discourage you if this type of work interests you, since the pros definitely outweigh the cons a hundredfold. See if a sound company is hiring, that concert venue needs a new engineer or if that TV station needs someone to man the mixing desks. It’s a whole different type of audio engineering waiting to see what it can throw your way.

Do any of these careers interest you or are you set on working some of the careers in the music industry, mentioned before? Stay tuned for the next installment where I go into the different roles sound engineers have in game design and film recording and post-production.


Workshop #80: Higher by The Nano Roots

At Audiotuts+ we irregularly put up a reader track for workshopping and critique (find out how to submit a track). This is how it works: you upload your song, and every week or so we’ll publish one here and step away from the podium. The floor is yours to talk about the track and how the artist can fix problems in and improve upon the mix and the song.

This track has been submitted for your friendly, constructive criticism. They have put their track (and their heart and soul) in your hands to learn and get useful feedback.

  • Do you enjoy the song or track itself? Does it have potential?
  • Can the arrangement be improved?
  • How did you find the mix? What would you do differently?
  • What do you enjoy about the rhythm track? What can be done to improve it?
  • Is the choice of instruments relevant and effective for the style/song?
  • Are the lyrics (if any) effective? Does the style, arrangement and genre of the song suit them?
  • Can you suggest any specific techniques that might improve the track?
  • Do you have any other constructive feedback?

Higher by The Nano Roots

Artist’s website: myspace.com/thenanoroots

Description of the track:

Rock, reggae, pop.

Download audio file (Higher.mp3)

Terms of Use: Feel free to download and redistribute.

Have a listen to the track and offer your constructive criticism for this Workshop in the comments section.


Submit Your Tracks for Workshopping

Need constructive criticism on your own tracks? Submit them using this form.