Create an Intense Corporate Style Illustration in Photoshop the Easy Way


Corporate illustrations can be an important part of any presentation, news, or magazine article. Today, we will demonstrate how to create an intense corporate style illustration in Photoshop. Let’s get started!


Resources Used

The following resources were used during the production of this tutorial.


Step 1

First we need to source a stock image that fits. Once we have done this it’s time to create a few sketches that clearly display the concept, composition and narrative of your image. We are creating an image of a worker who is highly stressed in their corporate environment so we need to think of scenarios that highlight this when creating the sketches. Once you have a sketch your happy with its time to scan it at a rate 300dpi at least.


Step 2

Now it is time to create the vectors starting with the model. Double click the image layer and name it ‘Model’ be sure to lock the layer we don’t want it to move at any point. We want to draw a two-tone illustration of the model that’s not overly detailed.

Create a new image and call it ‘Detail’ and using the pen tool with a black fill no stoke set to CMYK (C:100 M:83 Y:32 K:18) and begin the draw the models main features. Then create a new layer beneath the ‘Detail’ layer and name it ‘silhouette’ and with the color of (C: 14 M:0 Y: 2 K: 0) draw a base silhouette of the model.


Step 3

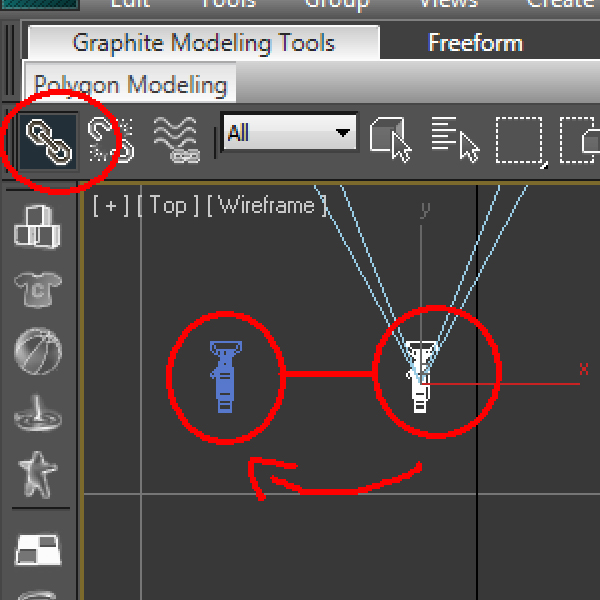
Now let’s open up the sketch in illustrator and begin drawing the elements of the illustration. I’m going to start with the computer screen. Make sure that everything you draw has its own layer so we stay organized. Create a new layer called ‘Computer,’ next select the rounded rectangle tool click the canvas to bring up its options palette and set the corner radius to 4pt. Set the fill to a light grey color with no stroke then draw the computer screens rectangle. To help align the computer accurately, place a guide over the horizontal centre point of the rectangle. Then select the peen tool base of the computer.


Step 4

Now create a new sub layer by clicking the second icon form the left in your layers palette and name it ‘screen’. To enable you to see the base rectangle and your sketch at the same time, reduce its opacity to 50% then with the rectangle tool, colour set to light blue draw the computer screen.

Ok, it’s time to draw the grid. Turn off the ‘screen’ layer’s visibility and select the rectangular grid tool. Click the canvas to bring up its tool options, set the horizontal dividers to 6 and vertical dividers to 7, now fill as above. Then set your stroke to 0.25pt and a dark blue color and draw your grid followed by the progress lines for this select the pen tool with a color set to mid red and stroke of 1 pt swap the stroke and fill around to draw the arrow tip. Then add the gross profit text.


Step 5

To add realism and depth to the computer screen we are going to add a linear gradient. Place three gradient sliders on the gradient one at location 0 the next at 50 and the last at 100. Set sliders 0 and 100 to C: 67 M: 58 Y: 55 K: 36. Now set the middle slider to C: 28 M: 22 Y: 21 K: 0. Follow the same procedure to do the base of the computer but this time set the gradient angle to 90 degrees. You can add a gradient slider where needed. It’s a good idea to save the gradient you make as a swatch so you can use them again if needed. Finally, add a radial gradient to the screen, set the location 0 slider to color C: 0 M:0 Y: 7 K: 0 and the location 100 slider to C: 13 M: 8 Y:3 K:0.


Step 6

Continue drawing the rest of the items such as the email sign and telephone in the same fashion (you only need to draw the items that are reflected horizontally once). When you get to the buildings set the color to C: 94 M: 57 Y: 1 K: 50 select the pen tool with a stroke of 0.5 pt and no fill and draw the building lines. Then, beneath this in create a new sub layer called ‘building gradients’. Set your gradients darkest sliders to the same blue we used for the building lines combined with a lighter color, add slider point and change the angles as you see fit until you get a nice reflective look. Next create a new sub layer called base and place it below the gradient layer. With a blue fill color of C: 10 M: 0 Y: 0 K: 0 select draw the base of the building.


Step 7

Continue to draw the rest of the illustrative elements but be sure to put each individual piece on its own layer even the two circuit areas shown above in orange name one ‘Circuit’ and the other ‘Circuit2′ for example. Once you have drawn everything we now need to save them as individual files. You can do this by turning off the visibility of all the layers except the item you saving. Once you have saved all them all its time to cross over to Photoshop.


Step 8

Open up the sketch file in Photoshop. We are going to use this a guide for the composition because this image is a symmetrical element use the guides to mark out the centre point. Now we are going to open all of the vectors that we drew in illustrator. To accurately position images such as the ‘building’ and circuits that are reflected horizontally in your layers palette drag them onto the ‘create new layer’ icon which will duplicate the layer, then go Edit > Transform > Flip Horizontally and while holding down shift, drag the duplicated layer to the other side.


Step 9

Add a gradient background layer as shown.


Step 10

Ok, let’s add some color and texture to the background, create a new layer and call it ‘Base colour’. Select the gradient tool and set the left slider to color to C: 90 M: 32 Y: 100 K: 30 and the right slider to C: 90 M: 40 Y: 100 K: 53 and fill the layer with this gradient. Now open the texture file, stretch it while holding down shift until it fills the page and then set the Blending mode to Difference. Then, duplicate the Texture layer then set the opacity to 20% and Blend mode to Overlay.


Step 11

It’s ok for this illustration to have a darkish backdrop as the theme is quite intense, but we now want to add more energy to the piece. The email symbols are currently black and are getting lost within the backdrop lets make them stand out. Double click one of the email symbols in the layers palette to bring up its style option and select Gradient overlay. Set the blend mode to Lighter Color, add an extra color slider at a location of 50% set the left and right sliders to C:7 M:5 Y:0 K:0 and the middle slider C:2 M:9 Y:2 K:0. Cmd/Ctrl > Click on the layer in the layers palette and select copy layer style then Cmd/Ctrl > Click on the other Email layer and select paste layers style.


Step 12

Set the Taxman layer to overlay then open its layer style options and select the gradient overlay tab. Set the Blending mode to Overlay and the left slider to C:63 M:0 Y:7 K:0 and the left slider to white. Now copy and paste this layer style to the loans layer. Add layer styles to the remaining layers to help them to stand out and don’t be afraid to experiment.


Step 13

Create a new layer and name it ‘Headache Beam’. Select the rectangle Marquee tool and draw a thin rectangle the fill it with a cream colour using the Paint bucket Tool. Then go Filter > Blur > Gaussian Blur and set the radius to 6.4pt. Now using the selection tool rotate the image so that it is pointing from the Taxman Layer to the models head then change the opacity to 82%.


Step 14

Create a New layer called ‘Headache sore spot’ then, with the Elliptical Marquee to draw a small circle where the light beam hits the Model’s head. Then fill the circle with a light orange colour and repeat the Gaussian Blur process we used on Step 12 and set the Layer opacity to 74%. Now repeat this process for the House, Loans and car layers. You may find you need to spread the symbols out slightly to give you enough room.


Step 15

Ok now duplicate the building layer, drag it to the bottom and then enlarge it so it takes up half of the page. Change the blend mode to hard light and the opacity to 16%. Now duplicate the layer, flip it horizontally and reposition it on the other side of the page.


Step 16

Select the Circuit layer, duplicate it and then rotate it so that it is horizontal. Now position it so that it is sitting under the ‘Interest Loan’ Layer. Now set the Blending mode to Overlay and the Layer opacity to 39%. Then duplicate it and flip horizontally, set the Blending mode to screen and opacity to 29%.


Step 17

Continue this method of playing with blending modes on the circuit layers and others until you find a really interesting composition that enhances the illustration. Use layer styles but always check your progress and be sure to duplicate layers in their original form before you edit them.


Step 18

Now we want to highlight the computer a little more. Duplicate its layer and drag the copied layer beneath. Now tap it to the right three or four times and set the blending mode to screen. Duplicate this layer and set the opacity to 40%. Then do the same for the left side of the computer. Now select all four layers and nudge them once or twice. Repeat this process for the phone layer.


Step 19

Create a new layer above the Texture layers and with a brush set to 715 pt, 0% hardness, color white and opacity at 21% begin to create lighter areas around the model, computer, phone, and buildings. Follow this by setting the layer opacity to 45% and its job done!


Step 20

Looking at the illustration as a whole there are two layers that don’t quite work in regards to general colour scheme. They are the ‘Taxman’ and ‘Loan Interest’ layers. Double click the ‘Taxman Layer’ to bring up the layer style options and set the Gradient Overlay blending mode to Screen. Now repeat this process for the ‘Interest Loan’ layer. Next set the four yellow circuit layers blend mode to Linear light.


Step 21

Digital photographs are great for adding depth and contrasts to your backdrops so it is a good idea to carry a digital camera with you everywhere you go. I used a photo I took of ‘Newcastle Millennium Bridge’. Drag the photo onto the canvas, rotate the photo so it is portrait and stretch it until it fits the full length of the page. Now set the layer Blending mode to Pin Light then go Image > Mode > Invert. Tap the photo inwards until you get and interesting darker shape running along the margin. Now add a gradient mask by clicking from the left on your layers palette, set the gradient to default black and white and while holding down shift, draw a short gradient starting from the vertical central line. This will make the other half of the photo disappear. Now duplicate this layer and flip it horizontally and reposition it onto the other side.


Step 22

Now Duplicate the Computer layer and position this layer just above the texture layers. Drag it down while holding shift and place it behind the telephone. Next, set the Blending Mode to Hard Light and opacity to 12%. Now use this process to add highlight areas so the backdrop appears more interesting.


Step 23

Because the texture is darker on the top left than it is on the top right, the photo layer on the top left is not quite as visible as the other. To fix this, first, duplicate the photo layer (left side and set the layer opacity to 20%. Now re-draw the gradient mask so that only the top left area is visible as seen the layers palette above.


Step 24

Now it’s time to make your final additions and adjustments. You might want to add some currency symbols such as the Pound, Euro, or Dollar sign. Then finally use a Curves adjustment layer (Layer > New Adjustment Layer > Curves) and place it at the top of your layers palette to intensify the illustration’s colour.


Final Image

WordPress: How to insert data programmatically

Inserting posts

Do you remember back in 2008, when I created WP Vote? This site was the first (as far as I know) social voting site created 100% within WordPress. Users were able to submit a story, which was automatically published on the blog.

Inserting a post programmatically in WordPress is extremely easy. You have to use the wp_insert_post() function, which takes an array as a parameter.
Here is a working example. If you want to test it, paste the code below on your functions.php file.

global $user_ID;
$new_post = array(
    'post_title' => 'My New Post',
    'post_content' => 'Lorem ipsum dolor sit amet...',
    'post_status' => 'publish',
    'post_date' => date('Y-m-d H:i:s'),
    'post_author' => $user_ID,
    'post_type' => 'post',
    'post_category' => array(0)
);
$post_id = wp_insert_post($new_post);

Cool, isn’t it? Let have a closer look to the parameters specified in the $new_post array:

  • post_title: the name of the post.
  • post_content: the content of the post
  • post_status: the post status (published, draft, etc)
  • post_date: use date() or specify a custom date
  • post_author: Author id of the post author
  • post_type: Can be post, page, or a custom post type
  • post_category An array of categories ids

Source: http://www.webmaster-source.com/2010/02/09/programmatically-creating-posts-in-wordpress

Inserting comments

Inserting comments is not harder than inserting posts. I personally never used this code, but here is it in case you need it. To give it a try, simply paste it in your functions.php file.

$data = array(
	'comment_post_ID' => 1,
	'comment_author' => 'admin',
	'comment_author_email' => '[email protected]',
	'comment_author_url' => 'http://www.catswhocode.com',
	'comment_content' => 'Lorem ipsum dolor sit amet...',
	'comment_author_IP' => '127.0.0.1',
	'comment_agent' => 'Mozilla/5.0 (Macintosh; U; Intel Mac OS X 10.6; fr; rv:1.9.2.3) Gecko/20100401 Firefox/3.6.3',
	'comment_date' => date('Y-m-d H:i:s'),
	'comment_date_gmt' => date('Y-m-d H:i:s'),
	'comment_approved' => 1,
);

$comment_id = wp_insert_comment($data);

Just like the wp_insert_post() function, wp_insert_comment() takes an array as a parameter. Here are the data used:

  • comment_post_ID: ID of the commented post
  • comment_author: Name of the comment author
  • comment_author_email: Email address of the comment author
  • comment_author_url: Website of the comment author
  • comment_content: Text of the comment
  • comment_author_IP: IP address of the comment author
  • comment_agent: User agent of the commenter browser
  • comment_date: Date of the comment
  • comment_date_gmt: GMT date of the comment
  • comment_approved: Is the comment approved? 1 for yes and 0 for “awaiting moderation”

Adding categories to a post

Now that we saw how to insert a post or a comment into WordPress database, let’s see how to make a post part of one (or more) categories. WordPress has a built-in function for that, named wp_set_object_terms().

What you have to do is to create an array with the desired categories ID, and then use the function as shown below:

$category_ids = array(4, 5, 6);
wp_set_object_terms( $post_id, $category_ids, 'category');

The wp_set_object_terms() function take 3 parameters: The post ID, an array of categories ID, and the taxonomy type (In this example, category).

Adding tags to a post

Adding tags to a post is extremely simple as well. Even better, it does not require a new function, you can do so by using wp_set_object_terms().
Take a look at the example below:

$tag_ids = array(7, 8, 9);
wp_set_object_terms( $post_id, $tag_ids, 'post_tag');

Looks very similar with the previous piece of code, which allowed us to add categories to a post, isn’t it? In fact, the only difference is the taxonomy type: Here the parameter is post_tag instead of category.
Source: http://wpprogrammer.com/snippets/add-a-category-or-tag-to-a-post-programatically/

Automatically create a custom field when a post is published

I recently had a client who wanted to have a custom field created automatically, each time he published a new post, so he wouldn’t have to create a custom field with a default value for each article he wrote.
This piece of code was a real life-saver: Just paste it on your functions.php file and publish a new post: A custom field has been created automatically.

function add_custom_field_automatically($post_ID) {
	global $wpdb;
	if(!wp_is_post_revision($post_ID)) {
		add_post_meta($post_ID, 'field-name', 'custom value', true);
	}
}
add_action('publish_page', 'add_custom_field_automatically');
add_action('publish_post', 'add_custom_field_automatically');

So how does it work? First, a function has been created. This function make sure the post isn’t a revision on then adds a custom field named field-name, with custom value as a value.
Then, a “hook” is used to make sure that every time a post or page will be published, the add_custom_field_automatically() function will be called.
Source: http://wpcanyon.com/tipsandtricks/adding-a-custom-field-automatically-on-postpage-publish/

Like CatsWhoCode? If yes, don’t hesitate to check my other blog CatsWhoBlog: It’s all about blogging!

WordPress: How to insert data programmatically

Convert Your Animations For Stereoscopic Viewing

In this tutorial, you’ll find everything you need to make a Stereoscopic 3D Video, I’ll explain how to make a 3D video with real camera footage or with 3D software (3Ds Max, Blender, Cinema 4D…)


Tutorial

Step 1

Open 3Ds max or any 3D software.

Step 2

Make a scenario (of your choice)

Step 3

Add a nice lighting:

go to "Lights" select Skylight.

Step 4

Select "Skylight" and go to "Modify"

Step 5

Select "Cast Shadows" in the skylight parameters (That’s all for the lighting).

Step 6

Add a "Free Camera" or a "Target Camera".

Step 7

Put the camera in the desired position.

Step 8

Duplicate the camera (the two cameras make you sence the profundity)

Step 9

Adjust the cameras.

Step 10

Name the cameras "Left_Camera" and "Right_Camera" (So, you can’t get confused).

Step 11

Link the "Right_Camera" to the "Left_Camera"

Step 12

Animate your "Left_Camera" or your scenario, depends on what you want to animate.

Step 13

Go to "Render Setup"

Step 14

Select "Active Time Segment" or "Range"

(Active Time segment: Render all frames

Range: render to a particular frame)

Step 15

make sure to render with the "Left_Camera"

Step 16

Save the video where you want it.

Step 17

Name the video "Left_Camera"

AVI file

Step 18

Hit "Render"

Step 19

Now, render with the "Right_Camera" and change the name of the video to "Right_Camera"

And RENDER.

Step 20

Check your videos ("Left_Camera" and "Right_Camera")

Step 21

After Effects:

Make a new composition and Import the Videos ("Left_Camera" and "Right_Camera")

Step 22

Make a new solid (Doesn’t matter the color of the solid)


Step 23

Select the solid and go to Effect > Perspective > 3D Glasses.

Step 24

In the "Left view" select the "Left_Camera" video

and in the "Right view" select "Right_Camera" .

Step 25

Now select "Red Blue LR" and don’t forget to play with the settings.

Enjoy your 3D video!

You can apply this "Two Cameras" technique, in the real life with two cameras.


Showcase: 20 Brilliant Designer Sketchbooks to Help Inspire Your Creative Workflow


If you followed Ben Mounsey’s "Core Art Skills" Series, then you will know how important it is to have a Sketchbook. But why settle for something drab and dreary when you can use one that is as inspired as you are? In the following showcase you will find a collection of 20 Designer Sketchbooks that are made for creativity (much like the designers of the books themselves.)

Continue reading “Showcase: 20 Brilliant Designer Sketchbooks to Help Inspire Your Creative Workflow”

An Introduction to Film Scoring – Audio Premium

In this week’s Audio Premium content, Ryan Leach gives us an overview of scoring for film. Check out Ryan’s experience in this area on IMDB.com.

To learn more about what you get as part of Audio Premium, read this. To take a peek inside this tutorial, hit the jump!

This tutorial is for people who are relatively new to the world of Film Scoring. Whether you’ve never scored a scene but have been considering learning more about it, or even if you’ve done a little bit of scoring on your own and want to explore getting into the field, this tutorial will introduce you to the basic ideas and concepts you’ll need to begin writing music for film.

I’ll introduce some basic terminology that you’ll need to know and discuss some early considerations to make about when and why to use music. I’ll also touch on a few points about choosing the right gear to get started.

Table of Contents

  • What is Film Scoring?
  • Basic Terminology
  • The Music
  • Why Use Music?
  • Stylistic Choices
  • Picture
  • Picture is King
  • Spotting
  • Hit Points
  • Technology
  • Hardware
  • Software
  • Samples
  • Conclusion

Existing Premium members can log-in and download. Not a Plus member? Join now.


50 Beautiful Fractal Flowers


Fractals are a unique digital art form with an infinite diversity of form, detail, color and light. Fractals originate from the field of mathematics and the term fractal means, a geometric pattern that is repeated at ever smaller (or larger) scales to produce self similar or irregular shapes and surfaces. Fractal art is created with the assistance of fractal-generating software, by calculating fractal objects and translating them into a visual form.

The world of fractal arts is full of possibilities. The beauty and charm of flowers are immense, no one can remain untouched by their elegance. In this edition, we looked at some stunning examples of fractal flowers and we came across some beautiful pieces of art. Take a look!


Summer Love by Gurly


What a Bloomin’ Life 2 by AmorinaAshton


Flower Thing by Parrotdolphin


Smile to Me by Lindelokse


Oriental Tulips by Svet-svet


Basic Julian Floral by Magnusti78


May Flowers by Wolfepaw


As Pretty as Petals by Missimoinsane


Dream Blooms by Colliemom


Summer Day by Lilyas


Winter Flowers by LR70


Luminescent Flower by Dlr4553


My Rainbow Garden by Magnusti78


Winter by SSilver


Untitled Flowers by LithMyathar


Verdura by WelshWench


Glassflower by Jost1


Winter Grace by Aeires


From the Gardens of Eden by d-b-c


Fading Flowers by Pinkal09


Flowers From Italy by MaRoC68


Fairy Flower V by Yuline


Whisper by DragonWinter


Fever by Abaraculite


August by Magnusti78


Flowers of August by Aeroglyph


Wintertime by Judazfx


Dessert for Butterflies by Lindelokse


Every 100 Years by Magnusti78


Crystal Flower by SSilver


Fractal Flowers by Dazy-Girl


Lilly by Denise-g


Enchanted by Lindelokse


Blossoming Joy by DragonWinter


Song of a Flower by Titiavanbeugen


Icy Flowers by Darkstormlord


First Snow by Magnusti78


Flower Spiral by Obeyyourmaster


Vintage Flowers by Magnusti78


Garden Of Flowers by RAStyles


RoseGarden by Silwenka


Star Flowers by Obeyyourmaster


Flowers by Drummerboy08


Magic by Magnusti78


Fractal Flowers Collection by Twenty4e


Entwined ‘Reworked’ by Mignon


Wonderland – Technicolor by Magnusti78


Fall by Gurly


Flowers and…Silence by Kiug


Fleur D’apo by Mynameishalo

Display Suggestions in a TextField using AS3 and External Files

Suggested Terms is an excellent usability element which helps the user select a better option or just increase search speed.

In this tutorial, we will learn how to create and display suggested terms in a Flash application.


Step 1: Overview

We’ll make use of TextField and String methods and properties to retrieve and display words from an external file containing the search suggestions.


Step 2: Document Settings

Launch Flash and create a new document. Set the stage size to 500x270px, background color to #F6F6F6 and the frame rate to 24fps.


Step 3: Interface

This is the interface we’ll use, a simple background with a title bar and a two TextFields, an Static TextField telling us what to do and an Input TextField that we’ll use to start suggesting.

No buttons this time, the events will be called by pressing a key.


Step 4: Background

You can leave the background color as it is or add 500x270px rectangle to have something you can select. For the title bar, use again the Rectangle Tool (R) to create a 500x30px rectangle and center it.


Step 5: Title

Select the Text Tool (T) and write a title for your application. I used this format: Lucida Grande Regular, 15pt, #EEEEEE.


Step 6: Text Area

We’ll use a Rectangle shape to show where the TextField is.

With the Rectangle Tool, create a 300x24px rectangle and remove the fill, instead, use a #CCCCCC stroke.


Step 7: Input TextField

Lastly, use the Text Tool to create a 345x20px Input TextField and name it inputField.This is the format I used: Helvetica Bold, 16pt, #666666.


Step 8: Font Embedding

To display the font correctly in the Input Text we’ll have to embed it.

Select the Input TextField and go to the Properties panel, Character section and press the Embed… button.

A new window will come up, select the characters you want to embed, and click OK.


Step 9: New ActionScript Class

Create a new (Cmd + N) ActionScript 3.0 Class and save it as Main.as in your class folder.


Step 10: Package

The package keyword allows you to organize your code into groups that can be imported by other scripts, its recommended to name them starting with a lowercase letter and use intercaps for subsequent words for example: myClasses. It’s also common to name them using your company’s website: com.mycompany.classesType.myClass.

In this example, we’re using a single class, so there isn’t really a need to create a classes folder.

package
{

Step 11: Import Directive

These are the classes we’ll need to import for our class to work, the import directive makes externally defined classes and packages available to your code.

import flash.display.Sprite;
import flash.net.URLLoader;
import flash.net.URLRequest;
import flash.events.Event;
import flash.ui.Keyboard;
import flash.events.KeyboardEvent;
import flash.text.TextField;
import flash.events.MouseEvent;
import flash.text.TextFormat;

Step 12: Declare and Extend the Class

Here we declare the class using the class definition keyword followed by the name that we want for the class, remember that you have to save the file using this name.

The extends keyword defines a class that is a subclass of another class. The subclass inherits all the methods, properties and functions, that way we can use them in our class.

public class Main extends Sprite
{

Step 13: Variables

These are the variables we’ll use, read the comments in the code to find out more about them.

private var urlLoader:URLLoader = new URLLoader();//Used to load the external file
private var suggestions:Array = new Array();//The suggestions in the text file will be stored here
private var suggested:Array = new Array();//The current suggestions
private var textfields:Array = new Array();//A textfield to be used to display the suggested term
private var format:TextFormat = new TextFormat();//The suggestions text format
private var currentSelection:int = -1;//Will handle the selected suggestion in order to write it in the main textfield

Step 14: Constructor

The constructor is a function that runs when an object is created from a class, this code is the first to execute when you make an instance of an object or runs using the Document Class.

public function Main():void
{

Step 15: External File Contents

The terms to suggest will be stored in an external text file, you can also use XML, PHP or the format of your choice.

Write the terms you want to suggest (separated by commas “,” ) and save the file in the same directory as your swf, in this case I used a list of sports and saved them in the file Sports.txt.


Step 16: Load External File

This line calls the load method of the URLLoader class and passes as parameter the url of the txt file we are using.

urlLoader.load(new URLRequest("Sports.txt"));

Step 17: Initial Listeners

Two initial listeners; one listens for the load of the external file and other listens for key up events in the Input TextField.

urlLoader.addEventListener(Event.COMPLETE, loadComplete);
inputField.addEventListener(KeyboardEvent.KEY_UP, suggest);

Step 18: Suggestions Text Format

Sets the text format used in the suggestions textfields.

format.font = "Helvetica";
format.size = 12;
format.bold = true;

Step 19: Loaded Data

The following function is executed when the external load is complete, it creates an array containing the comma-separated strings in the txt file.

private function loadComplete(e:Event):void
{
	suggestions = e.target.data.split(","); //The split method separates the words using as delimiter the ","
}

Step 20: Suggest Function

The suggest function handles all the operations to create and display the suggestions, is executed when the Input TextField detects a Mouse_UP event.

private function suggest(e:KeyboardEvent):void
{

Step 21: Reset

The first thing to do is clear the suggested array, this will erase the previous suggestions (if any).

suggested = [];

Step 22: Search Available Data

The next for loops through the available suggestions and uses an if statement and the indexOf method to search for the starting letters of any of the available words.

for (var j:int = 0; j < suggestions.length; j++)
{
	if (suggestions[j].indexOf(inputField.text) == 0)//indexOf returns 0 if the letter is found
	{

Step 23: Create Suggestions TextFields

If the written letter(s) are found, a new TextField is created for the corresponding word, since we are still in the for, if more than one suggestion starts with the same letter(s), then many TextFields will be created.

		var term:TextField = new TextField();

		term.width = 100;
		term.height = 20;
		term.x = 75;
		term.y = (20 * suggested.length) + 88;//Positions the textfield under the last one
		term.border = true;             /* Here we use the border property
		term.borderColor = 0x353535;       to separate the textfields */
		term.background = true;
		term.backgroundColor = 0x282828;
		term.textColor = 0xEEEEEE;
		term.defaultTextFormat = format;//Set the previously created format

		//Mouse Listeners
		term.addEventListener(MouseEvent.MOUSE_UP, useWord);
		term.addEventListener(MouseEvent.MOUSE_OVER, hover);
		term.addEventListener(MouseEvent.MOUSE_OUT, out);

		addChild(term);
		textfields.push(term); //Adds the textfield to the textfields array

		suggested.push(suggestions[j]);

		term.text = suggestions[j]; //Sets the found suggestion in the textfield
	}

}

Step 24: Clear TextFields

If the user deletes the letters in the Input Field, the suggestions are removed.

if (inputField.length == 0) //input field is empty
{
	suggested = []; //clear arrays

	for (var k:int = 0; k < textfields.length; k++)
	{
		removeChild(textfields[k]); //remove textfields
	}

	textfields = [];
}

Step 25: Keyboard Control

The next code allows the user to move through the suggestions using the keyboard.

It changes the color of the selected word, adds or removes a number to the currentSelection variable to use it later in the textfields array, this way it retrieves the correct item from the suggestions.

When the enter key is pressed, the selection is written in the Input Field and the suggestions are removed.

	if(e.keyCode == Keyboard.DOWN && currentSelection < textfields.length-1)
	{
		currentSelection++;
		textfields[currentSelection].textColor = 0xFFCC00;
	}

	if(e.keyCode == Keyboard.UP && currentSelection > 0)
	{
		currentSelection--;
		textfields[currentSelection].textColor = 0xFFCC00;
	}

	if(e.keyCode == Keyboard.ENTER)
	{
		inputField.text = textfields[currentSelection].text;

		suggested = [];

		for (var l:int = 0; l < textfields.length; l++)
		{
					removeChild(textfields[l]);
		}

		textfields = [];
		currentSelection = 0;
	}
}

Step 26: Mouse Control

This function is also used to select the suggestion, although this is easier because of the ability to add event listeners to the TextFields. The listeners were added in the suggest()function in Step 23, remember?

private function useWord(e:MouseEvent):void
{
	inputField.text = e.target.text;

	suggested = [];

	for (var i:int = 0; i < textfields.length; i++)
	{
		removeChild(textfields[i]);
	}

	textfields = [];
}

private function hover(e:MouseEvent):void
{
	e.target.textColor = 0xFFCC00;
}

private function out(e:MouseEvent):void
{
	e.target.textColor = 0xEEEEEE;
}

Step 27: Document Class

Go back to the FLA and in the Properties Panel > Publish section > Class field, add Main as value. This will link this class as the Document Class.


Conclusion

You’re done creating and implementing a suggested terms class, it’s time to make your own and customize it! Why not try using PHP to save the terms that users enter to the list of suggested terms?

Thanks for reading this tutorial, I hope you’ve found it useful!

Exclusive Freebie: Text-To-Speech Utility

First of the month (more or less) and therefore time for another Exclusive Freebie! This month ActiveDen author flashanctuary offers up an interesting tool making use of the Google Text-To-Speech API. Check it out after the jump!


Using the Unofficial Text-To-Speech Google API

Not so long ago, google added a new cool feature to the google translate system named the text-to-speech function. Is isn’t an official API, but anyone can make use of the service. All you need to do is access a url which generates an mp3 file. This file can be played in flash like any mp3 file.


Step 1: Creating the text-to-speech Class

The first step is to create the text-to-speech class. Open flash and select the file menu, new submenu and new action script file. Then save this file on the hard-disk in your desired package. Let’s name this class and file Text2Speech.as.

package com.flashanctuary.text2speech
{
	// flash imports
	import flash.events.Event;
	import flash.media.Sound;
	import flash.media.SoundChannel;
	import flash.media.SoundTransform;
	import flash.net.URLRequest;

	/**
	 * Text2Speech Main class
	 */
	public class Text2Speech
	{
		public function Text2Speech() : void
		{	

		}
	}
}

Step 2: Declaring Necessary Variables

First, we need the url constant link to the Google API. Another constant declared regards the google api limitation: it can not play a string which is longer than 100 characters. Of course, my flash file plays phrases longer than 100 characters, I’ll explain how later on.

Other variables that we need inlcude: the text to be played, an array to contain phrases of maximum 100 character from the text, the current sentence position to be played at one moment, the language where to play the text. We also need three variables to play the sound: a Sound variable, a SoundChannel variable and a SoundTransform variable.

// google api link
private static const url : String = "http://translate.google.com/translate_tts?";

// maximum number of characters supported by google api
private static const noOfMaxChars : Number = 100;

//
private var _text : String;
private var _sentences : Array;
private var _sentencePosition : int;

//
private var sound : Sound;
private var soundChannel : SoundChannel;
private var sTransform : SoundTransform;

//
private var _volume : Number = 0.5;
private var _currentPosition : Number = 0;

//
private var _language : String;

Step 3: Let’s Initialize it!

Now we would need a public function to initialize this class: this will contain the text we want to play and the language.

public function init(language : String, text : String) : void
{
	// set language
	_language = language;

	// if the number of chars is longer than the maximum number of chars supported
	// the the text will be split
	if (text.length <= noOfMaxChars)
	{
		initSound(url + "tl=" + language + "&q=" + text);
	}
	else
	{
		_sentences = new Array();

		// split text
		divideText(text);
		_sentencePosition = 0;

		// begin palying the first part of the text
		initSound(url + "tl=" + language + "&q=" + _sentences[_sentencePosition]);
	}
}

Step 4: Trim Text

If our text length is longer than the supported number of characters, than we must split it into sentences of a maximum of 100 characters. In order to do this, we create a recursive function to go through all the text and insert the sentences of maximum 100 characters in an array.

private function divideText(str : String) : void
{
	var substr : String;
	if (str.length >= noOfMaxChars)
	{
		substr = str.substring(0, noOfMaxChars + 1);
	}
	else
	{
		substr = str;
	}

	if (substr.charAt(substr.length - 1) != " " && str.length >= noOfMaxChars)
	{
		var index : int = substr.lastIndexOf(" ");
		substr = str.substring(0, index);
	}

	_sentences.push(substr);

	if (str.substring(substr.length + 1, str.length).length > 0)
	{
		divideText(str.substring(substr.length + 1, str.length));
	}
}

Step 5: Play the Sentences

From now on, the process is similiar to when you create an mp3 player. Firstly, we initialize the sound variables that I spoke about in the first instance and after this we begin to play the first sentence from the whole sentences array.

When this sentence has finished playing, we go and play the next one (when the SOUND_COMPLETE events is happening). And so on and so forth until all maximum 100 characters sentences from our initial text are played.

public function initSound(path : String) : void
{
	// reset sounds chanels, sound and sound transform if they are not null
	if (soundChannel != null)
	{
		stopSound();
		soundChannel = null;
	}

	if (sound != null)
	{
		sound = null;
	}

	if (sTransform != null)
	{
		sTransform = null;
	}

	_currentPosition = 0;

	// create the new sound and begin playing
	sound = new Sound(new URLRequest(path));
	soundChannel = new SoundChannel();
	sTransform = new SoundTransform(_volume);
	playSound();
}

public function playSound() : void
{
	soundChannel = sound.play(_currentPosition);
	soundChannel.addEventListener(Event.SOUND_COMPLETE, soundComplete);
	soundChannel.soundTransform = sTransform;
}

public function stopSound() : void
{
	_currentPosition = soundChannel.position;
	if (soundChannel.hasEventListener(Event.SOUND_COMPLETE))
	{
		soundChannel.removeEventListener(Event.SOUND_COMPLETE, soundComplete);
	}
	soundChannel.stop();
}

private function soundComplete(evt : Event) : void
{
	stopSound();

	// when the current sound is complete go to the next group of charcters and play that part
	if (_sentences != null)
	{
		if (_sentencePosition < _sentences.length - 1)
		{
			_sentencePosition++;
			initSound(url + "tl=" + _language + "&q=" + _sentences[_sentencePosition]);
		}
	}
}

Step 6: How to use This Class

You would probably now ask how this class can be used in one of your projects. Well, this is very simple: you just need to create one instance
of this class and initialize it with your desired language and text. All languages supported are listed and can be found at http://translate.google.com.

// create the new text to speech variable
var t2s : Text2Speech = new Text2Speech();

// initialize the text to speech class instance with the language desired and the text
t2s.init(language_abbreviation, text_to_play);

Sound Playing Issues

You have possibly already noticed in the preview that sometimes a cut-off appears when a sound ends and another one begins. This problem can be easily solved by loading all sounds before playing them back. This method implies a longer loading time, especially when the chosen text to play back is very long. The best solution for the time being seems to be the above one, but should anyone have a better one, you are most welcome to leave a comment!</p


Conclusion

I’ve spent a long time trying to find a solution for this text-to-speech problem so I can use it in Flash. It seems google has solved it and the solution is these days easy and accessible for all developers.

This is my first contribution to Activetuts+, I hope you have learned something useful, enjoy the file and thank you for reading!

Modeling and Rendering a Baseball Wall Title Spot

In this tutorial, Michael Szabo from Big Mike Design walks us through his recreation of the popular baseball wall title scenes that have been used to advertise baseball games this season. After modeling both manually and with the help of Mograph, Mike also covers proper rendering habits when moving into After Effects for compositing!

The tutorial covers a lot of ground within Cinema 4D and After Effects, as we build a 3D environment that closely resembles an outfield wall in a baseball stadium. The final project resides in After effects and can easily be tweaked by simply updating and swapping the title images that are placed in our scene.


Video 1

Download

Note: click the ‘Monitor’ icon to view tutorial in full-screen HD.


Video 2

Download

Note: click the ‘Monitor’ icon to view tutorial in full-screen HD.


Don’t miss more CG tutorials and guides, published daily – subscribe to Cgtuts+ by RSS.

Friend or Faux: How Do You Pick Your Friends on Social Networks?

Do you want to be my friend? Or my follower? Or whatever it is we call each other on this social network? I know we don’t know each other…but that shouldn’t stop you from making me one of your 1,742 friends.

To be honest, I’m kind of shy when I get friends requests. I generally don’t connect when I don’t know someone. Here are some rules of engagement on my social networks:

  • Foursquare: Absolutely no way if I don’t know you. Because I let people know where I’m hanging out, it seems a little to personal to notify complete strangers.
  • Facebook: Again, I want to know my friends. There are some casual acquaintances in the list. But they are people who I want to know better.
  • LinkedIn: If we haven’t met, then I want to get to know you better. This is purely professional.
  • Twitter: Anyone can follow me. And I follow people who interest me. I share a lot of information via Twitter because I see it as a publishing platform rather than a social network. Feel free to follow me.

This is what works for me, my comfort level and promotional needs. You may need to be friendlier or more restrictive. The important thing is that you have a strategy.

How do you choose your friends on social networks?

How to Make a Brochure on Microsoft Word 2007

Microsoft Word 2007 (a.k.a. Word 7) offers a variety of brochure templates, but what if you quickly want to create your own?  This tutorial gives a thorough walkthrough on how to do just that.

Step 1

Open up Word.  You will automatically have a new blank document.  Go to Page Layout, click Margins and choose Narrow.

Step 2

Click now on Orientation and choose Landscape.

Step 3

Still on the Page Layout Tap, choose Page Color and pick a color to your liking.

Step 4

Now go to the Insert Tap and select the Text Box button. Choose Simple form the pop up window.  Since we are creating a Standard Tri-fold Brochure with the size 8.5 x 11 inch, we want the text box to be around 3.5 in. Place the text box on the right hand side. Type some text or leave the default text.

Step 5

Right click on the text box and choose Format Text Box from the bottom of the pop up window. There you can set the background and outline. I set the color and outline to none.

Step 6

While still in the Format Text Box window, choose the Text Box Tab and set the text to be align to the center of the text box.

Step 7

Go now to the Shapes button (we are still on the Insert Tab) and add a rectangle. Set the size to the lenght of the document and choose a height and fill color.  The right click and from the Order option set the box behind the text.

Step 8

Add more shapes and more text boxes. Remember that we have a trifold  brochure and we are adding therefore at least three text boxes. As a small help, you can set the default text box to three columns (Page Layout Tab). This might help you to align the added text boxes.

Step 9

Here is what we have so far. Some shapes, some text boxes with a header and a list.

Step 10

Add another text box just like we did in Step 4. Repeat this step for each brochure panel. Since we have per page three panels, you might want to add three bigger text boxes.

Step 11

This is what I have so far. Add as many elements as you want.  You can fold a trifold brochure two ways , Accordion Fold or Gate Fold.  You are looking at the outside of the brochure.

Step 12

This is the inside if we are making an accordion fold. I kept the style the same.

Step 13

Here are the two pages.  The back panel could have the contact info or the inside panel. Once you add all the text, images or any other elements, you can print your brochure on your home printer. Make sure you can print borderless. Once you printed the first pages, turn over your page and print the other page onto the paper.

Conclusion

This is how the brochure can look like. Nothing fancy or complicated but semi professional looking.

5 Streaming Sound and Music Sites for Work

When we asked last week whether or not you need music at work, many of you responded in favor. Some mentioned that music lets you create a zone and focus more on what you are doing. In fact, there are many theories in support of that – like the so-called “Mozart effect”.

If you just can’t work with music on, you might want to try streaming sounds of different types to see if they have a positive effect on your focus and overall productivity. Check out the following tools if you intend to give it a shot.1. SimplyNoise

SimplyNoise is a color noise generator that creates clean sound waves. It can generate white noise, pink noise and brown noise, and also oscillate them as you need.

2. Zendesk Buddha Machine Wall

Zendesk’s Buddha Machine Wall has a nice collection of relaxing sounds that play smoothly in the background while you do your work.

3. Musopen

Musopen has a huge collection of instrumental tracks from music composers around the world. It’s basically an online library of music that’s in public domain.

4. Soma fm

Soma.fm is an internet radio station that broadcasts continuous streams of ambient beats among others.

5. Wikipedia’s Sound List

Finally, you can check Wikipedia’s sound list that has thousands of license-free sounds files that could be played directly on the site.

So, have you been listening to any of the above sites while at work? Any other such sound sources you know about?

Are You Getting Paid Enough? Do a Salary Comparison

Sure, it sounds like the start of a hokey pyramid scheme – but unless your office is very transparent about salaries, it’s hard to know if you are in the top, middle, or bottom of what you should be earning.

Money isn’t everything, and you’ve been able to help your company through the economic downturn.  Are you curious to find out if you are being valued appropriately by your current employer?

Here’s a list of salary comparison links that might help you get an idea of what you are, or should be, earning:

Salary.com

American-focused, and broken down by state and by profession.  Salary wizard is handy to give you an answer for the “expected salary” question in your next interview

Payscale.com

Based out of Seattle, WA, but providing info for jobs around the world.  They provide a free customized salary report or you can upgrade to the more detailed version for $19.95.  You can evaluate your current offer, or see what your current market value is.  Claim to represent 100,000 employers

Jobstar.org

While the design folks might cringe at this site, there’s some decent info if you drill down a bit.  Good links to salary surveys for quite a few different vocations.

Whatsalary.com

A new site and it looks like it will have good info once it gets some traction and the info gets populated.  Available in different regions (US, Europe, South Asia) Full disclosure: I have written a few articles for them, but they are still looking for more.

Computerworld.com

A quick and easy way to match your current salary up against the rest of the IT workers in the US.  If you aren’t in the US, or aren’t in IT – you might find value in some of their whitepapers, and that value might be a cost effective alternative to your sleeping pills

Globalrichlist.com

Once you’ve looked at your salary, stroll over to this site to find out how you rank among the world’s richest, and once you’ve done that…

Give Half

Apparently some rich folks – a couple named Bill and Melinda Gates and Jimmy Buffet’s older brother Warren – have come up with an idea to encourage the ultra-rich folks around the planet to pony up a hefty donation.  A billion here, a billion there – pretty soon you’re talking about real money!

So the next time you’re wondering if you’re getting paid what your worth, check out a few of these links.

How a Sticky Note Can Change Your Life

In this era of always-on, constantly connected mobile and computing devices, it’s comforting to know it’s still possible to be incredibly efficient and effective using the humble sticky note. In this article I’ll show you how to use a system called “The Critical Six” to manage your most important life goals using simple square sticky notes. You’ll be amazed at how focused and productive you can become and how much more you’ll get done.100 Years Of Productivity

The idea originally appeared about a 100 years ago as the brainchild of Ivy Lee, an efficiency expert hired by Charles Schwab, chairman of Bethlehem Steel. The story goes that Lee told Mr. Schwab he could have the idea for free, but would appreciate some form of compensation if it proved beneficial to Schwab within three months. Apparently it worked, since Schwab later sent Lee a check for $25,000 and claimed it was the greatest productivity tool he’d ever seen.

Your Six Most Important Things

The Critical Six list is very different from tracking daily to-dos like catching up on email, follow-up calls, paying your bills, and other busy work. The Critical Six is only for those activities that will clearly move you in the direction of your dreams and goals. To get started, take out a single square Post-it note and think about what is most important to you. What is the one thing you could do today, that if you completed it, would move you in the direction of your dreams and goals? Write it down on the sticky note. What else is important for you to accomplish? Write that down.Keep adding to your list until you have a total of six items.

It’s vital to list no more than six things, since more than that will make your list hard to manage. Next, prioritize them in order of importance from one to six. Your Critical Six list is now ready to rock. Next you need to put it where you can see it as often as possible.

Using a small Post-it note makes it easy to place your list in a convenient location like your computer monitor or desk. You want something you can easily refer to throughout the day that will constantly remind you of your goals despite daily distractions and interruptions.

Why, When and How it Works

Make your list at the end of the day or right before you go to bed. This way you avoid spending time planning your day the next morning. The time it takes “planning to plan” really adds up over the course of a year, so don’t waste your precious early morning hours planning when you could be taking action. Instead, wake up, check your list and get going.

Start working on item number one until it gets done. Don’t do anything else on your list until that one thing is completed. Of course you’ll have interruptions throughout the day, so keep coming back to number one until you can check it off your list. And, because life often gets in the way when we’re making other plans, you may need more time to complete a given item than you have available in a single day. Don’t worry. Just keep coming back to that one thing until it’s done, as long as it is the top priority.

Don’t change your priorities unless doing so really will move you forward faster. It’s all about setting your general trajectory by staying on course and making little adjustments along the way.As each item is completed, move the others up in priority and add new ones to the bottom so you still have a total of six. At the end of each day update your list on a fresh sticky note for use the following day.

What’s On Your List?

To summarize, here’s how to execute your Critical Six list:

  • At the end of the day or before you go to bed, take out your pad of sticky notes and write down the six things that will move you toward your goals and dreams. Only include six items per day – no more, no less.
  • Prioritize each in order of importance: number one is the most important, followed by number two, etc. Start working on number one the first thing the following morning. Do not move on to item number two or any others until the first one is completed, even if you get distracted by other activities. The only time you would change the order is if you decide your priorities need to be adjusted. After all, it’s your life, your goals and your dreams.
  • At the end of the day tally up all the items you’ve accomplished. If you have not yet completed number one your list will not change. If you have completed it and any others, move the remaining items up in priority to the top of the list and add new items until you have your next day’s Critical Six list.

This simple strategy could make a tremendous difference in your life. By staying focused and committed to your priorities, you will see tremendous changes over time that will help you move forward in the direction of your dreams and goals, all thanks to a humble little sticky note.

4 Reasons to Take Public Transportation to Work

Are you tired of driving to work or relying on a carpool? If you live in or near a city, there are several reasons why public transportation may be a great option for getting to work. Here are four good reasons to get out from behind the wheel:

Found Time

Public transportation is a great way to get more hours in the day. The time spent sitting on a bus, subway or commuter train can be time spent reading, working and even napping. If you have a long commute and you’re able to work while doing so, try to convince your boss to build that time into your workday.

Save the Earth—and Some Cash

By taking public transit, you’ll know that you are doing your part to cut down on CO2 emissions and the dependence on foreign oil. According to the American Public Transportation Association, public transit use saves the U.S. 4.2 billion gallons of gas and 37 million metric tons of CO2 annually. Plus, households that use public transit save more than $8,000 a year.

Employer Benefits

Many employers partially (or even fully) reimburse for transit passes, or offer a pre-tax deduction for the cost of a transit pass. Some employers are also going green and finding additional ways to incentivize or celebrate using public transit to get to work. It may earn you some brownie points – or green ones!

Market Research

One of the unique opportunities of taking public transit is the people watching. You may just find that the people milling around you on the platform or sitting next to you on the bus fit a demographic for something you are working on. Observe, take notes, perhaps even chat them up. You just may learn something.