Loading XML Through XNA Content Pipeline

XNA is quite possibly one of the most robust game programming frameworks out there. You can do nearly anything with it, and one of the reasons it is so flexible is its “Content Pipeline”. But sometimes it can be a bit tricky to use this feature, requiring us to do bit more work. But in the end, it helps to use the Content Pipeline. Luckily today we are going over how to use it to load in some XML.

A quick google search will reveal that loading in XML with C# and XNA can be a bit more complicated that it seems. There are several ways to accomplish XML integration, all dependent on your needs. Today we are going to go over the simplest way to load XML in XNA using the fancy Content Pipeline.

For the best viewing, use full screen mode.

<!–

Get Adobe Flash player

<!–

Installing and Running Google Go on Mac OS X

A while ago Google gave us a brand new language, Go. In the last couple of years I really haven’t heard much about it, but I decided to finally install it and give it a try. This tutorial will guide you step-by-step on how to install Google Go and start writing your own applications.

Go’s website has very good instructions on how to install it, and this tutorial will take many steps directly from there. Their website has instructions for all the major platforms, however this article will be specific to Mac OS X running on a 64 bit Intel processor.

Google does not distribute the binaries, which means you’ll have to build it for your own platform.

Setup Environment Variables

When you build Go, the compiler is going to need to know a few things.

export GOROOT=$HOME/go
export GOARCH=amd64
export GOOS=darwin
export GOBIN=$HOME/go/bin

$GOROOT is the path to where you’ll download the Google Go source code. I left mine where Google suggested, which is $HOME/go (/Users/[username]/go).

$GOARCH is the architecture you’re building for. The options are amd64, 386, or arm. The name is slightly misleading, but amd64 works for all 64bit x86 processors, and is what you’ll want to choose for Inlet 64 bit processors.

$GOOS is the operating system. The options here are darwin (for Mac), freebsd, linux, and nacl.

$GOBIN is where the output from the build will be placed. You’ll have to create this folder before building Go.

Grabbing The Go Source

Go uses Mercurial for version control. I didn’t have Mercurial installed, so I had to install it with this command.

$ sudo easy_install mercurial

After you have Mercurial installed, fetch the repository to your Go root.

$ hg clone -r release https://go.googlecode.com/hg/ $GOROOT

Building Go

This step assumes you have gcc and a bunch of other crap installed. The simplest way to get these is to just install Xcode. If you’re a developer on a Mac, however, chances are you’ve already got it installed.

$ cd $GOROOT/src
$ ./all.bash

When the build is complete, you’ll see something that looks like this:

2 known bugs; 0 unexpected bugs

The known bugs are expected and the number may vary based on the current release of Go and your architecture.

Once this is done, a compiler and a linker has been placed in the bin folder. Time to add that folder to the $PATH environment variable.

$ export PATH=$HOME/go/bin:$PATH

Writing Some Go Code

With your favorite text editor, create a helloworld.go file and add some Go code to it.

package main

import "fmt"
import "time"

func main() {
        var currentTime = time.LocalTime()
        fmt.Printf("The current time is: %s\n", currentTime.String())
}

The compiler and linker will be called 8g and 8l. We need to now compile and link our application.

$ 8g helloworld.g
$ 8l helloworld.8

After it builds and links without errors, it’s time to run our program.

$ ./8.out

Which outputs:

The current time is: Mon Jun 14 22:47:08 EDT 2010

And there you have it. If you own a Mac and are interested in messing with Google Go, this tutorial should get you started. Go has a pretty good sized framework that should let you do a lot of interesting things. Google uses Go internally for production systems, which I guess gives it some credibility as a mature language. Hopefully Go can gain some mainstream momentum in the future, and I’ll definitely be watching it grow.

Using Doc Raptor to create Excel Spreadsheets

Remember back many moons ago when we posted a previous tutorial about Excel document creation? Specifically, this one. It worked, but if you take a look at it again, that code was painful. And ugly. And required hooking up ruby with a Java library called JExcelAPI using RJB – which, really, is not something anyone actually wants to do. So today we are going to take a look at something else (that I think) is a lot nicer/cleaner for Excel document generation: a new web service specifically for document creation called Doc Raptor.

As a disclaimer, I am one of the people who wrote Doc Raptor – so I apologize if I come across as too excited about it. In all honesty, I think I’d be just as excited if someone else had created the service – because I really hated integrating and using that Java library in every app that needed to produce Excel documents.

Enough talk about that, let us dive in and see how Doc Raptor works. The example here today is going to be in Ruby (because that is what I write most of the time now), but since Doc Raptor is just a RESTful webservice, you can easily make it work with the language of your choice. The high level overview is that you create html tables, send them as a POST request to Doc Raptor, and get back an Excel document. Below, you can see the Ruby code necessary for such a request:

class Doc
  API_KEY = "YOUR_API_KEY_HERE"

  include HTTParty
  base_uri "https://docraptor.com"
 
  # :document_content => content, :name => "a doc",
  # :document_type => "xls", :test => false
  #
  # returns a string that is the document data
  def self.create(document_information)
    post("/docs", :body => {:doc => document_information},
                  :basic_auth => {:username => API_KEY})
  end
end

First off, you need to get a Doc Raptor API Key – which is easy to do, you can just go sign up for the free plan, and it will be right there on the dashboard:

Below that you see that we are including the module HTTParty. HTTParty is a ruby gem that makes dealing with http connections absurdly easy. Including the module makes it so that this Doc class can act as a nice encapsulation of communication with Doc Raptor – giving us handy methods like post. Right below the include line, you can see the call to base_uri. That is a method that we get by including HTTParty, and allows us to set what the base url we will be hitting against will be – in this case, it is “https://docraptor.com”.

Then we get to the meat of this class (although there really isn’t much to it) – the create method. This method takes the document information passed in (we will go over what is passed in in a moment), and does a POST request of that data plus the api key against “/docs” (which is really “https://docraptor.com/docs” – because of the setting of the base uri earlier). What is returned is just the response from Doc Raptor, which, if all went well, is the created document.

So what is passed into create? A hash of a couple parameters to send to Doc Raptor – :document_content, :document_type, :name, and :test. You can read about these parameters in detail in the Doc Raptor documentation, but I will go over them briefly here. :document_content is the most important – this is the string of html that Doc Raptor will use to create the document, and is what we will spend most of the rest of the tutorial creating. :document_type is used to tell Doc Raptor what type of document to create – it supports creating both Excel and PDF files – “xls” and “pdf”, respectively. In this tutorial, we are just creating Excel files, so this will be set to “xls”. :name is just a name for the document for your reference (shown on the Doc Raptor account dashboard with the date/time the document was created). And finally, :test sets if Doc Raptor creates this document in test mode – test mode allows you to create documents that don’t count against your monthly limit, but are watermarked, so it is great when figuring out how you want a document to look.

Ok, so that is a bunch of text covering how to use that create method, but who reads text? You want to see some code! So let us get to generating some content to create an Excel file from.

Since Doc Raptor takes html, we might as well use all the tools at our disposal in ruby that make creating html easy. I’m talking about haml. If you haven’t heard of haml, you should go take a look – it is a very clean and easy to use markup language that can be used to produce html. We are going to take some data and render it with a haml template, producing html that we can give to Doc Raptor. Below you can see the ruby code that does the rendering:

some_data = [2,4,1,6,3,5,18,22]

template = File.read(‘my_excel_template.haml’)
haml_engine = Haml::Engine.new(template)
rendered_template = haml_engine.render(Object.new, { :supplied_data => some_data })

We have an array of, literally, some data that we will be passing into the template. First, we open and read in the haml template (from a file called my_excel_template.haml (we will look at the contents of that file in a moment). Then we create a new haml renderer around that template. Finally, we render the template, and make the some_data variable available to be used inside the template as the variable supplied_data. The generated html is stored in the variable rendered_template.

Ok, so now we can take a look at this haml template. Haml is pretty easy to read even if you have never seen it before, but the folks at the haml website do a much better job explaining it than I ever could, so you should read through their tutorial if the markup below makes no sense.

%table{ :name => ‘My First Sheet’ }
  %tr
  %tr
    %td{ :colspan => 3,
         :style => "text-align:center;font-size:15pt;background-color:orange;" }
      Woo A Header Cell
  %tr
  %tr
    %td{ :colspan => 3, :style => "text-align:center;" }
      some subheader action
  %tr
  %tr{ :style => "background-color:#BBBBBB;border-top-style:thin;font-weight:bold;" }
    %td{ :style => "border-left-style:thin;" }
      My col data 1
    %td{ :style => "text-decoration:underline;" }
      My col data 2
    %td{ :style => "border-right-style:thin;" }
      My col data 3
  supplied_data.each do |value|
    %tr
      %td{ :style => "border-left-style:thin;" }
        = "Some text: #{value}"
      %td
        = value*value
      %td{ :style => "border-right-style:thin;" }
        Wheeee
  %tr{ :style => "border-top-style:thin;height:30;" }
    %td{ :style => "text-align:right;"}
      Sum:
    %td{ :style => "color:green;font-weight:bold;" }
      = "=SUM(B7:B#{supplied_data.count+6})"
    %td

Essentially, the code above is just describing an html table with some headers and then some rows of data generated by the data we passed in when rendering the template. So when this is rendered with that data, we get the html shown below:

<table name=‘My First Sheet’>
  <tr></tr>
  <tr>
    <td colspan=‘3’
        style=‘text-align:center;font-size:15pt;background-color:orange;’>
      Woo A Header Cell
    </td>
  </tr>
  <tr></tr>
  <tr>
    <td colspan=‘3’ style=‘text-align:center;’>
      some sub-header action
    </td>
  </tr>
  <tr></tr>
  <tr style=‘background-color:#BBBBBB;border-top-style:thin;font-weight:bold;’>
    <td style=‘border-left-style:thin;’>
      My col data 1
    </td>
    <td style=‘text-decoration:underline;’>
      My col data 2
    </td>
    <td style=‘border-right-style:thin;’>
      My col data 3
    </td>
  </tr>
  <tr>
    <td style=‘border-left-style:thin;’>
      Some text: 2
    </td>
    <td>
      4
    </td>
    <td style=‘border-right-style:thin;’>
      Wheeee
    </td>
  </tr>
  <tr>
    <td style=‘border-left-style:thin;’>
      Some text: 4
    </td>
    <td>
      16
    </td>
    <td style=‘border-right-style:thin;’>
      Wheeee
    </td>
  </tr>
  <tr>
    <td style=‘border-left-style:thin;’>
      Some text: 1
    </td>
    <td>
      1
    </td>
    <td style=‘border-right-style:thin;’>
      Wheeee
    </td>
  </tr>
  <tr>
    <td style=‘border-left-style:thin;’>
      Some text: 6
    </td>
    <td>
      36
    </td>
    <td style=‘border-right-style:thin;’>
      Wheeee
    </td>
  </tr>
  <tr>
    <td style=‘border-left-style:thin;’>
      Some text: 3
    </td>
    <td>
      9
    </td>
    <td style=‘border-right-style:thin;’>
      Wheeee
    </td>
  </tr>
  <tr>
    <td style=‘border-left-style:thin;’>
      Some text: 5
    </td>
    <td>
      25
    </td>
    <td style=‘border-right-style:thin;’>
      Wheeee
    </td>
  </tr>
  <tr>
    <td style=‘border-left-style:thin;’>
      Some text: 18
    </td>
    <td>
      324
    </td>
    <td style=‘border-right-style:thin;’>
      Wheeee
    </td>
  </tr>
  <tr>
    <td style=‘border-left-style:thin;’>
      Some text: 22
    </td>
    <td>
      484
    </td>
    <td style=‘border-right-style:thin;’>
      Wheeee
    </td>
  </tr>
  <tr style=‘border-top-style:thin;height:30;’>
    <td style=‘text-align:right;’>
      Sum:
    </td>
    <td style=‘color:green;font-weight:bold;’>
      =SUM(B7:B14)
    </td>
    <td></td>
  </tr>
</table>

So this is some pretty standard html, and will in fact render as a table if you throw it in a browser. There are a couple things to point out, though. The name property on the table is used by Doc Raptor to set the name of the sheet inside Excel – so in this case we will get a sheet named “My First Sheet”. Doc Raptor will also pay attention to the any style attributes to the best of its abilities – you can read the full set of supported styles in their documentation.

Ok, time to take this html and send it off:

File.open("my_excel_file.xls", "w+") do |f|
  f.write Doc.create(:document_content => rendered_template,
                     :name             => "my_excel_file.xls",
                     :document_type    => "xls",
                     :test             => true)
end

We just set those parameters like we talked about earlier, call create, and write the response to a file. Nice and simple! The resulting spreadsheet for this example looks like the following:

Pretty sweet for just making html – and a lot nicer than trying to deal with awkward java libraries. Below is the ruby code all together:

require ‘rubygems’
require ‘httparty’
require ‘haml’

class Doc
  API_KEY = "YOUR_API_KEY_HERE"

  include HTTParty
  base_uri "https://docraptor.com"
 
  # :document_content => content, :name => "a doc",
  # :document_type => "xls", :test => false
  #
  # returns a string that is the document data
  def self.create(document_information)
    post("/docs", :body => {:doc => document_information},
                  :basic_auth => {:username => API_KEY})
  end
end

some_data = [2,4,1,6,3,5,18,22]

template = File.read(‘my_excel_template.haml’)
haml_engine = Haml::Engine.new(template)
rendered_template = haml_engine.render(Object.new, { :supplied_data => some_data })

File.open("my_excel_file.xls", "w+") do |f|
  f.write Doc.create(:document_content => rendered_template,
                     :name             => "my_excel_file.xls",
                     :document_type    => "xls",
                     :test             => true)
end

And that wraps up this introduction to Doc Raptor! If ruby isn’t your thing, you can find other language examples on the examples page. If you have any questions or comments, feel free to leave them below, and I will do my best to answer them.

Creating a Roulette Wheel Using HTML5 Canvas

HTML5 is really hot all over the web right now so I figured I would drop some HTML5 knowledge on y’all. I have worked with Flash and Flex consistently for the last few years so I can easily drop and manipulate graphics in it, but I haven’t done much with HTML5. This lead me to try and challenge myself to recreate something I built in Flash in HTML5. That is what we are going to look at and learn to build in this tutorial.

A few things should be mentioned. First IE simply doesn’t implement the <canvas> tag which means it won’t work in IE, Google has released Explorer Canvas which fixes this to some extent. I, however, didn’t worry about adding that to this tutorial because this post is about creating the content. Also, there are some small things that don’t work in other browsers. Finally, Mobile Safari (iPhone, iPod Touch, and iPad) doesn’t implement text rendering correctly.

To get things rolling we’ll first put some simple html down. This includes the <canvas> tag which is what we’re using for this tutorial. The only other element we are going to use is an input button to spin our wheel. I also added a little bit of inline style to place the button.

<input type="button" value="spin" style="float:left;" />
<canvas id="canvas" width="500" height="500"></canvas>

The next thing we are going to do is begin drawing some stuff on to our canvas. This is going to be done in JavaScript in a function I named drawRouletteWheel. The basics of drawing on the <canvas> in 2D at least involve grabbing a drawing context and then drawing onto it. Sounds complicated doesn’t it. Let’s look at a little bit of code.

var colors = ["#B8D430", "#3AB745", "#029990", "#3501CB",
                 "#2E2C75", "#673A7E", "#CC0071", "#F80120",
                 "#F35B20", "#FB9A00", "#FFCC00", "#FEF200"];

var startAngle = 0;
var arc = Math.PI / 6;
var ctx;

function drawRouletteWheel() {
  var canvas = document.getElementById("canvas");
  if (canvas.getContext) {
    var outsideRadius = 200;
    var insideRadius = 125;
   
    ctx = canvas.getContext("2d");
    ctx.clearRect(0,0,500,500);
   
    ctx.strokeStyle = "black";
    ctx.lineWidth = 2;
   
    for(var i = 0; i < 12; i++) {
      var angle = startAngle + i * arc;
      ctx.fillStyle = colors[i];
     
      ctx.beginPath();
      ctx.arc(250, 250, outsideRadius, angle, angle + arc, false);
      ctx.arc(250, 250, insideRadius, angle + arc, angle, true);
      ctx.stroke();
      ctx.fill();
    }
  }
}

Okay, looking at the start of the function we grab a reference to our canvas object by id – nothing new here. Then we check to make sure the browser supports grabbing a drawing context, this is important to make sure we don’t throw errors in browsers that don’t support the features. Then we set a couple of variables for the inner and outer radius of our wheel. Now, we get into the meat. The first thing we do is grab a 2D drawing context by calling getContext. From here we clear the canvas, so we have a blank slate to draw onto. Then we set the stroke color and width which in this case is “black” and 2.

The next part takes a little bit of explaining, we are going to loop through 12 sections (the number of sides we are going to draw). For each section we determine the angle of where each section is going to start. The startAngle is a global variable in which we are going to use to animate the wheel, for now, it is set to 0. The following line sets the fill color by pulling a value from the global colors array. Drawing begins after that with starting a path drawing two arcs, using the arc(x, y, radius, startAngle, endAngle, anticlockwise) function. We then tell the context to stroke the path and fill the path, these will use the previously set parameters.

Now, we are going to add the restaurant text to our drawing code. Also, to finish off the drawing function we’ll add the nice little arrow at the top. The text drawing is done using the fillText(text, x, y [, maxWidth ]) function. Let’s take a look at the updated code.

var restaraunts = ["Wendy’s", "McDonalds", "Chick-fil-a", "Five Guys",
                       "Gold Star", "La Mexicana", "Chipotle", "Tazza Mia",
                       "Panera", "Just Crepes", "Arby’s", "Indian"];

function drawRouletteWheel() {
  var canvas = document.getElementById("canvas");
  if (canvas.getContext) {
    var outsideRadius = 200;
    var textRadius = 160;
    var insideRadius = 125;
   
    ctx = canvas.getContext("2d");
    ctx.clearRect(0,0,500,500);
   
   
    ctx.strokeStyle = "black";
    ctx.lineWidth = 2;
   
    ctx.font = ‘bold 12px Helvetica, Arial’;
   
    for(var i = 0; i < 12; i++) {
      var angle = startAngle + i * arc;
      ctx.fillStyle = colors[i];
     
      ctx.beginPath();
      ctx.arc(250, 250, outsideRadius, angle, angle + arc, false);
      ctx.arc(250, 250, insideRadius, angle + arc, angle, true);
      ctx.stroke();
      ctx.fill();
     
      ctx.save();
      ctx.shadowOffsetX = 1;
      ctx.shadowOffsetY = 1;
      ctx.shadowBlur    = 0;
      ctx.shadowColor   = "rgb(220,220,220)";
      ctx.fillStyle = "black";
      ctx.translate(250 + Math.cos(angle + arc / 2) * textRadius,
                    250 + Math.sin(angle + arc / 2) * textRadius);
      ctx.rotate(angle + arc / 2 + Math.PI / 2);
      var text = restaraunts[i];
      ctx.fillText(text, ctx.measureText(text).width / 2, 0);
      ctx.restore();
    }
   
    //Arrow
    ctx.fillStyle = "black";
    ctx.beginPath();
    ctx.moveTo(250 4, 250 (outsideRadius + 5));
    ctx.lineTo(250 + 4, 250 (outsideRadius + 5));
    ctx.lineTo(250 + 4, 250 (outsideRadius 5));
    ctx.lineTo(250 + 9, 250 (outsideRadius 5));
    ctx.lineTo(250 + 0, 250 (outsideRadius 13));
    ctx.lineTo(250 9, 250 (outsideRadius 5));
    ctx.lineTo(250 4, 250 (outsideRadius 5));
    ctx.lineTo(250 4, 250 (outsideRadius + 5));
    ctx.fill();
  }
}

Looking at the new text drawing we start by saving the current context state – this is going to allow us to rotate and translate the text without affecting everything else. We then set some shadow stuff, which will put a drop shadow on the text. Translating and rotating the text is tackled next, we first translate the text to the correct placement on the wheel and then rotate it. Drawing the text follows this but with the added effect of centering the text by measuring it and dividing that by 2 to offset it. You’ll notice we grab the restaurant name from a global array. Lastly we restore to our initial state we saved to, this makes sure the transformations do not affect later drawing. The arrow is even easier to explain, we just move to one corner and draw lines to create the shape and fill it with black.

Below I have the complete code for this demo. I’ll explain the spinning and animating code right after.

var colors = ["#B8D430", "#3AB745", "#029990", "#3501CB",
             "#2E2C75", "#673A7E", "#CC0071", "#F80120",
             "#F35B20", "#FB9A00", "#FFCC00", "#FEF200"];
var restaraunts = ["Wendy’s", "McDonalds", "Chick-fil-a", "Five Guys",
                   "Gold Star", "La Mexicana", "Chipotle", "Tazza Mia",
                   "Panera", "Just Crepes", "Arby’s", "Indian"];

var startAngle = 0;
var arc = Math.PI / 6;
var spinTimeout = null;

var spinArcStart = 10;
var spinTime = 0;
var spinTimeTotal = 0;

var ctx;
   
function drawRouletteWheel() {
  var canvas = document.getElementById("canvas");
  if (canvas.getContext) {
    var outsideRadius = 200;
    var textRadius = 160;
    var insideRadius = 125;
   
    ctx = canvas.getContext("2d");
    ctx.clearRect(0,0,500,500);
   
   
    ctx.strokeStyle = "black";
    ctx.lineWidth = 2;
   
    ctx.font = ‘bold 12px Helvetica, Arial’;
   
    for(var i = 0; i < 12; i++) {
      var angle = startAngle + i * arc;
      ctx.fillStyle = colors[i];
     
      ctx.beginPath();
      ctx.arc(250, 250, outsideRadius, angle, angle + arc, false);
      ctx.arc(250, 250, insideRadius, angle + arc, angle, true);
      ctx.stroke();
      ctx.fill();
     
      ctx.save();
      ctx.shadowOffsetX = 1;
      ctx.shadowOffsetY = 1;
      ctx.shadowBlur    = 0;
      ctx.shadowColor   = "rgb(220,220,220)";
      ctx.fillStyle = "black";
      ctx.translate(250 + Math.cos(angle + arc / 2) * textRadius,
                    250 + Math.sin(angle + arc / 2) * textRadius);
      ctx.rotate(angle + arc / 2 + Math.PI / 2);
      var text = restaraunts[i];
      ctx.fillText(text, ctx.measureText(text).width / 2, 0);
      ctx.restore();
    }
   
    //Arrow
    ctx.fillStyle = "black";
    ctx.beginPath();
    ctx.moveTo(250 4, 250 (outsideRadius + 5));
    ctx.lineTo(250 + 4, 250 (outsideRadius + 5));
    ctx.lineTo(250 + 4, 250 (outsideRadius 5));
    ctx.lineTo(250 + 9, 250 (outsideRadius 5));
    ctx.lineTo(250 + 0, 250 (outsideRadius 13));
    ctx.lineTo(250 9, 250 (outsideRadius 5));
    ctx.lineTo(250 4, 250 (outsideRadius 5));
    ctx.lineTo(250 4, 250 (outsideRadius + 5));
    ctx.fill();
  }
}
   
function spin() {
  spinAngleStart = Math.random() * 10 + 10;
  spinTime = 0;
  spinTimeTotal = Math.random() * 3 + 4 * 1000;
  rotateWheel();
}

function rotateWheel() {
  spinTime += 30;
  if(spinTime >= spinTimeTotal) {
    stopRotateWheel();
    return;
  }
  var spinAngle = spinAngleStart easeOut(spinTime, 0, spinAngleStart, spinTimeTotal);
  startAngle += (spinAngle * Math.PI / 180);
  drawRouletteWheel();
  spinTimeout = setTimeout(‘rotateWheel()’, 30);
}

function stopRotateWheel() {
  clearTimeout(spinTimeout);
  var degrees = startAngle * 180 / Math.PI + 90;
  var arcd = arc * 180 / Math.PI;
  var index = Math.floor((360 degrees % 360) / arcd);
  ctx.save();
  ctx.font = ‘bold 30px Helvetica, Arial’;
  var text = restaraunts[index]
  ctx.fillText(text, 250 ctx.measureText(text).width / 2, 250 + 10);
  ctx.restore();
}

function easeOut(t, b, c, d) {
  var ts = (t/=d)*t;
  var tc = ts*t;
  return b+c*(tc + 3*ts + 3*t);
}

drawRouletteWheel();

It’s a lot to take in but we’ll take it slow. At the bottom of the code you’ll see we call drawRouletteWheel, this is too draw the initial wheel when the page loads. We have to update the input button we put on the screen to now call our spin function, which handles spinning the wheel, of course. The updated input follows.

<input type="button" value="spin" onclick="spin();" style="float:left;" />

Taking a look at the spin function we set a couple global variables that decide how fast we are going to spin and how long we are going to spin. These have a little bit of randomness in them to make things more interesting. Lastly, we call rotateWheel.

The rotateWheel function updates the amount of time we have been spinning, checks to see if we should stop, updates spinning speed, draws the wheel, and then calls itself in 30 milliseconds. After checking the time we change the spinning angle, startAngle, this is done using an easing function to slow down the spinning. Then we call our drawing function and use setTimeout and keeps a reference to call our rotate again.

The last function we need look at is stopping the wheel, stopRotateWheel. This starts with clearing the timeout which will stop the code from rotating the wheel. Then we use some math to figure out what restaurant is at the top. Finally, we draw the large name of the of the selected restaurant in the middle of the wheel.

Well, that’s pretty much a wrap on this post. I really like how HTML5 and the canvas tag are coming along. Although it’s not quite ready for primetime production work yet. I look forward to the next couple years of web development.

If you have any questions on the tutorial or just want to bash on my coding skills feel free to drop a comment.

Taking a Dive into HTML5 – Web Storage

HTML5 is getting a lot of attention these days – especially when it comes to video. This tutorial is going to cover a feature added to HTML5 that I don’t think is getting enough attention – web storage.

Prior to web storage, most websites used cookies to store information on the client’s computer. Cookies, for the most part, work great for simple storage. They do, however, have one major drawback. If the user is visiting your site on two separate windows or tabs, information stored in cookies will be shared between them. To handle this case, the web storage in HTML5 has been split into two pieces: localStorage and sessionStorage. The first one works like cookies, saving information for an entire site (origin). The second one, sessionStorage, will store information for each origin but keep it isolated between windows or tabs.

Before we get started, I should note that not every browser supports web storage. Wikipedia is maintaining a pretty good list of HTML5 browser compatibility that should probably be consulted before using storage in a production environment.

Reading and Writing Values

Both mechanism use the same object as defined in the web storage spec, Storage. Let’s take a look at this interface.

interface Storage {
  readonly attribute unsigned long length;
  getter DOMString key(in unsigned long index);
  getter any getItem(in DOMString key);
  setter creator void setItem(in DOMString key, in any data);
  deleter void removeItem(in DOMString key);
  void clear();
};

Hats off the creators of this, as I don’t think there could have been a simpler interface for storing values. At its core, this is basically a dictionary mapping string keys to object values. For the most part, pretty much anything can be stored in here – as long as it can be cloned using the structured clone algorithm

Let’s take a look at how do use this, first using localStorage.

<!DOCTYPE HTML PUBLIC "-//W3C//DTD HTML 4.0 Transitional//EN">
<html>
   <head>
      <title></title>
      <script type="text/javascript">
         function load()
         {
          var value = localStorage.getItem("myKey");
         
          if(!value)
          {
            alert("No item found, adding to localStorage");
            localStorage.setItem("myKey", "myValue");
          }
          else
          {
            alert("Item found: " + value);
          }
         }
      </script>
   </head>
   <body onload="load()">
       
   </body>
</html>

In this example, if the value hasn’t been stored yet, you’ll receive this alert:

No item alert

The next time the page is loaded, you’ll now receive this alert:

Item found alert

As you can see, using localStorage is incredibly easy. This value will now be stored indefinitely on the client’s computer ready for me to retrieve whenever they visit my website again.

Using sessionStorage is just as easy. All we have to do is replace the object we’re using and we’re done.

<!DOCTYPE HTML PUBLIC "-//W3C//DTD HTML 4.0 Transitional//EN">
<html>
   <head>
      <title></title>
      <script type="text/javascript">
         function load()
         {
          var value = sessionStorage.getItem("myKey");
         
          if(!value)
          {
            alert("No item found, adding to sessionStorage");
            sessionStorage.setItem("myKey", "myValue");
          }
          else
          {
            alert("Item found: " + value);
          }
         }
      </script>
   </head>
   <body onload="load()">
       
   </body>
</html>

The code is nearly identical to the previous code, however this time, if you open the site in two different tabs, you’ll receive the “No item found” message for each tab. In the previous example, the value existed for every new tab or window created.

One thing to remember when dealing with HTML5 web storage is that it does not cross browsers. The spec does not outline where or how a browser must store the data. Therefore if the user visits your site in one browser one day, then in a different browser the next, you will not be able to see values that were stored by the other browser.

Listening for Changes

The HTML5 spec outlines an event that client’s can attach to in order to receive updates whenever a storage (local or session) changes. At this point in time, however, I wasn’t able to get it working in Chrome (6.0.401.1 dev). I was, however, able to get the following code working in Opera.

<!DOCTYPE HTML PUBLIC "-//W3C//DTD HTML 4.0 Transitional//EN">
<html>
   <head>
      <title></title>
      <script type="text/javascript">
         function load()
         {
         localStorage.clear();
          var value = localStorage.setItem("myKey", "myNewValue");
          alert(localStorage.getItem("myKey"));
         }
         
         function storageChanged(e)
         {
          alert("Storage changed.");
         }
      </script>
   </head>
   <body onstorage="storageChanged()" onload="load()" >
       
   </body>
</html>

In Opera, the storageChanged event will fire twice – once for when the localStorage is cleared, and again when the value is set.

Although we’re moving in the right direction, HTML5 still has a ways to go before it’s fully adopted. Web Storage has a great amount of potential in the future of web apps and I can wait to see what developers are able to do with it.

Defining The Photoshop File Types

This post is going to give the definitions for each file type that you can save as in Photoshop CS3 (as this is the one I use) Most of the below file types you won’t need but I thought it would be useful for you all to know and understand what each of them are for just in case.

Lets start with the most used file type:

Photoshop File (*.PSD*.PDD)

What is it?
Photoshop format (PSD) is the default file format and the only format, besides the Large Document Format (PSB), that supports most Photoshop features. Because of the tight integration between Adobe products, other Adobe applications, such as Adobe Illustrator, Adobe InDesign, Adobe Premiere, Adobe After Effects, and Adobe GoLive, can directly import PSD files and preserve many Photoshop features.

The .PDD (PhotoDeluxe Document) format is a version of .PSD that only supports the features found in the discontinued PhotoDeluxe software.

BMP (*.BMP*.RLE*.DIB)

What is it?
The BMP file format, sometimes called bitmap or DIB file format (for device-independent bitmap), is an image file format used to store bitmap digital images, especially on Microsoft Windows and OS/2 operating systems. Many graphical user interfaces use bitmaps in their built-in graphics subsystems.

File Size/Compression?
While most BMP files have a relatively large file size due to lack of any compression, many BMP files can be considerably compressed with lossless data compression algorithms such as ZIP (up to 0.1% of original size) because they contain redundant data.

CompuServe GIF (*.GIF) – Lossless

I found this awesome GIF image that represents this file type perfectly:
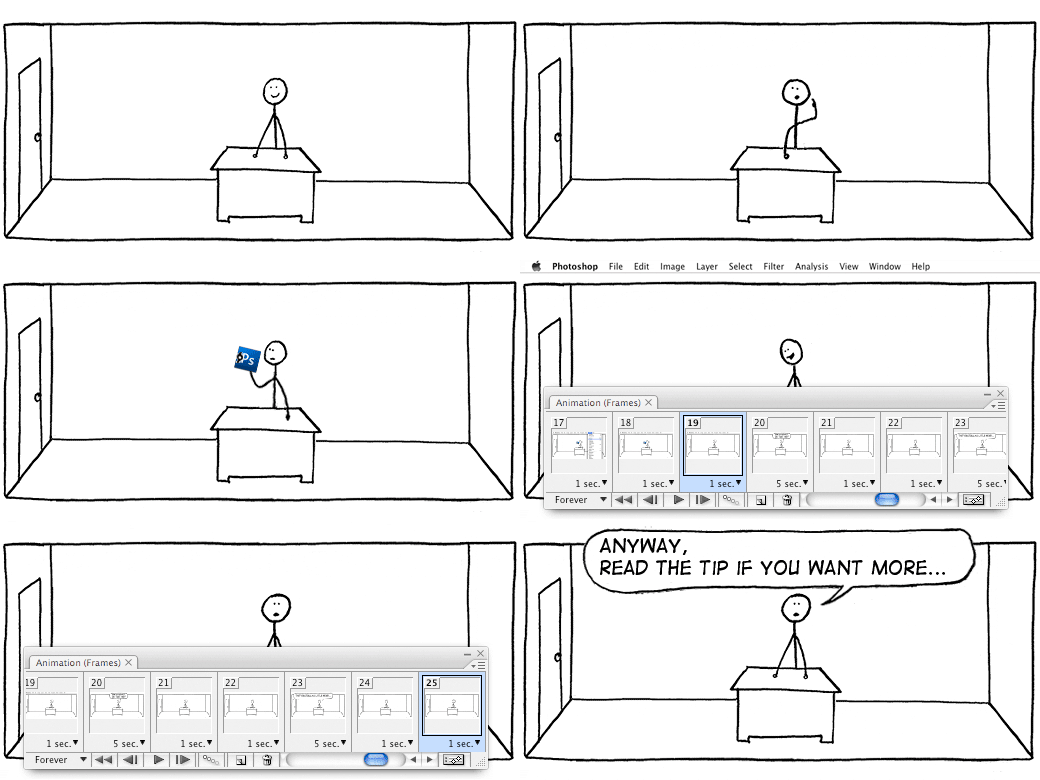
stickmananimation

What is it?
The Graphics Interchange Format (GIF) is a bitmap image format that was introduced by CompuServe in 1987 and has since come into widespread usage on the World Wide Web due to its wide support and portability.

The format supports up to 8 bits per pixel, allowing a single image to reference a palette of up to 256 distinct colors chosen from the 24-bit RGB color space. It also supports animations and allows a separate palette of 256 colors for each frame. The color limitation makes the GIF format unsuitable for reproducing color photographs and other images with continuous color, but it is well-suited for simpler images such as graphics or logos with solid areas of color.

File Size/Compression?
GIF images are compressed using the Lempel-Ziv-Welch (LZW) lossless data compression technique to reduce the file size without degrading the visual quality.

Dicom (*.DCM*.DC3*.DIC)

What is it?
Digital Imaging and Communications in Medicine (DICOM) is the most common standard for receiving medical scans. Photoshop Extended allows you to open and work with DICOM (.DC3, .DCM .DIC, or no extension) files. DICOM files can contain multiple “slices” or frames, which represent different layers of a scan.
Photoshop reads all frames from a DICOM file and converts them to Photoshop layers. Photoshop can read 8 , 10 , 12 , or 16 bit DICOM files. (Photoshop converts 10 and 12 bit files to 16 bit files.)

Photoshop EPS (*.EPS)

What is it?
Encapsulated PostScript (EPS) language file format can contain both vector and bitmap graphics and is supported by virtually all graphics, illustration, and page-layout programs. EPS format is used to transfer PostScript artwork between applications. When you open an EPS file containing vector graphics, Photoshop rasterizes the image, converting the vector graphics to pixels.
EPS format supports Lab, CMYK, RGB, Indexed Color, Duotone, Grayscale, and Bitmap color modes, and does not support alpha channels. EPS does support clipping paths. Desktop Color Separations (DCS) format, a version of the standard EPS format, lets you save color separations of CMYK images.

Photoshop DCS 1.0 (*.EPS) / Photoshop DCS 2.0 (*.EPS)

What is it?
Desktop Color Separations (DCS) format is a version of the standard EPS format that lets you save color separations of CMYK images. You can use DCS 2.0 format to export images containing spot channels. To print DCS files, you must use a PostScript printer.

JPEG (*.JPG*.JPEG*.JPE) – Lossy

An image that represents the lossiness of a JPEG image:

ball

What is it?
Joint Photographic Experts Group (JPEG) format is commonly used to display photographs and other continuous-tone images in HTML documents over the Internet and other online services. JPEG format supports CMYK, RGB, and Grayscale color modes, and does not support alpha channels. Unlike GIF format, JPEG retains all color information in an RGB image but compresses file size by selectively discarding data.

File Size/Compression?
A JPEG image is automatically decompressed when opened. A higher level of compression results in lower image quality, and a lower level of compression results in better image quality. In most cases, the Maximum quality option produces a result indistinguishable from the original.

Large Document Format (*.PSB)

What is it?
The Large Document Format (PSB) supports documents up to 300,000 pixels in any dimension. All Photoshop features, such as layers, effects, and filters, are supported. You can save high dynamic range, 32 bits-per-channel images as PSB files. Currently, if you save a document in PSB format, it can be opened only in Photoshop CS or later. Other applications and earlier versions of Photoshop cannot open documents saved in PSB format.

PCX (*.PCX)

What is it?
PCX format is commonly used by IBM PC compatible computers. Most PC software supports version 5 of PCX format. A standard VGA color palette is used with version 3 files, which do not support custom color palettes. PCX format supports Bitmap, Grayscale, Indexed Color, and RGB color modes, and does not support alpha channels.

File Size/Compression?
PCX supports the RLE compression method. Images can have a bit depth of 1, 4, 8, or 24.

Photoshop PDF (*.PDF*.PDP)

What is it?
Self explanatory, this file format saves the Photoshop file you are working on as a PDF file to be opened with Adobe Acrobat Reader.

Photoshop RAW (*.RAW)

What is it?
If you’ve saved the file in raw mode (when using a digital camera) when it is subsequently loaded into a raw conversion program and then saved to a TIFF or .PSD format file it can be exported in 16 bit mode. The 12 or 14 bits recorded by the camera are then spread over the full 16 bit workspace. If you’ve saved the file in-camera as a JPG then it is converted by the camera’s software to 8 bit mode and you will only ever have 256 brightness levels to work with.

File Size/Compression?
Files sizes are usually quite large as the name suggests the photo is in a RAW state therefore no compression has been done to it.

PICT File (*.PCT*.PICT)

What is it?
Image file saved in the Macintosh PICT format; may contain both vector and bitmap data and can use thousands of colors; also supports RLE (Run-length encoding) and JPEG compression to reduce the file size.

File Size/Compression?
File sizes are relatively small as it uses the same compression method as JPEG

Pixar (*.PXR)

What is it?
The Pixar format is designed specifically for high-end graphics applications, such as those used for rendering three-dimensional images and animation. Pixar format supports RGB and grayscale images with a single alpha channel.

PNG (*.PNG) – Lossless

This image represents how transparency is achieved in Photoshop:

transparent

What is it?
Portable Network Graphics (PNG) is a bitmapped image format that employs lossless data compression. PNG was created to improve upon and replace GIF (Graphics Interchange Format) as an image-file format not requiring a patent license, PNG also offers a variety of transparency options available.

Portable Bit Map (*.PBM*.PGM*.PPM*.PNM*.PFM*.PAM)

What is it?
The Portable Bit Map (PBM) file format, also known as Portable Bitmap Library and Portable Binary Map, supports monochrome bitmaps (1 bit per pixel). The format can be used for lossless data transfer because many applications support this format. You can even edit or create such files within a simple text editor.
While the PBM file format stores monochrome bitmaps, PGM additionally stores grayscale bitmaps, and PPM can also store color bitmaps. PNM is not a different file format in itself, but a PNM file can hold PBM, PGM, or PPN files. PFM is a floating-point image format that can be used for 32 bits-per-channel HDR files.

Scitex CT (*.SCT)

What is it?
Scitex Continuous Tone (CT) format is used for high-end image processing on Scitex computers. Contact Creo to obtain utilities for transferring files saved in Scitex CT format to a Scitex system. Scitex CT format supports CMYK, RGB, and grayscale images and does not support alpha channels.

File Size/Compression?
CMYK images saved in Scitex CT format often have extremely large file sizes. These files are generated for input using a Scitex scanner. It is often demanded in professional color work—for example, ads in magazines.

Targa (*.TGA*.VDA*.ICB*.VST)

What is it?
The Targa® (TGA) format is designed for systems using the Truevision® video board and is commonly supported by MS DOS color applications. Targa format supports 16 bit RGB images (5 bits x 3 color channels, plus one unused bit), 24 bit RGB images (8 bits x 3 color channels), and 32 bit RGB images (8 bits x 3 color channels plus a single 8 bit alpha channel). Targa format also supports indexed-color and grayscale images without alpha channels.

File Size/Compression?
When saving an RGB image in this format, you can choose a pixel depth and select RLE encoding to compress the image.

TIFF (*.TIF*.TIFF) – Lossless

What is it?
Tagged-Image File Format (TIFF, TIF) is used to exchange files between applications and computer platforms. TIFF is a flexible bitmap image format supported by virtually all paint, image-editing, and page-layout applications. Also, virtually all desktop scanners can produce TIFF images. TIFF documents have a maximum file size of 4 GB. Photoshop CS and later supports large documents saved in TIFF format. However, most other applications and older versions of Photoshop do not support documents with file sizes greater than 2 GB.

TIFF format supports CMYK, RGB, Lab, Indexed Color, and Grayscale images with alpha channels and Bitmap mode images without alpha channels. Photoshop can save layers in a TIFF file; however, if you open the file in another application, only the flattened image is visible. Photoshop can also save annotations, transparency, and multiresolution pyramid data in TIFF format. In Photoshop, TIFF image files have a bit depth of 8, 16, or 32 bits per channel. You can save high dynamic range images as 32 bits-per-channel TIFF files.

Conclusion

As you can see some of the file types are redundant unless you have specific software/hardware and most of you wont ever need to use them, but now you know what they are and what they do, so if you ever need to know what file type to use for a project check back here and you can find out which is best!

If there is any information here that you feel to be incorrect or would like me to add then leave a comment on the bottom and I will moderate what I think needs adding/deleting.

The “Love Design” iPhone Wallpaper

This tutorial will teach you how to make a cool “Love Design” wallpaper for you iPhone, obviously not everyone has an iPhone so if you wanted you could use the techniques and scale it up to a wallpaper for you desktop for instance, the main idea is to teach you how to get cool effects.

This is what we will be making:

Final

Step 1 – New Document

First of all we need to create a new docurment, with the sizes 320 x 480 (W x H) in pixels, this is size needed for it to fit on the iPhone screen and leave all other settings as default.

Step 2 – Gradient Background

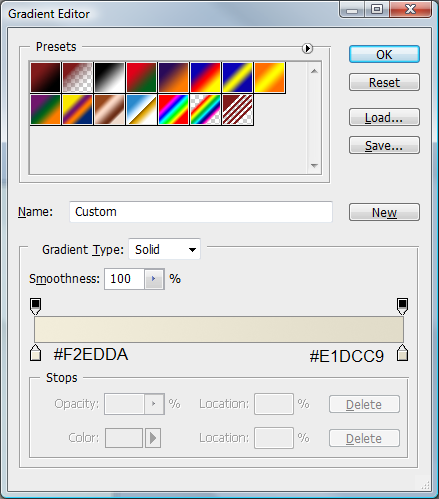
Next we need to create a gradient on the background layer, to do this select the gradient tool in the left hand toolbar and use the below colours:

Gradient Settings

And make sure that the radial gradient is selected, when this is done click in the middle and drag to any corner of the canvas and let go to get your gradient like below:

Gradient

Step 3 – Draw First Rectangle

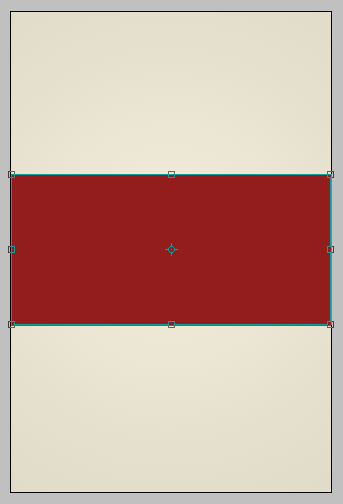
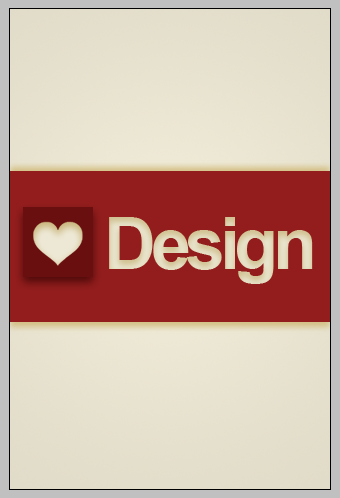
When this is done, make sure the primary colour is set to #931D1D and draw a rectangle across the canvas as shown below:

First Rectangle

Step 4 – Shadowing

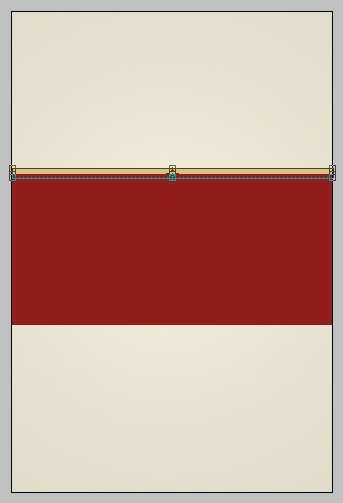
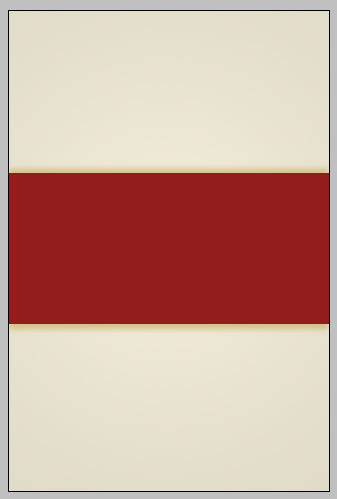
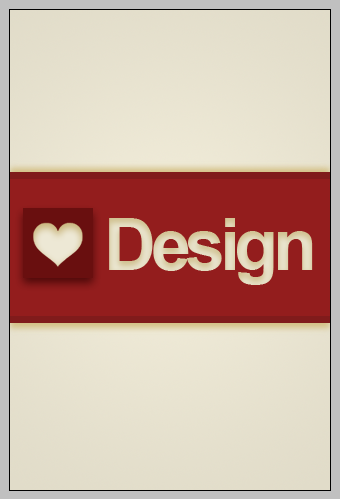
Now we need to create some shadowing to do this set the primary colour to #D5C38A and draw a rectangle in the same way you did with the first one but draw it a lot thinner and at the top of the first one as below:

Small Rectangle

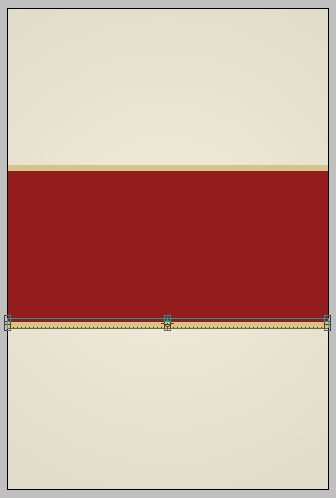
When this is done press (CTRL +J) to make a direct copy of the selected layer and move it to the same place but at the bottom of the first rectangle as below:

Small Rectangle 2

With this done, select the first small rectangle you drew and go to Filters > Blur > Gaussian Blur and set it to 3, and then do this process again with the second small rectangle and you should have something like this when done:

Small Rectangle blur

Step 5 – Adding The “Love Heart”

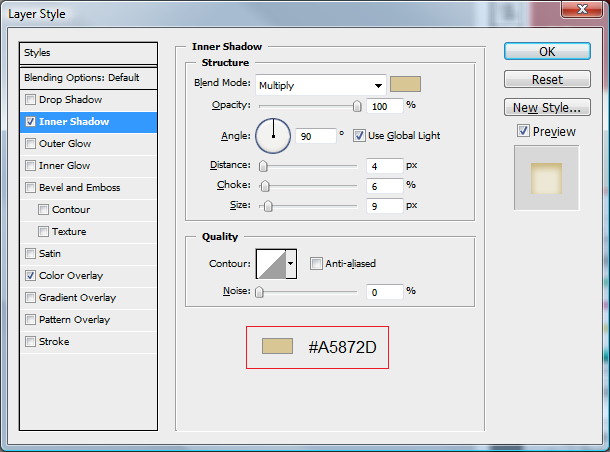
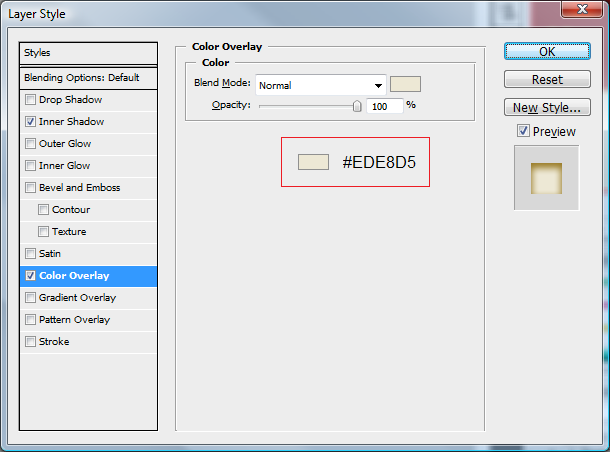
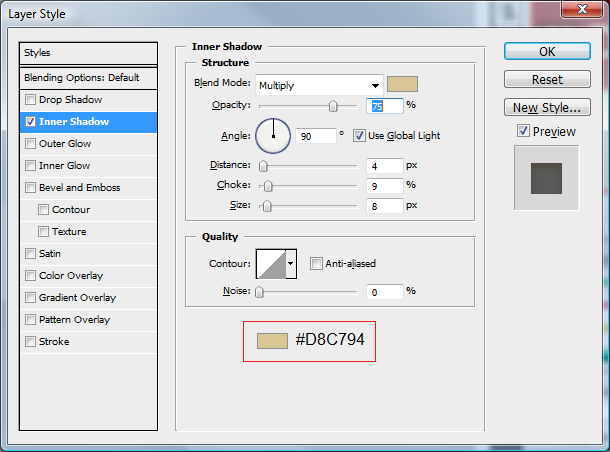
Next we need to get the heart, I did a quick Google search for “love heart” and found a suitable one so I put it into the document and resized it to fit where I wanted it to go, after this use these settings below using the blending options to get the right colour and effects:

Inner Shadow

Heart Shadow

Color Overlay

Heart Color

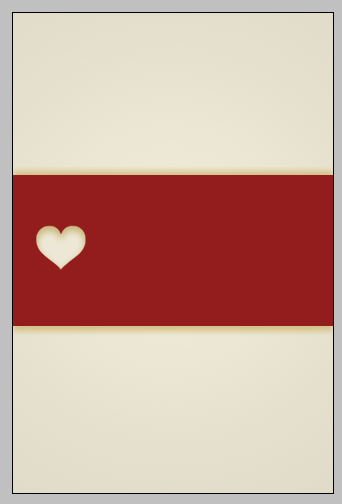
When these are done you should be left with something like this:

Heart Done

Step 6 – Creating A Square

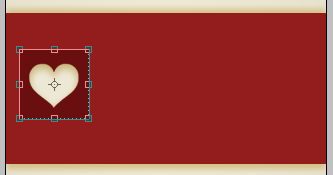
Next we need to create the box that goes behind the heart this is simple, choose the rectangle tool again and set the primary colour to #690F0F and hold shift and click and drag a box around your heart so that the heart fits nicely inside the box as below:

Heart Box

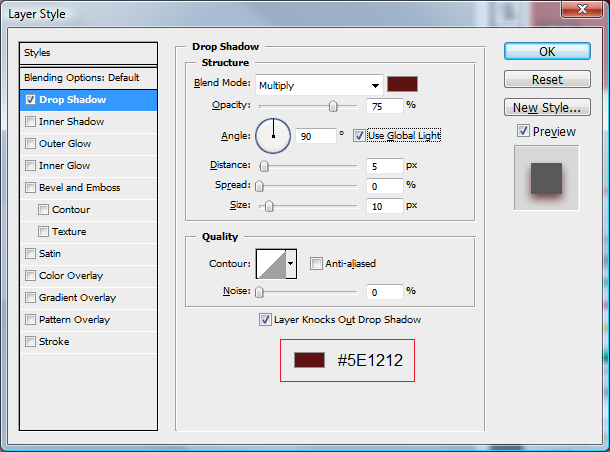
Once you are happy with the size put the below settings on the layer using the blending options:

Drop Shadow

Heart Box Shadow

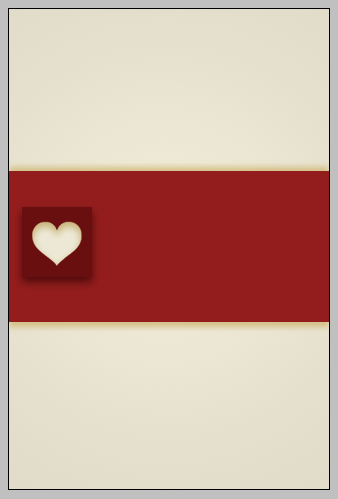
Once these are done you should be left with the below:

Heart Box Done

Step 7 – Add The “Design” Text

Next we need to add the design text, this is simple pick the text tool on the sidebar and select the Arial font and make sure it is bold, next to where you have placed your heart click and write the word “Design” when this is done use the settings below (again using the blending options) to get the right effect:

Text Shadow

When this is done you will have something like this:

Text Done

Step 8 – More Shadowing

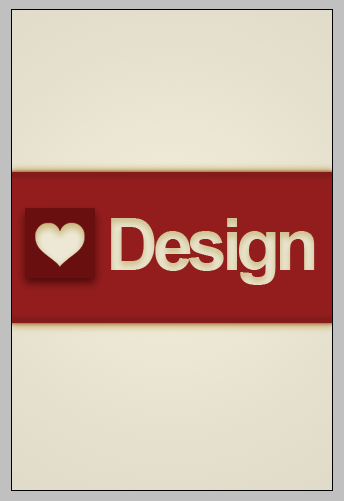
The penultimate step is to create some darker patches at the top and the bottom of the original rectangle this is again to give the idea of shading, to do this do the same as the other two small rectangles (Step 4) but use the colour # 801B1B and place them just inside the top and bottom of the original rectangle:

Shadowing 2

When this is done again apply a Gaussian blur of 2 with this done you will have this:

Shadowing 2 Blur

Step 9 – Adding Texture

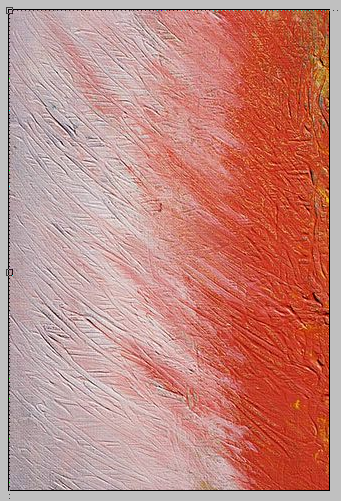
The final step is what makes this wallpaper comes and alive, as we all know textures make things jump out and give things depth, so what we are going to do is add a texture I again found THIS cool texture, of paint on a canvas, copy this and paste it onto the canvas and place around this area (with the top left of the image in the top left of the canvas)

Texture

With this in place make sure the texture layer is selected and go to Image > Adjustments > Black & White and then set the layer mode to Color Burn this will give you the finished wallpaper as shown below:

Final

iPhone Test

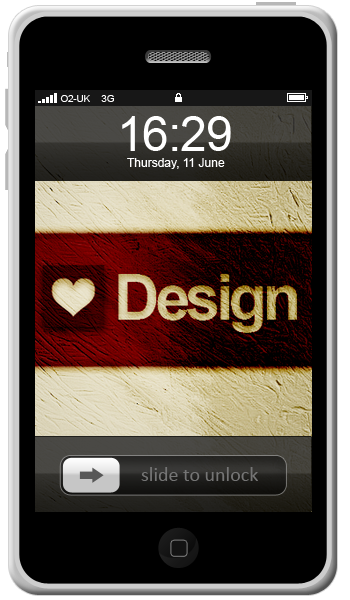
Also below is what the wallpaper will look like on the iPhone:

Wallpaper Test

If you want to know how to make the iPhone itself, leave a comment on this tutorial and if enough people want to see how it’s done then I will make it for the next tutorial.

It would be cool to see what you come up with so feel free to upload them to the Photoshop Tutorials Flickr Group and leave me a comment to say when you have uploaded one so people can comment on them,

And as always if you have any problems with this tutorial then don’t hesitate to leave me a comment or head over to the Online-Photoshop Tutorials Forums and post in the Tutorials Problems section and I and others will be able to help you.

http://forums.online-photoshoptutorials.com/

psd-download

BuddyPress Integration

I know I haven’t posted for a LONG time, but University has bee really demanding as of late and I haven’t had chance to do hardly any Photoshop work at all let alone write any tutorials, but whilst I haven’t got a lot on I wanted to get back to this website and start bringing it back to life, It is something I have wanted to do for ages but have only just got around to it.

With BuddyPress now working on normal WordPress installations, I wanted to get that installed so that we could get a community going and so you could all connect with each other if you have any Photoshop questions.

So with all that in mind I installed BuddyPress onto the site and altered the theme to fit with the BuddyPress layout and features, obviously with it being a new install the theme is in a kind of beta, so if you find any issues with it then if you could let me know that would be great, and I will aim to iron out any bugs that are found as soon as possible.

I will be checking the website on a daily basis to see how things are going and to reply to any messages, If you have any questions/queries then please leave a comment below and I will answer then as soon as possible, also if you have any feedback on the BuddyPress integration then also leave a comment below.

Finally I would like to thank all of my subscribers who have stayed subscribed although there has been a lack of posts I hope to get back into the flow of posting soon :)

Thanks,
Steve

CS5 Launch

The time has come for Adobe to launch the next version of their much loved software Adobe CS5 is coming, and at the time of writing this it is only 13 Days away!

If you haven’t yet heard, or seen any of the sneak peeks then head over to:

http://cs5launch.adobe.com/

And register so that you will be there to see it when it is launched…

A New Feature for Photoshop..

One feature they have shown for Photoshop CS5 is something called “Content Aware Fill” which (from the sneak peek video) looks amazing.. It’s even quite hard to believe, also with April 1st coming up I wouldn’t be surprised if it was all a big April Fools joke,

Anyway the video is shown here: http://www.youtube.com/watch?v=NH0aEp1oDOI&feature=related

See for yourself and let us know in the comments whether you think something like this is possible or just a hoax.

I will post again soon after the event to talk about the new features CS5 has to offer and if it is worth upgrading, but if the Content Aware Fill is real then I won’t hesitate in purchasing!

User Link Feed

Hello! Welcome to the User Link Feed. Anyone can submit links with a short description which will then appear in the sidebar. Links must be approved before appearing and we filter out links that aren’t relevant to the audience. We generally want:

  • Links to Useful Resources and Downloads
  • Links to Tutorials
  • Links to Inspirational Work (*really good* work only please)
  • Links to Articles

You can submit your links below using the form. They are generally approved within 24 hours.

1000 Business Card Giveaway – Winners Announced!

So it’s been 2 weeks since I announced the 1000 Business card giveaway and today is the day where the winners are announced,

There were quite a few entries to this competition and making a decision was really tough because to be honest all of the entries offered a viable reason to be given the business cards, but I have made a decision and the winners and there reasons are listed below.

What I need the winners to do is to contact me via the CONTACT form telling me there:

  • Email Addresses
  • Full Name
  • An Address For Delivery (e.g. Home Address)

All of the above are needed in order for the business cards to be sent to you!

Another thing is that you need to have a business card design for Uprinting as they do not make one for you

The Winners:

Below is the list of the winners in no particular order, If any of the winners do not contact me within a week then I will offer the business cards to someone else, so it’s best to send me your details as soon as possible:

1. Andrew Taylor

I need these business cards because I can’t afford them on my own. I’m leaving my job and losing my apartment and moving in with family to stay in town. I deserve these because I’ve been working harder than anyone I know to get my freelance career started. I almost started a freelance team with my girlfriend left town to live in a van with some band. Luckily the only client we had at the time stayed with me and has stayed with me through everything. My computer died and I lost all contact information and almost all the files. I’ve been surviving by using dropbox on my work computer, library computeres, and Mac labs at my school. I actually spent the night the the labs in order to get a large amount of work done and was kicked out by the janitor at 5:30 when she woke me up to tell me I couldn’t be in the lab after midnight. I have earned the right to have my own freelance career and I have earned these cards!

Cheers!

-Andrew Taylor (Additive Designs)

2. Dan

I need business cards because I am trying to grow a music production business. My wife and I work hard but during these hard economic times anything outside of the necessities are impossible to work into the budget. I really think these cards would help to get my name out there and make me look professional.
Thanks for offering these up. Your consideration is appreciated.

– Dan

3. Josh

Well, I’m kinda new to this industry, and because no one will hire me yet, I’ve started to do some freelance work. I just bought a brand new Mac computer, and don’t have money left to get proper business cards printed. I am currently living off disability and find that they’re not giving me nearly enough to even live off, let alone purchase equipment and supplies I need to run my business!
I also feel that this would be a great help to getting my business (and name) off the ground.

Thanks,

4. Lee

Howdy,

I’m a freelance photographer, after getting myself out an about shooting doco stuff at my own expense and which just doesn’t pay (but it’s in an exhibition….i’m trying to tick all the boxes off..ie. website, business cards, comp cards, printing my book. It really is a huge money injection, and I’m having to shoot weddings and things that aren’t really my deal to get these must have’s. AND I might very well loose my mind shooting weddings – so I reckon a free batch of business cards could save my mind for a WEE WHILE LONGER…and that would make mum very happy….probably no one else! Just kidding)

And Thats It…

I just want to say congratulations and Thankyou to all of the winners and to all of the people that didn’t win this time look out for another competition coming soon, which will be bigger and better with more prizes,

Subscribe To The RSS Feed to keep updated with the latest tutorials and competitions on this website!

17 of the Most Visually Beautiful HDR Images

After a break for a little while, and concentrating on my University Assignments I am back with another collection of inspirational and stunning images, this time its a collection on beautiful HDR images,

What is HDR?

High Dynamic Range. An HDR image aims to store pixel values that span the whole tonal range of real-world scenes. In order to create such an image several low dynamic range (ie ordinary digital photos) taken at differing exposure values are combined.

This process then gives amazing images that have a full range of tones and colours, which look truly amazing as can be seen in the collection below, I hope you enjoy them:

Waterfall

HDR at Le Louvre

Andalucia

Brooklyn Bridge

The Magic of Disney

The Airy Doom of the Duomo

Autumn Stream

The Seoul of a Sunset

Farewell Kuala Lumpur

The Veins of Bangkok

Modern Day Loneliness

The Powerful Sea

Treasure Island / The Island

Abandoned Matera

Swallowing The Ruins

Barn

Bench Lighting

Other HDR Collections:

Helvetica – Why is it SO Popular?

The other day I was thinking about what font to use for a some Photoshop work I was doing, and whilst searching through the many different fonts I had, the one that jumped out at me was Helvetica I don’t quite know what it was about the font that stood out so much to me, was it the simplicity, the beauty or something else, this got me thinking and so I did some research…

First let’s look at some of Helvetica’s history,

Who Developed It?

Helvetica was developed in 1957 by Max Miedinger with Eduard Hoffmann in Münchenstein, Switzerland.

The font was originally called Neue Haas Grotesk based on a typeface called Schelter-Grotesk, the main aim of Helvetica as a typeface was to create something that was quite neutral and could be used on a wide variety of signage.

The Name was changed to Helvetica in 1960 which was derived from Confoederatio Helvetica which is the Latin name for Switzerland, this was an idea to make it more marketable internationally.

Variations

Neue Helvetica is a re-working of the original font done in 1983, this style of Helvetica offered more structurally unified set of heights and widths, this was developed at D. Stempel AG which was the daughter company of Linotype, there are also other redesigns which include improved legibility, heavier punctuation marks and increased spacing in numbers.

Where Is It Being Used?

To put it simply… Everywhere!

It is a widely used typeface which has been designed for the following alphabets/scripts Latin, Cyrillic, Hebrew, Greek, Japanese, Korean, Hindi, Urdu, Khmer and Vietnamese.

It is being used in big companies such as AT&T, Microsoft, Panasonic and NASA also use the typeface on the side of their space shuttles!

When you’re walking down the street next, stop and look around to see how many places are using Helvetica as a typeface for their company, or simply try and spot some Helvetica near you, I bet it won’t be long until you can see some!

So Why Is It So Popular?

There are many reasons why Helvetica could be classed as popular, because it is simple yet it still manages to keep the beauty and keeps design looking good, and it never seems to get old, after 51 years it is still as loved as ever.

Below I asked some fellow designers to tell me there reasons why they think Helvetica has been so popular and why they like using it in their design work:

Andrew Taylor (Additive Designs)

Twitter: http://www.twitter.com/Additive

Andrew explains why he thinks it is popular and the reasons he fell in love with the typeface:

It’s a good type face. It’s generic and fits well with everything, but at the same time has those beautiful little nuances that stand out; I’m specifically thinking of the lowercase a and the uppercase R.

My personal obsession with Helvetica started with seeing the movie; it was fantastic! I was already heavily drawn to typography so it was natural that I would fall in love with that movie and it’s type face. For awhile I used Heltetica exclusively, haha. I was already enamored with Josef Mueller-Brockman and David Carson; I was torn between the idea that everything had it’s place and that you can create something beautiful from anything (kind of like the Punk ideal of how even ugly can be beautiful). I used Helvetica for clean, modular layouts and then I have pieces on my wall from a very David Carson inspired piece set entirely in Helvetica.

I think designers love the flexibility of Helvetica. I’m well aware it isn’t the only type face like that and I actually haven’t used Helvetica in months; I’ve been hand lettering everything, but the neutraility of the type face makes it very appealing. The neutrality and the repition; I belive many people use it simply because it’s all around us so it must be a safe choice. It’s minimalist, it’s corporate, it’s cold, but at the same time it can be so powerful, emotional and moving when used just right.

Adelle Charles

Website: http://www.fuelyourcreativity.com

Twitter: http://www.twitter.com/adellecharles

Adelle simply put:

I think it’s popular in the design community because it’s been around for over 50 years & it meshes well into projects. There are so many typefaces out there that are so popular, but the signature of the designer is in all of the work.

She also left this quote by a famous designer:

“Helvetica leaves you with just the shapes. Other typefaces give you that but with other characteristics, whereas Helvetica is reduced down to just letters,” says Saville

Selene M. Bowlby

Website: http://www.idesignstudios.com/blog/

Twitter: http://www.twitter.com/idesignstudios

Selene went into detail about why she thinks it’s as popular as it is:

Helvetica is just one of those fonts – it’s clean, it’s simple, it’s versatile… It’s a font that can work well in many different applications.

With so many variations on the font, it can be used in many ways – each version capable of giving a completely different look and feel to a design.

I’m personally fond of clean / simple designs, often going for a “less is more” approach with many of my own creations. I especially like the thinner versions of Helvetica Neue, and use it on my own website, as well as on a few of my client web sites.

Although simple, Helvetica is still a stylish and highly readable font… simply put, it’s a classic that I don’t think will go away any time soon!

So there you some great responses as to why top designers today still think the font is popular within the design community even after 51 years!

In my opinion I think it is beautiful yet so simple and effective that it can bring any design to life and still give it the WOW factor that so many people crave when designing, and I can’t see it going anywhere just yet…

Here are some examples of Helvetica being used in everyday life and in design itself,

The Movie

Yes thats right a movie about a typeface, sounds weird doesn’t it? But actually it is a great movie, where top designers explain where Helvetica fits into their design life, here is an explanation of the film from the website:

Helvetica is a feature-length independent film about typography, graphic design and global visual culture. It looks at the proliferation of one typeface (which recently celebrated its 50th birthday) as part of a larger conversation about the way type affects our lives. Helvetica is currently screening at film festivals, museums, design conferences, and cinemas worldwide

The film which was originally released last year (to celebrate Helveticas 50th Birthday) was a massive hit and being very popular within the design community, to read more about the film and to buy the DVD etc…visit the official Helvetica Film website HERE

Below is an example of some of the designers you can expect to see in the movie:

Erik Spiekermann, Matthew Carter, Massimo Vignelli, Wim Crouwel, Hermann Zapf, Neville Brody, Stefan Sagmeister, Michael Bierut, David Carson, Paula Scher, Jonathan Hoefler, Tobias Frere-Jones, Experimental Jetset, Michael C. Place, Norm, Alfred Hoffmann, Mike Parker, Bruno Steinert, Otmar Hoefer, Leslie Savan, Rick Poynor, and Lars Müller.

Some Helvetica Inspiration

So to finish off this post on Helvetica I will show you some Helvetica pieces to inspire you…Enjoy!

To Conclude

I think using Helvetica brings a piece of design to life just because it is so simple and yet it means so much to so many people! I know one thing is for sure, I LOVE IT!

What do you think?
Do You Love it or Hate it?

Leave a comment below and let me know what you think!