Category: Tutorials
Tutorials,freelance,projects,joomla,php,mysql,wordpress,blancer.com
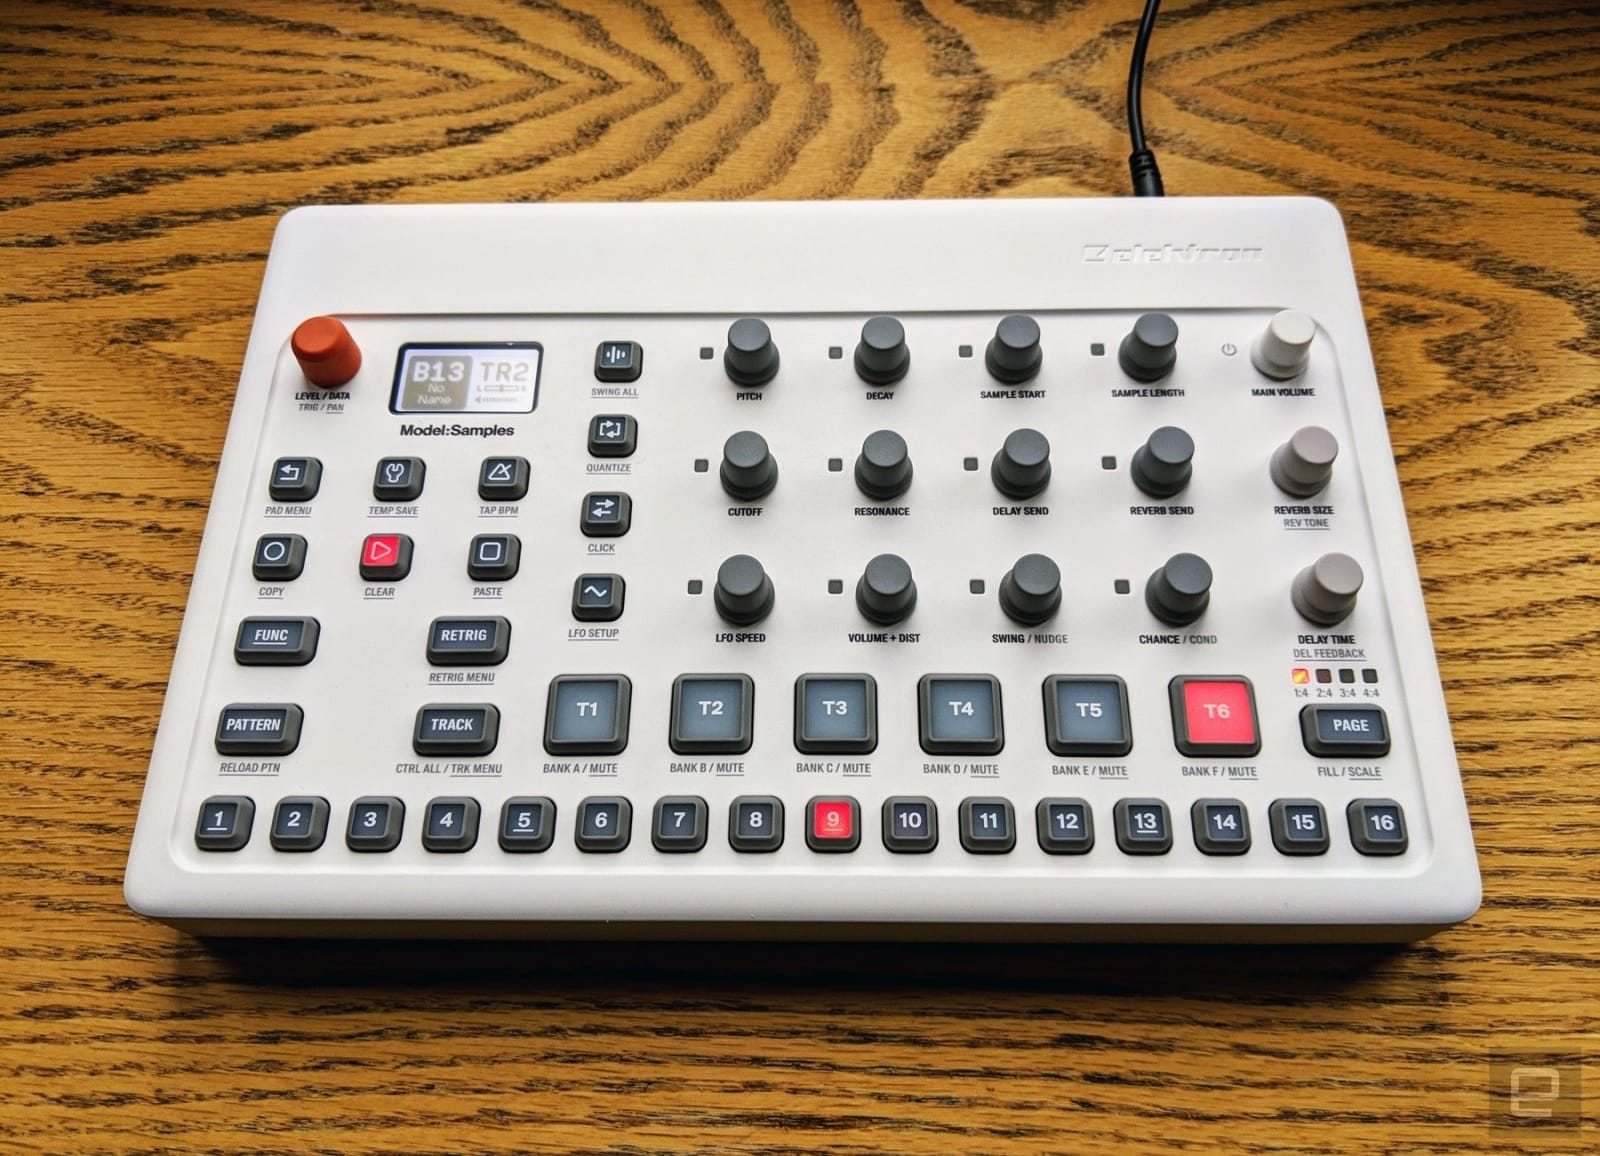
Elektron’s Model:Samples groovebox is $100 off for the holidays
Garmin’s Forerunner 645 (a staff favorite) is 50 percent off at Amazon

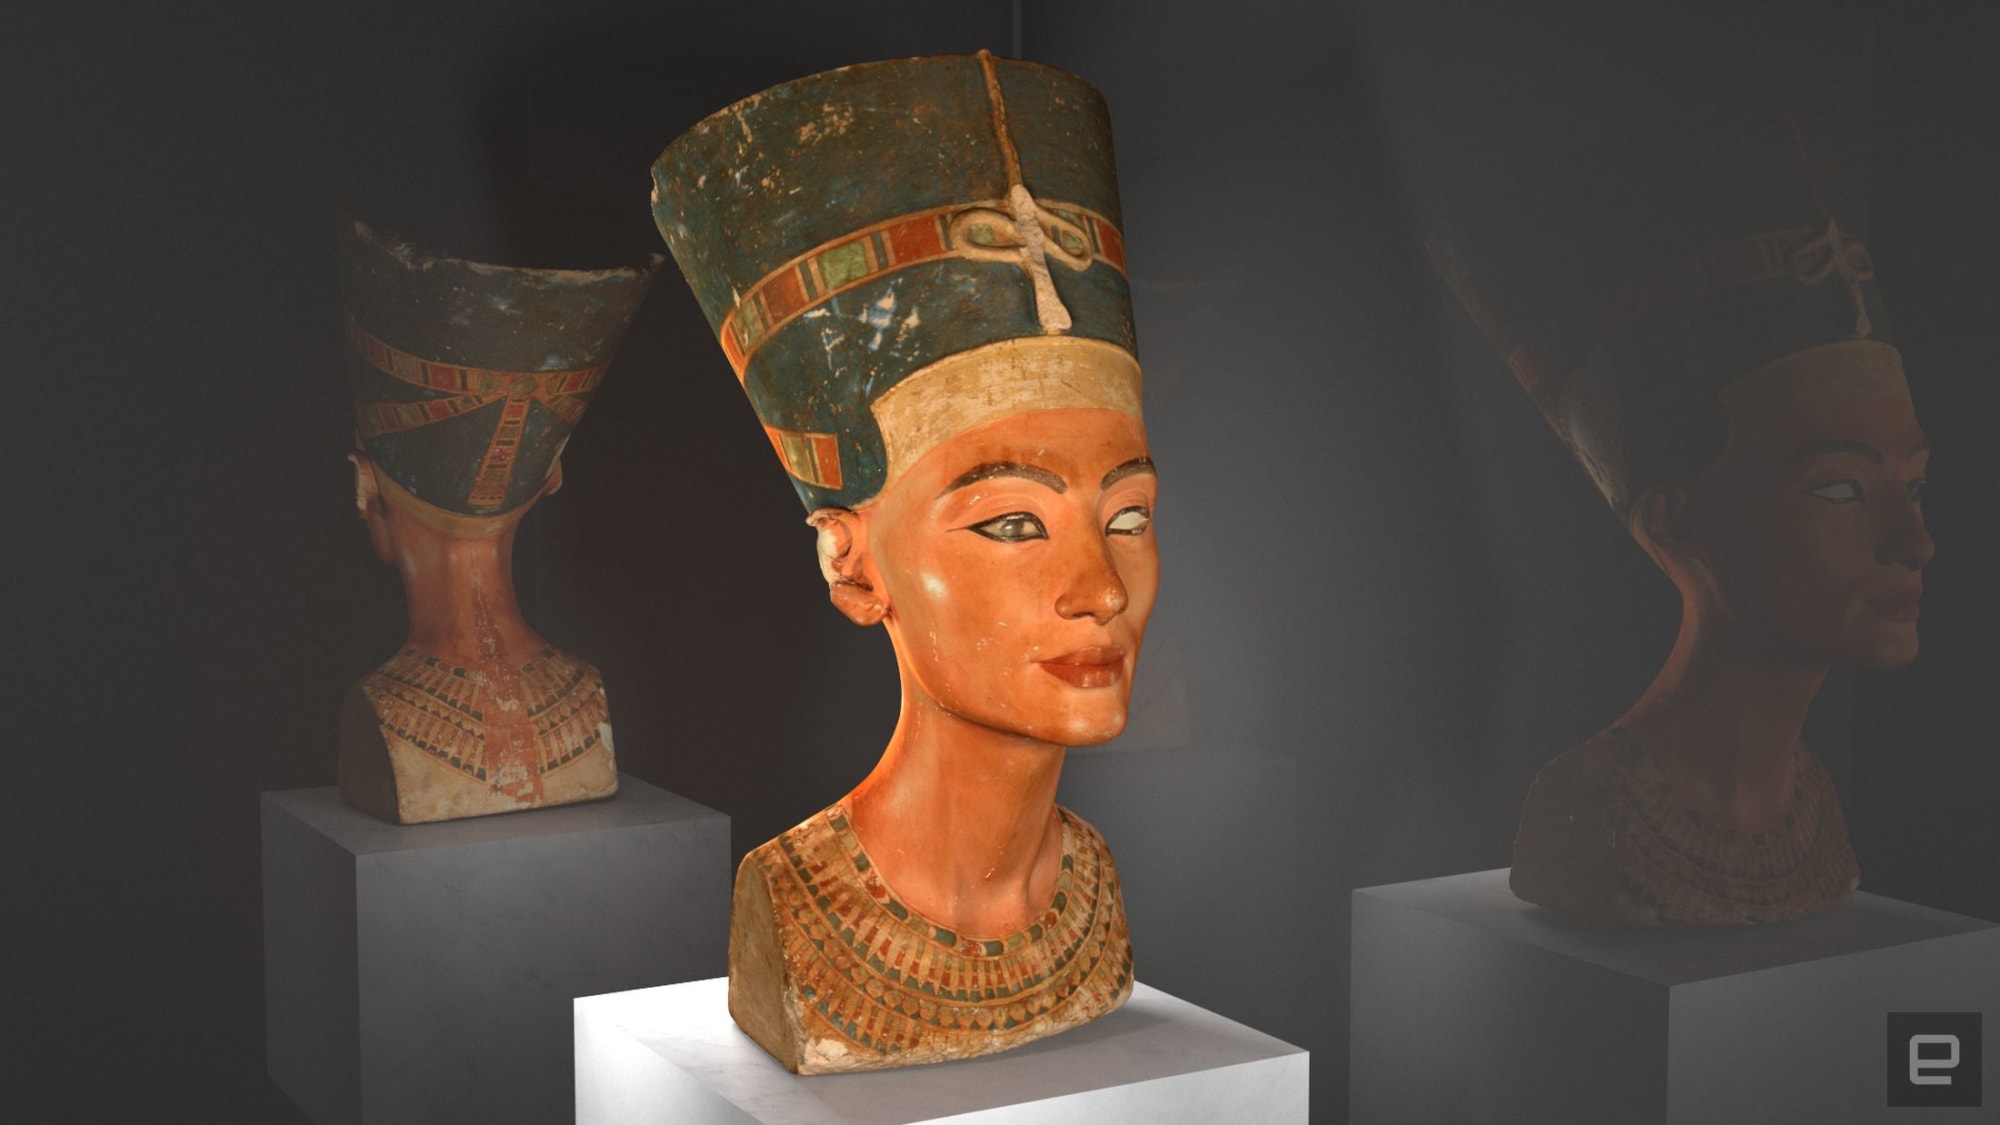
Nefertiti’s bust joins the digital age
Apple HomePod costs just $200 in Best Buy’s Black Friday sale

Oculus Go drops to $150 on Amazon in Black Friday sale
How to Use a Free Responsive Portfolio WordPress Gallery Plugin
{excerpt}
Read More
How to Create a Wrapped Ribbon Text Effect in Adobe Illustrator

In the following steps, you will learn how to create a wrapped ribbon text effect in Adobe Illustrator.
For starters, you will learn how to set up a simple grid and how to easily add and center a piece of text. Next, using basic tools and effects along with some basic vector shape-building techniques, you will learn how to create your pack of ribbon shapes.
Moving on, you will learn how to easily save and edit actions in Adobe Illustrator and how to make your work easier by using them. Finally, you will learn how to add a subtle texture and some shading using basic blending techniques and some effects.
1. Create a New Document and Set Up a Grid
Hit Control-N to create a new document. Select Pixels from the Units drop-down menu, enter 800 in the width box and 400 in the height box, and then click on the Advanced button. Select RGB, Screen (72 ppi) and make sure that the Align New Objects to Pixel Grid box is unchecked before you click OK.
Enable the Grid (View > Show Grid) and the Snap to Grid (View > Snap to Grid). You will need a grid every 1 px, so simply go to Edit > Preferences > Guides > Grid, and enter 1 in the Gridline every box and 1 in the Subdivisions box. Try not to get discouraged by all that grid—it will make your work easier, and keep in mind that you can easily enable or disable it using the Control-“ keyboard shortcut.
You should also open the Info panel (Window > Info) for a live preview with the size and position of your shapes. Don’t forget to set the unit of measurement to pixels from Edit > Preferences > Units > General. All these options will significantly increase your work speed.

2. Create Striped Text
Step 1
Pick the Type Tool (T) and focus on your Toolbar. Remove the color from the stroke, and then select the fill and set its color to R=241 G=90 B=35. Move to your artboard, click on it, and add the “RIBBON” piece of text. Use the Berlin Sans FB Demi Bold font with the size set to 140 px.
Once you’re done, you need to center this text, so open the Align panel (Window > Align). First, set the aligning to artboard (open the fly-out menu and go to Show Options if you can’t see the Align To section as shown in the following image), and then simply click the Horizontal Align Center and Vertical Align Center buttons. In the end, your text should be placed in the center of the artboard, as shown in the following image.
Making sure that it’s still selected, go to Type > Create Outlines (Shift-Control-O). Ungroup the resulting group using the Shift-Control-G keyboard shortcut and then turn your letter shapes into a simple compound path using the Control-8 keyboard shortcut.

Step 2
Using the Rectangle Tool (M), create a 511 x 5 px shape, place it as shown in the first image, and pick a random blue for the fill color. Make sure that this new shape stays selected and go to Effect > Distort & Transform > Transform. Drag the Move Vertical slider to 8 px, enter 11 in that Copies box, and then hit the OK button.

Step 3
Make sure that your blue shape is still selected, go to Object > Expand Appearance, and then turn the resulting group of shapes into a simple compound path using that same Control-8 keyboard shortcut.
Select both compound paths made so far, open the Pathfinder panel (Window > Pathfinder), and click the Intersect button. Ungroup (Shift-Control-G) the resulting group and turn all those blue shapes into a new compound path (Control-8).

Step 4
Now, you need to adjust some of the blue shapes that make up your text. Using the Rectangle Tool (M), add a bunch of simple rectangles in the areas highlighted in the following image. Once you’re done, select all these new shapes and turn them into a compound path using that same Control-8 keyboard shortcut.

Step 5
Disable the Grid (Control-‘) and the Snap to Grid (Shift-Control-‘). Reselect both compound paths made so far and click the Unite button from the Pathfinder panel. In the end, your set of blue shapes should look like the second image.

3. Adjust Your Striped Text
Step 1
For this step, you need to take a closer look at your blue shapes and get rid of the unnecessary anchor points.
Pick the Delete Anchor Point Tool (-) and simply click on the anchor points that you wish to remove. Take a good look at each shape, and when possible make sure that your shape doesn’t have more than four anchor points.

Step 2
Take a look at your Layers panel (Window > Layers) and make sure that your blue shapes are grouped. Select this group and go to Effect > Distort & Transform > Roughen. Enter the attributes shown in the following image and then click the OK button.

Step 3
Make sure that your group of blue shapes is still selected and go to Object > Expand Appearance. Select the resulting group and Ungroup it using the Shift-Control-G keyboard shortcut. You’ll have to hit this command twice so that you can get rid of all those groups and subgroups.
Once you’re done, select all your blue shapes and go to Effect > Warp > Arch. Enter the properties shown below, click the OK button, and then go Effect > Warp > Flag. Enter the attributes shown in the following image, hit the OK button, and then go to Object > Expand Appearance.

Step 4
Duplicate some of your blue shapes and spread the copies roughly, as shown in the following images.

4. Save the First Action
Step 1
Open the Actions (Window > Actions) panel and simply hit the Create New Set button to create a new set of actions. Name it “Ribbon Actions“.

Step 2
Now, let’s create the first actions. You’ll have to be a bit more careful in these steps and follow the instructions exactly to make sure that you’re recording the correct commands.
Focus on one of your blue shapes, select it, focus on the Actions panel, and hit the Create New Action button. Name it “Black 1“, select F2 for the keyboard shortcut, pick red for the color, and then hit the Record button.
Keep focusing on your selected shape and make a copy in front (Control-C > Control-F). Make sure that only the newly made copy is selected and replace the existing fill color with R=255 G=123 B=172.

Step 3
Be sure that your pink shape is still selected and go to Object > Transform > Move. Enter the properties shown in the following image, click the Copy button, and make sure that the resulting shape stays selected. Next, go to Select > Same > Fill Color to select both pick shapes, and then click the Minus Front button from the Pathfinder panel.

Step 4
Make sure that the thin shape made in the previous step is still selected, and focus on the Appearance panel (Window > Appearance). Replace the existing fill color with black, lower the Opacity to 50%, and change the Blending Mode to Soft Light.
Finally, return to the Actions panel. Simply hit that Stop Recording button and you have your first action.

Step 5
Select one of your other blue shapes, simply hit the F2 button from your keyboard and your “Black 1” action will do the work for you. Select the rest of the shapes one by one and repeat this technique.

5. Save Four More Actions
Step 1
Reselect one of your blue shapes, return to the Actions panel and hit again that Create New Action button to create a second action. Name it “Black 2“, select F3 for the keyboard shortcut, pick red for the color, and then hit the Record button.
Keep focusing on your selected shape and make a copy in front (Control-C > Control-F). Select the copy and replace the existing fill color with R=255 G=0 B=255, and then go to Object > Transform > Move. Enter the properties shown in the following image and then click the Copy button.
Make sure that the newly made shape is selected and go to Select > Same > Fill Color to select both magenta shapes, and then click the Minus Front button from the Pathfinder panel. Be sure that the resulting shape stays selected and focus on the Appearance panel. Replace the existing fill color with black, lower the Opacity to 10%, and change the Blending Mode to Soft Light.
Finally, return to the Actions panel, hit that Stop Recording button, and you have your second action.

Step 2
Select the rest of your blue shapes one by one and use the F3 keyboard shortcut to easily play the “Black 2” action.

Step 3
Reselect one of your short blue shapes, return to the Actions panel, and hit that Create New Action button again to create a third action. Name it “White 1 S“, select F4 for the keyboard shortcut, pick green for the color, and then hit the Record button.
Keep focusing on your selected shape and make a copy in front (Control-C > Control-F). Select the copy and replace the existing fill color with R=34 G=181 B=115, and then go to Object > Transform > Rotate. Set the Angle to -25 degrees and then click the Copy button.
Make sure that the newly made shape is selected and go to Select > Same > Fill Color to select both green shapes, and then click the Intersect button from the Pathfinder panel. Be sure that the resulting shape stays selected and focus on the Appearance panel. Replace the existing fill color with white, lower the Opacity to 25%, and change the Blending Mode to Soft Light.
Finally, return to the Actions panel, hit that Stop Recording button, and you have your third action.

Step 4
Make sure that your “White 1 S” action is selected, open the fly-out menu of the Actions panel, and go to Duplicate. Rename the newly added action “White 1 L” and expand it so that you can see all the registered commands.
Be sure that one of your blue shapes is selected and simply double-click that Rotate command that lies inside your “White 1 L” action to edit it. Set the Angle to -15 degrees and then click the Copy button. Return to your artboard and get rid of that newly made shape.

Step 5
Keep focusing on the Actions panel, double-click on your “White 1 L” action and set the keyboard shortcut to F5. Select one of your long blue shapes and use this keyboard shortcut to easily add a highlight like the one shown in the second image.

Step 6
Select the rest of your blue shapes one by one, and use the “White 1 S” action (F4) for the short ones and the “White 1 L” action (F5) for the long ones.

Step 7
Reselect one of your short blue shapes, return to the Actions panel, and hit that Create New Action button again to save one more action. Name it “White 2“, select F6 for the keyboard shortcut, pick blue for the color, and then hit the Record button.
Keep focusing on your selected shape and make a copy in front (Control-C > Control-F). Select the copy and replace the existing fill color with R=140 G=98 B=57 and then go to Object > Transform > Move. Enter the properties shown in the following image and then click the Copy button.
Making sure that your newly made shape is selected, go to Select > Same > Fill Color to select both brown shapes, and then click the Minus Front button from the Pathfinder panel. Be sure that the resulting shape stays selected and focus on the Appearance panel. Replace the existing fill color with white, lower the Opacity to 40%, and change the Blending Mode to Overlay.
Finally, return to the Actions panel, hit that Stop Recording button, and you have your final action.

Step 8
Select the rest of your blue shapes one by one and use the F6 keyboard shortcut to easily play that “White 2” action.
Open the fly-out menu of the Actions panel and go to Button Mode if you wish to understand the use of the colors that you selected for your saved actions.

6. Create the Back Pieces
Step 1
Enable the Smart Guides (Control-U) and then focus on the Layers panel (Window > Layers).
Double-click on the existing layer and name it “FRONT“. Add a second layer using the Add New Layer button and name it “BACK“. Make sure that it stays selected and drag it below your “FRONT” layer.
Focus on the blue shapes in the top right that make up the “N” letter. Using the Pen Tool (P), draw a simple, oblique shape that connects the top blue shape with the one that lies below. The Smart Guides feature will make things a lot easier for you. Once you have this shape, set its fill color to R=7 G=80 B=120.

Step 2
Repeat the technique mentioned in the previous step and add a bunch of new shapes that connect your blue shapes roughly as shown in the following images.

Step 3
Using the same tool and color, add a set of wavy shapes that connect the scattered blue shapes with the main ones, roughly as shown in the following image.

7. Add a Subtle Texture and a Simple Shadow
Step 1
Focus on the Layers panel, duplicate your “BACK” layer, select the copy, rename it “TEXTURE“, and drag it to the top of the panel. Duplicate all the blue shapes that lie inside your “FRONT” layer, select the copies, and drag them inside the “TEXTURE” layer.

Step 2
Reselect all the shapes that lie inside your “TEXTURE” layer and click the Unite button from the Pathfinder panel. Turn the resulting group of shapes into a compound path (Control-8), make sure that it stays selected, focus on the Appearance panel, and replace the existing fill color with black.

Step 3
Make sure that your black compound path stays selected and focus on the Appearance panel. Lower the Opacity to 10%, change the Blending Mode to Soft Light, and then go to Effect > Distort > Glass. Enter the attributes shown in the following image and click the OK button.

Step 4
Focus on the Layers panel, duplicate your “TEXTURE” layer, select the copy, rename it “SHADOW“, and drag it to the bottom of the panel.
Select the compound path that lies inside your “SHADOW” layer and focus on the Appearance panel.
Get rid of that Film Grain effect, restore the Blending Mode to Normal, and increase the Opacity back to 100%. Replace the existing fill color with R=7 G=80 B=120 and then go to Effect > Stylize > Drop Shadow. Enter the attributes shown in the left window (in the following image), click the OK button, and then go again to Effect > Stylize > Drop Shadow. Enter the properties shown in the right window and then hit the OK button.

Congratulations! You’re Done!
Here is how it should look. I hope you’ve enjoyed this tutorial and can apply these techniques in your future projects.

 World AIDS DayHow to Create a World AIDS Day Text Effect in Adobe IllustratorAndrei Marius
 IllustrationHow to Create an Awareness Ribbon in Adobe Illustrator for World AIDS DayMary Winkler
 Spirit DayHow to Create a Spirit Day-Inspired Text Effect in Adobe IllustratorAndrei Marius
 Text EffectsHow to Create a Cool Cut-Out Text Effect in IllustratorAndrei Marius
 Pattern BrushHow to Create a Rainbow Text Effect in Adobe IllustratorAndrei Marius
 Text EffectsHow to Create an Isometric Text Effect in Adobe IllustratorAndrei Marius
 Text EffectsHow to Create a Retro Long Shadow Text Effect in Adobe IllustratorAndrei Marius
 Text EffectsHow to Create a Disney Frozen Inspired Text Effect in PhotoshopEnrique Eliçabe
 Text EffectsHow to Create a Russian Text Effect in Adobe IllustratorDiana Toma
 Text EffectsHow to Create a Colorful 3D Text Effect in Adobe IllustratorAndrei Marius

{excerpt}
Read More
How to Create a Realistic Chrome Text Effect in Adobe Photoshop

This super easy and quick tutorial will show you how to use a couple of textures and layer styles to create a shiny, reflective chrome text effect. Let’s get started!
This text effect was inspired by the many Layer Styles available on Envato Market.
Follow along with us over on our Envato Tuts+ YouTube channel:
Tutorial Assets
The following assets were used during the production of this tutorial.
- Bebas Neue Bold font
- AsphaltDamaged0043 Image 1 – Small (1024×768)
- Bus Seats
- Free Pack 6000 photoshop gradients by Supertuts007 (Load the CHROMES.grd file)
1. Define the Pattern
Step 1
Open the Bus Seats image, and then go to Filter > Distort > ZigZag. Change the Amount to 20, the Ridges to 5, and the Style to Pond Ripple.

Step 2
Go to Edit > Define Pattern, and type Reflection Pattern in the Name field.

2. Create the Background
Step 1
Create a new 950 x 650 px document, place the AsphaltDamaged0043 texture on top of the Background layer, and resize it as needed.

Step 2
Double-click the texture’s layer to apply a Gradient Overlay effect with these settings:
- Blend Mode: Multiply
- Style: Radial
- Scale: 150%
- Click the Gradient box to create the gradient fill using the colors
#757575to the right and#0f0f0fto the left.

This will create a simple radial gradient.

3. Create the Text Layers
Step 1
Create the text using the font Bebas Neue Bold and set the Size to 220 pt and the Kerning to Optical.

Step 2
Duplicate the text layer, and change the copy’s Fill value to 0.

4. Style the Original Text Layer
Double-click the original text layer to apply the following layer style:
Step 1
Add a Bevel and Emboss with these settings:
- Size: 1
- Uncheck the Use Global Light box
- Angle: 30
- Altitude: 16
- Check the Anti-aliased box
- Highlight Mode – Opacity: 100%
- Shadow Mode – Opacity: 100%

Step 2
Add a Contour with these settings:
- Contour: Cove – Shallow
- Check the Anti-aliased box
- Range: 100%

Step 3
Add a Stroke with these settings:
- Size: 1
- Position: Inside
- Fill Type: Gradient
- Use the stainless steel xx gradient fill

Step 4
Add an Inner Shadow with these settings:
- Opacity: 35%
- Uncheck the Use Global Light box
- Angle: -115
- Distance: 3
- Size: 7

Step 5
Add an Inner Glow with these settings:
- Blend Mode: Vivid Light
- Opacity: 100%
-
Color:
#f4f2e7 - Choke: 0
- Size: 3

Step 6
Add a Gradient Overlay with these settings:
- Check the Dither box
- Blend Mode: Color
- Opacity: 90%
- Check the Reverse box
- Use the stove pipe 70 gradient fill

Step 7
Add a Pattern Overlay with these settings:
- Pattern: Reflection Pattern
- Scale: 50%

Step 8
Add an Outer Glow with these settings:
- Blend Mode: Multiply
- Opacity: 35%
-
Color:
#404040 - Size: 21

Step 9
Add a Drop Shadow with these settings:
- Opacity: 100%
- Distance: 5
- Spread: 10
- Size: 10

Step 10
Add another Drop Shadow with these settings:
- Opacity: 80%
- Uncheck the Use Global Light box
- Angle: 132
- Distance: 17
- Size: 38

Step 11
You can go back to the Pattern Overlay effect, and then click-drag the pattern inside the text to move it around until you get a result you like.

This will style the first layer of text.

5. Style the Copy Text Layer
Double-click the copy text layer to apply the following layer style:
Step 1
Add an Inner Glow with these settings:
- Blend Mode: Linear Light
- Opacity: 20%
-
Color:
#e1e1e1 - Technique: Precise
- Size: 5
- Contour: Cove – Deep

Step 2
Add a Gradient Overlay with these settings:
- Blend Mode: Soft Light
- Angle: 80
- Use the steel pipe 10 gradient fill

Step 3
Add an Outer Glow with these settings:
- Blend Mode: Color Dodge
- Opacity: 50%
-
Color:
#ececec - Size: 21

This will style the second text layer and finish off the text effect.

6. Add an Adjustment Layer
Step 1
Click the Create new fill or adjustment layer icon at the bottom of the Layers panel, and choose Gradient Map.

Step 2
Check the Dither box, and then create the gradient fill using the colors #554b70 to the left, #857177 in the middle, and #d8a082 to the right.
Change the adjustment layer’s Blend Mode to Soft Light and its Opacity to 20%.
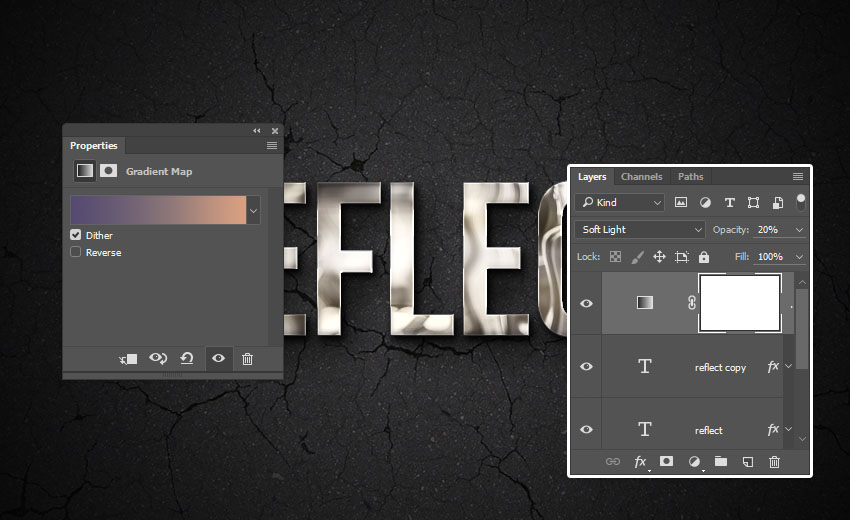
Congratulations, You’re Done!
In this tutorial, we applied a filter to an image and defined it as a pattern. Then, we created a simple background using a texture and a gradient overlay effect. After that, we created two text layers and styled them to create the text effect. Finally, we finished things off by adding a color adjustment layer.

More Chrome Text Effects
3D Metal – Photoshop Action
Looking for something a bit quicker? This group of Photoshop actions creates a number of metal text effects with just a few clicks, including steel, copper, and bronze text effects! All the layers remain customizable, so you can fine-tune as you go.
.jpg)
The Ultimate 1001 Text Effects
In this text effect pack, you will find gold and red foil, chrome metal, and even wood—all wrapped up in one handy PSD file! This pack includes both flat and 3D text effects, with textures that you can mix and match in Photoshop.
.jpg)
Metal Pro-Instant
This text effect pack includes 25 different high-quality metal text styles for Adobe Illustrator. Even including a rose-gold text effect!

Ultimate Metal Graphic Styles for Illustrator
This text effect pack contains a whopping 50 metallic styles made for Adobe Illustrator, all of which are completely customizable.

Metallic Styles for Illustrator
A set of metallic layer styles made for Adobe Illustrator that are all one click to apply. This includes gold, rose-gold, and chrome text effects in either a glossy or matte finish.
.jpg)
Looking to learn more? Why not check out the following tutorials:
 Text EffectsHow to Create a 3D Gold Text Effect With Photoshop Layer StylesEnrique Eliçabe
 Text EffectsHow to Create an Animated Text Effect Photoshop ActionIvan Gromov
 Text EffectsHow to Create a Vintage Movie Text Effect in Adobe InDesignGrace Fussell
 Text EffectsHow to Create a ‘Stranger Things’ Inspired Text Effect in Adobe PhotoshopRose
 Adobe IllustratorNew Course: Create an Isometric Text Effect in Adobe IllustratorAndrew Blackman
 Text EffectsHow to Create a Bold Floral Text Effect Quickly in Adobe PhotoshopRose

{excerpt}
Read More
15 Best Royalty-Free Cinematic Music Packs of 2019
To help you find the best possible music for your next project, I have collected a list of the 15 best royalty-free cinematic music packs of 2019.
1. Sentimental Pack
First up on my list of the best royalty-free cinematic music packs is a pack that contains tracks that are sure to inspire. All of your classic orchestral elements are in the three tracks that are in this pack. Each track will help lift your next audiovisual project to a new level!
2. The Epical Sports Music Pack
“The Epical Sports Music Pack” contains three epic cinematic tracks that will give your audience a memorable experience. These tracks create a feeling of success, emotion, and resilience that can be suited for a wide range of mediums such as YouTube videos, podcasts, and corporate videos.
3. Cinematic and Documentary Pack
“Cinematic and Documentary Pack” is the ideal background music to use for films, history videos, education videos, podcasts, and TV. Add these cinematic background music tracks to your project now!
4. Hollywood Action Trailer Pack
The title of this pack says it all. If you are looking to create a Hollywood like production, then this pack is for you. Suspense, intensity, excitement are just a few of the emotions that you will experience when listening to this blockbuster pack.
5. Ultimate Horror Trailer Pack
Looking to add a little horror to your multimedia projects. Whether you are creating a trailer, commercial, video game, or horror movie, this bone-chilling royalty-free cinematic pack will be just what you need.

6. Grand Opening Fanfares
The Grand Opening Fanfares music pack contains three award-winning cinematic tracks that are all sure to impress. Motivate and inspire your audience with these high-quality productions.
7. Acoustic Uplifting Strings Pack
Bring a sense of freedom and hope to your next audiovisual project with this music pack. Pianos, guitars, strings, and cinematic drums are the instrumentation that you can expect in the three-track pack.
8. Epic Cinematic Pack
Capture a mood of cinematic, uplifting, heroic, and epic with “Epic Cinematic Pack.” This pack will be best suited for commercials, movie trailers, ads, and any promotional content.
9. Inspiring Epic Cinematic Uplifting Pack
Out of all the inspiration music packs on this list, this one will to your multimedia projects to a completely new level. Hit the play button and see for yourself!
10. Inspirational and Emotional Cinematic Piano Pack
Sophistication, suspense, and sense of true harmony are what you can expect from this royalty-free cinematic music pack. Let the sweet sound of an acoustic piano help guide your next multimedia project.
11. Powerful Short-form Music Pack
“Powerful Short-form Music Pack” takes the audience on a suspenseful and intense ride. This pack features three high impact tracks that fit nicely in any collection.
12. Wind Of Changes
Bring that epic blockbuster movie atmosphere to your next project with “Wind Of Changes.” The tracks in this pack feature all the classic cinematic instruments.
13. Cinematic Trailer Pack
This pack can be summed up in one word, drama. If the royalty-free cinematic songs in this pack don’t excite your audience then nothing will. Hit the play button and hear for yourself just how powerful these songs are.
14. Epic Orchestra Pack
You can picture the hero saving the day when listening to “Epic Orchestra Pack.” Add these uplifting royalty-free cinematic songs to your multimedia project as a background song now!
15. Emotional Piano Music Pack
This last music pack on our list rounds out our selections nicely. “Emotional Piano Music Pack” adds sophistication, inspiration, and hope. Placing one of these songs on your next project is sure to make it a success.
Conclusion
The 15 royalty-free cinematic music packs are just a small selection of the thousands of cinematic songs available at AudioJungle,
If none of the mentioned music tracks fit your audiovisual project, then there are plenty of other options from you to choose from on AudioJungle.
If you are looking to improve your own music production skills, then check out all the in-depth music and audio tutorials on Envato Tuts.

{excerpt}
Read More
23 Best New Fundraiser Flyer Templates for Photoshop & InDesign for 2020
Give back to your local community with a great fundraiser. Check out these amazing premium flyer templates.
23 Best New Fundraiser Flyer Templates
Charities and non-profit organizations can benefit a lot from fundraising flyer templates. These easy-to-use resources make it simple to promote local causes fast.
And to help get you started, we’re bringing you an inspiring selection of Photoshop and InDesign flyer templates from Placeit, Envato Elements, and Envato Market.
From 5K runs to breast cancer awareness, there are many causes you can attach yourself to in order to help improve the world.
Use these flyers to meet your fundraising goals while giving back to others. Make this the start of incredible relationships and a lasting local impact with the right promotional flyer.
Kids Charity Flyer Template
This template is cheery, sunny, and full of personality—perfect for causes and fundraising for the kids in your life! Whether it’s a school function or a private event, this flyer could work for a variety of situations.

Charity Flyer Promo Template

Breast Cancer Charity Flyer
Check out this colorful template! Open up the Adobe Photoshop file, and you can easily swap out any of the imagery here! Need a different ribbon? It’s as easy as copying and pasting what you need, right into the layout.

Kids Charity Night Event Flyer
This fun and colorful layout could work for any event that’s all about giving a helping hand. It comes with both an Adobe Photoshop and Adobe Illustrator file, and largely utilizes vector artwork—how convenient!

Charity Flyer Template
This is an amazing template, because you get so many easy to edit files—Illustrator, inDesign, Microsoft Word, and more! It comes with two different templates and could work for a wide variety of design projects.

Golf Tournament Rack Card Template
Love to golf? Kick off your next golf tournament with a special cause! This first template features a rack card design with simplistic details. Update it with the help of Photoshop or InDesign to customize this template with your own photos, text, and event details.

5k Run Event Flyer
5k runs are a great way to give back to the community while also getting in some exercise! Check out this brilliant 5k run event flyer with beautiful, vibrant colors and silhouettes of runners. They feature two optional designs and print-ready formats for your convenience.

Breast Cancer Awareness Month Flyer
Be a part of breast cancer awareness month with this stunning flyer template. This download features three wonderful color choices, including the original pink color associated with this cause. Enjoy fully editable files made with only free fonts.

Charity Golf Tournament Flyer
Inspire your buddies to make a change with a local charity golf tournament. This next flyer features a standard A4 size design with bleed lines already included for efficient printing. A help file is also included to help you navigate the files inside. Check it out!

Non-Profit Organization Flyer Maker
If you don’t know where to begin, consider the online flyer maker at Placeit for phenomenally clean flyer designs. Check out this non-profit organization flyer template, for instance. Easily change the main title and background photo for more impact. Add it to your collection!

Coat Drive Flyer
Don’t forget there are many in need this winter! So create a local coat drive to help those less fortunate with this new flyer template. This template features three alternative colors to choose from. You’ll need to replace the main images, but you can do that easily with free or premium stocks.

Fundraiser Online Flyer Maker
Placeit online flyer makers also help you create inspiring flyers surrounding wildlife causes. Check out this minimalist fundraiser flyer template, for instance. Easily switch out the animal for the one you prefer before customizing it even further with a powerful tagline. Experiment with different results!

Rustic Chalkboard Church Picnic Flyer
Chalkboard designs always trend across the industry for a multitude of projects. Check out this unique rustic design, made exclusively for a church picnic fundraiser. It’s easy to edit in Adobe Photoshop and can be handed out as an invitation or posted on nearby bulletin boards.

Flyer Maker for Running Events
Placeit also features flyer makers for sports-related fundraising events. This next 5K run/walk flyer features a minimalist design with colors you can quickly update. Choose the subject or sport you prefer before finalizing it with the appropriate event details. Try it out!

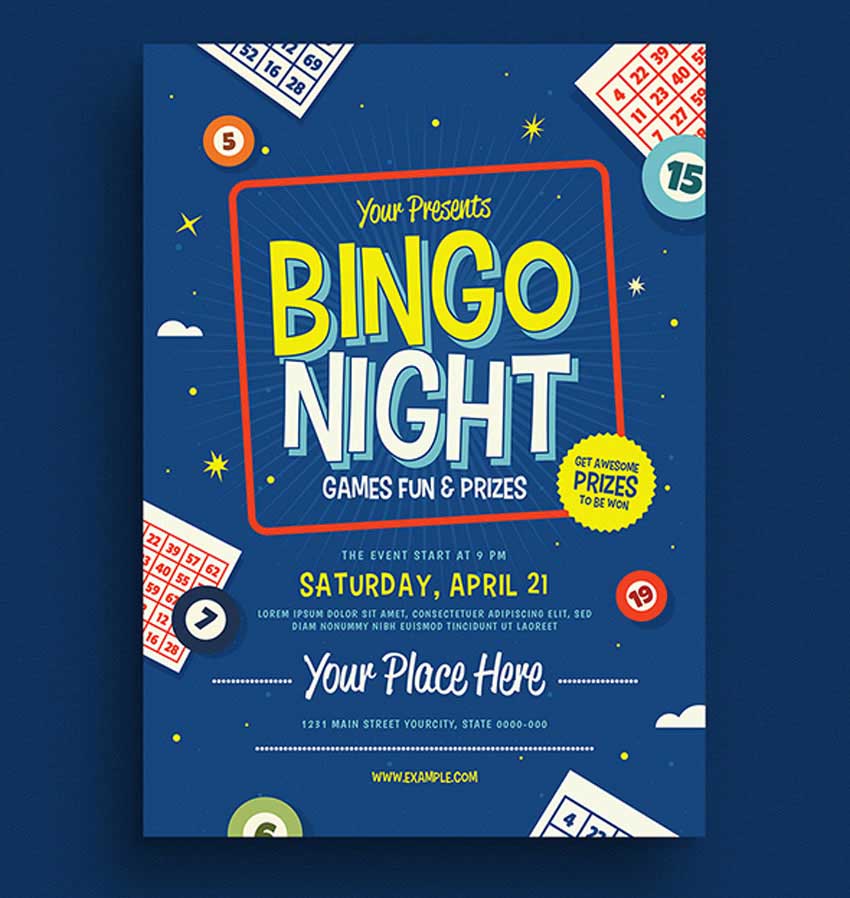
Bingo Night Event Flyer
Bingo night is a favorite past time for many folks. It’s also often used as a backdrop to incredible charitable organizations. So try out this next event flyer template for a clean and modern design. It was made with completely free fonts and is editable in both Adobe Photoshop and Illustrator.
Charity Flyer
Bring out the best of the people around you with this lovely charity flyer. This beautiful design features polygonal hearts with hands reaching out to inspire community outreach programs. Download this pack to get two alternate versions with A4 paper sizes and bleeds.

Marathon Event Flyer Template
Many local athletes love running, so consider throwing a marathon event with this minimalist flyer template. This template features silhouette characters against a textured background, as well as simple details you can definitely update fast. Try it out with new colors and more.

Charity Event Flyer
Organizations around the world connect strangers to important causes. This charity event flyer will help you do just the trick with powerful images and organized text. It comes with three color options, but you can edit any color with the help of Adobe Photoshop.

Summer Classes Flyer
Even when school is out, it’s still important to motivate our local youth. That’s why this summer classes flyer template is a simple way to make that happen. It features a minimalist striped background graphic you can easily change on Placeit. Check it out!

School Flyer With Postcard Bundle
Whether your community needs more school supplies or new books, this next flyer template bundle is fast and efficient. It features standard sizes for both flyer and postcard orientations and can be easily interchanged between three colorful options. Help your school out today!

Hot Dog Fundraiser Flyer
For some fundraising events, all you need to provide is good company and food. Take this hot dog fundraiser flyer template, for instance, with bright bold colors. It features a trendy flat design that is 100% vector and fully scalable. Update it with new colors, text, and more!

Charity Flyer Template
People all over the world need our help. And we can definitely make that happen with a great cause. This charity flyer template helps to make that possible with a straightforward design that is compelling and original. Use it in Photoshop or Illustrator for a high-quality result.

Event Flyer
Last but not least, there are many event flyers you can customize to fit your special cause. This festival event flyer template is colorful with a clean, simplistic design. You can customize the gradient to fit your brand and update the cover with inspiring photos. Check it out!

More Charity Flyer Templates
We hope you’ve been inspired to make a lasting impression on your community with these incredible flyer designs. Join millions of others in creating wonderful change in the hearts of others and around the world.
Want more flyer templates? Check out these tutorials and articles for inspiration:
 Marketing35+ Business Flyer Templates (Creative Layout Designs & Industry-Specific Templates)Marc Schenker
 Flyers38 Stylish Flyer Templates (PSD Flyer Templates)Melody Nieves
 How-ToHow to Change a Photo in a Flyer Template in Adobe PhotoshopKirk Nelson
 Poster DesignHow to Create a Vintage Style Poster for World Blood Donor Day in Adobe InDesignGrace Fussell
 Flyers20 Best Examples of Business Flyer Designs (For 2019)Sarah Joy
Tried any of these assets? Let us know! Tell us your favorites in the comments below.
This has been a selection of premium resources perfect for the avid creator. For more fundraiser flyer templates, check out Placeit, Envato Market, and Envato Elements, or enlist the help of our talented designers at Envato Studio. Happy creating!

{excerpt}
Read More
How to Create a Light Particles Photoshop Brush

Welcome to How to Create Light Particles Photoshop Brush! In this tutorial, you will learn the step-by-step process of how to create a particle effect using Photoshop brushes.
Adding light particles to an illustration or photo is a great way to enhance your image and make it more eye-catching. One of the best things about using a light particle Photoshop brush is that it has such a wide range of uses, such as adding a bokeh effect, a sparkle effect, dust particles, and even snow effects!

To get started with this tutorial, we’ll need a photograph or image to use as a background for our light particles. You can find a wide range of professional photos on Envato Elements. Whether you’re looking for a spooky forest or a glitzy wedding image, you’ll be able to find all sorts of inspirational topics to help you get started. For a single monthly rate, you can unlock access to all of these and countless others.
For this tutorial, we will use a photo called ‘Path through misty haunted woods‘.
1. How to Set Up a New Project File
Step 1
Let’s get started by setting up a New Document in Adobe Photoshop (File > New or Control-N). For this tutorial, we will use the settings below:
- Width: 1920 px
- Height: 1080 px
- Resolution: 72
- Color Mode: RGB Color

Step 2
Download a background image from Envato Elements or use your own image. For this tutorial, we will use a photo called ‘Path through misty haunted woods‘.

Step 3
Open the background image in Photoshop (File > Open and then navigate to the file location on your hard drive). Select the whole image by using the Marquee Tool (M) or by pressing Control-A on the keyboard to select all. Press Control-C to copy the image.

Step 4
Now return to the original document and press Control-V to paste it.
Alternatively, you can change the size of the image by going to Image > Image Size and changing the values to something close to 1920 x 1080.
Then use Edit > Free Transform (Control-T) to resize the image or layer to fit the 1920×1080 sized document.

2. How to Create Small Dust Particles in Photoshop
Step 1
In this section of the tutorial, we will first learn how to add dust particles in Photoshop. Create a new layer (Shift-Control-N) and rename it Small Dust Particles. This is the layer where we will paint our dust particles Photoshop brush.

Step 2
Select the Brush Tool (B).

Step 3
Now go to the brush library and select a standard round brush.

Step 4
Go to the Brush Settings panel (Window > Brush Settings) where you will find many options to adjust the brush that you have selected.

Step 5
Under Brush Tip Shape, set the size of the brush to approximately the size of the dust particles that you would like (e.g. 10 or 20). Set the Hardness to 20%.
Activate the Spacing option and set it to its maximum value (1000%). This will make the brush appear as dots instead of a line.

Step 6
Select Shape Dynamics and activate it using the tick box on the left. Set the Size Jitter to 100%. If you are using a tablet, you can also activate the pen pressure and use the settings below:
- Control: Pen Pressure
- Minimum Diameter: 5%
- Angle Jitter: 0%
- Roundness Jitter: 0%

Step 7
Select Scattering and activate it using the tick box on the left. Make sure that the option for Both Axes has been selected. Then follow the settings below:
- Scatter: Both Axes 1000%
- Count: 2

Step 8
Select Transfer and activate it using the tick box on the left. Set the Opacity Jitter to 100%.

Step 9
Activate Wet Edges and Smoothing.

Step 10
Once you are happy with the settings, you can save the brush as a preset by clicking on the Create New Brush button on the bottom right.

Step 11
Use a new layer to add the dust particles Photoshop brush to see what the brush looks like on your image. You can also set the Opacity of the layer down to around 20% to make it lighter. The end result here can also be used as a sparkle effect Photoshop brush.

3. How to Create Particle Effects in Photoshop Using Custom Brushes
Step 1
In this section of the tutorial, you will learn how to create particle effects in Photoshop using a custom brush. To create a new brush, we need to create a New Document in Adobe Photoshop (File > New or Control-N). For this tutorial, we will use the settings below:
- Width: 1000 px
- Height: 1000 px
- Resolution: 300
- Color Mode: RGB Color

Step 2
Create a new layer (Shift-Control-N) by clicking on the New Layer button in the Layers panel. This is the layer where we will create the light particle brush. You can also rename the layer ‘Light Particles’.

Step 3
Select the Brush Tool (B).
Step 4
Go to the Brush Settings panel (Window > Brush Settings) where you will find many options to adjust the brush that you have selected.

Step 5
Now go to the brush library and select the standard round brush. This will be the base for our light particle effect Photoshop brush.

Step 6
Under Brush Tip Shape, set the Hardness to 40%.

Step 7
Make sure that your background and foreground colors are set to Black and White. Select the black color so that your light particle brush color is black.

Step 8
Using the square bracket keys on your keyboard (they look like [ or ] on the keyboard), you can increase or decrease the size of your brush. Use this to create some light particle spots within the square.
Depending on how dense you want your light particle brush to be, you can increase or decrease the number of light particle dots within the square. Try to randomize the size and the location of each light particle dot to create the best results (see below for a few different examples). For a bokeh effect Photoshop brush, you may want to use a wider brush with fewer particles.

Step 9
Remove the background layer.

Step 10
Now go to Edit > Define Brush Preset and give the brush a name such as ‘particle effect Photoshop brush’. Feel free to create a few different versions of this.

4. How to Adjust and Customize the Light Particles Photoshop Brush
Step 1
After clicking on the OK button, you’ll find that your new light particles Photoshop brush has been automatically selected and is ready to be used.
You can now also select the brush in the Brush Settings panel or the Brushes panel.

Step 2
Now switch back to the original photograph document by clicking on the tab at the top.
Go to the Brush Settings panel (Window > Brush Settings) where you will find many options to adjust the light particle brush that you have selected.

Step 3
Select Scattering and activate it using the tick box on the left. Make sure that the option for Both Axes has been selected. Then follow the settings below:
- Scatter: Both Axes 1000%

5. How to Adjust the Color of the Background Photo Image
Step 1
In order to give our background layer a cold atmosphere, we will apply a blue hue. Create a new layer above the background layer (our photograph) and use the Fill Tool to color it in blue.
Set the layer to Overlay in order to see what kind of effect it will have on the photo.

Step 2
Keep adjusting the color of the overlay layer until you are happy with the result. Below is an example of a dark blue (#0e2640) overlay layer on top of the photograph.

Step 3
Create another new layer and set the layer mode to Overlay with an Opacity setting of 75%. Use the soft round brush to color the top of the photograph using a light blue (#b3dbe4).
This will add a bright light glow to the top or wherever your light source is in the photograph.

Step 4
Now use a slightly warmer color (#d1aea6) and use the soft round brush to warm up the darker areas of the photograph—for example, the top left of the example photograph shown below.

Step 5
Next, we’ll adjust the photo further by going to Image > Adjustments > Curves.

Step 6
In the curve properties, we can adjust the graph for the red, green and blue channel. The example below shows how each has been adjusted slightly by clicking a point on the line and then moving it either up or down.

Step 7
Use the graph settings to come up with a look that you like.

6. How to Use the Light Particles Photoshop Brush
Step 1
Now, with the particle effect Photoshop brush all set up, we can choose a color for it. For this tutorial, we will select white for the light particles.
Create a new layer and call it ‘Back Light Particles’. Make the size of the brush small using the square bracket keys or the brush settings. Use the particle effect Photoshop brush and create some light particles for the photographic image. Set the Opacity to 20%.

Step 2
Create a new layer and call it ‘Mid Light Particles’. Make the size of the brush slightly larger using the square bracket keys or the brush settings. Use the particle effect Photoshop brush and create some light particles for the photographic image. Set the Opacity to 90%.

Step 3
Create a new layer and call it ‘Front Light Particles’. Increase the size of the particle effect Photoshop brush and create some light particles for the foreground using the brush. Set the Opacity to 30%.

Step 4
Select the ‘Front Light Particles’ layer, and then go to Filter > Blur > Gaussian Blur and set the percentage value to 15%.

7. How to Add a Vignette
Step 1
Create a new layer and use the Fill Tool (G) to fill it with black. Then use the Ellipse Tool (U) to draw a white oval in the middle. Merge both of these layers.

Step 2
In the top menu, go to Filter > Blur > Gaussian Blur and adjust the settings until the layer looks similar to the image shown below.

Step 3
Set the layer to Multiply.

Step 4
Adjust the opacity of the layer to your liking. In this example, we have set the Opacity to 25%.

Awesome! You’re Finished!
Congratulations! You have successfully completed this tutorial. Feel free to share your own creations below! I hope you found this tutorial helpful and that you’ve learned many new tips and tricks that you can use for your future illustrations. See you next time!

Learn More Particles Art Skills!
If you liked this and are looking to learn some more light particle effects or anything similar, check out the tutorials below! Expand your expertise by going through these in-depth guides. Happy designing!
-

How to Make a Sandstorm Photoshop Action (Special Effect)
In this tutorial, you will learn how to create a sandstorm Photoshop action to add amazing special effects to your photos. Want more sandstorm Photoshop… -

How to Create an Ashes & Embers Dispersion Action in Adobe Photoshop
In this tutorial, I’ll show you how to create an ashes and embers style dispersion effect from any photo in Adobe Photoshop and automate everything in a… -

How to Create a Colorful Explosion Text Effect in Adobe Photoshop
Use a couple of colorful texture images, a Photoshop action, and some smoke and texture overlays to create an easy and colorful explosion text effect. -

How to Create a Lens Dust Photoshop Action Effect
In this tutorial you will learn how to create an amazing lens dust effect, with such detailed explanations that everyone can create it, even those who have… -

How to Create a Bokeh Effect Photoshop Action
In this quick video, I’ll show you how to create a beautiful bokeh effect using a custom brush and gorgeous background elements. -

20+ Best Colorful Sparkle & Lighting Photo Effects for Photoshop
Add beautiful lighting effects to your photos. Today we bring you an awesome collection of colorful and sparkly photo effects from Envato Market and Envato…

{excerpt}
Read More
50 More Useful and Stylish Video Project Templates for After Effects
{excerpt}
Read More
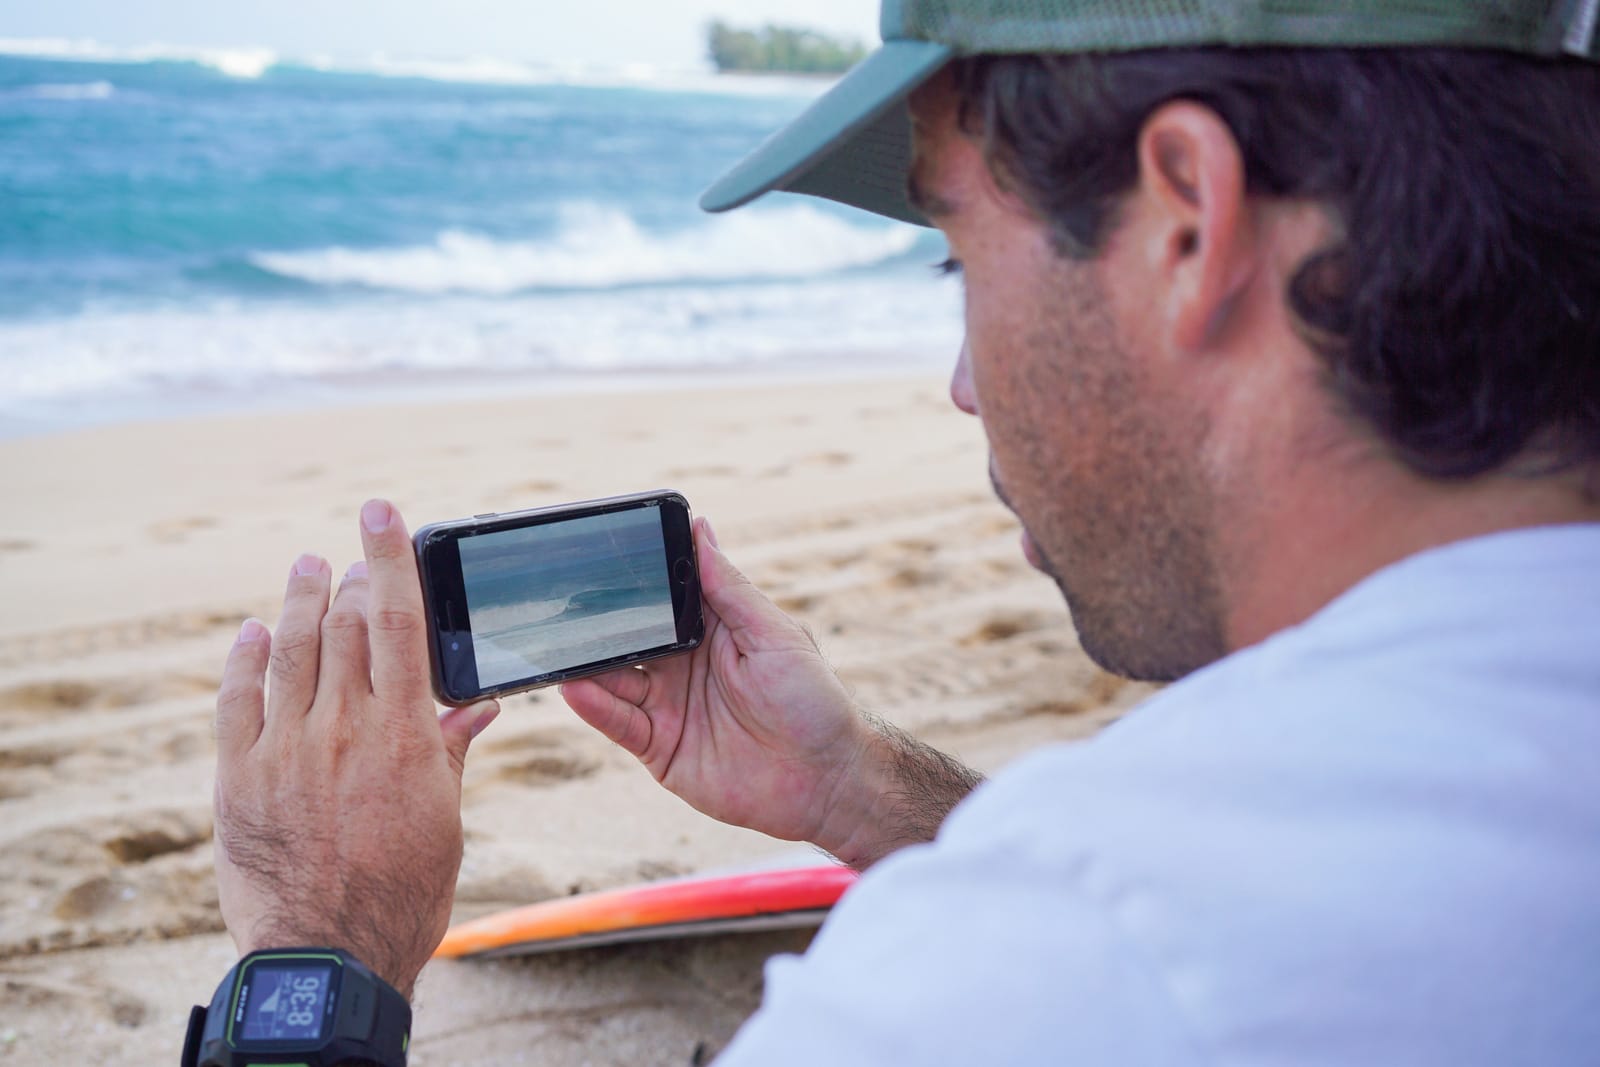
Rip Curl and Surfline team up to serve videos of your surf sessions
Amazon is discounting more Echo Show models by up to $80