Parsing XML Files

Reading XML files is one of the common tasks we perform in our application, In this tutorial let’s see how we can use NSXMLParser to parse XML in our iPhone app.
Introduction
NSXMLParser is a forward only reader or an event driven parser. What it means is, an event is raised whenever the parser comes across a start of an element, value, CDATA and so on. The delegate of NSXMLParser can then implement these events to capture XML data. Some of the events are raised multiple times like the start of an element, value of an element and so on. Since NSXMLParser is known as an event driven parser, we can only read data at the present node and cannot go back. The iPhone only supports NSXMLParser and not NSXMLDocument, which loads the whole XML tree in memory.

Books Application
To understand how to use an instance of NSXMLParser, let’s create a simple navigation based application where we will list the title of the book in the table view and upon selecting a title, display the detail information in a detail view. Click here to see the sample XML file, used in this application.

Create a new application in XCode by selecting Navigation-Based Application, I have named my app XML. Since the NSXMLParser is a forward only parser or an event driven parser, we need to store the data locally, which can be used later. To store this data, we will create a class which replicates the elements and attributes in the XML file. An instance of this class represents one single Book element in the XML file. I have named this class “Book” and its source code is listed below

//Book.h
#import <UIKit/UIKit.h>

@interface Book : NSObject {

NSInteger bookID;
NSString *title; //Same name as the Entity Name.
NSString *author; //Same name as the Entity Name.
NSString *summary; //Same name as the Entity Name.

}

@property (nonatomic, readwrite) NSInteger bookID;
@property (nonatomic, retain) NSString *title;
@property (nonatomic, retain) NSString *author;
@property (nonatomic, retain) NSString *summary;

@end

//Book.m
#import "Book.h"

@implementation Book

@synthesize title, author, summary, bookID;

- (void) dealloc {

[summary release];
[author release];
[title release];
[super dealloc];
}

@end

Notice that the name of the property is the same as the element name in the XML file. Since the XML file has n number of Book elements, we need an array to hold all the books we read, so we declare an array in the application delegate and this is how the source code changes

//XMLAppDelegate.h
#import <UIKit/UIKit.h>

@interface XMLAppDelegate : NSObject <UIApplicationDelegate> {

UIWindow *window;
UINavigationController *navigationController;

NSMutableArray *books;
}

@property (nonatomic, retain) IBOutlet UIWindow *window;
@property (nonatomic, retain) IBOutlet UINavigationController *navigationController;

@property (nonatomic, retain) NSMutableArray *books;

@end

The Delegate
To keep the source code clean, we will also declare a delegate, which will be used by the instance of NSXMLParser and this how its source code looks like

//XMLParser.h
#import <UIKit/UIKit.h>

@class XMLAppDelegate, Book;

@interface XMLParser : NSObject {

NSMutableString *currentElementValue;

XMLAppDelegate *appDelegate;
Book *aBook;
}

- (XMLParser *) initXMLParser;

@end

Let’s look at how the variables will be used. currentElementValue holds the current element value, appDelegate so we can access the array which holds the list of books and finally a reference to the Book class itself. Notice that we do not keep track of the current element name being processed, because the event will tell us that. Finally, we have a constructor called initXMLParser and let’s see what it does

//XMLParser.m
- (XMLParser *) initXMLParser {

[super init];

appDelegate = (XMLAppDelegate *)[[UIApplication sharedApplication] delegate];

return self;
}

Very simple, gets a reference to the application delegate and returns itself.

Parsing the XML File
Now that we have everything set up, let’s look at the code to read the XML file

//XMLAppDelegate.m
- (void)applicationDidFinishLaunching:(UIApplication *)application {

NSURL *url = [[NSURL alloc] initWithString:@"http://sites.google.com/site/iphonesdktutorials/xml/Books.xml"];
NSXMLParser *xmlParser = [[NSXMLParser alloc] initWithContentsOfURL:url];

//Initialize the delegate.
XMLParser *parser = [[XMLParser alloc] initXMLParser];

//Set delegate
[xmlParser setDelegate:parser];

//Start parsing the XML file.
BOOL success = [xmlParser parse];

if(success)
NSLog(@"No Errors");
else
NSLog(@"Error Error Error!!!");

// Configure and show the window
[window addSubview:[navigationController view]];
[window makeKeyAndVisible];
}

The code is very simple, we create an instance of NSURL, create an instance of NSXMLParser, initialize the delegate, assign the delegate and start parsing by passing the parse message. It returns YES, if the parsing is successful, NO if there is an error or if the operation is aborted.

Parsing the start of an element

The delegate of the parser does not have to implement all the methods that it raises, so we can pick and choose which events we care about. If we do not want to handle the event when the parser starts reading the document, we can choose to ignore it by not implementing it. We will only implement three methods which is called when the parser encounters the start of an element, end of an element or value of an element.

Let’s look at parser:didStartElement:namespaceURI:qualifiedName:attributes method which is called when the parser encounters the start of an element.

//XMLParser.m
- (void)parser:(NSXMLParser *)parser didStartElement:(NSString *)elementName
namespaceURI:(NSString *)namespaceURI qualifiedName:(NSString *)qualifiedName
attributes:(NSDictionary *)attributeDict {

if([elementName isEqualToString:@"Books"]) {
//Initialize the array.
appDelegate.books = [[NSMutableArray alloc] init];
}
else if([elementName isEqualToString:@"Book"]) {

//Initialize the book.
aBook = [[Book alloc] init];

//Extract the attribute here.
aBook.bookID = [[attributeDict objectForKey:@"id"] integerValue];

NSLog(@"Reading id value :%i", aBook.bookID);
}

NSLog(@"Processing Element: %@", elementName);
}

From the above code we first initialize the array when it encounters the “Books” element, which can also be done in parserDidStartDocument method. If the element is “Book” then we initialize the local book object and read the attribute of the present XML book element from the attribute dictionary object.

Parsing an element’s value
Now that we have a local book object representing the current book element in the XML tree, the next thing to do is to populate the local object with the XML data. The parser now moves to the title element and the same method is called again, but this time we do not do anything. Parser then moves to the element value and it sends parser:foundCharacters event to the delegate, let’s see how the code look like

//XMLParser.m
- (void)parser:(NSXMLParser *)parser foundCharacters:(NSString *)string {

if(!currentElementValue)
currentElementValue = [[NSMutableString alloc] initWithString:string];
else
[currentElementValue appendString:string];

NSLog(@"Processing Value: %@", currentElementValue);

}

The code is very easy to read, if the mutable string is nil then we initialize it with the string parameter. If the currentElementValue is not nil then we simply append the data to the existing string value.

Parsing the end of an element
The parser now moves to the end of the element and hence parser:didEndElement:namespaceURI:qualifiedName is sent to the delegate. This is where we set the currentElementValue to the correct property of the local book object and set the currentElementValue to nil. This is how the code looks like

//XMLParser.m
- (void)parser:(NSXMLParser *)parser didEndElement:(NSString *)elementName
namespaceURI:(NSString *)namespaceURI qualifiedName:(NSString *)qName {

if([elementName isEqualToString:@"Books"])
return;

//There is nothing to do if we encounter the Books element here.
//If we encounter the Book element howevere, we want to add the book object to the array
// and release the object.
if([elementName isEqualToString:@"Book"]) {
[appDelegate.books addObject:aBook];

[aBook release];
aBook = nil;
}
else
[aBook setValue:currentElementValue forKey:elementName];

[currentElementValue release];
currentElementValue = nil;
}

If the element it encounters is “Books” then there is nothing to do as we are almost done reading the file. If the element name is “Book” then we add the book object to the array and set the local book object to nil and release its memory, so it can be used again. If the end element is not “Books” or “Book” then it must be one of the sub element of “book” and we set the currentElementValue to the current book property using setValue:forKey. We can do this, because the properties declared in the book is the same as the XML element names.

The cycle starts again by initializing the book object and reading the attribute, reading the children elements and setting its value to the local object and finally adding the object to the array. The parser calls the three functions again and again as long as it does not encounters eof.

Complete listing of XMLParser.m file

//XMLParser.m
#import "XMLParser.h"
#import "XMLAppDelegate.h"
#import "Book.h"

@implementation XMLParser

- (XMLParser *) initXMLParser {

[super init];

appDelegate = (XMLAppDelegate *)[[UIApplication sharedApplication] delegate];

return self;
}

- (void)parser:(NSXMLParser *)parser didStartElement:(NSString *)elementName
namespaceURI:(NSString *)namespaceURI qualifiedName:(NSString *)qualifiedName
attributes:(NSDictionary *)attributeDict {

if([elementName isEqualToString:@"Books"]) {
//Initialize the array.
appDelegate.books = [[NSMutableArray alloc] init];
}
else if([elementName isEqualToString:@"Book"]) {

//Initialize the book.
aBook = [[Book alloc] init];

//Extract the attribute here.
aBook.bookID = [[attributeDict objectForKey:@"id"] integerValue];

NSLog(@"Reading id value :%i", aBook.bookID);
}

NSLog(@"Processing Element: %@", elementName);
}

- (void)parser:(NSXMLParser *)parser foundCharacters:(NSString *)string {

if(!currentElementValue)
currentElementValue = [[NSMutableString alloc] initWithString:string];
else
[currentElementValue appendString:string];

NSLog(@"Processing Value: %@", currentElementValue);

}

- (void)parser:(NSXMLParser *)parser didEndElement:(NSString *)elementName
namespaceURI:(NSString *)namespaceURI qualifiedName:(NSString *)qName {

if([elementName isEqualToString:@"Books"])
return;

//There is nothing to do if we encounter the Books element here.
//If we encounter the Book element howevere, we want to add the book object to the array
// and release the object.
if([elementName isEqualToString:@"Book"]) {
[appDelegate.books addObject:aBook];

[aBook release];
aBook = nil;
}
else
[aBook setValue:currentElementValue forKey:elementName];

[currentElementValue release];
currentElementValue = nil;
}

- (void) dealloc {

[aBook release];
[currentElementValue release];
[super dealloc];
}

@end

This is how the data looks like in the table view and the detail view controller.

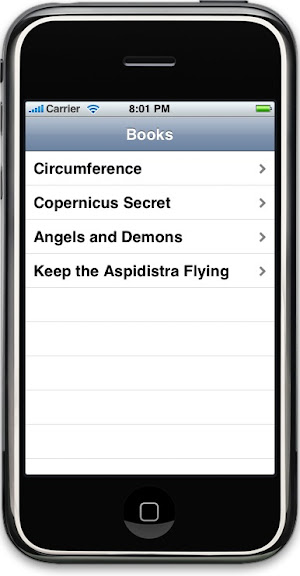
The data is then shown in a UITableView with a detail view, the complete code is not shown here but you can download the source code and to get a better understanding UITableView, you can follow my suggested readings below.

Summary
Reading XML files is very easy and it can be done with only three methods as seen above. I hope this tutorial has got you started in reading XML files.

Happy Programming,
iPhone SDK Articles


Attachments

Suggested Readings

UITableView – Creating a Simple Table View

If you want to display a list of items in your app, then UITableView object is your answer. The object makes it really easy to display a list of items. In this tutorial, you will learn how to set up a simple table view. Click on “Read more” to get started.

Introduction
In most cases, the requirement is to select an item from the list displayed and then load the details of the selected item in a detail view. UITableView is only responsible for the list of items it displays, the navigation that happens between the list of items and the detail view is handled by the UINavigationController. So the table view always works with the navigation controller and viceversa. This is how the final app looks like

Creating the project
Create a new XCode project by clicking on File -> New Project -> (Under iPhone OS) select “Navigation-Based Application”, give it a name and save the project. I have named my project “TableView”. The project template “Navigation-Based Application” will give you a navigation controller and a table view tied together, so you do not have to set it up manually.

Data Source
Since we want to display not one or two but a list of items in the table view, we need some kind of a data source to hold our data and something which we can pass it on to the table view so it can use it. This data source can come from anywhere XML Files, Databases, or an array. To learn how to use SQL Lite databases read my SQL Lite tutorial series here. To keep this tutorial simple, I will choose a NSMutableArray as the data source for the table view. You can fill this array from XML files or SQLLite database. The array will be populated with string objects and not custom objects to keep the tutorial less confusing. Read my SQL Lite tutorial series to understand how to use custom objects with the table view.

The first thing to do is to build the data source, populate it with the items we need to display in the table view. Let’s build our data source in viewDidLoad method of the RootViewController which is called when the view is loaded. This is how the header file and viewDidLoad method in the implementation file looks like

#import <UIKit/UIKit.h>

@interface RootViewController : UITableViewController {

NSMutableArray *listOfItems;
}

@end

//viewDidLoad method declared in RootViewController.m
- (void)viewDidLoad {
[super viewDidLoad];

//Initialize the array.
listOfItems = [[NSMutableArray alloc] init];

//Add items
[listOfItems addObject:@"Iceland"];
[listOfItems addObject:@"Greenland"];
[listOfItems addObject:@"Switzerland"];
[listOfItems addObject:@"Norway"];
[listOfItems addObject:@"New Zealand"];
[listOfItems addObject:@"Greece"];
[listOfItems addObject:@"Rome"];
[listOfItems addObject:@"Ireland"];

//Set the title
self.navigationItem.title = @"Countries";
}

//dealloc method declared in RootViewController.m
- (void)dealloc {

[listOfItems release];
[super dealloc];
}

Array “listOfItems” is declared in RootViewController.h file and is of type NSMutableArray, it is also released in the dealloc method as shown above.

In viewDidLoad method, we allocate memory and initialize the array and add 8 objects to it. The view of the navigation bar is set to “Countries”. Now somehow we need to tell the table view to display the items in the array.

Customize the number of rows in the table view
The first thing we have to do is, tell the table view how many rows it should expect and this is done in tableView:numberOfRowsInSection. This method returns an integer which is the number of rows that the table view will display. Since our array consists of 8 objects, we will pass the count message to the array. This is how the code looks like

//RootViewController.m
- (NSInteger)tableView:(UITableView *)tableView numberOfRowsInSection:(NSInteger)section {
return [listOfItems count];
}

Display data in a table cell.
Now that the table view knows how many rows to display, we need to display the actual text which goes in a table view cell. The table view is made of table rows and rows contains table cell. This is done in tableView:cellForRowAtIndexPath which is called n number of times, where n is the value returned in tableView:numberOfRowsInSection. The method provides indexPath which is of type NSIndexPath and using this we can find out the current row number the table view is going to display. This is how the code looks like

//RootViewController.m
- (UITableViewCell *)tableView:(UITableView *)tableView cellForRowAtIndexPath:(NSIndexPath *)indexPath {

static NSString *CellIdentifier = @"Cell";

UITableViewCell *cell = [tableView dequeueReusableCellWithIdentifier:CellIdentifier];
if (cell == nil) {
cell = [[[UITableViewCell alloc] initWithFrame:CGRectZero reuseIdentifier:CellIdentifier] autorelease];
}

// Set up the cell...
NSString *cellValue = [listOfItems objectAtIndex:indexPath.row];
cell.text = cellValue;

return cell;
}

In the code above, we first initialize the cell if required. Then get the string from the array, by passing objectAtIndex method to the receiver, with the current row number. The “cellValue” is then set to the text of the cell and the cell is returned. Run your application to see the eight rows in the UITableView.

Conclusion
UITableView really makes it easy to display list of items, by configuring few simple methods. I hope this tutorial helped you in getting started. I know this tutorial is really simple but this way I really get to concentrate on one problem at a time. In my next tutorial,I will show you how to load a detail view and pass data to it.

Happy Programming,
iPhone SDK Articles


Attachments

Suggested Readings

UITableView – Loading a detail view

The purpose of a UITableView is to display a list of items, from which a user can select one item to see it’s detail view. The navigation that happens between the table view and the detail view is controlled by the navigation controller. In this tutorial we will see how to navigate to a detail view.

Introduction
In this tutorial, you will learn how to navigate to the detail view and also pass some data at the same time. This is the second tutorial in the UITableView tutorial series and inherits its source code from the first tutorial.

Creating a detail view
Open Interface Builder and click on File -> New -> (select Cocoa Touch) View, save it in the application directory and name it “DetailView”. You will be asked to add the view to the current project, click on “Add”. You may need to drag the view (in XCode) to the “Resources” folder. Now that you have your view, we will create a view controller class to control the view on the screen. In XCode select Classes then click on File -> New File -> (under iPhone OS) select UIViewController subclass and name it “DetailViewController, do not change the extension. Now we have to connect the view to the view controller we just created. In Interface Builder, select File’s Owner and open Identity Inspector, under class Identity set the class to “DetailViewController”, open Connections Inspector and create a connection from the view property to the view object in the nib file.

Now add controls to the view which will display the detail contents. The controls that you may want to add to the view, depends on the data you want to display. We will display the country selected in the table view, so a simple label should do. Drag and drop the label on the view. We need some way to change the text of the label from XCode, create a variable of type UILabel in xcode and connect it with the label object on the view. The label should be declared with IBOutlet property, so it shows up in the Connections Inspector. This is how the code looks like

//DetailViewController.h
#import <UIKit/UIKit.h>

@interface DetailViewController : UIViewController {

IBOutlet UILabel *lblText;
}

@end

//Dealloc method declared in DetailViewController.m
- (void)dealloc {

[lblText release];
[super dealloc];
}

After you have declared the variable, open IB and connect the variable to the label placed on the view in Connections Inspector. Now we can change the label’s properties from XCode.

Navigate to the detail view
The method tableView:didSelectRowAtIndexPath is called when a row is selected, it passes the tableview object with the indexPath object to tell us which row was selected. First import the “DetailViewController” class in RootViewController, so it knows about it. The following code will initialize the detail view and display it

//RootViewController.m
- (void)tableView:(UITableView *)tableView didSelectRowAtIndexPath:(NSIndexPath *)indexPath {

DetailViewController *dvController = [[DetailViewController alloc] initWithNibName:@"DetailView" bundle:[NSBundle mainBundle]];
[self.navigationController pushViewController:dvController animated:YES];
[dvController release];
dvController = nil;
}

A “DetailViewController” is created, initialized with initWithNibName:bundle message and the name of the nib file is passed as the parameter. The view controller is then push to the top of the stack with its animated property set to YES. At last, we clean up memory by releasing the detail view controller. Run the application and now you can select a row to see the detail view.

Passing data
We still have to pass the selected country from the list to the detail view. To do this, we will declare a property in “DetailViewController” whose data type is the same as the in the array, in our case NSString. This is what you have to do if you want to pass data from one view controller to another. The following code declares a property in “DetailViewController”

//DetailViewController.h
#import <UIKit/UIKit.h>

@interface DetailViewController : UIViewController {

IBOutlet UILabel *lblText;
NSString *selectedCountry;
}

@property (nonatomic, retain) NSString *selectedCountry;

@end

//Dealloc method declared in DetailViewController.m
- (void)dealloc {

[selectedCountry release];
[lblText release];
[super dealloc];
}

//First three lines of DetailViewController.m
#import "DetailViewController.h"

@implementation DetailViewController

@synthesize selectedCountry;

The property is synthesized at the top after the implementation begins. Now we can pass the selected country from the table view to the detail view. The tableView:didSelectRowAtIndexPath method looks like this

- (void)tableView:(UITableView *)tableView didSelectRowAtIndexPath:(NSIndexPath *)indexPath {

//Get the selected country
NSString *selectedCountry = [listOfItems objectAtIndex:indexPath.row];

//Initialize the detail view controller and display it.
DetailViewController *dvController = [[DetailViewController alloc] initWithNibName:@"DetailView" bundle:[NSBundle mainBundle]];
dvController.selectedCountry = selectedCountry;
[self.navigationController pushViewController:dvController animated:YES];
[dvController release];
dvController = nil;
}

We first get the selected country from the array, initialize the detail view controller, set the selected country to the property on the detail view controller and display it.

Setting the accessory view
Run the app and now we are able to select a row in a table view. However, it is not obvious to the user that a row can be selected to see its detail view. We can add a “accessory view” to the cell which will show up at the right end of the row. The accessory view can be set up in tableView:cellForRowAtIndexPath method or in tableView:accessoryTypeForRowWithIndexPath. We will use the later method to keep our code simple. This is how the source code changes

//RootViewController.m
- (UITableViewCellAccessoryType)tableView:(UITableView *)tableView accessoryTypeForRowWithIndexPath:(NSIndexPath *)indexPath {

//return UITableViewCellAccessoryDetailDisclosureButton;
return UITableViewCellAccessoryDisclosureIndicator;
}

The above method returns an enum UITableViewCellAccessoryType and we can return four values: UITableViewCellAccessoryNone, UITableViewCellAccessoryDisclosureIndicator, UITableViewCellAccessoryDetailDisclosureButton, and UITableViewCellAccessoryCheckmark. You can test the code by returning one of the four values to see how the accessory view looks like. If you return “UITableViewCellAccessoryDetailDisclosureButton” clicking on the button will not do anything, since the cell is not selected but a button is clicked. The SDK does provide a method which gets called when the accessory button is clicked and that is called tableView:accessoryButtonTappedForRowWithIndexPath. In this method we can call tableView:didSelectRowAtIndexPath which will load the detail view and this is how the code will look like

//RootViewController.m
- (void)tableView:(UITableView *)tableView accessoryButtonTappedForRowWithIndexPath:(NSIndexPath *)indexPath {

[self tableView:tableView didSelectRowAtIndexPath:indexPath];
}

The last thing we need to do in detail view controller, is to display the selected country on the label. Do it in viewDidLoad method and this is how the code looks like

// DetailViewController.m
- (void)viewDidLoad {
[super viewDidLoad];

//Display the selected country.
lblText.text = selectedCountry;

//Set the title of the navigation bar
self.navigationItem.title = @"Selected Country";
}

The method “viewDidLoad” gets called when the view is loaded, where we set the selected country by setting the text property of the label “lblText”. The title of the navigation bar is also set in the same method.

Conclusion
We have seen how to display a list of items in a table view, how to select a row and display the detail view, and in the next tutorial we will look at how to search the list of items in a table view. I hope you found this tutorial helpful and if you have any questions, please send me an email. Don’t forget to leave a comment.

Happy Programming,
iPhone SDK Articles


Attachments

Suggested Readings

UITableView – Sectioned Table View

Sometimes it makes sense to group information and show it to the user. In this tutorial, you will learn how to create a simple sectioned table view. Click on “Read more” to learn more…

Introduction
So far we have seen how easy it is to display list of items in a table view. As it turns out, displaying grouped items is easy too. This is the third tutorial in the UITableView tutorial series and it borrows its source code from the previous one. This is how the final app will look like

Preparing the Data Source
From the above picture it is obvious that the countries are grouped into two sections: “Countries to visit” and “Countries visited”. I don’t know where I want to go next but Iceland is been on my list for a long time :).

Since the information is now grouped, we need to create our data source in a specific way, which will make it easier to display the data. We will still use a NSMutableArray to hold the data. This time we will populate it with two dictionary objects, instead of simple strings. The dictionary objects will contain one key/value pair, where the key will be a string and the value will be an array containing all the countries. This is done in viewDidLoad method and this is how the method changes from the second tutorial

//RootViewController.m
- (void)viewDidLoad {
[super viewDidLoad];

//Initialize the array.
listOfItems = [[NSMutableArray alloc] init];

NSArray *countriesToLiveInArray = [NSArray arrayWithObjects:@"Iceland", @"Greenland", @"Switzerland", @"Norway", @"New Zealand", @"Greece", @"Rome", @"Ireland", nil];
NSDictionary *countriesToLiveInDict = [NSDictionary dictionaryWithObject:countriesToLiveInArray forKey:@"Countries"];

NSArray *countriesLivedInArray = [NSArray arrayWithObjects:@"India", @"U.S.A", nil];
NSDictionary *countriesLivedInDict = [NSDictionary dictionaryWithObject:countriesLivedInArray forKey:@"Countries"];

[listOfItems addObject:countriesToLiveInDict];
[listOfItems addObject:countriesLivedInDict];

//Set the title
self.navigationItem.title = @"Countries";
}

P.S The array is declared in the header file and released in the dealloc method, this is shown in the first part of the tutorial. It also contains information about the detail view.

We create two arrays: countries to visit and countries visited. The arrays are then used to create dictionary objects with the key “Countries” and they are added to the “listOfItems” array with countries to live followed by countries lived in.

Preparing UITableView to display data

The table view needs to know how many sections it should expect, which is the number returned in numberOfSectionsInTableView method. Since we only have two dictionary objects added to the array, it know to display two sections. This is how the code looks like

//RootViewController.m
- (NSInteger)numberOfSectionsInTableView:(UITableView *)tableView {

return [listOfItems count];
}

The table view needs to know how many rows it should expect it in every section, which is the number returned in tableView:numberOfRowsInSection method. This is how the code looks like

//RootViewController.m
// Customize the number of rows in the table view.
- (NSInteger)tableView:(UITableView *)tableView numberOfRowsInSection:(NSInteger)section {

//Number of rows it should expect should be based on the section
NSDictionary *dictionary = [listOfItems objectAtIndex:section];
NSArray *array = [dictionary objectForKey:@"Countries"];
return [array count];
}

We have added two dictionary objects in the array, so this method will be called twice. Since the index of the section and the array starts with 0, We can use this to get the dictionary located at a specific index. Once we find out which dictionary the table view is displaying, we get the array using the key “Countries” and return the count of the array.

Displaying the header text
We took care of the number of sections and the rows the table view should know about. We still have to display the actual header text that shows up in the table view. This is done in tableView:titleForHeaderInSection method which is called twice since we only have two groups. This is how the code looks like

//RootViewController.m
- (NSString *)tableView:(UITableView *)tableView titleForHeaderInSection:(NSInteger)section {

if(section == 0)
return @"Countries to visit";
else
return @"Countries visited";
}

We know that the first dictionary in “listOfItems” array contains the list of countries I want to visit. So the above code checks if the section is 0 or not and displays the relevant header text.

Displaying the text of the UITableViewCell
We now have the header text but what about the text of the cell. The logic is similar to that of tableView:numberOfRowsInSection. We first find out which dictionary object we should read, from the section property of NSIndexPath. We then get the dictionary object, with its array from the key “Countries”. At last we display the text of the cell by getting the string at a given row, which comes from the row property of NSIndexPath. This is how the code looks like

//RootViewController.m
- (UITableViewCell *)tableView:(UITableView *)tableView cellForRowAtIndexPath:(NSIndexPath *)indexPath {

static NSString *CellIdentifier = @"Cell";

UITableViewCell *cell = [tableView dequeueReusableCellWithIdentifier:CellIdentifier];
if (cell == nil) {
cell = [[[UITableViewCell alloc] initWithFrame:CGRectZero reuseIdentifier:CellIdentifier] autorelease];
}

// Set up the cell...

//First get the dictionary object
NSDictionary *dictionary = [listOfItems objectAtIndex:indexPath.section];
NSArray *array = [dictionary objectForKey:@"Countries"];
NSString *cellValue = [array objectAtIndex:indexPath.row];
cell.text = cellValue;

return cell;
}

Selecting the right row
The method tableView:didSelectRowAtIndexPath also changes, to adjust the sectioned table view. This is how the code looks like

- (void)tableView:(UITableView *)tableView didSelectRowAtIndexPath:(NSIndexPath *)indexPath {

//Get the selected country

NSDictionary *dictionary = [listOfItems objectAtIndex:indexPath.section];
NSArray *array = [dictionary objectForKey:@"Countries"];
NSString *selectedCountry = [array objectAtIndex:indexPath.row];

//Initialize the detail view controller and display it.
DetailViewController *dvController = [[DetailViewController alloc] initWithNibName:@"DetailView" bundle:[NSBundle mainBundle]];
dvController.selectedCountry = selectedCountry;
[self.navigationController pushViewController:dvController animated:YES];
[dvController release];
dvController = nil;
}

The code is similar to tableView:cellForRowAtIndexPath, in how we access the dictionary, array, and the selected country value.

Run your application to see the sectioned table view in action.

Setting the style of UITableView
If your app looks like the picture above, then the style of the table view is set to “Plan” in Interface Builder. Change this to “Grouped” and see how the display changes when you run the app.

Conclusion
We have seen how we can display some information which is grouped together. I hope this tutorial was helpful to you and please leave your comments. My next tutorial will show you how to search the UITableView using the UISearchBar control.

Happy Programming,
iPhone SDK Articles


Attachments

Suggested Readings

UITableView – Searching table view

If the user has to scroll often to get to access the data, providing a search bar to search the table view helps in making the process faster. To learn more on searching, click on “Read more”…

Introduction
In this tutorial, you will learn how to search the contents of the table view. This is the fourth tutorial in the UITableView tutorial series and borrows its code from the previous one. This is how the final app looks like

Adding the search bar
Let’s get started by adding the search bar to our existing sectioned table view app. Open Interface Builder by double clicking “RootViewController.nib” file. Drag and drop a UISearchBar object in the nib file. In XCode, open RootViewController.h file declare a variable of type UISearchBar called “searchBar” and declare it with the keyword “IBoutlet” so it is visible in IB. Connect the variable to the UISearchBar object and set the delegate of UISearchBar to File’s Owner. This way the “RootViewController” gets notified of all the events generated on the search bar. This is how the header file looks like, where I have added some more variables and method which will help us in searching.

//RootViewController.h
@interface RootViewController : UITableViewController {

NSMutableArray *listOfItems;
NSMutableArray *copyListOfItems;
IBOutlet UISearchBar *searchBar;
BOOL searching;
BOOL letUserSelectRow;
}

- (void) searchTableView;
- (void) doneSearching_Clicked:(id)sender;

@end

The search bar is added to the header of the table view in “viewDidLoad” method and this how the code looks like

//RootViewController.m
- (void)viewDidLoad {
[super viewDidLoad];

//Initialize the array.
listOfItems = [[NSMutableArray alloc] init];

NSArray *countriesToLiveInArray = [NSArray arrayWithObjects:@"Iceland", @"Greenland", @"Switzerland", @"Norway", @"New Zealand", @"Greece", @"Rome", @"Ireland", nil];
NSDictionary *countriesToLiveInDict = [NSDictionary dictionaryWithObject:countriesToLiveInArray forKey:@"Countries"];

NSArray *countriesLivedInArray = [NSArray arrayWithObjects:@"India", @"U.S.A", nil];
NSDictionary *countriesLivedInDict = [NSDictionary dictionaryWithObject:countriesLivedInArray forKey:@"Countries"];

[listOfItems addObject:countriesToLiveInDict];
[listOfItems addObject:countriesLivedInDict];

//Initialize the copy array.
copyListOfItems = [[NSMutableArray alloc] init];

//Set the title
self.navigationItem.title = @"Countries";

//Add the search bar
self.tableView.tableHeaderView = searchBar;
searchBar.autocorrectionType = UITextAutocorrectionTypeNo;

searching = NO;
letUserSelectRow = YES;
}

Here we also set some boolean variables which will help us in searching. More about this later in the tutorial. The search bar is added to the “tableHeaderView” property of the table view. I also have another mutable array called “copyListOfItems”, which is used to store the search results. It used as the data source of the table view when searching. Run your application to see the search bar added to the top of the table view. The search bar is also released in the dealloc method (source code not provided here).

How the search will work
Before we proceed with any code, lets review some things we will do. When the user begins searching by clicking the search text box, we will do the following:

  1. Set the “searching” variable to YES.
  2. Set the “letUserSelectRow” variable to NO, since we do not want the user to select a row when the search box is empty.
  3. Disable scrolling of the table view. This is done to avoid an error that is raised, when the user scrolls the table view after the search bar is clicked.
  4. Display a done button on the right bar.
  5. Start searching as the user starts typing, this time allowing the user to select a row.
  6. Use a different data source to bind the table, which display’s the search reults.
  7. Search results are displayed in a single list and they are not grouped.
  8. Hide the keyboard and finish searching, when the user clicks on done.

Handling events
The first event that gets raised, is when the user touches the search bar to bring up the keyboard. The method searchBarTextDidBeginEditing is called and this is where we set the table view in search mode. The code looks like this

//RootViewController.m
- (void) searchBarTextDidBeginEditing:(UISearchBar *)theSearchBar {

searching = YES;
letUserSelectRow = NO;
self.tableView.scrollEnabled = NO;

//Add the done button.
self.navigationItem.rightBarButtonItem = [[[UIBarButtonItem alloc]
initWithBarButtonSystemItem:UIBarButtonSystemItemDone
target:self action:@selector(doneSearching_Clicked:)] autorelease];
}

Set the “searching” variable to YES, so we know the table view is in search mode. The variable “letUserSelectRow” is set to NO, so we can prohibit the user from selecting a row. Scrolling of the table view is also disabled which will help us when we add a overlay above the view. This is done in tableView:willSelectRowAtIndexPath method and this is how the code looks like

//RootViewController.m
- (NSIndexPath *)tableView :(UITableView *)theTableView willSelectRowAtIndexPath:(NSIndexPath *)indexPath {

if(letUserSelectRow)
return indexPath;
else
return nil;
}

The above code prevents the user from selecting a row if the variable “letUserSelectRow” is set to true.

The method “doneSearching_Clicked” is called when the user clicks the done method. The code for this method is shown later in this tutorial.

Searching the table view
The method searchBar:textDidChange is called when the user starts typing in the search field. This is how the search code looks like

//RootViewController.m
- (void)searchBar:(UISearchBar *)theSearchBar textDidChange:(NSString *)searchText {

//Remove all objects first.
[copyListOfItems removeAllObjects];

if([searchText length] > 0) {

searching = YES;
letUserSelectRow = YES;
self.tableView.scrollEnabled = YES;
[self searchTableView];
}
else {

searching = NO;
letUserSelectRow = NO;
self.tableView.scrollEnabled = NO;
}

[self.tableView reloadData];
}

There is a lot of stuff going on in the code above, so let’s look at it line by line

  1. We first empty the array, which is used as the data source to the table view when searching.
  2. If the search bar has some text then we continue searching, by calling “searchTableView” method. This time we let the user select a row to see its detail view.
  3. The method “searchTableView” is responsible to search the table view based on the search text and populate the search results in the array “copyListOfItems”.
  4. If the search bar is empty then, disable scrolling, set the searching variable to NO, and prohibit the user from selecting a row.
  5. At last we refresh the table view.

Before we jump to understand how the table view is able to display the search results, let’s review what happens when the user clicks the search button and the “searchTableView” method.

The method “searchBarSearchButtonClicked” is called and this is how the code looks like, where we simply call “searchTableView” method.

//RootViewController.m
- (void) searchBarSearchButtonClicked:(UISearchBar *)theSearchBar {

[self searchTableView];
}

- (void) searchTableView {

NSString *searchText = searchBar.text;
NSMutableArray *searchArray = [[NSMutableArray alloc] init];

for (NSDictionary *dictionary in listOfItems)
{
NSArray *array = [dictionary objectForKey:@"Countries"];
[searchArray addObjectsFromArray:array];
}

for (NSString *sTemp in searchArray)
{
NSRange titleResultsRange = [sTemp rangeOfString:searchText options:NSCaseInsensitiveSearch];

if (titleResultsRange.length > 0)
[copyListOfItems addObject:sTemp];
}

[searchArray release];
searchArray = nil;
}

Let’s review what goes on in “searchTableView” method. We first create a temporary search array, which we will fill it all the objects from the original data source. We loop through the dictionary objects, and add all the array objects to “searchArray”. We then loop through all the items in “searchArray” and compare it with the search text. We add the string object to the “copyListOfItems” if we find the search text in one of the countries.

Finish Searching
The following method “doneSearching_Clicked” is called when the user clicks the done button and this is how the code looks like

//RootViewController.m
- (void) doneSearching_Clicked:(id)sender {

searchBar.text = @"";
[searchBar resignFirstResponder];

letUserSelectRow = YES;
searching = NO;
self.navigationItem.rightBarButtonItem = nil;
self.tableView.scrollEnabled = YES;

[self.tableView reloadData];
}

We hide the keyboard, let the user select a row, set “searching” to false and hide the right bar button item.

Displaying search results
The search results are stored in “copyListOfItems” array and the table view is refreshed by calling reloadData. We also set the variable “searching” to YES when the user is searching, so we know to display the search results. To display results results we have to change few methods. The code changes for the following methods “numberOfSectionsInTableView“, “tableView:numberOfRowsInSection“, “tableView:titleForHeaderInSection“, “tableView:cellForRowAtIndexPath“, and “tableView:didSelectRowAtIndexPath“. We have to display data from “copyListOfItems” is the variable “searching” is set to YES else we display data as before. Let’s look at the code of all these methods

//RootViewController.m
- (NSInteger)numberOfSectionsInTableView:(UITableView *)tableView {

if (searching)
return 1;
else
return [listOfItems count];
}

// Customize the number of rows in the table view.
- (NSInteger)tableView:(UITableView *)tableView numberOfRowsInSection:(NSInteger)section {

if (searching)
return [copyListOfItems count];
else {

//Number of rows it should expect should be based on the section
NSDictionary *dictionary = [listOfItems objectAtIndex:section];
NSArray *array = [dictionary objectForKey:@"Countries"];
return [array count];
}
}

- (NSString *)tableView:(UITableView *)tableView titleForHeaderInSection:(NSInteger)section {

if(searching)
return @"";

if(section == 0)
return @"Countries to visit";
else
return @"Countries visited";
}

// Customize the appearance of table view cells.
- (UITableViewCell *)tableView:(UITableView *)tableView cellForRowAtIndexPath:(NSIndexPath *)indexPath {

static NSString *CellIdentifier = @"Cell";

UITableViewCell *cell = [tableView dequeueReusableCellWithIdentifier:CellIdentifier];
if (cell == nil) {
cell = [[[UITableViewCell alloc] initWithFrame:CGRectZero reuseIdentifier:CellIdentifier] autorelease];
}

// Set up the cell...

if(searching)
cell.text = [copyListOfItems objectAtIndex:indexPath.row];
else {

//First get the dictionary object
NSDictionary *dictionary = [listOfItems objectAtIndex:indexPath.section];
NSArray *array = [dictionary objectForKey:@"Countries"];
NSString *cellValue = [array objectAtIndex:indexPath.row];
cell.text = cellValue;
}

return cell;
}

- (void)tableView:(UITableView *)tableView didSelectRowAtIndexPath:(NSIndexPath *)indexPath {

//Get the selected country

NSString *selectedCountry = nil;

if(searching)
selectedCountry = [copyListOfItems objectAtIndex:indexPath.row];
else {

NSDictionary *dictionary = [listOfItems objectAtIndex:indexPath.section];
NSArray *array = [dictionary objectForKey:@"Countries"];
selectedCountry = [array objectAtIndex:indexPath.row];
}

//Initialize the detail view controller and display it.
DetailViewController *dvController = [[DetailViewController alloc] initWithNibName:@"DetailView" bundle:[NSBundle mainBundle]];
dvController.selectedCountry = selectedCountry;
[self.navigationController pushViewController:dvController animated:YES];
[dvController release];
dvController = nil;
}

In “numberOfSectionsInTableView” we return 1 if we are searching because the search results are not displayed in sections. In tableView:numberOfRowsInSection we return the count of the search results array, if we are searching. We return the text “Search Results” when searching in tableView:titleForHeaderInSection method. We get the data from the search results array when displaying text in tableView:cellForRowAtIndexPath method. The same logic is used to get the selected country in tableView:didSelectRowAtIndexPath method.

Adding an overlay
If you do a search in the contacts application, the table view gets a gray overlay above the table view and the search is canceled if the user touches the table view. We can do this same, by adding an overlay view above the table view.

Let’s adding another view under resource and name it “OverlayView”. Create a view controller called “OverlayViewController” in XCode. Open the nib file in IB and set the class of File’s Owner to “OverlayViewController” and create all the appropriate connections. Make sure that the view is able to respond to touches.

Now let’s add the overlay above the table view. We do this in “searchBarTextDidBeginEditing” and this is how the code looks like

//RootViewController.m
- (void) searchBarTextDidBeginEditing:(UISearchBar *)theSearchBar {

//Add the overlay view.
if(ovController == nil)
ovController = [[OverlayViewController alloc] initWithNibName:@"OverlayView" bundle:[NSBundle mainBundle]];

CGFloat yaxis = self.navigationController.navigationBar.frame.size.height;
CGFloat width = self.view.frame.size.width;
CGFloat height = self.view.frame.size.height;

//Parameters x = origion on x-axis, y = origon on y-axis.
CGRect frame = CGRectMake(0, yaxis, width, height);
ovController.view.frame = frame;
ovController.view.backgroundColor = [UIColor grayColor];
ovController.view.alpha = 0.5;

ovController.rvController = self;

[self.tableView insertSubview:ovController.view aboveSubview:self.parentViewController.view];

searching = YES;
letUserSelectRow = NO;
self.tableView.scrollEnabled = NO;

//Add the done button.
self.navigationItem.rightBarButtonItem = [[[UIBarButtonItem alloc]
initWithBarButtonSystemItem:UIBarButtonSystemItemDone
target:self action:@selector(doneSearching_Clicked:)] autorelease];
}

We have changed the header file “RootViewController.h” to add a variable “ovController” of type “OverLayViewController” and the header file is added to the top of RootViewController.m file.

Start by initializing the overlay view controller with the nib name “OverlayView”. We perform some calculations to find out where the search bar ends, as we want the overlay view to show up below the search bar. We set the frame of the view which will redraw the view on the screen. We set the background color and its transparency. The next line of code says that the self is assigned to the “rvController” property. The view is inserted above the table view, using insertSubView method.

We have declared a variable called “rvController” of type “RootViewController” in “OverlayViewController”. The reason it is done because, we want a reference to the root view controller from the overlay controller. This is how the header file and implementation file of the “OverlayController” looks like

//OverlayViewController.h
@class RootViewController;

@interface OverlayViewController : UIViewController {

RootViewController *rvController;
}

@property (nonatomic, retain) RootViewController *rvController;

@end

//OverlayViewController.m
#import "OverlayViewController.h"
#import "RootViewController.h"

@implementation OverlayViewController

@synthesize rvController;

- (void)touchesBegan:(NSSet *)touches withEvent:(UIEvent *)event {

[rvController doneSearching_Clicked:nil];
}

- (void)didReceiveMemoryWarning {
[super didReceiveMemoryWarning]; // Releases the view if it doesn't have a superview
// Release anything that's not essential, such as cached data
}

- (void)dealloc {
[rvController release];
[super dealloc];
}

Let’s look at the method touchesBegan:withEvent which is called when the user touches the overlay view. A call is made to the “doneSearching_Clicked” method defined in “RootViewController”. This is possible because we have a reference to the root view controller.

Now that that a overlay shows up when the user clicks the search bar, it should be hidden when the user starts searching. The method searchBar:textDidChange method now changes accordingly

//RootViewController.m
- (void)searchBar:(UISearchBar *)theSearchBar textDidChange:(NSString *)searchText {

//Remove all objects first.
[copyListOfItems removeAllObjects];

if([searchText length] > 0) {

[ovController.view removeFromSuperview];
searching = YES;
letUserSelectRow = YES;
self.tableView.scrollEnabled = YES;
[self searchTableView];
}
else {

[self.tableView insertSubview:ovController.view aboveSubview:self.parentViewController.view];

searching = NO;
letUserSelectRow = NO;
self.tableView.scrollEnabled = NO;
}

[self.tableView reloadData];
}

We remove the view if the user starts searching and add it back if the search bar is empty. The overlay view is removed and released when the user clicks the done button. This is how the code for “doneSearching_Clicked” is changed

//RootViewController.m
- (void) doneSearching_Clicked:(id)sender {

searchBar.text = @"";
[searchBar resignFirstResponder];

letUserSelectRow = YES;
searching = NO;
self.navigationItem.rightBarButtonItem = nil;
self.tableView.scrollEnabled = YES;

[ovController.view removeFromSuperview];
[ovController release];
ovController = nil;

[self.tableView reloadData];
}

The overlay is removed, released and set to nil. Run the app to see the search work.

Conclusion
Providing a search feature to the table view is a good option, if the user has to scroll a lot to select a row. I hope you had fun reading this tutorial as much as I had writing it. Don’t forget to leave a comment.

Happy Programming,
iPhone SDK Articles


Attachments

Suggested Readings

Localizing iPhone Apps – Part 1

It is very important to localize your iPhone applications, since the app can be used in more then 70 countries. Users want to see information, which is formatted according to their native country or region.

Introduction
A Locale is not a language, it is a representation of data like the currency, units, decimal separator or date and time format. A Locale’s identifier is represented as languagecode_regioncode_variant. The naming convention is defined by ICU (International Components for Unicode). The variant is not required and the locale identifier looks like “en_US” for english in USA and “en_GB” for english in Great Britain”. A user can set his/her locale in the iPhone by going to Settings -> General -> International -> Region Format. In this tutorial, we will look at how to display data (like currency, date and time…) in the user’s set region or country.

Formatters
We generally work with the user’s current locale object, instead of working with a specific locale. The locale object is used with some other objects, usually formatters. With Cocca, we have NSNumberFormatter and NSDateFormatter. The classes is locale sensitive, which means when you create an instance it uses the user’s current locale, which makes it very easy to work with. NSLocale is a class, which we use to get the user’s locale or to create new ones.

To get the current locale, the code would look something like this

NSLocale *currentUsersLocale = [NSLocale currentLocale];
NSLog(@"Current Locale: %@", [currentUsersLocale localeIdentifier]);

//Output
Current Locale: en_US

We get the current locale by passing currentLocale message to the class and we get the locale identifier(string representation) by passing localeIdentifier message. The output will be en_US if the region is set to United States.

Working with NSNumberFormatter
The code is very easy and it does not take a long time to learn eveything about formatters, we just create new one’s and set some properties and use it with the NSNumber class. Below is some code with some sample numbers and different formatters, where the output is displayed on the debugger console.

//Get the current user locale.
NSLocale *currentLocale = [NSLocale currentLocale];
NSLog(@"Current Locale: %@", [currentLocale localeIdentifier]);

NSLog(@"Test numbers: 4.0, 0.4, 4.6, -64");

NSNumber *number40 = [NSNumber numberWithFloat:4.0];
NSNumber *number04 = [NSNumber numberWithFloat:0.4];
NSNumber *number46 = [NSNumber numberWithFloat:4.6];
NSNumber *number64 = [NSNumber numberWithInt:-64];

//Working with number 4.0 and representing as No Style
NSNumberFormatter *noStyleFormatter = [[NSNumberFormatter alloc] init];
[noStyleFormatter setFormatterBehavior:NSNumberFormatterBehavior10_4];
[noStyleFormatter setNumberStyle:NSNumberFormatterNoStyle];

//Decimal Style
NSNumberFormatter *decimalStyle = [[NSNumberFormatter alloc] init];
[decimalStyle setFormatterBehavior:NSNumberFormatterBehavior10_4];
[decimalStyle setNumberStyle:NSNumberFormatterDecimalStyle];
[decimalStyle setRoundingMode:NSNumberFormatterRoundFloor];
[decimalStyle setRoundingIncrement:[NSNumber numberWithInt:1]];

//Currency Style
NSNumberFormatter *currencyStyle = [[NSNumberFormatter alloc] init];
[currencyStyle setFormatterBehavior:NSNumberFormatterBehavior10_4];
[currencyStyle setNumberStyle:NSNumberFormatterCurrencyStyle];

//Percent Style
NSNumberFormatter *percentStyle = [[NSNumberFormatter alloc] init];
[percentStyle setFormatterBehavior:NSNumberFormatterBehavior10_4];
[percentStyle setNumberStyle:NSNumberFormatterPercentStyle];

//Scientific Style
NSNumberFormatter *scientificStyle = [[NSNumberFormatter alloc] init];
[scientificStyle setFormatterBehavior:NSNumberFormatterBehavior10_4];
[scientificStyle setNumberStyle:NSNumberFormatterScientificStyle];

//Spell Out Style
NSNumberFormatter *spellOutStyle = [[NSNumberFormatter alloc] init];
[spellOutStyle setFormatterBehavior:NSNumberFormatterBehavior10_4];
[spellOutStyle setNumberStyle:NSNumberFormatterSpellOutStyle];

NSLog(@"Locale of noStyle formatter: %@", [[noStyleFormatter locale] localeIdentifier]);
NSLog(@"Locale of decimal style formatter: %@", [[decimalStyle locale] localeIdentifier]);
NSLog(@"Locale of currency style formatter: %@", [[currencyStyle locale] localeIdentifier]);
NSLog(@"Locale of percent style formatter: %@", [[percentStyle locale] localeIdentifier]);
NSLog(@"Locale of scientific style formatter: %@", [[scientificStyle locale] localeIdentifier]);
NSLog(@"Locale of spell-out style formatter: %@", [[spellOutStyle locale] localeIdentifier]);
NSLog(@"---------------------------------------");

//Display Results
NSLog(@"Different formatting results for NSNumber 4.0 with Locale: %@", [currentLocale localeIdentifier]);
NSLog(@"---------------------------------------");
NSLog(@"Formatting 4.0 with No Style: %@", [noStyleFormatter stringFromNumber:number40]);
NSLog(@"Formatting 4.0 with Decimal Style: %@", [decimalStyle stringFromNumber:number40]);
NSLog(@"Formatting 4.0 with Currency Style: %@", [currencyStyle stringFromNumber:number40]);
NSLog(@"Formatting 4.0 with Percent Style: %@", [percentStyle stringFromNumber:number40]);
NSLog(@"Formatting 4.0 with Scientific Style: %@", [scientificStyle stringFromNumber:number40]);
NSLog(@"Formatting 4.0 with Spell Out Style: %@", [spellOutStyle stringFromNumber:number40]);
NSLog(@"---------------------------------------");

NSLog(@"Different formatting results for NSNumber 0.4 with Locale: %@", [currentLocale localeIdentifier]);
NSLog(@"---------------------------------------");
NSLog(@"Formatting with No Style: %@", [noStyleFormatter stringFromNumber:number04]);
NSLog(@"Formatting with Decimal Style: %@", [decimalStyle stringFromNumber:number04]);
NSLog(@"Formatting with Currency Style: %@", [currencyStyle stringFromNumber:number04]);
NSLog(@"Formatting with Percent Style: %@", [percentStyle stringFromNumber:number04]);
NSLog(@"Formatting with Scientific Style: %@", [scientificStyle stringFromNumber:number04]);
NSLog(@"Formatting with Spell Out Style: %@", [spellOutStyle stringFromNumber:number04]);
NSLog(@"---------------------------------------");

NSLog(@"Different formatting results for NSNumber 4.6 with Locale: %@", [currentLocale localeIdentifier]);
NSLog(@"---------------------------------------");
NSLog(@"Formatting with No Style: %@", [noStyleFormatter stringFromNumber:number46]);
NSLog(@"Formatting with Decimal Style: %@", [decimalStyle stringFromNumber:number46]);
NSLog(@"Formatting with Currency Style: %@", [currencyStyle stringFromNumber:number46]);
NSLog(@"Formatting with Percent Style: %@", [percentStyle stringFromNumber:number46]);
NSLog(@"Formatting with Scientific Style: %@", [scientificStyle stringFromNumber:number46]);
NSLog(@"Formatting with Spell Out Style: %@", [spellOutStyle stringFromNumber:number46]);
NSLog(@"---------------------------------------");

NSLog(@"Different formatting results for NSNumber -64 with Locale: %@", [currentLocale localeIdentifier]);
NSLog(@"---------------------------------------");
NSLog(@"Formatting with No Style: %@", [noStyleFormatter stringFromNumber:number64]);
NSLog(@"Formatting with Decimal Style: %@", [decimalStyle stringFromNumber:number64]);
NSLog(@"Formatting with Currency Style: %@", [currencyStyle stringFromNumber:number64]);
NSLog(@"Formatting with Percent Style: %@", [percentStyle stringFromNumber:number64]);
NSLog(@"Formatting with Scientific Style: %@", [scientificStyle stringFromNumber:number64]);
NSLog(@"Formatting with Spell Out Style: %@", [spellOutStyle stringFromNumber:number64]);
NSLog(@"---------------------------------------");

All the code does is, create a bunch of formatters based on different styles and we see how the data looks like. The formatters behavior is set to NSNumberFormatterBehavior10_4, telling the formatter to behave since Mac OS X 10.4. We display the number by passing stringFromNumber message to the formatter. With NSNumberFormatter, you can set the currency symbol, set positive/negative symbols and it lets you do change many default settings. Click here to get a list of all the methods and properties which you can work with.

Working with NSDateFormatter
Just like NSNumberFormatter, NSDateFormatter is also locale sensitive. This is some sample code, showing how to use the NSDateFormatter

//Date Formatters.
[NSDateFormatter setDefaultFormatterBehavior:NSDateFormatterBehavior10_4];
NSDateFormatter *dateFormatter = [[NSDateFormatter alloc] init];
[dateFormatter setDateStyle:NSDateFormatterLongStyle];
[dateFormatter setTimeStyle:NSDateFormatterNoStyle];
NSDate *date = [NSDate date];

NSString *formattedDateString = [dateFormatter stringFromDate:date];
NSLog(@"Formatted date string for locale %@: %@", [[dateFormatter locale] localeIdentifier], formattedDateString);

//Custom Date Formatter.
NSDateFormatter *customDateFormatter = [[NSDateFormatter alloc] init];

//When setting the date format, do not set the date and time format style.
//Only one of the two can be set if not, the latter setting will take precedence.
[customDateFormatter setDateFormat:@"'The time is' hh:mm 'on' EEEE MMMM d"];

NSLog(@"%@", [customDateFormatter stringFromDate:date]);

NSDateFormatter lets you do many things, set months symbol, set the time zone, set the AM/PM symbols, click here to find out all the methods and properties you can use with NSDateFormatter.

Conclusion
Always use a formatter when display currency, units and datetime so it is always displayed in the user’s current locale. I know, this article was pretty simple and the code propably does not a whole lot, but I hope it helped you a little bit.

Happy Programming,
iPhone SDK Articles


Attachments

Localizating iPhone Apps – Custom Formatter

From time to time you may need to display some information which is locale specific and we may not be able to do it using NSNumberFormatter and NSDateFormatter. Any example might be displaying telephone numbers in a certain format. In such a case, we can create a custom formatter, which is what this tutorial does.

Introduction
The goal of this article is to create a custom formatter, used to display locale specific data. In this tutorial, I will create a new class to format phone numbers based on the user’s current locale. If the locale is set to “en_US” then the phone number looks like 1(111)111-1111.

NSFormatter
To create a custom formatter, start by creating a new class which inherits from NSFormatter. In Xcode click File -> New File -> NSObject subclass, I have named my file “PhoneNumberFormatter”. The new class you create will inherit from NSObject, simple delete that and inherit from NSFormatter. This is how the header file looks like

#import <UIKit/UIKit.h>

@interface PhoneNumberFormatter : NSFormatter {

NSLocale *locale;
}

@property (nonatomic, copy) NSLocale *locale;

- (NSString *) stringFromPhoneNumber:(NSNumber *)aNumber;

@end

We have a locale property, to keep track of the current user’s locale and a method which takes a NSNumber and returns its string representation.

Since the class inherits from NSFormatter, it needs to override some methods. The three methods that we have to override are stringForObjectValue:(id)anObject, getObjectValue:(id)anObject forString:(NSString *)string errorDescription:(NSString *)error and attributedStringForObjectValue:(id)anObject withDefaultAttributes:(NSDictionary *)attributes. This has been my understanding so far, if I’ am wrong please send me an email. All these methods are really useful in Mac OS X development where we can assign a cell to an NSFormatter object (I have tried to do this in IB for iPhone and it does not work). stringForObjectValue returns NSString object that textually represents the cell’s value and the other two methods are also useful in Mac OS X development and not really helpful in iPhone development. As a result, I will not be talking a lot about these methods.

Lets see how the initWithLocale and stringFromPhoneNumber methods looks like

- (void) initWithLocale {
[super init];

locale = [NSLocale currentLocale];
}

- (NSString *) stringFromPhoneNumber:(NSNumber *)aNumber {

NSString *localeString = [locale localeIdentifier];
NSString *tempStr = [[NSString alloc] initWithString:@""];
NSRange range;
range.length = 3;
range.location = 3;
//Returns the phone number 2032225200 as 1(203)222-5200
if([localeString compare:@"en_US"] == NSOrderedSame) {
NSString *areaCode = [[aNumber stringValue] substringToIndex:3];
NSString *phone1 = [[aNumber stringValue] substringWithRange:range];
NSString *phone2 = [[aNumber stringValue] substringFromIndex:6];

tempStr = [NSString stringWithFormat:@"1(%@)%@-%@", areaCode, phone1, phone2];
}

return tempStr;
}

In the initWithLocale method, we get the current user’s locale and copy it to the internal variable. In stringFromPhoneNumber we write our logic to display the text representation of the NSNumber value, based on the locale. This is a very simple example and I’ am sure there is a better way to parse and display the information.

Let’s also take a look at stringForObjectValue method

- (NSString *) stringForObjectValue:(id)anObject {

if(![anObject isKindOfClass:[NSNumber class]])
return nil;
else
return [self stringFromPhoneNumber:anObject];
}

We first check if the object is kind of NSNumber and if it is we simple pass the control to stringFromPhoneNumber message.

This is how we will use the code in the application

- (void)applicationDidFinishLaunching:(UIApplication *)application {

NSNumber *phoneNumber = [NSNumber numberWithInt:1231231212];
PhoneNumberFormatter *pnf = [[PhoneNumberFormatter alloc] initWithLocale];

NSLog(@"Phone Number: %@ for locale: %@", [pnf stringFromPhoneNumber:phoneNumber], [[pnf locale] localeIdentifier]);

[pnf release];

// Override point for customization after application launch
[window makeKeyAndVisible];
}

The phone number and the locale will be displayed on the debugger window.

Conclusion
Creating a custom formatter, comes in handy when we have to display data like phone numbers and format it according to the user’s current locale. By doing this, we also keep our code clean.

Happy Programming,
iPhone SDK Articles


Attachments

Suggested Readings

SQLite Tutorial – Deleting Data

In the second part of the SQLite tutorial, I will show how to delete data from UITableView and from the database. This picks up from the first part of the SQLite tutorial, where I show how to select some data from the database and display it to the user.


Introduction

Sometimes we do need to delete data and this is what we will learn to do in this tutorial. If you haven’t read the part 1 of this tutorial you can read it here.

Deleting a row from UITableView
To delete data, we first need to delete the row from the table and then delete it from the UITableView, it is not necessary to do it in that order. Data can be deleted by using the edit button or by swiping your finger across the UITableViewCell.

When a row is deleted from the UITableView “commitEditingStyle” method is called which can be found in RootViewController.m.

This is how the source code looks like

- (void)tableView:(UITableView *)tv commitEditingStyle:(UITableViewCellEditingStyle)editingStyle
forRowAtIndexPath:(NSIndexPath *)indexPath {

if(editingStyle == UITableViewCellEditingStyleDelete) {

//Get the object to delete from the array.
Coffee *coffeeObj = [appDelegate.coffeeArray objectAtIndex:indexPath.row];
[appDelegate removeCoffee:coffeeObj];

//Delete the object from the table.
[self.tableView deleteRowsAtIndexPaths:[NSArray arrayWithObject:indexPath] withRowAnimation:UITableViewRowAnimationFade];
}
}

We first check if the editingStyle is “UITableViewCellEditingStyleDelete” or not, if it is then we first delete the row from the database and then from the UITableView using “deleteRowsAtIndexPaths” method.

Since we have not yet implemented “removeCoffee” method, let’s do that now.

Deleting rows from the database
Declare “removeCoffee” in “SQLAppDelegate.h” file which takes a “Coffee” object as a parameter and returns void, the code looks like this

//Complete code listing not shown
- (void) removeCoffee:(Coffee *)coffeeObj;

The method does two things, sends a message to the Coffee Object to delete itself from the database and removes the object from the coffeeArray. The method is implemented in SQLAppDelegate.m file and looks like this

- (void) removeCoffee:(Coffee *)coffeeObj {

//Delete it from the database.
[coffeeObj deleteCoffee];

//Remove it from the array.
[coffeeArray removeObject:coffeeObj];
}

The first line, it sends a “deleteCoffee” message to the coffee object, let’s see how the code for that looks like

//Method is declared in the header file.
//Full code listing not shown
- (void) deleteCoffee;

“deleteCoffee” is implemented in SQLAppDelegate.m file.

- (void) deleteCoffee {

if(deleteStmt == nil) {
const char *sql = "delete from Coffee where coffeeID = ?";
if(sqlite3_prepare_v2(database, sql, -1, &deleteStmt, NULL) != SQLITE_OK)
NSAssert1(0, @"Error while creating delete statement. '%s'", sqlite3_errmsg(database));
}

//When binding parameters, index starts from 1 and not zero.
sqlite3_bind_int(deleteStmt, 1, coffeeID);

if (SQLITE_DONE != sqlite3_step(deleteStmt))
NSAssert1(0, @"Error while deleting. '%s'", sqlite3_errmsg(database));

sqlite3_reset(deleteStmt);
}

The “deleteStmt” as a static variable whose type is sqlite3_stmt. Deceleration shown below

#import "Coffee.h"

static sqlite3 *database = nil;
static sqlite3_stmt *deleteStmt = nil;

@implementation Coffee

We first prepare the delete statement with the sql query “delete from Coffee where CoffeeID = ?”. The ‘?’ specifies that we have to pass a parameter to the statement, we do this using sqlite3_bind_int method since the parameter we have to pass is an int. Note that the index is specified as 1 and not 0 because when assigining parameters the index starts from 1 and not 0. sqlite_step is called to execute the delete statement and if it returns “SQLITE_DONE” it means that the row is deleted successfully. Click here to get a list of complete return codes by SQLite. We then reset the delete statement so it can be reused later, without having the need to build it.

Run your application and delete a row to test.

Conclusion
Deleting rows is very easy and straight forward. In my next tutorial, I will show you insert data in the database.

Happy Programming,
iPhone SDK Articles


Attachments

Suggested Readings

SQLite Tutorial – Adding data

Inserting data into SQLite database is a breeze with iPhone applications. In the third part of SQLite tutorials, I will show how to insert data into the database.


Introduction

Adding data into the database is very simple using the SQLite library, although there are some tweaks we have to perform if we want the application to behave in a certain way. This tutorial picks up its source code from the last tutorial in this series. This is how the “AddView” looks like

The work flow is as following, a user will click on the “Add” button on the left hand bar button item and the “AddView” will be presented to him. The user will enter the coffee name and price and click on “Save” on the navigation item on the right hand side to save it. Internally, it will call “save_Clicked” method which will create a “Coffee” object and set all the right properties. We then call “add_Coffee” method on “SQLAppDelegate” which will call “add_Coffee” method on the “Coffee” class and then it will add the object to the array. We then dismiss the add view controller and reload data on the table view in “viewWillAppear” method implemented in “RootViewController.m”.

Creating the addCoffee Method
First thing we do is create the addCoffee method in the Coffee class which is responsible for inserting data in the database.

This is how the header file looks like (Complete code not shown)

- (void) addCoffee;

and the method is implemented in Coffee.m file

- (void) addCoffee {

if(addStmt == nil) {
const char *sql = "insert into Coffee(CoffeeName, Price) Values(?, ?)";
if(sqlite3_prepare_v2(database, sql, -1, &addStmt, NULL) != SQLITE_OK)
NSAssert1(0, @"Error while creating add statement. '%s'", sqlite3_errmsg(database));
}

sqlite3_bind_text(addStmt, 1, [coffeeName UTF8String], -1, SQLITE_TRANSIENT);
sqlite3_bind_double(addStmt, 2, [price doubleValue]);

if(SQLITE_DONE != sqlite3_step(addStmt))
NSAssert1(0, @"Error while inserting data. '%s'", sqlite3_errmsg(database));
else
//SQLite provides a method to get the last primary key inserted by using sqlite3_last_insert_rowid
coffeeID = sqlite3_last_insert_rowid(database);

//Reset the add statement.
sqlite3_reset(addStmt);
}

The “add_Stmt” is declared as static sqlite3_stmt variable. It is finalized in finalizeStatements and this is how the code looks like

//Complete code listing not shown
#import "Coffee.h"

static sqlite3 *database = nil;
static sqlite3_stmt *deleteStmt = nil;
static sqlite3_stmt *addStmt = nil;

@implementation Coffee
...

+ (void) finalizeStatements {

if(database) sqlite3_close(database);
if(deleteStmt) sqlite3_finalize(deleteStmt);
if(addStmt) sqlite3_finalize(addStmt);
}

Coming back to addCoffee method, “add_Stmt” is built using the appropriate insert SQL code. To bind the coffee name the following method sqlite3_bind_text is used and sqlite3_bind_double is used to bind the price variable to the insert statement. Since the method only accepts a value of datatype double, we send doubleValue message to the receiver. Execute the statement using sqlite_step method and if it returns SQLITE_DONE then the row was successfully added to the database. We still do not have the primary key for the row which was inserted, which we can get by calling sqlite3_last_insert_rowid method and passing the database object. The “rowid” is only returned on column of type INTEGER PRIMARY KEY.

After adding the data in the database, we have to add the coffee object to the coffeeArray declared in SQLAppDelegate class. To do this we will declare a method called “add_Coffee” which will take a parameter of type Coffee and this method is called from “save_Clicked” method, which is called when the user clicks on the save button.

This is how the header file changes (Full code not shown)

//FileName: SQLAppDelegate.h
- (void) addCoffee:(Coffee *)coffeeObj;
...

addCoffee is implemented in SQLAppDelegate.m file and this is the code listing

- (void) addCoffee:(Coffee *)coffeeObj {

//Add it to the database.
[coffeeObj addCoffee];

//Add it to the coffee array.
[coffeeArray addObject:coffeeObj];
}

The first line calls the “addCoffee” method on the coffee object which we just created. The second line adds the object in the array.

Now we have to work with the Add View and its associated view controller.

Adding new UIView
Create a new view using the Interface Builder, I have named the view “AddView”. Add two labels and two text boxes as shown in the figure below. For the text fields, Capitalize is set to “Words”, Return Key is set to “Done” and set the Placeholder as “Coffee Name” and “Price” for the two respective text fields. You would set the properties in “Text Field Attributes” (Tools -> Inspector) using IB. Open “Connections Inspector” and create a connection from the delegate property to “File’s Owner” object, do the same for both the text boxes. I find it hard to explain what goes in IB, so here is a screen shot of how it should look like. The “Text Field Connections” applies to both the text boxes.


Creating a UIViewController
Create a new view controller (using Xcode), the name of my file is “AddViewController”. Create two variables of type UITextField with “IBOutlet” attribute so the variables show up in IB and create two methods called “save_Clicked” and “cancel_Clicked”. This is how the header file should look like

#import <UIKit/UIKit.h>

@class Coffee;

@interface AddViewController : UIViewController {

IBOutlet UITextField *txtCoffeeName;
IBOutlet UITextField *txtPrice;
}

@end

Now that we have defined “AddViewController” set the File’s Owner class as “AddViewController” in “Controller Identity”, below is a screen shot of that.

Also link the text fields declared in the view controller to the objects on the “AddView”, below is a screen shot of that

We are done with using Interface builder, feels good now that we can concentrate on code.

We now have to add two buttons “Cancel” and “Save” on the “UINavigationItem” of the “AddView”. Let us do this in “viewDidLoad” method and this how the code looks like

- (void)viewDidLoad {
[super viewDidLoad];

self.title = @"Add Coffee";

self.navigationItem.leftBarButtonItem = [[[UIBarButtonItem alloc]
initWithBarButtonSystemItem:UIBarButtonSystemItemCancel
target:self action:@selector(cancel_Clicked:)] autorelease];

self.navigationItem.rightBarButtonItem = [[[UIBarButtonItem alloc]
initWithBarButtonSystemItem:UIBarButtonSystemItemSave
target:self action:@selector(save_Clicked:)] autorelease];

self.view.backgroundColor = [UIColor groupTableViewBackgroundColor];
}

Everything is self explanatory, we set the title, add two buttons and set the background of the view by passing groupTableViewBackgroundColor message to UIColor.

Since the view has only two text fields, it will be easier if the keypad is presented to the user when the view is loaded. Lets do this in “viewWillAppear” method and this is how the code looks like

- (void) viewWillAppear:(BOOL)animated {
[super viewWillAppear:animated];

//Set the textboxes to empty string.
txtCoffeeName.text = @"";
txtPrice.text = @"";

//Make the coffe name textfield to be the first responder.
[txtCoffeeName becomeFirstResponder];
}

Here we always set the text property of the text fields to empty string and we make the keypad show up for the coffeeName text field by passing becomeFirstResponder message.

Since the user can click “Done” the keyboard should be hidden and the method which gets called is textFieldShouldReturn and this is how the code looks like

- (BOOL)textFieldShouldReturn:(UITextField *)theTextField {

[theTextField resignFirstResponder];
return YES;
}

Please note that, I send “resignFirstResponder” message to the text field without finding out which textbox should be hidden. I do this because, the actual save happens in “save_clicked” method.

Before we look at “save_Clicked” method, this is how “cancel_Clicked” method looks like

- (void) cancel_Clicked:(id)sender {

//Dismiss the controller.
[self.navigationController dismissModalViewControllerAnimated:YES];
}

and this is how the “save_Clicked” method looks like

- (void) save_Clicked:(id)sender {

SQLAppDelegate *appDelegate = (SQLAppDelegate *)[[UIApplication sharedApplication] delegate];

//Create a Coffee Object.
Coffee *coffeeObj = [[Coffee alloc] initWithPrimaryKey:0];
coffeeObj.coffeeName = txtCoffeeName.text;
NSDecimalNumber *temp = [[NSDecimalNumber alloc] initWithString:txtPrice.text];
coffeeObj.price = temp;
[temp release];
coffeeObj.isDirty = NO;
coffeeObj.isDetailViewHydrated = YES;

//Add the object
[appDelegate addCoffee:coffeeObj];

//Dismiss the controller.
[self.navigationController dismissModalViewControllerAnimated:YES];
}

We create a new coffee class and set all the properties, isDetailViewHydrated is set as YES because all the data is in memory and isDirty is set as NO because the row will be inserted in the database after setting all the properties. The view is dismissed by passing “dismissModalViewControllerAnimated” message to the receiver.

We still have to add the “Add” button to the “RootViewController” and add the code to show the “AddView”. This is how the header file changes for “RootViewController”

#import <UIKit/UIKit.h>

@class Coffee, AddViewController;

@interface RootViewController : UITableViewController {

SQLAppDelegate *appDelegate;
AddViewController *avController;
UINavigationController *addNavigationController;
}

@end

Do not forget to import “AddViewController.h” in “RootViewController.m” file. The “Add” button is added in the “viewDidLoad” method and this is how the code changes

- (void)viewDidLoad {
[super viewDidLoad];

self.navigationItem.rightBarButtonItem = self.editButtonItem;

self.navigationItem.leftBarButtonItem = [[UIBarButtonItem alloc]
initWithBarButtonSystemItem:UIBarButtonSystemItemAdd
target:self action:@selector(add_Clicked:)];

appDelegate = (SQLAppDelegate *)[[UIApplication sharedApplication] delegate];

self.title = @"Coffee List";
}

When “Add” is clicked “add_Clicked” method is called and this is how the code looks like

- (void) add_Clicked:(id)sender {

if(avController == nil)
avController = [[AddViewController alloc] initWithNibName:@"AddView" bundle:nil];

if(addNavigationController == nil)
addNavigationController = [[UINavigationController alloc] initWithRootViewController:avController];

[self.navigationController presentModalViewController:addNavigationController animated:YES];
}

The reason we present the “AddView” using “addNavigationController” because when we want a custom UINavigationItem to show up on the AddView and that is why we initialize “addNavigationController” with “avController” and present it using “presentModalViewController”.

Run your application to insert data in the database.

There is however a problem with the design here, a User can click on Edit and nothing restricts him/her from clicking the add button. The code below fixes the issue

- (void)setEditing:(BOOL)editing animated:(BOOL)animated {

[super setEditing:editing animated:animated];
[self.tableView setEditing:editing animated:YES];

//Do not let the user add if the app is in edit mode.
if(editing)
self.navigationItem.leftBarButtonItem.enabled = NO;
else
self.navigationItem.leftBarButtonItem.enabled = YES;
}

The method setEditing is called when the edit button is clicked. We send the same message to the parent class and the tableview, also disable or enable the leftBarButtonItem if the tableview is in edit mode.

Conclusion
As we can see inserting data in SQLite databases is very easy to do.

Happy Programming,
iPhone SDK Articles


Attachments

Suggested Readings

SQLite Tutorial – Loading data as required.

In this tutorial, I was supposed to show how to update data in a SQLite database, but when I finished writing it, I realized that it is a big one and that is why, I renamed this tutorial to “Loading data as required”.

Introduction
In this tutorial, I will show you how to select a row and load the Coffee class details in a detail view. According to the design of this app, we only load data when we need it. Now we load the price of coffee from the SQLite database, when a row is selected. This is the fourth tutorial in SQLite tutorial series and it borrows its source code from the previous tutorials. This is how the detail view looks like

Selecting data from database
Since we need to get the price of a coffee from the database and show it on the detail view, let’s declare a method called “hydrateDetailViewData” in Coffee class and this is how the method deceleration looks like in Coffee.h File

- (void) hydrateDetailViewData;
//Complete code listing not shown.

and the method is implemented in Coffee.m, this is how the source code looks like

- (void) hydrateDetailViewData {

//If the detail view is hydrated then do not get it from the database.
if(isDetailViewHydrated) return;

if(detailStmt == nil) {
const char *sql = "Select price from Coffee Where CoffeeID = ?";
if(sqlite3_prepare_v2(database, sql, -1, &detailStmt, NULL) != SQLITE_OK)
NSAssert1(0, @"Error while creating detail view statement. '%s'", sqlite3_errmsg(database));
}

sqlite3_bind_int(detailStmt, 1, coffeeID);

if(SQLITE_DONE != sqlite3_step(detailStmt)) {

//Get the price in a temporary variable.
NSDecimalNumber *priceDN = [[NSDecimalNumber alloc] initWithDouble:sqlite3_column_double(detailStmt, 0)];

//Assign the price. The price value will be copied, since the property is declared with "copy" attribute.
self.price = priceDN;

//Release the temporary variable. Since we created it using alloc, we have own it.
[priceDN release];
}
else
NSAssert1(0, @"Error while getting the price of coffee. '%s'", sqlite3_errmsg(database));

//Reset the detail statement.
sqlite3_reset(detailStmt);

//Set isDetailViewHydrated as YES, so we do not get it again from the database.
isDetailViewHydrated = YES;
}

As always, detailStmt is declared as static and is of type sqlite3_stmt, this is the code

static sqlite3_stmt *addStmt = nil;
static sqlite3_stmt *detailStmt = nil;

@implementation Coffee
//Complete code listing not shown.

Let’s see what happens in hydrateDetailViewData, the first thing we check is if detailStmt is nil or not, if it is then we prepare the statement using sqlite3_prepare_v2 function with the correct SQL query. The query “Select price from Coffee Where CoffeeID = ?” takes one parameter represented by one ‘?’. Parameters are assigned to the statement using the function sqlite3_bind_int, since the parameter is going to be the type of int. Notice, that the index is represented as 1 and not 0, this is because when assigning parameters the index starts from 1. The statement is executed using sqlite3_step method and SQLITE_DONE is returned on success. We get the price in a temporary variable priceDN, using the function sqlite3_column_double, then our temporary variable is initialized using initWithDouble method. We assign the temporary variable to the price variable and then release it, which we have to do since the object was created using the alloc method. Remember price property is declared in the Coffee class using the copy attribute and not retain, this way we do not increment the count on priceDN but copy it to the price variable. The statement is reset using sqlite3_reset, so it can be used again without preparing the statement again.

Creating the detail view
Now that we have a routine to get the price of a coffee, let’s create the detail view and the detail view controller. First let’s create the UIViewController, in Xcode (Select the Classes Folder) create a new file which inherits from UIViewController (File -> New File -> Select UIViewController SubClass) and name it “DetailViewController”. Lets add some variables and properties to it, coffeeObj to hold the Coffee object and tableView which will be placed on the Detail View (to be created in IB). This is how the header file looks like

@class Coffee;

@interface DetailViewController : UIViewController <UITableViewDataSource, UITableViewDelegate> {

IBOutlet UITableView *tableView;
Coffee *coffeeObj;
}

@property (nonatomic, retain) Coffee *coffeeObj;

@end

In the implementation file of the DetailViewController, the property is synthesized and both the variables are released in the dealloc method.

Let’s see what happens in IB. Create a new view in IB and name it “DetailView”. Place a UITableView on the view and change the style property to “Grouped”. Since I always have a hard time explaining what goes in IB, here are the screen shots of the connections.

Class Identity for File’s Owner Object

Controller Connections for File’s Owner

Table View Connections

Selecting a row
We are doing all this work to display the detail view when a row is selected, lets look at the code on how to do that

- (void)tableView:(UITableView *)tableView didSelectRowAtIndexPath:(NSIndexPath *)indexPath {
// Navigation logic -- create and push a new view controller

if(dvController == nil)
dvController = [[DetailViewController alloc] initWithNibName:@"DetailView" bundle:nil];

Coffee *coffeeObj = [appDelegate.coffeeArray objectAtIndex:indexPath.row];

//Get the detail view data if it does not exists.
//We only load the data we initially want and keep on loading as we need.
[coffeeObj hydrateDetailViewData];

dvController.coffeeObj = coffeeObj;

[self.navigationController pushViewController:dvController animated:YES];

}

We have a new variable defined here called “dvController” and it is defined in the header file like this and it is also released in the dealloc method.

//Complete code listing not shown
DetailViewController *dvController;
...

Coming back to “didSelectRowAtIndexPath” method, the first thing we do is check if dvController is nil or not, if it is we initialize it. We then get the coffee object from the array and send “hydrateDetailViewData” message to get the price of the coffee. The coffee object is assigned to the detail view controller so it is available to the detail view. The detail view is shown to the user using pushViewController method.

Now that a row can be selected, we have to let the user know that it can be done. We can do that by setting the accessoryType property of the cell in cellForRowAtIndexPath, this is how the code looks like now

- (UITableViewCell *)tableView:(UITableView *)tableView cellForRowAtIndexPath:(NSIndexPath *)indexPath {

static NSString *CellIdentifier = @"Cell";

UITableViewCell *cell = [tableView dequeueReusableCellWithIdentifier:CellIdentifier];
if (cell == nil) {
cell = [[[UITableViewCell alloc] initWithFrame:CGRectZero reuseIdentifier:CellIdentifier] autorelease];
}

//Get the object from the array.
Coffee *coffeeObj = [appDelegate.coffeeArray objectAtIndex:indexPath.row];

//Set the coffename.
cell.text = coffeeObj.coffeeName;

//Set the accessory type.
cell.accessoryType = UITableViewCellAccessoryDisclosureIndicator;

// Set up the cell
return cell;
}


Displaying data in the detail view

Let’s see what we have to do in the detail view. From the detail view image (at the top), we can tell that coffeeName and price shows up in a table view with “Coffee Name” and “Price” as the title of the section name. The first thing we will do is, set the title of the view with the coffee name and we do this in viewWillAppear method, this is how the source code looks like, which is pretty self explanatory.

- (void) viewWillAppear:(BOOL)animated {

[super viewWillAppear:animated];

self.title = coffeeObj.coffeeName;

[tableView reloadData];
}

Since we only have to show two fields on the view, we will return 2 in numberOfSectionsInTableView method and as only one coffee data will be displayed, we return 1 in numberOfRowsInSection method. This is how the source code looks like

- (NSInteger)numberOfSectionsInTableView:(UITableView *)tblView {
return 2;
}

- (NSInteger)tableView:(UITableView *)tblView numberOfRowsInSection:(NSInteger)section {
return 1;
}

Next thing we have to do is give names to our section, which is set in titleForHeaderInSection method. It gets called n number of times, where n is the number returned in numberOfSectionsInTableView. This is how the source code looks like

- (NSString *)tableView:(UITableView *)tblView titleForHeaderInSection:(NSInteger)section {

NSString *sectionName = nil;

switch (section) {
case 0:
sectionName = [NSString stringWithFormat:@"Coffee Name"];
break;
case 1:
sectionName = [NSString stringWithFormat:@"Price"];
break;
}

return sectionName;
}

Now we set the text of the cell which is returned in cellForRowAtIndexPath, which gets called n number of times where n is the number returned in numberOfRowsInSection. I would like to mention one thing here, for example if your table view can only show 4 rows and we return 10 in numberOfRowsInSection then, cellForRowAtIndexPath is only called 4 times because that is what the user sees. When the user scrolls to see more data, it is then cellForRowAtIndexPath is called again to display additional data.

This is how cellForRowAtIndexPath method looks like

- (UITableViewCell *)tableView:(UITableView *)tblView cellForRowAtIndexPath:(NSIndexPath *)indexPath {
static NSString *CellIdentifier = @"Cell";

UITableViewCell *cell = [tableView dequeueReusableCellWithIdentifier:CellIdentifier];
if (cell == nil) {
cell = [[[UITableViewCell alloc] initWithFrame:CGRectZero reuseIdentifier:CellIdentifier] autorelease];
}

switch(indexPath.section) {
case 0:
cell.text = coffeeObj.coffeeName;
break;
case 1:
cell.text = [NSString stringWithFormat:@"%@", coffeeObj.price];
break;
}

return cell;
}

NOTE: When this post was published, I had a error in case 1. I had earlier set the price of the coffee by passing stringValue message to the receiver, which works now but gives an error in the next tutorial.

In this method, after getting UITableViewCell, we find out the index of the section from indexPath object. If it is 0 then we set the coffeeName property, if it is 1 then we set the price property. Price of the coffee is set as string to the text property of the cell.

Conclusion
By following this design pattern, where we only load the data we need to show to the user and loading additional data as required, we adhere to the Apple’s recommended way of accessing data.

Happy Programming,
iPhone SDK Articles


Attachments

Suggested Readings

SQLite Tutorial – Updating data

In this tutorial, I will show you how to edit data and update its contents in the SQLite database. We will look at how to edit one field at a time.

Introduction
In the detail view, the user will be able to edit the fields by clicking the edit button and selecting a row at a time to load the edit view. When the data is updated in the edit view, we will mark the object as dirty. Data will only be saved in the database when the application is being terminated or when it receives a memory warning.

Editing Data
First thing we have to do is, place the edit button on the left bar. We add the button in viewDidLoad method and this is how the source code looks like for DetailViewController.m

- (void)viewDidLoad {
[super viewDidLoad];

self.navigationItem.rightBarButtonItem = self.editButtonItem;
}

When the edit button is clicked, we will hide the back button and let the user know that the row can be selected to edit. This is how the code is going to look like

- (void)setEditing:(BOOL)editing animated:(BOOL)animated {
[super setEditing:editing animated:animated];
[self.navigationItem setHidesBackButton:editing animated:animated];

[tableView reloadData];
}

The method setEditing is called when the user clicks on the edit button and it is where we hide or show the back button. The table view is also refreshed, so we can set the accessory type. To hide the back button use setHidesBackButton message. This is how the code looks like

- (UITableViewCellAccessoryType)tableView:(UITableView *)tv accessoryTypeForRowWithIndexPath:(NSIndexPath *)indexPath {
// Show the disclosure indicator if editing.
return (self.editing) ? UITableViewCellAccessoryDisclosureIndicator : UITableViewCellAccessoryNone;
}

accessoryTypeForRowWithIndexPath gets called to use a disclosure control for the specified row. Based on the editing variable status, an indicator is set. You may have noticed that, the row can be selected even if the user did not click on the edit view. The following code takes care of that

- (NSIndexPath *)tableView:(UITableView *)tv willSelectRowAtIndexPath:(NSIndexPath *)indexPath {
// Only allow selection if editing.
return (self.editing) ? indexPath : nil;
}

willSelectRowAtIndexPath tells the delegate that a specified row is about to be selected and is called before didSelectRowAtIndexPath. Return the indexPath selected if the user clicks on edit and nil if the done button is clicked.

Now we handle the event didSelectRowAtIndexPath, which is called when a row is selected. The user will select a row to load the edit view where a value can be changed.

Creating the edit view

Create a new view in Interface Builder and name it “EditView”. Place a text field on the view and set the property capitalize to Words and uncheck “Clear when editing begings” field. leave all the other properties as default. Then add UINavigationBar from the library to the EditView nib file and place two bar button items on the right and left bar button items. Set the style of the left button item to Cancel and the right one to Save.

Creating the edit view controller
In Xcode create a new UIViewController and name it “EditViewController”. This is how the header file looks like

#import <UIKit/UIKit.h>
@interface EditViewController : UIViewController {

IBOutlet UITextField *txtField;
NSString *keyOfTheFieldToEdit;
NSString *editValue;
id objectToEdit;
}

@property (nonatomic, retain) id objectToEdit;
@property (nonatomic, retain) NSString *keyOfTheFieldToEdit;
@property (nonatomic, retain) NSString *editValue;

- (IBAction) save_Clicked:(id)sender;
- (IBAction) cancel_Clicked:(id)sender;

@end

Let’s finish working with the Interface Builder first, by making all the right connections.

Text Field Properties

File’s Owner Class Identity

Edit View Nib File

Navigation Bar with two buttons

File’s Owner Connections

Coming back to the EditViewController header file, notice that we do not have a reference to the Coffee class any where, the edit view controller does not know anything about what object it is going to edit and we want to keep it this way. Let’s look at the properties defined in the header file and see what they are meant to to. txtField is a reference to the text field placed on the view, keyOfTheFieldToEdit is the key of the field we are going to edit or the property name as string, editValue is going to be the value we are about to edit (this is the value which will be displayed on the text field) and objectToEdit declared as type id which is going to be the Coffee object itself. save_Clicked and cancel_Clicked handle the events when save or cancel are clicked.

Selecting a row to edit
Let’s go back to the Detail view controller and look at what goes on in didSelectRowAtIndexPath method. This is how the code looks like

- (void)tableView:(UITableView *)tblView didSelectRowAtIndexPath:(NSIndexPath *)indexPath {

//Keep track of the row selected.
selectedIndexPath = indexPath;

if(evController == nil)
evController = [[EditViewController alloc] initWithNibName:@"EditView" bundle:nil];

//Find out which field is being edited.
switch(indexPath.section)
{
case 0:
evController.keyOfTheFieldToEdit = @"coffeeName";
evController.editValue = coffeeObj.coffeeName;
break;
case 1:
evController.keyOfTheFieldToEdit = @"price";
evController.editValue = [coffeeObj.price stringValue];
break;
}

//Object being edited.
evController.objectToEdit = coffeeObj;

//Push the edit view controller on top of the stack.
[self.navigationController pushViewController:evController animated:YES];

}

selectedIndexPath is a new variable declared in the Coffee header file, which is of type NSIndexPath. The variable is used to keep track of which row was selected, so we can deselect it when the detail view is shown. evController is declared in the header file and is of type EditViewController. This is how the code looks like in the DetailViewController header file

@class Coffee, EditViewController;

@interface DetailViewController : UIViewController <UITableViewDataSource, UITableViewDelegate> {

IBOutlet UITableView *tableView;
Coffee *coffeeObj;
NSIndexPath *selectedIndexPath;
EditViewController *evController;
}

@property (nonatomic, retain) Coffee *coffeeObj;

@end

Coming back to didSelectRowAtIndexPath, first thing we do is keep track of the row selected then initialize the controller if it is nil. We then find out which row to edit and assign “keyOfTheFieldToEdit”, “editValue” and objectToEdit properties. keyOfTheFieldToEdit takes the name of the property, edit value takes the value to edit and objectToEdit takes the coffee object. Since objectToEdit is declared as id and not Coffee, this view can be used to edit any object. We will see how to edit the coffee object soon. At last, the edit view controller is pushed to the top of the stack.

Display data in edit view
To make the edit view look pretty, let’s give it a background color. In viewDidLoad method, set the view’s background color to groupTableViewBackgroundColor, and this is how the code looks like

- (void)viewDidLoad {
[super viewDidLoad];

self.view.backgroundColor = [UIColor groupTableViewBackgroundColor];
}

Back to EditViewController, in viewWillAppear method, we are going to set the text of the text field and also the title of the view. The title of the view is going to be the property we are about to edit, which we get it from keyOfTheFieldToEdit variable, this also becomes the placeholder text for the text field. Since, we are only going to edit one field in this view, it makes sense to have the keyboard show up when the view is loaded. This way the user does not have to tap the text field. We do this by passing the message becomeFirstResponder to text field. This is how the code looks like

- (void)viewWillAppear:(BOOL)animated {

[super viewWillAppear:YES];

self.title = [self.keyOfTheFieldToEdit capitalizedString];
txtField.placeholder = [self.keyOfTheFieldToEdit capitalizedString];

txtField.text = self.editValue;

[txtField becomeFirstResponder];
}

The code is pretty self explanatory, we get the property name as capitalized string by passing the message capitalizedString and show the text field by passing becomeFirstResponder to the text field.

Now we have to handle save_Clicked and cancel_Clicked methods. This is how the code looks like for the cancel method

- (IBAction) cancel_Clicked:(id)sender {

[self.navigationController popViewControllerAnimated:YES];
}

We simply pop the present view controller from the stack to show the detail view controller, by passing popViewControllerAnimated message.

This is how the save_Clicked method looks like

- (IBAction) save_Clicked:(id)sender {

//Update the value.
//Invokes the set<key> method defined in the Coffee Class.
[objectToEdit setValue:txtField.text forKey:self.keyOfTheFieldToEdit];

//Pop back to the detail view.
[self.navigationController popViewControllerAnimated:YES];
}

Two lines, without any comments. This is what I love about iPhone programming, we can update any object by just passing a message to the object and asking it to change some properties. setValue does all the tricks, which will set the property of the receiver specified by a given key to a given value (text borrowed from documentation).

However, I found out that I was not able to set the value of boolean property isDirty to YES using setValue:forKey and that is why I had to write my own version of setCoffeeName and setPrice. According to the design of this app, we will only save data which has been changed in memory, to the database when the application is terminated or the app receives a memory warning. This way we reduce the round trip from the app to the database, making it a little faster.

This is how the setCoffeeName and setPrice methods look like

- (void) setCoffeeName:(NSString *)newValue {

self.isDirty = YES;
[coffeeName release];
coffeeName = [newValue copy];
}

- (void) setPrice:(NSDecimalNumber *)newNumber {

self.isDirty = YES;
[price release];
price = [newNumber copy];
}

Since the property is declared with copy attribute, we get the copy of the newValue and assign it to the local variable. The isDirty property is also set to YES.

When the user clicks on save, the detail view is shown but the row which was selected is still highlighted. To deselect the row, pass deselectRowAtIndexPath message to the table view, the message is passed in viewWillDisappear method and this how the code looks like. You can call this method in viewWillAppear method too

- (void)viewWillDisappear:(BOOL)animated {

[tableView deselectRowAtIndexPath:selectedIndexPath animated:YES];
}

We still have to update the data in the SQLite database and write code for it. Data is only updated when the app is about to be terminated or when a memory warning is received. applicationWillTerminate method is called when the app is shutting down, which is declared in SQLAppDelegate.m file. This is how the code will change

- (void)applicationWillTerminate:(UIApplication *)application {
// Save data if appropriate

//Save all the dirty coffee objects and free memory.
[self.coffeeArray makeObjectsPerformSelector:@selector(saveAllData)];

[Coffee finalizeStatements];
}

The method makeObjectsPerformSelector sends saveAllData message to each object in the array. So we are going to declare a method in the Coffee class header file called “saveAllData” and write the implementation in the implementation file (Coffee.m file)

//Complete code listing not shown
- (void) hydrateDetailViewData;
- (void) saveAllData;
...

Code in Coffee.m file looks like this

- (void) saveAllData {

if(isDirty) {

if(updateStmt == nil) {
const char *sql = "update Coffee Set CoffeeName = ?, Price = ? Where CoffeeID = ?";
if(sqlite3_prepare_v2(database, sql, -1, &updateStmt, NULL) != SQLITE_OK)
NSAssert1(0, @"Error while creating update statement. '%s'", sqlite3_errmsg(database));
}

sqlite3_bind_text(updateStmt, 1, [coffeeName UTF8String], -1, SQLITE_TRANSIENT);
sqlite3_bind_double(updateStmt, 2, [price doubleValue]);
sqlite3_bind_int(updateStmt, 3, coffeeID);

if(SQLITE_DONE != sqlite3_step(updateStmt))
NSAssert1(0, @"Error while updating. '%s'", sqlite3_errmsg(database));

sqlite3_reset(updateStmt);

isDirty = NO;
}

//Reclaim all memory here.
[coffeeName release];
coffeeName = nil;
[price release];
price = nil;

isDetailViewHydrated = NO;
}

We only save the data of the objects which has been changed in memory. updatestmt is declared as static and is of type sqlite3_stmt.

//Complete code listing now shown.
static sqlite3_stmt *detailStmt = nil;
static sqlite3_stmt *updateStmt = nil;

@implementation Coffee
...

We prepare the update statement if it is nil, then assign the variables to the update statement where the index starts from 1 and not 0. The method sqlite3_step is called and if it returns SQLITE_DONE then we know that the update was a success. Finally we reset the updatestmt so it can be reused later. The update statement like any other statement is finalized in finalizeStatements method which looks like this, which is implemented in Coffee.m file.

+ (void) finalizeStatements {

if (database) sqlite3_close(database);
if (deleteStmt) sqlite3_finalize(deleteStmt);
if (addStmt) sqlite3_finalize(addStmt);
if (detailStmt) sqlite3_finalize(detailStmt);
if (updateStmt) sqlite3_finalize(updateStmt);
}

When the application receives a memory warning, “applicationDidReceiveMemoryWarning” is called which is implemented in SQLAppDelegate.m file and this is how the source code looks like

- (void)applicationDidReceiveMemoryWarning:(UIApplication *)application {

//Save all the dirty coffee objects and free memory.
[self.coffeeArray makeObjectsPerformSelector:@selector(saveAllData)];
}

Here the message finalizeStatements is not passed to the Coffee class because the application is not shutting down.

Conclusion
This tutorial shows how to save data in a edit view by passing the setValue message, shows how to save dirty data to the database when the application is terminated or when it receives a memory warning. This also concludes the SQLite tutorial series.

Happy Programming,
iPhone SDK Articles


Attachments

Suggested Readings

Multi Touch Tutorial Part 2

In this tutorial we will learn how to show a UIActionSheet by implementing touchesBegan method.

In the second part of the touch tutorial series, I will show you how can you use the touchesBegan event. It is recommended that you read the first tutorial in this series. You can download the source code for the first tutorial here.

This is the method which we will implement in ImgViewController.m file.

– (void)touchesBegan:(NSSet *)touches withEvent:(UIEvent *)event {
}

In this method we will display an alert if the user has touched the image for 2 seconds. This how the source code will look like

– (void)touchesBegan:(NSSet *)touches withEvent:(UIEvent *)event {

NSSet *allTouches = [event allTouches];

switch ([allTouches count]) {
case 1: { //Single touch

//Get the first touch.
UITouch *touch = [[allTouches allObjects] objectAtIndex:0];

switch ([touch tapCount])
{
case 1: //Single Tap.
{
//Start a timer for 2 seconds.
timer = [NSTimer scheduledTimerWithTimeInterval:2 target:self
selector:@selector(showAlertView:) userInfo:nil repeats:NO];

[timer retain];
} break;
case 2: //Double tap.
break;
}
} break;
case 2: { //Double Touch

} break;
default:
break;
}

}

We get all the touches and for now we will only look at the code for single touch. Get the touch object at index 0 (since it is a single touch, there will be an object at this index) and find out the tap count. If the tap count is one then create a new timer for 2 seconds and give a method which will be called, when the timer is elapsed. The timer variable is declared in the header file of ImgViewController.h file. “showAlertView” is the method which is called when the user presses the screen for 2 seconds.

To display an alert view, we need to implement the UIAlertViewDelegate. This is how the header file will be changed

#import <UIKit/UIKit.h>

@interface ImgViewController : UIViewController {

IBOutlet UIImageView *imgView;
NSTimer *timer;

}

@end

this is how “showAlertView” method will look like

-(void) showAlertView:(NSTimer *)theTimer {

UIAlertView *alert = [[UIAlertView alloc] initWithTitle:@”Birth of a star” message:@”Timer ended. Event Fired.”
delegate:self cancelButtonTitle:@”OK” otherButtonTitles: nil];
[alert show];
[alert release];

}

We do need to cancel the timer if any other method like touchesMoved, touchesEnded or touchesCanceled is called. We do this by first checking if the timer is active or not, if it is active then we call the “invalidate” method. This is to be done at the beginning of all the three methods mentioned.

Run this application in the simulator and see it working. The same technique can be used to display an alert sheet or any custom action that you want to perform.

You can download the source code from here and please leave me your comments.

Happy Programming,
iPhone SDK Articles

Multi Touch Tutorial 3

In this tutorial I will show how to implement the pinch feature (zoom in/out).

In this tutorial, I will show you how to use the touchesMoved event to zoom in and out the image on the UIImageView. Now, I have not exactly figured out a way to actually zoom in and out the actual image but here is the code on when to zoom in and zoom out. If anyone has figured out a way to zoom in/out the actual image, please share it everyone.

Before we can implement the touchesMoved event, we are going to declare some variables and methods in ImgViewController.h file. This is how the header file is going to look like

#import <UIKit/UIKit.h>

@interface ImgViewController : UIViewController {

IBOutlet UIImageView *imgView;
NSTimer *timer;
CGFloat initialDistance;

}

– (CGFloat)distanceBetweenTwoPoints:(CGPoint)fromPoint toPoint:(CGPoint)toPoint;
– (void) clearTouches;

@end

disanceBetweenTwoPoints is used to calculate as the method name implies, distance between two points. initialDistance is used to keep track of the distance when touchesBegan method is fired. To zoom in and zoom out, we first need to calculate the distance between the two fingers and store it in initialDistance variable. This is how the touchesBegan method will look like.

– (void)touchesBegan:(NSSet *)touches withEvent:(UIEvent *)event {

NSSet *allTouches = [event allTouches];

switch ([allTouches count]) {
case 1: { //Single touch

//Get the first touch.
UITouch *touch = [[allTouches allObjects] objectAtIndex:0];

switch ([touch tapCount])
{
case 1: //Single Tap.
{
//Start a timer for 2 seconds.
timer = [NSTimer scheduledTimerWithTimeInterval:2 target:self
selector:@selector(showAlertView:) userInfo:nil repeats:NO];

[timer retain];
} break;
case 2: {//Double tap.

//Track the initial distance between two fingers.
UITouch *touch1 = [[allTouches allObjects] objectAtIndex:0];
UITouch *touch2 = [[allTouches allObjects] objectAtIndex:1];

initialDistance = [self distanceBetweenTwoPoints:[touch1 locationInView:[self view]]
toPoint:[touch2 locationInView:[self view]]];
} break;
}
} break;
case 2: { //Double Touch

} break;
default:
break;
}

}

We get the first touch objects at index 0 and 1 and then we calculate the initial distance between the two points. This is how the distanceBetweenTwoPoints method looks like

– (CGFloat)distanceBetweenTwoPoints:(CGPoint)fromPoint toPoint:(CGPoint)toPoint {

float x = toPoint.x – fromPoint.x;
float y = toPoint.y – fromPoint.y;

return sqrt(x * x + y * y);
}

In touchesMoved event, we find out if there are at least two touches on the screen. We then get the touch object at index 0 and 1, calculate the distance between the finalDistance and the initialDistance. If the initialDistance is greater then the finalDistance then we know that the image is being zoomed out else the image is being zoomed in. This is how the source code looks like

– (void)touchesMoved:(NSSet *)touches withEvent:(UIEvent *)event {

if([timer isValid])
[timer invalidate];

NSSet *allTouches = [event allTouches];

switch ([allTouches count])
{
case 1: {

} break;
case 2: {
//The image is being zoomed in or out.

UITouch *touch1 = [[allTouches allObjects] objectAtIndex:0];
UITouch *touch2 = [[allTouches allObjects] objectAtIndex:1];

//Calculate the distance between the two fingers.
CGFloat finalDistance = [self distanceBetweenTwoPoints:[touch1 locationInView:[self view]]
toPoint:[touch2 locationInView:[self view]]];

//Check if zoom in or zoom out.
if(initialDistance > finalDistance) {
NSLog(@”Zoom Out”);
}
else {
NSLog(@”Zoom In”);
}

} break;
}

}

NSLog tells us if what we are doing is correct or not. If someone knows how to zoom in/out an actual image, please let me know.

Since we keep track of the initialDistance, we need to clear that value when touches is canceled or when touches are ended. We do this in clearTouches method, which is called from touchesEnded event and touchesCanceled event. This is how the method looks like

– (void)clearTouches {

initialDistance = -1;
}

I hope you found this tutorial a little helpful without the actual zoom in/out functionality. You can download the source code here and please leave me your comments.

Happy Programming,
iPhone SDK Articles

Multi Touch Tutorial – Part 4

In this tutorial I will show you how to implement the swipe feature (pan an image left or right).

Welcome to the fourth part of the tutorial where we will see how to pan an image (move left or right). This tutorial borrows its source code from its predecessors.

What we want to do is move the image left or right when the user swipes his fingers in either direction. We do this in touchesMoved method. This is how the source code will look like

– (void)touchesMoved:(NSSet *)touches withEvent:(UIEvent *)event {

if([timer isValid])
[timer invalidate];

NSSet *allTouches = [event allTouches];

switch ([allTouches count])
{
case 1: {
//The image is being panned (moved left or right)
UITouch *touch = [[allTouches allObjects] objectAtIndex:0];
CGPoint centerPoint = [touch locationInView:[self view]];

[imgView setCenter:centerPoint];

} break;
case 2: {
//The image is being zoomed in or out.

UITouch *touch1 = [[allTouches allObjects] objectAtIndex:0];
UITouch *touch2 = [[allTouches allObjects] objectAtIndex:1];

//Calculate the distance between the two fingers.
CGFloat finalDistance = [self distanceBetweenTwoPoints:[touch1 locationInView:[self view]]
toPoint:[touch2 locationInView:[self view]]];

//Check if zoom in or zoom out.
if(initialDistance > finalDistance) {
NSLog(@”Zoom Out”);
}
else {
NSLog(@”Zoom In”);
}

} break;
}

}

Since only one touch is required to move the image left or right, the following code is executed when the total number of touches is one. We get the first touch and then get the position of the touch. We move the image by setting the position of the touch as the center of the UIImageView.

I hope this tutorial helped you learning better how to use the touch features of the iPhone SDK. The same basic primniple can be used in any kind of application.

The source code can be downloaded from here and please leave me your comments.

Happy Programing
iPhone SDK Articles

SQLite Tutorial – Selecting Data

Like any other applications you may have the need to store data in some kind of a database. With iPhone applications we can use SQLite for FREE. In the first part of this tutorial, I will show you how to do some basic operations using SQLite database.


Introduction

Like any other applications you may have the need to store data in some kind of a database. For iPhone applications, we can use SQLite for free. SQLite is a software library that implements a self-contained, serverless, zero-configuration, transactional SQL database engine. Note: iPhone applications cannot work with remote databases.

In this tutorial, I will discuss how to create a new SQLite database and use it in a iPhone application.

This is how the application will look like
SQLite Manager
To use SQLite in your application, you do not have to install any new software on your mac. You can either use the command line to create a new SQL database or use SQLite Manager for Firefox add-on, which is what I use.

The screenshots below shows you the database schema used, which is very simple.

iPhone App
Create a new project by selecting Navigation-based application. The name of the project used for this tutorial is “SQL”. We first need to add a library which understands how to communicate with the SQLite database. In Xcode select “Frameworks” folder and click on the Action dropdown and select Add -> Existing Frameworks and browse to /Developer/Platforms/iPhoneOS.platform/Developer/SDKs/iPhoneOS2.1.sdk/usr/lib and select libsqlite3.0.dylib file and it will be added in the “Frameworks” folder.

Now add the SQLite database file to the “Resources” folder in Xcode.

Next we need to create a data structure to hold the data from the database. Create a new class and name it “Coffee”. This is how the class looks like.

#import <UIKit/UIKit.h>
#import <sqlite3.h>

@interface Coffee : NSObject {

NSInteger coffeeID;
NSString *coffeeName;
NSDecimalNumber *price;

//Intrnal variables to keep track of the state of the object.
BOOL isDirty;
BOOL isDetailViewHydrated;
}

@property (nonatomic, readonly) NSInteger coffeeID;
@property (nonatomic, copy) NSString *coffeeName;
@property (nonatomic, copy) NSDecimalNumber *price;

@property (nonatomic, readwrite) BOOL isDirty;
@property (nonatomic, readwrite) BOOL isDetailViewHydrated;

@end

Note that in the “Coffee” class the price variable is declared as “NSDecimalNumber” because in the database its corresponding column is of type “REAL”. Note: Although SQLite does not enforce data type constraints, it is good practice to enforce data type constraints at the application level. The two boolean variables keep track of the state of the object. The boolean “isDirty” tells us if the object was changed in memory or not and “isDetailViewHydrated” tell us, if the data which shows up on the detail view is fetched from the database or not.

NOTE: It is good practice to fetch only the data required to show on the screen, which makes the application load faster. So in our case, we will only get the primary key and the name of the coffee from the database as the price is only shown in the detail view.

Synthesize the properties and release price and coffeeName in the dealloc method. This is how the implementation file of class “Coffee” looks like

#import "Coffee.h"

@implementation Coffee

@synthesize coffeeID, coffeeName, price, isDirty, isDetailViewHydrated;

- (void) dealloc {

[price release];
[coffeeName release];
[super dealloc];
}

@end

Copying the database
The first thing we need to do when the application loads is to check whether the user’s phone has the database or not, if not then we copy it to the user’s phone. We will create two methods which will help us in copying the database to the user’s phone. This is how SQLAppDelegate header file will look like

#import <UIKit/UIKit.h>

@class Coffee;

@interface SQLAppDelegate : NSObject <UIApplicationDelegate> {

UIWindow *window;
UINavigationController *navigationController;

//To hold a list of Coffee objects
NSMutableArray *coffeeArray;
}

@property (nonatomic, retain) IBOutlet UIWindow *window;
@property (nonatomic, retain) IBOutlet UINavigationController *navigationController;

@property (nonatomic, retain) NSMutableArray *coffeeArray;

- (void) copyDatabaseIfNeeded;
- (NSString *) getDBPath;

@end

coffeeArray is the array used to hold all the “Coffee” objects. It is declared in the application delegate file and not anywhere else is because the object lives in memory as long as the application is running and it also gets a notification when the application is being terminated. The method copyDatabaseIfNeeded is used to copy the database on the user’s phone when the application is finished launching. Another method used with “copyDatabaseIfNeeded” is “getDBPath” which gets the database location on the user’s phone.

This is how “copyDatabaseIfNeeded” method looks like

- (void) copyDatabaseIfNeeded {

//Using NSFileManager we can perform many file system operations.
NSFileManager *fileManager = [NSFileManager defaultManager];
NSError *error;
NSString *dbPath = [self getDBPath];
BOOL success = [fileManager fileExistsAtPath:dbPath];

if(!success) {

NSString *defaultDBPath = [[[NSBundle mainBundle] resourcePath] stringByAppendingPathComponent:@"SQL.sqlite"];
success = [fileManager copyItemAtPath:defaultDBPath toPath:dbPath error:&error];

if (!success)
NSAssert1(0, @"Failed to create writable database file with message '%@'.", [error localizedDescription]);
}
}

and this is how the getDBPath method looks like

- (NSString *) getDBPath {

//Search for standard documents using NSSearchPathForDirectoriesInDomains
//First Param = Searching the documents directory
//Second Param = Searching the Users directory and not the System
//Expand any tildes and identify home directories.
NSArray *paths = NSSearchPathForDirectoriesInDomains(NSDocumentDirectory , NSUserDomainMask, YES);
NSString *documentsDir = [paths objectAtIndex:0];
return [documentsDir stringByAppendingPathComponent:@"SQL.sqlite"];
}

In “copyDatabaseIfNeeded” method we get the NSFileManager object with which we can perform some basic file management tasks. The method “getDBPath” gives us the database location on the user’s phone. Method “NSSearchPathForDirectoriesInDomains” is used to find documents in the user’s documents directory expanding the tildes so we get the whole path. Using the “fileManager” object we check if the database exists or not, if it doesn’t exists then we copy it to the user’s phone from the application bundle. Method “copyDatabaseIfNeeded” is called from “applicationDidFinishLaunching”. Once the database is copied to the user’s phone, we need to display a list of coffee’s from the database on the UITableView.

Getting data from the database
The approach that I have taken here to get the data from the database is a little clean, as I have all my database operations in the Coffee Class. I have declared a class method in the “Coffee” class which is responsible to get the data from the database and fill the coffeeArray which is declared in the application delegate object (SQLAppDelegate).

This is how the header file of the “Coffee” class will look like after the method decelerations are added.

#import <UIKit/UIKit.h>
#import <sqlite3.h>

@interface Coffee : NSObject {

NSInteger coffeeID;
NSString *coffeeName;
NSDecimalNumber *price;

//Intrnal variables to keep track of the state of the object.
BOOL isDirty;
BOOL isDetailViewHydrated;
}

@property (nonatomic, readonly) NSInteger coffeeID;
@property (nonatomic, copy) NSString *coffeeName;
@property (nonatomic, copy) NSDecimalNumber *price;

@property (nonatomic, readwrite) BOOL isDetailViewHydrated;

//Static methods.
+ (void) getInitialDataToDisplay:(NSString *)dbPath;
+ (void) finalizeStatements;

//Instance methods.
- (id) initWithPrimaryKey:(NSInteger)pk;

@end

The method “getInitialDataToDisplay” gets the data from the database and creates “Coffee” objects using “initWithPrimaryKey” method and fills the objects in the coffeeArray which is declared in SQLAppDelegate.

This is how the “getInitialDataToDisplay” method looks like

+ (void) getInitialDataToDisplay:(NSString *)dbPath {

SQLAppDelegate *appDelegate = (SQLAppDelegate *)[[UIApplication sharedApplication] delegate];

if (sqlite3_open([dbPath UTF8String], &database) == SQLITE_OK) {

const char *sql = "select coffeeID, coffeeName from coffee";
sqlite3_stmt *selectstmt;
if(sqlite3_prepare_v2(database, sql, -1, &selectstmt, NULL) == SQLITE_OK) {

while(sqlite3_step(selectstmt) == SQLITE_ROW) {

NSInteger primaryKey = sqlite3_column_int(selectstmt, 0);
Coffee *coffeeObj = [[Coffee alloc] initWithPrimaryKey:primaryKey];
coffeeObj.coffeeName = [NSString stringWithUTF8String:(char *)sqlite3_column_text(selectstmt, 1)];

coffeeObj.isDirty = NO;

[appDelegate.coffeeArray addObject:coffeeObj];
[coffeeObj release];
}
}
}
else
sqlite3_close(database); //Even though the open call failed, close the database connection to release all the memory.
}

initWithPrimaryKey method is very simple and it looks like this

- (id) initWithPrimaryKey:(NSInteger) pk {

[super init];
coffeeID = pk;

isDetailViewHydrated = NO;

return self;
}

In “getInitialDataToDisplay” method we first get a reference to the application delegate because that is where the coffeeArray is declared. We open the database using sqlite3_open method which takes the database path and a database object. The database object is declared as static in the “Coffee.m” file.

#import "Coffee.h"

static sqlite3 *database = nil;

@implementation Coffee
...

After we open the connection to the database we create a select statement and if that returns “SQLITE_OK” we execute the select statement using sqlite3_step method, which will return “SQLITE_ROW” if the operation is a success and it has one or more rows to return. To get a full list of return codes click here. We then get the coffeeID, coffeename and create “Coffee” objects using “initWithPrimaryKey” method. When reading data from the database, the column index starts from zero instead of one. The coffee object is added to the array and we do this for n number of rows. If the connection to the database fails, only then we close the connection and release any resources associated with the connection object. The static database connection is left open to be used by the “Coffee” class.

We close the database connection in the “finalizeStatements” method which is called from “applicationWillTerminate” which is in SQLAppDelegate.m file.

+ (void) finalizeStatements {

if(database) sqlite3_close(database);
}

Now all we have to do is call the right methods from “applicationDidFinishLaunching” method in SQLAppDelegate.m file. This is how the code looks like

- (void)applicationDidFinishLaunching:(UIApplication *)application {

//Copy database to the user's phone if needed.
[self copyDatabaseIfNeeded];

//Initialize the coffee array.
NSMutableArray *tempArray = [[NSMutableArray alloc] init];
self.coffeeArray = tempArray;
[tempArray release];

//Once the db is copied, get the initial data to display on the screen.
[Coffee getInitialDataToDisplay:[self getDBPath]];

// Configure and show the window
[window addSubview:[navigationController view]];
[window makeKeyAndVisible];
}

To recap, we first copy the database to the user’s phone if it does not exists, then we initialize the coffee array and get the initial data to display on the UITableView.

Display data in the UITableView
Since the Coffee Array is in the application delegate file (SQLAppDelegate), for simplicity I’ am going to add the “SQLAppDelegate.h” header file in “SQL_Prefix.pch” file so that the file is added to all the files in the project. This is how the file should look like

#ifdef __OBJC__
#import <Foundation/Foundation.h>
#import <UIKit/UIKit.h>
#import "SQLAppDelegate.h"
#endif

Open “RootViewController.h” file and create a variable of type SQLAppDelegate like this

#import <UIKit/UIKit.h>

@class Coffee;

@interface RootViewController : UITableViewController {

SQLAppDelegate *appDelegate;
}

@end

We are able to do the above because “SQLAppDelegate.h” file is added as a header file to all the files in the project.

Open “RootViewController.m” and import “Coffee.h” file, change the “viewDidLoad” method like this

- (void)viewDidLoad {
[super viewDidLoad];

self.navigationItem.rightBarButtonItem = self.editButtonItem;

appDelegate = (SQLAppDelegate *)[[UIApplication sharedApplication] delegate];

self.title = @"Coffee List";
}

We get a reference to the application delegate in the second line and everything is self explanatory. Using the appDelegate we can access the array.

Now all we have to do is tell the table view how many rows to expect and set the text property of the UITableViewCell which is returned in “cellForRowAtIndexPath” method.

Method “numberOfRowsInSection” returns the number of rows UITableView should expect in a section. By default “numberOfSectionsInTableView” returns 1, so the UITableView looks like a regular table.

Below is a code snippet of “numberOfRowsInSection”

- (NSInteger)tableView:(UITableView *)tableView numberOfRowsInSection:(NSInteger)section {
return [appDelegate.coffeeArray count];
}

and cellForRowAtIndexPath

- (UITableViewCell *)tableView:(UITableView *)tableView cellForRowAtIndexPath:(NSIndexPath *)indexPath {

static NSString *CellIdentifier = @"Cell";

UITableViewCell *cell = [tableView dequeueReusableCellWithIdentifier:CellIdentifier];
if (cell == nil) {
cell = [[[UITableViewCell alloc] initWithFrame:CGRectZero reuseIdentifier:CellIdentifier] autorelease];
}

//Get the object from the array.
Coffee *coffeeObj = [appDelegate.coffeeArray objectAtIndex:indexPath.row];

//Set the coffename.
cell.text = coffeeObj.coffeeName;

// Set up the cell
return cell;
}

cellForRowAtIndexPat is called n number of times, where n is the total number of objects in the coffeeArray which is returned in “numberOfRowsInSection” method. We get the Coffee object from the array using “objectAtIndex” method and set the coffeeName as the text of the UITableViewCell.

Conclusion
This concludes part one of the SQLite Tuturial, where we learn how easy it is to manage databases using SQLite Manager and using it in your iPhone applications. Overall SQLite is FREE for all to use. You also learn how to copy database to the user’s phone and perform select operations on the database.

The next tutorial will show you how to delete data.

Happy Programming,
iPhone SDK Articles


Attachments

Suggested Readings