This is part one of two tutorials detailing how to use Fixel to build Frogger for the web and AIR on Android.
Introduction
Welcome to my two part series on how to build Frogger for the Web and AIR on Android. As soon as I started playing with Flash on Android I begin building games, it seemed like the most logical choice. Normally building a game is a monumental task but we are going to use the excellent game framework Flixel to get up and running quickly.
Flixel is perfect for retro 8-bit looking games since it uses bitmaps called Sprites (not to be confused with the Sprite class) for all of the in game graphics. On the desktop/web blitting (drawing bitmaps to the display) is incredibly fast and one of the best techniques to use when looking to maximize performance. On Flash mobile it is slower then you may expect. To combat this, I will cover some optimization techniques to help get great performance across any platform you target. Let’s get started!
FDT
For this tutorial I am going to use FDT which is an excellent AS3 editor based on Eclipse and is similar to Flash Builder. Currently you can get a 30 day trial or an extended preview of FDT 4. To make things more appealing, FDT pure is very affordable.
This project will also work in FlashBuilder or any editor that supports running ANT. One of the reasons I chose FDT is because its AS3 editor is light years ahead of Flash Builder or the Flash IDE, making it perfect for AS3 only projects like games. And if you are familiar with Flash Builder making the switch to FDT should come naturally.

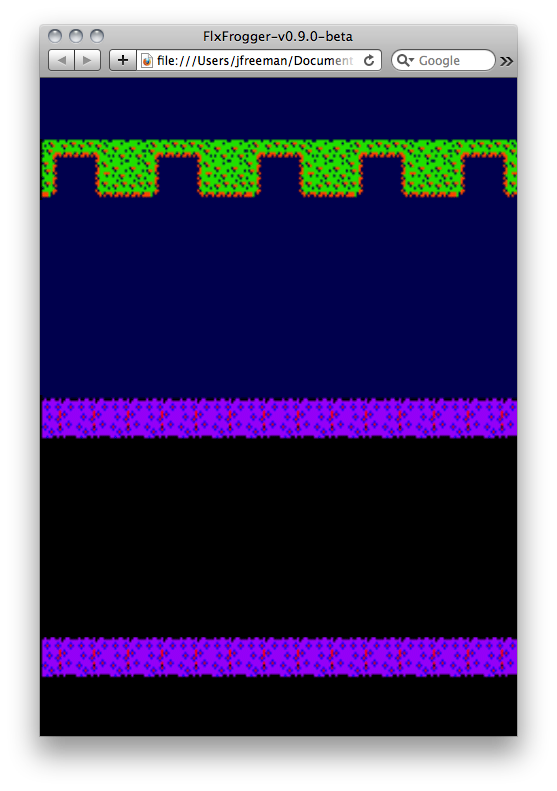
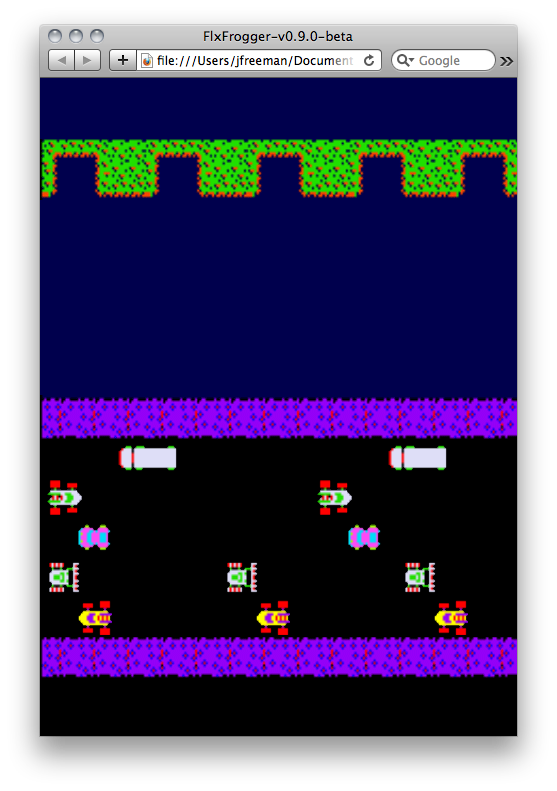
Final Result Preview
Here is a preview of what we will build in this tutorial:
We will cover how to build different States in Flixel and build out a full level for the game. Let’s get started.
Step 1: Download The Project
I have already set up a simple project for us to begin with, you can download it from the source link at the top of the page. Don’t worry if you are unfamiliar with how ANT works, I’m going to show you exactly how to set this project up in FDT to help you get comfortable with working with ANT.
Once you have downloaded the project, fire up FDT and create a new workspace, if you have not already done so. Make sure you take note of where this is on your computer. Go to your finder and locate the Workspace. Drag the project file over to the workspace and in FDT select new Project from the menu.
Lets name it FlxFroggerTutorial.
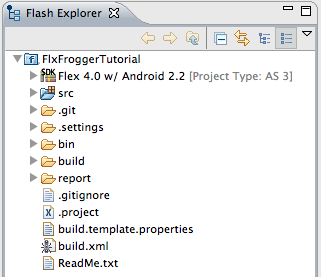
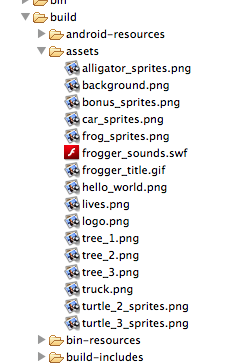
Now you should see the following project and all the required resources.
Step 2: Set Up AntBuild
Ant may seem intimidating at first but I have taken all of the guess work out for you. This project is a modified version of my ANTPile template which you can get on GitHub here. It’s designed to help you get up and running in a matter of mins in any editor that supports ANT.
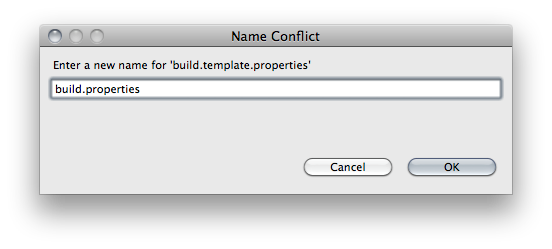
The first thing we need to do is copy the build.template.properties file and rename it to build.properties. This is the main file that contains all the configuration for you build. Let’s open it up and see what we need to set up.
To give you a point of reference I have left my configuration settings in here. The first thing you should look at is FLEX_HOME. Make sure that it is pointed to the Flex SDK on your computer. I have a copy of FlashBuilder on my computer so I point it to that. If you don’t have FlashBuilder you can download the SDK from here and put it anywhere on your computer you want then point to that path. If you are on windows you should make all the paths forward facing.
Next we want to check the correct browser, look for the “browser” variable. As you can see on the Mac I have it set up for Safari
browser = Safari
If you are on windows you will need to point it to a browser executable. Here is an example of how to set it up for FireFox.
browser = C:/Program Files/Mozilla Firefox/firefox.exe
The final thing you may want to do is set up a path for the Android SDK. You can download it from here, as you can see I keep my copy in /Users/jfreeman/Documents/AndroidDev/. I also named mine based on the version of Android I am building for. In this case I am using 2.2. You can skip this step for right now since I will go into more detail in part 2 on how to build AIR for Android using ANT.
So now you have all the paths set up, let’s look at how to run this. Setting up a Ant build is very easy in FDT. Simply right-click on the build.xml. Select “Run as Ant Build… and you will see the following window.
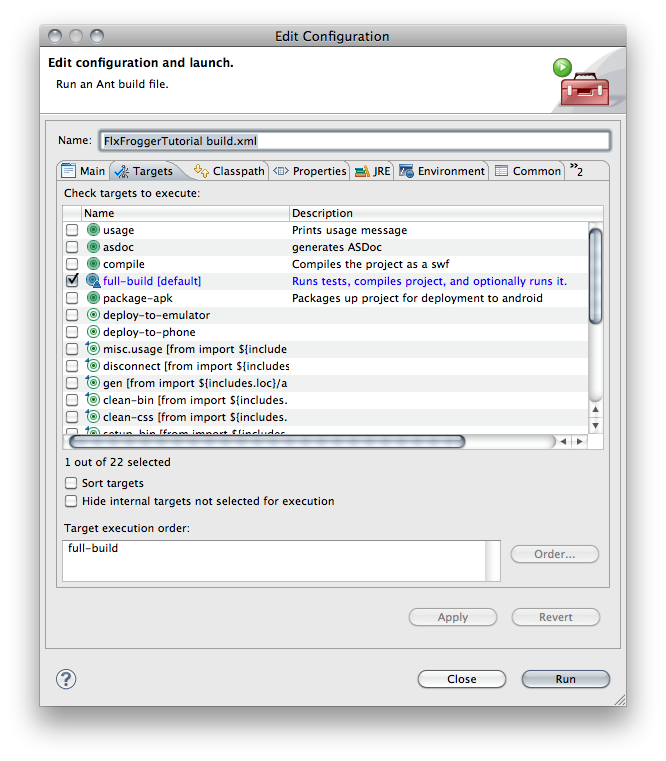
As you see FDT has automatically set everything up for you. All you have to do is select run; you will see Ant begin the build and your browser should pop up with the following swf:
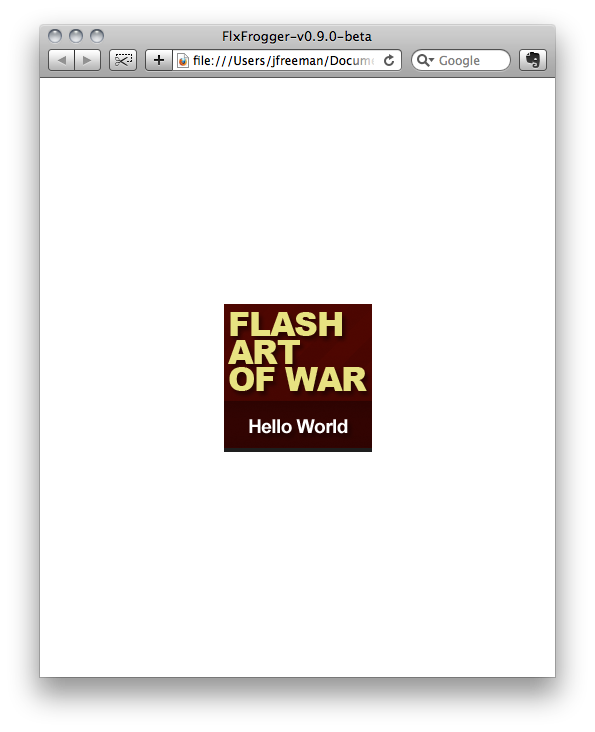
This is the default screen of Ant Pile. Congratulations, this was probably the hardest part of the entire tutorial. If you had any issues building, make sure you set the correct path to FLEX_HOME and your Browser. If you are new to Ant you may be thinking that this is a lot of work, and for some things you are correct. This kind of setup is used on very large projects but knowing how to use ANT can make your life easier. This build does a lot of things the IDE would not normally do for you. It can be set up to auto generate ASDocs, move files around, and as you will see later it will build a swf and apk (Android app) with one click.
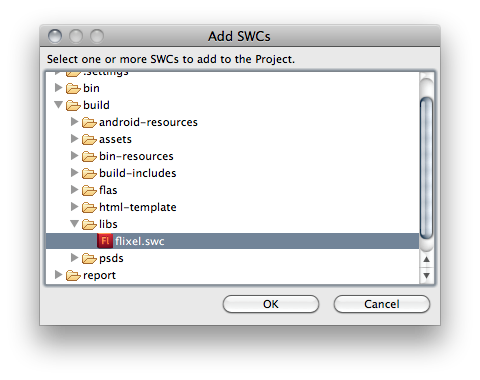
We just have to do one more thing before we can make our first game, we need to tell FDT where the Flixel swc is. To make things easy, I have included a build of Flixel in the build/libs folder which is where you should put all of your swc libraries for your project. The ANT Build automatically looks in this folder for these libs but FDT has no idea. Right-click on your project and select Properties from the contextual menu. Next select FDT Build Path and click on the Library tab. From here you can select Add SWCs… from the right and find the flixel.swc in our libs folder.
Now we can reference Flixel classes and FDT will know where to find them. Also this will help with our code completion.
Step 3: Create Start State
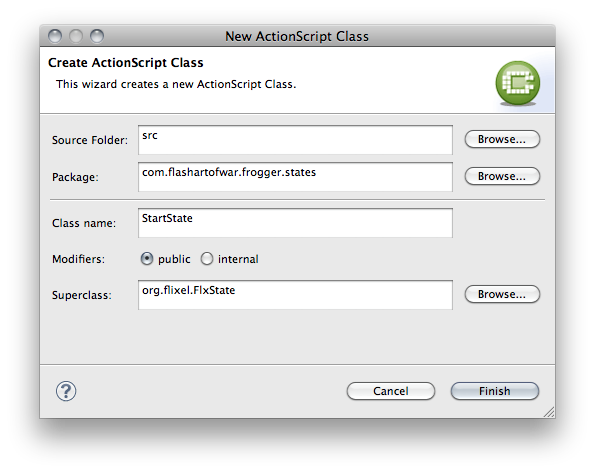
Before we can do anything with Flixel we need to create a State. A State is similar to a screen or scene in your game. You may have a start, end, and credit State and you can also make States for each level of your game. Lets make a Start state so we can setup Flixel. Right-click on the src folder and select New AS Class. You will want to fill in everything like this:
Now we can fill in the basics for our Start Screen. Let’s copy and past the following code in:
package com.flashartofwar.frogger.states
{

	import flash.events.MouseEvent;

    import org.flixel.FlxG;
    import org.flixel.FlxSprite;
    import org.flixel.FlxState;
    import org.flixel.FlxText;

    public class StartState extends FlxState
    {

        /**
         * This is the first game state the player sees. Simply lets them click anywhere to start.
         */
        public function StartState()
        {
            super();
        }

        /**
         * Goes through and creates the graphics needed to display the start message
         */
        override public function create():void
        {
            var sprite:FlxSprite = new FlxSprite();
            sprite.createGraphic(FlxG.width, FlxG.height / 2, 0xff000047);
            add(sprite);

            stage.addEventListener(MouseEvent.CLICK, onClick);

            add(new FlxText(0, 200, FlxG.width, "PUSH").setFormat(null, 18, 0xffffffff, "center"));
            add(new FlxText(0, 300, FlxG.width, "ANYWHERE TO START").setFormat(null, 18, 0xd33bd1, "center"));
        }

        /**
         * Handles when the user clicks and changes to the PlayState.
         * @param event MouseEvent
         */
        private function onClick(event:MouseEvent):void
        {
        }

        /**
         * This removed the click listener.
         */
        override public function destroy():void
        {
            stage.removeEventListener(MouseEvent.CLICK, onClick);
            super.destroy();
        }

    }
}
Right now this isn’t going to make much sense if you have not used Flixel before. I will talk a little more about how this works when we begin building out the Play state a few steps for now. I have commented what is going on so you can get the general Idea.
Once we have our first state, let’s go into our Main Class FlxFrogger and replace everything with this:
package
{
	import com.flashartofwar.frogger.states.StartState;

	import org.flixel.FlxGame;

	[SWF(width="480", height="800", backgroundColor="#000000")]
    [Frame(factoryClass="Preloader")]

    public class FlxFrogger extends FlxGame
    {
        /**
         * This is the main game constructor.
         */
        public function FlxFrogger()
        {
            // Create Flixel Game.
            super(480, 800, StartState, 1);
        }
    }
}
This is all the code we need to start Flixel and begin our game. As you can see we simply extend FlxGame and pass the dimensions and our StartState up to the super. The last value, 1, represents the scale mode. Flixel can “upscale” your game to help achieve a cool retro pixelated look. We are not going to use that in this game since the source images are pixelated enough.
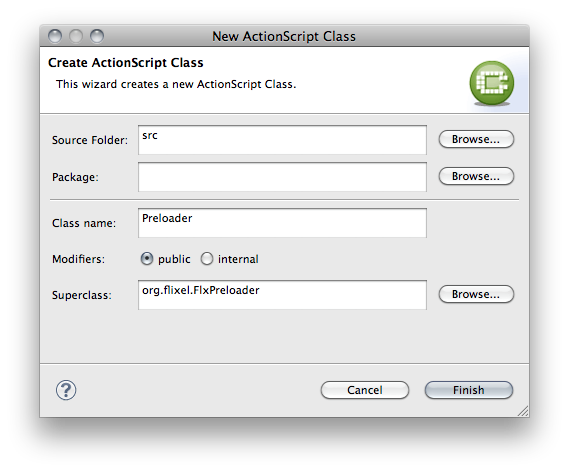
You will also need to make a default Preloader class. Create a new class called Preloader and configure it like this:
Then copy this code into it:
package
{
    import org.flixel.*;

    public class Preloader extends FlxPreloader
    {
        public function Preloader()
        {
            className = "FlxFrogger";
            super();
        }
    }
}
This simply tells Flixel and the compiler what class is the main class to create once preload is completed.
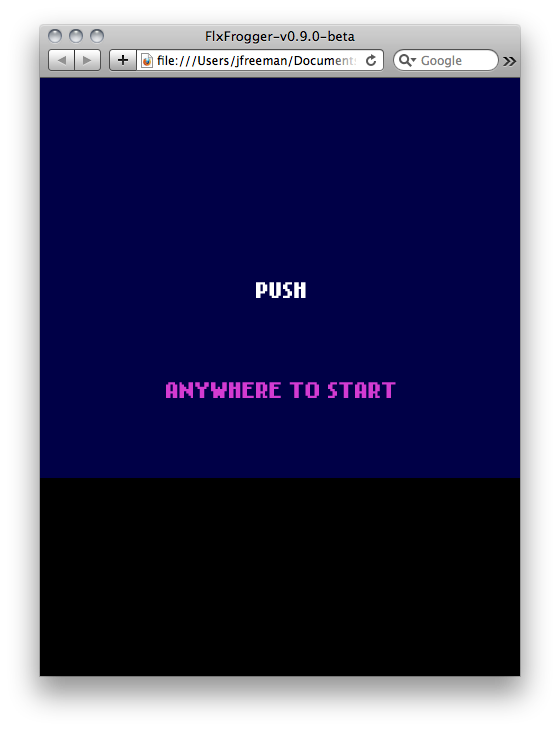
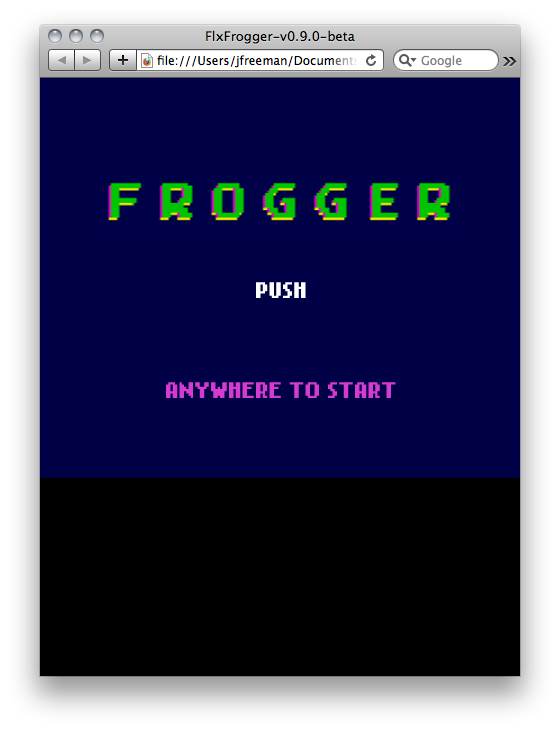
Now let’s run the ANT Build to see our start screen. You are doing great if you see this:
If you click, nothing will happen. We will need to make our Play State. Before we do that, let’s set up all of our game graphics and sounds.
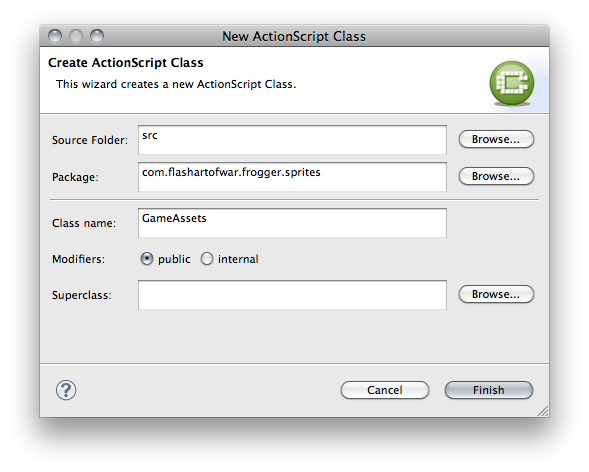
Step 4: Create a GameAssets Class
In the past you may have put all of your assets in a FLA and used the timeline. In this project we are going to do everything through code. Since Flixel handles animations through Sprite sheets we don’t need a timeline or a MovieClip. Let’s create a new class called GameAssets and set it up like this:
If you look in our build/assets folder you will see all of our images are ready for us to import.
Since we don’t have a library when using the Flex SDK we will need to use the Embed Tag. Here is an example of what one of our assets will look like when we embed it. Add this to the GameAssets class.
[Embed(source="../../../../../build/assets/frogger_title.gif")]
public static var TitleSprite:Class;
As you can see we need to provide a path to the graphic and give it a variable name. This is similar to adding a linkage ID in the library of a SWF. The path is always relative to the location of your Class in the project. Since this class is in several packages you will notice the ../ denoting that the compiler should look a level higher from the current location. Let’s add this to our GameAssets class. One last thing to notice is that the variable is static. We will be using this class all over our application to gain access to asset class reference. Once you have this asset added and saved, lets open our StartState and add a title.
After the line with stage.addEventListener in the create() method, add the following lines of code:
var title:FlxSprite = new FlxSprite(0, 100, GameAssets.TitleSprite);
title.x = (FlxG.width * .5) - (title.width * .5);
add(title);
As you can see we are creating a new FlxSprte which is the base image type in Flixel and passing in a reference to the TitleSprite from our GameAssets class. You will also need to import GameAssets at the top:
import com.flashartofwar.frogger.sprites.GameAssets;
FDT can help you manage your imports and should have prompted you to add it for you. You can press Command 1 on a Mac to get the quick fix dialog box to popup. Now let’s run the ANT Build and see our game title:
Great, you have just learned how to import a Bitmap into your app and how to display it in Flixel. Let’s go back into our GameAssets class and fill in the rest of the graphics we will need:
[Embed(source="../../../../../build/assets/background.png")]
public static var LevelSprite:Class;

[Embed(source="../../../../../build/assets/lives.png")]
public static var LivesSprite:Class;

[Embed(source="../../../../../build/assets/alligator_sprites.png")]
public static var AlligatorSprite:Class;

[Embed(source="../../../../../build/assets/car_sprites.png")]
public static var CarSpriteImage:Class;

[Embed(source="../../../../../build/assets/frog_sprites.png")]
public static var FrogSpriteImage:Class;

[Embed(source="../../../../../build/assets/bonus_sprites.png")]
public static var HomeSpriteImage:Class;

[Embed(source="../../../../../build/assets/tree_1.png")]
public static var LogSpriteImage1:Class;

[Embed(source="../../../../../build/assets/tree_2.png")]
public static var LogSpriteImage2:Class;

[Embed(source="../../../../../build/assets/tree_3.png")]
public static var LogSpriteImage3:Class;

[Embed(source="../../../../../build/assets/truck.png")]
public static var TruckSpriteImage:Class;

[Embed(source="../../../../../build/assets/turtle_2_sprites.png")]
public static var TurtlesSpriteImage:Class;

[Embed(source="../../../../../build/assets/turtle_3_sprites.png")]
public static var TurtlesBSpriteImage:Class;
Now that we have all of our game graphic set up we can set up a few sounds.
Step 5: Adding Sounds
Embedding sounds directly into a Class is a no win situation. This is one of the times I actually use the Flash IDE to make my life easier. The other time I use it is for embedding fonts but luckily Flixel has all the fonts we need already part of the framework. To embed a sound file we will need to add it to the library of a FLA and add a linkage ID. I have already created a swf for us in the assets folder called frogger_sounds. If you would like to see how I did this, I included a FLA in the build/flas folder. Let’s add some sounds to our GameAssets class.
[Embed(source="../../../../../build/assets/frogger_sounds.swf", symbol="FroggerExtraSound")]
public static var FroggerExtraSound:Class;

[Embed(source="../../../../../build/assets/frogger_sounds.swf", symbol="FroggerPlunkSound")]
public static var FroggerPlunkSound:Class;

[Embed(source="../../../../../build/assets/frogger_sounds.swf", symbol="FroggerSquashSound")]
public static var FroggerSquashSound:Class;

[Embed(source="../../../../../build/assets/frogger_sounds.swf", symbol="FroggerTimeSound")]
public static var FroggerTimeSound:Class;

[Embed(source="../../../../../build/assets/frogger_sounds.swf", symbol="FroggerHopSound")]
public static var FroggerHopSound:Class;

[Embed(source="../../../../../build/assets/frogger_sounds.swf", symbol="FroggerThemeSound")]
public static var FroggerThemeSound:Class;
So this works similar to how we embed an image but as you can see all of our sounds are coming from our swf. Also we reference the linkage ID as the symbol value. Now that you have these in place, let’s give it a test. Open up our StartState class and look for the onClick() method. Add the following line of code:
// Sound is played after the state switch to keep it from being destroyed
FlxG.play(GameAssets.FroggerThemeSound);
Flixel makes playing sound incredibly easy. You simply ask FlxG, which is a Singleton in the framework, to play and pass it a reference to the sound Class. We can test this by running the ANT build and clicking anywhere on the screen.
Now we are ready to add our PlayState so we can actually do something when the user tries to start the game.
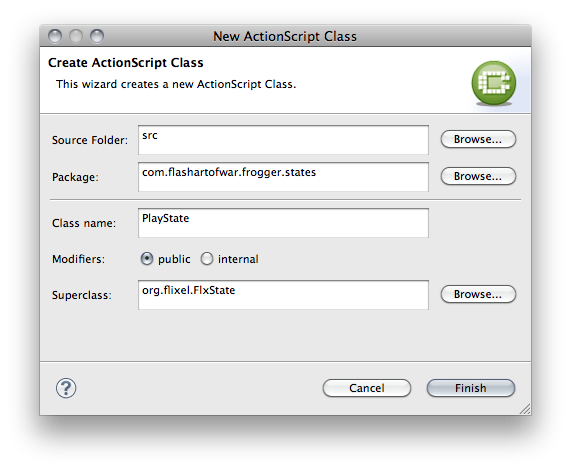
Step 6: Create A Play State
Earlier when we created our StartState I kind of glossed over what was going on under the hood. Let’s take it a little slower this time so you can get a better idea of how States work in Flixel. Create a new class called PlayState and configure it like this:
Next add some stub code:
package com.flashartofwar.frogger.states
{
	import com.flashartofwar.frogger.sprites.GameAssets;

    import org.flixel.FlxSprite;
    import org.flixel.FlxState;

    public class PlayState extends FlxState
    {

        /**
         * This is the main level of Frogger.
         */
        public function PlayState()
        {
            super();
        }

        /**
         * This is the main method responsible for creating all of the game pieces and layout out the level.
         */
        override public function create():void
        {
			// Create the BG sprite
            var bg:FlxSprite = new FlxSprite(0, 0, GameAssets.LevelSprite);
            add(bg);
        }

    }
}
So here we have two methods, our constructor which doesn’t do anything and an overridden create() method. In Flixel the FlxState class, which we are extending, has this default method called “create”. This is where all of our initialization logic goes. Think of it as init. As you can see we are creating the background image for our game level. Another thing you should pay attention to is the add() call when we want to attach sprites to the renderer. This is similar to how addChild() works but in Flixel since all of our display elements are drawn to the screen during each “render cycle” we have nothing to really add to the Display List.
Before we can see this, we are going to need a way to switch to this state. Let’s go int our StartState class and add the following in the onClick handler:
FlxG.state = new PlayState();
This is how we change between states in Flixel. It’s really easy to move from State to State. Once you tell FlxG its new state class the display automatically renders it. There are ways of animating between states but that is out of the scope of this tutorial. Let’s run the demo and when you click to start you should see the following empty level.
It’s looking really empty in there, let’s add some characters.
Step 7: Create The WrappingSprite
In Frogger there are 3 basic “actors”:
- The Player: This is the frog, he can move up, down, left and right. On land he can not walk past the bottom, left and right borders. In the water if he goes off screen he dies.
- Wrapping Objects: These are cars, trucks, logs, and turtles. All moving objects in the game can “wrap”. This means when they go off screen they appear on the opposite side and keep moving in the same direction. Moving objects can go left or right.
- Timer Objects: These are objects that move, or in the case of the home bases don’t move, and are on a timer. When the timer is up they change state. Turtles go under water and home show a bonus or an alligator.
For now let’s focus on wrapping objects. Create a new class called WrappingSprite and configure it like this:
And here is the code for this class:
package com.flashartofwar.frogger.sprites.core
{
    import com.flashartofwar.frogger.enum.GameStates;
    import com.flashartofwar.frogger.states.PlayState;

    import org.flixel.FlxG;
    import org.flixel.FlxSprite;

    public class WrappingSprite extends FlxSprite
    {

        protected var leftBounds:int;
        protected var rightBounds:int;
        protected var state:PlayState;

        public var speed:int;

        /**
         * This is a base class for any sprite that needs to wrap around the screen when it goes out of
         * bounds. This kind of sprite watches for when it is off screen the resets it's X position to
         * the opposite site based on it's direction.
         *
         * @param X start X
         * @param Y start Y
         * @param SimpleGraphic Use for sprites with no animations
         * @param dir Direction, supports Right (1) and Left (0)
         * @param speed how many pixel sprite will move each update.
         */
        public function WrappingSprite(X:Number = 0, Y:Number = 0, SimpleGraphic:Class = null, dir:uint = RIGHT, speed:int = 1)
        {
            super(X, Y, SimpleGraphic);
            this.leftBounds = 0;
            this.rightBounds = FlxG.width;

            this.speed = speed;

            facing = dir;

            state = FlxG.state as PlayState;
        }

        /**
         * This update methods analyzes the direction and x position of the instance to see if it should
         * be repositioned to the opposite side of the screen. If instance is facing right, it will restart
         * on the left of the screen. The opposite will happen for anything facing left.
         */
        override public function update():void
        {

            // Make sure the game state is Playing. If not exit out of update since we should be paused.
            if (state.gameState != GameStates.PLAYING)
            {
                return;
            }
            else
            {
                // Add speed to instance's x based on direction
                x += (facing == LEFT) ? -speed : speed;

                // Check to see if instance is out of bounds. If so, put it on the opposite side of the screen
                if (x > (rightBounds))
                {

                    if (facing == RIGHT)
                    {
                        x = leftBounds - frameWidth;
                    }

                }
                else if (x < (leftBounds - frameWidth))
                {

                    {
                        x = rightBounds + frameWidth;
                    }
                }

            }

            // Call update
            super.update();
        }
    }
}
I am not going to go over all of the logic here but I want to highlight the update() method. All FlxSprites have an update() method. Flixel uses something called a Game Loop. What this means is that everything in the framework is synced up to the same loop to perform all of its commands. This may be rendering instructions, pre-render calculations or simply game logic. In this update method we check the state of the game, more on this in a sec, if we are playing it is safe to move the Object.
Our moving logic checks to see our direction and moves along its X axis. If we reach our bounds, the instance moves to the opposite side of the screen. It may look like a lot but the logic is very simple. It will make more sense when we create our first WrappingSprite. Let’s set up our game state constants first.
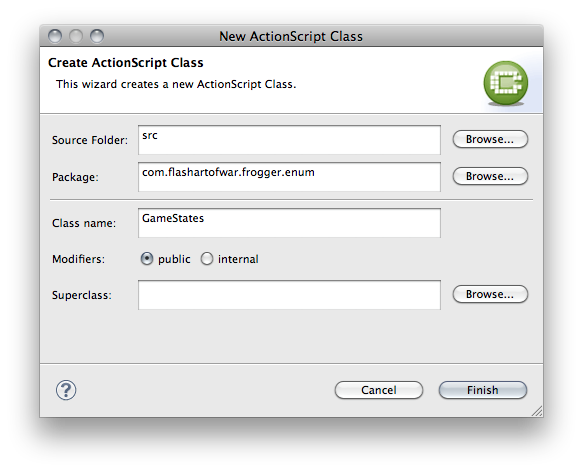
Create a new class called GameStates and configure it like this:
Here are our states:
public static const PLAYING:uint = 0; // Game is playing so animation is allowed
public static const COLLISION:uint = 1; // A collision has occurred, stop all animation
public static const RESTART:uint = 2; // Restart the game animations
public static const GAME_OVER:uint = 3; // Game is over
public static const DEATH_OVER:uint = 4; // A death animation is over
public static const LEVEL_OVER:uint = 5; // A level is over
We will also need to add a place to store the game state in our PlayState. Add the following property and import statement:
public var gameState:uint;
Now our PlayState can keep track of the global state of the entire game. We will use this to allow/disable animations from happening when major events happen in the game. Finally let’s add the correct state to our create() method:
// Activate game by setting the correct state
gameState = GameStates.PLAYING;
So this will set our game in motion once everything has been created. Let’s look at how to add cars to our game.
Step 8: Create Cars
We are finally ready to make something move. There was a lot of build up to get to this point but now we have all the key classes in place for a solid foundation to build on. Create a Car class and configure it like this:

And here is our code:
package com.flashartofwar.frogger.sprites
{
    import com.flashartofwar.frogger.sprites.core.WrappingSprite;

    public class Car extends WrappingSprite
    {
		public static const SPRITE_WIDTH:int = 40;
        public static const SPRITE_HEIGHT:int = 40;

        public static const TYPE_A:int = 0;
        public static const TYPE_B:int = 1;
        public static const TYPE_C:int = 2;
        public static const TYPE_D:int = 3;

        /**
         * Simple sprite to represent a car. There are 4 types of cars, represented by TYPE_A, _B,
         * _C, and _D constant.
         *
         * @param x start X
         * @param y start Y
         * @param type type of car to use. Type_A, _b, _c, and _d are referenced as constants on the class
         * @param direction the direction the sprite will move in
         * @param speed the speed in pixels in which the sprite will move on update
         */
        public function Car(x:Number, y:Number, type:int, direction:int, speed:int)
        {
            super(x, y, null, direction, speed);

            loadGraphic(GameAssets.CarSpriteImage, false, false, SPRITE_WIDTH, SPRITE_HEIGHT);

            frame = type;
        }
    }
}
As you can see, we are simply extending WrappingSprite here and outside of storing a few values, we simply define the graphic to use for the Car’s sprite. As you can see there are 3 types of cars. We also have a constant for the Car’s width and height which you will use to help lay it out when setting up the level. Before we move on let’s talk about how loadGraphic() works.
As I have mentioned a few times before, Flixel uses its own custom class to represent visual elements of your game. You need to load a graphic in order for the FlxSprite to know how to render itself. When it comes to simple Sprites such as this car which has no animation it is relatively easy to set up. We pass in a reference to the graphic’s Class, set animation to false, set reverse to false and supply its width and height. On the following line we set the frame to the car type. This is a little trick you can do with Sprites in order to cut down on having several resources to input. Take a look at the car sprite:
I have added all the different types of cars to the Sprite image and simply tell the Car instance what frame to use based on the constants at the top of the class. This will make more sense when you see it in action.
Step 9: Adding Sprites to the PlayState
Let’s move over to our PlayState and add the following methods:
/**
 * Helper function to find the X position of a column on the game's grid
 * @param value column number
 * @return returns number based on the value * TILE_SIZE
 */
public function calculateColumn(value:int):int
{
    return value * TILE_SIZE;
}

/**
 * Helper function to find the Y position of a row on the game's grid
 * @param value row number
 * @return returns number based on the value * TILE_SIZE
 */
public function calculateRow(value:int):int
{
    return calculateColumn(value);
}
These two helper methods will allow us to quickly and consistently place our game Sprite in the game world. At first glance it may not be obvious but Frogger is actually based on a grid.
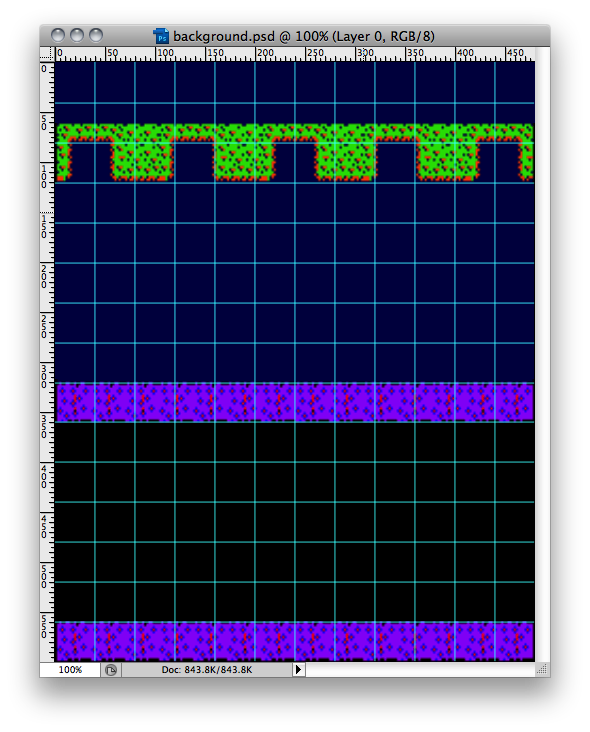
Each tile is 40 x 40 and there are 12 columns by 16 rows. Only 15 rows are in our background because the last row where the frog starts is black and there is no point in adding an extra row to the png to increase the file size.
You also want to keep sprites as small as possible since Flixel will paint this entire bitmap to the display before it does anything else. The larger your background, the longer it takes to render it and all the other FlxSprites. We could break this image down even more but to keep this tutorial easy to follow, I kept the background as one large image.
Since we know the tile’s dimensions, let’s add a constant to our PlayState class.
private const TILE_SIZE:int = 40;
Now we are ready to start adding Cars to our level. Go to the create() method and add the following lines above where we set the state variable.
// Create Cars
carGroup = add(new FlxGroup()) as FlxGroup;

carGroup.add(new Car(0, calculateRow(10), Car.TYPE_C, FlxSprite.RIGHT, 1));
carGroup.add(new Car(270, calculateRow(10), Car.TYPE_C, FlxSprite.RIGHT, 1));

carGroup.add(new Car(0, calculateRow(11), Car.TYPE_D, FlxSprite.LEFT, 1));
carGroup.add(new Car(270, calculateRow(11), Car.TYPE_D, FlxSprite.LEFT, 1));

carGroup.add(new Car(0, calculateRow(12), Car.TYPE_B, FlxSprite.RIGHT, 1));
carGroup.add(new Car((Car.SPRITE_WIDTH + 138) * 1, calculateRow(12), Car.TYPE_B, FlxSprite.RIGHT, 1));
carGroup.add(new Car((Car.SPRITE_WIDTH + 138) * 2, calculateRow(12), Car.TYPE_B, FlxSprite.RIGHT, 1));

carGroup.add(new Car(0, calculateRow(13), Car.TYPE_A, FlxSprite.LEFT, 1));
carGroup.add(new Car((Car.SPRITE_WIDTH + 138) * 1, calculateRow(13), Car.TYPE_A, FlxSprite.LEFT, 1));
carGroup.add(new Car((Car.SPRITE_WIDTH + 138) * 2, calculateRow(13), Car.TYPE_A, FlxSprite.LEFT, 1));
We have now added all of our cars. There is a lot of code but it should be easy to follow. We create what is called a FlxGroup. This is a great way to group similar sprites together and comes in handy when we begin doing our collision detection in part 2 of this tutorial. Each car is added to our carGroup and it gets a start X, Y, type, direction and speed. Since we want all of our cars to always be correctly lined up on the rows, we use the calculatRow method to help put it in the right place.
You will need to import the FlxGroup and Car classes then add the following property:
private var carGroup:FlxGroup;
You will also need to import the Car and FlxGroup classes.
import com.flashartofwar.frogger.sprites.Car;
import org.flixel.FlxGroup;
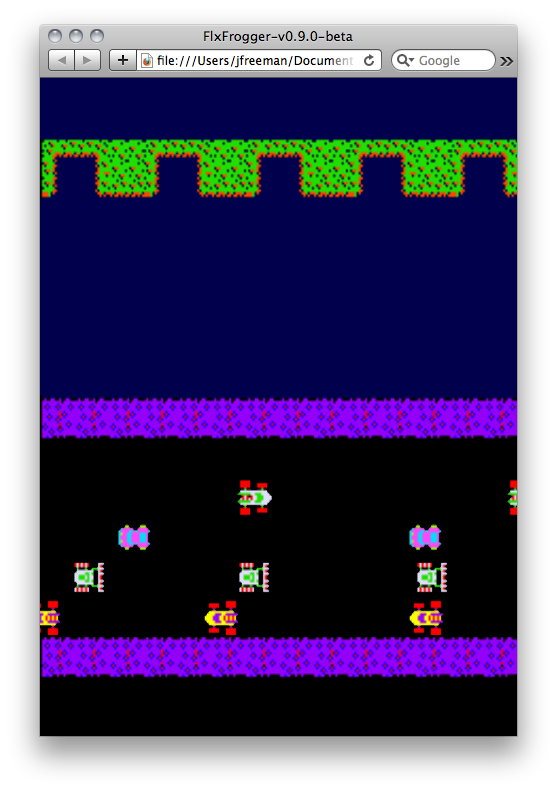
Now if we run the ANT build you will see all of our cars in their correct place and as each one goes off screen, it will reappear on the opposite side.
Let’s add in some trucks.
Step 10: Creating Trucks
Creating a Truck is easier than the car since there is only one type of truck. Let’s create a new Truck class and configure it like this:

And here is the code for the class:
package com.flashartofwar.frogger.sprites
{
    import com.flashartofwar.frogger.sprites.core.WrappingSprite;

    public class Truck extends WrappingSprite
    {
		/**
         * This is a simple sprite which represents the Truck.
         *
         * @param X start X
         * @param Y start Y
         * @param dir direction the sprite will move in
         * @param speed speed in pixels the sprite will move on update
         */
        public function Truck(x:Number, y:Number, direction:uint, velocity:int)
        {
            super(x, y, GameAssets.TruckSpriteImage, direction, velocity);
        }
    }
}
See how easy this was? Since we don’t have any animation and there is only one type of truck we can make this a simple sprite and pass a reference to the Truck asset to the constructor.
We can add some trucks by going into our PlayState class and adding the following code in above where we create our first car, making sure it is below where we create our carGroup.
carGroup.add(new Truck(0, calculateRow(9), FlxSprite.LEFT, 1));
carGroup.add(new Truck(270, calculateRow(9), FlxSprite.LEFT, 1));
If you run the game you will now see all of our trucks and cars zipping by.
Step 11: Create Logs
Logs are just as easy to add as our Trucks. Let’s create a new Trucks class and configure it like this:

Here is the code for the Log class:
package com.flashartofwar.frogger.sprites
{
    import com.flashartofwar.frogger.sprites.core.WrappingSprite;

    public class Log extends WrappingSprite
    {
        public static const TYPE_A:int = 0;
        public static const TYPE_B:int = 1;
        public static const TYPE_C:int = 2;

        public static const TYPE_A_WIDTH:int = 95;
        public static const TYPE_B_WIDTH:int = 196;
        public static const TYPE_C_WIDTH:int = 127;

        /**
         * Simple sprite to represent a log. There are 3 types of logs, represented by TYPE_A, _B, and
         * _C constant.
         *
         * @param x start X
         * @param y start Y
         * @param type type of car to use. Type_A, _b, _c, and _d are referenced as constants on the class
         * @param direction the direction the sprite will move in
         * @param speed the speed in pixels in which the sprite will move on update
         */
        public function Log(x:Number, y:Number, type:int, dir:int, velocity:int)
        {

            var graphicClass:Class;

            switch (type)
            {
                case TYPE_A:
                    graphicClass = GameAssets.LogSpriteImage1;
                    break;
                case TYPE_B:
                    graphicClass = GameAssets.LogSpriteImage2;
                    break;
                case TYPE_C:
                    graphicClass = GameAssets.LogSpriteImage3;
                    break;
            }

            super(x, y, graphicClass, dir, velocity);

        }
    }
}
And we can add our logs to the PlayState above where we created our cars and trucks.
// Create logs
logGroup = add(new FlxGroup()) as FlxGroup;

logGroup.add(new Log(0, calculateRow(3), Log.TYPE_C, FlxSprite.RIGHT, 1));
logGroup.add(new Log(Log.TYPE_C_WIDTH + 77, calculateRow(3), Log.TYPE_C, FlxSprite.RIGHT, 1));
logGroup.add(new Log((Log.TYPE_C_WIDTH + 77) * 2, calculateRow(3), Log.TYPE_C, FlxSprite.RIGHT, 1));

logGroup.add(new Log(50, calculateRow(5), Log.TYPE_B, FlxSprite.RIGHT, 1));
logGroup.add(new Log(Log.TYPE_B_WIDTH + 120, calculateRow(5), Log.TYPE_B, FlxSprite.RIGHT, 1));

logGroup.add(new Log(0, calculateRow(6), Log.TYPE_A, FlxSprite.RIGHT, 1));
logGroup.add(new Log(Log.TYPE_A_WIDTH + 77, calculateRow(6), Log.TYPE_A, FlxSprite.RIGHT, 1));
logGroup.add(new Log((Log.TYPE_A_WIDTH + 77) * 2, calculateRow(6), Log.TYPE_A, FlxSprite.RIGHT, 1));
You will also need to create a new logGroup property.
private var logGroup:FlxGroup;
Now you can run the ANT build to see the logs floating at the top of the screen.

As you can see we spent most of our time upfront building base classes for our game so adding new Sprites would be very easy to do. Also Flixel handles a lot of the difficult stuff for you so you can focus on making great Flash games.
Step 13: Create TimerSprite
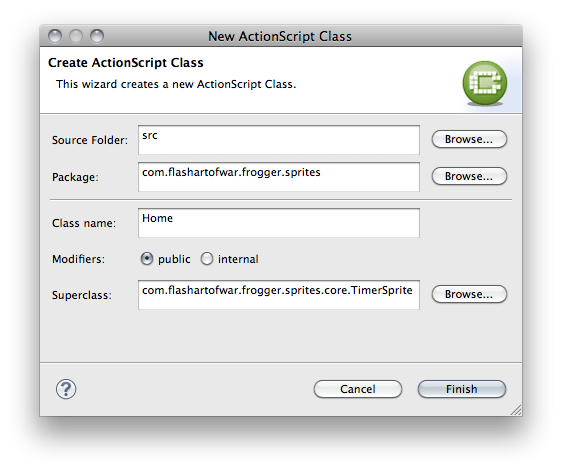
We are now ready to create our second type of game object, the TimerSprite. Let’s create a new class called TimerSprite and configure it like this:
Here is the code for the sprite:
package com.flashartofwar.frogger.sprites.core {
	import com.flashartofwar.frogger.enum.GameStates;

	import org.flixel.FlxG;

	public class TimerSprite extends WrappingSprite
    {

        public static const DEFAULT_TIME:int = 400;

        protected var timer:int;
        protected var hideTimer:int;
        protected var _active:Boolean = true;

        /**
         * The TimerSprite allows you to change states from active to inactive based on an internal timer.
         * This is useful for sprites that need to hide/show themselves at certain intervals. If you want
         * to disable the internal timer, simply pass in -1 for the start time.
         *
         * @param x start x
         * @param y start y
         * @param SimpleGraphic used for sprites that don't need to show an animation
         * @param delay this represents the delay between switching states
         * @param startTime this is the time in which the timer starts. Use -1 to disable.
         * @param dir This represents the direction the sprite will be facing
         * @param speed This is the speed in pixels the sprite will move on update
         */
        public function TimerSprite(x:Number, y:Number, SimpleGraphic:Class = null, delay:int = DEFAULT_TIME, startTime:int = DEFAULT_TIME, dir:uint = RIGHT, speed:int = 1)
        {

            super(x, y, SimpleGraphic, dir, speed);

            this.hideTimer = delay;
            timer = startTime;
        }

        /**
         * This updates the internal timer and triggers toggle when equal to 0
         */
        override public function update():void
        {

            if (state.gameState == GameStates.PLAYING)
            {
                if (timer > 0)
                    timer -= FlxG.elapsed;

                if (timer == 0)
                {
                    toggle();
                }
            }

            super.update();

        }

        /**
         * Getter returns if the instance is active or not.
         *
         * @return a boolean, true is active and false is inactive
         */
        public function get isActive():Boolean
        {
            return _active;
        }

        /**
         * This is a simple toggle between active and deactivated states.
         */
        protected function toggle():void
        {
            if (!isActive)
            {
                onActivate();
            }
            else
            {
                onDeactivate();
            }

            timer = hideTimer;
        }

        /**
         *  Toggles the _activate variable signaling that it is no longer active.
         */
        protected function onDeactivate():void
        {
            _active = false;
        }

        /**
         * Toggles the _activate variable signaling that it is now active.
         */
        protected function onActivate():void
        {
            _active = true;
        }
    }
}
As you can see we are extending our WrappingSprite so that TimerSprite can wrap but also adding in logic to activate/deactivate. You’ll also notice in the update() method that in order to keep track of how much time has elapsed we rely on the Flixel’s internal clock. Your first instinct may have been to do:
timer --;
But when dealing with Flixel you want your time to always be in sync with the main game loop. That is why FlxG makes an elapsed getter available.
When the timer hits 0 we call toggle() and some action is put in motion. This class is an AbstractClass and simply has enough code to help setup children classes that extend it. Children classes are responsible for overriding the supplied methods with their own logic. It is also important to note that if you set the timer value to -1 the timer will not count down and all the timer logic will be ignored. This is a great way to disable a TimerSprite. Let’s look at how we can use this class by adding in turtles.
Step 13: Create Turtles
We are now ready to create our Turtles. Nothing new here, it is the same as our other Sprites. Create a new TurtlesA class and configure it like this:

The reason we gave this class an “A” as a suffix is because there are two types of turtles in our game; ones that float like logs and ones that can go under water. This is the basic Turtle so we can keep the logic simple. We just need to know how many turtles to render and this is done similarly to how we set up our cars. Here is the code:
package com.flashartofwar.frogger.sprites
{
    import com.flashartofwar.frogger.sprites.core.TimerSprite;

    public class TurtlesA extends TimerSprite
    {

		public static const SPRITE_WIDTH:int = 65;
        public static const SPRITE_HEIGHT:int = 40;
        public static const DEFAULT_TIME:int = 300;

        /**
         * This represents the Turtles the player can land on.
         *
         * @param x start X
         * @param y start Y
         * @param delay This represents the amount of time before toggling active/deactivate
         * @param startTime where the timer should start. Pass in -1 to disable the timer.
         * @param speed speed in pixels the turtle will move in
         */
        public function TurtlesA(x:Number, y:Number, delay:int = DEFAULT_TIME, startTime:int = DEFAULT_TIME, dir:uint = RIGHT, speed:int = 1)
        {
            super(x, y, null, delay, startTime, dir, speed);

            loadGraphic(GameAssets.TurtlesSpriteImage, true, false, SPRITE_WIDTH, SPRITE_HEIGHT);

            addAnimation("idle", [0], 0, false);
            addAnimation("hide", [1, 2, 3], 3, false);
            addAnimation("show", [3, 2, 1, 0], 3, false);
        }

        /**
         * Checks to see what frame the turtle is on and can be used to see if turtle is underwater or not.
         * @return if frog is totally underwater it will return false, if not true
         */
        override public function get isActive():Boolean
        {
            return (frame == 3) ? false : true;
        }

        /**
         * Makes turtle appear out of water.
         */
        override protected function onActivate():void
        {
            super.onActivate();
            play("show");
        }

        /**
         * Makes turtle go underwater
         */
        override protected function onDeactivate():void
        {
            super.onDeactivate();
            play("hide");
        }

    }
}
We finally have some animation to setup. By using the addAnimation() method built into Flixel we can tell the game engine which frames to play based on the Sprite’s state. Let’s take a look at the turtle sprite.
Here you will see we have several frames for our turtle’s animation. Animations get tied to a label, here we have idle, hide, and show. We also tell Flixel what order to animate the frames and at what speed. We can play an animation at any time by calling play() and supplying the animation name. If you notice in our onActivate() and onDeactivate we trigger the show/hide animations so the turtle can go under water.
Now let’s add some turtles to our PlayState. Put this code just above your logGroup code.
// Create turtles
turtleGroup = add(new FlxGroup()) as FlxGroup;

turtleGroup.add(new TurtlesA(0, calculateRow(4), -1, -1, FlxSprite.LEFT, 1));
turtleGroup.add(new TurtlesA((TurtlesA.SPRITE_WIDTH + 123) * 1, calculateRow(4), TurtlesA.DEFAULT_TIME, 200, FlxSprite.LEFT, 1));
turtleGroup.add(new TurtlesA((TurtlesA.SPRITE_WIDTH + 123) * 2, calculateRow(4), -1, -1, FlxSprite.LEFT, 1));
You will also need to import the TurtlesA class and add the following property.
private var turtleGroup:FlxGroup;
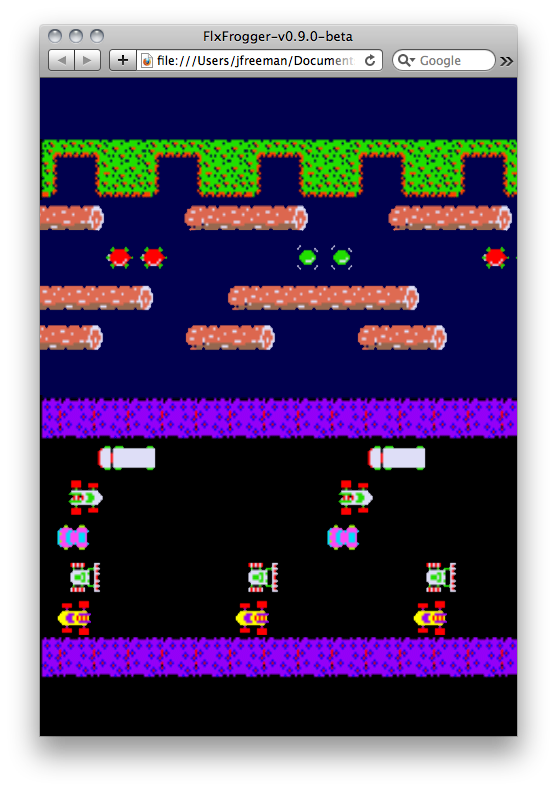
If you run the ANT build you will see our Turtles and can watch them dive under the water.
Next up we will add our 3 Turtles sprites.
Step 14: Create Turtles B
Now it is time for us to add the other set of Turtles. This is the 3 turtle group and will work exactly how our two turtle group did. Let’s create a new class TurtlesB and set it up like this:

Now add the following code.
package com.flashartofwar.frogger.sprites
{
    public class TurtlesB extends TurtlesA
    {

		public static const SPRITE_WIDTH:int = 99;
        public static const SPRITE_HEIGHT:int = 40;
        public static const DEFAULT_TIME:int = 300;

        /**
         * This represents the Turtles the player can land on.
         *
         * @param x start X
         * @param y start Y
         * @param delay This represents the amount of time before toggling active/deactivate
         * @param startTime where the timer should start. Pass in -1 to disable the timer.
         * @param speed speed in pixels the turtle will move in
         */
        public function TurtlesB(x:Number, y:Number, hideTimer:int = DEFAULT_TIME, startTime:int = DEFAULT_TIME, dir:uint = RIGHT, velocity:int = 40)
        {
            super(x, y, hideTimer, startTime, dir, velocity);

            loadGraphic(GameAssets.TurtlesBSpriteImage, true, false, SPRITE_WIDTH, SPRITE_HEIGHT);

        }

    }
}
Since TurtlesA has all of the basic logic we need to run the turtle sprites, we simply change the graphics to our 3 turtle sprite. All of our animation sets will be retained as well. Add the following code to your PlayState class below the TurtleA references we added in the last step.
turtleGroup.add(new TurtlesB(0, calculateRow(7), TurtlesA.DEFAULT_TIME, 0, FlxSprite.LEFT, 1));
turtleGroup.add(new TurtlesB((TurtlesB.SPRITE_WIDTH + 95) * 1, calculateRow(7), -1, -1, FlxSprite.LEFT, 1));
turtleGroup.add(new TurtlesB((TurtlesB.SPRITE_WIDTH + 95) * 2, calculateRow(7), -1, -1, FlxSprite.LEFT, 1));
Once you have imported the TurtlesB class, you can run the ANT build and see all the turtles.

Step 15: Create Home Bases
It’s now time to add our last actor in the level, the home bases. At the top of the screen are 5 places where the Player must jump into in order to move to the next level. These bases have 4 kinds of animation states: a fly for a bonus, an alligator to kill the player, a frog that has been saved, and an empty slot. Here is the image we will be using for this sprite:
Let’s create a Home class and set it up like this:
package com.flashartofwar.frogger.sprites
{
    import com.flashartofwar.frogger.sprites.core.TimerSprite;

    public class Home extends TimerSprite
    {

        public static const SPRITE_WIDTH:int = 40;
        public static const SPRITE_HEIGHT:int = 40;
        public static const BONUS:int = 0;
        public static const NO_BONUS:int = 1;
        public static const SUCCESS:int = 2;
        public static const EMPTY:int = 3;
		public var mode:uint;
        public var odds:uint;

        /**
         * Home represents the sprite the player lands on to score points and help complete a level.
         * The home has 4 states Empty, Success, No Bonus, and Bonus
         *
         * @param x start X
         * @param y start Y
         * @param delay This represents the amount of time before toggling active/deactivate
         * @param startTime where the timer should start. Pass in -1 to disable the timer.
         * @param odds the randomness that one of the 3 states will be reached (empty, bonus, or no bonus)
         */
        public function Home(x:Number, y:Number, delay:int = TimerSprite.DEFAULT_TIME, startTime:int = TimerSprite.DEFAULT_TIME, odds:int = 10)
        {
            super(x, y, null, delay, startTime, 0, 0);

            this.odds = odds;

            loadGraphic(GameAssets.HomeSpriteImage, false, false, SPRITE_WIDTH, SPRITE_HEIGHT);
            addAnimation("empty", [EMPTY], 0, false);
            addAnimation("bonus", [BONUS], 0, false);
            addAnimation("noBonus", [NO_BONUS], 0, false);
            addAnimation("success", [SUCCESS], 0, false);

            play("empty");

        }

        override protected function onDeactivate():void
        {
            super.onDeactivate();
            showEmpty();
        }

        /**
         * On active draw a random number based on the odds and see what state should be shown.
         */
        override protected function onActivate():void
        {
            super.onActivate();

            var id:uint = Math.random() * odds;

            switch (id)
            {
                case(BONUS):
                    showBonus();
                    break;
                case(NO_BONUS):
                    showNoBonus();
                    break;
                default:
                    showEmpty();
                    break;
            }
        }

        /**
         * Shows empty state
         */
        private function showEmpty():void
        {
            play("empty");
        }

        /**
         * Shows no bonus state
         */
        private function showNoBonus():void
        {
            play("noBonus");
        }

        /**
         * Show bonus state
         */
        private function showBonus():void
        {
            play("bonus");
        }

        /**
         * Show success state
         */
        public function success():void
        {
            play("success");
            timer = -1;
        }

        /**
         * Reset the sprite to the empty state and restart the timer.
         */
        public function empty():void
        {
            setMode(EMPTY, "empty");
            timer = hideTimer;
        }

        /**
         * private method to set the state of the sprite.
         *
         * @param mode what mode should the sprite be in Empty, Bonus, No Bonus or Success
         * @param animationSet What animation set should it use to display the state
         */
        protected function setMode(mode:int, animationSet:String):void
        {
            //TODO This should be consolidated to use the same mode int
            this.mode = mode;
            play(animationSet);
        }

    }
}
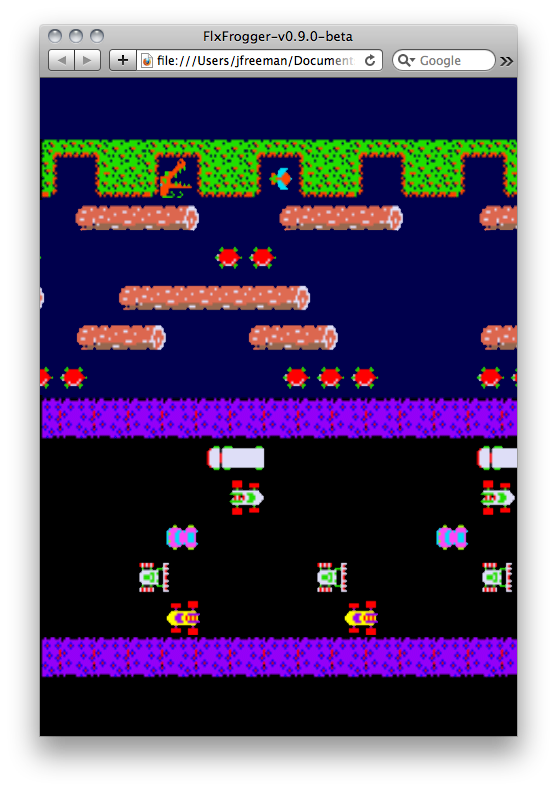
I have commented this class to better explain what is going on. The basic idea is that when the timer goes off we randomly pick a state for the sprite. Once the state has been selected the correct animation is called. Let’s add the bases to our PlayState. Add the following code above our Turtles.
// Create home bases sprites and an array to store references to them
bases = new Array();
homeBaseGroup = new FlxGroup();
add(homeBaseGroup);
bases.push(homeBaseGroup.add(new Home(calculateColumn(0) + 15, calculateRow(2), 200, 200)));
bases.push(homeBaseGroup.add(new Home(calculateColumn(3) - 5, calculateRow(2), 200, 200)));
bases.push(homeBaseGroup.add(new Home(calculateColumn(5) + 20, calculateRow(2), 200, 200)));
bases.push(homeBaseGroup.add(new Home(calculateColumn(8), calculateRow(2), 200, 200)));
bases.push(homeBaseGroup.add(new Home(calculateColumn(11) - 15, calculateRow(2), 200, 200)));
We are doing this group a little differently because in Part 2 we will need a reference to the bases to validate a level has been completed. You will need to import the Home class and add the following properties.
private var bases:Array;
private var homeBaseGroup:FlxGroup;
Now run the ANT Build and you will see the top rows fill in with random base graphic.
Conclusion
So, we have covered a lot in this tutorial! You learned how to start up Flixel, create and switch between game States, and finally the basics of creating new Sprites and attaching them to a level. In the next tutorial we will cover how to create the player, move him, add collision detection and more. If you don’t have the patience to wait for the next part (Editor: We’re only talking a week Jesse!), you can always check out the full FlxFrogger source code from GitHub.