
In this tutorial, I will explain how to create a metallic text effect using layer styles in Photoshop.
This text effect you are going to learn today is part of 8 Photoshop Styles 2 of 4.
 8 Premium fully editable PSD and ASL Photoshop files
Tutorial Assets
The following assets were used during the production of this tutorial.
Download the file MetalKid_assets.zip and extract both files inside. Install the Pattern file named Dark_Pattern.pat and the Contour file pack named CustomContoursMK.shc. To install, you have to double-click the icons. It’s that simple.
Download and install the Strasua font.
Let’s get started!
1. How to Create the Background
Step 1
Create a new document (File > New).
- Width: 850 px
- Height: 500 px
- Resolution: 72 PPI

Step 2
Duplicate the background (go to Layer > Duplicate Layer > OK) and rename the new layer as “Background Pattern“.

Step 3
Now we are going to add a texture to the background layer.
Double-click on “Background Pattern layer” to open the layer style window. Go to Pattern Overlay, and then click on the Pattern box and select the new added Dark Pattern. Press OK.

Step 4
To make the background look even better, we are going to add an inner shadow. You have to double-click on Background Pattern layer and, once the layer style window appears, set the following values.
- Blend Mode: Normal
- Color:
#000000 - Opacity: 100%
- Angle: 90º
- Use Global Light checkbox: Unchecked
- Distance: 0 px
- Choke: 0%
- Size: 250 px
- Noise: 0%

2. How to Create the Text and Align It
Step 1
Type the word “Metalkid” using the Strasua font.
- Font Size: 100 pt
- Tracking: 20 pt
- Anti-aliasing mode: Sharp
- Color:
#ffffff

Step 2
Using the Move Tool, select the text layer and background layer and then click the align commands on the top menu to center the text.
- Align Horizontal: Center
- Align Vertical: Center

3. How to Create the Text Effect
Step 1
Add a layer style to the text—you have to right click on the layer in your Layers menu and choose Blending Options. Make sure you use the following values and press OK.

Step 2
Let’s start with the text effect! First, we are going to add some shadows to separate the text from the background. Go to Layer Style > Drop Shadow and use the values shown in the image below.
- Blend Mode: Normal
- Color:
#000000 - Opacity: 70%
- Angle: 90º
- Use Global Light: Unchecked
- Distance: 10 px
- Spread: 20 px
- Size: 10 px
- Contour: Default
- Noise: 0%
- Layer Knocks Out Drop Shadow: Checked

Step 3
Now we are going to create a gradient overlay, which will give a base to the metal effect. Open the Layer Style again and modify the Gradient Overlay setting to the following values.
- Blend Mode: Normal
- Opacity: 100%
- Reverse: Unchecked
- Style: Linear
- Align with Layer: Checked
- Angle 90º
- Scale: 150%
Click on the Gradient Bar and make a gradient with these settings:
Tip: To create a new point in the gradient, you have to click under the gradient bar. Clicking each one of the color stops allows you to modify the Location and Color.
- First Stop Color:
#0d1117 - First Stop Position: 0%
- Second Stop Color:
#a0a0a0 - Second Stop Position: 25%
- Third Stop Color:
#161a20 - Third Stop Position: 50%
- Fourth Stop Color:
#a0a0a0 - Fourth Stop Position: 75%
- Fifth Stop Color:
#0d1117 - Fifth Stop Position: 110%

Step 4
Go to Layer Style > Inner Glow and use the settings shown below to brighten up the edges.
- Blend Mode: Normal
- Opacity: 100%
- Noise: 0%
- Color:
#ffffff - Technique: Softer
- Edge: Checked
- Choke: 40%
- Size: 2 px
- Contour: Default
- Anti-aliased: Unchecked
- Range: 50%
- Jitter: 0%

Step 5
To start creating the 3D look, go to Layer Style > Bevel & Emboss and use the following values.
- Style: Inner Bevel
- Technique: Smooth
- Depth: 100%
- Direction: Up
- Size: 10 px
- Soften: 1 px
- Angle: 90º
- Use Global Light: Unchecked
- Altitude: 30º

Now, we are going to add the previously installed “custom contour”. Click on the Gloss Contour drop-down icon and then select the contour named “CustomContourMK01“

Now we can continue:
- Anti-aliased: Unchecked
- Highlight Mode: Screen
- Highlight Color:
#ffffff - Highlight Opacity: 75%
- Shadow Mode: Multiply
- Shadow Color:
#000000 - Shadow Opacity: 75%

Step 6
Now we are going to emphasize the highlights and shadows to give more realism to the metal effect. Go to Layer Style > Satin and use the settings shown below.
- Blend Mode: Color Dodge
- Color:
#ffffff - Opacity: 50%
- Angle 20º
- Distance: 45 px
- Size: 8 px
- Anti-aliased checkbox: Unchecked
- Invert checkbox: Checked

We are going to add the second “custom contour” we installed. Click on the Gloss Contour drop-down icon and then select the contour named “CustomContourMK02” and press OK.

Step 7
It’s almost done. In this final step, we are going to accentuate the edges and corners, giving the text the final 3D look. Go to Layer Style > Stroke, and use the values shown in the image below.
- Size: 2 px
- Position: Outside
- Blend Mode: Normal
- Opacity: 100%
- Fill Type: Gradient
Click on the Gradient Bar and make a gradient with these settings:
- First Stop Color:
#1a1b1e - First Stop Position: 0%
- Second Stop Color:
#7f7f7f - Second Stop Position: 50%
- Third Stop Color:
#1a1b1e - Third Stop Position: 100%
- Style: Reflected
- Align with Layer checkbox: Checked
- Angle 90º
- Scale: 100%

Final Image

Great Job, You’re Done!
In this tutorial, I showed you how to create a metal text effect using only style options. I hope that you enjoyed this tutorial and can use what you’ve learned for your own projects. Please feel free to comment and show me your results.
This text effect is part of 8 Photoshop Styles 2 of 4.
8 Premium fully editable PSD and ASL Photoshop files
You may also like:
-
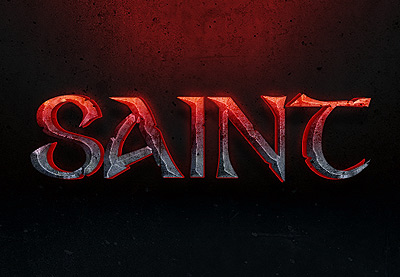
How to Create a Hot Concrete Text Effect in Adobe Photoshop
In this tutorial, you’ll learn how to create a hot concrete text effect using two layers to get a central vanishing point in Adobe Photoshop. Let’s get started! -
How to Create a Bronze Beveled Text Effect in Adobe Photoshop
In this tutorial, you’ll learn how to create a bronze beveled text effect using layer styles in Adobe Photoshop. -

How to Create a Shiny Summer Text Effect in Adobe Photoshop
In this tutorial, I will explain how to create a shiny summer text effect using layer styles in Photoshop. Let’s get started! -

Quick Tip: Create a Metallic Copper Text Effect Using Layer Styles in Photoshop
Learn how to create a metallic copper text effect using layer styles in Adobe Photoshop. Let’s get started!
{excerpt}
Read More