Welcome to Part 2 of my Beginner’s Guide to Augmented Reality, I hope you finished off the first part of this tutorial, or at least downloaded and read the source files (otherwise you may get a bit confused with what’s going on).
Quick Recap
Last time we looked at setting up a simple AR environment, creating a cube, applying materials to the cube and the “hole in the wall” effect.
Today we will be building on that knowledge and creating the final as shown in the demo. To create that final effect, we need to know how to render spheres, animate objects, play sound effects and finally, render 3d objects. Rendering 3D objects in the palm of your hand is the main reason why Augmented Reality has become a big hit this year, especially when you create some of the more interesting shapes or animate them. If you are in the UK you may have seen The Gadget Show recently where they featured Augmented reality and had an animated version of Suzi Perry that you could hold in your hand. Very nice.
So let’s get down to business. I’ll be starting with the world and stars render first of all, then moving on to animating the shapes and finally creating the cow. Open up your files from last time and let’s get creating.
Step 1: Download the World

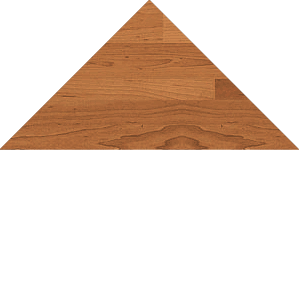
Source: NASA Visible Earth. Credit: Reto Stöckli, Robert Simmon.
Download the 2048x1024px version of the image above from the NASA Visible Earth page and call it map.jpg. Place it into the following folder: deploy > assets. This is the same folder where you saved the images for the inside of the cube in the last part of the tutorial. This lovely image of the world came from NASA. They take good photos don’t they?
Step 2: Creating a Sphere
In your code, navigate to where we set up the “hole in the wall” effect for Marker 0 last time. Just after the “hole in the wall” code, add in the following code:
var Earth:Sphere = new Sphere(earth, 40);
Earth.z=200;
dispObj.addChild(Earth);
Step 3: Mapping the World
Now that we have set up a sphere, it needs a texture. This is done in the exact same way as mapping a texture to a cube. Notice how in the set up for the sphere, it’s looking for something called “earth” this is our texture variable.
Navigate in the code to where we set up materials before. Add to that code the following line:
var earth : BitmapFileMaterial = new BitmapFileMaterial("assets/map.jpg");
Just the same as the others.
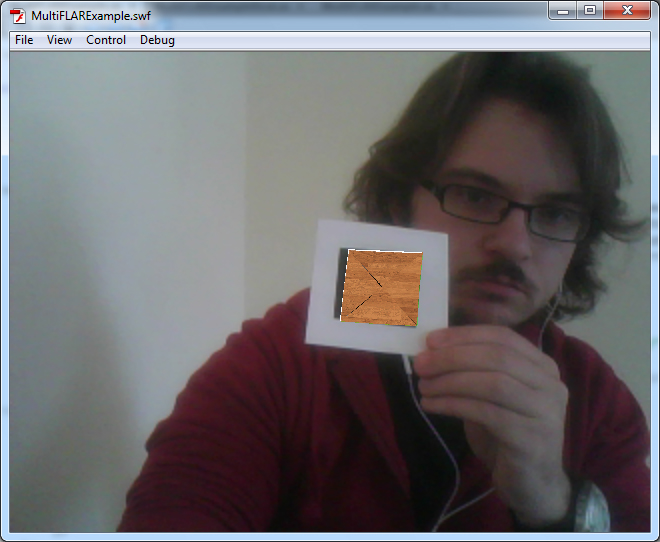
Step 4: Test it!
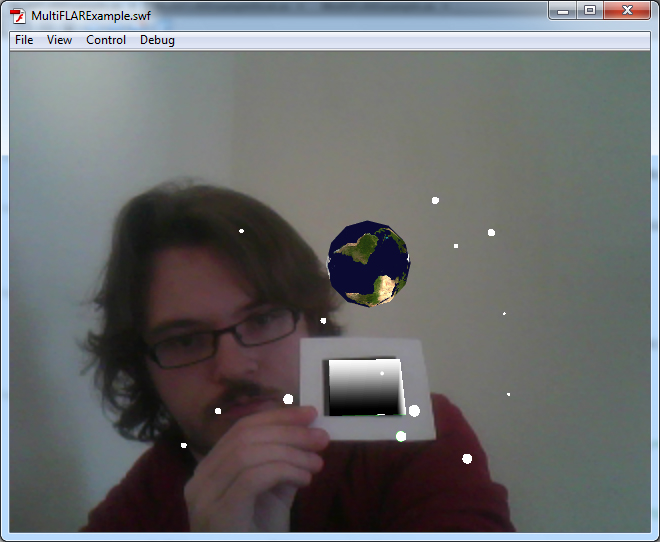
When you test it, you should see something like the following image (but of course without that handsome devil holding up the marker for you):
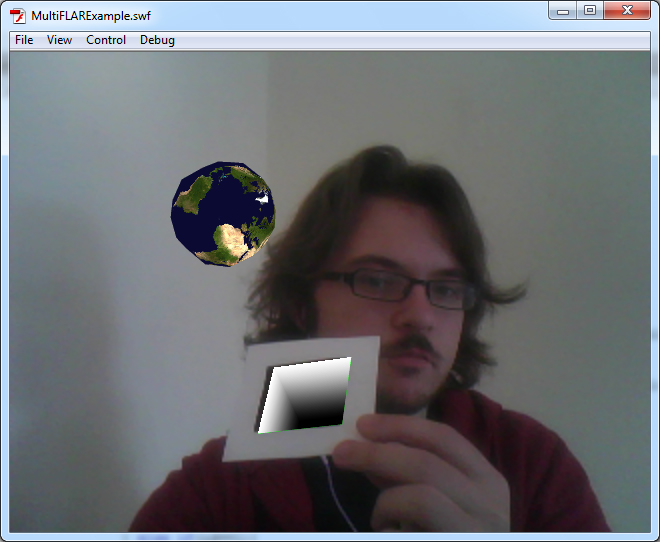
Just as last time, you’ll need to download the marker image and print it off with plenty of white space around the edges.
Step 5: Stars in Your Eyes
Now what would a space image be without some stars? Let’s add some in shall we? This is possibly the most tedious part for me to write up since all the stars need to be individually positioned. But you cheeky rascals get the benefit of copy and paste.
Add in the following code after the earth render code:
var star1:Sphere = new Sphere(star, 4);
star1.z=65;
star1.x=84;
star1.y=164;
dispObj.addChild(star1);

var star2:Sphere = new Sphere(star, 3);
star2.z=246;
star2.x=32;
star2.y=64;
dispObj.addChild(star2);

var star3:Sphere = new Sphere(star, 2);
star3.z=163;
star3.x=78;
star3.y=98;
dispObj.addChild(star3);

var star4:Sphere = new Sphere(star, 4);
star4.z=120;
star4.x=164;
star4.y=157;
dispObj.addChild(star4);

var star5:Sphere = new Sphere(star, 2);
star5.z=148;
star5.x=-164;
star5.y=-157;
dispObj.addChild(star5);

var star6:Sphere = new Sphere(star, 3);
star6.z=46;
star6.x=-36;
star6.y=-156;
dispObj.addChild(star6);

var star7:Sphere = new Sphere(star, 5);
star7.z=40;
star7.x=-16;
star7.y=-84;
dispObj.addChild(star7);

var star8:Sphere = new Sphere(star, 5);
star8.z=59;
star8.x=-84;
star8.y=30;
dispObj.addChild(star8);

var star9:Sphere = new Sphere(star, 4);
star9.z=87;
star9.x=-134;
star9.y=84;
dispObj.addChild(star9);

var star10:Sphere = new Sphere(star, 2);
star10.z=49;
star10.x=10;
star10.y=18;
dispObj.addChild(star10);

var star11:Sphere = new Sphere(star, 5);
star11.z=94;
star11.x=-84;
star11.y=41;
dispObj.addChild(star11);

var star12:Sphere = new Sphere(star, 3);
star12.z=54;
star12.x=91;
star12.y=-46;
dispObj.addChild(star12);

var star13:Sphere = new Sphere(star, 2);
star13.z=180;
star13.x=88;
star13.y=-130;
dispObj.addChild(star13);

var star14:Sphere = new Sphere(star, 4);
star14.z=102;
star14.x=134;
star14.y=-13;
dispObj.addChild(star14);

var star15:Sphere = new Sphere(star, 1);
star15.z=61;
star15.x=-35;
star15.y=145;
dispObj.addChild(star15);
Phew, that”s quite a lot. Of course, you can add more if you want more stars. Or just use a loop an array to add an arbitrary number.
Step 6: Color the Stars
Now we need to add a material for the stars. Add the following with the other material code:
var star : ColorMaterial = new ColorMaterial(0xFFFFFF);
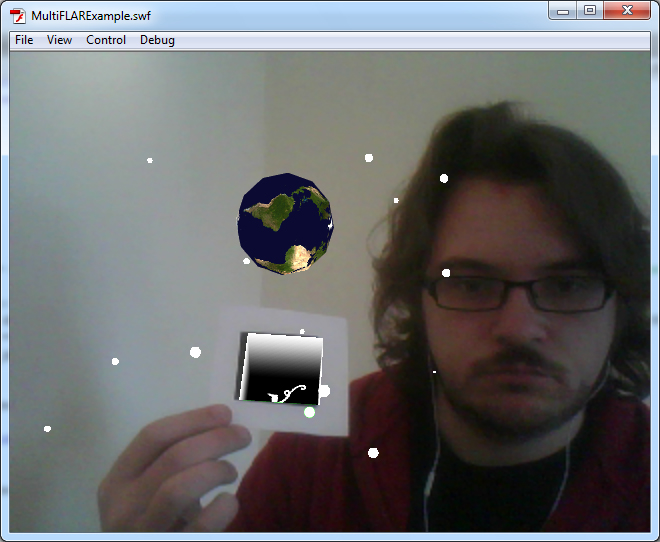
Step 7: Testing Time!
Test the flash movie and hopefully you’ll see something like this:
Step 8: Trapped in a Box
Wouldn’t it be cool if, say, we could have the space scene we just created, be trapped in a little box held within the marker and then explode out? Well you’re in luck, and probably saw the outcome as that’s exactly what we are going to do.
It’s fairly simple to animate things in AR. Especially if you just want to move them from one point to another like we want to. To do this, we need to download some extra classes for Flash. GreenSock do a very nice series of animation libraries that help us easily move objects from one point to another.
Head over to greensock.com and download the AS3 TweenMax library.
Step 9: Importing a new Library
Once you have downloaded the TweenMax library, you need to extract the .zip file and place the greensock folder into src > com of our project. This is where the squidder library is also kept. Extract here and all will be just swell.
Now move back over to Flash. Add the following line at the top of your code with the other import lines:
import com.greensock.*;
Now you have access to the GreenSock library.
Step 10: Animating the Earth
Find the code where you set up the Earth variable. Replace it with the following code:
var Earth:Sphere = new Sphere(earth, 1);
Earth.z=-40;
TweenMax.to(Earth, 4, {scaleX:40, scaleY:40, scaleZ:40, z:"200", delay:4});
What I’ve done here is alter the Earth’s starting point and size so that it’s very small and inside the box. TweenMax is a great animation class. Here we set up which variable to animate (Earth), how long it will take in seconds (4), by how much it should scale up the variable, its z point and finally how long it should wait before animating. This is set to 4 so that we can animate other things first.
Step 11: Animating the Stars
Replace all your star setup code with the following:
var star1:Sphere = new Sphere(star, 1);
star1.z=-40;
TweenMax.to(star1, 4,{scaleX:1, scaleY:1, scaleZ:1, x:"84", y:"164", z:"65", delay:4});
dispObj.addChild(star1);

var star2:Sphere = new Sphere(star, 1);
star2.z=-40;
TweenMax.to(star2, 4,{scaleX:3, scaleY:3, scaleZ:3, x:"32", y:"64", z:"246", delay:4});
dispObj.addChild(star2);

var star3:Sphere = new Sphere(star, 1);
star3.z=-40;
TweenMax.to(star3, 4,{scaleX:2, scaleY:2, scaleZ:2, x:"78", y:"98", z:"163", delay:4});
dispObj.addChild(star3);

var star4:Sphere = new Sphere(star, 1);
star4.z=-40;
TweenMax.to(star4, 4,{scaleX:4, scaleY:4, scaleZ:4, x:"164", y:"157", z:"120", delay:4});
dispObj.addChild(star4);

var star5:Sphere = new Sphere(star, 1);
star5.z=-40;
TweenMax.to(star5, 4,{scaleX:2, scaleY:2, scaleZ:2, x:"-164", y:"-157", z:"148", delay:4});
dispObj.addChild(star5);

var star6:Sphere = new Sphere(star, 1);
star6.z=-40;
TweenMax.to(star6, 4,{scaleX:3, scaleY:3, scaleZ:3, x:"-36", y:"-156", z:"46", delay:4});
dispObj.addChild(star6);

var star7:Sphere = new Sphere(star, 1);
star7.z=-40;
TweenMax.to(star7, 4,{scaleX:5, scaleY:5, scaleZ:5, x:"-16", y:"-84", z:"40", delay:4});
dispObj.addChild(star7);

var star8:Sphere = new Sphere(star, 1);
star8.z=-40;
TweenMax.to(star8, 4,{scaleX:5, scaleY:5, scaleZ:5, x:"-84", y:"30", z:"59", delay:4});
dispObj.addChild(star8);

var star9:Sphere = new Sphere(star, 1);
star9.z=-40;
TweenMax.to(star9, 4,{scaleX:4, scaleY:4, scaleZ:4, x:"-134", y:"84", z:"87", delay:4});
dispObj.addChild(star9);

var star10:Sphere = new Sphere(star, 1);
star10.z=-40;
TweenMax.to(star10, 4,{scaleX:2, scaleY:2, scaleZ:2, x:"10", y:"18", z:"49", delay:4});
dispObj.addChild(star10);

var star11:Sphere = new Sphere(star, 1);
star11.z=-40;
TweenMax.to(star11, 4,{scaleX:5, scaleY:5, scaleZ:5, x:"-84", y:"41", z:"94", delay:4});
dispObj.addChild(star11);

var star12:Sphere = new Sphere(star, 1);
star12.z=-40;
TweenMax.to(star12, 4,{scaleX:3, scaleY:3, scaleZ:3, x:"91", y:"-46", z:"54", delay:4});
dispObj.addChild(star12);

var star13:Sphere = new Sphere(star, 1);
star13.z=-40;
TweenMax.to(star13, 4,{scaleX:2, scaleY:2, scaleZ:2, x:"88", y:"-130", z:"180", delay:4});
dispObj.addChild(star13);

var star14:Sphere = new Sphere(star, 1);
star14.z=-40;
TweenMax.to(star14, 4,{scaleX:4, scaleY:4, scaleZ:4, x:"134", y:"-13", z:"102", delay:4});
dispObj.addChild(star14);

var star15:Sphere = new Sphere(star, 1);
star15.z=-40;
TweenMax.to(star15, 4,{scaleX:1, scaleY:1, scaleZ:1, x:"-35", y:"145", z:"61", delay:4});
dispObj.addChild(star15);
This will animate your stars from a hidden start point to their final positions. Again, I’ve altered the stars’ z-positions so that they start inside the box.
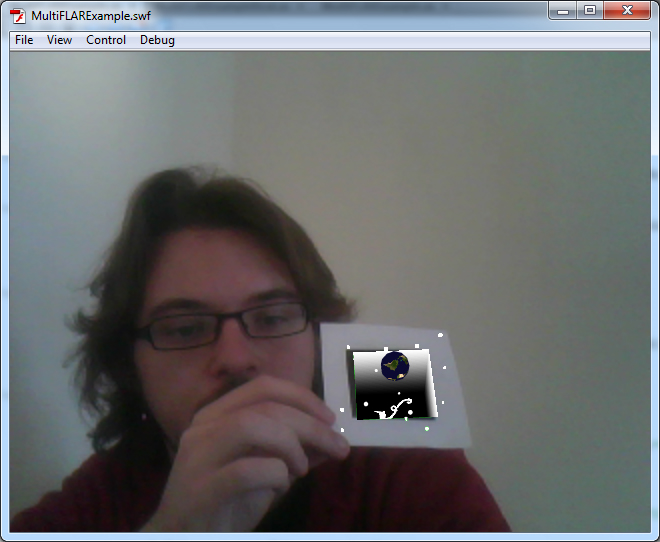
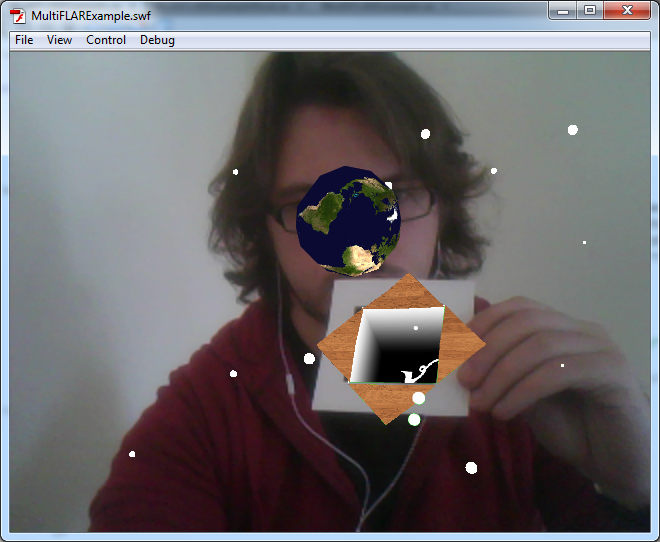
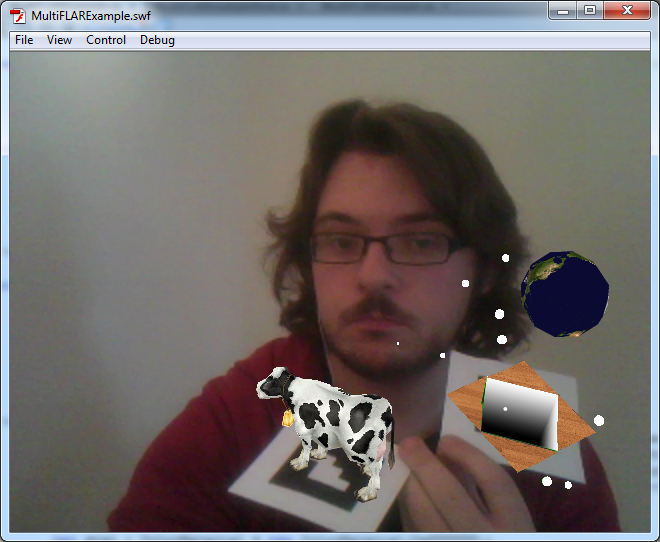
Step 12: Test it!
Let’s test the Flash movie again. You should have a nice animated transition from nothing to the earth and stars exploding out of the box we trapped them in.
Step 13: It’s all a Cover up!
For the box lid that will open up and have the Earth and stars explode out, we will use four images. I use a wooden panel look for my box but feel free to create your own. Here are the images I made, download these and save them into deploy > assets.
Save as top.png
Save as bottom.png
Save as left.png
Save as right.png
Step 14: Create the Box Lid
Beneath where we set up the stars, add the following code:
var top:Cube = new Cube( new MaterialsList( {all: Top} ) , 80 , 0 , 80 );
top.z=0;
top.y=40;
TweenMax.to(top, 2,{rotationX:-180, delay:2});
dispObj.addChild(top);

var bottom:Cube = new Cube( new MaterialsList( {all: Bottom} ) , 80 , 0 , 80 );
bottom.z=0;
bottom.y=-40;
TweenMax.to(bottom, 2,{rotationX:180, delay:2});
dispObj.addChild(bottom);

var left:Cube = new Cube( new MaterialsList( {all: Left} ) , 80 , 0 , 80 );
left.z=0;
left.rotationZ=90;
left.x=-40;
TweenMax.to(left, 2,{rotationX:180, delay:2});
dispObj.addChild(left);

var right:Cube = new Cube( new MaterialsList( {all: Right} ) , 80 , 0 , 80 );
right.z=0;
right.x=40;
right.rotationZ=90;
TweenMax.to(right, 2,{rotationX:-180, delay:2});
dispObj.addChild(right);
This sets up all the parts that make up the box lid, positions them correctly and animates them. Great stuff.
Each “cube” is set to have a depth of zero (the third argument in the constructor), so they appear to be flat planes.
Step 15: Lid Material
In the material section, add the following code:
var Top : BitmapFileMaterial = new BitmapFileMaterial("assets/top.png");
var Bottom : BitmapFileMaterial = new BitmapFileMaterial("assets/bottom.png");
var Left : BitmapFileMaterial = new BitmapFileMaterial("assets/left.png");
var Right : BitmapFileMaterial = new BitmapFileMaterial("assets/right.png");
Now the lid will look the part. I’m sure you noticed that the left and right images are rotated and then I rotate them back again in the code in Step 14. You are probably wondering why I did that instead of just leaving the images as they were. Well, there’s a reason for that. They won’t work correctly unless you rotate them. It’s an odd bug, but the images turn up backwards when rendered and when you apply an animation to them they go the wrong way. Rotating them first and then back in the code makes them work as they should. It’s quite odd, but there you go.
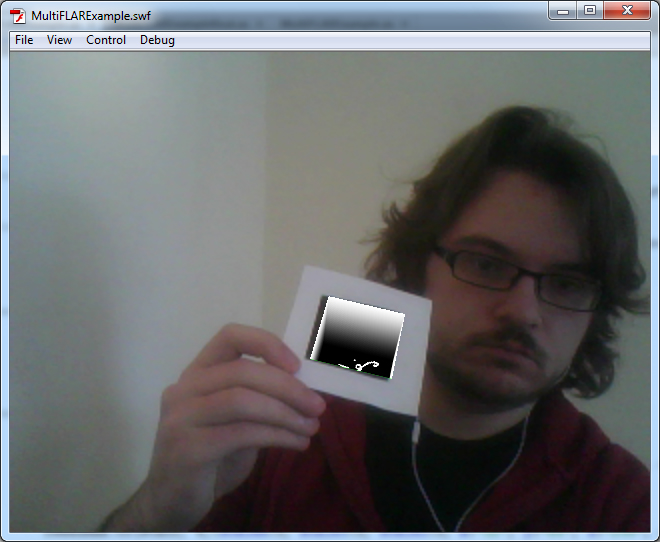
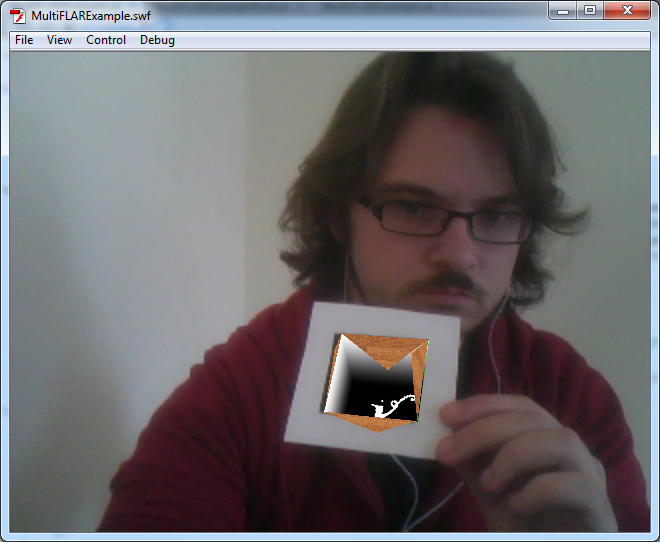
Step 16: Testing!
Now all the parts are ready for another test, it’s all coming into place. I’m sure you’re making all sorts of oohing noises right now. Marvelous.
Step 17: This Needs Some Drama
If you’re like me, you’re looking at this thinking, wow that’s great, but it really needs some more drama. Well we’re going to do just that. Let’s add some dramatic music when the box opens.
Go to the Hollywood Edge sound effects library and download BrightPad.wav. (It’s not included in the Source download.) I’ve converted this to an MP3 called “dramatic.mp3″ but you can follow these instructions while keeping it as a WAV.
Save it to the folder deploy > assets.
Step 18: Adding in the Sound
Open up the .fla file and go to File > Import > Import to Library. Import dramatic.mp3.
Open up your library and you should see your newly imported file sitting right there.
Right-click on it and click on Properties. Check the “Export for ActionScript” box. The class box should now become active; type in it “dramatic” without the quotes.

Step 19: More Coding
Return to the .as file. At the top of the file, find the import code. Add the following import code:
import flash.media.SoundMixer;
import flash.media.SoundChannel;
A little further down, there are some private vars. You may remember this from last time when we set up the green cube. Add the following code to the private vars:
private var drama:dramatic = new dramatic();
private var dramaChnl:SoundChannel = new SoundChannel();
Now what we have done here is to set up the sound file “dramatic” and a sound channel. The sound channel allows starting and stopping of the sound through code.
Step 20: Playing the Sound
Since we only want the sound to play once (when the box opens and not every time we show the marker) you need to put the following code with all the shape set up code. I put mine just after I set up the box lid.
dramaChnl = drama.play(0,1);
This plays the sound once when the lid opens.
Step 21: Testing!
The sound should now play and hopefully it will feel very dramatic indeed.
You should feel very pleased with yourself right now, you have created something you can impress your friends with.
Step 22: Cows!
Now we get to the part where we render a 3d cow that you can hold in your hand. First of all, you need to download the following two files, save them in the usual place:
The texture, which you should save as Cow.png and the cow model file which you need to save as cow.dae.
Step 23: Setting up the Cow
At the top of your file, you need to add an import. Add the following line:
import org.papervision3d.objects.parsers.Collada;
Find the private vars a little further down and add the following:
private var cowSkin: BitmapFileMaterial;
private var cowMat: MaterialsList;
private var cow: Collada;
Step 24: More Setting Up
We are going to load the cow up onto a second marker. This is to show you that this method of loading different objects onto different markers is fairly robust and can handle not only shapes but 3d complex objects too.
Remember in the previous part of the tutorial, we had four markers on a single sheet of paper, and created different colored cubes for each marker? We’re going to re-use that code to let us use a separate marker for the cow and the Earth.
Navigate through your file until you find else if (id ==1){ – the check for the second marker.
Replace everything within the two curly brackets with the following code:
cowMat = new MaterialsList();
cowSkin  = new BitmapFileMaterial("assets/Cow.png");
cowMat.addMaterial(cowSkin,"all");

//Create the new Collada Object with cowMat
cow = new Collada("assets/cow.dae",cowMat);
cow.rotationX = 90;
cow.scale = 0.5;
dispObj.addChild(cow);
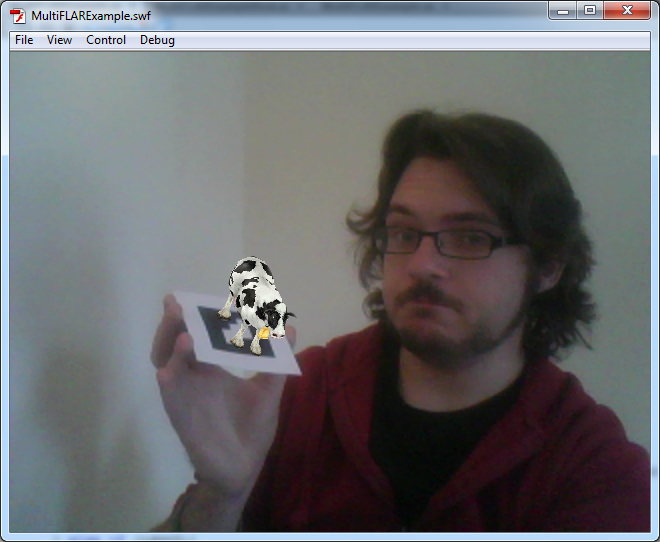
Step 25: Testing!
Yes, more testing already, wasn’t that quick. Download and print out the second marker. If all goes well, you should be the proud owner of a new little 3d cow. Congratulations!
Step 26: Is That Cow on Moo-t?
It’s great that we have such a nice looking cow, but wouldn’t it be better if the cow were to moo?
Go to this directory of files from a CD called, The Best Of Tucows, Volume 2 – and download MOO.WAV. (It’s not included in the Source download.)
Save it in the usual place as moo.wav.
Head on over to your .fla file and import the file to your library. Just like you did with the last sound file you imported, open up its properties, tick Export for ActionScript and change its class to mooSnd.
Step 27: Moo-sic to my Ears
Navigate to the private vars and add the following lines of code:
private var moo:mooSnd = new mooSnd();
private var mooChnl:SoundChannel = new SoundChannel();
Now, for this marker, I want the sound to play every time the cow appears but to only play once. To do this, you need to add the code to play the sound in a slightly different place than we did last time.
Find this line in your code:
private function _addCube( id:int , index:int ) : void {
We want to add our code just after this. By taking the following out of the shape set up code, it will play every time that ID is found rather than when the shape is set up, which only happens once.
Add this code:
if(id==1){
	mooChnl = moo.play(0, 1);
}
Conclusion
Test the file for the last time and the cow should moo. You can even use both markers at the same time and be super swish.
I hope you’ve enjoyed this two part tutorial on Augmented Reality and hope that you can go off now and create some very cool things.