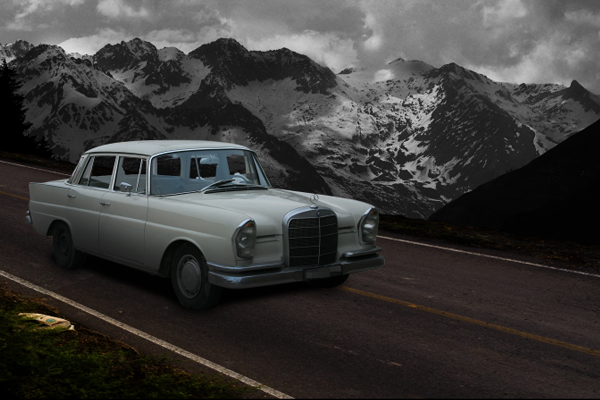
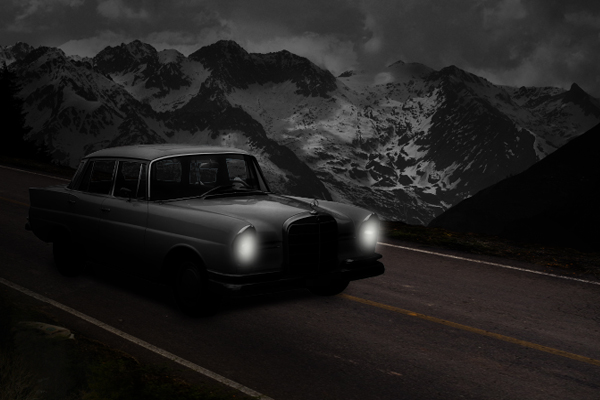
Photoshop is an excellent tool to combine several photos into one seamless image. In today’s tutorial we will use different tools and techniques to create an abandoned automobile in a moonlit night scene in Photoshop. Let’s get started!
Resources Used
You can download the following images from the links below. Just sign up for free to download the image.
Step 1
Create a new document 2856 x 1888 px in 300 dpi.

Step 2
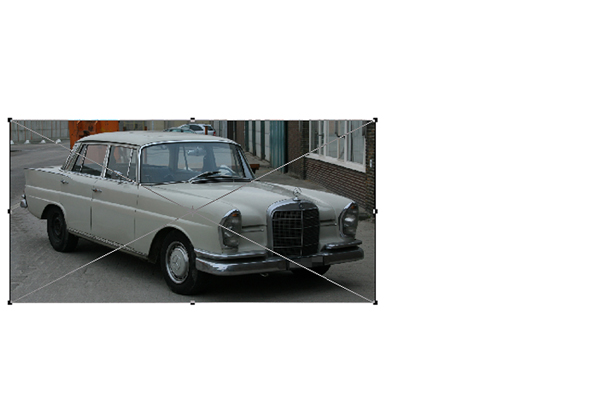
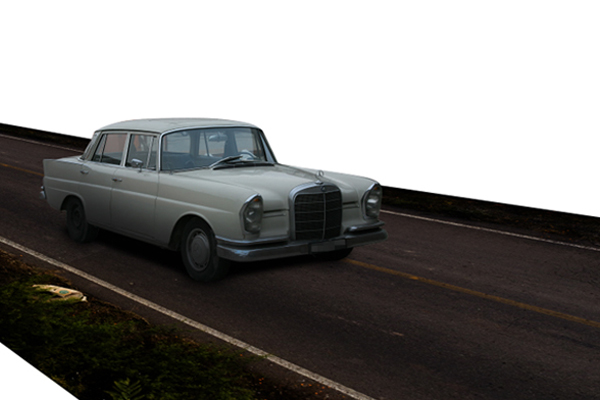
Next open Car.jpg and resize it by pressing Cmd/Ctrl + T. Place the car on the left portion of your canvass as shown.
Step 3
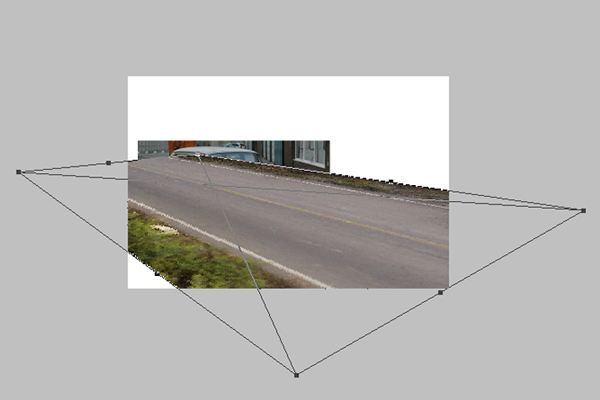
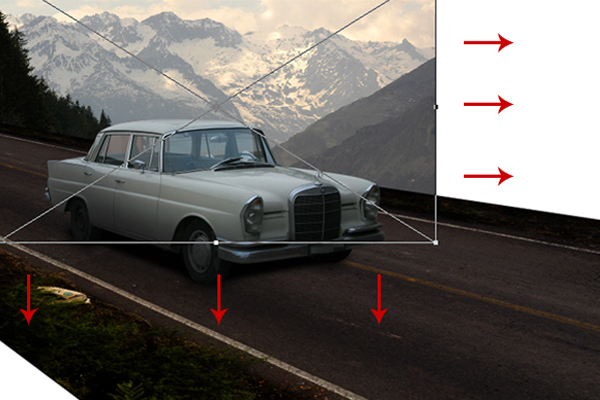
Open Road.jpg, then press Cmd/Ctrl + T. Once the resizing handles have been activated, right-click and choose Free Transform from the dropdown menu.
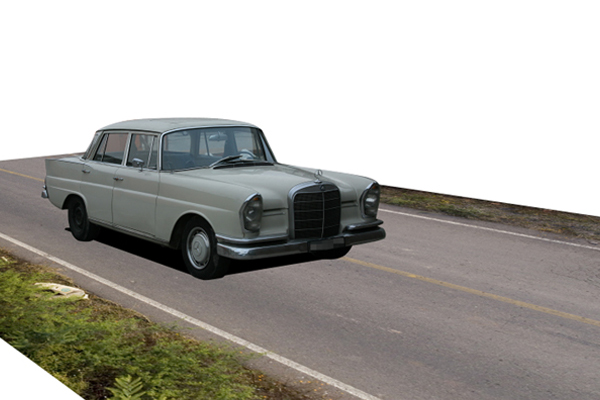
Step 4
After that, make sure to place the Road.jpg’s layer below the Car.jpg as shown below. Make sure that the car’s perspective matches that of the road and vice-versa. Use the resizing handles, Cmd/Ctrl+T, just in case you still need to adjust the images.

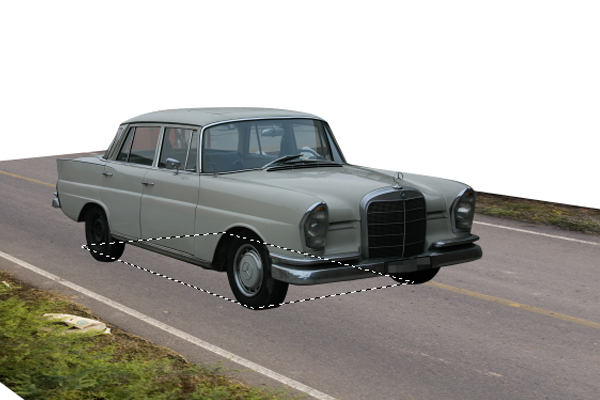
Step 5
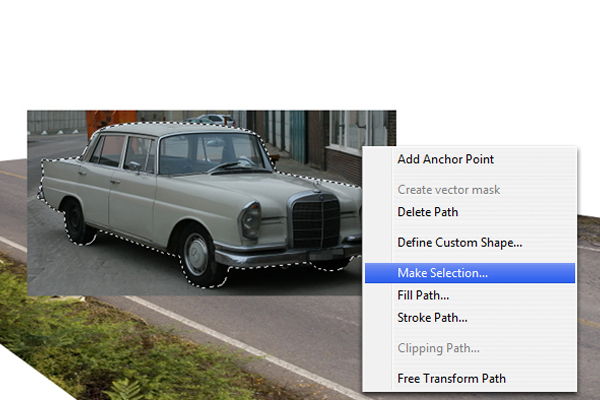
Next, use the Pen tool (P) to trace all the way around the car. Then, right-click and select Make Selection from the dropdown menu. Next, hold Cmd/Ctrl + Shift + I to inverse the selection, then hit delete.
Step 6
Next, create a new layer above Road.jpg layer and name it "Primary Shadow." Using the Pen tool (P), make a rectangular shape in line with the perspective of the road as shown. This will serve the primary shadow of the car.
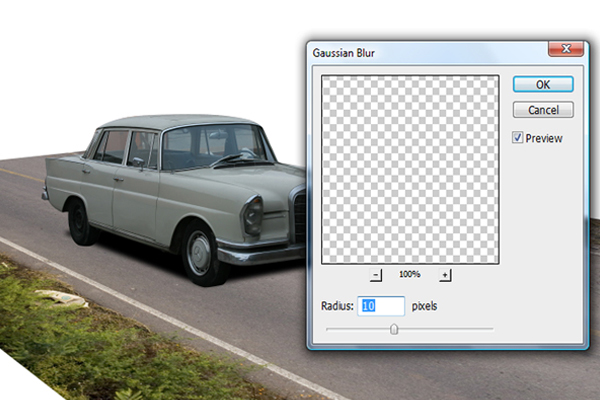
Step 7
After that, go to Filter > Blur > Gaussian Blur and apply the settings as shown below for the "Primary Shadow."
Step 8
Next, select the Brush tool (B) with a size of 60 px, a Hardness of 20% and color #000000, brush the areas indicated below.
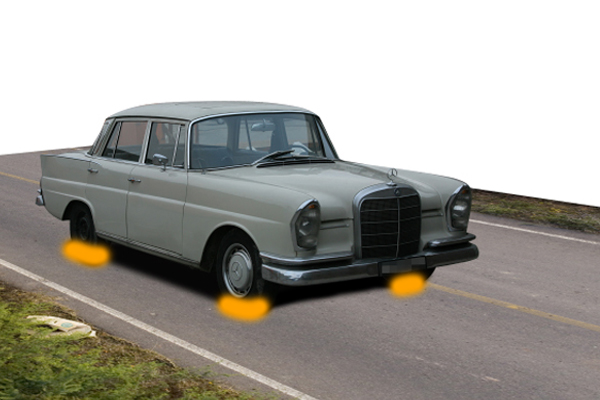
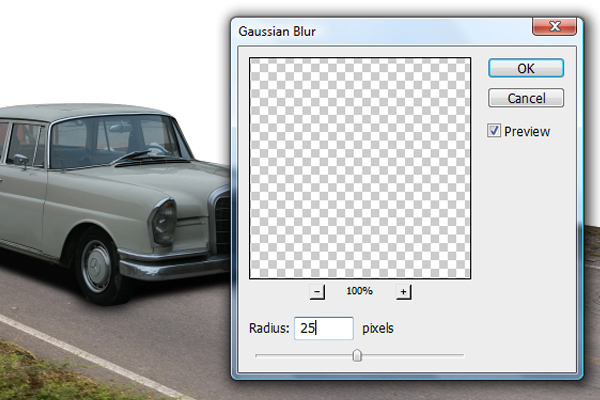
Step 9
Next go to Filter > Blur > Gaussian Blur and change its radius setting to 25px.
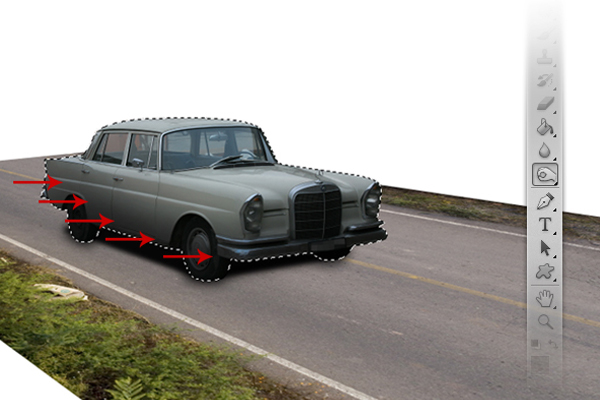
Step 10
Use the Burn tool (O) to burn the indicated areas of the car using a mid-sized brush with a low level of hardness.
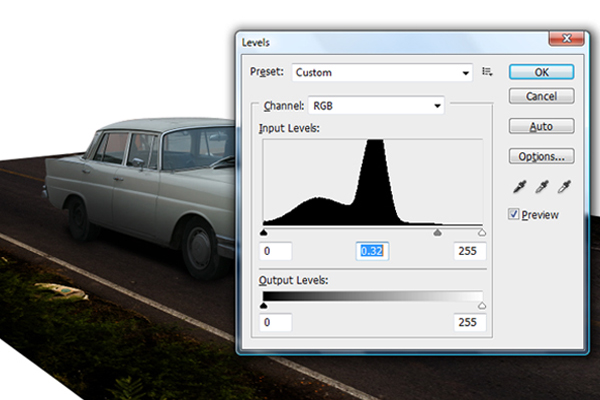
Step 11
Next, let’s darken Road.jpg to match the darkness of the car . To do this, hold Cmd/Ctrl + L to activate the Levels window. In the Levels window, input the values indicated below.
Step 12
The next step would be to extend the road further backward. To do this, first duplicate Road.jpg by pressing Cmd/Ctrl + J in the Road.jpg’s layer. Next, press Cmd/Ctrl + T to activate the resizing handles. Once activated, right-click and select Free Transform from the dropdown menu. Adjust the road to fit to the perspective of the first road.
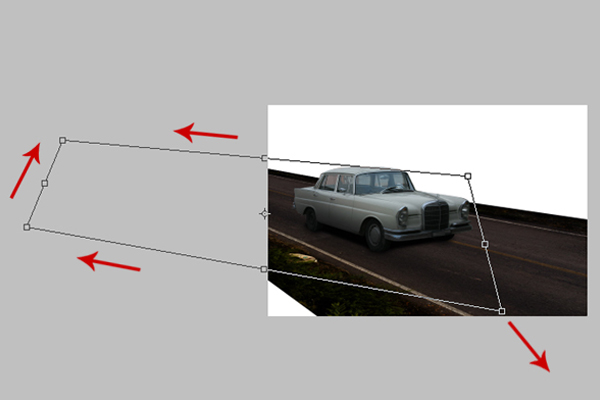
Step 13
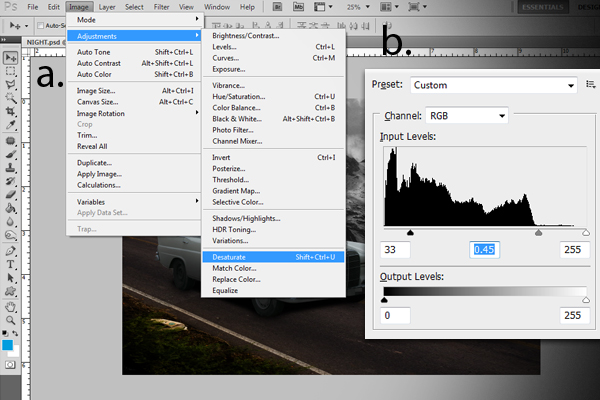
Now let’s add a background. First, open Mountain.jpg and place it below Road.jpg. Press Cmd/Ctrl + T to activate the resizing handles. Once activated, resize the image as shown below. After resizing, go to Image > Adjustments > Desaturate.
Step 14
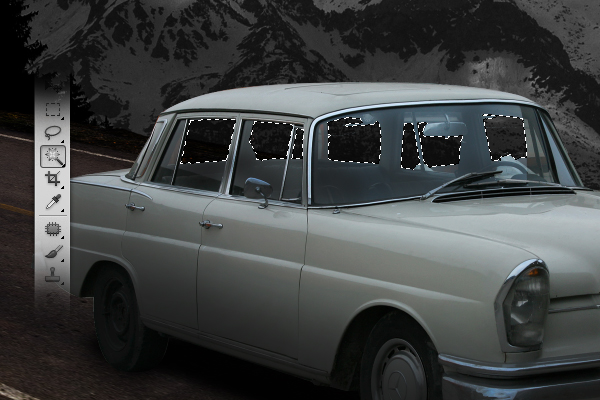
Use the Magic Wand tool (W) to select the areas shown below then hit delete.
Step 15
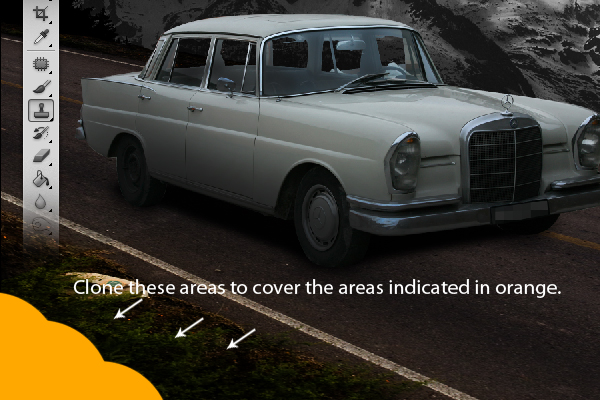
Next, use the Clone Stamp tool (S) to clone the areas indicated and transfer the cloned areas to the indicated areas in orange.
Step 16
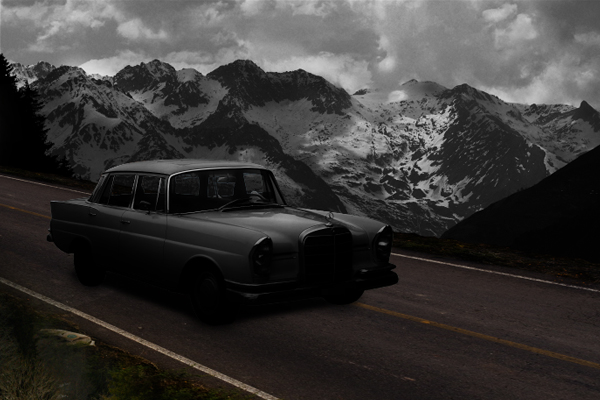
Next, go to "Car.jpg" layer, then go to Image > Adjustments > Desaturate, After desaturating, press Cmd/Ctrl + L to activate the Levels window. From the Levels window, change the values as indicated below.
Step 17
Create a new layer and name it "Black Shade." Using the Brush tool (B), set to 1400 px with 0% hardness and color #000000, brush the areas indicated below. After that, decrease its Opacity level to 62%.
Step 18
Now we’ll add the light effects for the car’s headlights. First add a new layer and name it "Base light", then using the Brush tool (B) set to a master diameter of 60 px, a hardness of 0% and color #ffffff, brush the inside parts of the headlights. After that, go to Filter > Blur > Gaussian Blur and change its radius value to 60 px.
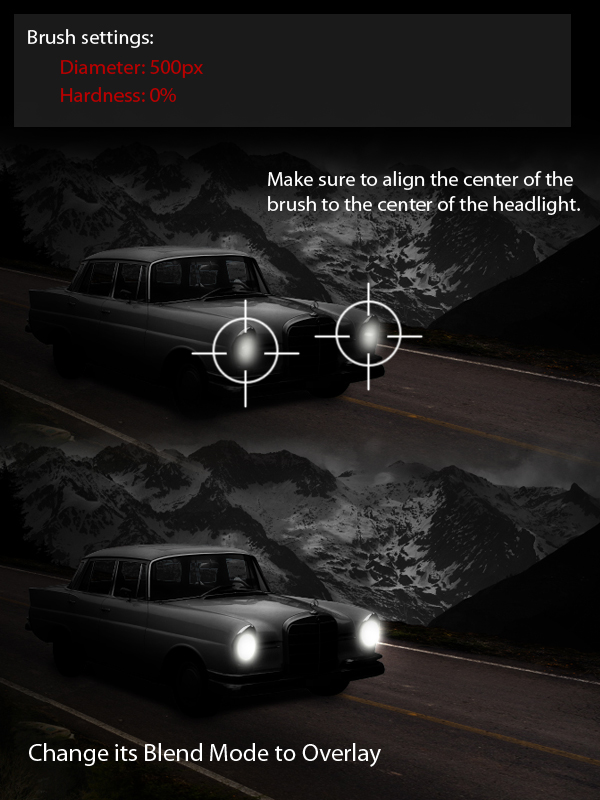
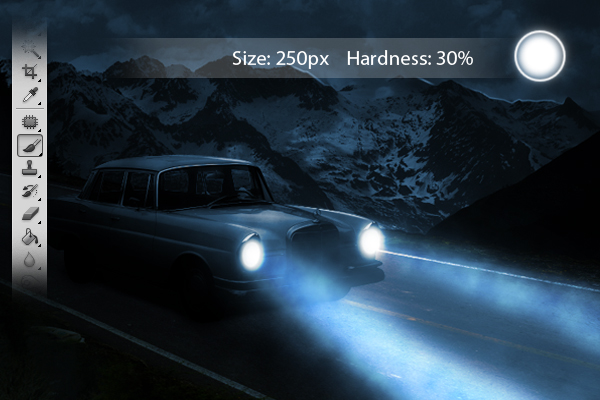
Step 19
Next, add a new layer and name it "Secondary light", then using the Brush tool (B) set to a master diameter of 500px, a hardness of 0% and color #ffffff and paint as shown.
Step 20
Add a new layer and name it "Extended light-1" then using the Brush tool (B), brush the indicated areas as shown below, Then, using the Eraser tool (E), erase the indicated areas. Lastly go to Filter > Blur > Gaussian Blur and apply the indicated value. Decrease its opacity level to 40%.

Step 21
Now it is time to add more light coming from the headlights. First add a new a layer and name it "Extended light-2." Instead of using the Brush tool (B), we’ll be using the Pen tool (P). First, define a path from the headlight to the road. Next right-click and select Stroke Path from the dropdown menu. From the Stroke path window, select the Brush tool. Prior to doing this, make sure to change the brush settings with the values indicated. Next, go to Filter > Blur > Gaussian Blur and apply the values as indicated. Lastly, change the opacity level to 20%.
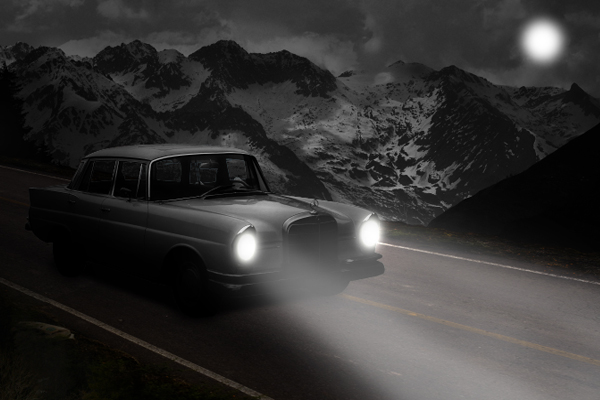
Step 22
The next step is to add the moon. First add a new layer and name it as "moon." Using the Brush tool (B), set to a size of 200px, a hardness of 0% and color #ffffff, brush a small area in the upper right corner of our image, just as shown. After that go to Filter > Blur > Gaussian Blur and change the value of the radius to 18px.
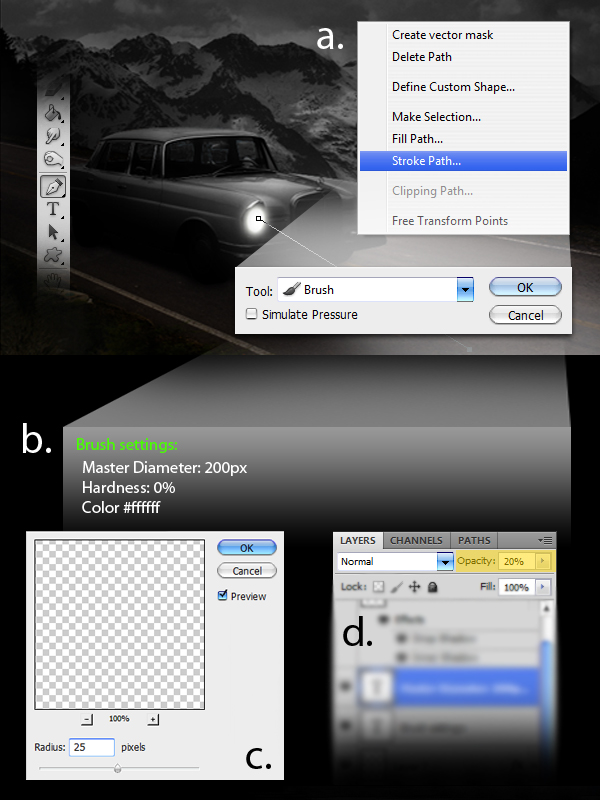
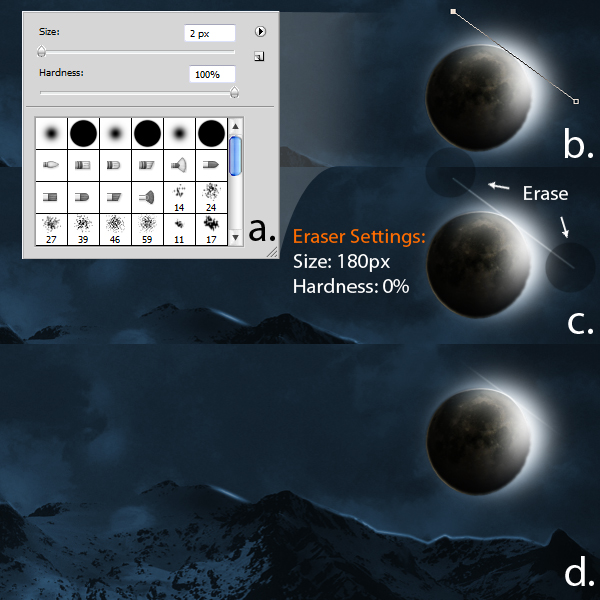
Step 23
Next, add the surface reflection lights from the moon to the car’s body and also to the mountain ranges. To do this first add a new layer and name it as "Light lines." Using the Pen tool (P), define a path just like as shown in a. Make sure to change the brush settings with the values indicated in b prior to creating the path. After defining the path, right-click and choose Stroke Path from the dropdown menu. From the Stroke path window, select the Brush tool.
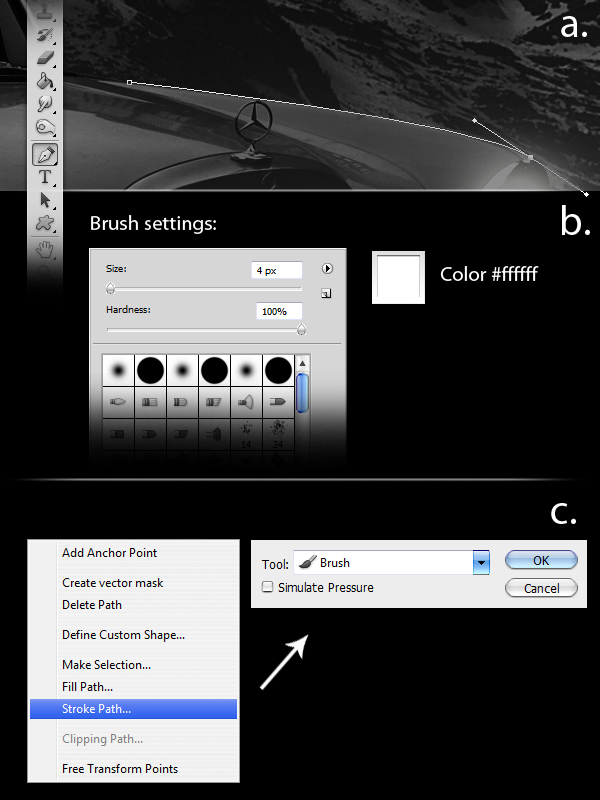
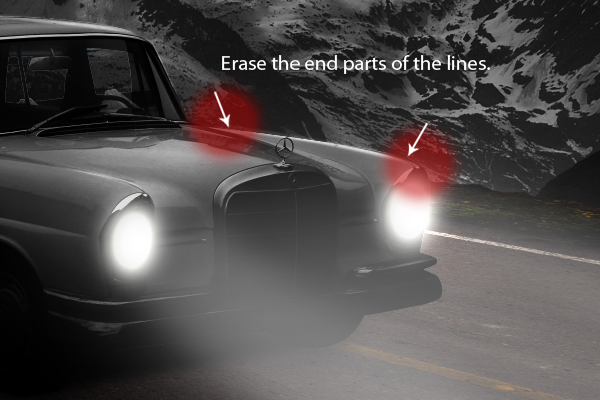
Finally, using the Eraser tool (E), erase the both ends of the lines.
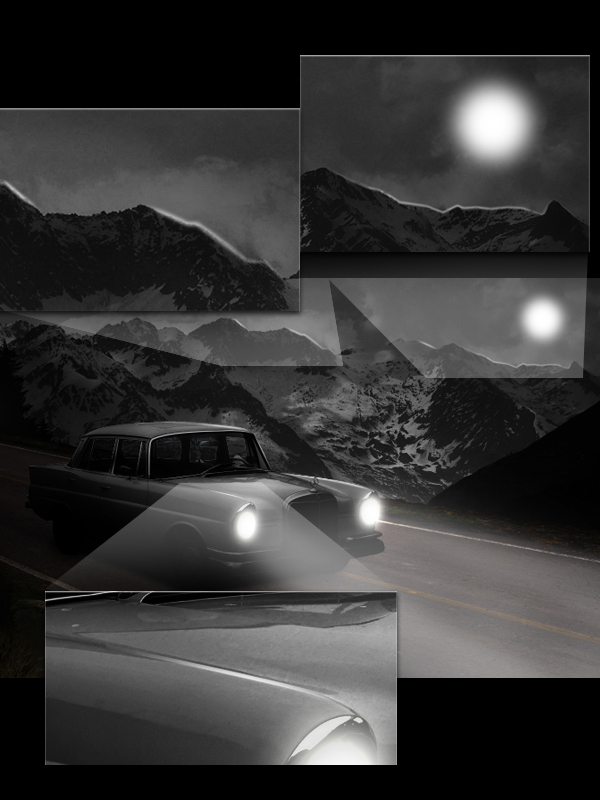
Apply light using the same technique to other parts of the car where light might hit. Change the layer blending mode to Overlay.
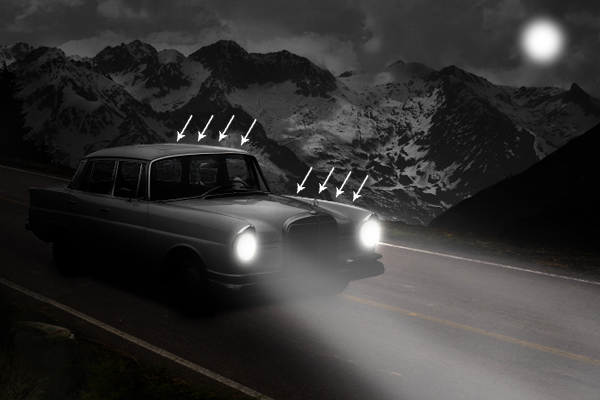
Do the same for the mountain ranges. Set blending mode to Normal.
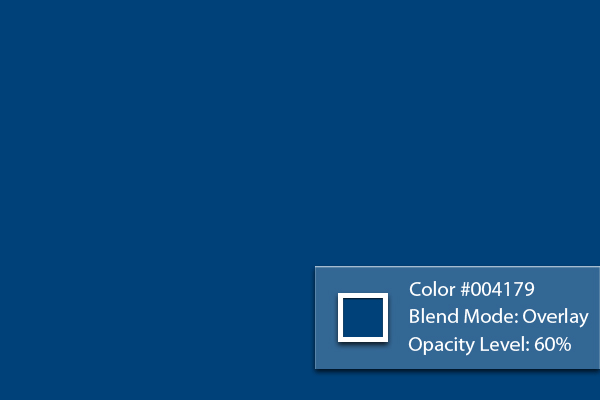
Step 24
Next, add a new layer and name it "Blue tint." Using the Paint Bucket tool (G), fill the entire image with #004179. After that, set its Blending mode to Overlay and change its opacity level to 60%.
Step 25
Next, using the Brush tool (B) set the values as indicated below, brush a small spot over the moon.
Step 26
Next, duplicate "Extended light-2" and place it over the "Blue tint" layer. Increase its Opacity level back to 100% and change its Blending mode to Overlay.
Step 27
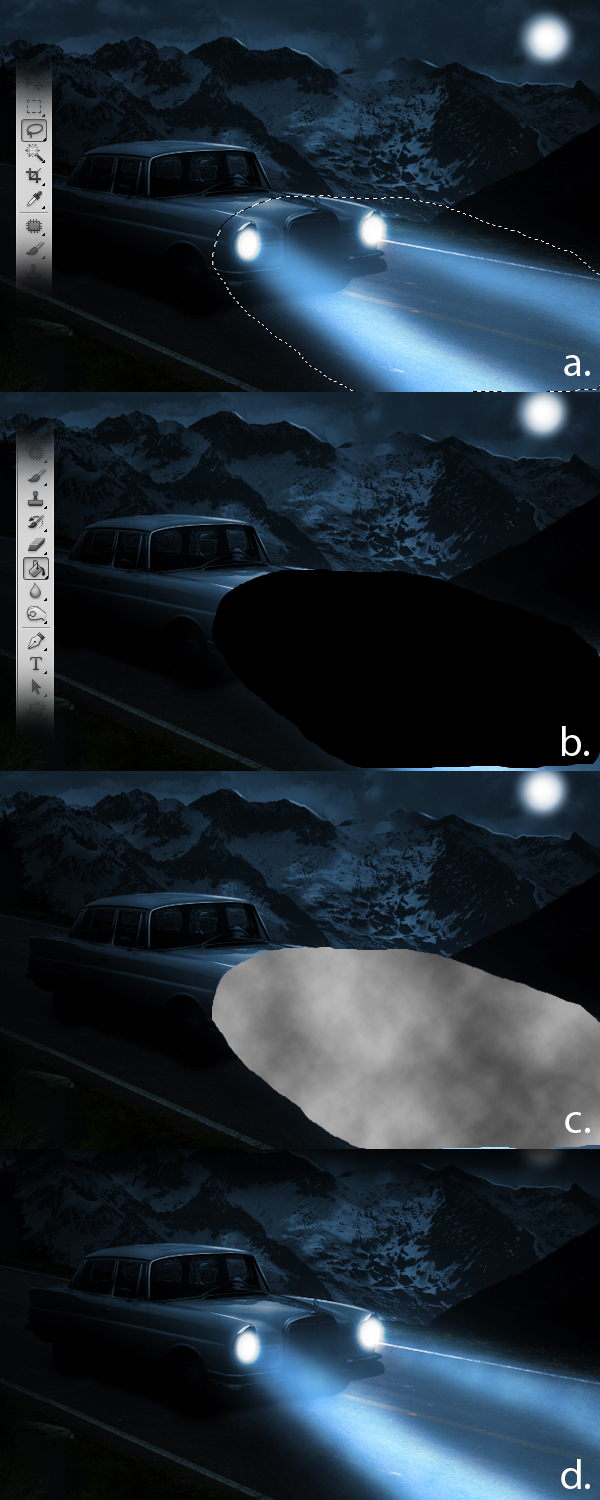
Next, add a subtle smoke effect in front of the car. To do this, first add a new layer and name it "Smoke." Next, using the Lasso tool (L), define an area as shown in below. Next, using the Paint Bucket tool (G), fill the entire selection with color #000000. Then go to Filter > Render > Clouds. Lastly, change the layer’s Blend mode to Overlay and decrease its Opacity level to 40% then use the Eraser tool (E) to erase some remaining hard edges.
Step 28
Next, Moon.jpg. Press Cmd/Ctrl + T to activate the resizing handles and resize the Moon as shown. After resizing, move the Moon slightly to the lower left corner.
Step 29
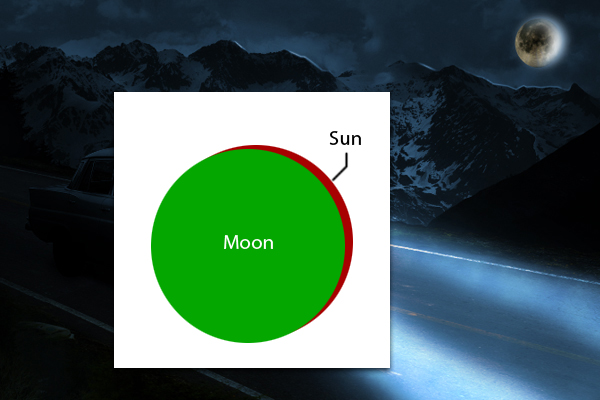
Next, select the Brush tool (B) and change its values as indicated below. Then, using the Pen tool (P), make a path on the upper right corner of the moon as shown. Finally, using the Eraser tool (E), erase the end parts of the path we’ve created.
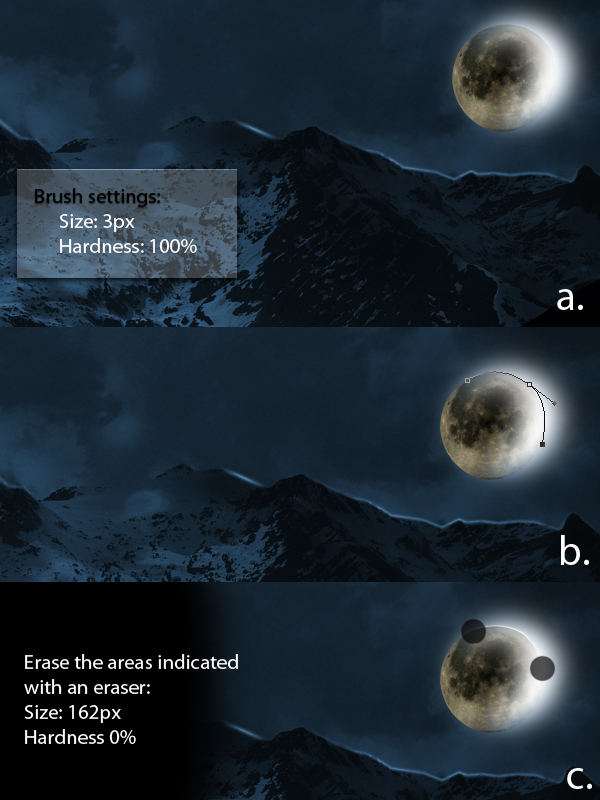
Step 30
Using the Elliptical Marquee tool (M), make a circle just right with the size of the moon, a. You can hold down the Shift key to create perfect circles. Next, using the Brush tool (B) set to a size of 298 px, hardness of 0% and color #000000, brush the lower left corners of the selection we’ve made.
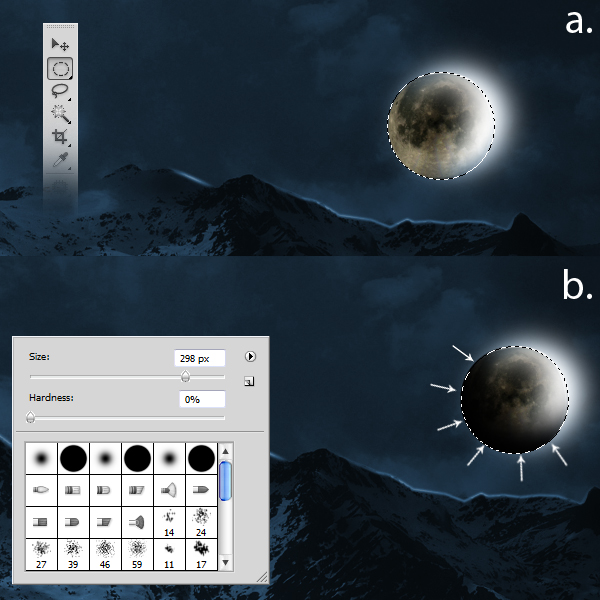
Step 31
Apply the following brush settings. After that, use the Pen tool (P) to draw a path as shown. After defining the path, right-click and choose Stroke Path from the drop down menu. From there, choose Brush as the tool of reference. Next, using the Eraser tool (E) with the indicated values, erase the areas as indicated.
Step 32
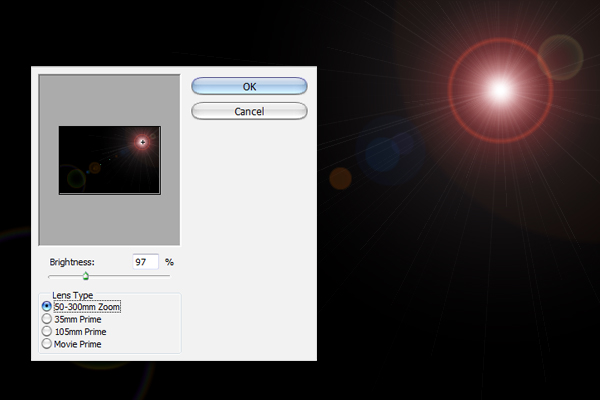
Next, add a new layer and name it "Lens Flare." Using the Paint Bucket tool (G), fill the entire image with color #000000. Next go to Filter > Render > Lens Flare and change the values indicated below. Finally, change its Blending mode to Screen and decrease its Opacity level to 70%.
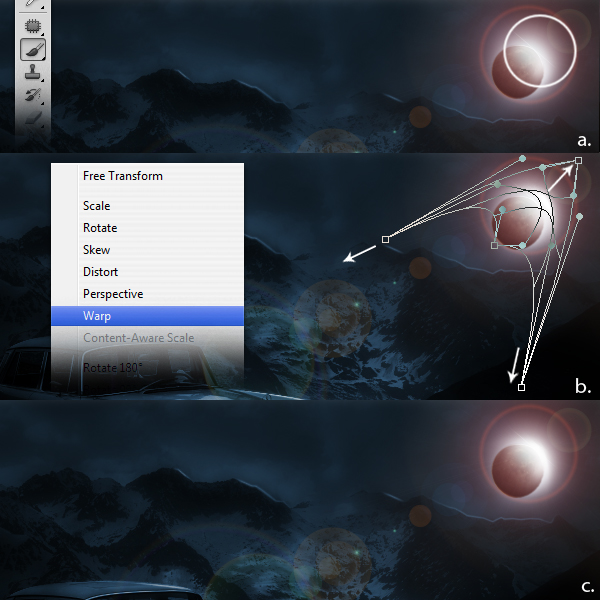
Step 33
Create a new layer and name it "Additional Light." Using the Brush tool (B) set to a size of 250 px, a Hardness of 0% and color #fffffff, brush a small portion on the indicated area. Next, press Cmd/Ctrl + T to activate the resizing handles then right-click and select Warp from the dropdown menu. Warp the selection as shown.
Step 34
The next step is to duplicate all layers except the "Lens Flare" and "Additional Light" layers. Once duplicated, merge all these layers by right-clicking and selecting Merge layers from the dropdown menu. Next go to Filter > Blur > Gaussian Blur and change the value with the one indicated below. Finally, decrease its Opacity level to 51%.
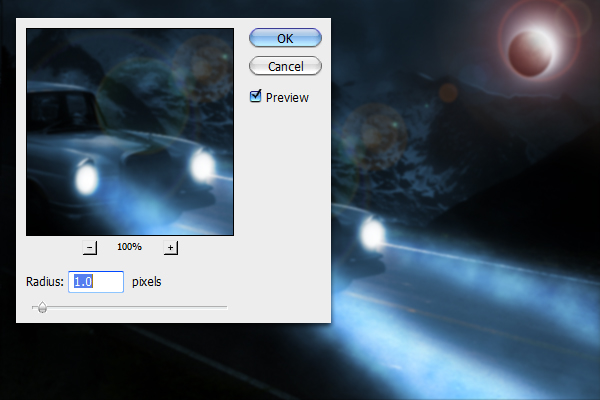
Step 35
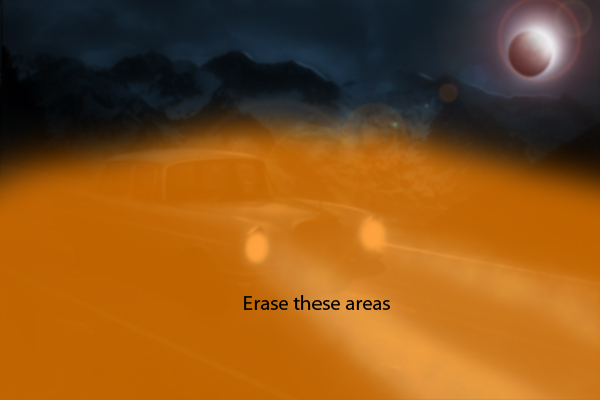
Erase the areas indicated below.
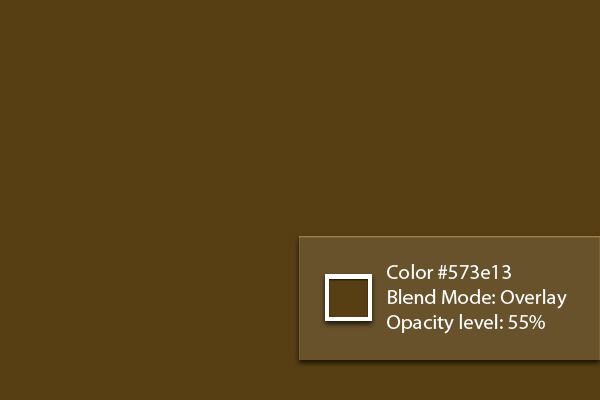
Step 36
Finally, add a new layer and name it "Brown tint." Next, using the Paint Bucket tool (G), fill the entire image with color #573e13. Next change its Blend mode to Overlay and decrease its Opacity level to 55%.
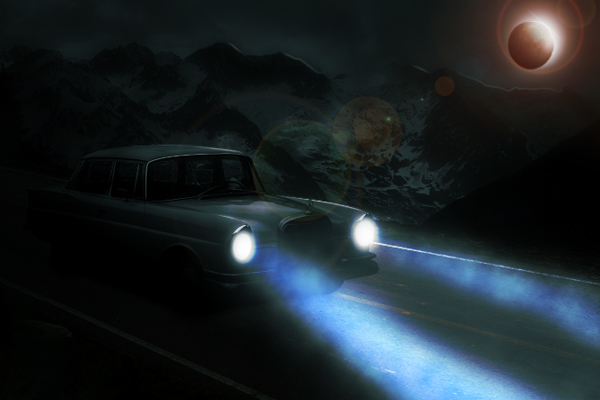
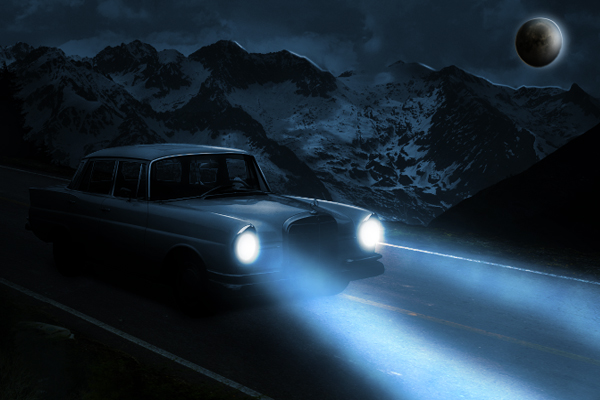
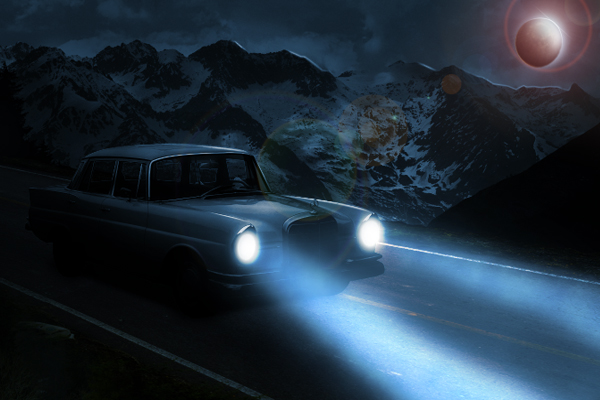
Final Image