Today’s financial situation has led to more clients asking for better value for money when setting budgets for design and print. A common request for a designer is to cut the number of inks from four down to two. Although this does cut print costs, it also cuts the designer’s color palette down dramatically. This tut will give you the knowledge to create more colors from a two color brief.
Step 1
First a little information on using the Mixed Ink Swatch feature within InDesign. To mix colors, one of the swatches needs to be a spot color, the other can be a regular process swatch or another spot color. When mixing colors digitally its wise to obtain a printed proof from your printer, as it will be different to the onscreen representation.
OK back to mixing the colors, create a new document (File > New > Document) or use an existing document. Go to the fly out menu in your swatches palette and select New Color Swatch. I am going to select "PANTONE Warm Red C" from the "PANTONE Solid Coated swatch book" within the Color Mode.

Step 2
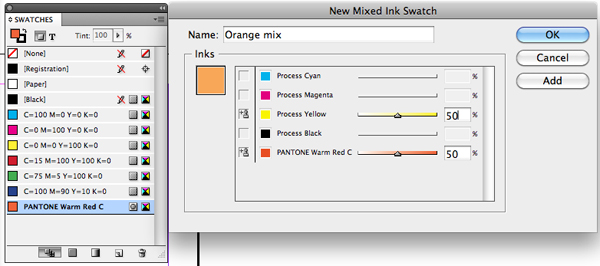
Go back into the same fly out menu and this time select New Mixed Ink Swatch. Next to the spot color you have just created click the empty grey square, you will see an icon appear with a plus symbol. I am now going to select my second color. For a good contrast use the Process Yellow to mix with the spot color. In the percentage box type 50% for both swatches, which will make an orange swatch. You can also give your new swatch a name in the top box. Finally click the OK button to leave.
Step 3
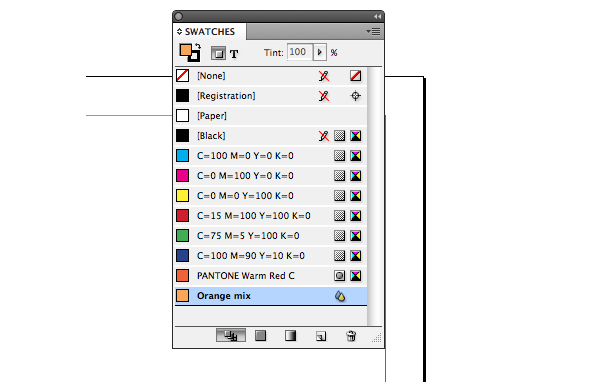
You will now see the new mixed ink in the Swatches palette. A mixed ink is recognizable by the two droplets logo that sits to the right of the swatch name. Using this technique it is possible to create a number or colors by adjusting the percentages of your two color mix. However InDesign provides a more efficient way to create a bunch colors in one go as described in the next step.
Step 4
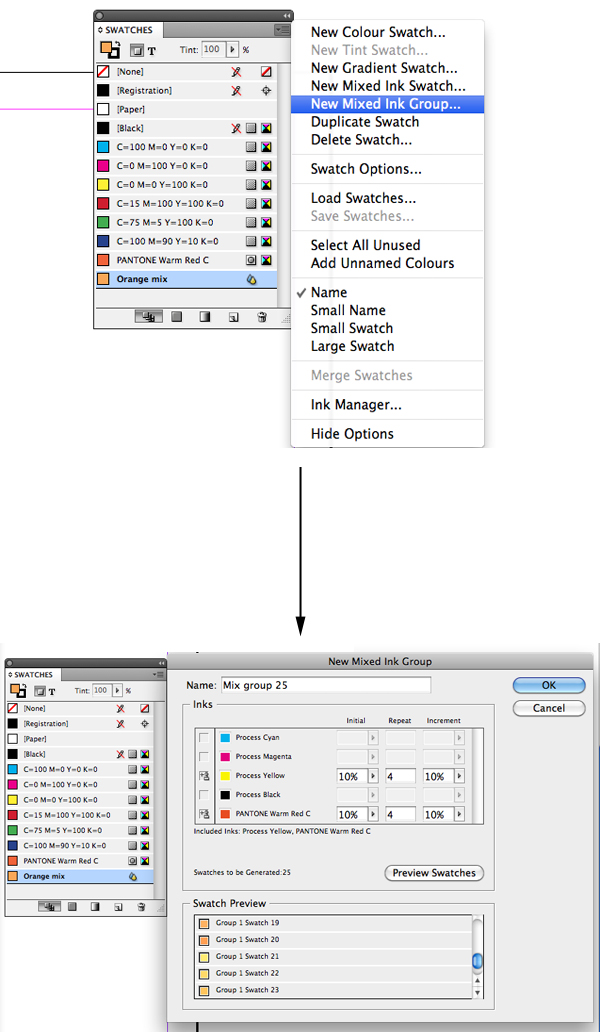
Again select the fly out menu from the swatches palette and select New Mixed Ink Group. Within the panel it is possible to adjust the percentages to create a range of colors. For this example I am going to create 25 new swatches. For both the process and spot color enter these values: Initial: 10%. Repeat: 4. Increment: 10%. Now click the Preview Swatches button. InDesign has generated a whole range of colors from a skin color to a golden yellow color. Try experimenting with the values to create your own groups and once you are happy with the results click OK.
Step 5
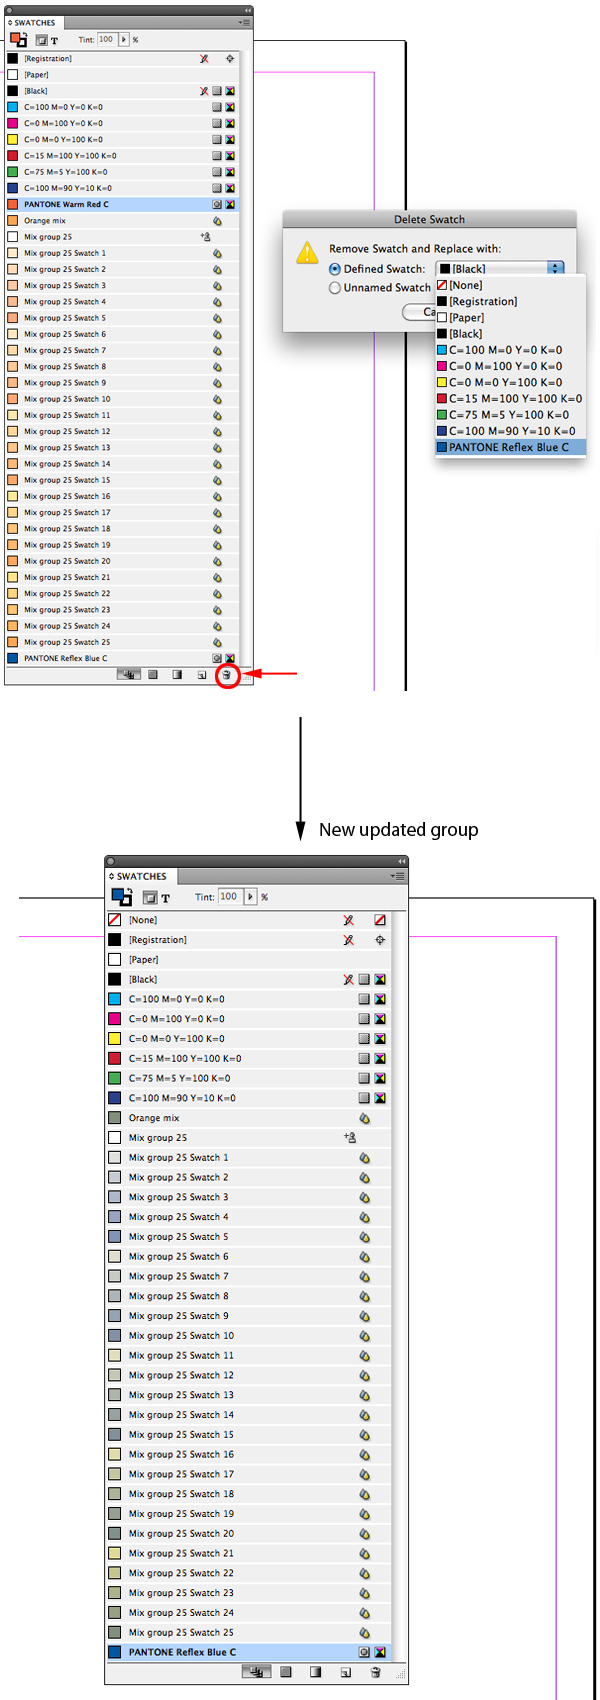
If for some reason your client changes their mind and decides on using blue instead of red, don’t worry the colors you mixed won’t be spoilt. Simply create your new swatch as described in step 1 and delete the swatch that isn’t required by selecting it and clicking on the trash can in the bottom right hand corner of the palette. A box will appear asking which swatch you want to replace the deleted swatch with. From the menu select the new blue swatch and click OK. Immediately all of the mixed colors you created will update with the new color.
Step 6
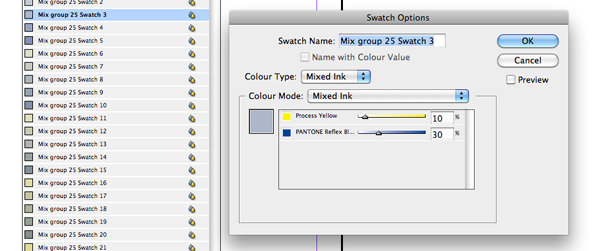
If you aren’t happy with the tones created, double click on each individual swatch and adjust the percentages to suit.