This Quick Tip will show you – in just a few easy steps – how to make an useful isometric grid. You will learn how to use the Rectangular Grid Tool with the "SSR technique", and in less than two minutes you’ll be ready to draw your isometric designs.
Step 1
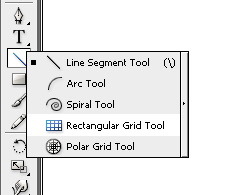
Open a new document. The dimensions will depend on what you will create on the grid we’ll make, and also the color mode. We’ll start now by selecting the Rectangular Grid Tool.
Step 2
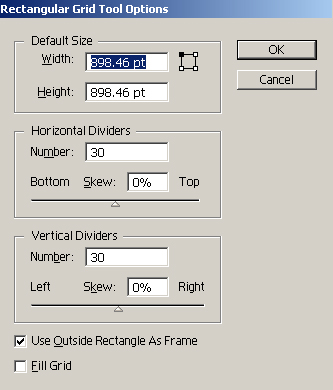
Set the parameters of Rectangle Grid Tool. Press Enter and set the values for Number under both Vertical Dividers and Horizontal Dividers to around 30. This value depends on the proportions of your project, so chose a number that suits your needs.
Step 3
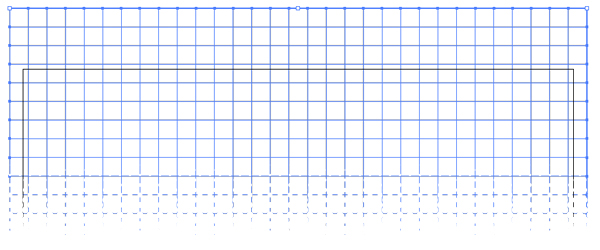
Now, you have two alternatives. You can specify the exact values for the Width and Height in the previous step (which I don’t recommend). In this case you must set the same value for both Width and Height to obtain a square grid. Or you can ignore those values and just drag with your mouse, holding Shift, to make one large square, a bit larger than your document (you will see later why).
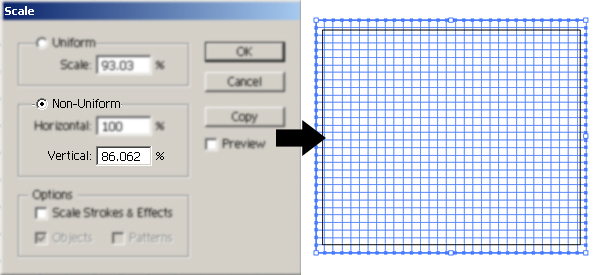
What we are going to do next is called "the SSR method". This is a method to make 3D isometric graphics from 2D. For our grid we will use this technique for the top plane.
Step 4 – Scale
Select the grid and go to Object > Transform > Scale, check the Non-Uniform and set the Vertical at 86,062%
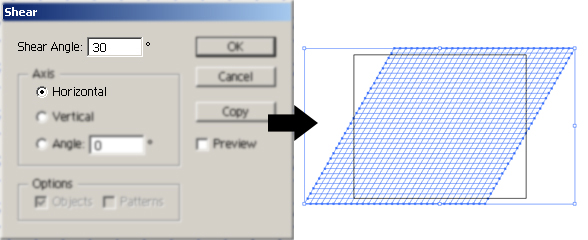
Step 5 – Shear
Keep the grid selected from now on. Go to Object > Transform > Shear and set the angle at 30 degrees.
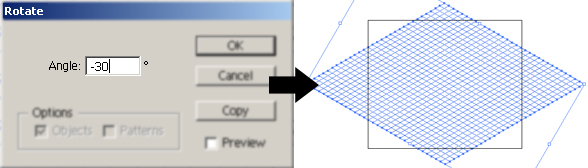
Step 6 – Rotate
Finally we have to rotate the grid. Object > Transform > Rotate and set an Angle of -30 degrees.
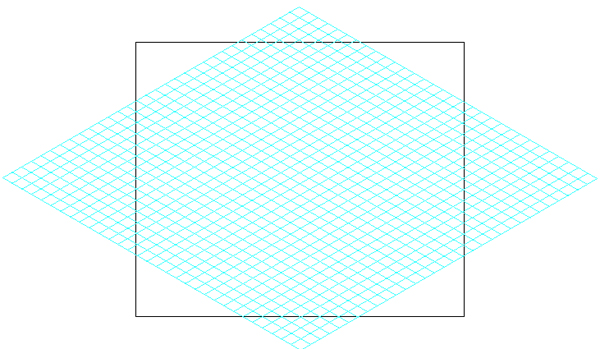
Step 7
Now the lines are set, all you need to do is to make Guides out of them. Be sure you have the grid selected and go to View > Guides > Make Guides (Control + 5).
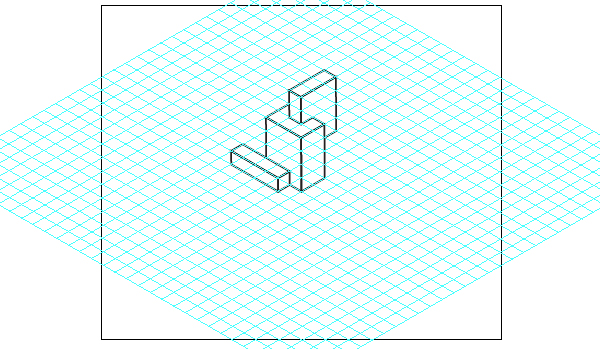
Conclusion
You now have a playground for your ideas, and this should take only two or three minutes. By taking the time out to use this technique you can make some great looking isometric illustrations and know that you’re using the right perspective. Have fun!
This Quick Tip is available as a Free Download to all Vectortuts+ visitors, and is just a fraction of the content you can access via our Premium Membership System.
Tuts+ run a Premium membership system that costs $9 a month (or $22 for 3 months!). Members have full access to the hundreds of full length tutorials, professional source files and periodic extra tutorials available from all our Premium Program sites!
To join today and begin downloading High Quality Vector Resources and Tutorials visit Vector Premium.