The Quickest (and Best) Way to Create Forms: Wufoo
Wufoo is a web application which intends to simplify forms. Forms can generally be tedious to work with. You’d have to write the XHTML/CSS for the form elements, set up the back end code to capture all the data and then work on generating usable reports for it. Wufoo simplifies this entire process right from form creation to integrating it within your site through extensive theme support to producing pretty, usable reports for you to parse your data.
It even does a lot of advanced stuff, including web hooks and a proper API to access the collected data. Today, we’ll look at how to create a simple form with Wufoo, and then use the API to programmatically access and modify the data collected.
Creating Your First Form
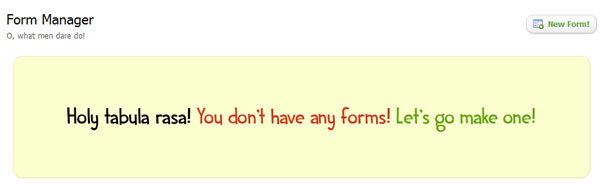
First up, we’ll need to set up a form so we can play around with it. Register for a new account with Wufoo and you are taken to one of the most humorous blank application states of all time:
Click on the button to start building a new form and you are taken to the form builder application. The interface is very intuitive with a context sensitive panel on the left and the main form section on the right. Adding elements is as simple as clicking on it or dragging it into the main section.
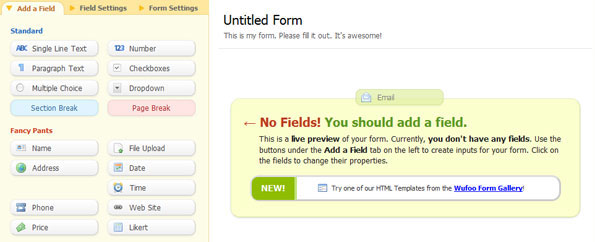
Clicking on the created element lets you edit all the relevant details.
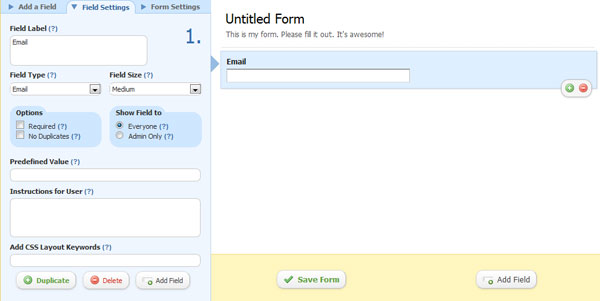
Since we’d like to keep it as simple as possible, just a single text field which takes an email address will do. Click save form and we’re done. We’ve created our first form with zero code and it took all of 60 seconds.
Integrating it With Your Site
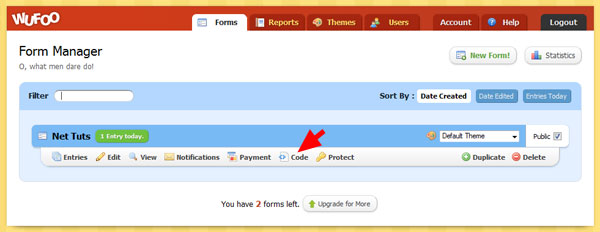
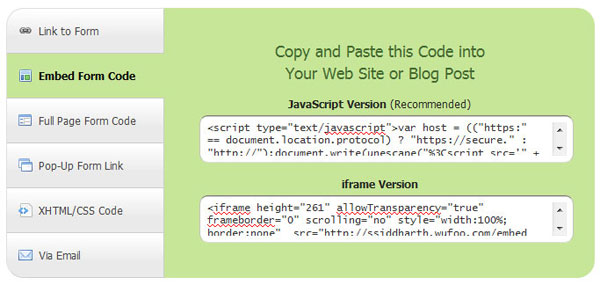
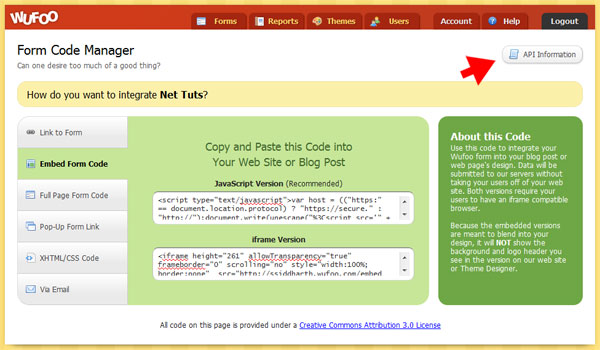
Integrating the created form with in our site is incredibly easy. Go to the forms page and click on the code link of the newly created form.
Wufoo provides a number of ways for you to get the form to your visitors including a JavaScript version which works inside an iframe, XHTML code for a complete page containing the forms or just a link you can share with your friends.
The Wufoo API
The Wufoo API lets you programmatically retrieve, submit and modify data pertinent to your account with very little fuss. The API set essentially consists of two stable, fixed APIs and one more under beta testing. We’ll look at the stable parts today.
Do note that you’ll only be able to retrieve and submit data to already existing forms. If you are looking to create forms on-the-fly and then submit data to it or just creating new fields through the API, you are out of the luck. The current version of the API doesn’t allow this functionality but look for it in the near future along with a bunch of other functionality.
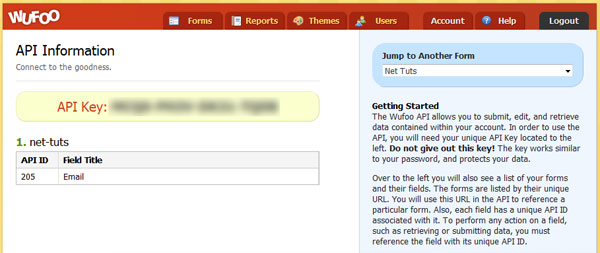
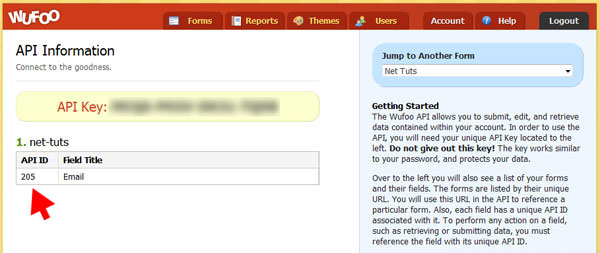
But first, you’ll be needing an API key. You can get it from the API information link in the page where you get your code snippets.
Make a note of your API key and the ID of the field you want to access and/or modify. We’ll be using it shortly.
Getting to Your Data – The Query API
The Query API lets you retrieve information you’ve collected through your forms bypassing the Wufoo web site. In case you are looking to get all the raw data and then create a custom report out of it, this is the way to go.
The first thing you need to note is the URL you’ll need to request to get to the right data. The URL looks like so:
http://username.wufoo.com/api/query/
Replace username with your username and you’re good to go. The query parts let them Wufoo servers know that you are looking to retrieve information from the servers.
Sending a Request to the Server
cURL is the easiest way for us to send data to the server. If you are a little new to cURL and feel lost, I highly recommend you go through this cURL article right here at Nettuts+.
<?php

$apikey = '1234-1234-1234-1234';
$form = 'net-tuts';
$req = 'w_api_key='.$apikey.'&w_version=2.0&w_form='.$form;

$ch = curl_init("http://username.wufoo.com/api/query/");
curl_setopt($ch, CURLOPT_HEADER, 0);
curl_setopt($ch, CURLOPT_RETURNTRANSFER, 1);
curl_setopt($ch, CURLOPT_POSTFIELDS, $req);
$resp = curl_exec($ch);
curl_close ($ch);

echo $resp;

?>
Let’s go over the code part by part. We first need the API key we made a note of before. We also need the name of the form you want to retrieve the data from. These two along with the version of the API we are using, two in our case, are the minimum parameters we need to make a successful request.
We concatenate all the required elements as key/value pairs and store it for later use.
Next up, we pass in the correct URL as noted above along with the request string we created above. We also store the response to a variable so we can use it.
$resp holds the response to our request. By default, the Wufoo API returns data in a JSON format. In case XML happens to be your payload of choice, you’ll need to add an additional parameter to the request string. The additional parameter takes the format of w_format=format where format can either be XML or JSON.
The JSON Response
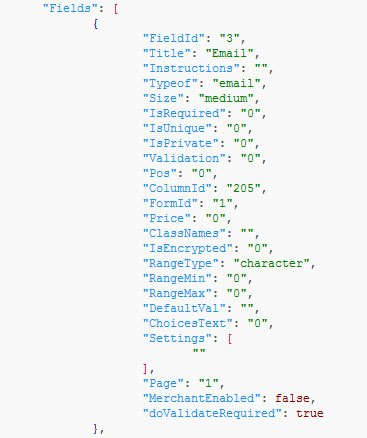
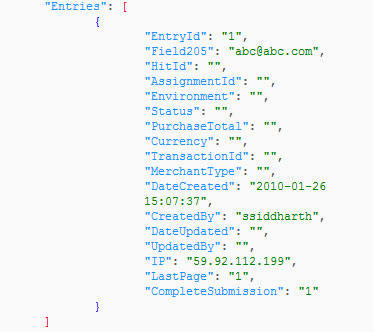
The returned JSON payload is actually pretty large containing numerous pieces of information. The relevant parts are shown below:
The main part is the result of the request along with information about the requested form including the name of the form, its title, URL, description and a lot of other information.
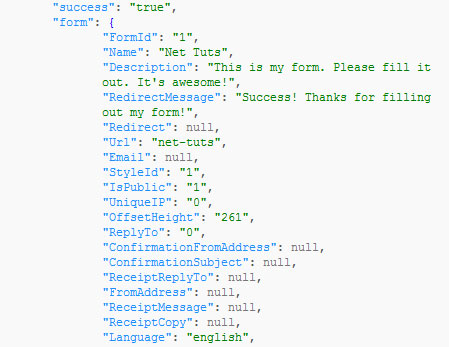
The second point of interest is the fields, the form contains. Since our form was very simple with just a single field, our returned data is pretty short. Either way, it carries information about the ID of the field, its title and various other information including whether its required or not, a description for the field and so on.
The final point of interest is the portion containing tthe entries themselves. Each entry for the selected form is returned to the caller containing a myriad of information including the id of the entry, the value of the fields, the IP of the user, date it was created and so on.
From this point, what you do with the data is completely up to you. You can parse the data to create a nice custom report, search through the information for specific data or just enter them all into a spreadsheet or database. Your imagination is the limit.
Submit with Style – The Submit API
The submit API lets you submit data directly to the Wufoo servers. This API is specially useful if you absolutely need to use your own XHTML/CSS whilst still leveraging all the back end capabilities Wufoo provides. This way you get the best of both worlds: you get to use your own customized look but retain all the power of Wufoo.
The front end requires no significant difference. As an example, here is the markup, I used for testing out the submit API.
<form action="handler.php" method="post">
<input id="input1" name="input1" type="text" maxlength="255" value="" />
<input id="saveForm" class="btTxt" type="submit" value="Submit" />
</form>
handler.php looks like so.
<?php
$apikey = '1234-1234-1234-1234';
$formid = 'net-tuts';
$data = $_POST['input1'];
$fieldid = '205';
$req = 'w_api_key='.$apikey.'&w_form='.$formid.'&'.$fieldid.'='.$data;

$ch = curl_init("http://ssiddharth.wufoo.com/api/insert/");
curl_setopt($ch, CURLOPT_HEADER, 0);
curl_setopt($ch, CURLOPT_RETURNTRANSFER, 1);
curl_setopt($ch, CURLOPT_POSTFIELDS, $req);
$resp = curl_exec($ch);
curl_close ($ch);

echo $resp;

?>
There are a couple of things to note here. As with the query API, we save the apikey and formid so we can use it later. We also capture the value of the POSTed text box so we can send it to Wufoo ourselves.
Notice that we’ve also created a variable called fieldid. This corresponds directly to the API ID present in the API key page.
After this, everything is just as before. We concatenate the string and then use cURL to pass the data to the server. The server returns a JSON response which looks like below:
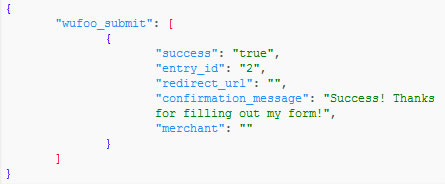
That’s it. No hassles, no non-sense. Posting to Wufoo through our custom code is as simple as that.
Bonus: Integration With Third Party Services
As an added bonus feature, Wufoo now lets you post to other services when a new entry is logged into the system. You can do a lot of nifty things with this awesome new feature but I’ll just stick to how to use this feature.
To get to the notifications page, click on the notifications link on the forms page.

This page lets you choose to get notified via a number of options including email and SMS or post to services like Highrise, Twitter and many more when a new entry is posted. But those aren’t the ones we are going to look at today. The one we are going to look at is web hooks – a nifty technology which lets developers receive HTTP callbacks when an entry is submitted to Wufoo. Think of it like a callback on steroids.
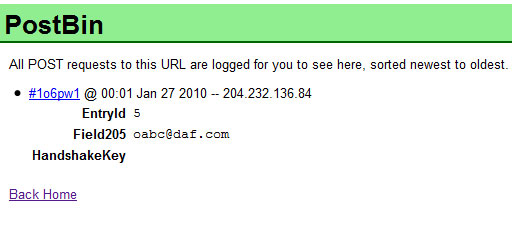
On Wufoo’s side all you need to do is enter a URL to which Wufoo will POST data to every time. All you need to on your side it to set up a page which captures the POSTed data. For testing purposes, you can setup an account at PostBin which saves you the hassle. Enter this URL into Wufoo and you are all set. An example of the data posted by Wufoo to our target URL.
Very nifty, if I may say so myself.
Conclusion
And we are done! We looked at creating a simple form with Wufoo and then how to programmatically manipulate and retrieve the data we’ve collected through Wufoo’s easy to use API. Hopefully, this has been useful to you and you found it interesting. I’ll be closely watching the comments section; so chime in there if you have any queries.
Questions? Nice things to say? Criticisms? Hit the comments section and leave me a comment. Happy coding!
Write a Plus Tutorial
Did you know that you can earn up to $600 for writing a PLUS tutorial and/or screencast for us? We’re looking for in depth and well-written tutorials on HTML, CSS, PHP, and JavaScript. If you’re of the ability, please contact Jeffrey at [email protected].
Please note that actual compensation will be dependent upon the quality of the final tutorial and screencast.

- Follow us on Twitter, or subscribe to the Nettuts+ RSS Feed for the best web development tutorials on the web.