
There are people out there, real artists, creating amazing pieces in seconds. And here’s you, struggling with a simple stick figure. Wouldn’t it be great to draw that, at least? Imagine your friend saying “I can’t even draw a stick figure,” and you, cutting in: “I can!” How awesome would that be?
With that remarkable skill, your dreams would come true! Imagine people approaching you on the street and asking you to draw a stick figure for them! You could become rich and famous! All you need to do to make it come true is to follow this life-changing tutorial. Let’s get started!
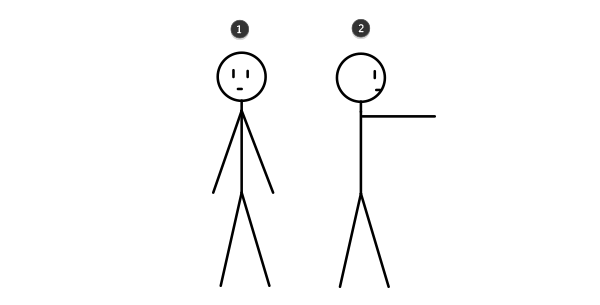
1. General Anatomy of Stick Figure
Let’s start from the basics. A common stick figure is constructed of:
- Head: roughly circular
- Facial features (optional): easily recognizable
- Neck (optional): thin and short
- Arms: two of them
- Spine: looking like a third arm
- Legs: two of them

It is widely known that a stick figure seen in the side view (2) shares most of its characteristics with the front view (1). Therefore, perspective is useless when you want to draw a stick figure (isn’t it pretty useless anyway?).
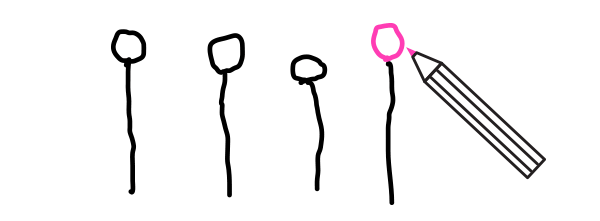
2. Spine and Skull
Spine
Draw a medium-length vertical line. It is the spine of a stick figure.

Just kidding! Of course, every stick figure has its own personal spine, and it doesn’t need to be as straight as… something very straight.

Skull
Add a circle for the skull.

By “circle” I mean, of course, something resembling this noble shape. Perfection is overrated.
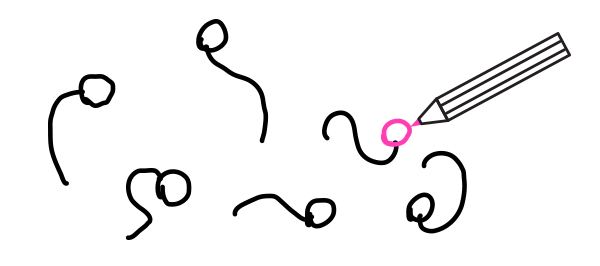
A legless stick figure moves by floating in space. Practice these simple poses for a while before we make it more complicated.
3. Legs
A stick figure without legs is more like a fish than a man. Let’s fix it.
Step 1
Draw one long leg.

Step 2
Add another leg on the other side.

Step 3
However, these long sticks won’t stand on their own unless they’re stuck into the ground. For a proper support we need to add tripod feet:
- Toes
- Heel
- Ankle

The tripod structure is visible the best in the front (2) and back (3) view.

So, add feet to your stick figure.

Step 4
The legs are not done yet. They’re too straight! How is the figure supposed to move?
To give our stick figure full mobility we need to add joints to every leg:
- Hip
- Knee
- Ankle and toes

Each joint has its own range of motion.

The spine can use the hip joint, too:

The problem is, one joint can’t manage three different moves at the same time. How to create a pose like the one below?

We need to use two hips. This way both legs and the spine get the mobility they need, and the pose is more stable. Keep in mind that these three joints merge into one when in side view.

Step 5
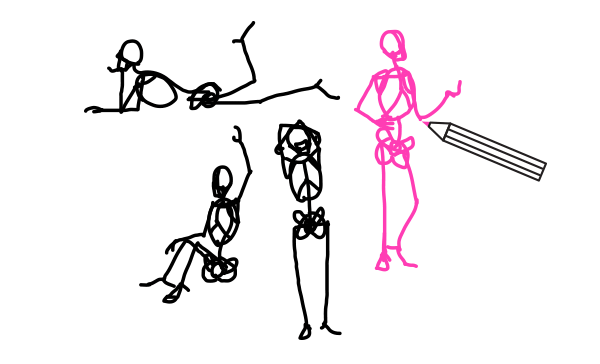
Practice! It’s going to be harder with every step, so it’s good to work on small chunks at a time to avoid chaos.

4. Arms
Step 1
By dividing the spine you get the neck point. The arms start there.

Step 2
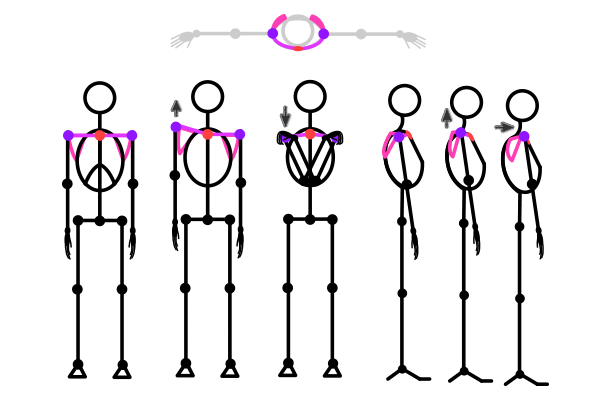
Of course, we can predict that the neck and arms will want to have their own mobility, so let’s add the clavicles.

Step 3
The arm has three joints that make it very mobile:
- Shoulder
- Elbow
- Wrist and fingers

Just as with the leg joints, arm joints have a defined range of motion:

We can re-use one of these new joints to move the neck:

Step 4
Hands are very complicated—they’re actually stick figures on their own—so we’ll take only a brief look at them. There are two things you can remember about them:
- Every finger (except the thumb) has three joints: one at the base and two in the middle.
- All the fingers follow the same rhythm—imagine them being attached to the base of thumb with invisible strings.

Step 5
Time for practice! Forget the hands for now and just have fun.
5. Upper Body
Step 1
We need a chest to put the stick figure’s heart in. Draw an oval between the shoulders and the elbows.

Step 2
The chest is very heavy, and it’s placed high in the body, making it unstable. The spine needs to be modified to hold this weight!

Cut the roundness of the chest by adding the sternum—that flat area between the breasts.

Step 3
Arms have such a great range of motion thanks to being attached to the shoulder girdle. Each shoulder is attached to scapula (shoulder blade) and clavicle, which is attached to the sternum, which is attached to the chest, which is attached to the spine. The spine and chest are quite rigid, but the arms aren’t connected to them directly, hence their mobility.
Anyway… just look what your shoulders can do!
Step 4
The lower torso is a bit more complicated, but that won’t stop us! Draw a flipped heart to create buttocks. In side view they look like a drop.

In the front, in the middle, add a circle. It indicates the pubic area.

Add two “wings” for the iliac crest.

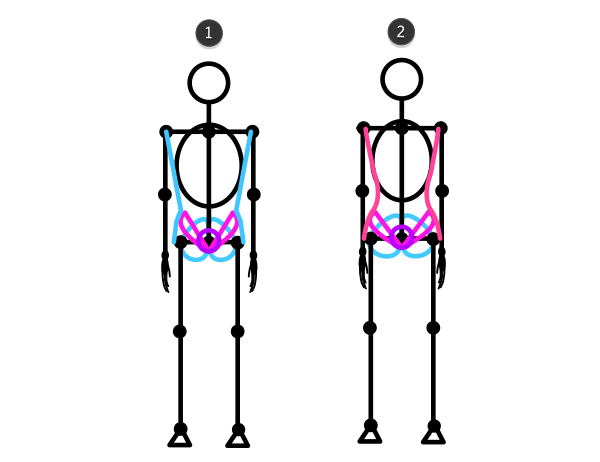
Step 5
Traditionally, there’s a type of silhouette typical for men (1) and women (2), although it’s not always the case. It’s safer to say that narrow hips and wide shoulders make the silhouette more masculine, and wide hips/narrow shoulders—feminine, whatever the gender.
Step 6
The spine is attached between the buttocks. If humans had tails, this is where one would start.

The human spine is not very flexible, and it changes its shape very slightly when bent.
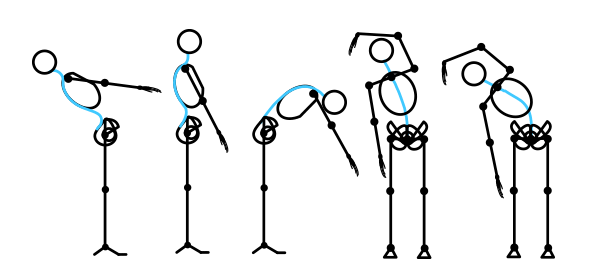
The spine limits the range of motion of the hips, too.

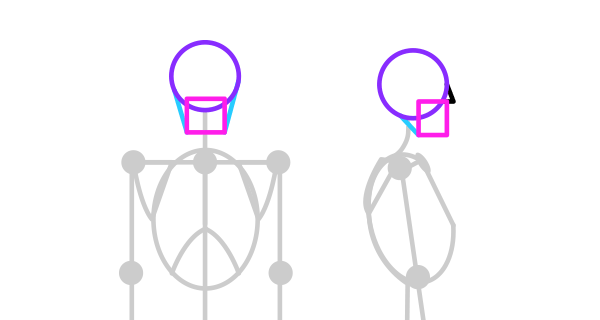
Step 7
The head isn’t overly important for a stick figure, so let’s make do with this simple scheme:
6. Perspective and Proportions
I was kidding about the importance of perspective. It is, in fact, very useful. However, it’s much simpler than you may think. Perspective defines what happens to the view in transition, for example between front and side.
If you want to turn the stick figure around, simply imagine one side turning into the other side. Imagine a transitional form between two sides. For example, if in the front view two arms are visible, and in the side view one arm overlaps the other, in the transition one arm is coming closer to the point where it will be overlapped.

When it comes to proportions, there is no one perfect recipe for them. Humans are very, very different, and “average” doesn’t really exist. So instead of remembering all these “x heads long”, observe your own body:
- You can fit your elbow in the waist—the elbow is placed right below the chest.
- You can grab your shoulder—the forearm is almost as long as the upper arm.
- You can touch your thighs with your wrists when upright—arms are longer than the upper body.
- You can roughly cover your face with your hands—one hand is as big as roughly half of the head.
- If you curl up, you can touch the knee with your chin—the thigh is shorter than the upper body.
- You can sit down on your heels—the thigh and calf have similar length.
- With your back flat, you can’t reach the heel level with your extended arms—arms, hands included, are shorter than legs.

It’s very easy to forget what we’ve just learned, so take your time to practice!
That’s All!
I hope you forgive me that little trick I’ve used to drag you through quite a complicated tutorial about drawing a simplified human skeleton. After all, that’s still a stick figure—except it’s far more useful than its cousin.
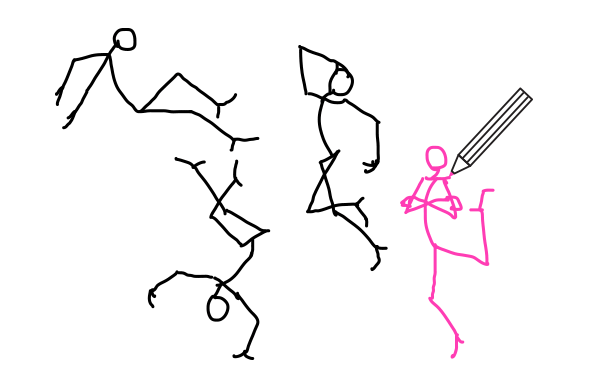
You’re now ready to practice gestures—a base for the human figure. If you manage to practice at least 15 minutes every day, congratulations—you’re on the way to drawing interesting, dynamic human poses without a reference! And all this thanks to a simple stick figure.
{excerpt}
Read More