Panoramic photography is the process of capturing an extremely wide field of view into a single photograph either by using specialized equipment, or specialized software. Today we’ll be looking at the latter of those two and examining how you can create your very own panoramic images with Adobe Photoshop, using almost any camera and lens.
Understanding Panoramic Photography
The word “panorama” was coined in the 1780′s by an Irish artist named Robert Barker. He used the word to describe a technique which had invented for painting a scene on the inside of a large cylinder, creating the illusion of a natural 360 degree view to anyone standing at the center.
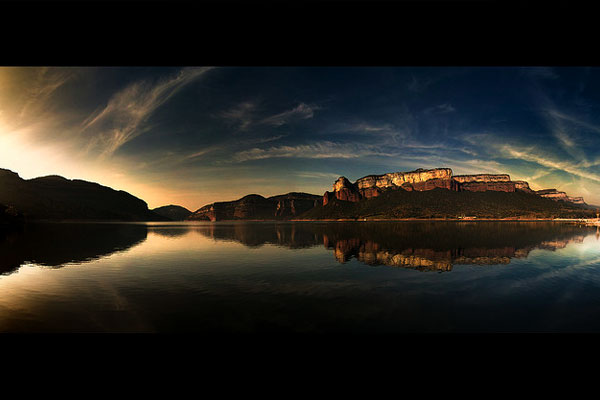
There is no official divide between wide-angle photography and panoramic photography, but it’s a generally accepted rule that panoramic photographs take in approximately the field of view visible by the human eye, or slightly more. The purpose of panoramic photography is to capture an entire scene rather than just a single portion of it. For this reason it’s a popular technique amongst landscape photographers in particular.
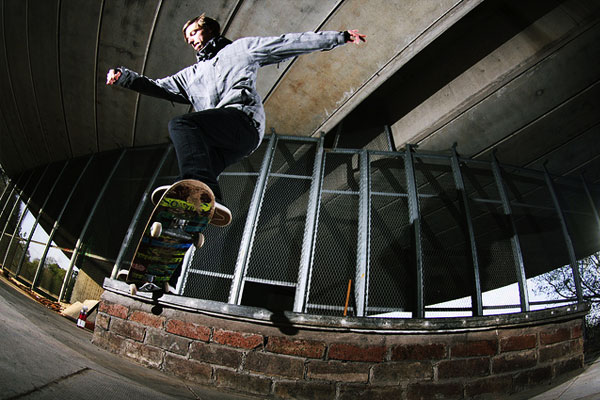
Outside of the truly specialized panoramic lenses, you’ve probably already seen what the more common fisheye lens can do, pulling in the world around it and distorting it into a round shape. Often used in skateboarding and other extreme sports photography, fisheye lenses are the first step to getting the whole scene into the photograph while remaining close to the subject.
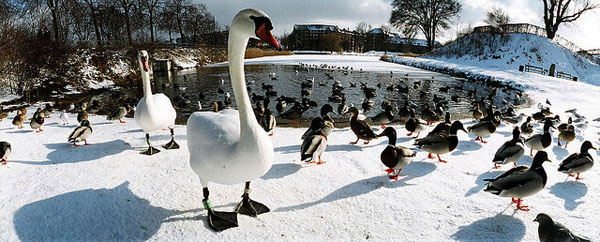
True panoramic photography, however, does not distort the entire image as much as fisheye lenses typically do. Where the fisheye expands the field of view both horizontally and vertically, generally speaking the focus of panoramic photography is only horizontal. Of course landscapes aren’t the only subject suited to this style of photography, all the birds flocked around the lake in the picture above are a perfect example of expanding the field of view for a good reason.
Creating Your Own Panoramic Image
If you come across a scene which you think would be perfectly suited to a very wide-angle panoramic image, then you can create one almost completely regardless of what camera or lens you have with you. The only real limitation is that the scene which you want to photograph has to be static. You’re going to need to take multiple photographs of the same location, which won’t work if there’s a lot of movement within the frame.
Step 1
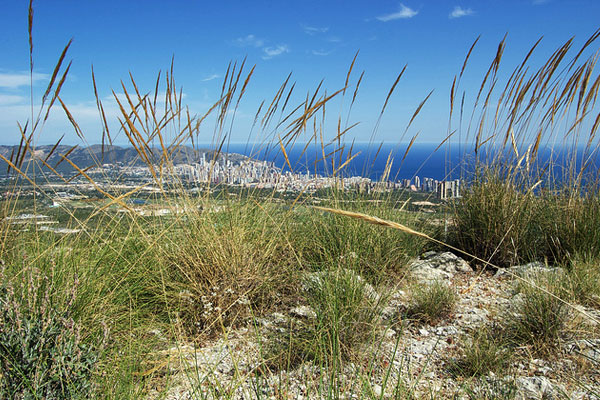
The first thing you’re going to need to do is find a good location to take your shots from. What you’re going to do is stand in a single place, and then take photos starting at one side and working your way over to the other. Preferably you should us a tripod for this and rotate it around on the same spot, however it’s not essential. Either way, you need to be somewhere where you have ample space to turn around and your view isn’t obstructed in any direction.
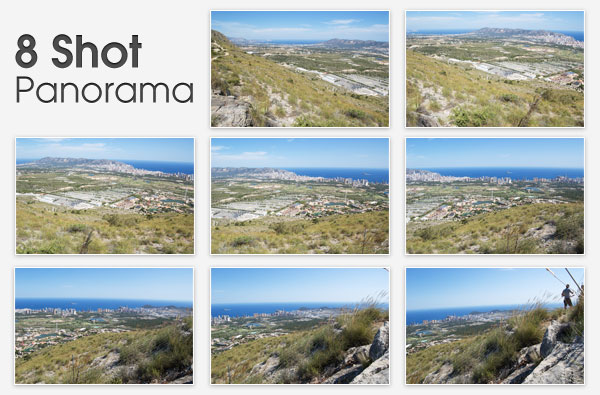
I was in Spain recently on a bloggers press trip organized by the Land of Valencia and happened to find this rather nice spot at the top of a nearby mountain overlooking Benidorm, so this is where I stood.
Step 2
Now you need to take all the photos which are going to make up your panoramic photograph. The easiest thing to do here is to start at the left, and pick out a landmark on the right hand side of your frame. Take the shot, then move that landmark from the right hand side of the frame to left hand side.
Pick out a new landmark on the right, take the shot, and continue. This ensures that all the photos which you take will overlap properly without leaving any gaps between them.
Pay close attention to how you’re standing, try to keep the camera level and follow the horizon to make sure you don’t go up or down as you pan across.
Here are the photos which I took from the above location, which you’ll see have quite a large overlap. Realistically you don’t have to allow that much overlap, but it’s always better to waver on the side of caution. Too much overlap is better than not enough overlap – also known as gaps!
Step 3
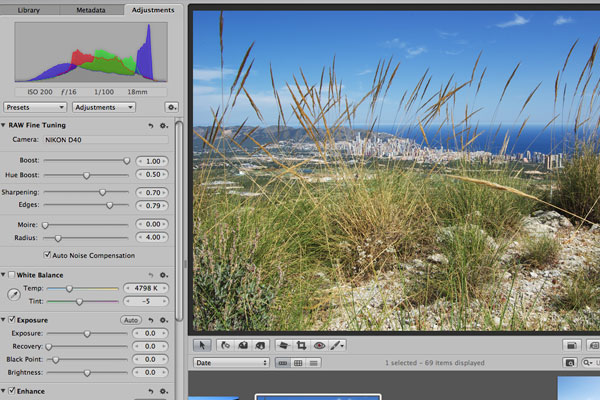
The next step is to post process all the images in your series, but remember that you have to process them all in the same way or they won’t match up. If you add vibrancy and sharpening to one shot then you need to apply the same effects in the same amounts to all the other photos to stay consistent. A Photoshop actionmight help with this!
Step 4
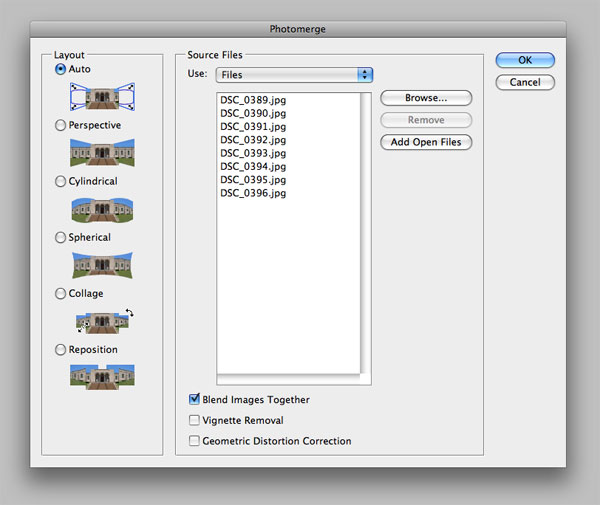
Now we’re going to open up Adobe Photoshop (CS3 or higher). Make sure that you don’t have any files open in Photoshop, then select File > Automate > Photomerge. You can experiment with the different photo merging modes, however for most standard applications the Auto option will suffice.
Browse to the location where all the images to be blended are stored and add them to the dialog box.
Step 5
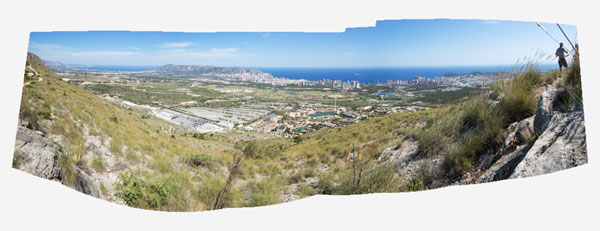
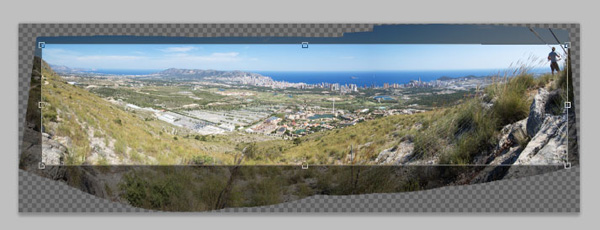
Hit the OK button, then give Photoshop a few minutes to work its magic. Some pretty hefty processing work is involved here, especially when working with large images from DSLR cameras. Once it’s finished you should end up with something like this:
Step 6
Choose the Crop tool (C) and then select the area inside the edges of the shape to find the composition of your final image. Once you’re happy with the selection, press enter, and you’re done!
The Final Image
There you have it, a full (and in this case, rather large) panoramic image created by stitching together multiple images. The best part is that each photo is still at full resolution, so if you wanted to print this then you could get it done at a seriously large size. Click here to see a bigger version of the final image.
This simple technique can come in handy for creating some really stunning panoramic images. Now that you know how to do it, make sure you’re always keeping an eye out for potential scenes which would be suited to this technique.
Finally, if you’ve taken any really great panoramic photographs yourself then we would absolutely love to see them so please do drop us a link in the comments below!
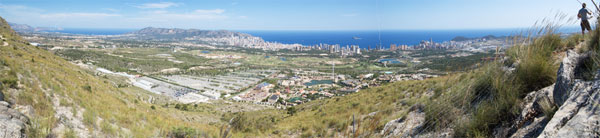
Photo credits, in order of appearance: Reinante El Pintor de Fuego, Stig Nygaard, Starka-Snap, JohnONolan.