Whether created for a specific project or even if you’ve had the same ones for years, marking menus form an essential part of the Maya interface. In this time-saving quick tip tutorial, Pratik Gulati will be walking us through how to create our own marking menus from scratch in Maya 2009.
Step 1
Open up Maya.
Step 2
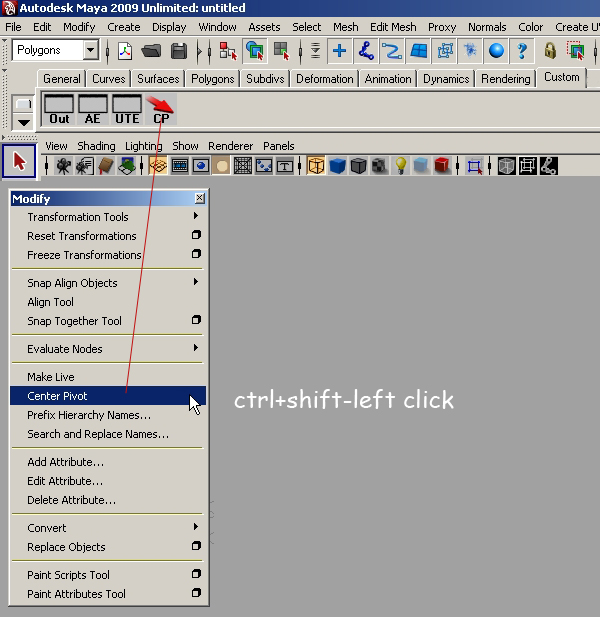
Select the Custom shelf. (We’ll just be using this shelf to store our desired commands temporarily, and we can always delete them once the marking menu has been created.) We’re going to add the shortcuts we want to appear in the marking menu to the custom shelf. To do so, find each command in the top menus, and then Ctrl+Shift+Click it to create a shortcut on the currently selected shelf, as shown below.
Step 3
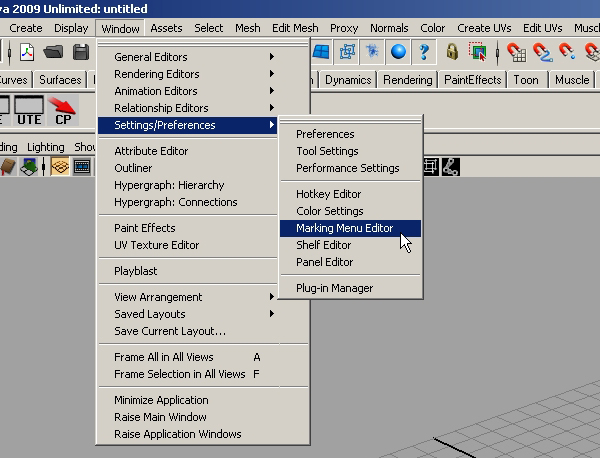
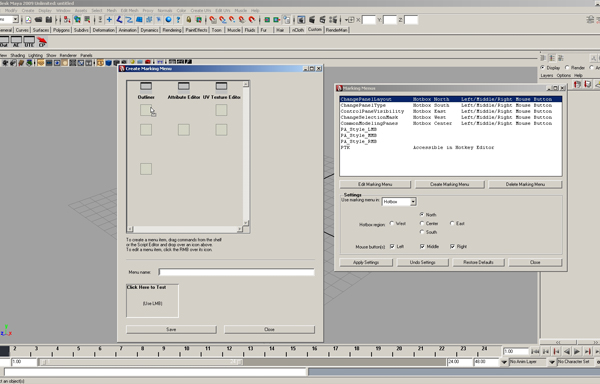
With all of our shortcuts in place on the Custom shelf, go to Window > Settings/Preferences > Marking Menu Editor.
Step 4
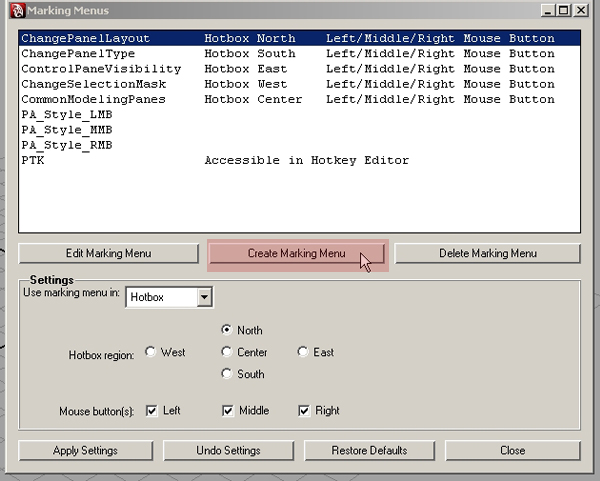
In the Marking Menus dialog box, click Create Marking Menu to bring up the new window shown below.
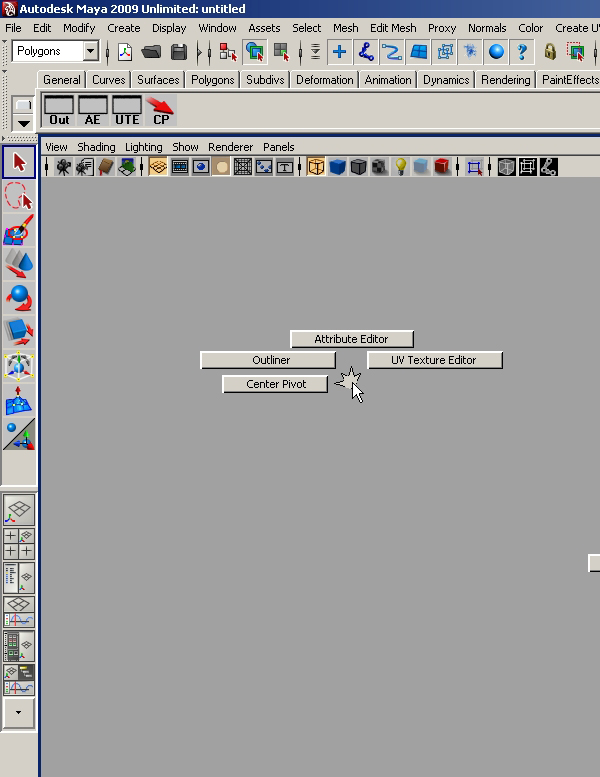
Step 5
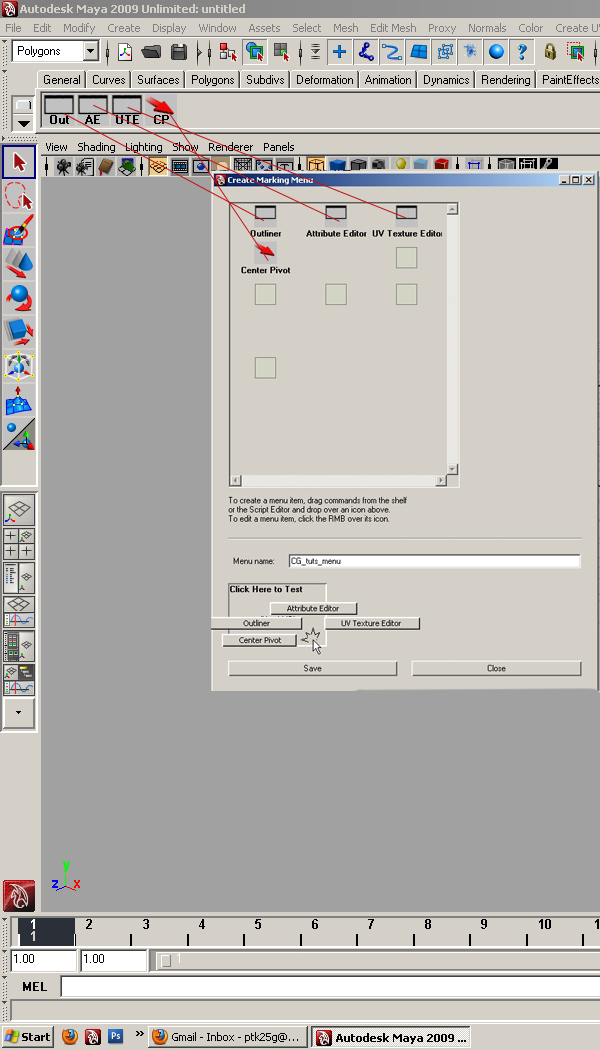
Now, Middle-Mouse-Drag each command from the Custom shelf to a slot in the Create Marking Menu window as shown. Once done, give your new marking menu a name by filling in the Menu name text field. Here I’ve used CG_tuts_menu.
Step 6
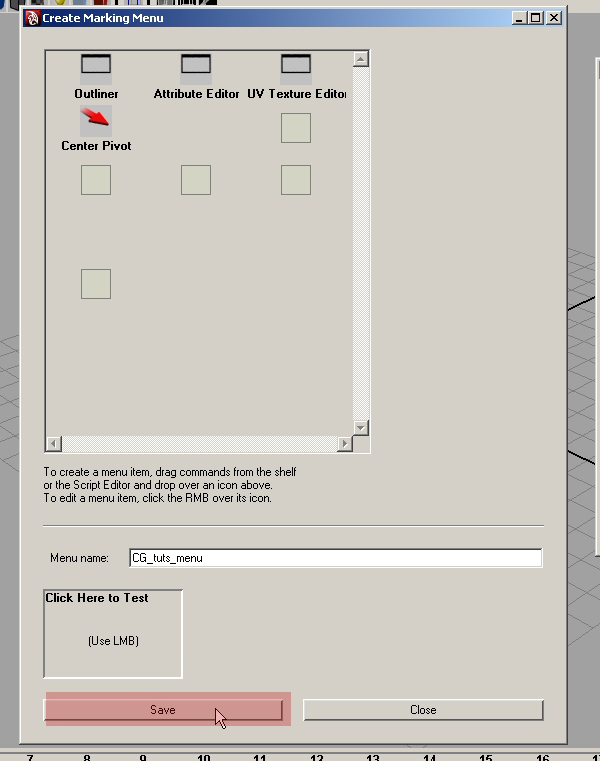
With everything in place, we can now click Save.
Step 7
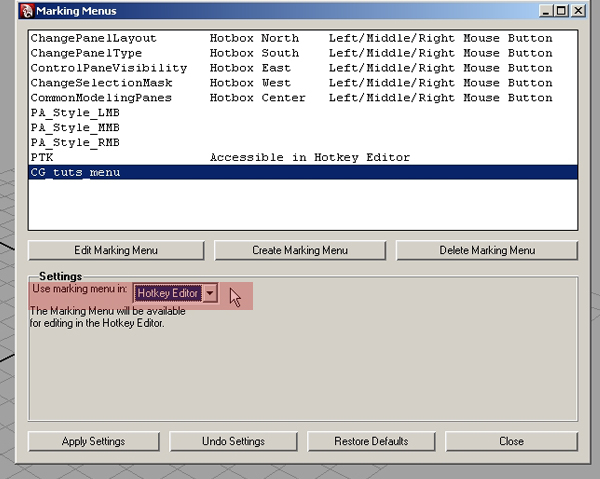
As we want to be able to invoke our new menu with a hotkey, make sure to choose Hotkey Editor from the Use marking menu in dropdown. Now click Apply Settings and close the window. With that done, our menu is now complete. We just need a way of accessing it!
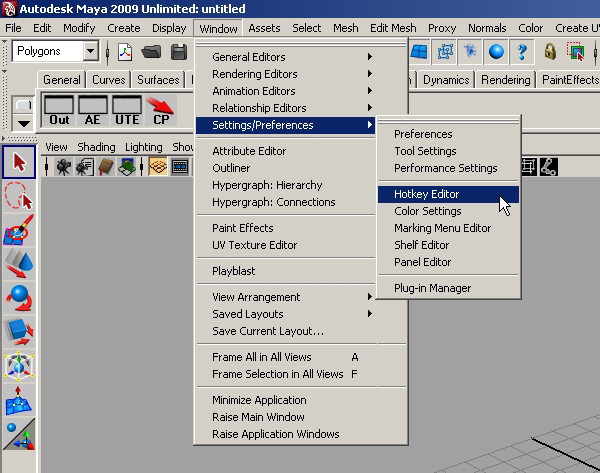
Step 8
To assign a hotkey to our menu, go to Window > Settings/Preferences > Hotkey Editor.
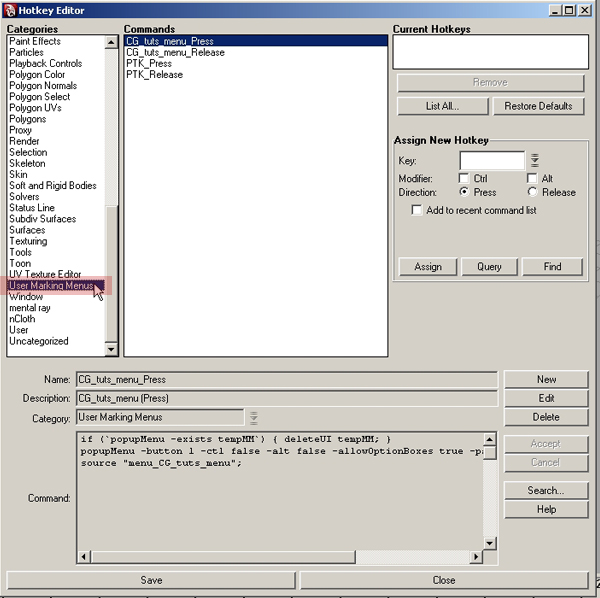
Step 9
Select User Marking Menus from the categories list on the left, and then select your custom marking menu from the resulting Commands list.
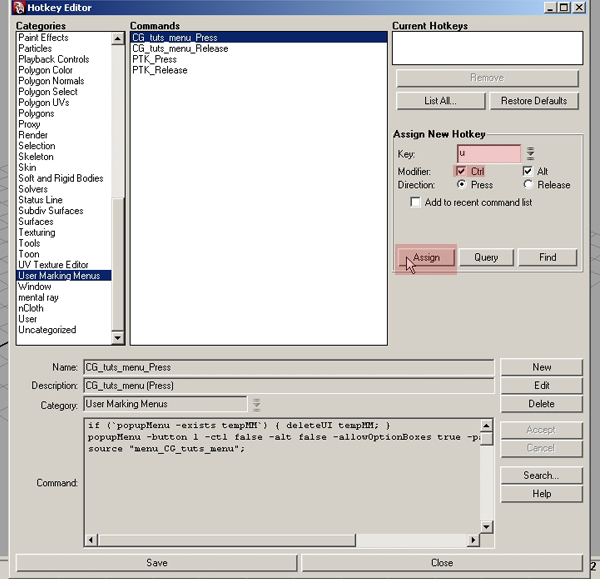
Step 10
Now we can assign a hotkey combination to our brand new marking menu. Here I’m assigning Ctrl-Alt-U by checking the Ctrl and Alt checkboxes, entering a U into the Key field, and hitting Assign. If, like me, you have a lot of keyboard shortcuts, you may want to check that you’re not overwriting an existing hotkey combination. To do this, enter your shortcut as above, but instead of hitting Assign hit Query. Info text just above the Query button will inform you if that combo is taken (and if so what it is currently assigned to) or if it is assigned to “nothing”.
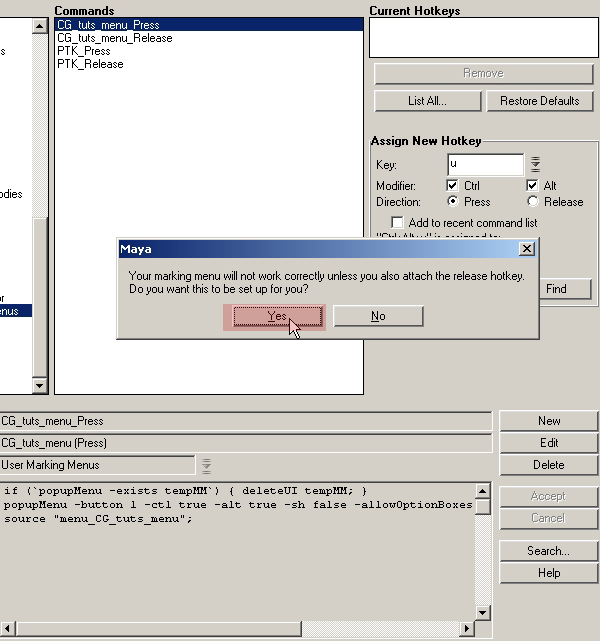
Step 11
Click Yes in this dialog box. This ensures that our marking menu will appear and disappear correctly.
Step 12
Now click Save and close the window. It’s time to test! Hit the hotkey combo you previously assigned and Voila! Your custom marking menu is complete.
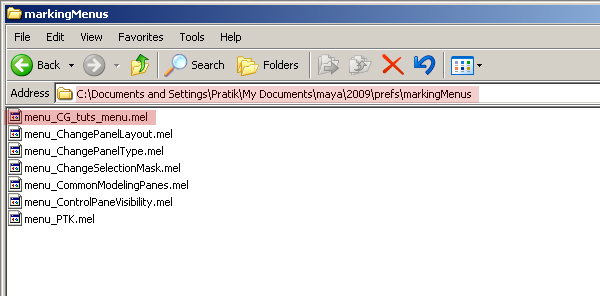
Step 13
If you want to take your new marking menu from one installation to another, you can simply copy the .mel file from Maya’s Marking Menus folder and paste it into the Marking Menus folder on the second machine. One restart of Maya later and your menu will be there, although you will have to reassign the hotkey combo.
The default path to the Marking Menus folder is :
C:\Documents and Settings\YOURNAME\My Documents\maya\2009\prefs\markingMenus
Don’t miss more CG tutorials and guides, published daily – subscribe to Cgtuts+ by RSS.