Today marks the first entry in a new “Web Dev Q&A” series. I’m often emailed concerning various web development related questions. Though some are more specific than others, many of these, I’m sure, would appeal to all of our readers. As such, each week or so, we’ll post a new batch of question and answers from the community, in both article and video form, for your convenience.
This week, we discuss JavaScript callback functions, a LESS compiler, and those tricky CSS floats.
Subscribe to our YouTube page to watch all of the video tutorials!
Prefer to watch this video on Screenr?
1. JavaScript Callback Functions?
“Hi Nettuts+: is there an easy way to create callback functions with regular JavaScript, similar to what we can do with jQuery?”
Of course. This is any easy one. For example, let’s create a generic function.
function doSomething(name) {
   alert('Hello, ' + name);
}

doSomething("John and Kate Plus 8");
When called, as expected, the browser will alert “Hello, John and Kate Plus 8.” Now, if we want to pass a callback function as well, as the second parameter of the “doSomething” function, we can simply pass an anonymous function.
function doSomething(name, cb) {
   alert('Hello, ' + name);
}

doSomething("John and Kate Plus 8", function() {
   alert('this callback function will only run after doSomething has');
});
Notice how we’ve added a second argument to the doSomething() function: “cb.” You’re free to label this how you wish, though it’s common to keep it as “cb,” which refers to “callback.” Now, that anonymous function will be represented via this variable.
The last step is to simply call it at the bottom of the function.
function doSomething(name, cb) {
   alert('Hello, ' + name);
  cb(); // now run the callback function
}

doSomething("John and Kate Plus 8", function() {
   alert('this callback function will only run after doSomething has');
});
2. LESS Compiler for Coda?
Dear Nettuts+: I loved your LESS.js video, but don’t want to use it for production. Is there an app for Coda that will automatically compile my code instead?
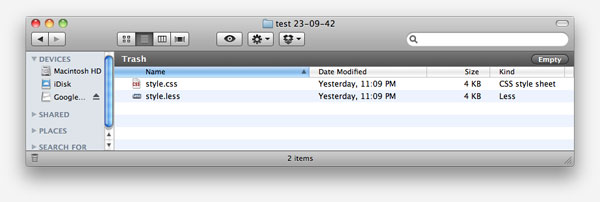
Sure thing. The best solution I was able to find is called LESS.app.

After you download it (free), you simply drag your project folder into the app, which instructs it to watch all .LESS files. At this point, you can continue working on your project, per usual. Every time you save, the compiler will run, which generates/updates an automatically created style.css file. When you’re finished developing your app, you only need to change your stylesheet references from style.less to style.css, accordingly. Easy! Now there’s no reason not to take advantage of LESS — unless you’re using a different solution, like Sass.
3. Where’s my Background?
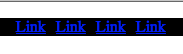
“Hey Nettuts+: So I have a navigation menu with a list of horizontal links; but when I set a background color to the menu, nothing shows up? How come? Here’s my code:”
<!DOCTYPE html PUBLIC "-//W3C//DTD XHTML 1.0 Strict//EN"
	"http://www.w3.org/TR/xhtml1/DTD/xhtml1-strict.dtd">

<html xmlns="http://www.w3.org/1999/xhtml" xml:lang="en" lang="en">
<head>
	<meta http-equiv="Content-Type" content="text/html; charset=utf-8"/>

	<title>Menu Problem</title>
	<style type="text/css">
		#nav {
			background: black; /* why doesn't this show up? */
		}

		#nav li {
			float: left;
			padding-right: 10px;
			list-style: none;
		}
	</style>

</head>

<body>
    <ul id="nav">
		<li><a href="#">Link</a></li>
		<li><a href="#">Link</a></li>
		<li><a href="#">Link</a></li>
		<li><a href="#">Link</a></li>
	</ul>
</body>
</html>

Okay, this is a common confusion. The reason why the background of “black” isn’t showing up is because you’ve floated all the list items to the left. When you do, it causes the parent element (#nav) to collapse. There are two solutions:
1. Set “overflow: hidden;”
“Overflow:hidden” is a nifty little trick that was only discovered in the last several years, around 2005. By applying a value of “hidden” or “auto” to the “overflow” property, it seems to remind the parent element that it’s supposed to be wrapping its children! The logic is a bit odd, I admit; however, none the less, it works.
#nav {
	background: black;
	overflow: hidden; /* ta da! */
}
2. Clearfix
Setting “overflow” works 80% of the time, though, there might be times when we need to overlap the boundaries of the parent element, in which case “overflow: hidden;” will chop the image/element off. The second solution is to use the popular “clearfix” method. You’ll use this one often, so I recommend that you go ahead and save the code to your favorite snippet management tool, like TextExpander, Texter, or Snippets.
First, return to your mark-up, and apply a class of “clearfix” to the parent element.
<ul id="nav" class="clearfix">
Next, let’s add the appropriate styling for this class. The general functionality is that we use the “after” psuedo class on the parent element to apply content, and then subsequently clear that content — which essentially mimics adding <div style=”clear:both;”></div> to the bottom of your mark-up. However, this method is smarter, and doesn’t ruin our beautiful, semantic mark-up.
.clearfix {
	*zoom: 1; /* triggers has haslayout in older versions of iE
}
.clearfix:after {
	content: " ";
	display: block;
	clear: both;
	visibility: hidden;
	font-size: 0;
	height: 0;
}
“hasLayout is important because it forces the element to have a rectangular shape.”
As you can see, we use “:after” to add a blank space after all of the floated content. We then set the display to block, and clear it, which forces the parent to wrap the floated children. Lastly, we set some general visibility, font-size, and height rules to ensure that this code doesn’t affect our layout in some browsers.
Worth noting is the “*zoom: 1″ declaration at the top. The “zoom” property allows us to trigger IE’s proprietary “hasLayout” property. hasLayout is important because it forces the element to have a rectangular shape. This means that the content of the element cannot flow around other boxes, which will often cause major layout issues with your website. When Microsoft’s proprietary property “hasLayout” is equal to true, the element “has layout.” Luckily, we can trigger this by adding specific properties to our selectors, including “zoom.” Other hasLayout triggers, to name only a handful, are:
- float: left/right
- display: inline-block
- position: absolute
- height: any value (not auto)
Conclusion
That’ll do it for this flagship “Web Dev Q&A” entry. If you have a “not-too-complicated” web development question for us, you can:
- Email [email protected], and write “Web Dev Q&A” as the subject of the email.
- Tweet us @nettuts, and hash “#askNettuts”.
- Leave a comment under any “Web Dev Q&A” posting with your new question.
Thanks for reading and watching!