In this tutorial you will learn how to create a realistic looking electric guitar. We will start with basic shapes and build our way up using a couple of simple yet effective techniques. You will learn how to use 3D Effect, Scale and Blend Options, to make a guitar worthy of even the most rockin’ of vector fans!
Step 1
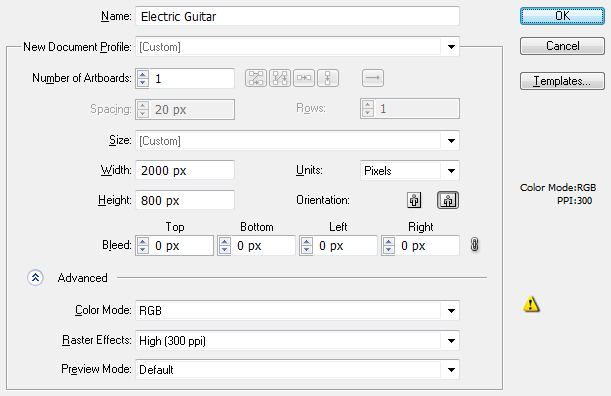
Start by opening Adobe Illustrator and creating a new 2000 px by 800 px RGB document, and set the resolution to 300 dpi.
Step 2
Next add a new layer and call it "guides". Turn Rulers on (Control+R) and drag out a horizontal guide. Use the Align pallete to put the guide right in the middle of the document. It will become the axis of our guitar.

Step 3
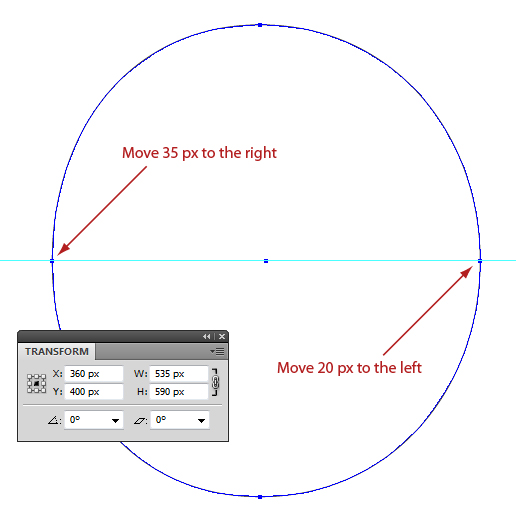
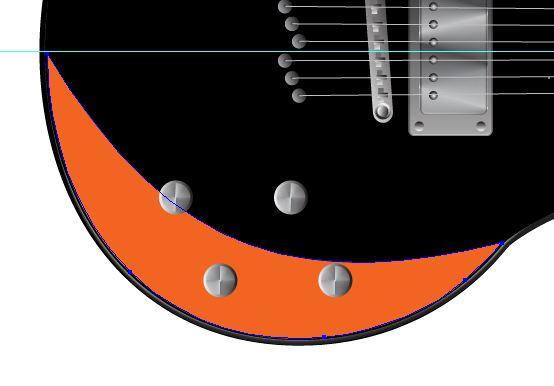
Let’s start with the body! Create a new layer and call it "body". Select Ellipse Tool (L) and click once on the artboard. Input 590px for the width and height to create a perfect circle. Using the Direct Selection Tool (A) select the left anchor point and move it 35px to the right using Transform (Window> Transform). Do the same to the right anchor point but this time move it 20px to the left. Select the whole shape with your Selection Tool (V) and open the Transform pallete (Window> Transform). Set the reference point to the center and input an X coordinate of 360 px and a Y coordinate of 400 px. The center of the object should nicely align with the guide.
Step 4
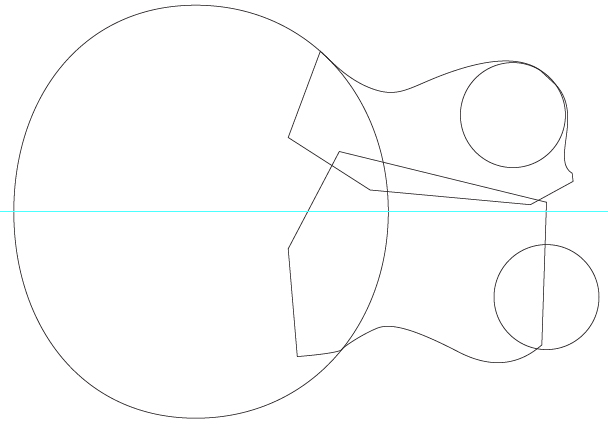
Keep adding shapes to the guitar body. Create a 150px by 150px circle and duplicate it. Once again using the Transform palette place one at X: 806px Y: 538px. Move the second circle to X: 854px Y: 278px. Take the Pen Tool (P) and draw three shapes that will make the rest of the guitar’s body. Try to make a smooth transition between all elements.
Step 5
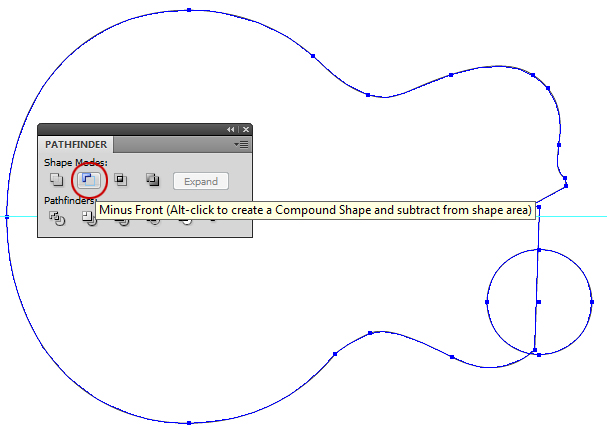
Open the Pathfinder palette, select all shapes except for the bottom circle and merge them together. Click on the circle and bring it to the front (Shift+Control+Right Bracket). Select both the remaining shapes and use the circle like a cookie cutter to subtract a portion of the body shape.
Step 6
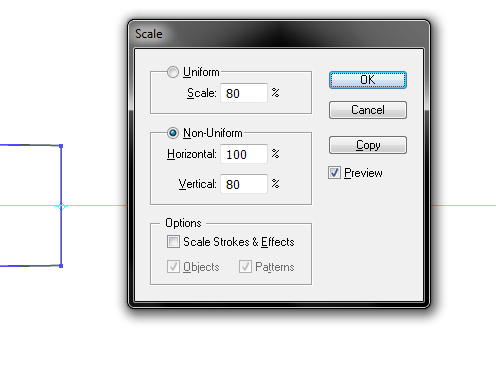
On to the fret board! Create a new layer and call it "fret board". With the Rectangle Tool (M) selected, click on the artboard and create a 846px by 100px rectangle. Once again go to the Transform palette and position the center of the rectangle at X: 1170px Y: 400px.
Grab the Direct Selection Tool (A) and marquee over the two anchor points at the right side of your rectangle. Select the Scale Tool (S), hit Enter and set the transformation to 80%. This will ensure a nice narrowing of our fret board
Step 7
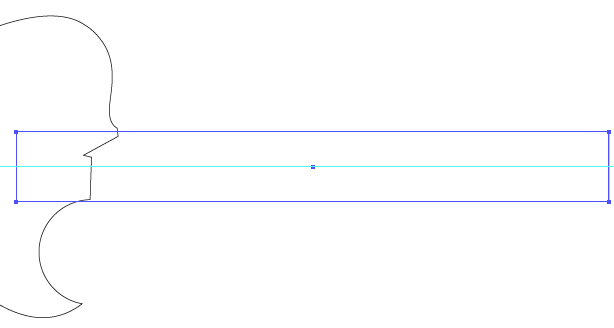
Create a new layer and call it "head". Take the Pen Tool (P) and start sketching half of the head’s outline. Align the terminal anchor points to the guide and the corner of the fret board

Step 8
Now make sure your Smart Guides are active. Go to Window > Smart Guides or simply press Control + U. You may find the keyboard shortcut very useful since Smart Guides are helpful, but sometimes they get in your way. Select your head shape (actually its half) and using the Reflect Tool (O) make a reflection of the shape along our horizontal guide. All you have to do is to click directly on the guide to set the reflection point then while holding Shift + Option, click somewhere else on the guide. During the tutorial you will master this operation.
Close the corresponding end points by using the Direct Selection Tool (A) and make them into the whole head shape (Object > Path > Join).


Step 9
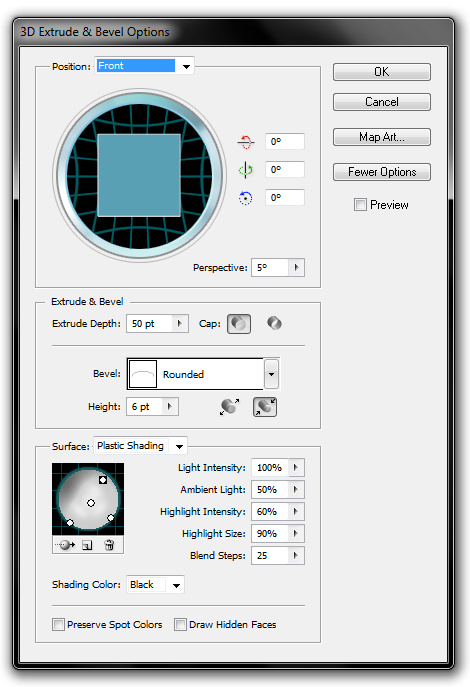
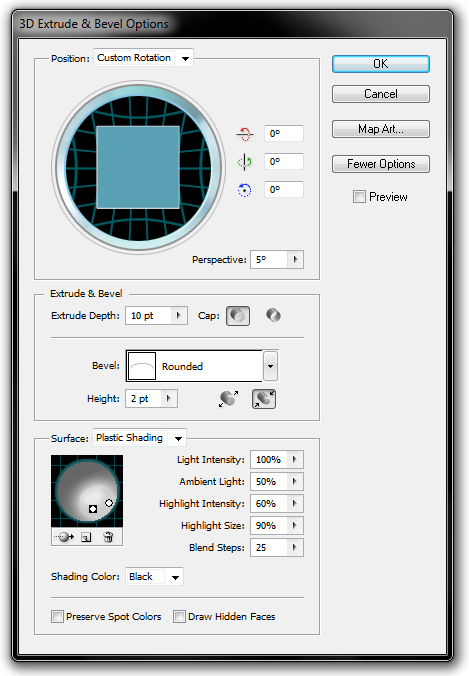
Now we have established the basic shape – let’s add some dimension! Select the body and the head shape and set the Fill color to black with no Stroke. Next go to Effects menu > 3D > Extrude & Bevel, and apply the settings below. You might want to adjust the lighting to achieve the effect you like.
Step 10
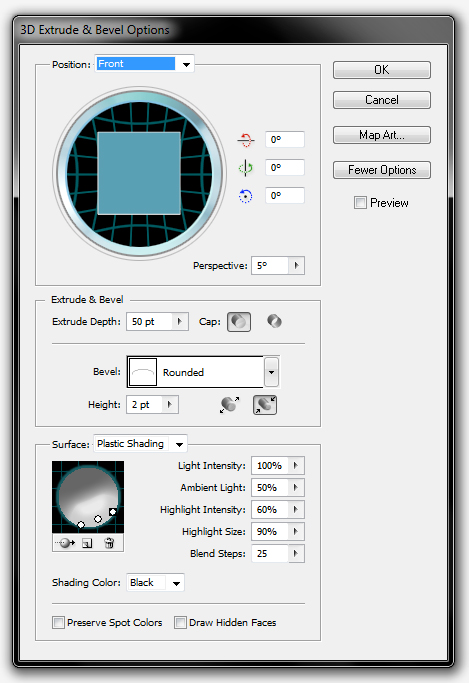
Select the fret and fill it with nice brown gradient. I used the RGB values of 79, 51, 27 and 35, 31, 32. Also remove any stroke from the shape and apply the 3D effect as follows.

Step 11
Create a new layer and call it "frets". Next draw a 94px by 4px rectangle and position the center at X: 760px. Drag out a copy of the rectangle and position it at X: 1527px. Scale it down vertically to 80%.

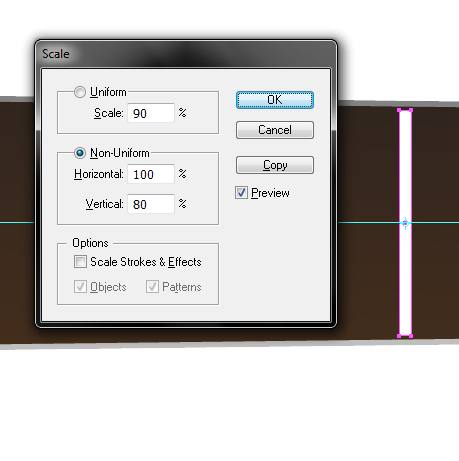
Step 12
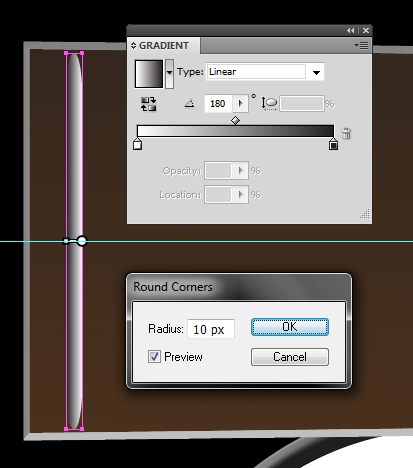
Select both rectangles and go to Effect menu > Stylize > Round Corners, and apply a radius of 10px. Fill both rectangles with a gradient ranging from black to white. Use the Gradient Tool (G) to reposition the gradient.
Step 13
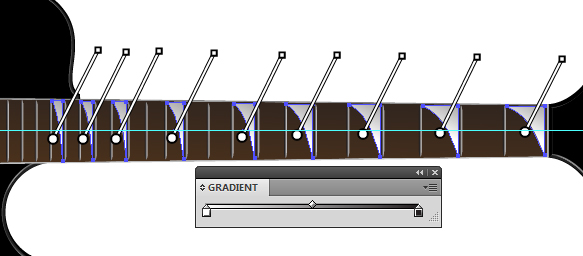
Select both frets and go to Object Menu > Blend > Make. The frets need adjusting so bring up the Blend Options ( Object Menu > Blend > Blend Options). Set the Spacing to Specified Steps and input 21 steps.

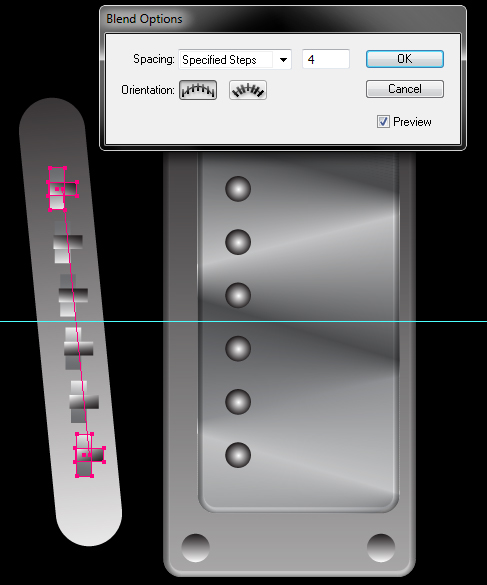
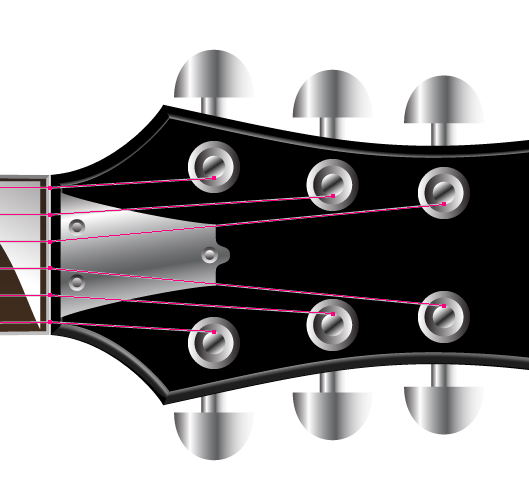
Step 14
Now it is the tricky part. Since the frets are not distributed regularly we will have to adjust them manually. Bring up your Layers palette, find and select the Spine of our Blend. Next, using the Convert Tool (Shift + C), click on the anchor points and Shift-drag the Spine, thus, reshaping the Blend. Use the following images for reference.


Step 15
Select the "fret board" layer and using your Pen Tool (P) draw a position marker shape next to the first fret. Fill it with a subtle grey gradient. Drag out a copy, scale it and position it on the third marker. Repeat this operation until you mark the frets of your choice. I did this for frets 1, 3, 5, 7, 9, 12, 15, 17, 19:
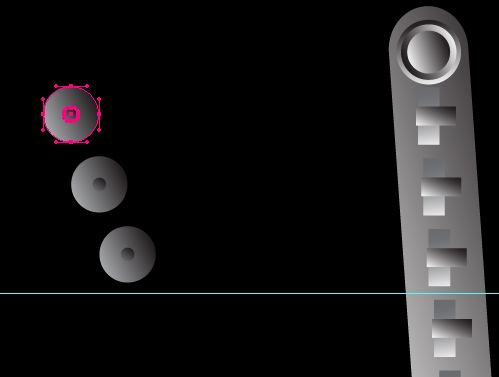
Step 16
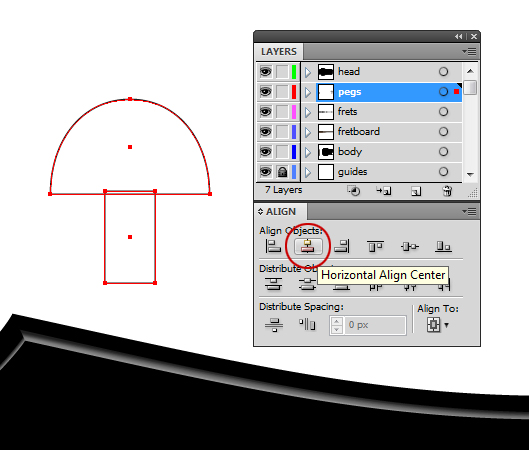
Create a new layer and call it "pegs". Position it directly below the "head" layer. Using the Ellipse Tool (L) and the Rectangle Tool (M) draw a perfect circle and a thin rectangle. Remove the bottom half of the circle, scale it down horizontally to 90% and align the remaining half with the rectangle to create a peg. Select both shapes, fill them with a black and white gradient, with no stroke (see image). Group the peg shapes (Control + G) and drag out 2 copies. Position them along the head of the guitar. Next simply select the three pegs and reflect-copy them using the technique used in Step 8.

Step 17
The base of our guitar is ready. Now let’s add some more details.
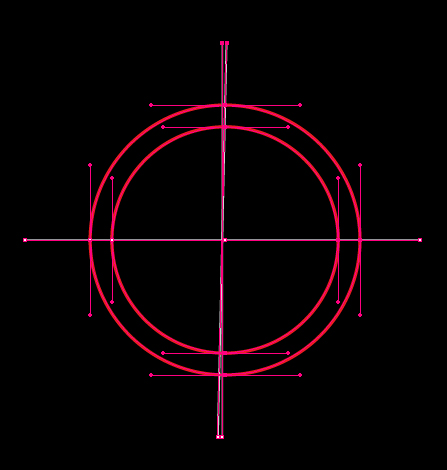
Create a new layer above the "head" layer and call it "gear". Create a 26px by 26px perfect circle. Using the Smart Guides align it vertically to the first peg. Make a copy of the circle and scale it down. Repeat this to get three concentric circles. Set their Stroke color to none and fill them with a nice black and white gradient. You may want to tweak it to get a nice 3D effect. Group the concentric circles (Control + G) and Option + Drag 2 copies. Align them to the remaining pegs, select all and copy reflect them to the other side of the head.
Step 18
Grab the Pen Tool (P) and draw the shape seen below. Reflect the shape and merge them together. Apply a black and white gradient. Now create another circle, copy and scale it down. Align these two circles together and once again apply the gradient. Drag out two copies and position them according to the image.


Step 19
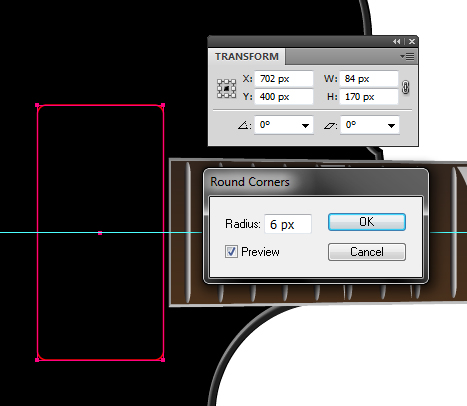
Still on the "gear" layer, use the Rectangle Tool (M) to create a 84px by 170px rectangle. Bring up the Transform palette and position the center of the rectangle at X: 702, Y: 400. Next go to the Effect menu and choose Stylize > Round Corners. Apply a radius of 6px and click OK. Next go to the Object menu and choose Expand Appearance. Fill the object with a greyish gradient, with no stroke.
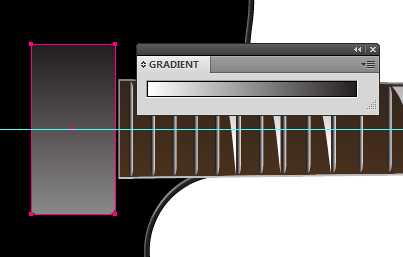
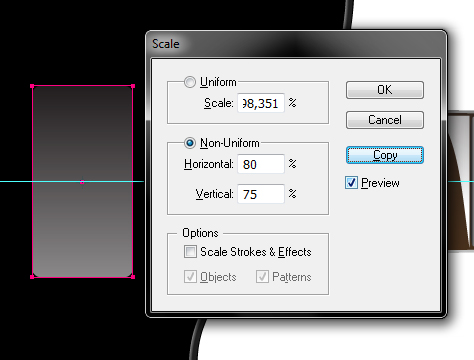
Step 20
With the rounded rectangle selected, bring up the Scale Tool (S) and hit Enter. Input 80% for Horizontal and 75% for Vertical and click Copy. Move the smaller rectangle 3px to the left and fill it with orange for distinction. Next add four little circles in the corners of the bigger rectangle and fill them with another grey gradient to imitate screws.

Step 21
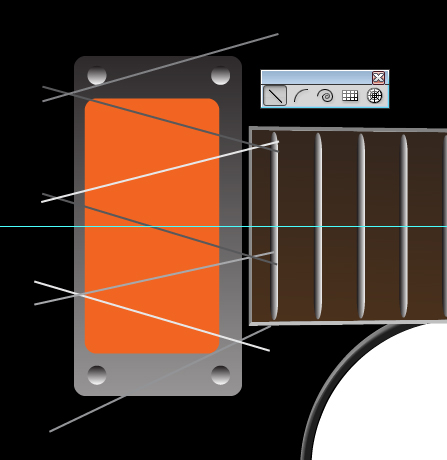
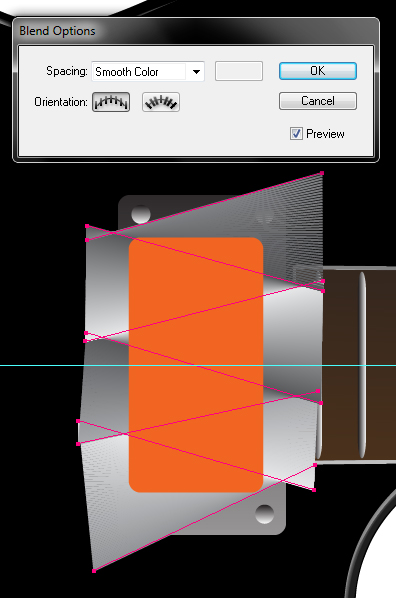
Now some action kicks in! We will use a trick I have to give the smaller rectangle the appearance of polished metal. Go ahead and select the Line Tool ( Backslash ) and draw a couple of angled lines. Set their Stroke color to different shades of grey. Select all the lines and Blend them together by pressing Control + Option + B. Option + Drag out a copy of the orange rectangle for use later. Move the original rectangle over the Blend, Shift + Click the Blend to add it to selection and hit Control + 7 to create a Clipping mask.
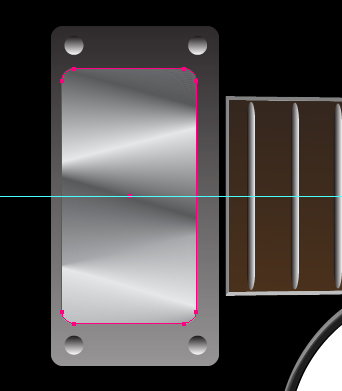
Step 22
Now let’s add some depth. Move the orange rectangle back over the mask so that it overlaps it. Then select the bigger rectangle and press Control + C to copy it and Control + F to paste it in front. Shift click the orange rectangle to add it to the selection. Change the Fill of both rectangles to white and their Stroke to none. Next go to Effect Menu > 3D > Extrude & Bevel. Enter the values shown below and click OK. Next, with both rectangles still selected, open your Transparency palette and change the Blending Mode to Multiply.


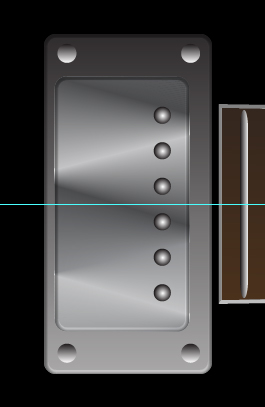
Step 23
Using the Ellipse Tool (L) create a circle in the upper right corner of the smaller rectangle. Use the Reflect Tool to make a copy of it on the opposite side of the rectangle. Having selected both circles press Command + Control + B to blend them together and adjust the number of steps to 4. Now go to Object menu and click Expand. Select all six circles and change their Stroke color to none and fill them with a white to black gradient. This is the effect you should get.
Step 24
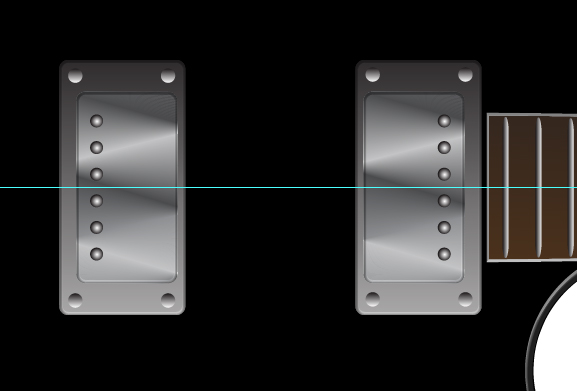
Select all of the humbucker pickup shapes and Option + Drag to make a copy of them. Position them to the left and tweak the location of the elements.
Step 25
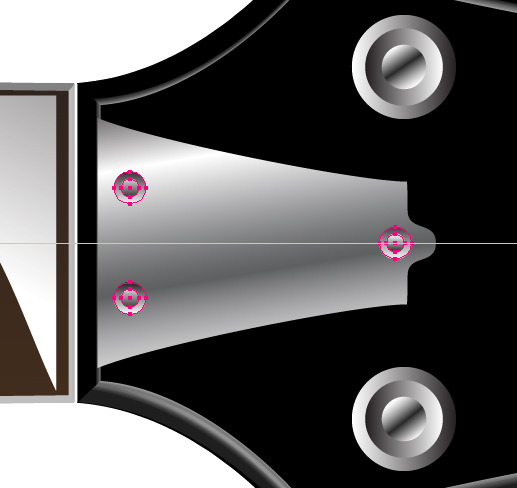
Still on the "gear" layer, create a 22px by 150px rectangle and position it behind the second humbucker pickup. Go to the Effect Menu > Stylize > Round corners. Input 11px for the Radius, click OK and expand the effect. Next, using the Rotate Tool (R) rotate the rounded rectangle a couple of degrees counterclockwise. Fill the shape with a black and white gradient, no stroke.

Step 26
Now we will take care of the bridge. Create a small, horizontal rectangle with a black and white gradient fill. Copy the rectangle and rotate it into a vertical position. Place the two rectangles on top of one another creating a slightly offset cross and group them together. Use the following image for reference.

Step 27
Reflect the element you created in Step 26 and place them on the bottom of the underlying object. Select both shapes and Blend them together using 4 steps. Adjust the elements so that they align nicely with the pickups of the humbucker. Finish off the bridge by adding two sets of circles to imitate screws. Give them a gradient fill and adjust all other gradients to achieve consistent lighting.

Step 28
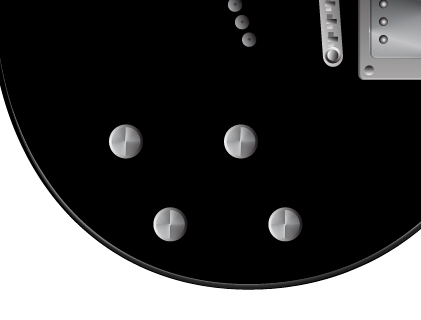
On the "gear" layer create a 14px by 14px circle. Position it on the same level as the pickups and the bridge holders. On the inside add a smaller circle and shade them with grey gradients. Create two more sets of circles and align them to their respective pickups shifting each of the elements slightly to the right. Copy the three string holders, paste them and position them below to form a complete array of string holders.

Step 29
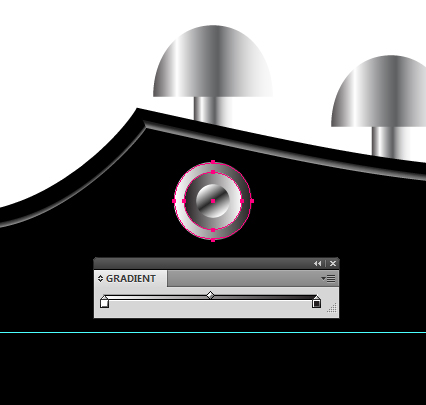
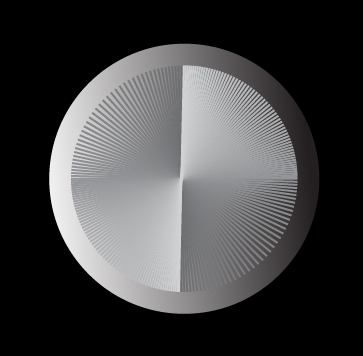
Now let’s create some control knobs. Draw a circle about 34px in diameter and create a slightly smaller copy on top of it. Get the Line Segment Tool ( Backslash ) and draw three lines – two of them forming a cross and a third one a couple of degrees from being vertical.
Blend the three lines together (use Smooth color for Spacing), position the smaller circle in front of the Blend and use it to mask the Blend. Fill the bigger circle with a black and white gradient and give it no stroke. Group the three shapes together, create three copies and position them where guitar knobs should be. This is the effect we are looking for:
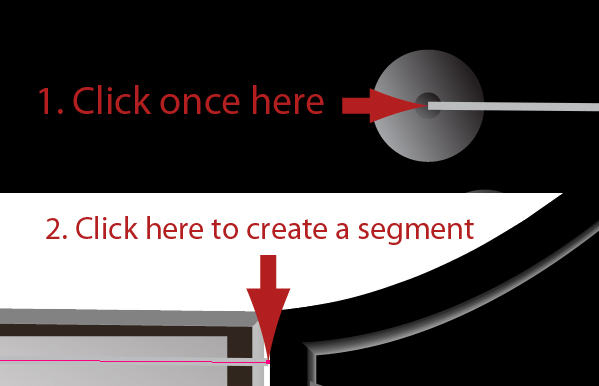
Step 30
Let’s add some strings, shall we? Create a layer called "strings" and position it on top of the other layers. Using the Pen Tool (P) click once in the middle of the string holder, then click again between the fret board and the head to create a segment. Give the path a grey stroke. Select the path and reflect it on the other side of the fret board Then, with both strings selected, Blend them together in 4 steps. Expand the blend and use the Direct Selection Tool (A) to grab the ends of the strings and align them with the string holders.

Step 31
Let’s add a couple of tweaks. Select the Pen Tool (P) and using the technique from the previous step join the strings with their respective pegs. Select the "gear" layer and create an 8px by 78px rectangle. Position it over the joint between the head and the fret board Fill it with a grey gradient and apply the Extrude & Bevel settings as below:

Step 32
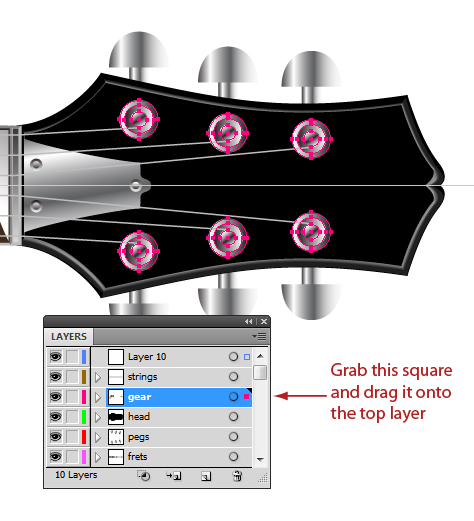
We’re almost there! Create another layer and place it on top of the layer stack. Now select all the circles that form the cylinders on which strings are rolled and drag them to the top layer so that they appear over the strings.
Step 33
Final step! Select the "body" layer and use the Pen Tool (P) to draw a highlight shape. Fill it with a black to white radial gradient, set the blending mode to Screen and reduce its opacity to 50%.

Conclusion
Your realistic looking electric guitar is ready to rock! You can experiment with different colors or lighting effects to get the look you like – you may even add your own fret board ornaments! The techniques in this tutorial can be used to make different styles of guitars, do a google search to find some reference images and make the different models for yourself. The sky is the limit!
