The Gradient Mesh can be one of the hardest tools to control. Even professional Illustrators can be heard crying out in frustration at its seemingly random actions. You can overcome these feelings of frustration by learning some techniques that will make your job easy and fun. This quick tip will teach you two handy mesh taming techniques that will save you time and help you overcome the "Gradient Mesh blues".
Tip 1: How to make a shape with gradient mesh
Some shapes, no matter how hard you try, won’t let you apply a gradient mesh. The following steps should be used if you want to apply a gradient mesh to a compound path.
Step 1
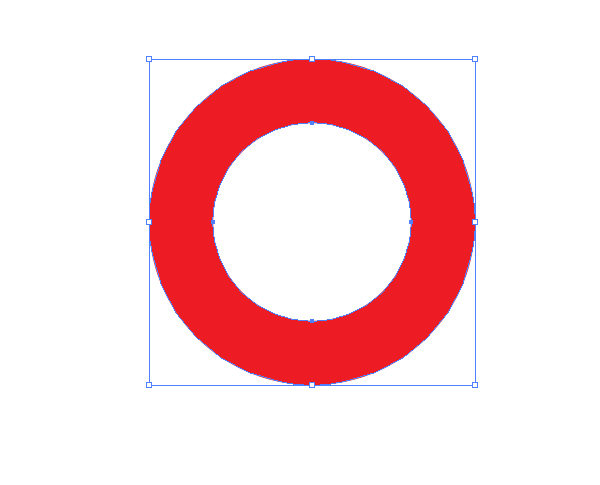
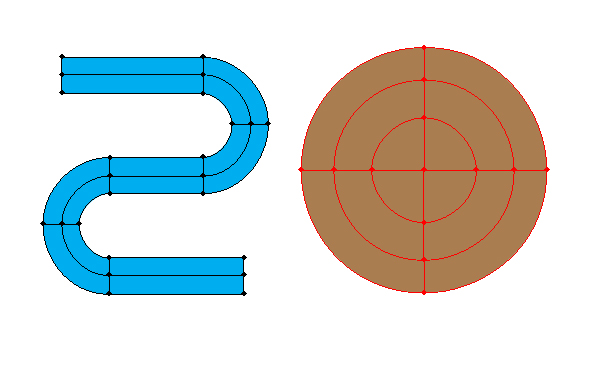
Let us build a Gradient Mesh for the Compound Path shown in the picture below. Gradient Mesh can’t be applied to Compound Paths using the regular techniques, we will have to build one.
Step 2
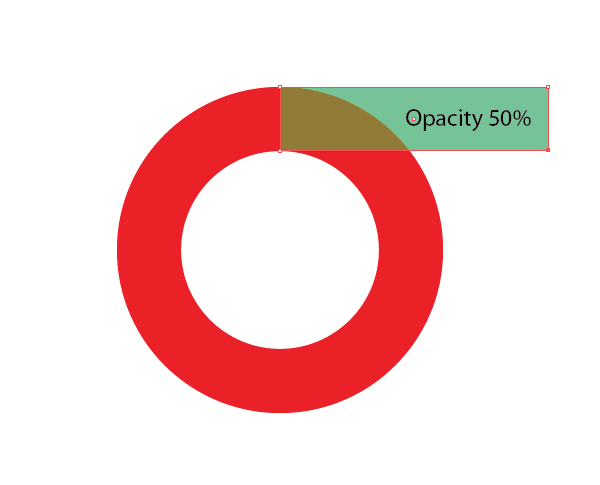
Start creating the Gradient Mesh, we will do this by transforming a Rectangle. Lock the sub-layer containing the original shape, this will be used as a template. Draw a Rectangle (as shown below) and change its opacity to 50%.
Step 3
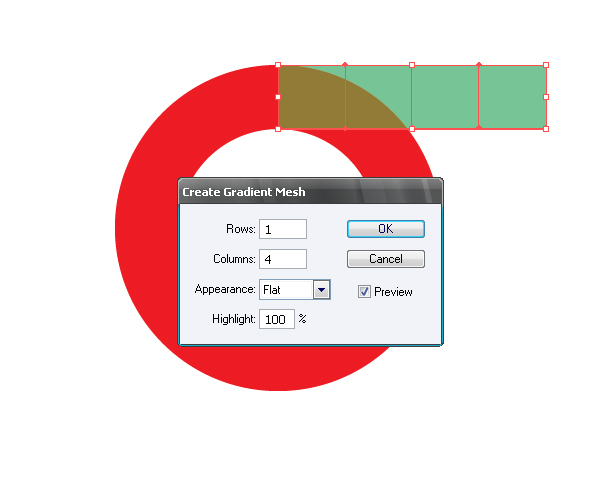
Select the rectangle and go to Object > Create Gradient Mesh, set the values as shown. The mesh should be as simple as possible, the number of columns must equal the number of bends, so the circumference has 4.
Step 4
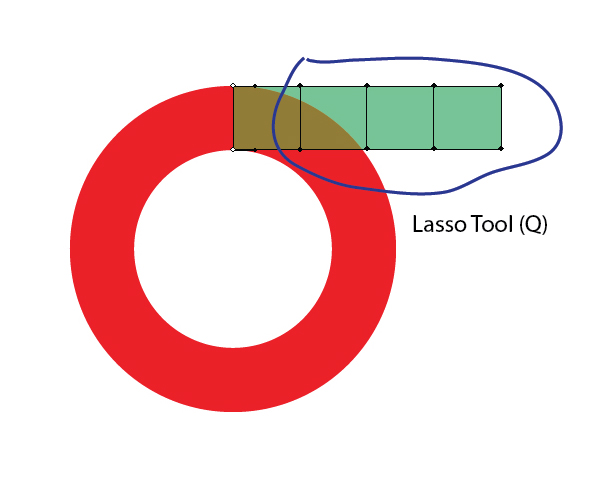
Let’s transform the rectangle. We will be using the following tools: the Lasso Tool (Q); Direct Selection Tool (A); Rotate Tool (R). Select the Lasso Tool (Q). Select anchor points, as shown in the figure below.
Step 5
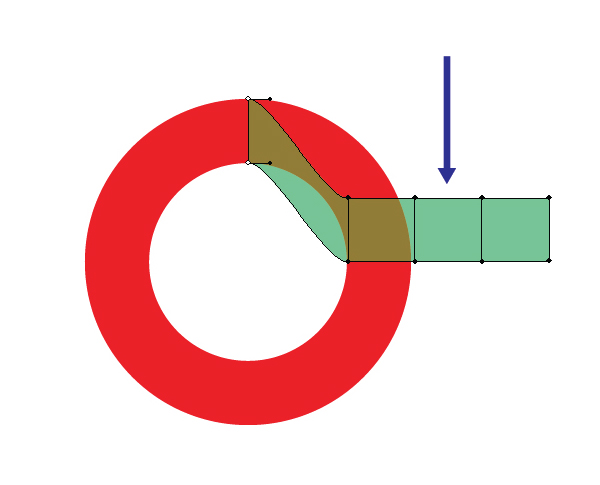
Take the Direct Selection Tool (A) and move the selected segments to the first "bend" of the guide shape.
Step 6
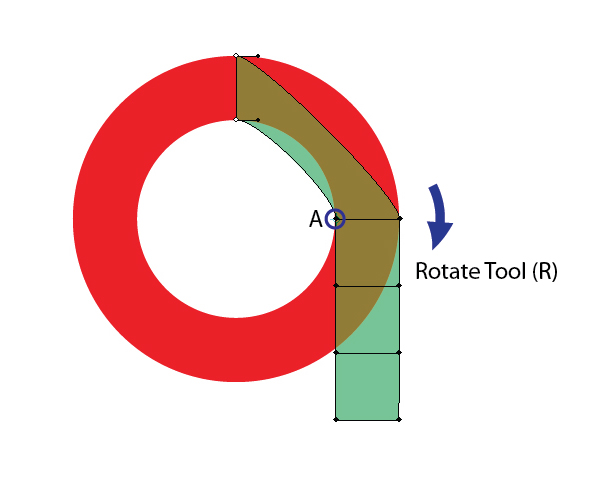
Take the Rotate Tool (R) and place the axis of rotation on point "A" and rotate the segment 90 degrees while holding down the Shift key.
Step 7
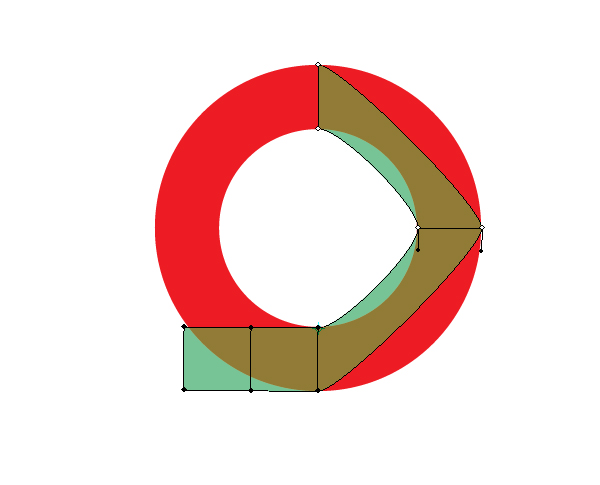
Using this technique, repeat the same step for the remainder of the segments.
Step 8
Adjusting the handles of the anchor points will improve the contour of your shape. Hold the Shift key while moving the handles to keep them straight.

Step 9
Remove the template, change the opacity to 100% and, if needed, add new points to the mesh using the Mesh Tool (U).
Step 10
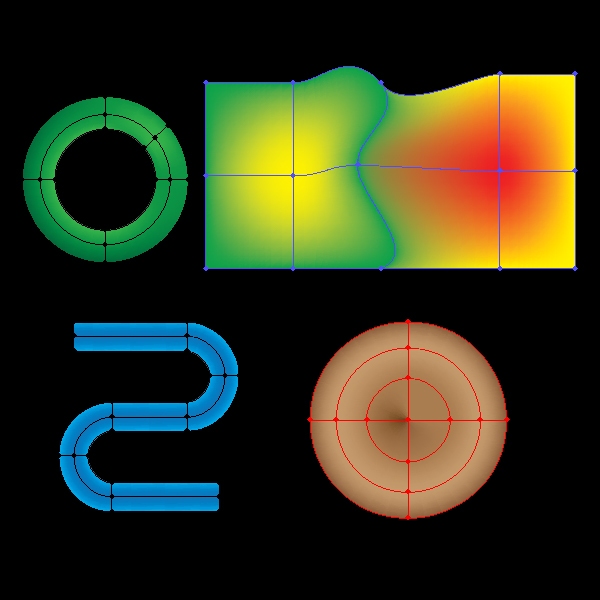
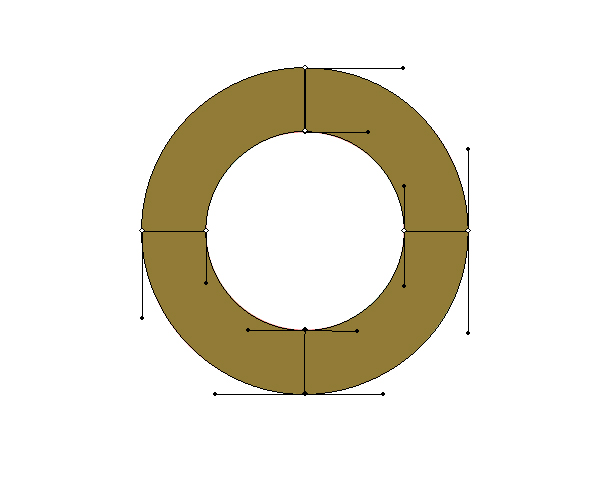
Using the technique you’ve just learnt, you can create quite complex objects. The image below shows an example of such objects.
Tip 2: How to make a complex gradient mesh by joining two shapes
When you have a complex shape that requires multiple colors, it’s often better to make your gradient mesh in pieces. Using this technique will reduce the time it takes to get the perfect gradient mesh with the same result.
Step 1
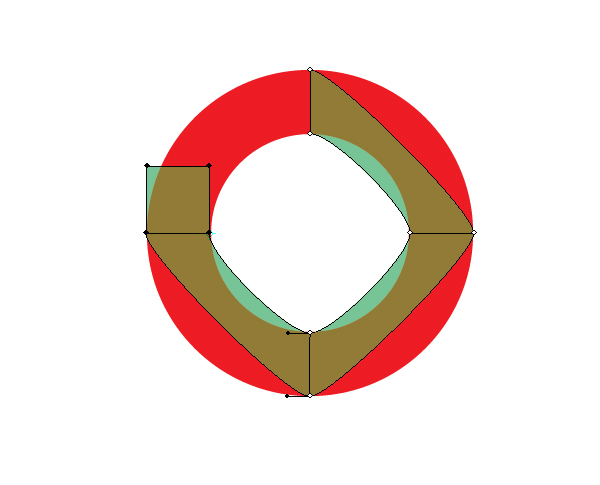
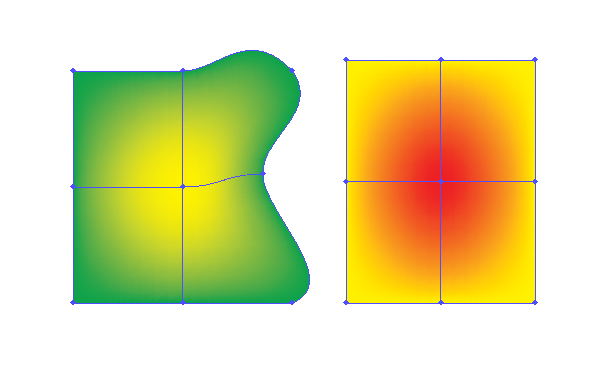
When creating complex objects you have to create a few different gradient meshes. The following is the technique of overlapping of two gradient meshes. The figure below shows the two Mesh-objects that we will join. The left object will be the basic one, which will not be edited.
Step 2
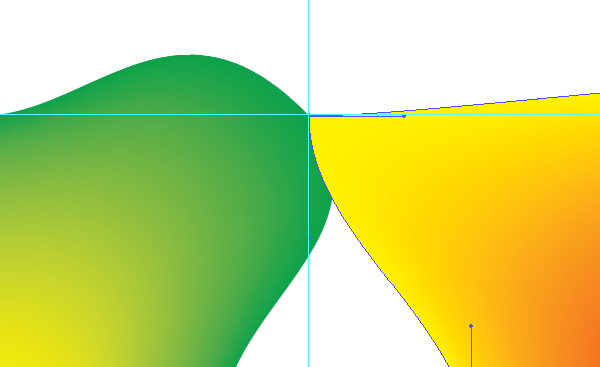
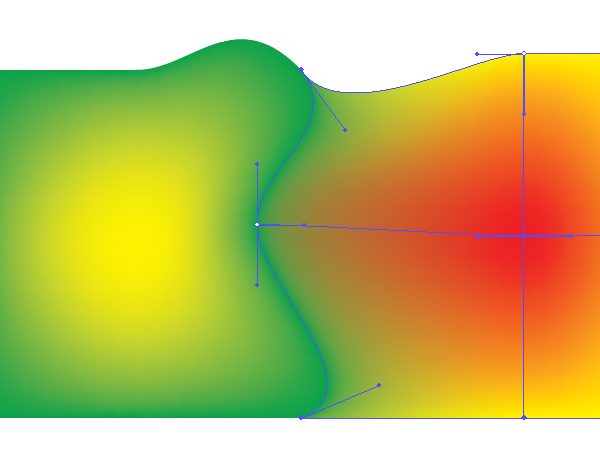
Zoom in on the image so that it’s convenient to work with it. Turn on the Smart Guides mode (Command + U). With the help of the vertical and horizontal directional lines set the position grid point of the left figure. Using the Direct Selection Tool (A), Overlap an anchor point on the gradient mesh of the right figure with one point from the left figure.
Step 3
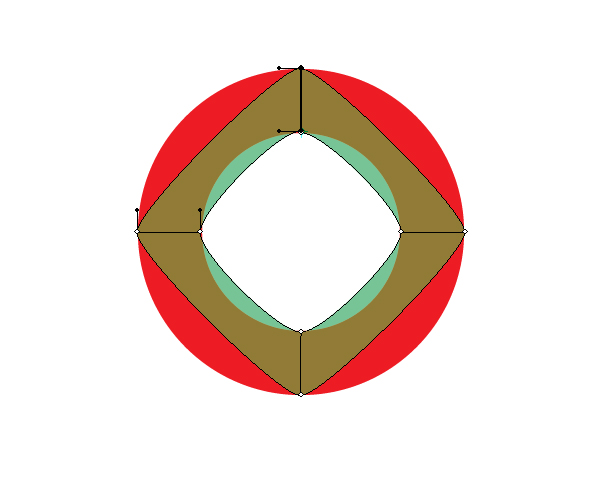
Use the Lasso Tool (Q) to select both of the overlapped points of the gradient mesh. With Direct Selection Tool (A) overlap the handles, so that they are the same length and there’s no angle between them. While overlapping the handles you will see the caption "Handle".

Step 4
Repeat this step for all of the overlapped anchor points.
Step 5
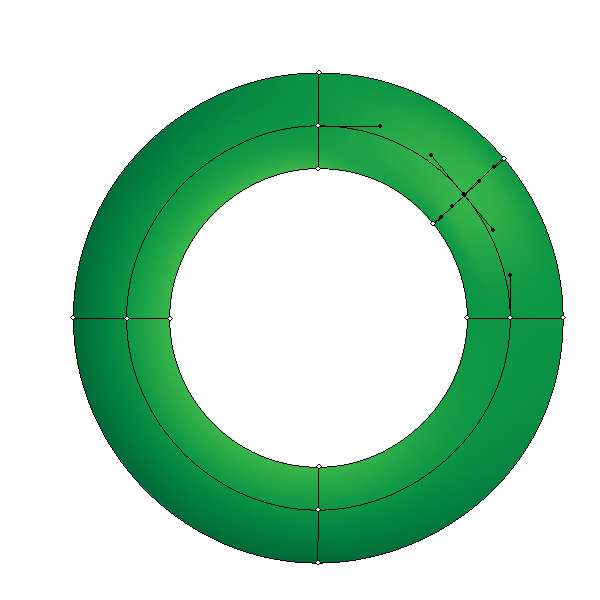
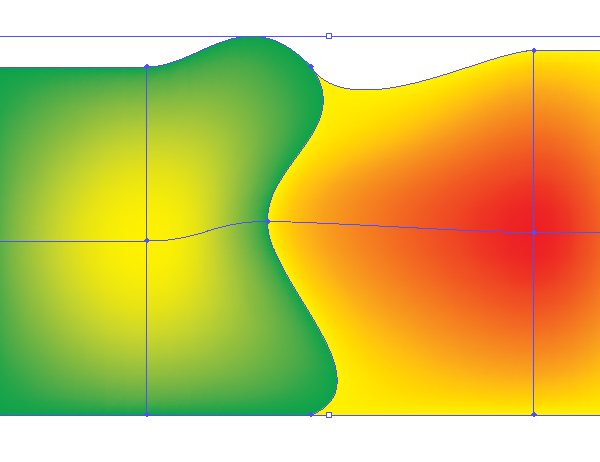
Select the mesh points on the left hand side of the right shape (the orange and yellow shape) and change them to match the color of the left gradient (in this case, green) using the Eyedropper Tool (I).
Here’s a demonstration of the last few steps.
Conclusion
If you work with simple shapes before moving to the complex ones you will have a better chance at overcoming the challenges of using the gradient mesh… Remember, complex work usually consists of simple parts. Don’t get tired of experimenting, It’s the key to learning this challenging tool. Good luck!