Follow this quick tip and learn how to draw a shiny abstract background. We will use a very useful Script called Vary Hues to speed up the coloring process, along with the Transform effects, a Scatter brush and a little dose of Gradient Mesh. Two versions await you so let’s get started!
Step 1
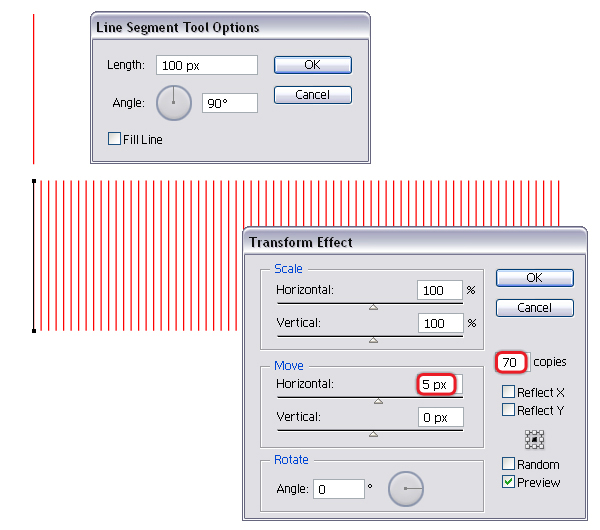
First open a new document. Now, take the Line Segment Tool (Backslash) and click anywhere on your artboard to open the Options window. There, select 100 px and you will get the first vertical line. With this line selected, go to Effect menu > Distort & Transform and apply the Transform effect. Choose to move the line 5 px horizontally and then 70 copies.
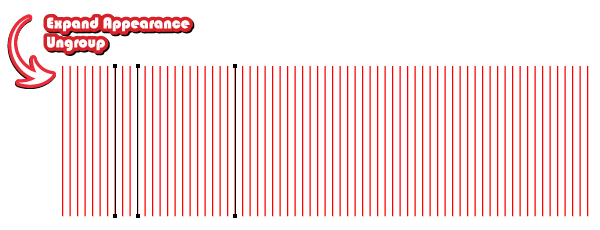
In order to expand this effect and to obtain separate lines, go to Object menu and select Expand Appearance then Ungroup.
Step 2
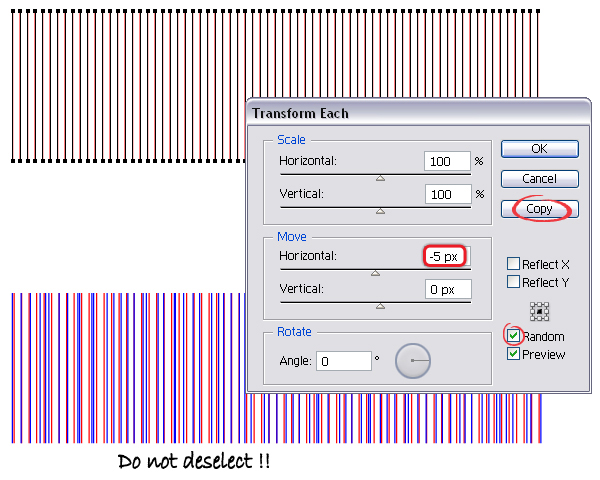
Select all the resulting lines and go to Object menu > Transform > Transform Each. Choose to move them minus 5 px horizontally, check the Random option then press Copy. I changed the Stroke color to blue so we can see better the result. Do not deselect all the lines obtained and move on to the next image.
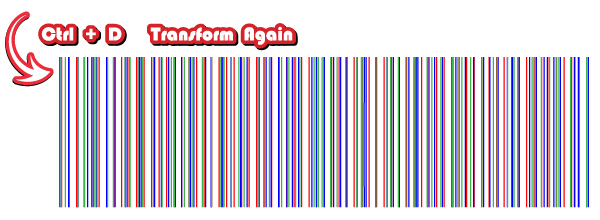
With the blue lines still selected, press Command + D which is the shortcut for Transform Again in order to repeat the last action (move H: minus 5 px randomly). You will get more lines and in the image below they are green.
Step 3
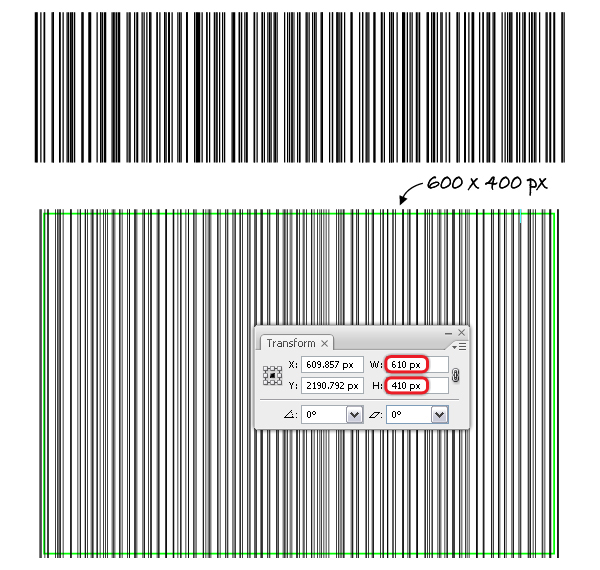
Here are all the lines ready to be used. We will create a 600 x 400 px background so take the Rectangle Tool (M) , click anywhere on your artboard and enter these dimensions to create a rectangle. Now, select all the lines and take a look at the Transform Panel (Window menu > Transform). We need to modify the Width and Height values therefore type 610 px and 410 px, slightly larger than the rectangle. Arrange the lines over the rectangle as in the image and before you continue, Copy and Paste in back the green rectangle because you will need it later.
Tip: If you want to create a background much bigger than this, I recommend you to choose more than 70 copies when you apply the Transform effect, 100 or even more.
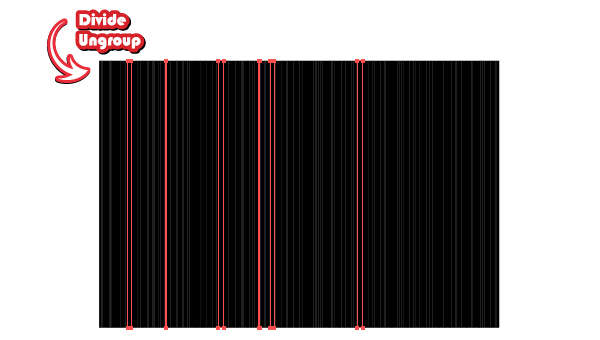
Now, select all the lines and also the rectangle and choose Divide from the Pathfinder Panel then Ungroup from the Object menu. As a result you will get a lot of rectangles of different widths. Select black as the fill color.
Step 4
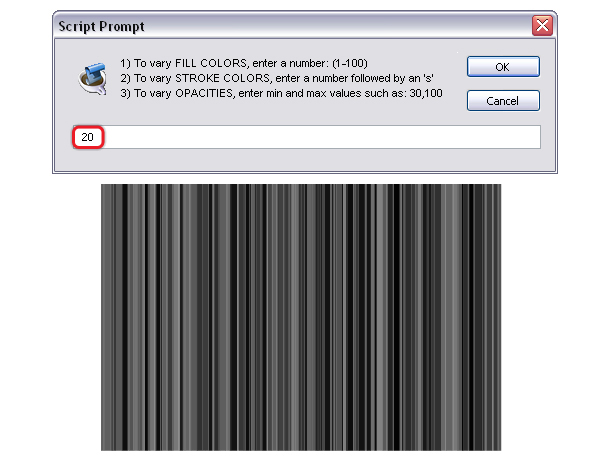
At this step we will use a new script called Vary Hues that I find very useful. It speeds up the coloring process very much. Go here and follow the instructions to download and install it. After you restart Illustrator you should find it in the File menu under Scripts. Next, select all the black rectangles, run this script, choose 20 and hit Ok. As a result all the stripes will be filled with various shades of gray and at this point you can group them.
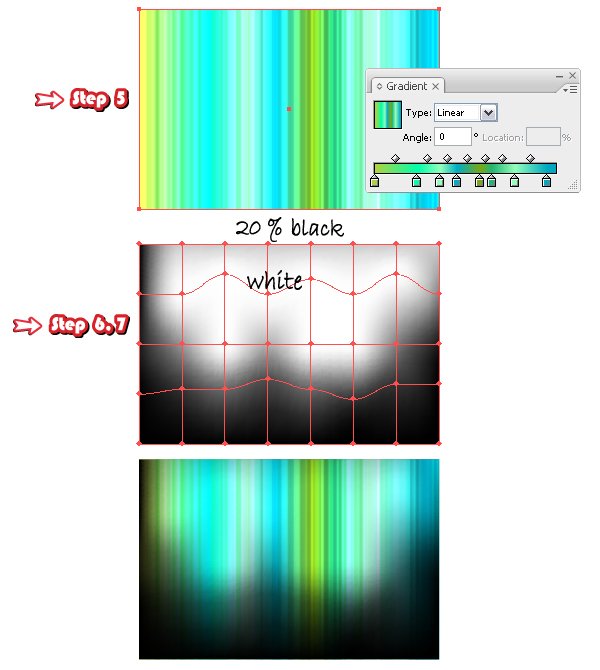
Step 5
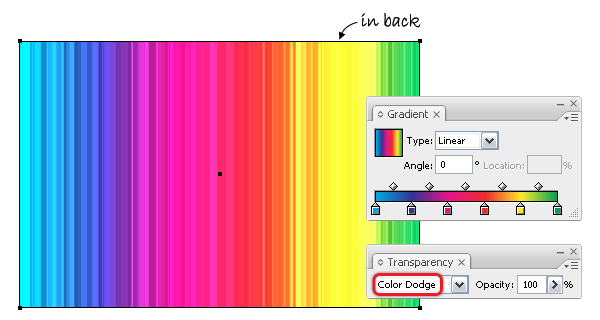
Now, we need the copy of the rectangle made at step 3. Move it behind the group of stripes and fill it with a gradient called Spectrum that you can find in the Swatch Libraries menu under Gradients > Spectrums. Set the Blending mode to Color Dodge.
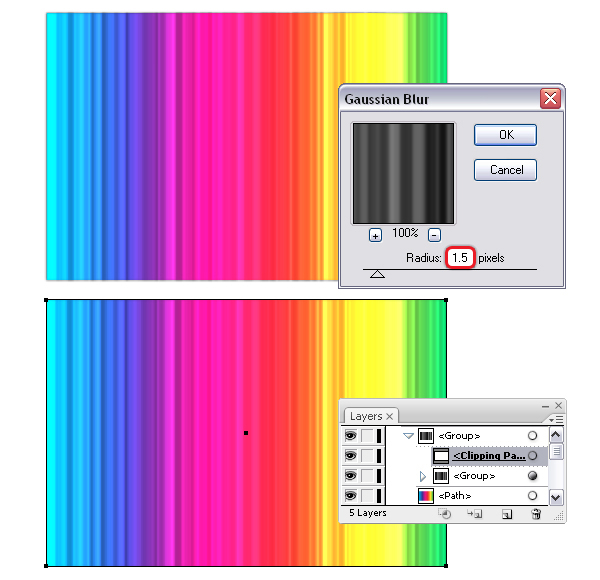
Select the group of stripes then go to Effect menu > Blur > Gaussian Blur and apply a 1.5 px Radius. To get the sharp edges we will create a mask. First, make a copy of the rectangle, delete the gradient fill and move it in front of the stripes. Now, select this rectangle and also the group of stripes and go to Object menu > Clipping Mask > Make.
Step 6
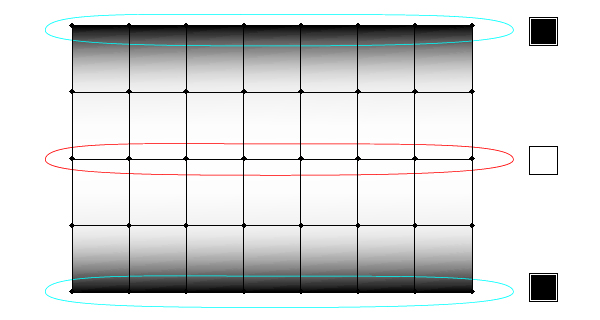
Make another copy of the background rectangle and move it in front. Fill it with gray for the moment. Having this rectangle selected, go to Object menu > Create Gradient Mesh, choose four Rows and seven Columns and hit OK.

Take the Direct Selection Tool (A) and drag a selection over the first row of mesh points then change their fill color to black. Next, select all the mesh points on the middle row and change their fill color to white. For the last row of mesh points select black as the fill color.
Step 7
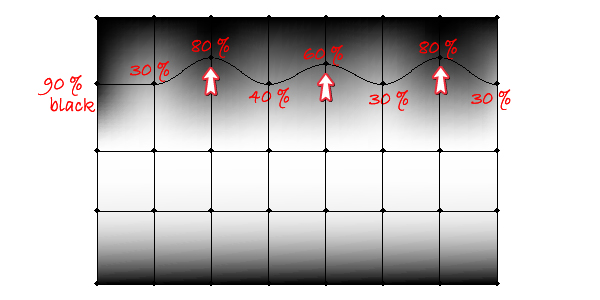
Now, we will move some of the points on the second row. Select using the Direct Selection Tool (A) only the points indicated below and move them up. We will use different shades of gray to fill each mesh point therefore follow the indications and fill them with 90 %, 80 %, 60 %, 40 % and 30 % black.
Repeat the same process for the points on the fourth row. Select with the Direct Selection Tool (A) only the points indicated and move them as shown. When you are done, change their fill colors to 80 %, 60 %, 40 % and 20 % black.
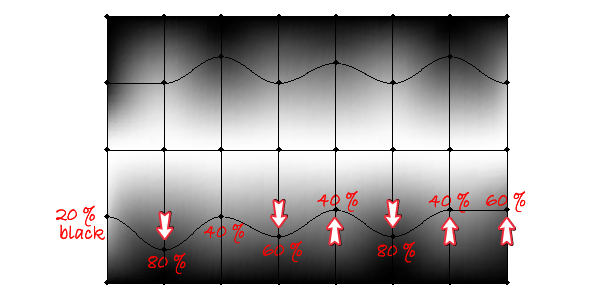
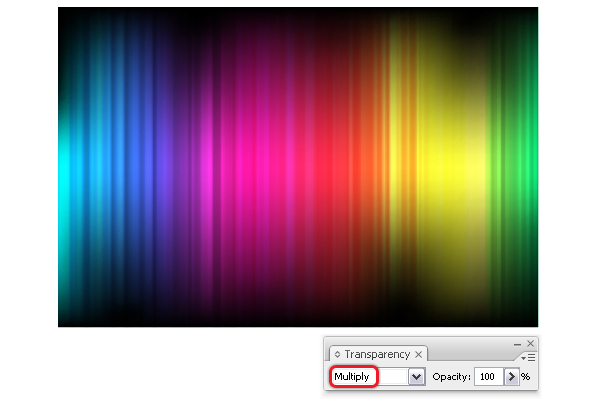
Finally, set the Blending mode to Multiply because in this way white becomes transparent.
Step 8
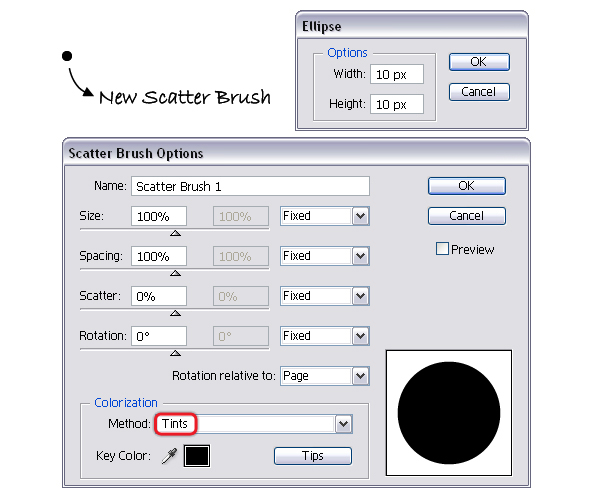
Take the Ellipse Tool (L) and draw a 10 x 10 px circle. Fill it with black then drag the circle into the Brushes Panel and choose New Scatter Brush. In the Options window, leave all the settings as they are and only change the Colorization Method to Tints.
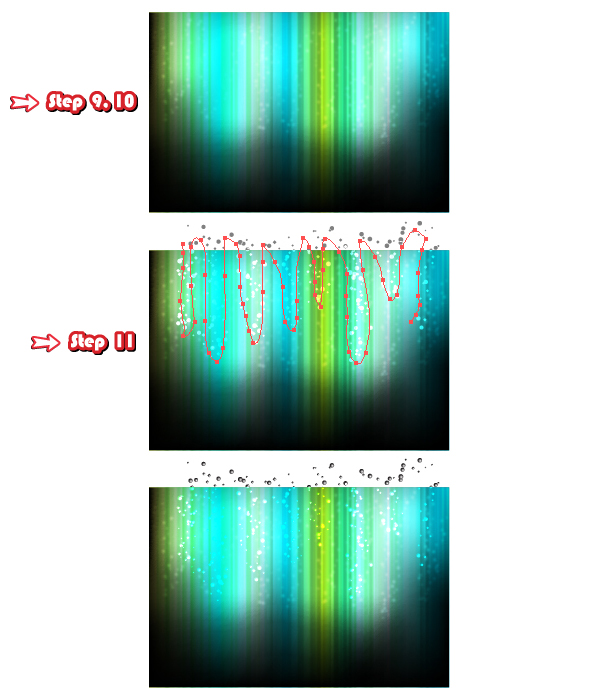
Step 9
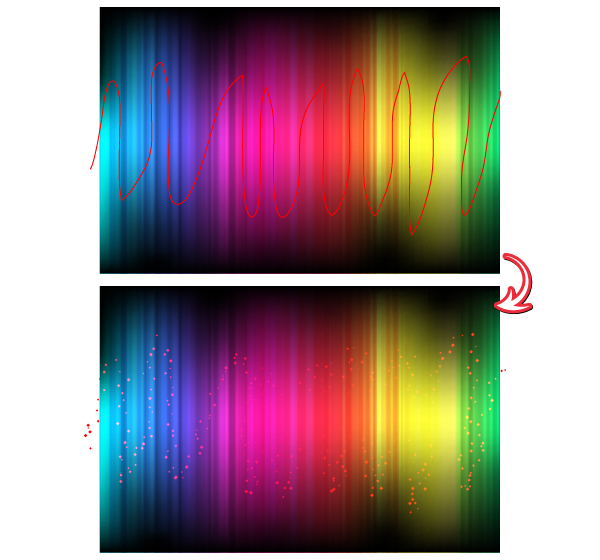
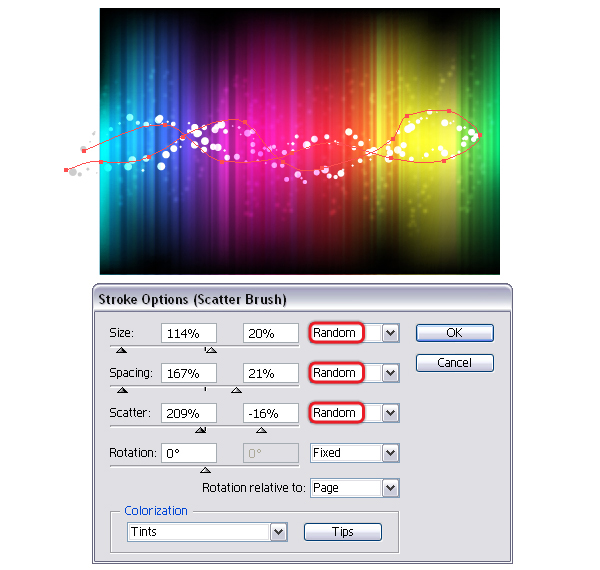
Next, use the Pencil Tool (N) to draw a random path over the background similar to the one below and Stroke it with the Scatter brush saved at the previous step. In order to change the settings, double click on the brush stroke applied in the Appearance Panel to open the Options window and there you can move the sliders for Size, Spacing and Scatter as you want.
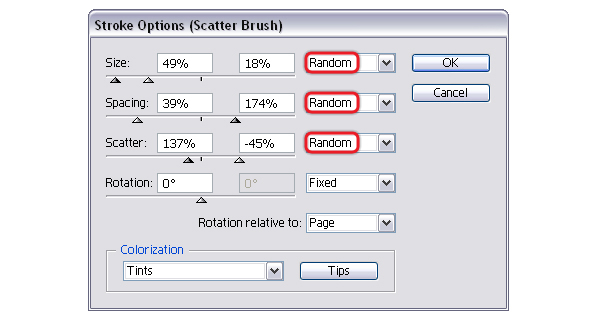
Here are the values that I’ve used, chosen purely at random.
Step 10
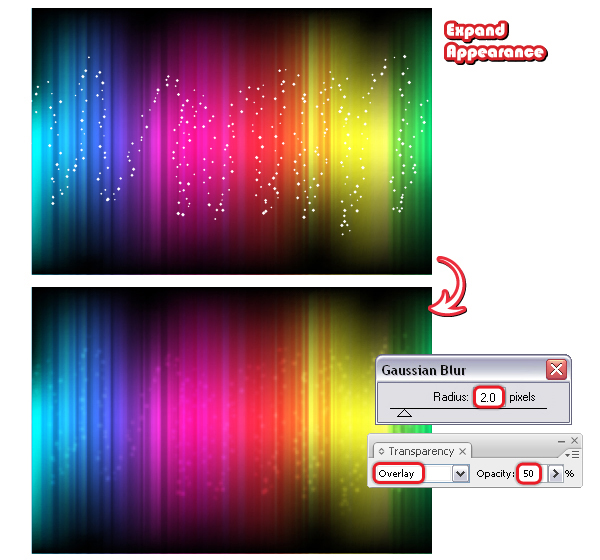
Having this path selected, go to Object menu and select Expand Appearance. As a result you will get a group of circles. Select white as the fill color then go to Effect menu > Blur > Gaussian Blur and apply a 2 px Radius. Set the Blending mode to Overlay and reduce the Opacity to 50 %.
Step 11
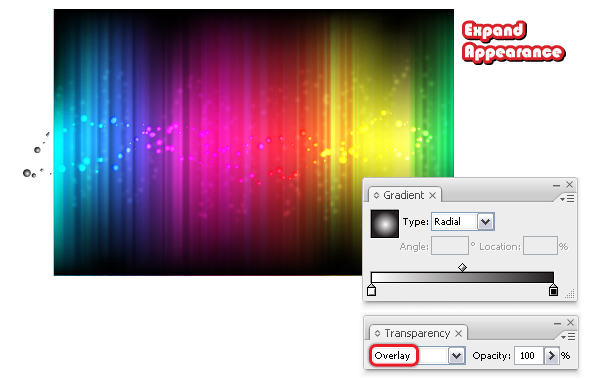
Take again the Pencil Tool (N) and draw another path in the middle of the background. Stroke it with the Scatter brush saved then change the Size, Spacing and Scatter values as you did earlier.
Having the path selected, go to Object menu and choose Expand Appearance. Fill the resulting group of circles with a radial gradient from white to black and set the Blending mode to Overlay.
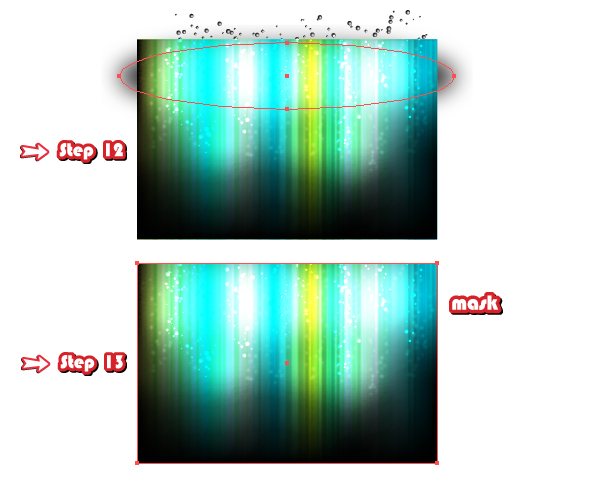
Step 12
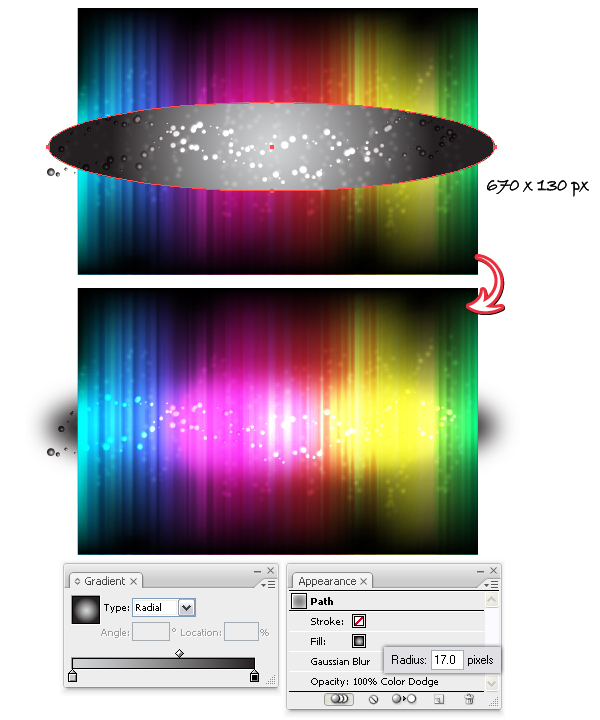
Draw using the Ellipse Tool (L) an oval shape in the middle of the background. Fill it with a radial gradient from gray to black then go to Effect menu > Blur > Gaussian Blur and apply a 17 px Radius. Change the Blending mode to Color Dodge to get the shiny look Move the ellipse behind the two groups of circles.
Step 13
Now, we need to mask everything that passes over the edges of the background. First, make a copy of the background rectangle (the one filled with the colorful gradient in back), remove the gradient fill and move it in front. Now, select the two groups of circles, the ellipse and also this rectangle and go to Object menu > Clipping Mask > Make. At this point, the abstract background is ready.
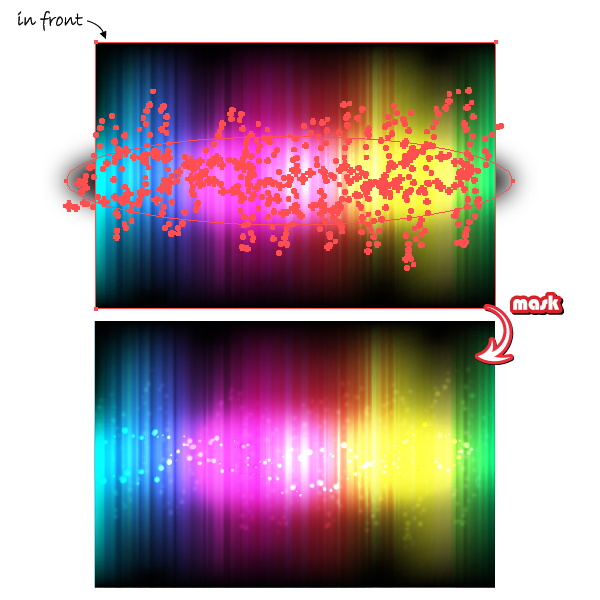
Extra
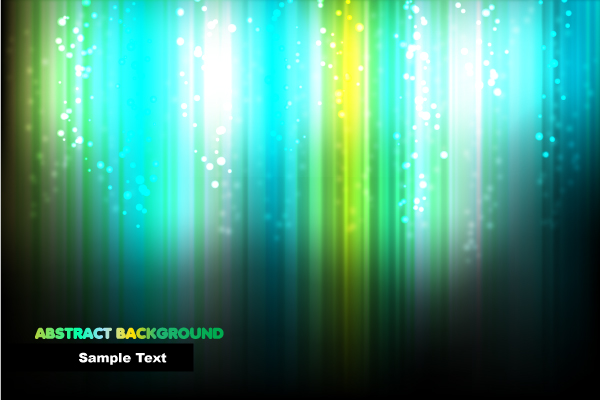
1. Here is another version of the abstract background and how to make it by simply changing a few things. Start with the gradient for the rectangle in back and use anything you like.
Continue with the mesh points. This time I used black and dark shades of gray only in the bottom of the background, 20 % black for the mesh points from the top and white in the middle area. For more details follow again the steps 5, 6 and 7.
2. The first group of circles is the same from step 10. For the second, draw a path with the Pencil Tool (N) as below then follow again the step 11 and use the same settings.
3. Draw an ellipse as you did at step 12 and this time put it at the top not in the middle. Finally, mask everything that passes over the edges of the background as you did at step 13.
Conclusion
Here are the two final images. Many other variations can be created in the same way and if you create one interesting I’d love to see it.

{excerpt}
Read More