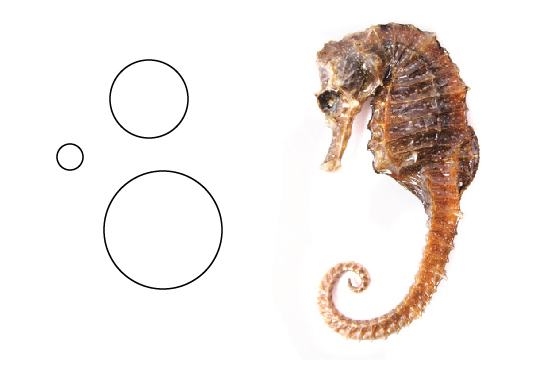
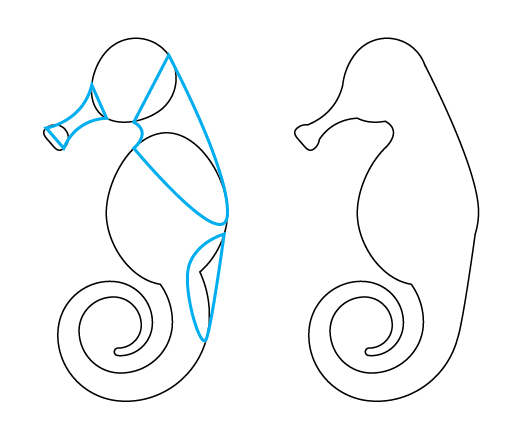
In today’s tutorial I’m going to show you how to create a stylized but simple illustration of a sea horse I’ll be using a stock image only to give me a basic idea for the shape of the sea horse and then go on to using Shape Tools, the Appearance Panel and more. So let’s jump in and get started.
Step 1
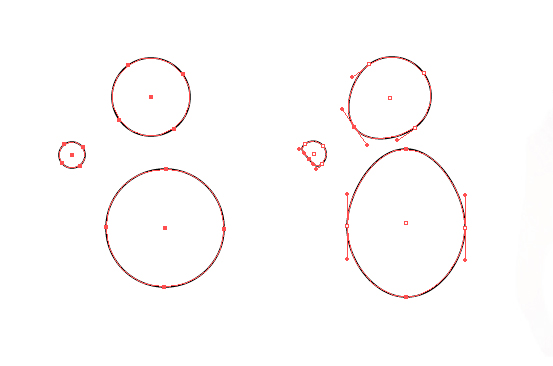
I’ll be using the Ellipse Tool (L) to create three even circles for the face and body of the sea horse To create an even circle hold down on Alt + Shift and drag out. I’m not following the stock image completely, but only using it to get an idea of the basic shape of the creature.
Now that I have the three circles, I’m going to rotate the head and snout with the Free Transform Tool (E). Then with the Direct Selection Tool (A) select the points as shown below and drag them out or in with the snout. I’ve not altered the shapes with the handle bars, I’ve only moved the points. You may find Smart Guides (Ctrl + U) helpful in this to ensure the points stay central.
Step 2
In the Toolbar, hold down on the Line Segment Tool to access the fly out menu. Here you’ll be able to get the Spiral Tool. Begin the spiral where you’d like the center of the curl to begin and then drag out to the right, the pull it upwards to the front of the tummy shape.
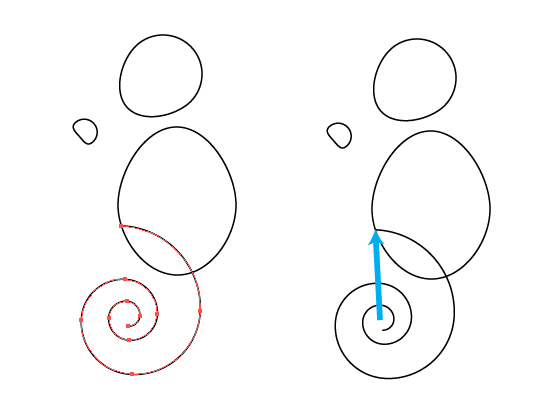
With the Direct Selection Tool (A), select the four central points and then remove them by pressing delete on your keyboard.
Step 3
Within the Stroke panel, change the Stroke Weight to 5pt and then change the Cap to a Round Cap.
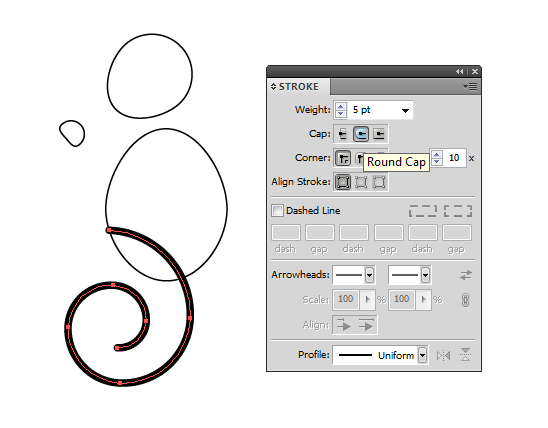
With the Width Tool (Shift + W), increase the width of the top point to around 30px. You wont get an exact amount but don’t worry about that.
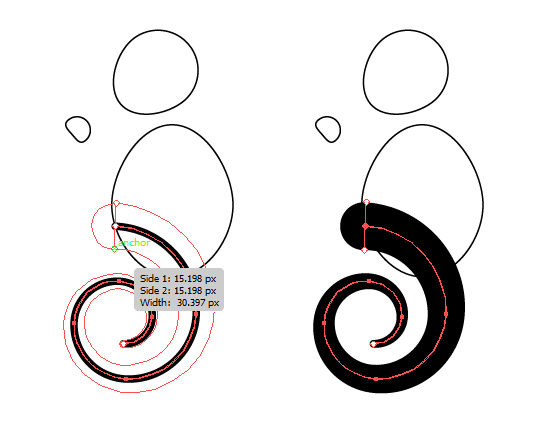
Step 4
While the spiral is selected go to Object > Expand to convert it to a shape.

Step 5
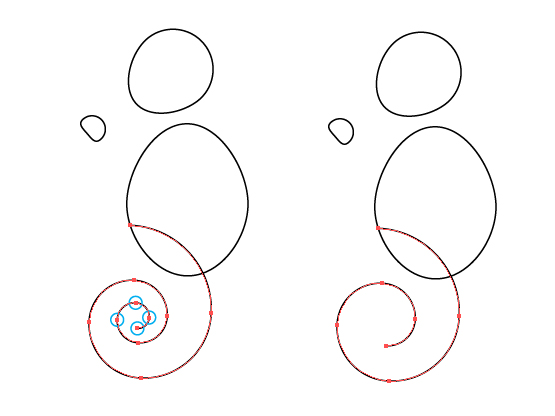
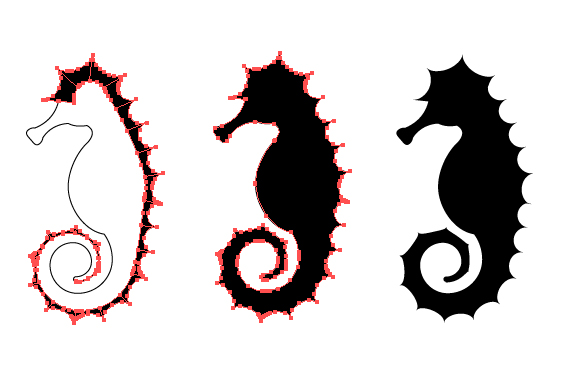
Go into the Pathfinder panel and while the spiral and body are selected, click on Divide. This will split the shapes into five shapes as shown below.
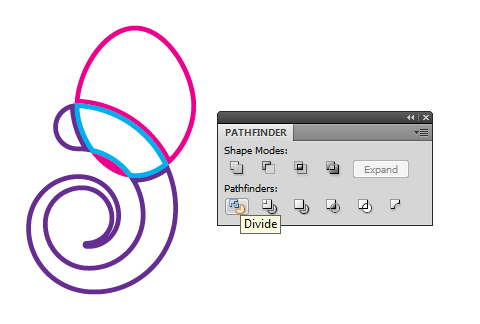
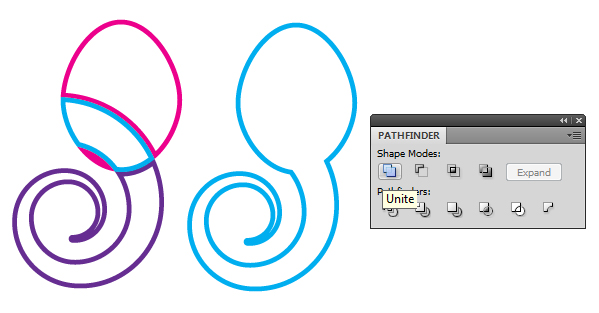
Delete the shape from the tail which is overlapping the body and then use Pathfinder > Unite to combine all the other shapes.
Step 6
With the Pen Tool (P) draw shapes connecting each of the other shapes and then Select All (Ctrl + A) and use Pathfinder > Unite to combine them.
Step 7
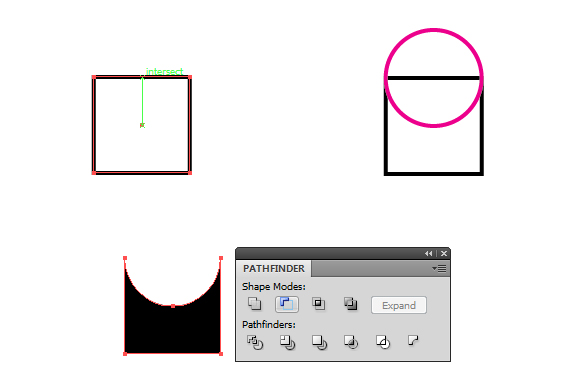
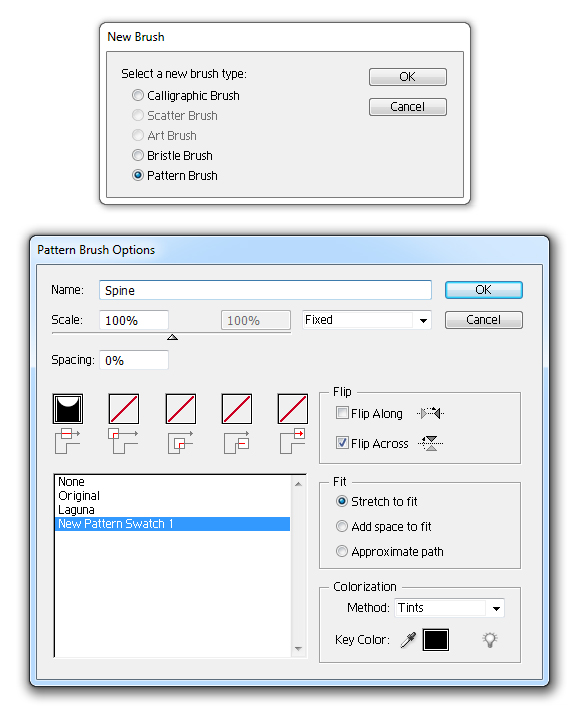
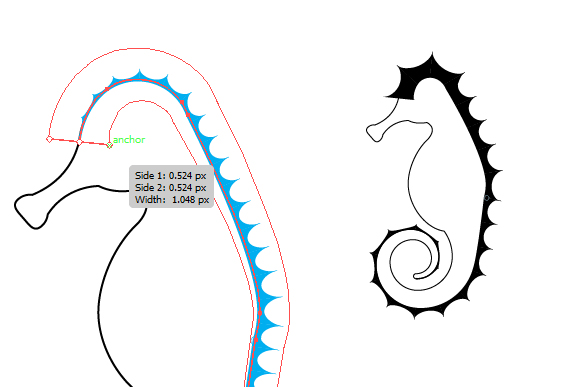
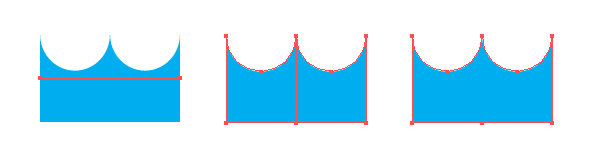
We’re going to create a simple Pattern Brush to give our sea horse a spiky spine. Use the Rectangle Tool (M) to draw an even square, again holding down Shift + Alt and dragging out to make it even. With Smart Guides (Ctrl + U) find the center of the top line of the square and with the Ellipse Tool (L) draw an even circle. Smart Guides should allow you to snap the circle to the corners of the square. Then with Pathfinder > Minus Front, remove the circle from the square.
Step 8
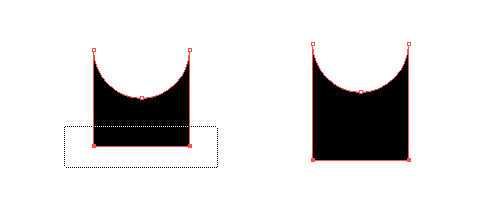
Use the Direct Selection Tool (A) to select the bottom points of the shape and then with your arrow keys on your keyboard, bring the point down about five nudges. Ensure your shape has a black fill.
Step 9
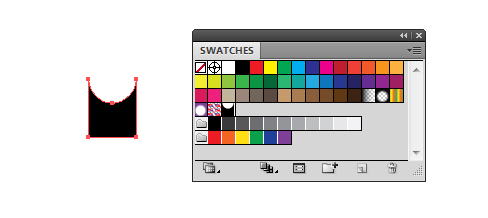
Select the whole shape and then drag and drop it into your Swatch panel.
In the Brush panel, click on New Brush and select Pattern Brush and use the below settings. Select "New Pattern Swatch" in the box below and Flip > Flip Across. I’ve changed the Colorization Method to Tints however this isn’t relevant to this specific tutorial, it’s good practice to get in the habit of. Using a black shape in your brush and with this method will mean which ever stroke color you use, will be the color the brush will be. Click on OK once done.
Step 10
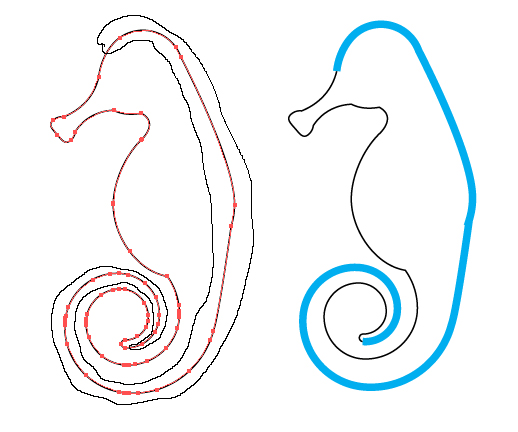
With the Lasso Tool (Q), draw around the points as shown below. This will select only these sections and points of the shape. Then Copy (Ctrl + C) and Paste in Front (Ctrl + F). You’ll end up with a duplicate of the line on top of the original shape as shown below with my exaggerated blue line.
Step 11
Then apply your Spine Brush to the line. However you may have the same problem as I have where one or two points are creating an unnecessary corner and producing a gap in your line. Of course we don’t want this, so let’s rectify it.
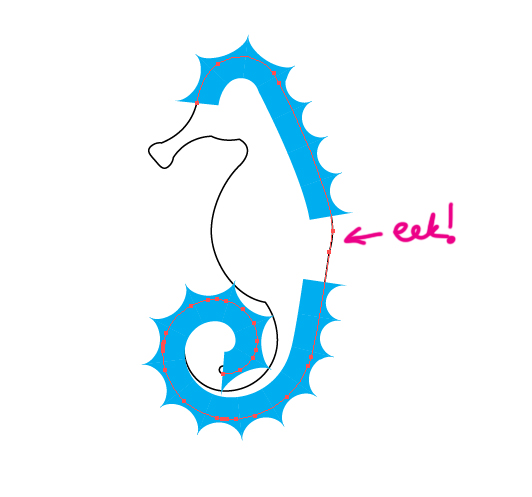
When you zoom into the offending area, look for tell tale signs of an error occurring. It might be too many points clumped up, which is the case here. For a smooth line, it shouldn’t have a jagged piece coming out right? The problem is there are two points overlapping each other, which has caused a corner to happen. So with the Pen Tool (P), I’ve moused over the point and then deleted one point. Then as if by magic, the whole line now accommodates the Pattern Brush.
Step 12
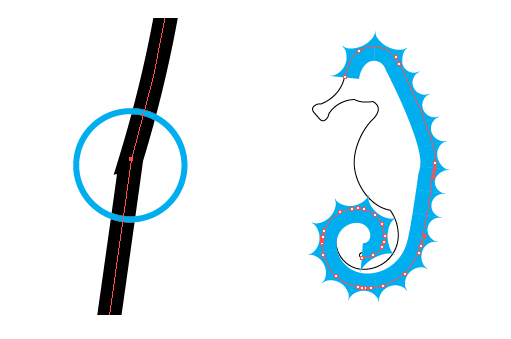
In the Stroke panel, I’m going to modify the Profile of the line with Width Profile 6, then to make sure the spikes are on the outside, click on Flip Across.

I want our sea horse to have more of a mohawk look, so I’m going to use the Width Tool (Shift + W) again and increase the point at the start of the line to around 1px.
Step 13
Select the line for the spine and then Object > Expand it. Then select the body and spine then use Pathfinder > Unite.
Step 14
From here, you can then modify your sea horse basic shape if you’re not happy with any of the elements. I’m not that happy with the blunt look of the mohawk, so I’m going to use the Pen Tool (P) to remove some of the points to then create a nice smooth bump on the forehead.

Step 15
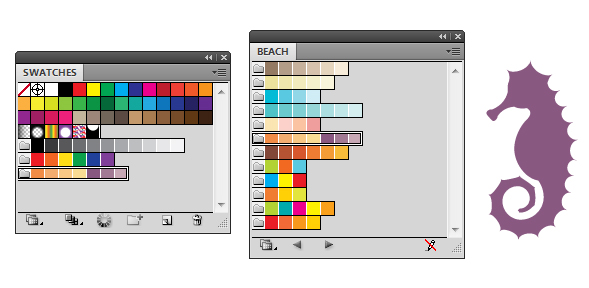
Now to color the sea horse If you’re like me and not completely confident with colors, there are a variety of ways you can get help with this. There is Kuler, which is one of my favorite color sources and there is also the many Swatch libraries which come with Adobe Illustrator. In the Swatch panel, go into the drill down menu in the top right hand corner and select Open Swatch Library > Nature > Beach to access the below. I’ve then selected the swatch "Sunrise" by clicking on the folder to the left of the swatch palette it will add the whole group of colors to your Swatch panel. I’ve given our sea horse a purple fill.
Step 16
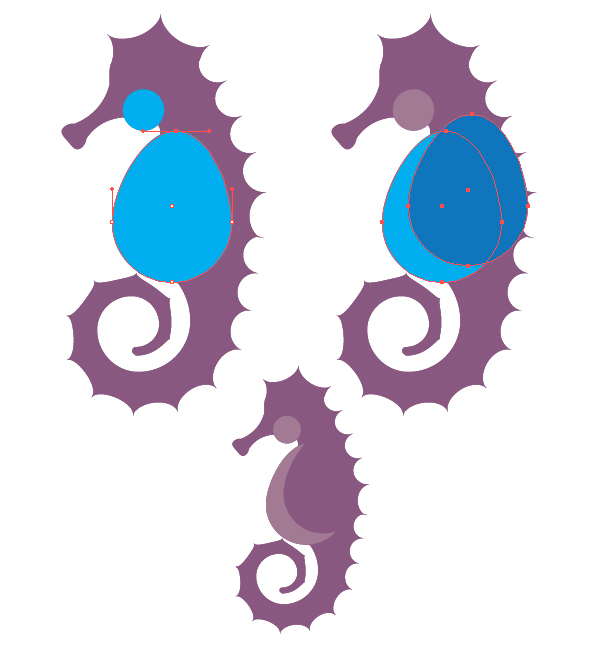
Now to add some additional shapes. An even circle with the Ellipse Tool (L) for the cheek and a modified circle for the tummy. I’m then going to duplicate the egg shape for the tummy and move it to the side. Use Pathfinder > Minus front to then create a crescent shape as shown below.
Step 17
Give the shapes the same fill as the body of the sea horse Then in the Appearance panel, click on the drop down menu and select New Fill. Select the black transparent radial gradient from the swatch panel.
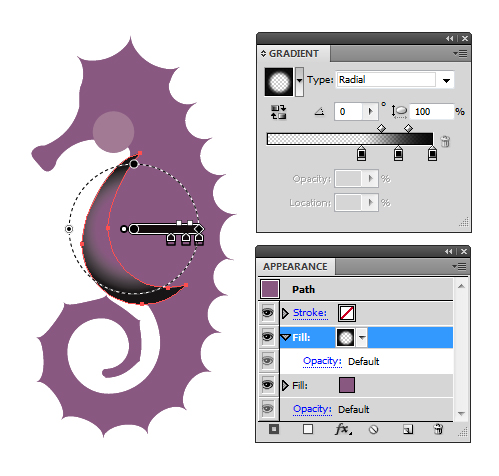
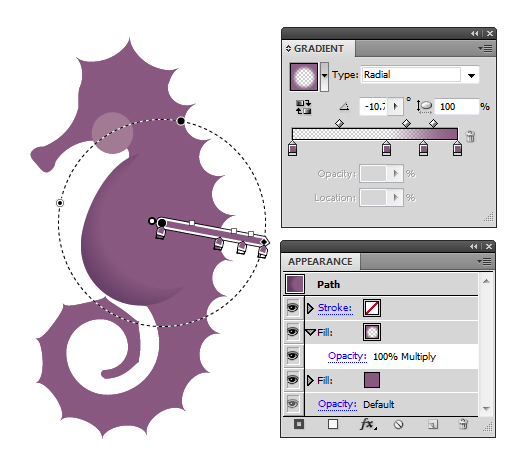
Then drag and drop the purple onto the Gradient Sliders in the Gradient panel. Use the Gradient Tool (G) to increase the size of the gradient. Click on Opacity in the Appearance panel and select Blending Mode Multiply and leave the Opacity at 100%.
Step 18
We’re going to reuse these options in the Appearance panel. So go into the Graphic Styles panel and click on New Graphic Style. You can double click on the icon in the panel and rename it. I’ve called it Tummy for now.
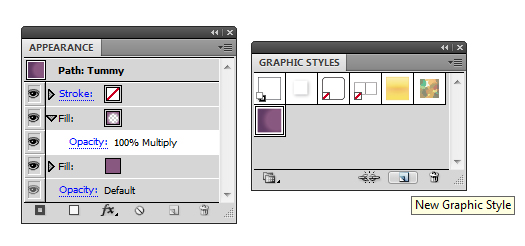
Then select the circle for the cheek and click on the Tummy Graphic Style. Then select the shape for the whole of the sea horses shape and give that the same Graphic Style.
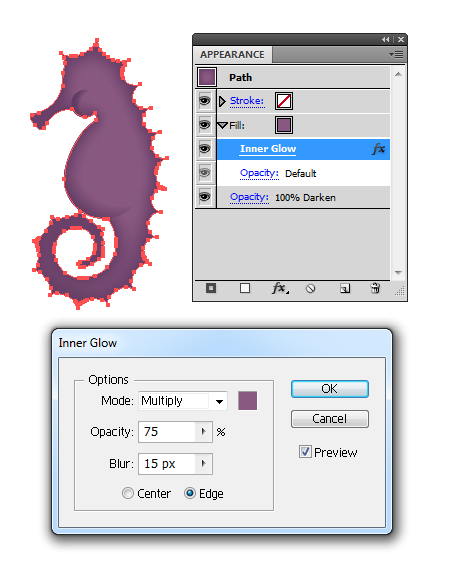
Step 19
Duplicate the same for the body, cheeky and tummy and use Pathfinder > Unite to create a shape which overs the entire sea horse Place this on top of all the shapes you’ve created. Give it a purple fill and then click on the FX button along the bottom and go to Stylize > Inner Glow. Use the options below and then click on OK. Then change the Opacity of the whole of the style by clicking on the Opacity link at the bottom. The difference with this Opacity link is that it will influence all strokes and fills and any further settings you may have applied, rather than just the fill. I’ve changed it to Blending Mode Darken.
Once done, save these settings in the Graphic Styles panel for future use as you did previously.
Step 20
Now to add a small fin on the side of the cheek. Use the Line Segment Tool (\) to draw a horizontal line. Give it a 0.75pt Stroke Weight in the Stroke panel and then apply the Spine brush you previously created for the spine. Then go to Object > Expand and then Pathfinder > Unite to create one shape.
Step 21
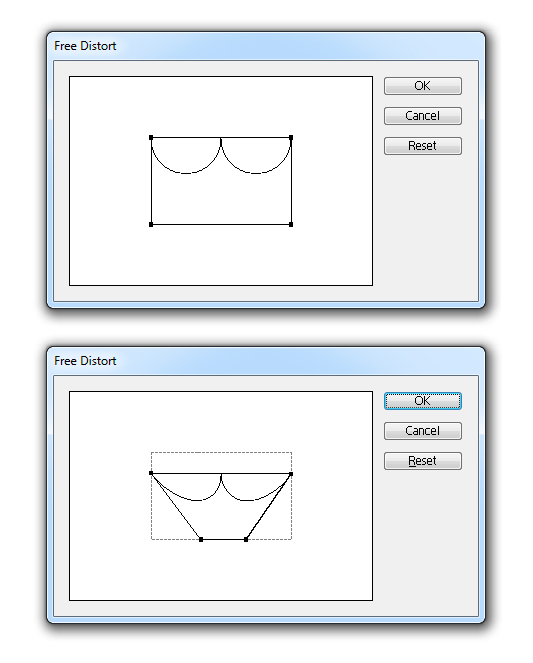
While still selected, go to Effects > Distort & Transform > Free Distort. I’ve brought in the bottom corners and then squashed the shape by moving the top corners down as shown below.
Once done, Object > Expand and then use the Free Transform Tool (E) to rotate the fin and place it at the side of the face. Use your Tummy Graphic Style to give it color. I’ve then used the Gradient Tool (G) to move the gradient so it just influenced the tips of the fin and then lowered the Opacity to 60%.

Step 22
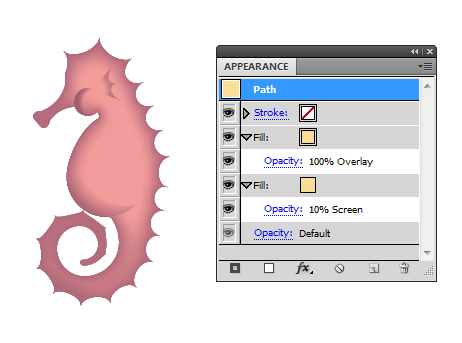
I’m not completely happy with the color of the sea horse, so I’m going to play around with the color. First duplicate the shape of the entire sea horse Select all the other shapes and then Group them (Ctrl + G). I’ve then given the duplicated sea horse shape a yellow fill from the same "Sunrise" swatch.
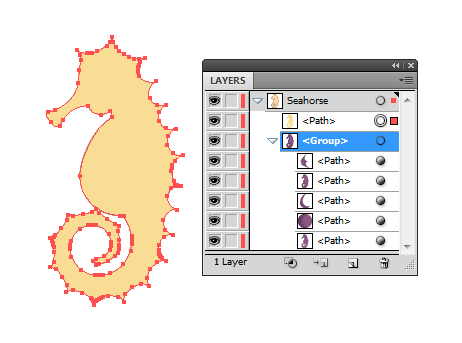
I’ve played around with the Appearance panel with two fills. One is set to Blending Mode Overlay, the other is set to Blending Mode Screen, Opacity 10%.
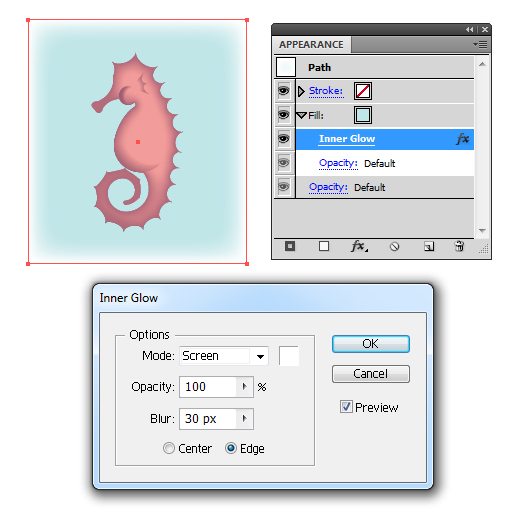
Step 23
In the Layer panel, Create New Layer and move it below the sea horse Use the Rectangle Tool (M) to draw a rectangle around the sea horse Then apply the Inner Glow Graphic Style previously used for the entire body shape. I’ve changed the fill of the layer to a light blue and then changed the settings of the Inner Glow as shown below. Finally I’ve changed the Blending Mode back to Normal.
Step 24
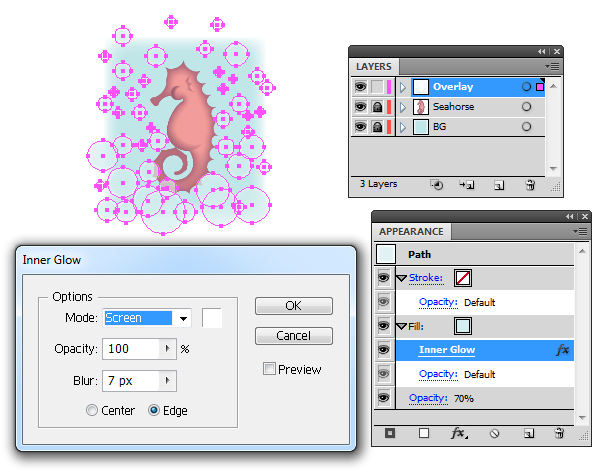
In the Appearance panel, go into the drill down menu and take the tick out of "New Art has Basic Appearance". Change the Blur in the Inner Glow settings to 7px and click on OK. Then click on the Opacity to 70%. Use the Ellipse Tool (L) to then draw even circles around the sea horse Overlap some and perhaps a few on the body of the sea horse to make stylized bubbles.
Step 25
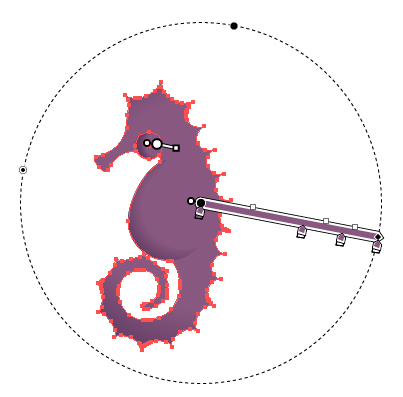
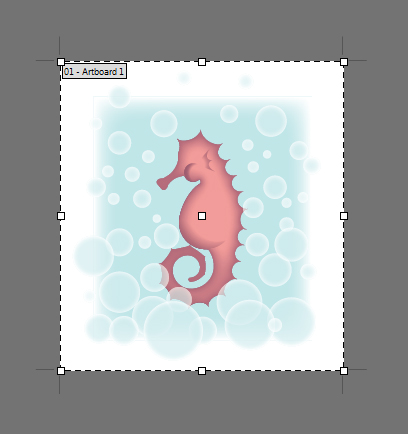
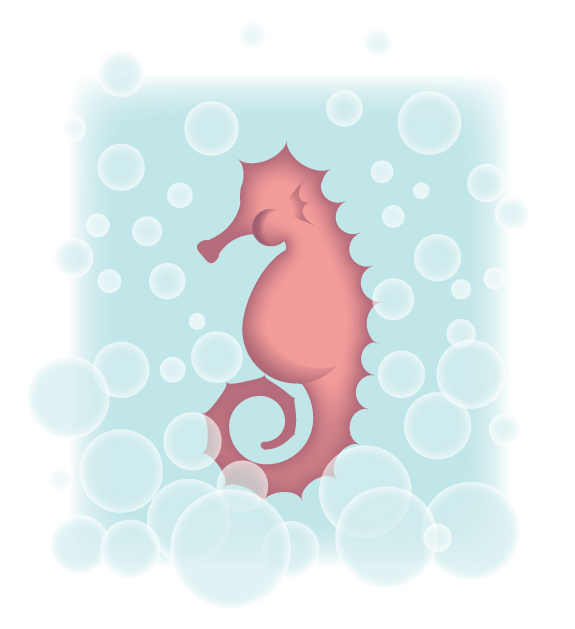
Finally, use the Artboard Tool (Shift + O) to define the boundaries of your illustration and your sea horse is now complete!
Conclusion
How you’ve enjoyed today’s tutorial and you can apply some of these simple techniques in future projects.
{excerpt}
Read More