Chances are, you know what a database trigger is, at least in conceptual terms. Chances are even greater that you know that MySQL supports triggers and has supported them for quite some time. I would guess, even armed with this knowledge, that a good many of you are not taking advantage of triggers with MySQL. They’re one of those things which should absolutely be in your development toolbox, as they can really change the way that you look at your data.
Introduction: What is a Trigger
“However, as applications grow more and more complicated, the further we can abstract the layers of an application to handle what they should, the greater our internal development usability becomes.”
For the uninitiated, a trigger is a rule that you put on a table which basically says whenever you DELETE, UPDATE or INSERT something in this table, also do something else. For instance, we might want to log a change, but instead of writing two separate queries, one for the change, and one for the log, we can instead write a trigger that says, “Whenever this row is updated, create a new row in a different table to tell me that the update was made”. It adds a little overhead to the initial query, but since there are not two packets traveling to your database to do two separate things, there is an overall performance gain (in theory anyway).
Triggers were introduced into MySQL in version 5.0.2. The syntax for a trigger is a bit foreign on first blush. MySQL uses the ANSI SQL:2003 standard for procedures and other functions. If you are comfortable with a programming language in general, it is not that difficult to understand. The specification is not freely available, so I will do my best to use simple structures and explain what is happening within the trigger. You will be dealing with the same logic structures that any programming language provides.
As I mentioned above, triggers will be executed procedurally on UPDATE, DELETE and INSERT events. What I didn’t mention is there is they can be executed either before or after the event defined. Therefore, you could have a trigger that would fire before a DELETE or after a DELETE, so on and so on. This means that you could have one trigger that fires before an INSERT and a separate one that fires AFTER an INSERT, which can be very powerful.
I am going to look at three uses that you could consider adding to your toolbox. There are several uses that I will not be delving into, as I feel there are better methods to get the same results, or they deserve their own tutorial. Each of these uses that I am exploring have a counterpart in your server side logic layer, and are not new concepts. However, as applications grow more and more complicated, the further we can abstract the layers of an application to handle what they should, the greater our internal development usability becomes.
Beginnings: My Table Structure, Tools and Notes
I am working with a mythical cart system, with items that have prices. I have tried to keep the data structure as simple as possible just for illustration purposes. I am naming columns and tables for the purpose of understanding, and not for production use. I am also using TIMESTAMPS rather than other alternatives for ease. For those playing the at-home version of today’s game, I am using the table names of carts, cart_items, cart_log, items, items_cost.
Please note throughout this tutorial I will be using very simple queries to express my points. I am not binding any variable, as I am not using any user input. I want to make the queries as easy to read as possible, but don’t use this tutorial for anything other than practical trigger applications. I know there might be a comment or two about this, so consider this my disclaimer.
I am using the Particle Tree PHP Quick Profiler to see execution times. I am also using the database abstraction layer provided in the tool just for my own benefit. It’s a nice tool, and does much more than just providing SQL execution times.
I am also using Chive to illustrate the DB effects and create my triggers. Chive is MySQL 5+ only, and is very similar to PHPMyAdmin. It’s prettier, but also much buggier at the moment. I am using Chive, simply because it gives good screen shots as to what is happening with the queries.
One other quick note. You may need to change the delimiter for MySQL while creating a trigger. The natural delimiter for MySQL is ; but since we will be using that delimiter for our added queries, you may need to explicitly rename the delimiter if creating these via command line. I have chosen not to show this, because using Chive, there is no need to change the delimiter.
To change a delimiter, you would simply do this before your trigger command:
DELIMITER $$
And this after your trigger command:
DELIMITER ;
The Easy Trigger: Data Integrity
If you do even the slightest normalization to your database structure you have probably run into a time where you have deleted the main data source, but still have fragments running around in your data stream. For instance, you might have an cart_id which is referenced in two or three tables without foreign keys, particularly since foreign keys are not supported with the MyISAM engine.
What you have probably done in the past is something like this (simplified for illustration):
    $sql = 'DELETE FROM no_trigger_cart_items WHERE cart_id = 1';
    $rs = $this->db->query($sql);

    $sql = 'DELETE FROM no_trigger_carts WHERE cart_id = 1';
    $rs = $this->db->query($sql);
Now, depending on how well you organize yourself, you might have a single API or method which you would clear your carts. If that is the case, you have isolated your logic to run these two queries. If that is not the case, then you always need to remember to clear your cart items when you delete a specific cart. Not difficult, but when you forget, you are losing your data integrity.
Enter our trigger. I am going to create a very simple trigger so that whenever I delete a cart, my trigger will fire to delete any cart items that have the same cart_id:
CREATE TRIGGER `tutorial`.`before_delete_carts`
    BEFORE DELETE ON `trigger_carts` FOR EACH ROW
    BEGIN
        DELETE FROM trigger_cart_items WHERE OLD.cart_id = cart_id;
    END
Very simple syntax as I said above. Let’s go through each line.
My first line states “CREATE TRIGGER `tutorial`.`before_delete_carts`”. I am telling MySQL to create a trigger on the database “tutorial” to have a name of “before_delete_carts”. I tend to name my triggers with the formula of “When_How_Table”. That works for me, but there are plenty of other ways to do this.
My second line tells MySQL the definition of this trigger, “BEFORE DELETE ON `trigger_carts` FOR EACH ROW”. I am telling MySQL that before you delete on this table, for each row do something. That something is explained next, within our BEGIN and END. “DELETE FROM trigger_cart_items WHERE OLD.cart_id = cart_id;” I am telling MySQL before you delete from trigger_carts, take the OLD.cart_id and also delete from trigger_cart_items. The OLD Syntax is the defined variable. We will discuss this in the next section where we will combine OLD and NEW.
There is really nothing to creating this trigger. The advantage is moving your data integrity logic to your data layer, which I could make the case, is where it belongs. There is also one other slight advantage and that is the slight performance gain, seen below.
Two Queries:

One Query with a Trigger:

As you can see there is a slight performance gain, which should be expected. My database that I am using is on localhost with my server, but had I been using a separate DB server, my performance gain would be a bit greater due to round trip time between the two servers. My trigger delete has a slightly higher time to delete, but there is only one query, so the overall time decreases. Multiply this over all the code that you use to keep your data integrity, and the performance gain becomes at least modest.
One note on the performance, the first time the trigger runs, it may be much slower than subsequent times. I don’t use triggers necessarily for the performance gain, but rather to move my data logic to my data layer, just like you want to move your presentation from your markup to your presentation layer, otherwise known as CSS.
The Pretty Easy Trigger: Logging and Auditing
The next example that we will look at will deal with logging. Say I want to keep track of every item placed into a cart. Perhaps, I want to monitor my cart items purchase rate. Perhaps, I just want to have a copy of every item placed into a cart, not necessarily sold, just for some insight into the mind of my customers. Perhaps, you created your cart items as a MEMORY table, and you want to log all items in an InnoDB table. Whatever the reason, let’s look at an INSERT trigger, which will open up some good possibilities for logging or auditing of our data.
Before triggers, we probably did something like this (again, simplified for illustration):

Now, we can create a very simple trigger for this logging process:
CREATE TRIGGER `after_insert_cart_items`
    AFTER INSERT ON `trigger_cart_items` FOR EACH ROW
    BEGIN
        INSERT INTO trigger_cart_log (cart_id, item_id)
        VALUES (NEW.cart_id, NEW.item_id);
    END
Let’s run through this again, just so there is clarity of what this trigger is doing. First we start with the line, “CREATE TRIGGER `after_insert_cart_items`”. I am again telling MySQL to create a trigger with the name of “after_insert_cart_items”. The name could be “Foo”, or “BullWinkle” or whatever you want to call it, but again, I prefer to illustrate my trigger names. Next we see, “AFTER INSERT ON `trigger_cart_items` FOR EACH ROW”. Again, this is saying after we insert something on trigger_cart_items, for each row inserted execute what is between my BEGIN and END.
Finally, we just have, “INSERT INTO trigger_cart_log (cart_id, item_id) VALUES (NEW.cart_id, NEW.item_id);” which is a standard query with the exception of my two values. I am using the NEW value that is inserted into the cart_items table.
And we have cut our queries in half with the subtle performance gain:

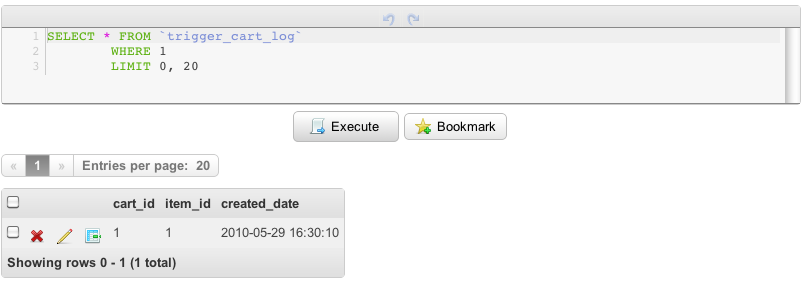
And just to check that our trigger is working, I see the values in my table:
This is again, relatively easy, but we are working with a couple of values, which can add to the complexity just a bit. Let’s look at something a little harder.
The Harder Trigger: Business Logic
At this point we can skip the old way of multiple queries with a single query. I imagine that will get just a whee bit tedious to continue to measure performance of queries. Instead, let’s get into a few more advance examples of triggers.
Business logic is where the bugs always creep up. Regardless, of how careful or organized we are, something always slips through the cracks. Triggers on UPDATE mitigate that just a bit. We have some power in a trigger to evaluate what the OLD value was, and set the NEW value based on the evaluation. Say for instance we want to always have our price of items to be a 30% markup of the cost of the items. It makes natural sense then, that when we UPDATE our cost, we also need to UPDATE our price. Let’s handle that with a trigger.
CREATE TRIGGER `after_update_cost`
    AFTER UPDATE ON `trigger_items_cost` FOR EACH ROW
    BEGIN
       UPDATE trigger_items
       SET price = (NEW.cost * 1.3)
       WHERE item_id = NEW.item_id;
    END
What we are doing is updating the items table with a price based on the NEW.cost times 1.3. I entered a cost of $50, so my new price should be $65.
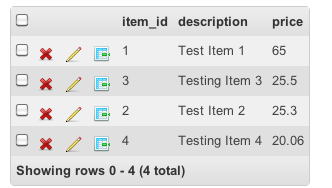
Sure enough, this trigger worked as well.
We need to take a look at a bit more advanced example. We already have the rule to change the price of an item based on it’s cost. Let’s say that we want to tier our cost a bit. If the cost is less than $50 our cost is actually $50. If it the cost is over $50 but less than $100 then our cost becomes $100 dollars. While my example probably doesn’t match a true business rule, we do adjust cost based on factors everyday. I am merely trying to keep the example easy to understand.
In order to do this, we are again going to work with an UPDATE but this time we will fire it before we execute our query. We are also going to be working with an IF statement, which is available to us.
Here’s the new trigger:
CREATE TRIGGER `before_update_cost`
    BEFORE UPDATE ON `trigger_items_cost` FOR EACH ROW
    BEGIN
        IF NEW.cost  50 AND NEW.cost < 100 THEN
            SET NEW.cost = 100;
        END IF;
    END
What we are doing now is not calling a query, but rather just overriding the value. I am saying if the cost is less than $50, then just make it $50. If the cost is between $50 and $100, then make it $100. If it is above that, then I just let it stay the same. My syntax here is not that foreign from any other server side language. We do need to close our IF clause with an END IF; but other than that, it really isn’t tricky.
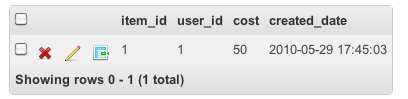
Just to check to see if our trigger works, I have entered a value of $30 for the cost, and it should be $50:
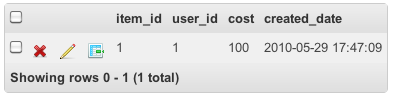
When I enter a cost of $85, here is the value:
And, just to check if my AFTER UPDATE trigger is still working, my price should now be $130:
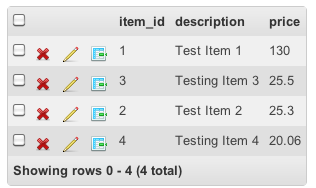
Life is good.
Conclusion
I have only touched the tip of the iceberg with triggers and MySQL. While there are countless uses for triggers, I have gotten along just fine in the past without them by dealing with my data in my logic layer. That said, the ability to add rules to my data in the data layer just makes sense. When you add in the modest performance improvements, the advantage is even greater.
We have to deal with complicated high traffic web applications now. While using a trigger on a single page vanity site might not be the best use of time and energy; a trigger on a complex web application might make the world of difference. I hope you enjoyed the examples, and please let me know what needs further explanation.