Nowadays a softbox needn’t be all that expensive – you can get nice results for $100 or even less. But what if there’s a way of making it much cheaper, with the same results? That’s what we’ll be explaining in this DIY tutorial; how to make a softbox with professional results for less than $20.
Step 1: What is a Softbox?
A Softbox is a type of light modifier, used specially in studio or outdoor portraits. It creates a soft diffused light by directing light through some diffusing material. The light is reflected in its inner walls, covered with a bright surface, usually aluminum foil, bouncing against a white diffusion sheet.
It can be used with either strobe light or continuous light sources. The main purpose of a softbox is to create a soft and uniform light, often used as key light. Also, it’s perfect for lighting a studio, where every inch of bright area is important.
Step 2: Materials required
In order to build the softbox, this is all you need:
- Large cardboard
- Tape
- Aluminium foil
- Glue
- Velcro straps
- Screws and nuts
- Paper roll (at least 40 inch wide, and 50 inch large)
- Black spray
Step 3: Drawing and Measuring
In this tutorial, we’ll explain how to create a 30×25 inch softbox, but this method will work for any size. Just remember to keep in mind proportions in order to make it correctly.
First of all, you need to draw the four sides of the softbox in trapezoid shape. The first two sides will be the large ones, and then the other two the short ones.
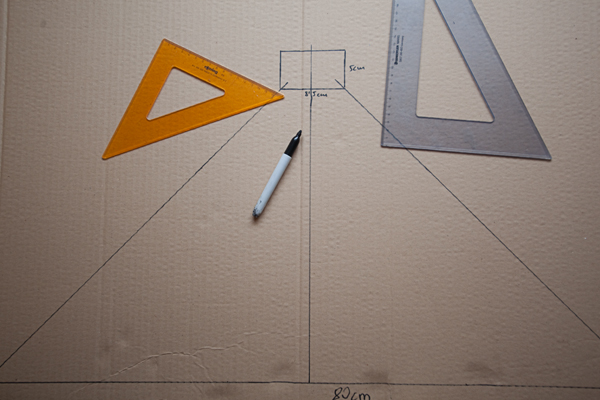
The lower part of the trapezoid will be 30 inches long. The side walls have a 45º angle. The upper part of the shape will be the length of your flash head, in my case, it’s 3 inches. Next, repeat the process again to have the two large sides of the softbox.
Afterwards, it’s time for the short sides. The lower part is 25 inches long, and the upper one, the height of your flash head. At this point, the angle of the sides is not so important, it’s a little more than 60º, but to make it easier, simply use the length of the sides of the walls you made before.

Step 4: Cutting the Four Walls
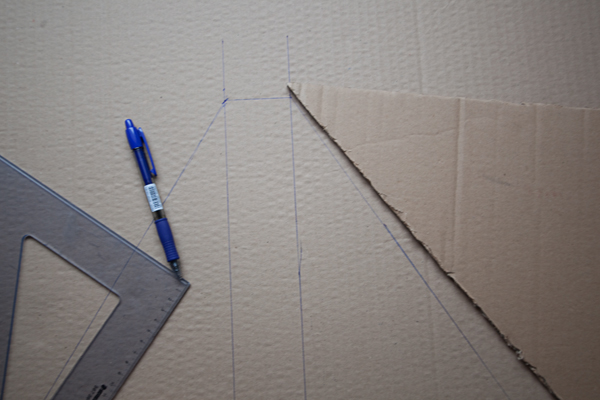
Now that you have the four sides of the softbox – two large and two small ones- , it’s time to cut the cardboard carefully. Remember to leave a small amount of cardboard in the upper part, about 2-3 inches long, because that’s where the flash goes. Cut every piece using a cutter, and place the finished ones aside.


Step 5: Making the Inner Part
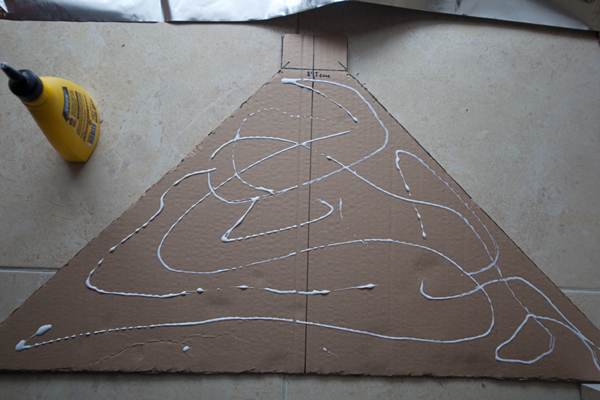
Once you have everything cut, use some glue and cover every piece of cardboard with aluminum foil (but only one side). You can use aluminum tape along the borders to fix it more securely. This part will reflect the light of the flash, making it stronger and more powerful. Just in case, use two layers of aluminum foil, to ensure everything will stay intact for a long time.

Step 6: Adding the Velcro Straps
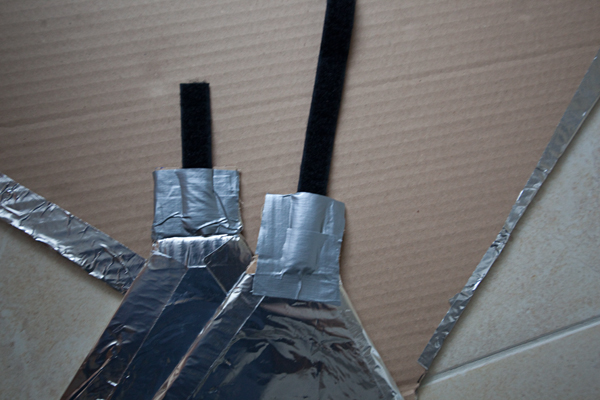
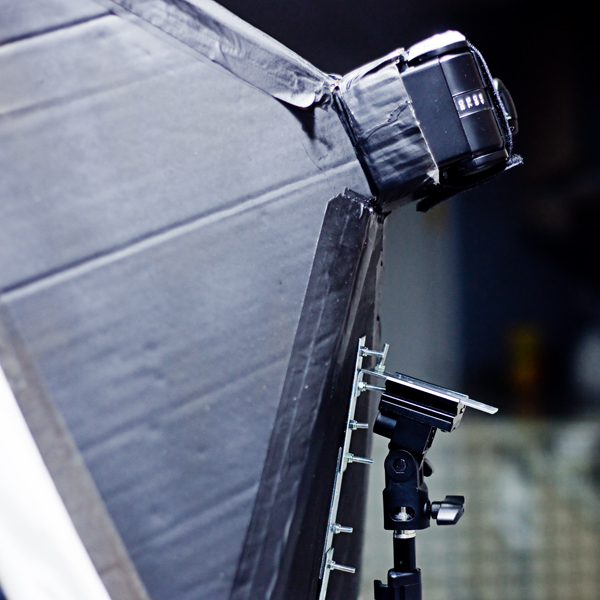
Next, take the two short walls – those with the short part at the top – and tape two velcro straps on it. A large one, about 6 inches, and a short one, 2 inches. Also, staple it carefully and double tape it, to make it more resistant. These two straps will keep the flash from falling, and will hold it still.
Step 7: Gluing and Mounting

Once you have everything in order, it’s time to assemble the softbox. The order is very simple. First, take a large side, then a short one, then the other large one, and finally the remaining side. Tape it well and glue it, with large amount of glue and tape, just to secure every part, so that it won’t tear apart.
Remember to tape the upper part, where the flash goes, too. A good way to check that it’s properly built is to lift the softbox holding the upper part. If it doesn’t move, then it’s ok. If it’s moving and unstable, add more tape until everything is secure.
Step 8: Painting
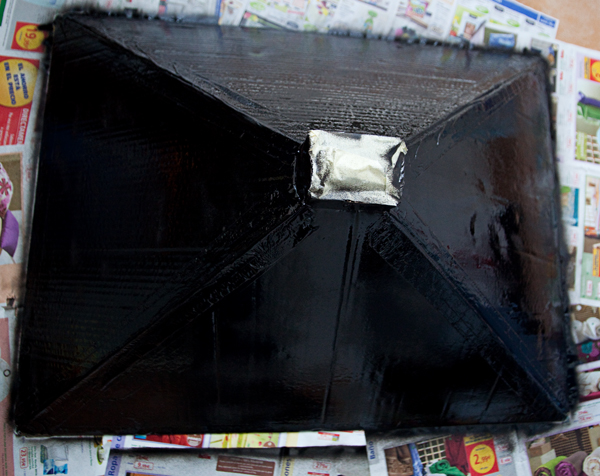
After waiting a few minutes, you can paint your softbox to make it look a lot considerably more professional. Use old newspapers and some tape to protect the parts you don’t want to paint, like the upper hole. I used black spray to make the process a little simpler. After it dries, add another layer of color, and then leave it drying overnight.
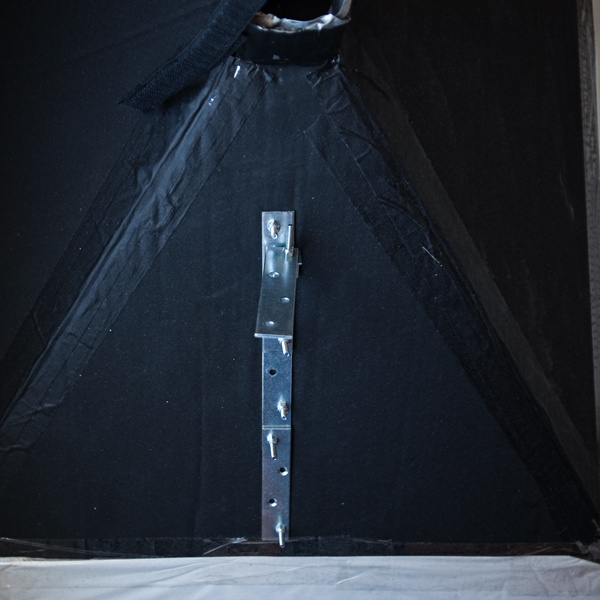
Step 9: Building and Adjusting the Tripod Adaptor
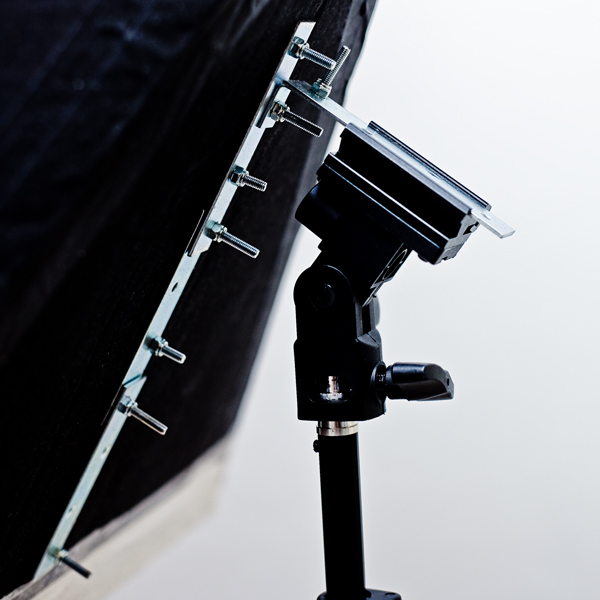
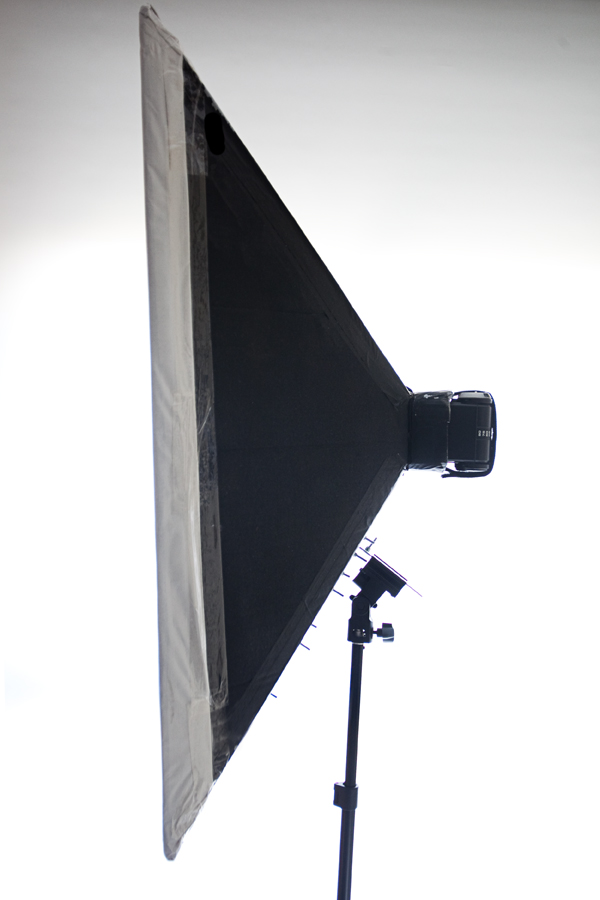
Once you have the softbox almost finished, it’s time to make the tripod adaptor. Use an L shaped aluminum bracket, and place the large side of it on the softbox. Make some holes in the softbox, just in the middle of the short side. Then, using some screws and nuts, place the bracket and screw it on, making sure that it’s stable and not moving.
To use this bracket, you’ll also need a light stand and a light stand mount swivel, easy to find on eBay, for example, for just only $10. To mount it, the easiest way is to insert the L bracket in the flash mount gently.
Step 10: Making the Diffusion Panel
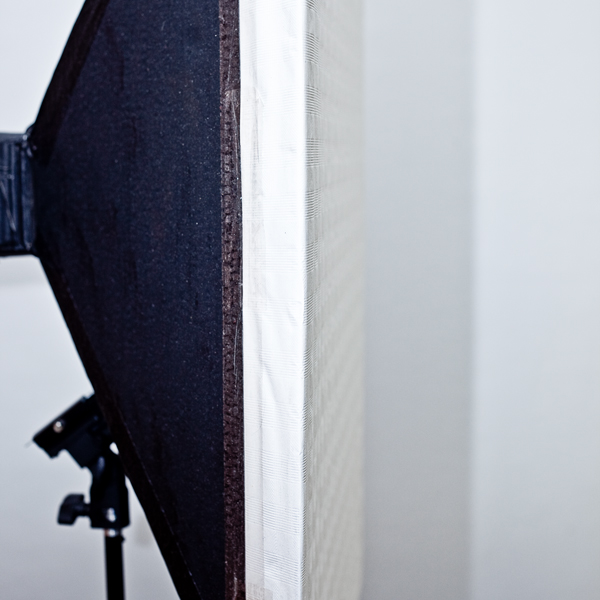
Now it’s time to mount the diffusion panel, made of paper. Extend the paper roll on the floor, place the softbox face down on it, and carefully glue the paper to every side. You can also add more layers if you’d like to make the light much softer, and also more uniform and equal. Remember that the more layers you add, the lower the power of the light.
Of course, if the paper tears, you can always repeat this process at a later date.
Step 11: Mounting the Flash
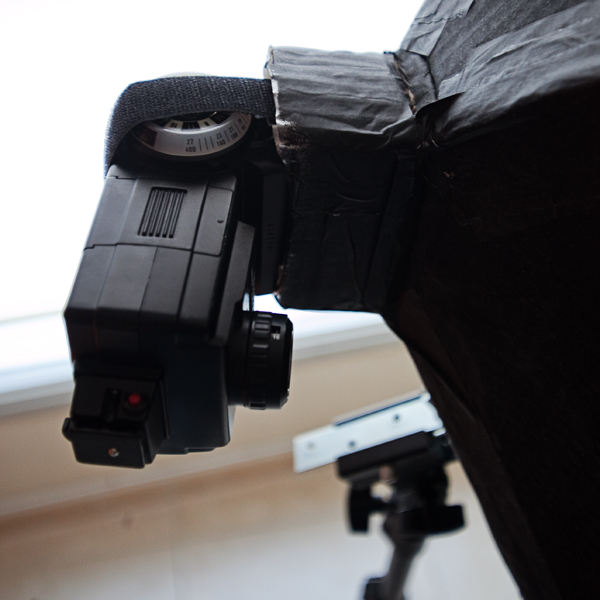
Finally, it’s time to mount the softbox on the light stand, and then place the flash in the hole. In order to do this, hold the flash gently and insert it in the hole, pressing carefully until it fits snugly. Proceed to secure it using the velcro straps.
The reason to use the flash horizontally is to have more flexibility moving the softbox. You can use it pointing down, up, or in a 45º angle, for example.

Step 12: Final result
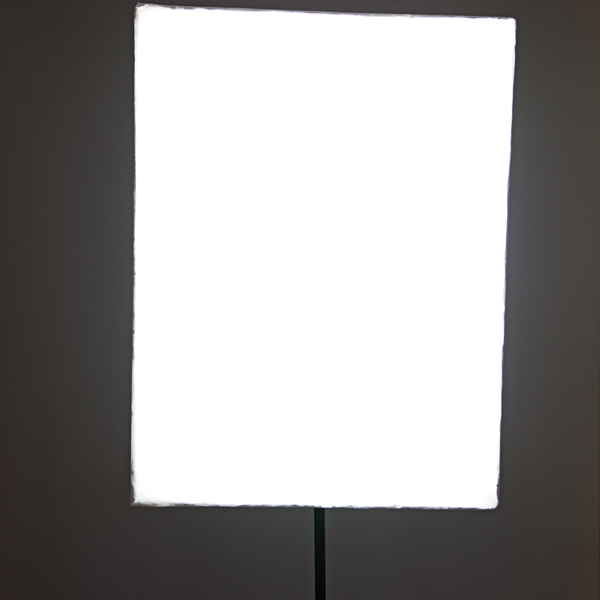

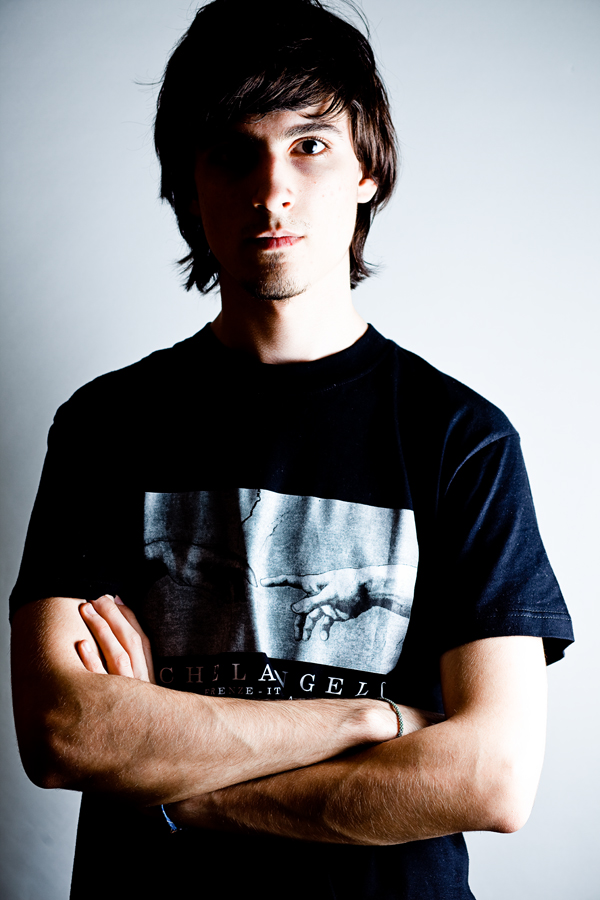
All you need to do now is to experiment taking a few photos with your brand new softbox! It produces wonderful, soft light, lighting an entire person, for example. I always use it in the studio as main light, without needing anything else.
It’s great for making dramatic portraits, by pointing it at a side of a model, or producing soft beauty images. Here are some examples. The first one is using only the softbox, at camera right at full power. It produces a high-contrast look. The other two were made using the softbox as main source, along with another two bare strobes – one on each side as rim light.


Give it a Try!
What are you waiting for? Dig out that old cardboard box sat in your garage, and give the process a try! If you do decide to go ahead with putting your own softbox together, be sure to share a few photos of it in the comments below.