In this tutorial, you’ll learn how to make an illustration of a webcam by using Adobe Illustrator tools, such as: the Ellipse Tool (L), Pen Tool (P), Rectangle Tool (M), Gradients and the Pathfinder Panel. We’ll follow a professional vector illustration workflow. Let’s get started.
Step 1
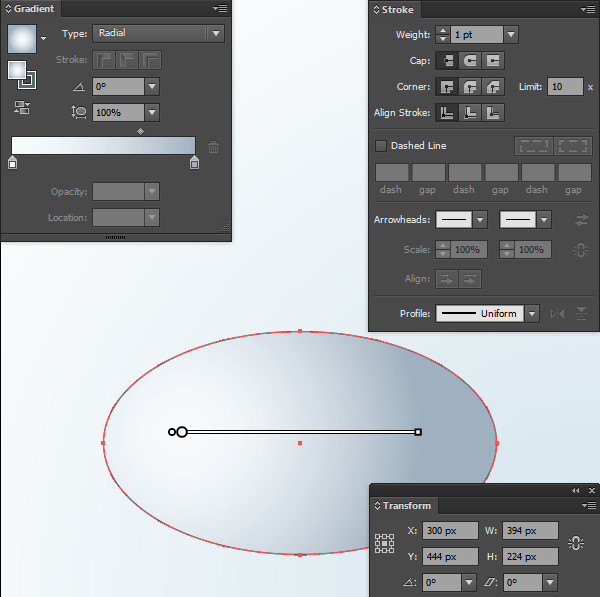
Take the Ellipse Tool (L), draw an ellipse with the size of W=394 and H=244px. Now fill it with a Black to R=159 G=177 B=193, Radial color and apply the Stroke color R=85 G=104 B=109 with a 1pt Weight.
Step 2
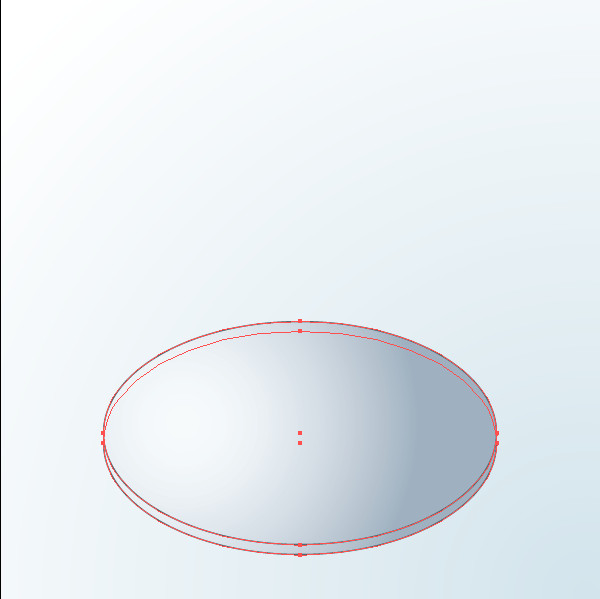
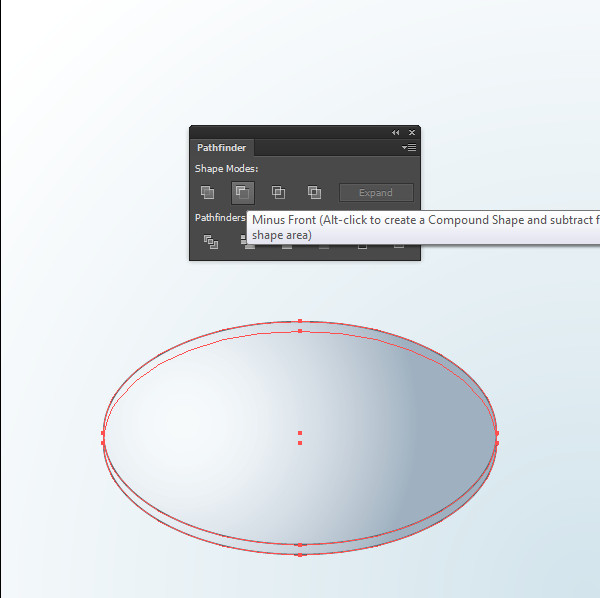
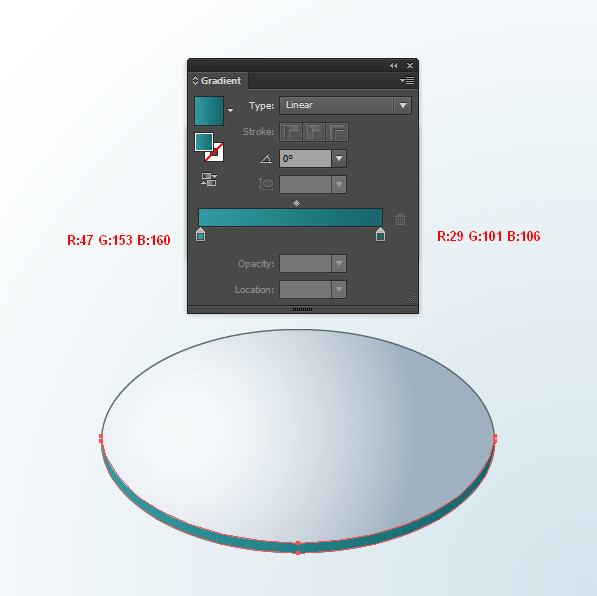
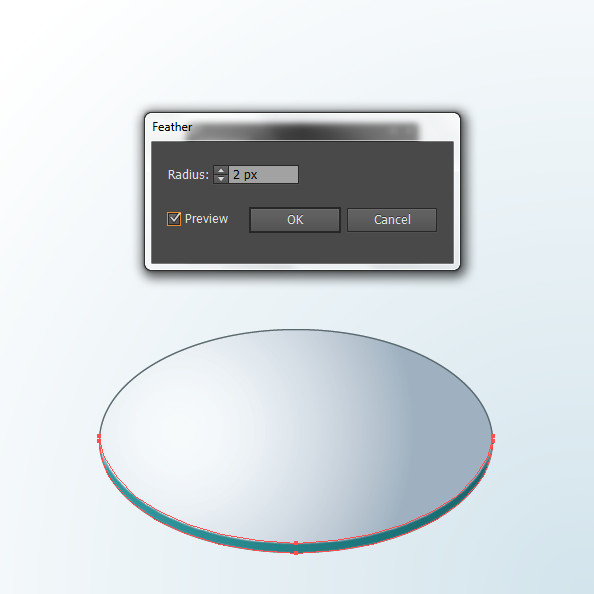
Make two copies of the shape from the previous step using Command + C then paste with Command + F. Now move the shape that’s on top 10px up. Select the copies of the two shapes you just created, open the Pathfinder Panel, click on the Minus Front button. Turn off the Stroke color and fill the new shape with a Linear Gradient, with the colors R=47 G=153 B=160 to R=29 G=101 B=106. Also, apply Feather with Radius: 2px (Effect > Stylize > Feather).
Step 3
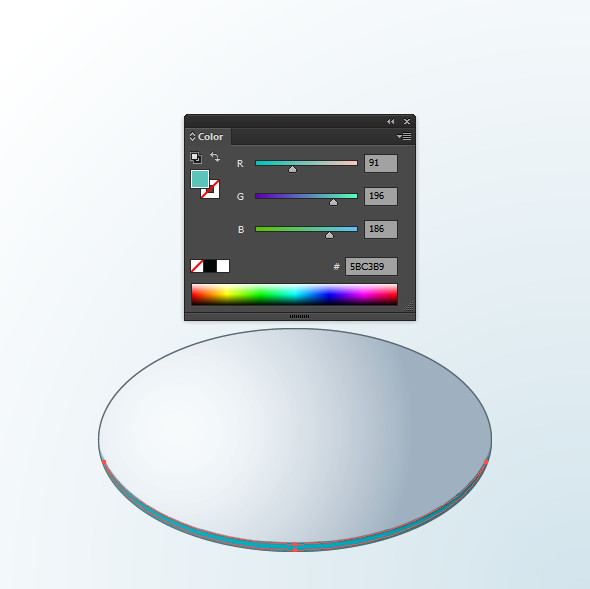
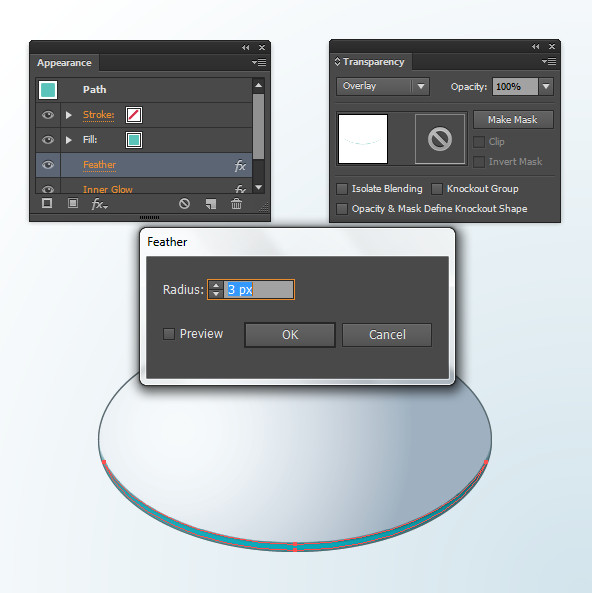
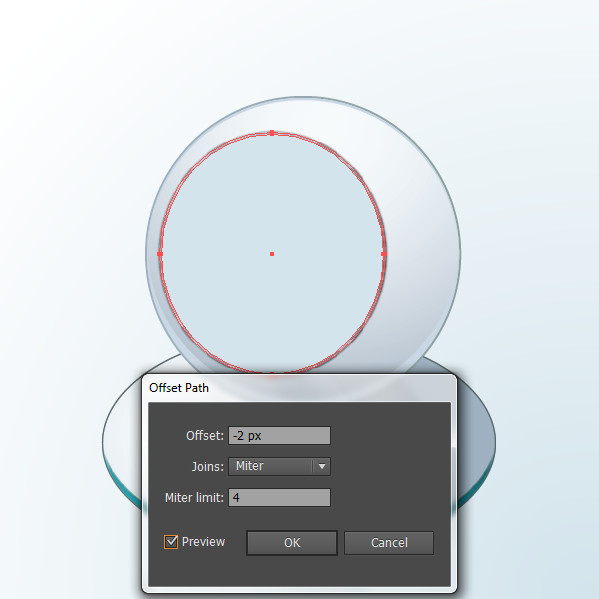
Select the shape from the previous step that you applied Feather to and go to Object > Path > Offset Path. Set the Offset to -2px, click OK and fill the new shape with an R=91 G=196 B=186 color. Then go to the Appearance Panel, click on the Feather effect, change the Radius to 3px, click OK and change the Blending Mode from Normal to Overlay.

We continue with the upper part of the webcam. We are not done with the lower part of the webcam yet, but we’ll go back to it a bit later. After we make the upper part, in order to be able to get to know how to make the upper part of the webcam’s shadow.
Step 4
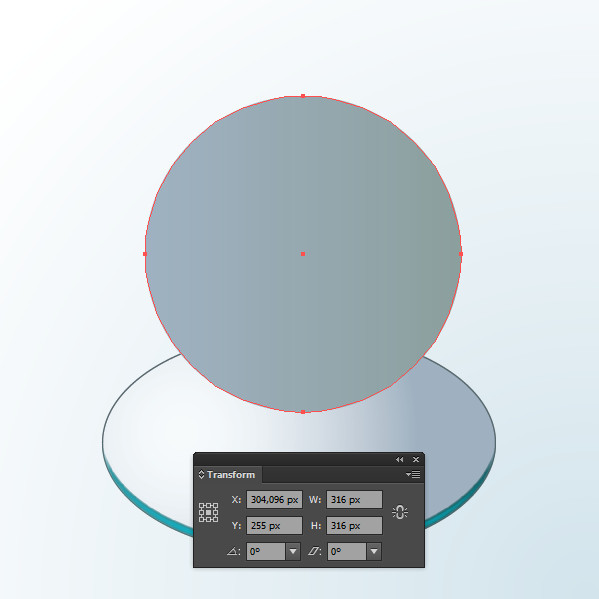
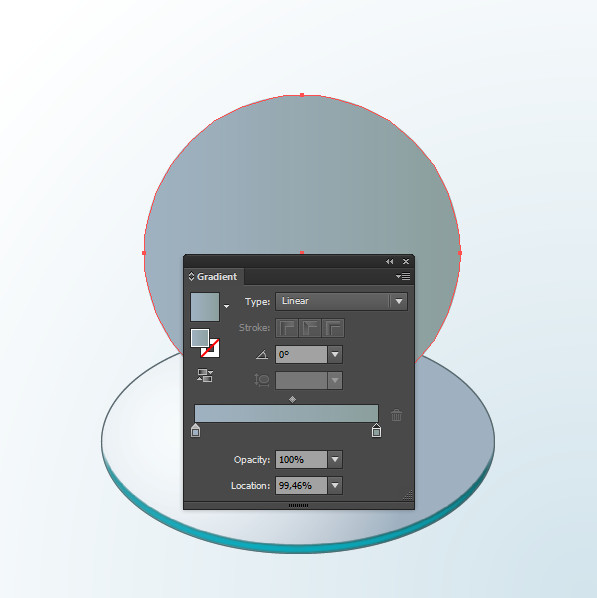
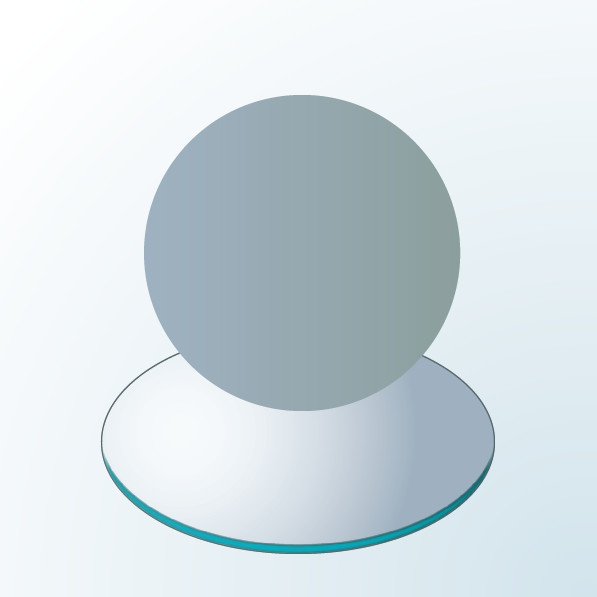
Take the Ellipse Tool (L) and draw a circle at the size W=316 px and H=316 px. Now fill it with a Linear Gradient using the colors R=159 G=177 B=193 to R=139 G=158 B=156. Place the shape on top of all other shapes in position as shown below.
Step 5
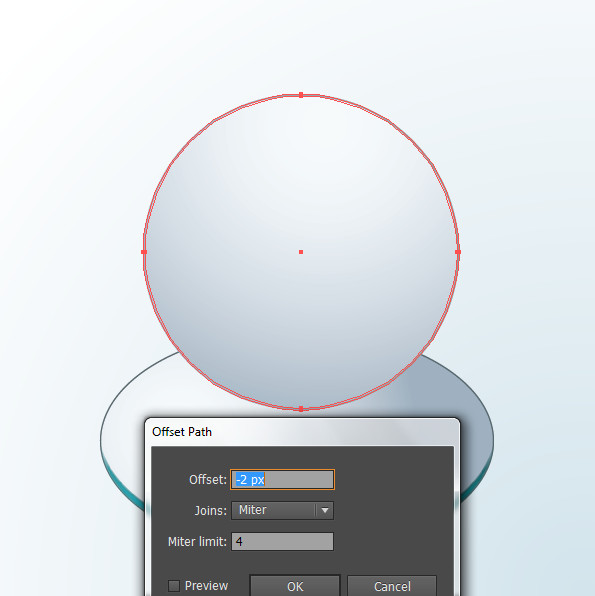
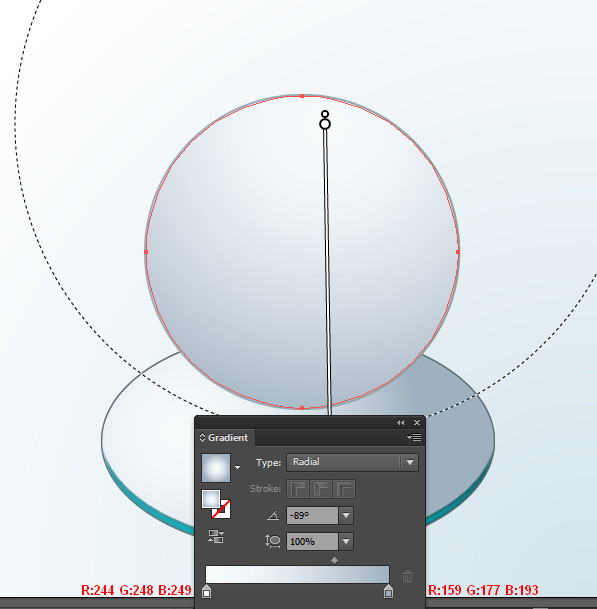
With the shape from the previous step selected, go to Object > Path > Offset Path. Apply Offset: -2px and click OK. Now fill the new shape with Radial Gradient colors R=244 G=248 B=249 to R=159 G=177 B=193.
Step 6
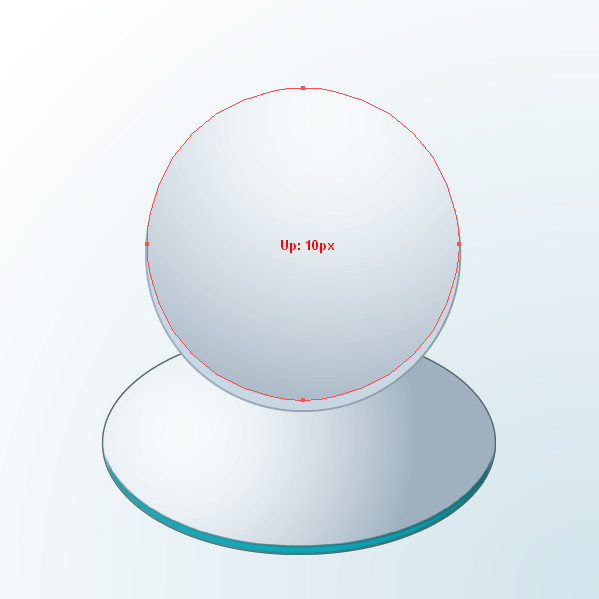
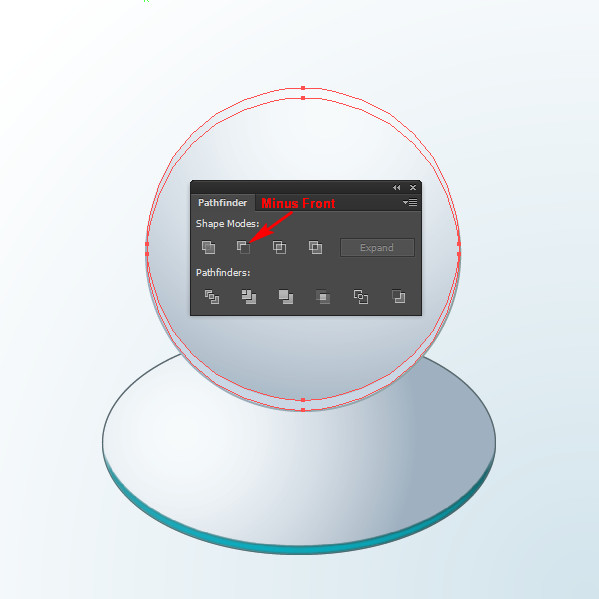
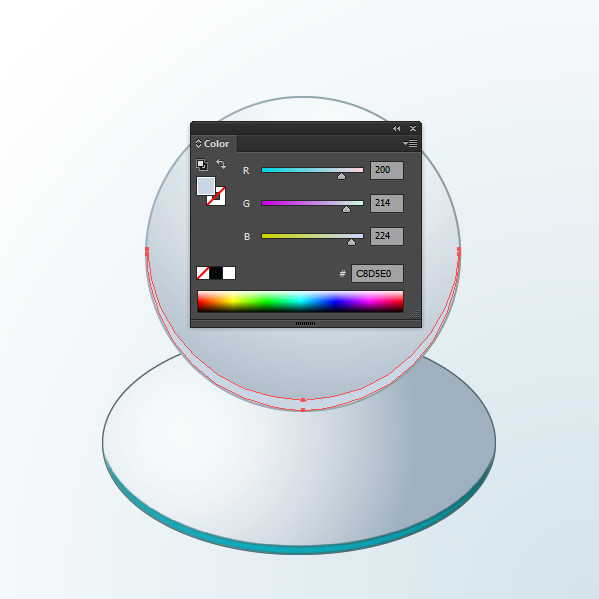
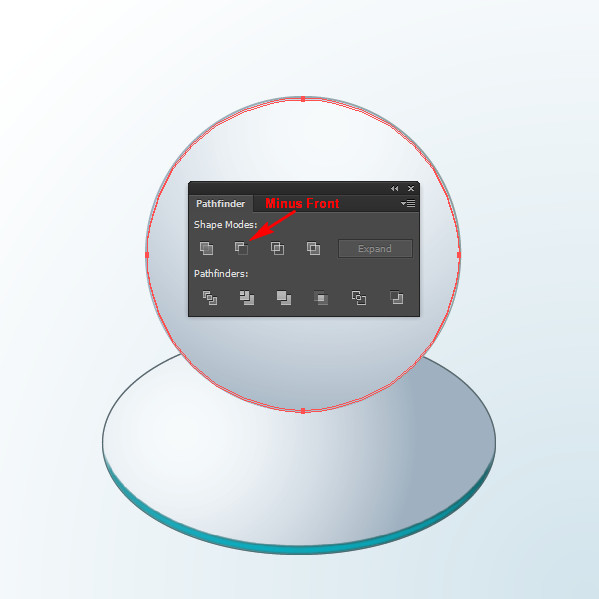
Make two copies of the shape from the previous step using Command + C then paste with Command + F, and again Command + F. Then move the top shape 10px up. Select the copies of the two shapes you just created, open the Pathfinder Panel, and click on the Minus Front button. Now fill the new shape with R=200 G=214 B=224 color.
Step 7
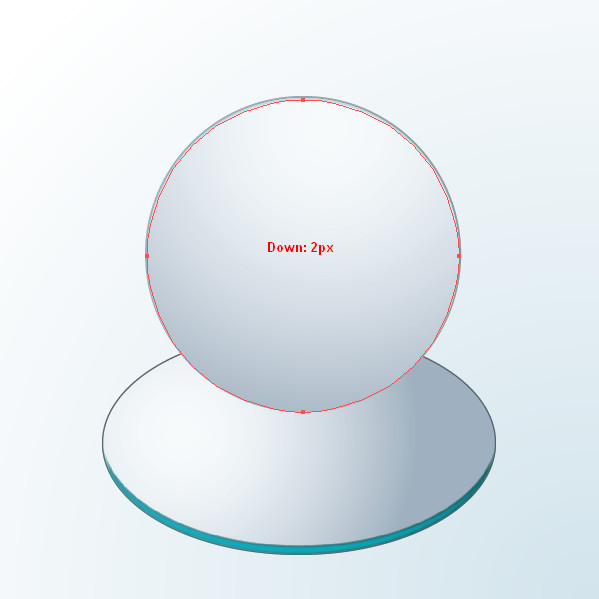
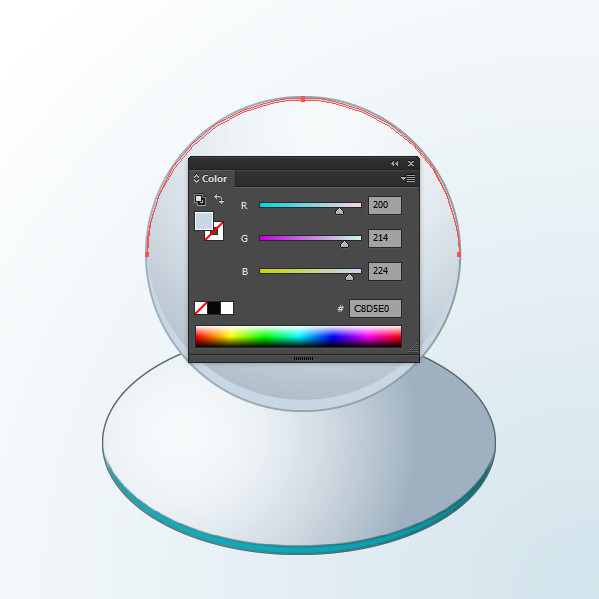
Make the upper part of the shape the same way by making two copies of the shape from Step 5, then slide the second copy 2px down. Select both copies, open the Pathfinder Panel, click on the Minus Front button and fill with an R=200 G=214 B=224 color.
Step 8
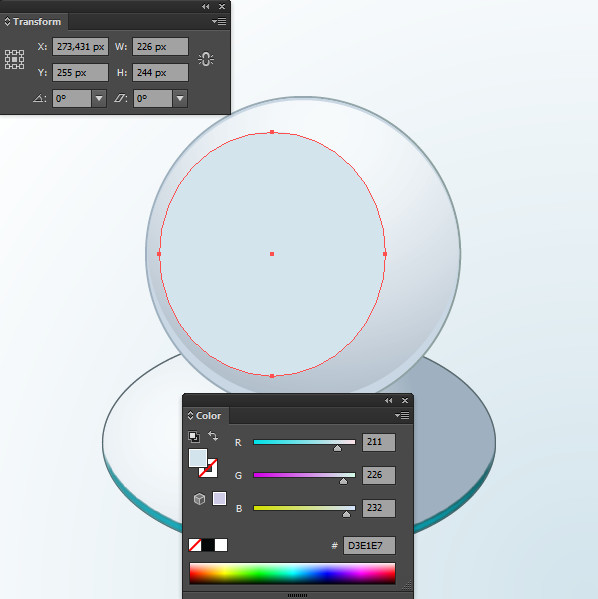
Take the Ellipse Tool (L), draw an ellipse with the size W=226 px and H=244 px, fill it with an R=211 G=226 B=232 color and place it in position, as shown in the picture below:
Step 9
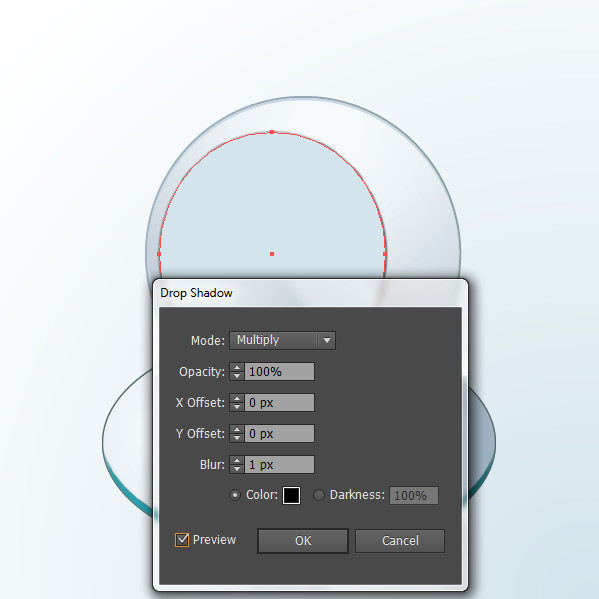
With the shape from the previous step selected, go to Effect > Stylize > Drop Shadow. Set the values shown below and click OK.
Step 10
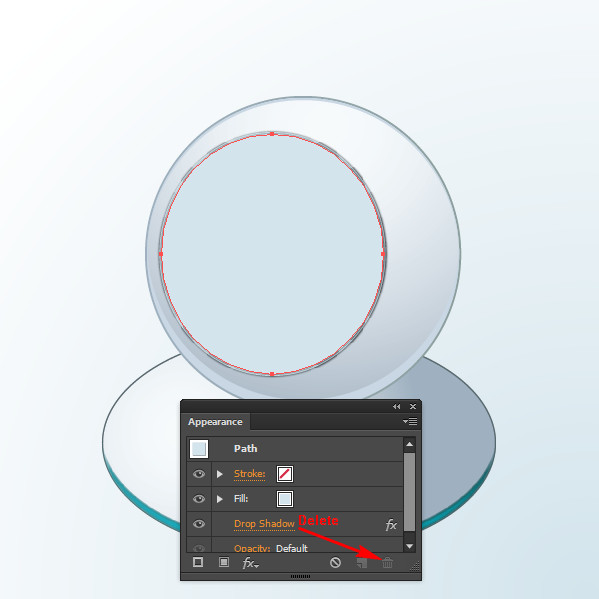
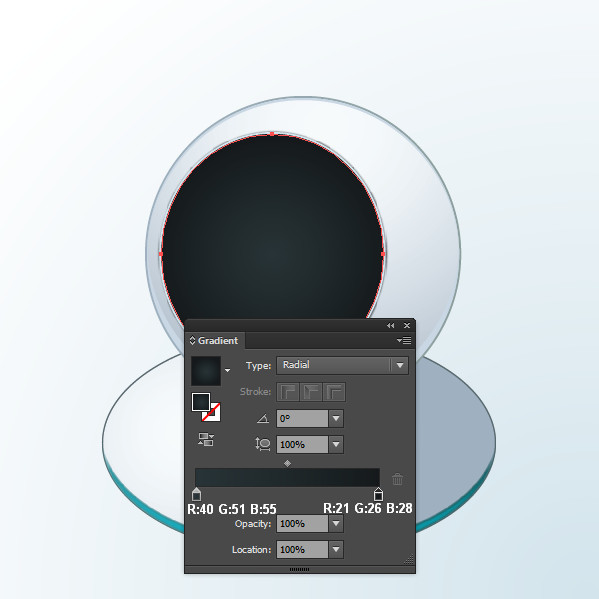
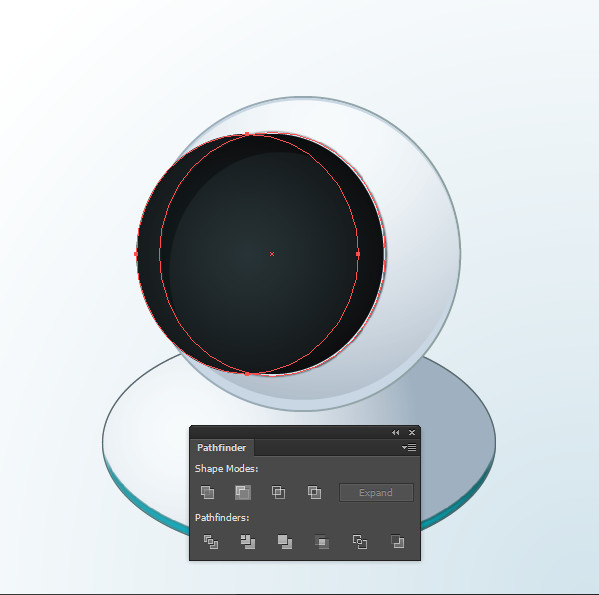
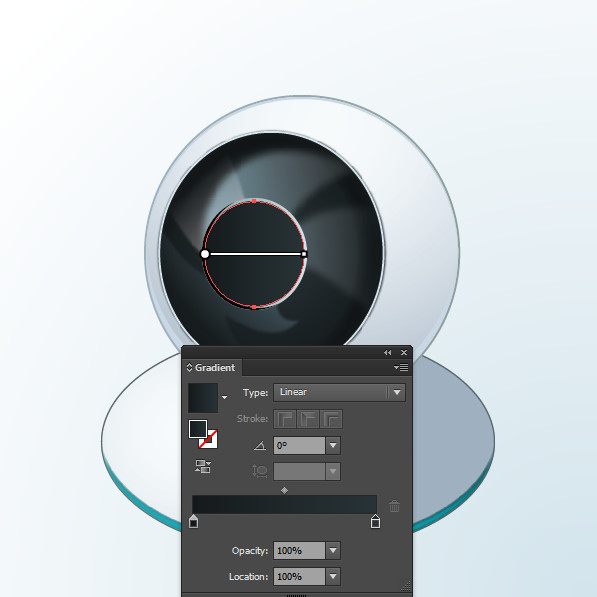
With the shape from the previous step still selected, go to Object > Path > Offset Path. Set the Offset to -2px and click OK. Now open the Appearance Panel. Delete the Drop Shadow effect and fill the shape with Radial Gradient colors R=40 G=51 B=55 to R=21 G=26 B=28.
Step 11
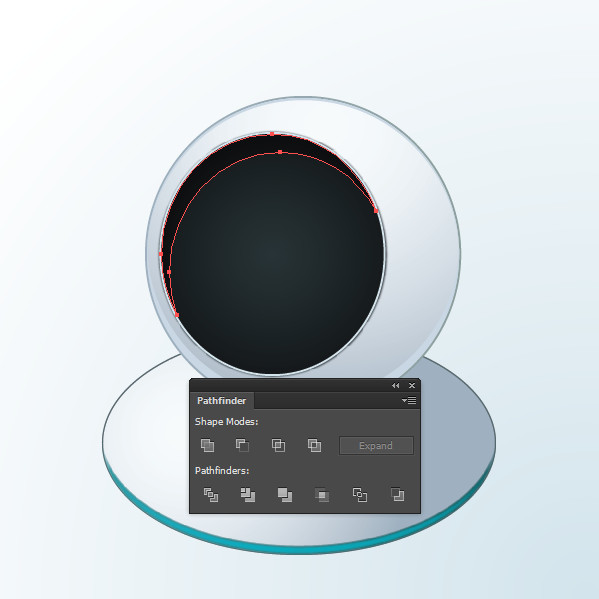
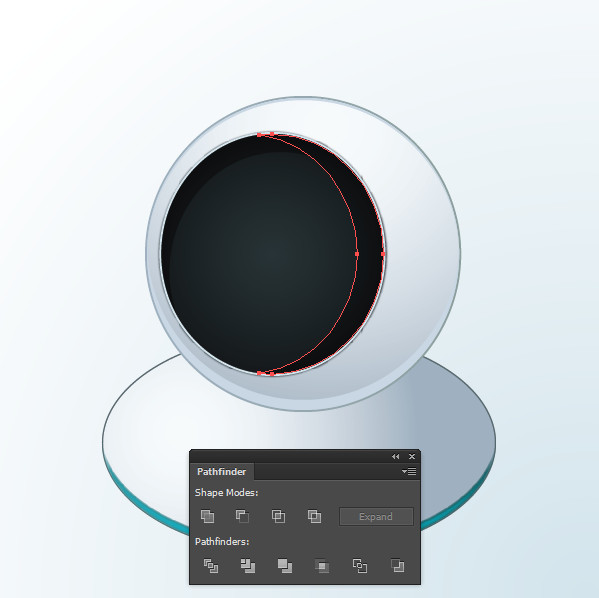
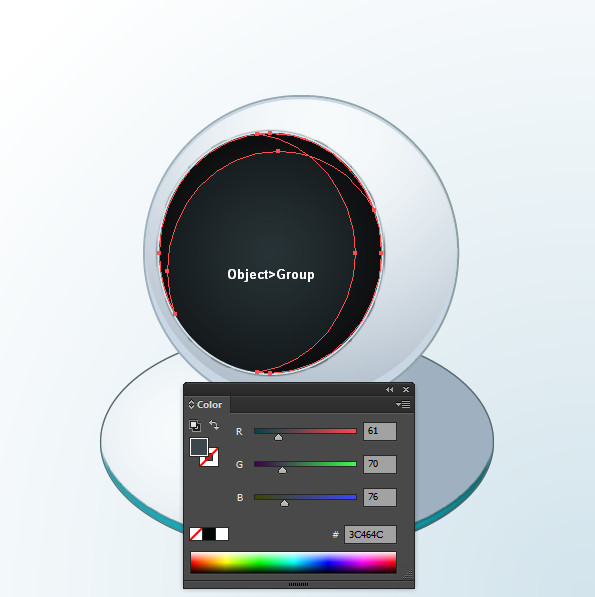
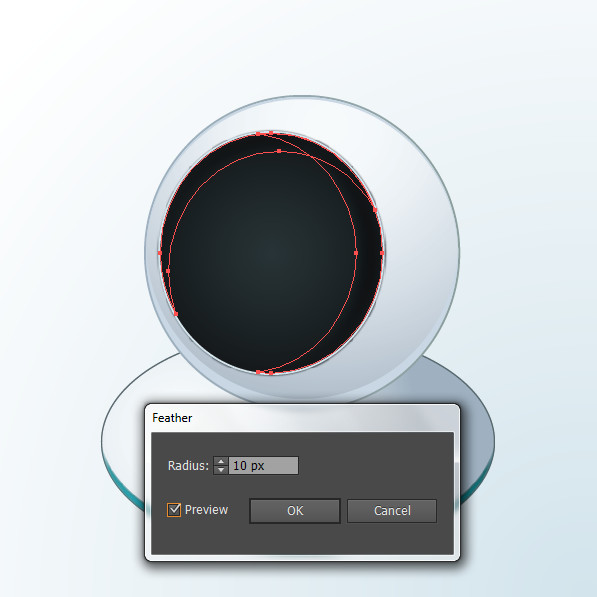
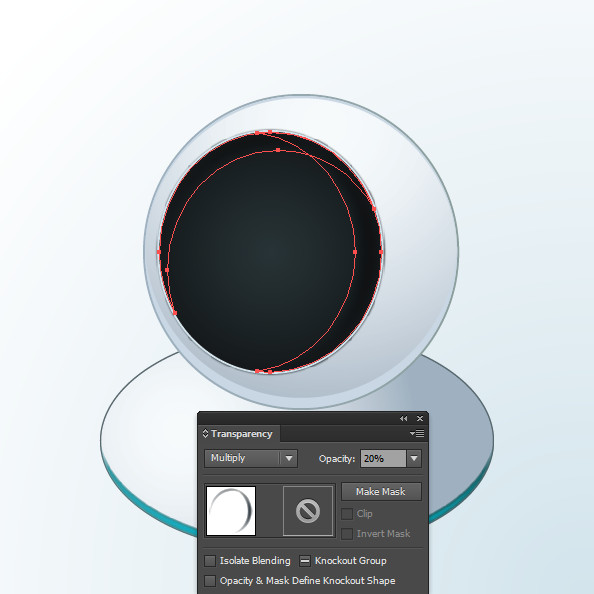
Duplicate two times the shape from the previous step. Move the second copy a few pixels down and to the right, then select the two copies. Open the Pathfinder Panel and click on the Minus Front button. Do the same thing for the right part of the shape, then group the last two shapes (Object > Group), and fill them with R=61 G=70 B=76 color. Apply a Feather Radius at 10px to the group and click OK. Now change the Blending Mode from Normal to Multiply and reduce the Opacity to 20%.
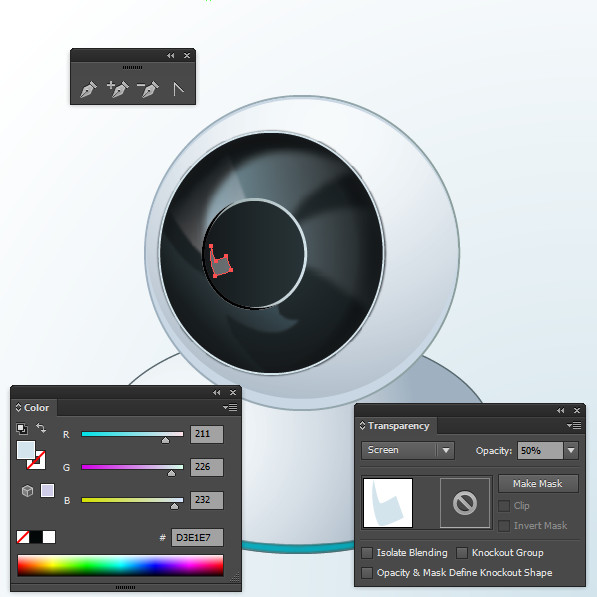
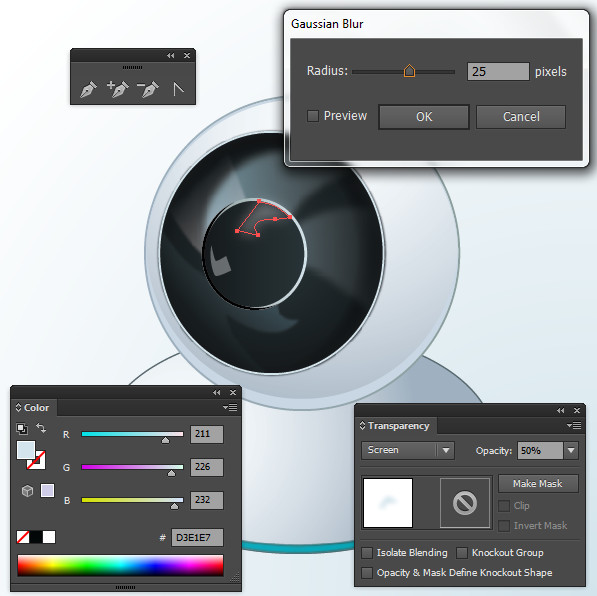
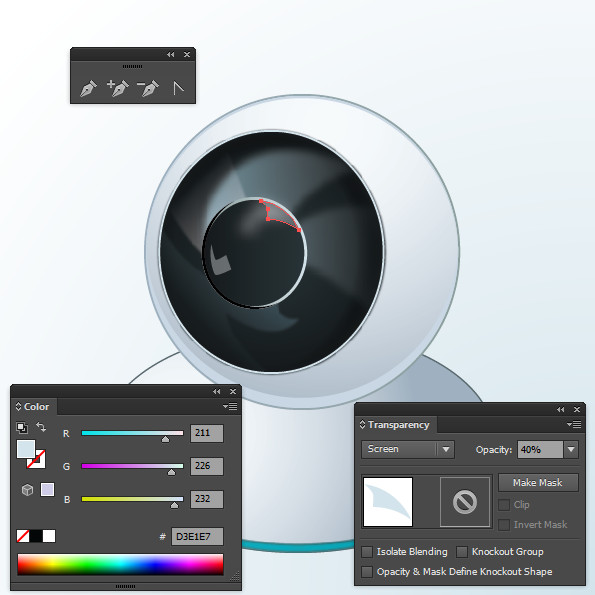
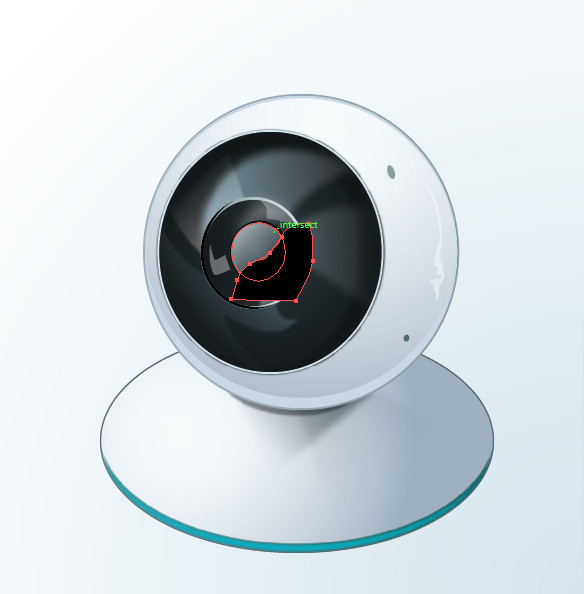
Step 12
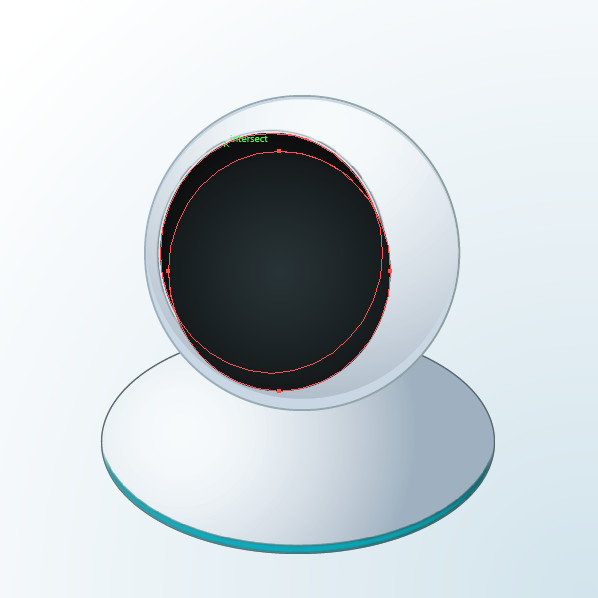
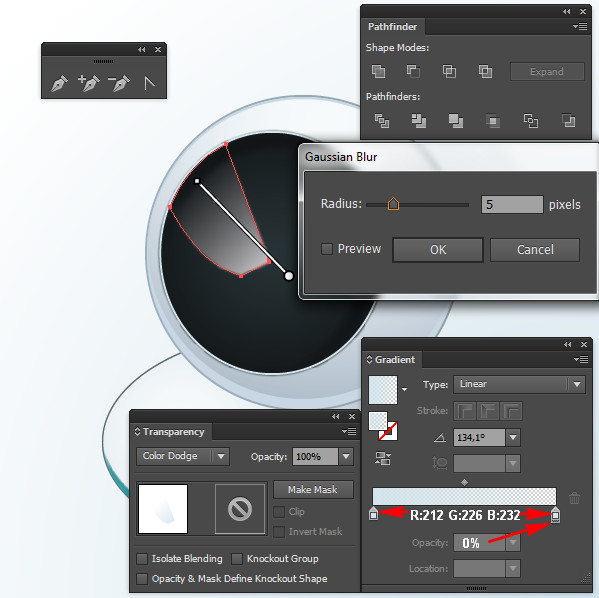
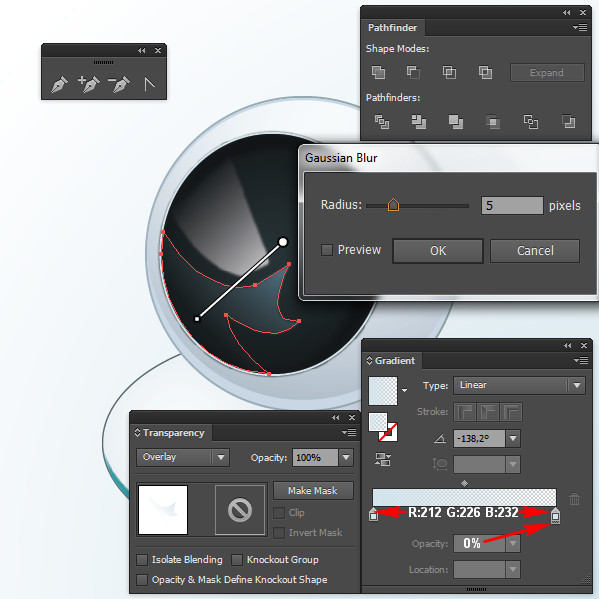
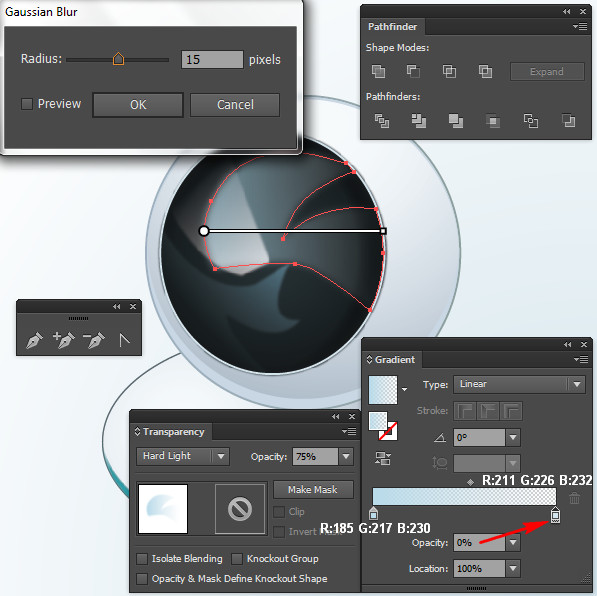
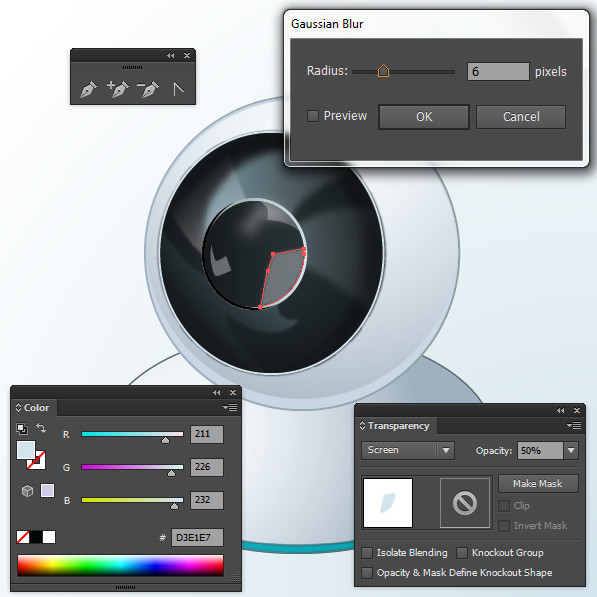
Take the Pen Tool (P) and make the shapes on top of all others. If the shapes go outside of the shape you filled with a Radial Gradient in step 10, use the Pathfinder Panel and the Intersect button. Fill them with a Linear Gradient and apply Gaussian Blur. Change the Blending Mode of each shape as shown below:
Step 13
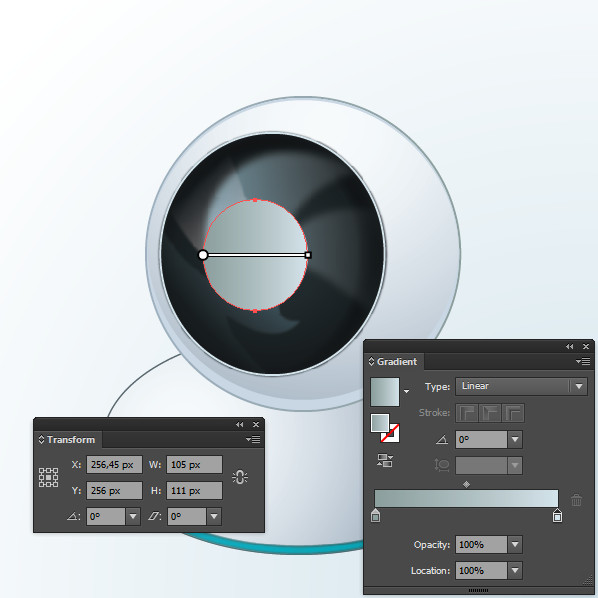
Take the Ellipse Tool (L), draw an ellipse with the size W=105 px and H=111 px and in position as shown in the picture below. Fill it with a Linear Gradient using the colors R=139 G=158 B=156 to R=211 G=226 B=232.
Step 14
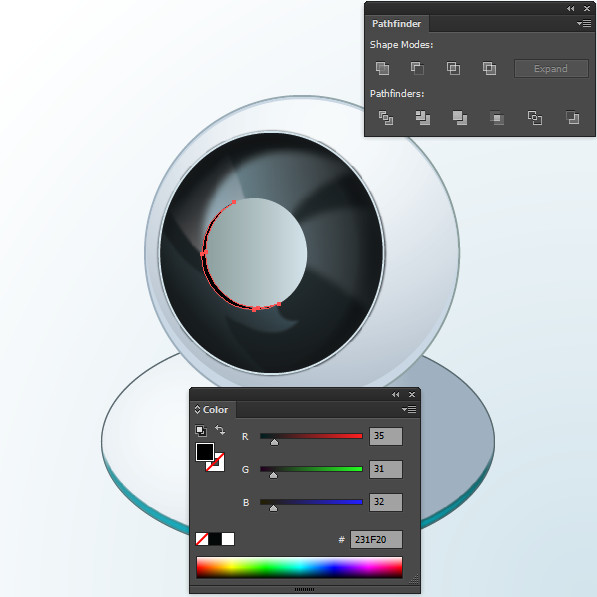
Duplicate two times the shape from the previous step with Command + C then paste with Command + F, and Command + F again. Move the second copy a few pixels to the right and then select both shapes. Open the Pathfinder Panel, click on the Minus Front button and fill the resulting shape with an R=35 G=31 B=32 color.
Step 15
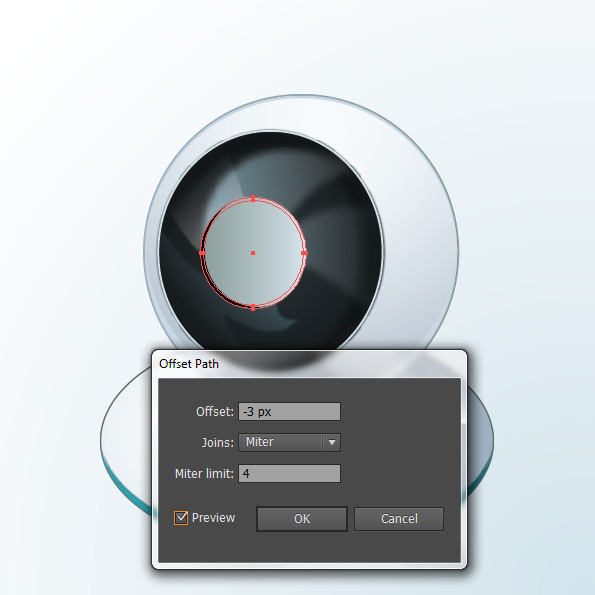
Select the shape from step 13 and go to Object > Path > Offset Path. Set the Offset to -3px, click OK and fill the new shape with Linear Gradient colors R=21 G=26 B=28 to R=40 G=51 B=55.
Step 16
Take the Pen Tool (P) and start adding shapes in the position and color shown below. I’ve also applied Gaussian Blur to some of them, look at the pictures below for detail:
Step 17
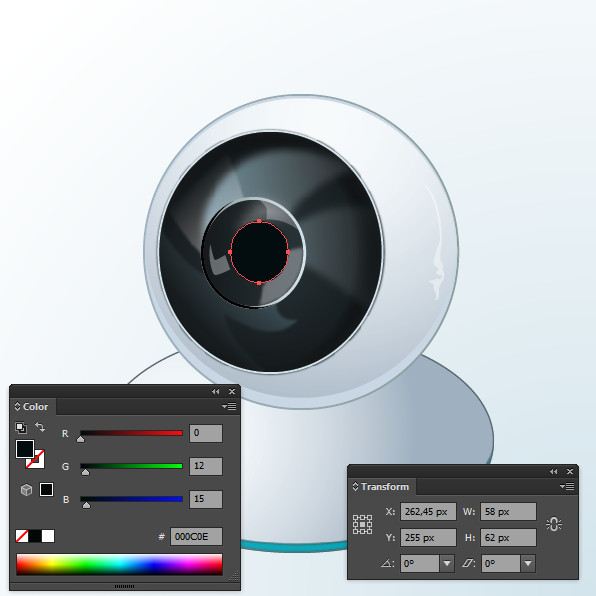
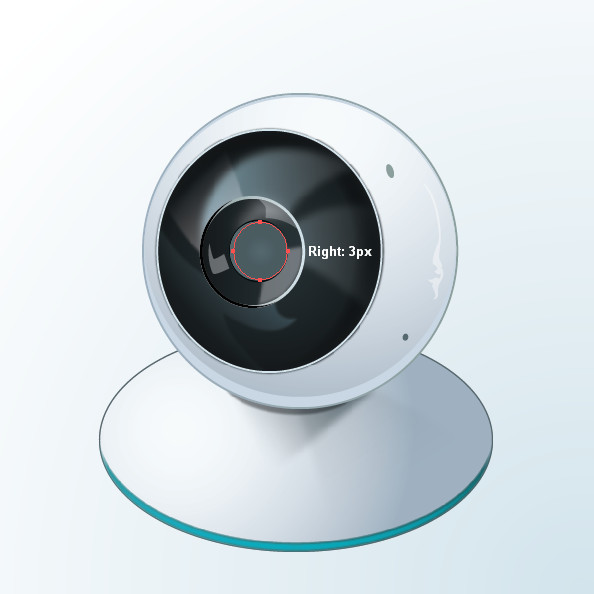
Take the Ellipse Tool (L), draw an ellipse with the size W=58 px and H=62 px. Now fill it with R=0 G=12 B=15 color. Place the shape in position as shown below:
Step 18
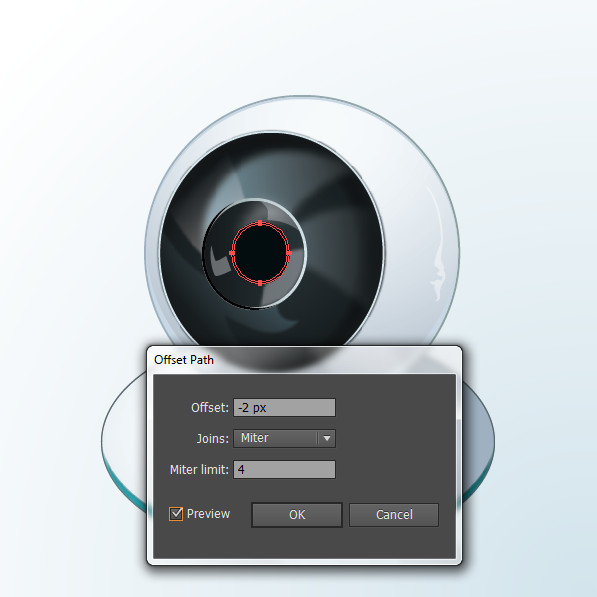
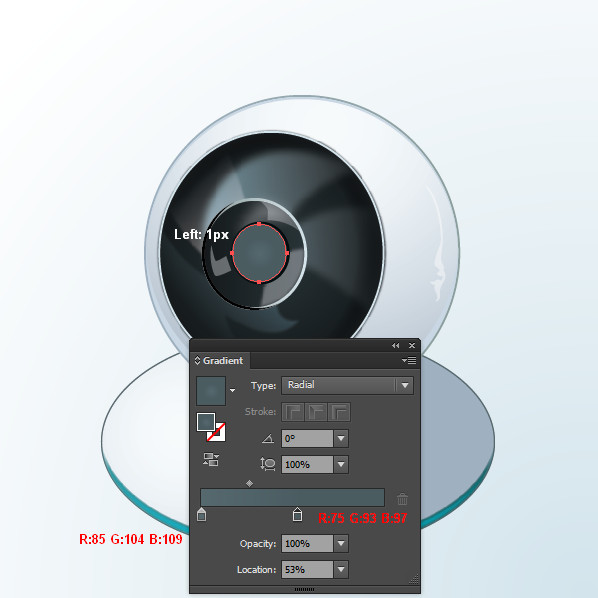
Select the shape from the previous step and go to Object > Path > Offset Path. Set the Offset to -2px and click OK. Now fill it with Linear Gradient colors R=85 G=104 B=109 to R=75 G=93 B=97. Move the shape 1px to the left.
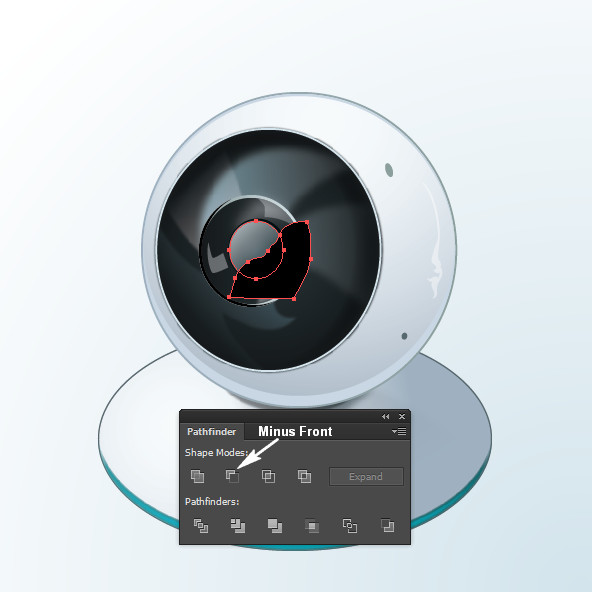
Step 19
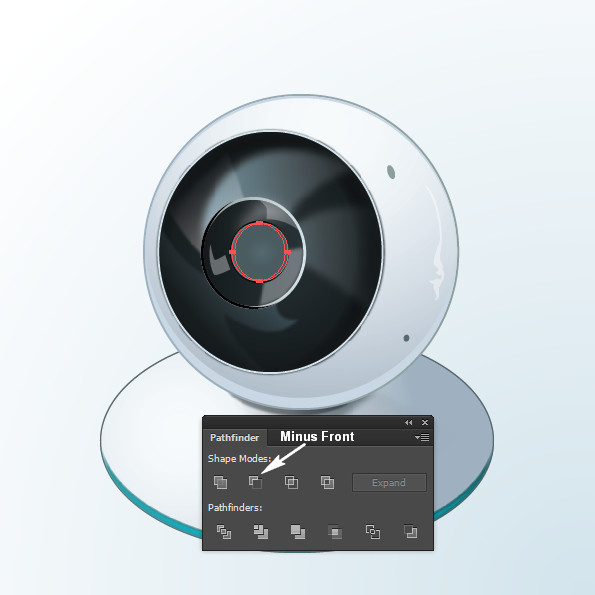
Copy the shape from the previous step using Command + C, then paste with Command + F. Use the Pen Tool (P) to make another shape over the copy as shown in the picture below.
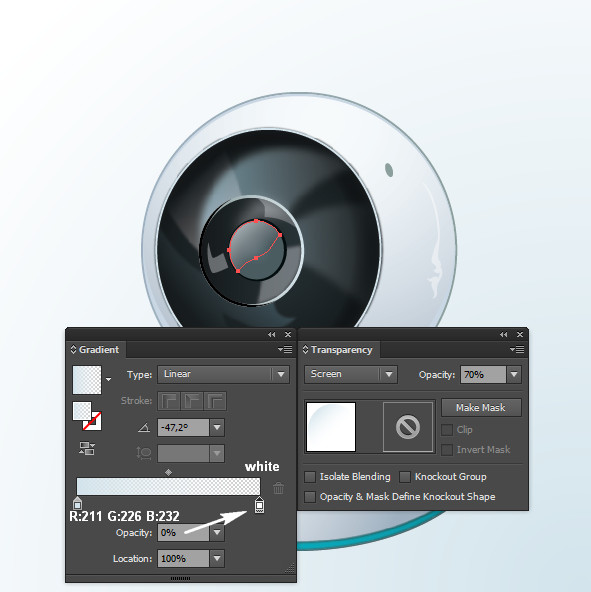
Now select the copy and the shape you just created. Open the Pathfinder Panel, click on the Minus Front button, and fill the new shape with Linear Gradient colors R=211 G=226 B=232 to White with Opacity at 0%. Then change the Blending Mode of the shape from Normal to Screen and set the Opacity at 70%.
Step 20
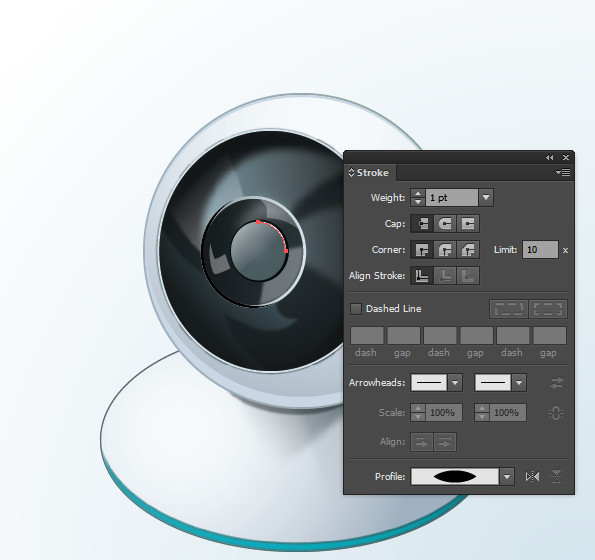
Copy the shape from Step 18 with Command + C then paste with Command + F. Use the Direct Selection Tool (A) to select the left and lower key point. Now press Delete on the keyboard. Then turn off the Fill color and apply a 1px Stroke with a White color.
Step 21
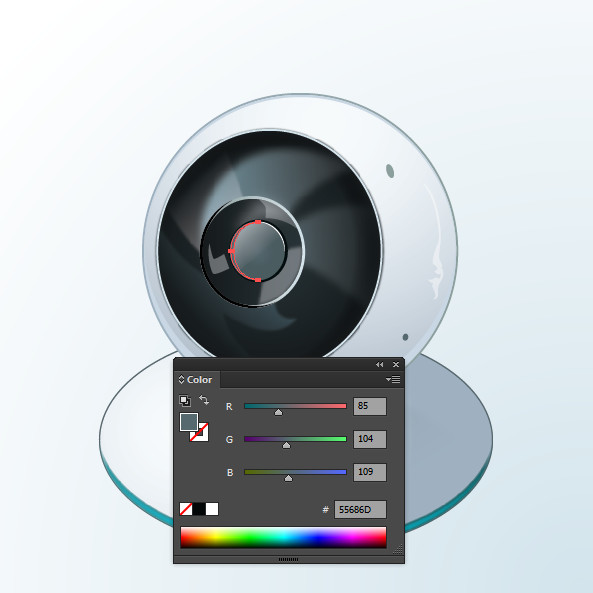
Make two copies of the shape from Step 18, move the top copy 3px to the right, then select both copies and open the Pathfinder Panel. Click on the Minus Front button and change the color of the resulting shape to R=85 G=104 B=109.
Step 22
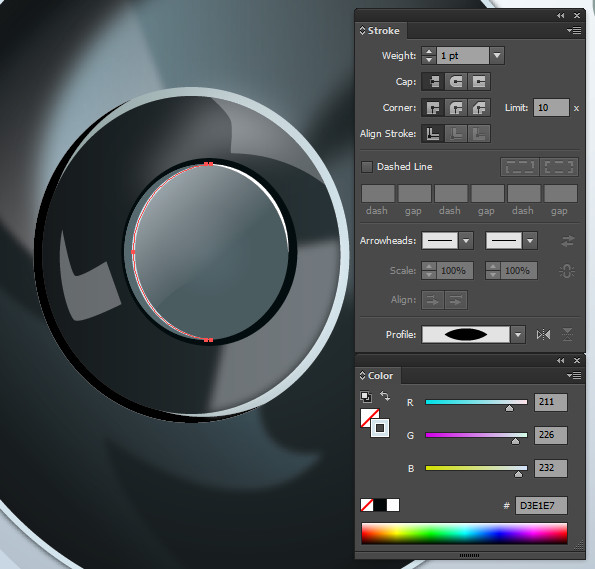
Copy the shape from the previous step with Command + C then paste with Command + F. Now use the Direct Selection Tool (A) to select and delete the right key point. Turn off the Fill color and apply a 1px Stroke with R=211 G=226 B=232 color. Look at the picture below for reference details:
Select all the shapes of the upper part of the webcam and group them (Object > Group).
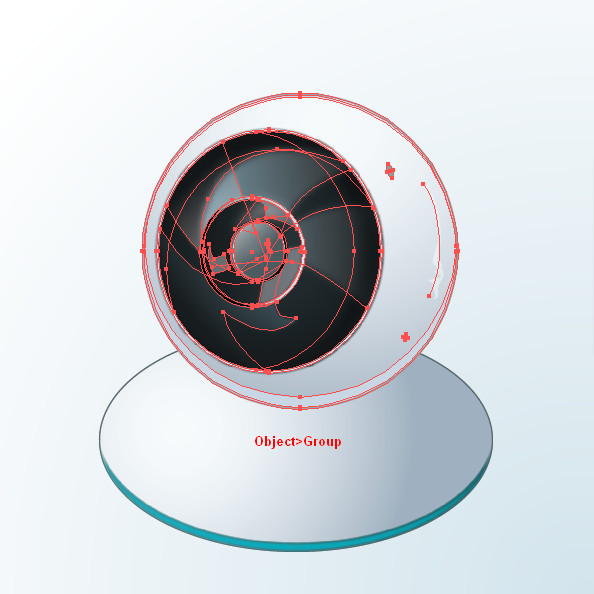
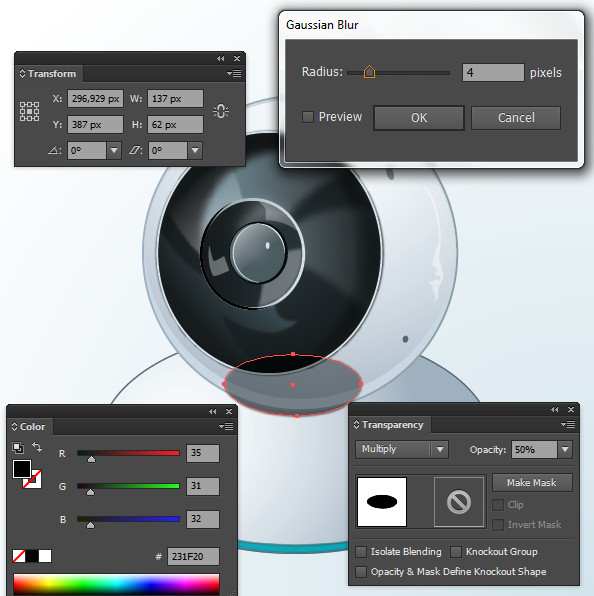
Step 23
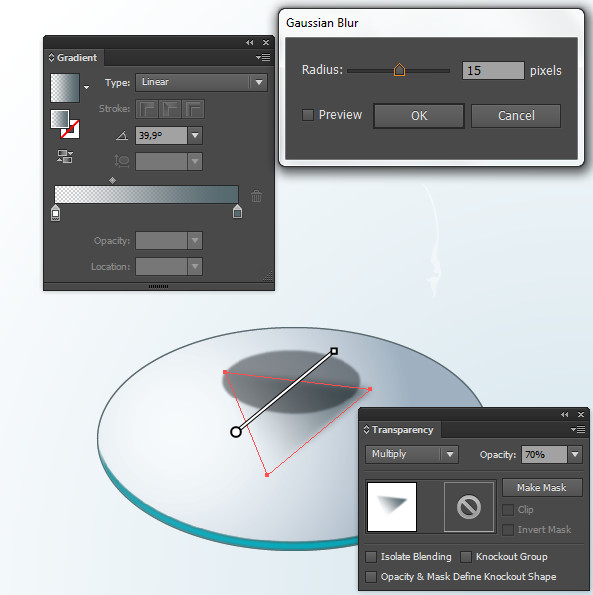
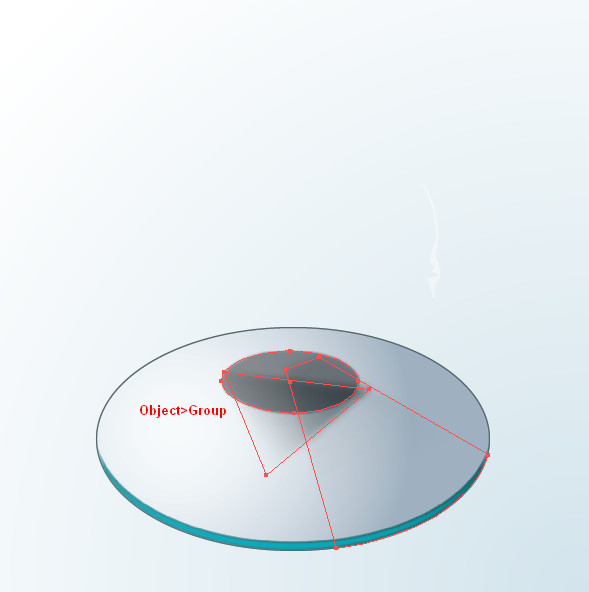
In this step we are going to make the shadow of the top part of the webcam. In order to do this, take the Ellipse Tool (L) and draw an ellipse in any position you decide is best, then fill it with a dark color. Apply Gaussian Blur of 4px and change the Blending Mode from Normal to Multiply with Opacity 50%. Now use the Pen Tool (P) to add the shapes shown below, apply Gaussian Blur to them too, and also change the Blending Mode as shown below:
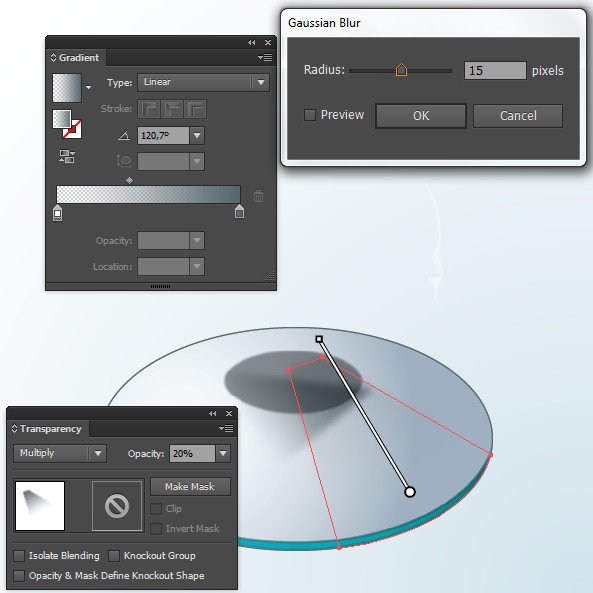
Step 24
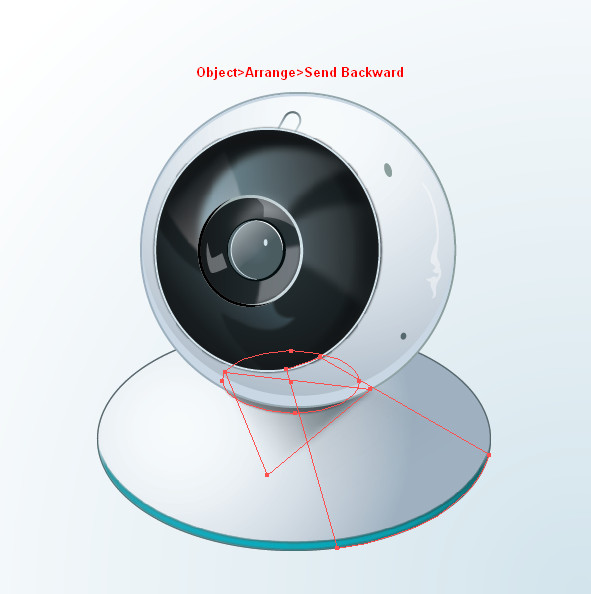
Select the shapes that will represent the shadow of the upper part of the webcam, group them (Object > Group), then send them under the group of the upper part of the group by going to Object > Arrange > Send Backward. Look at the picture below:
In the next steps we are going to make the webcam’s antenna.
Step 25
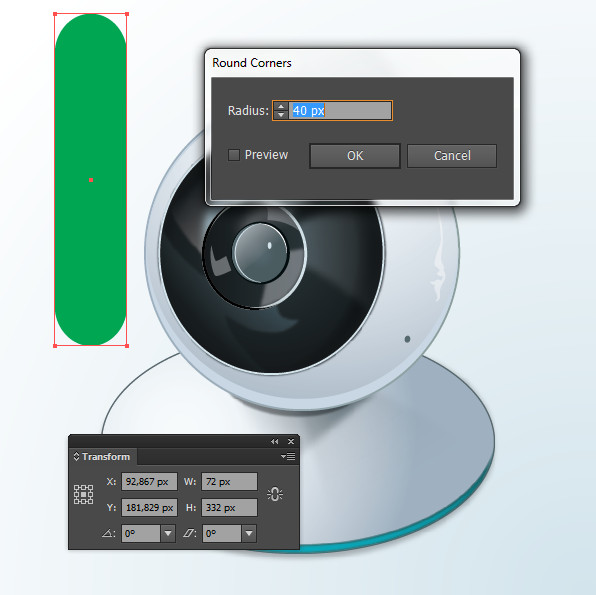
Take the Rectangle Tool (M), draw a rectangle the size W=72 px and H=332 px with rounded corners of 40 px Radius.
Step 26
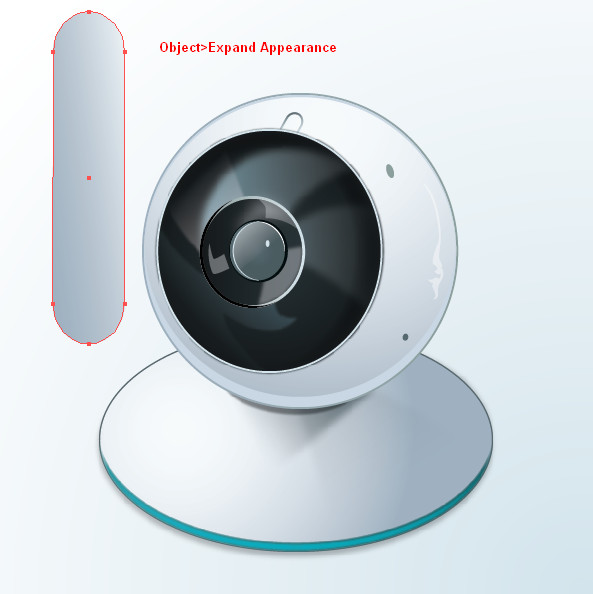
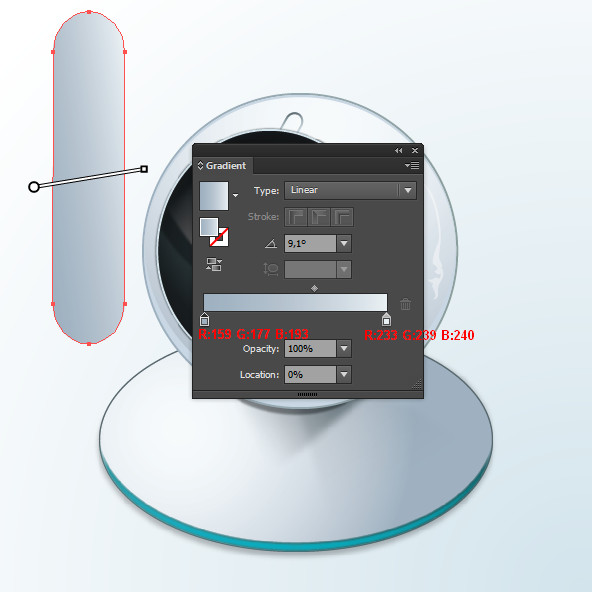
With the rectangle that you rounded the corners to selected, go to Object > Expand Appearance, and fill the shape with a Linear Gradient as shown below:
Step 27
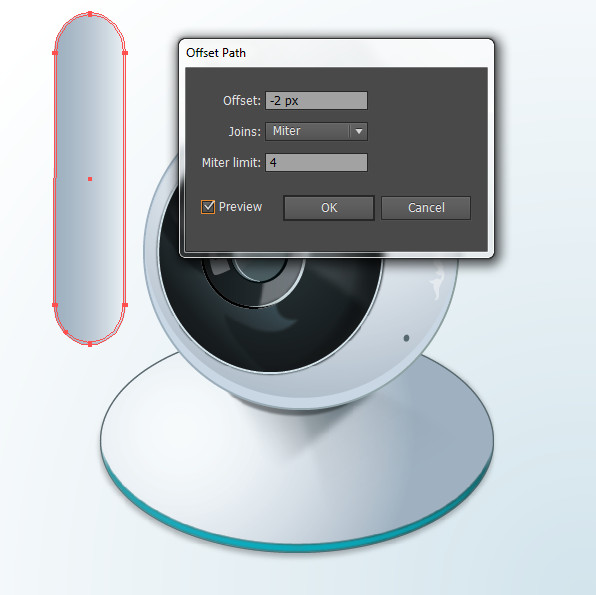
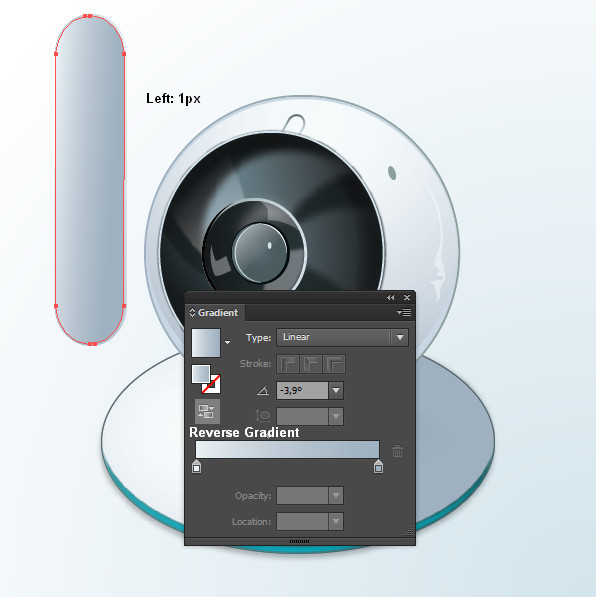
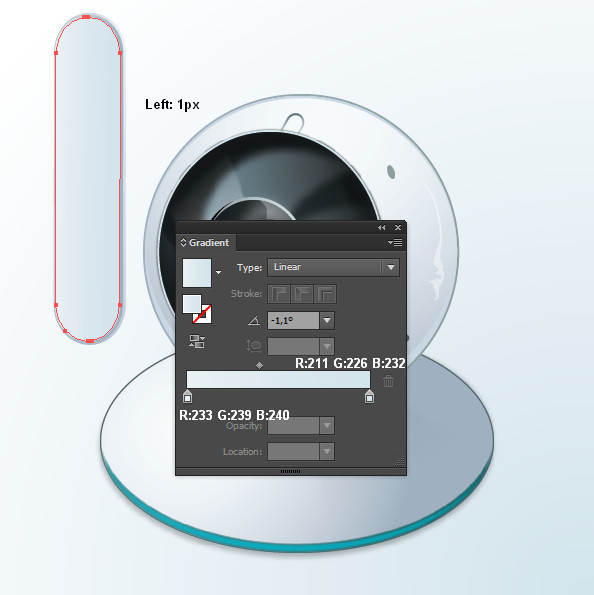
Select the shape from the previous step and go to Object > Path > Offset Path. Set the Offset to -2px and click OK. Move the new shape that appeared after applying Offset 1px to the left, open the Gradient Panel and click on the Reverse Gradient button.
Step 28
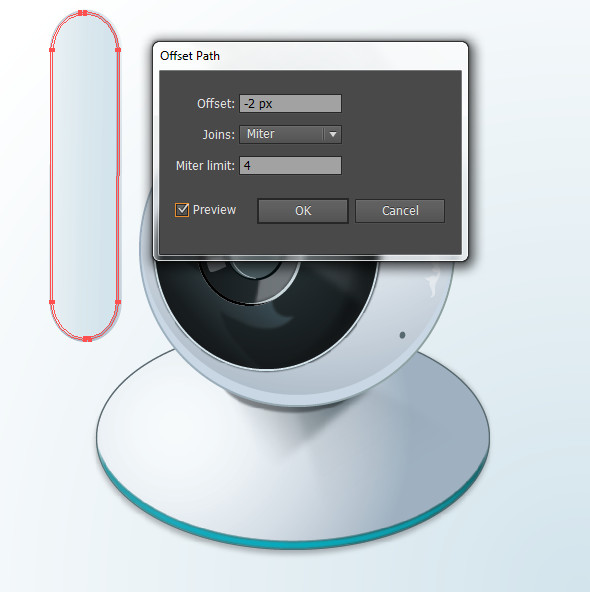
With the last shape you created in the previous step selected, go to Object > Path > Offset Path, set the Offset to -2px, and click OK. Move the new shape that appeared after applying Offset 1px to the left and change the gradient’s colors.
Step 29
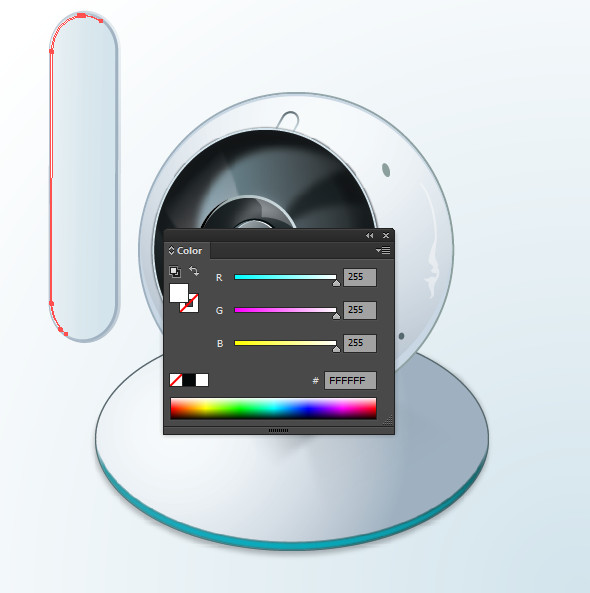
Make two copies of the last shape using Command + C, then paste with Command + F, and again Command + F. Move the top copy 1 pixel down and 1 pixel to the right. Now select both copies, open the Pathfinder Panel, click on the Minus Front button, and fill the shape with White.
Step 30
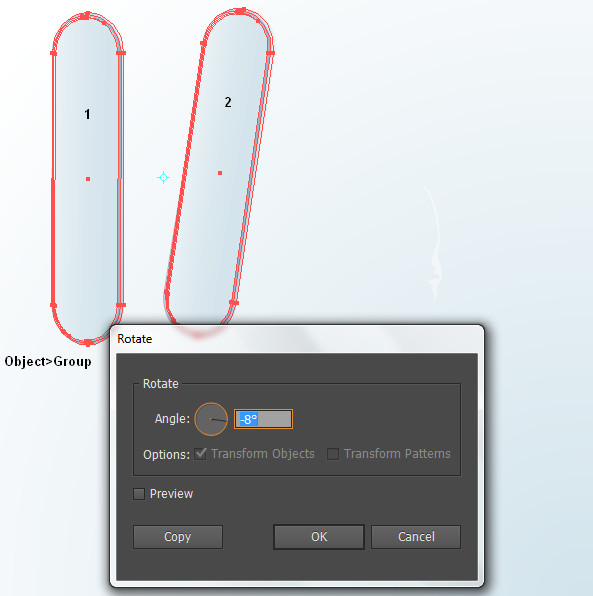
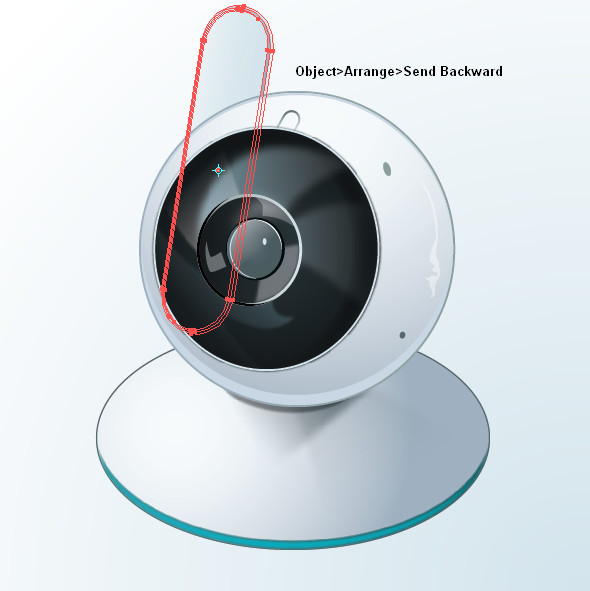
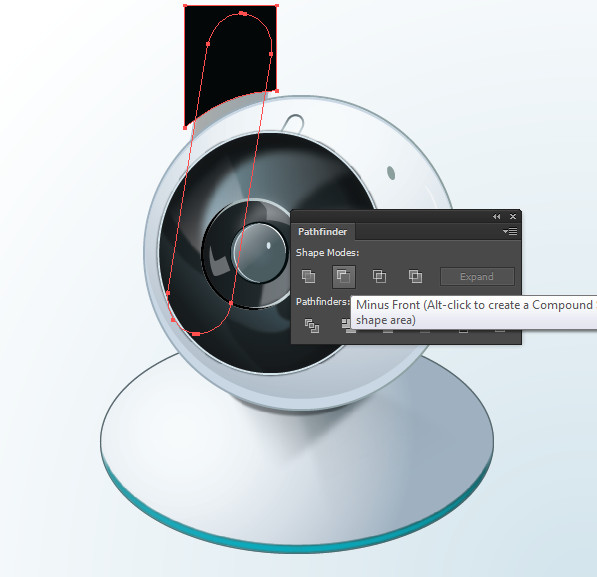
Select all shapes of the antenna and group them (Object > Group). Rotate the shapes of the group to -8 degrees and send them behind the shapes of the upper part of the webcam by applying Object > Arrange > Send Backward.
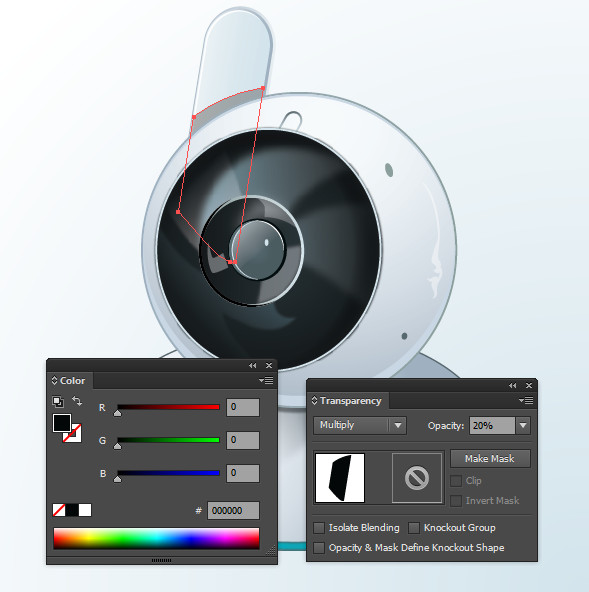
Step 31
Copy the shape from Step 28 with Command + C and then paste with Command + F. Use the Pen Tool (P) to make another shape over the copy as shown below. Now select the copy and the shape you just created. Open the Pathfinder Panel, click on the Minus Front button, fill the new shape with a Black color, and then change the Blending Mode from Normal to Multiply with 20% Opacity.
Final
At the end you can add a background and shadow in the way you want. Here is the final result:

{excerpt}
Read More