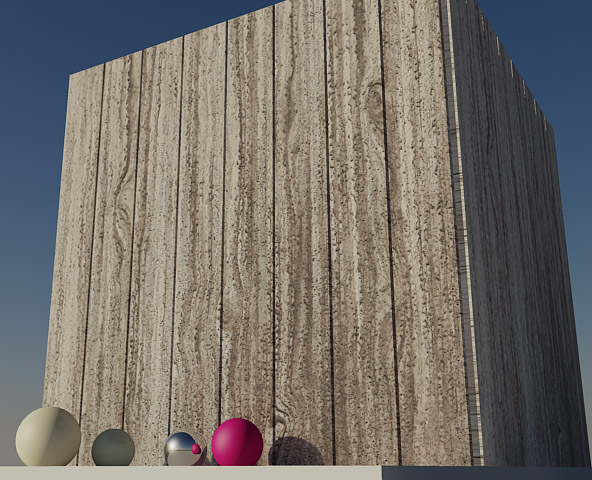
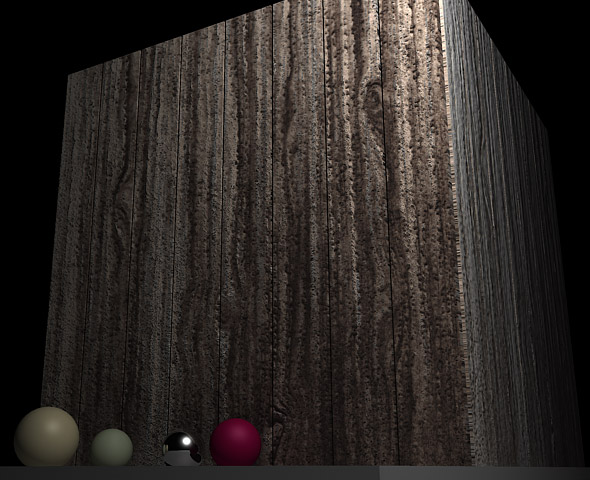
There are a lot of techniques out there to create wooden textures in Photoshop. Photoshop is a powerful application and it enables you to produce wooden textures photographically and from scratch. In today’s tutorial we will demonstrate how to create a wooden texture from scratch using some of Photoshop’s handy filters. You can then use this technique to create textures for your 2D or 3D projects.
Step 1
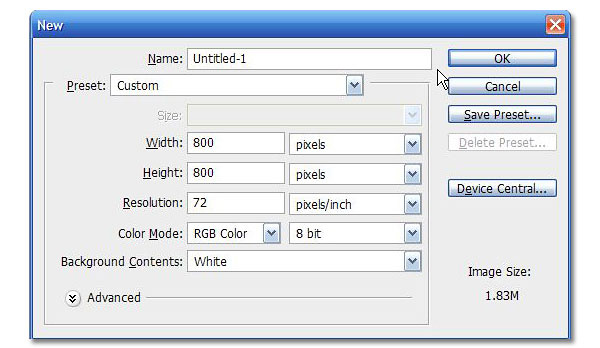
Start with a New Document 800×800 px. Leave everything else as is.
Step 2
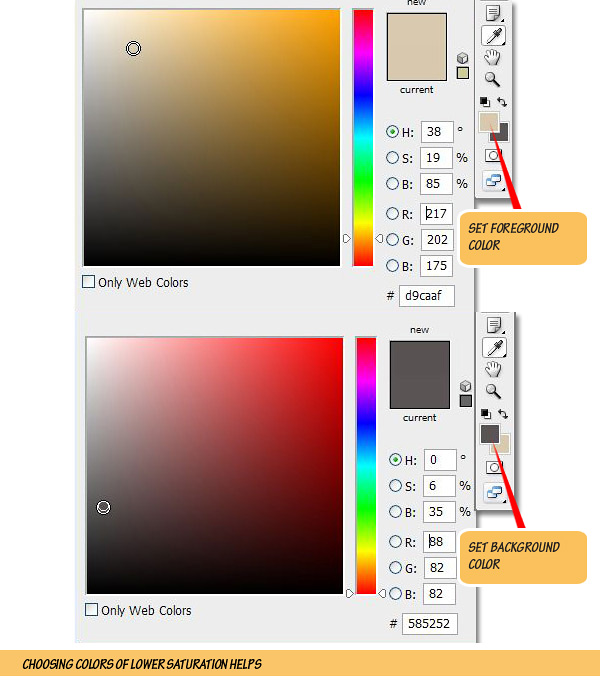
Set Background and Foreground colors. Foreground should be a desaturated woody orange and background should be a dark shade of brown close to black.
Step 3
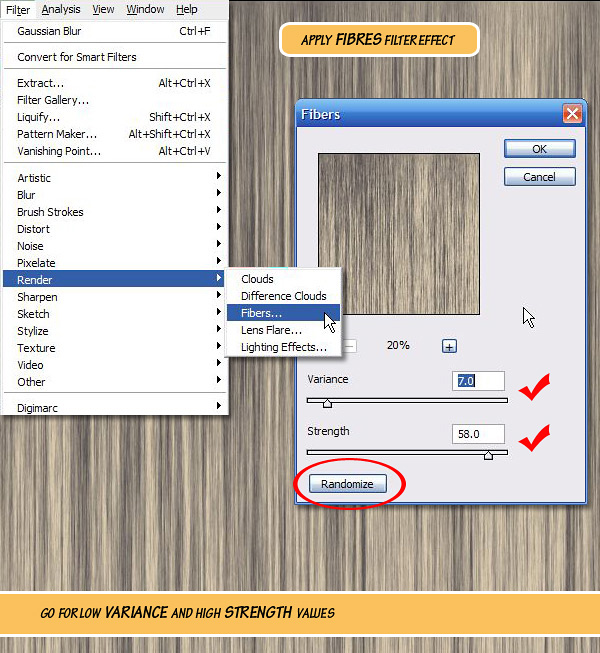
Go to Filter > Render > Fibres. Keep number of threads low by reducing the Variance value and keep them straightened by a high Strength value. Feel free to hit the Randomize button if you are not satisfied with the initial look. Zoom In [+] and out [-] in the preview window for better guidance.
Step 4
After getting a satisfactory grain double-click on the "Background" layer to unlock it. Press Cmd+[J] to duplicate the layer. This is to preserve the original grain pattern in case something goes wrong.

Step 5
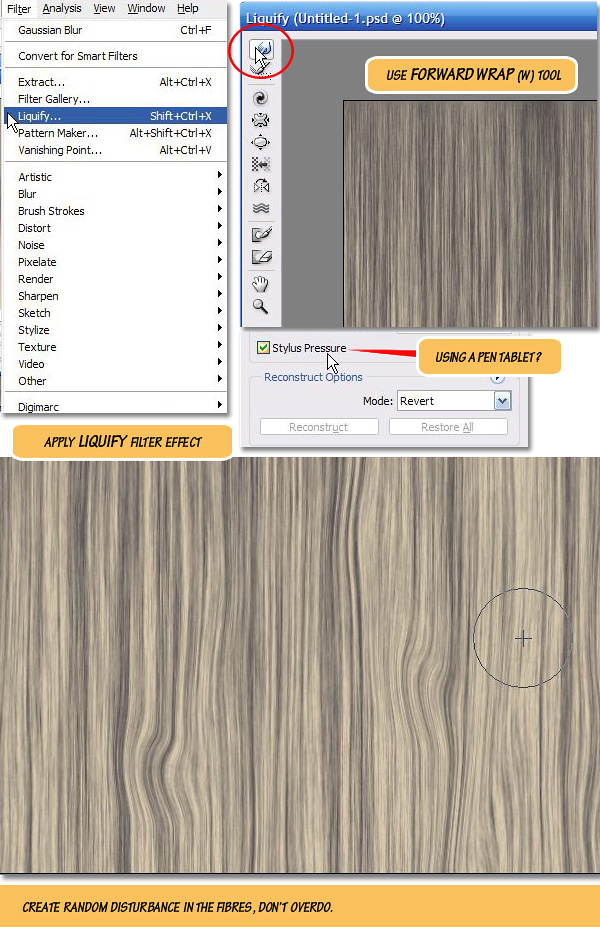
Go to Filter > Liquify or Press Cmd+Shift+[X]. In the Liquify panel/window use the Forward Wrap [W] tool to paint mild disturbances in the grain layer. Enable the Stylus Pressure option if you’re using a pressure sensitive Tablet (like WACOM).
Steps 6 – 9
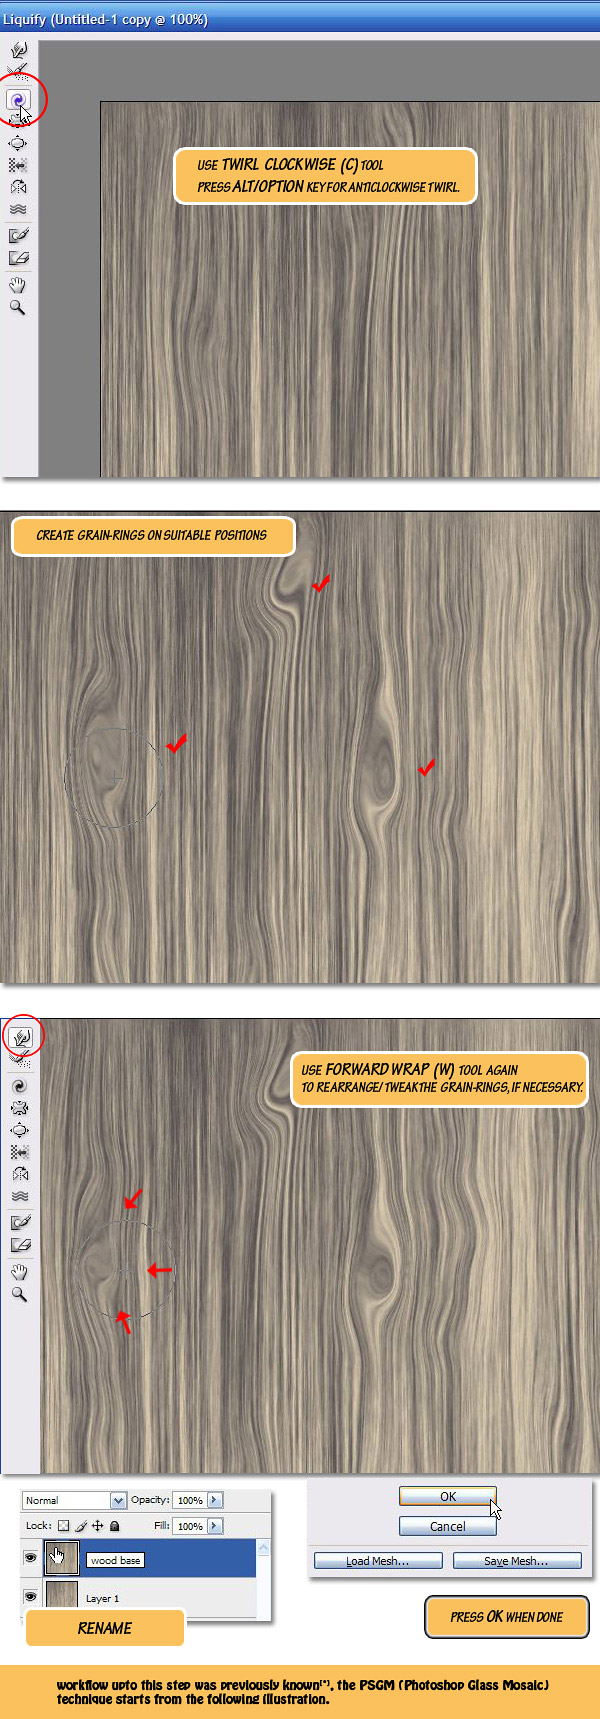
Use Twirl Clockwise[C] tool to paint twirls over expanded areas created by the Forward Wrap [W] tool. Pressing [Alt] key reverses the twirls. Use Forward Wrap [W] tool again to rearrange the look and size of the twirls. Hit OK button to commit changes done in Liquify window. Finally Rename the layer to "wood base". Now we are going to turn this layer into a grainy coarse surface.
NOTE: Wood grain creation technique source: Luke Ahern [3D Game textures, Focal Press, 2006]
Step 10
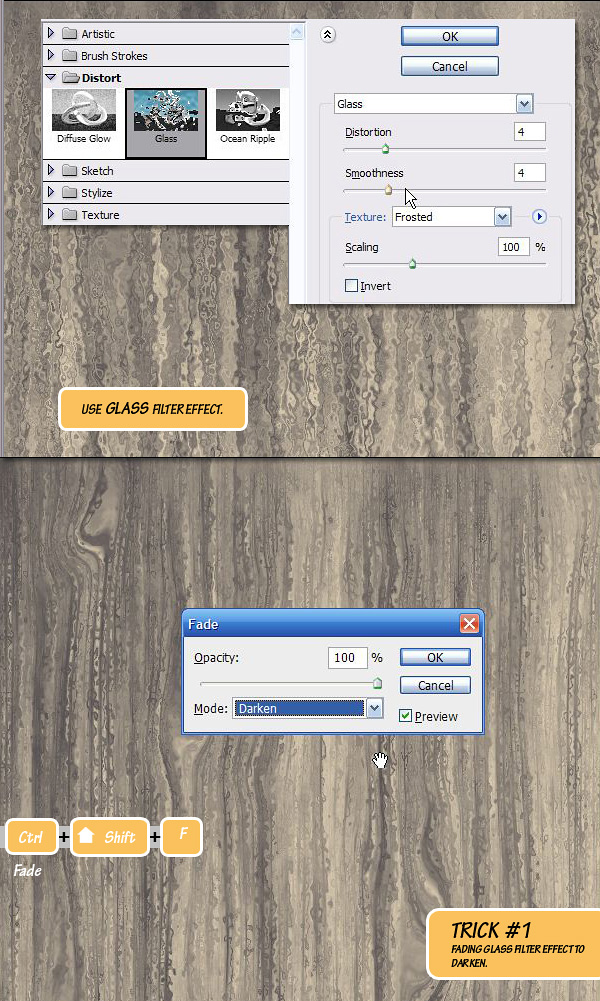
Open the Filter Gallery (Filter > Filter Gallery) and go to Glass effect in the Distort category, apply it with the following settings: Distortion: 4, Smoothness: 4, Texture: Frosted, Scaling: 100%, Value of Distortion/Smoothness may have to be changed if texture size is different from the one I used (800×800). Hit OK to exit the Filter Gallery window and press [CMD]+[Shift]+[F] to bring in the Fade dialog box. Select Darken as Fade blend mode and tweak Opacity if necessary.
Step 11
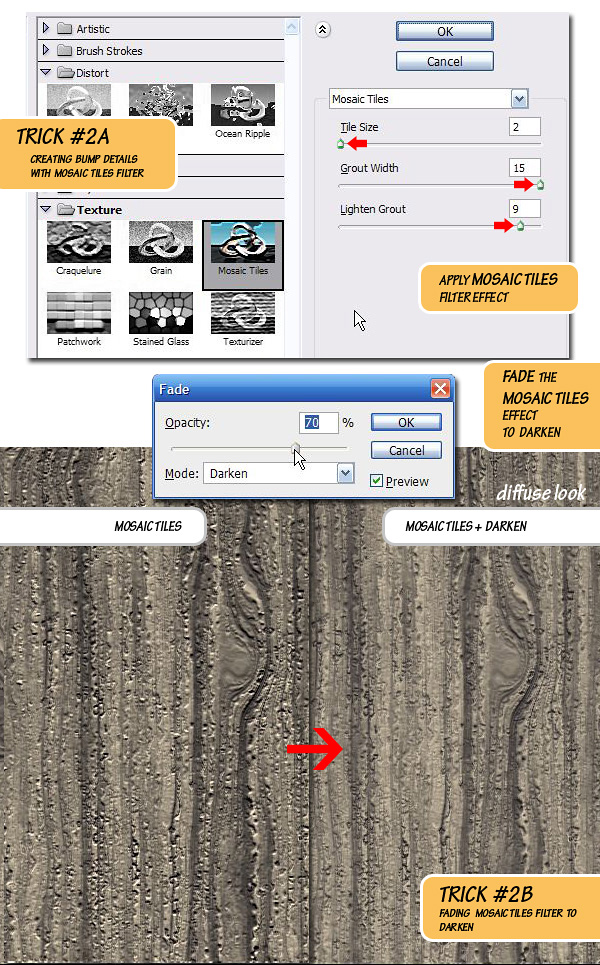
If you remember all of this is happening in the "wood base" layer. Keep the layer selected and apply another filter: Filter > Filter Gallery > Texture > Mosaic Tiles. With default settings the result will look very awkward but once you split the first two sliders (Tile Size to min: 2 and Grout Width to max: 15) in opposite directions the result may surprise you.
Now crank-up the Lighten Grout slider to a high value and you have a cool wood texture in your screen. We are wanting for a neutral look (diffuse only) wood texture, so Fade the effect to Darken and remove all the shininess. Also tweak Opacity if needed.
Step 12
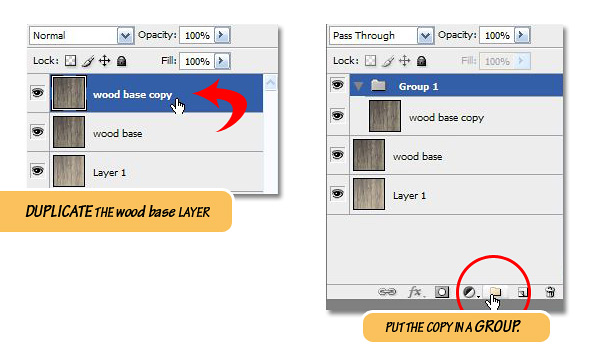
Duplicate [Cmd]+[J] the "wood base" layer and put it into a new Group called Group 1. This is again to preserve the texture.
Step 13
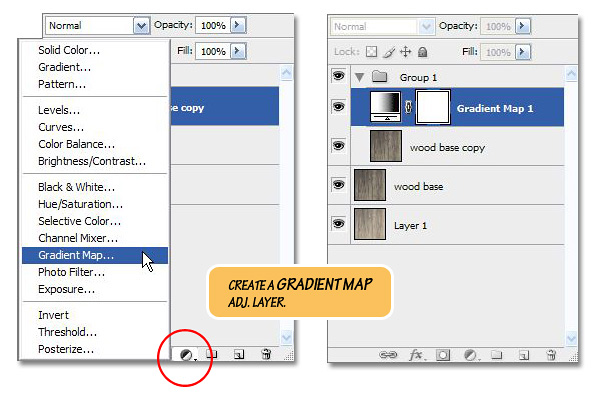
Inside this new Group, create a Gradient Map adjustment Layer as the top layer.
Step 14
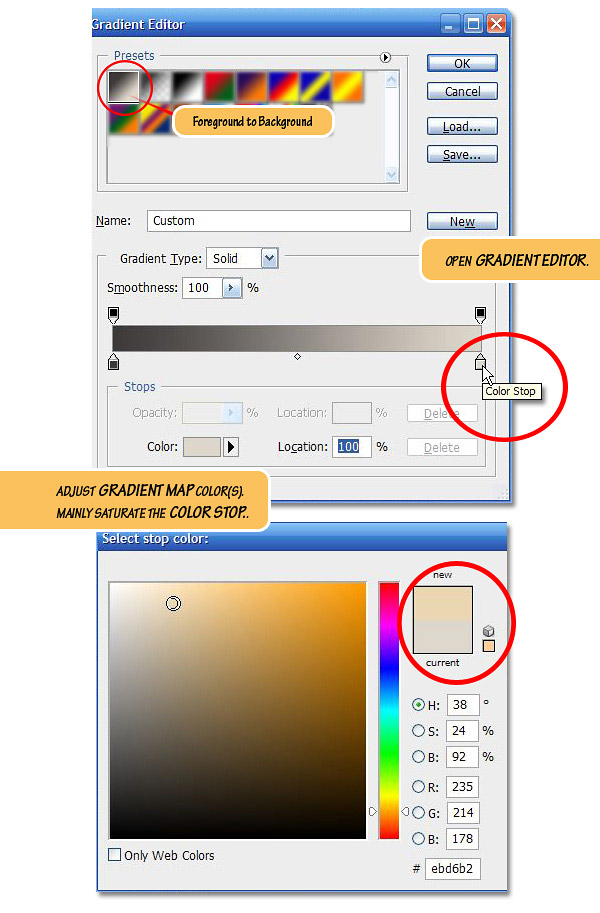
Double-click on the Gradient Map icon to open the Ramp (not shown, use background-foreground gradient type), double-click on it again to open the Gradient Editor. Keep the Color Start (background color) untouched and saturate the Color Stop (foreground color) a bit.
Step 15
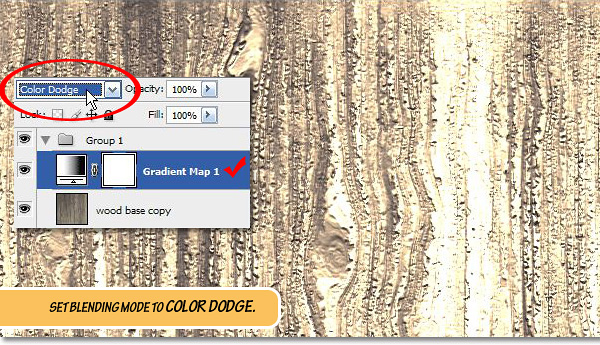
Change the Blending mode of this Gradient Map layer to Color Dodge, as you can see, initially the result won’t look all that spectacular.
Step 16
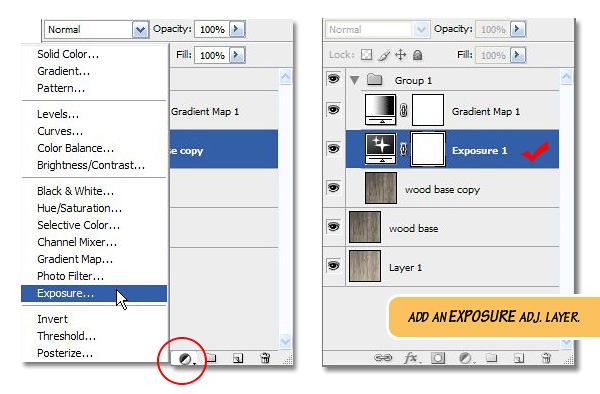
Below the Gradient Map layer, create a new adjustment layer Exposure.
Step 17
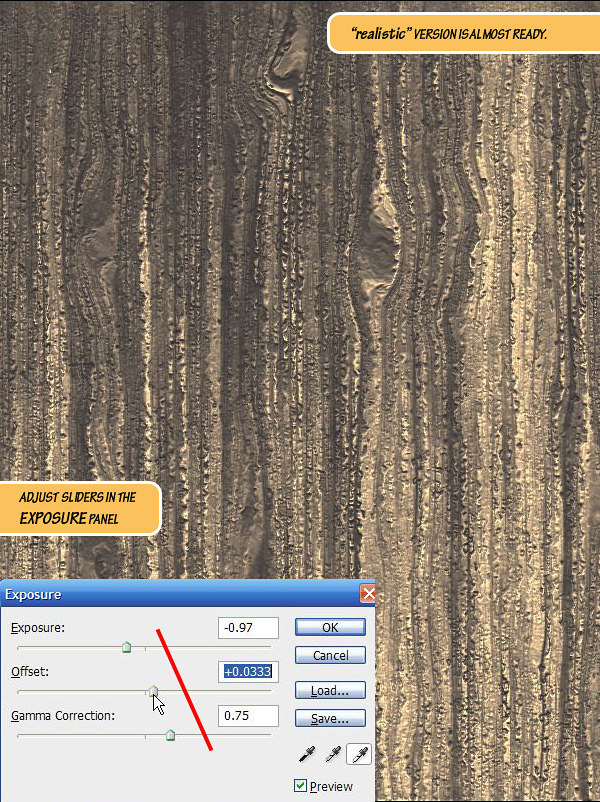
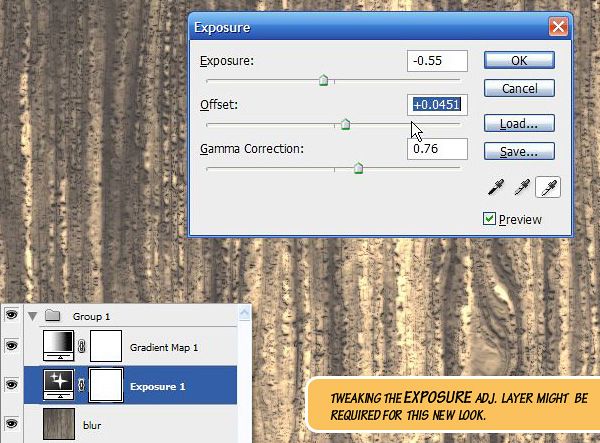
Tweak the sliders in Exposure adjustment layer as shown to get a desired look. Adjust the Exposure (highlights) slider first, and then adjust the Gamma Correction (midtones) and finally the Offset (brightness offset).
Step 18
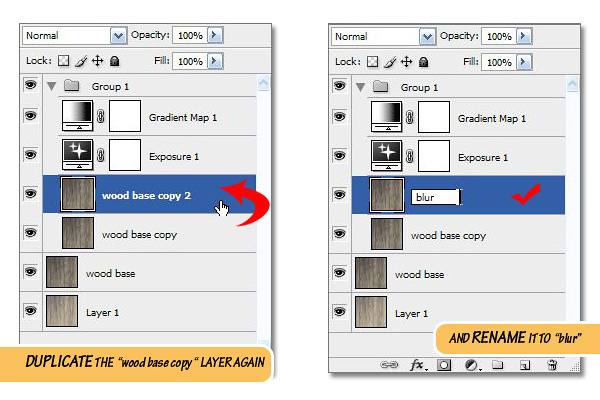
Duplicate the "wood base copy" layer once more and rename it to "blur."
Step: 19
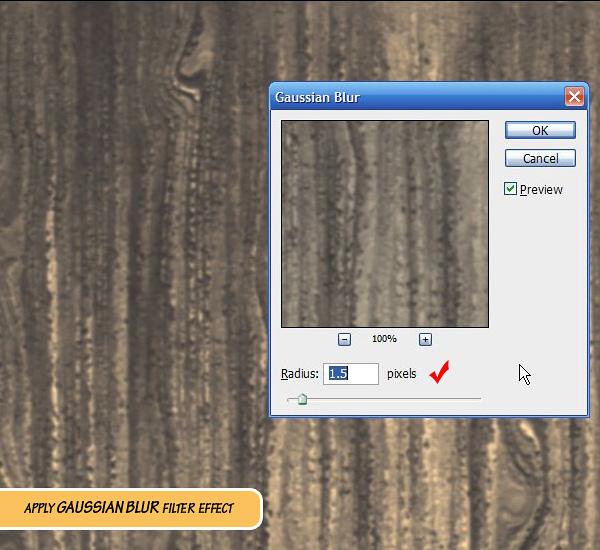
To the layer "blur" apply Filter > Blur > Gaussian Blur effect with a Radius value of 1.5 px. This value may vary depending on the document size.
Step 20
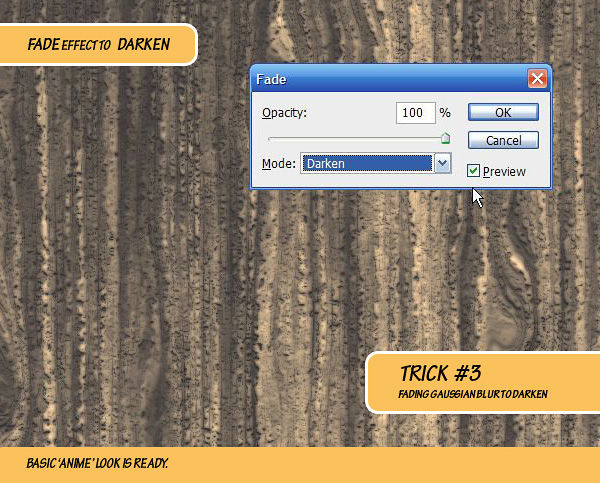
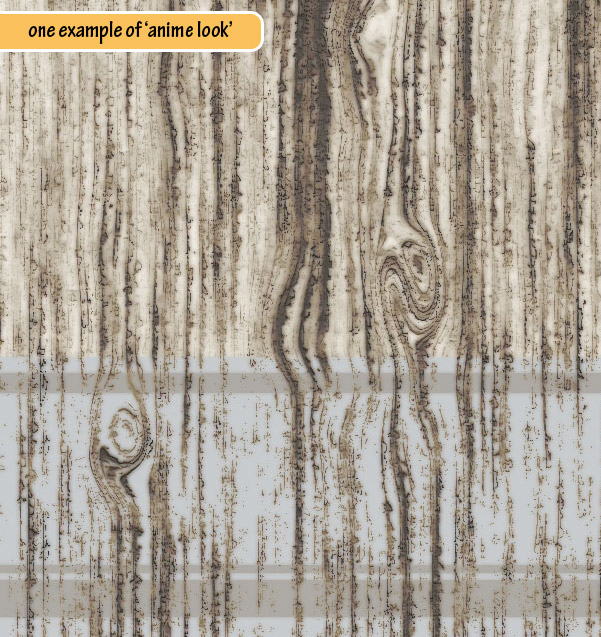
Fade the Gaussian Blur effect to Darken to give it an ambient occlusion/dirt look. If the image had more contrast the resulting texture would look like Japanese style anime.
Here is an example of ‘anime look.’
Step 21
Go back to the Exposure adjustment layer and tweak the values (mainly Exposure:) to improve the brighter areas.
Step 22
To ‘dramatize’ the effect we can go one step further and add some more contrast to the texture. Inside Group 1, add a new Black and White adjustment layer. Crank up the Reds and Yellows (as these two colors define the brighter areas of our image) and set the blending mode to Soft Light.
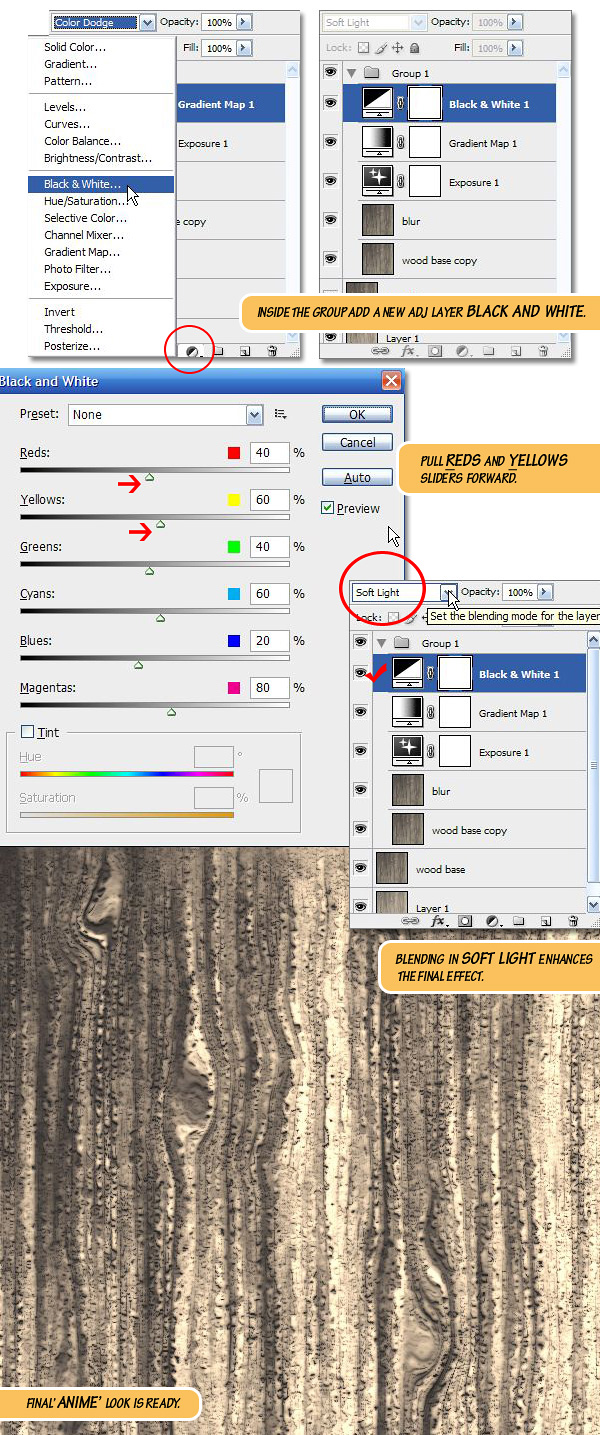
Final Image Preview
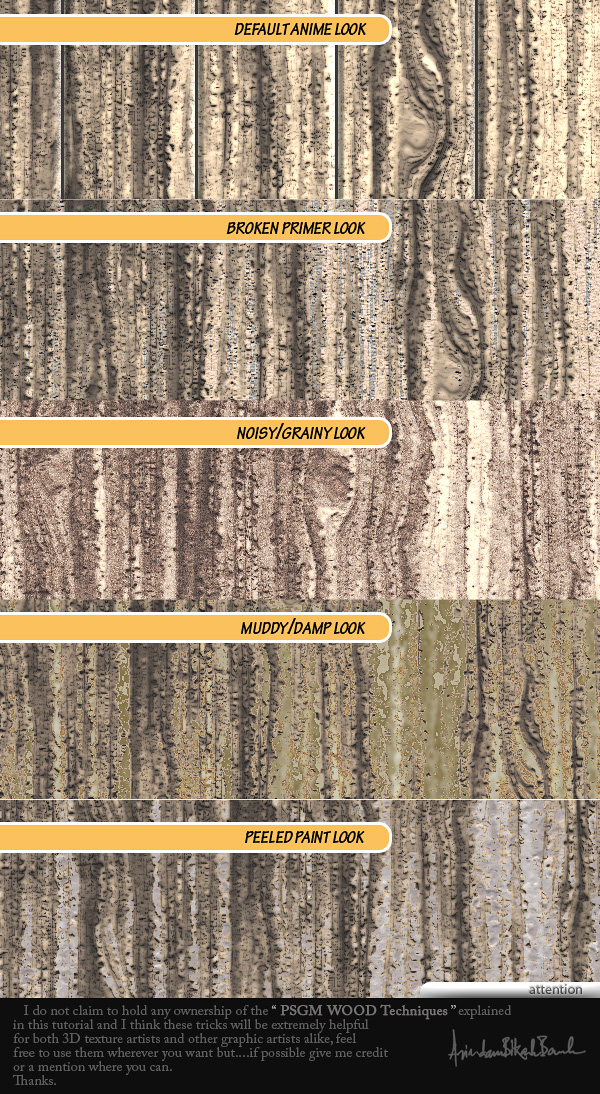
Take a look at some of these alternative examples.
3D Renders
This texture can easily be applied to a 3D rendering.
