These days you’d be hard pressed to find someone in the creative industry who doesn’t use dual monitors. If you’re one of these people, why not dress your space with a custom made wallpaper? It’s easy to do and proudly claims your desktop as your very own. In this easy to follow tutorial, you will learn how to make a dual screen wallpaper and how to use cel-shading illustration techniques to bring a hand drawn image to life.
Step 1
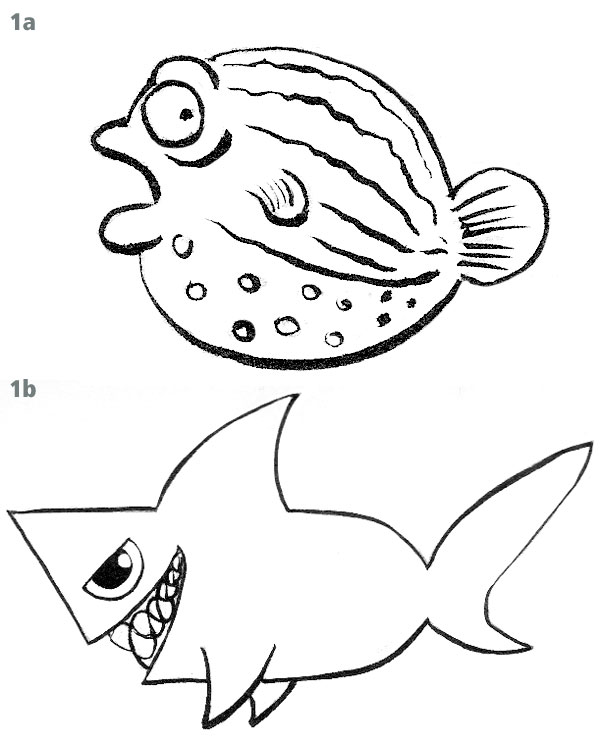
The first step of every illustration is, of course, sketching your ideas onto paper. Take your time to try as many different characters as you need until you find the right design. In this case we have a blowfish (round, colorful, cute) (1a) and a shark (sharp, angular, aggressive but still fun) (1b). Since we plan on tracing and coloring the characters in Illustrator, it’s best to use simple inked sketches. Scan and clean up your drawings in Photoshop until you have a good base for tracing.
Step 2
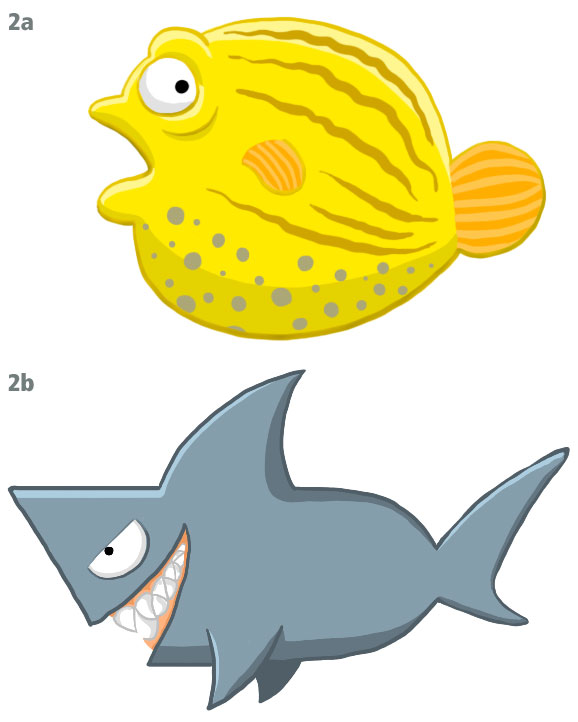
Depending on the method you prefer, you can either make some color studies on paper or in Photoshop. I chose the second option and spent some time tracing and coloring my sketches using Photoshop’s standard brushes (2a, 2b). Instead of importing my original sketches into Illustrator I placed these color studies in a new document. As you can see the fish have a base color, a shadow color, a highlight color and an outline color .They’re lit from above therefore the highlights appear along the top edges and the shadows along the bottom edges.
Step 3
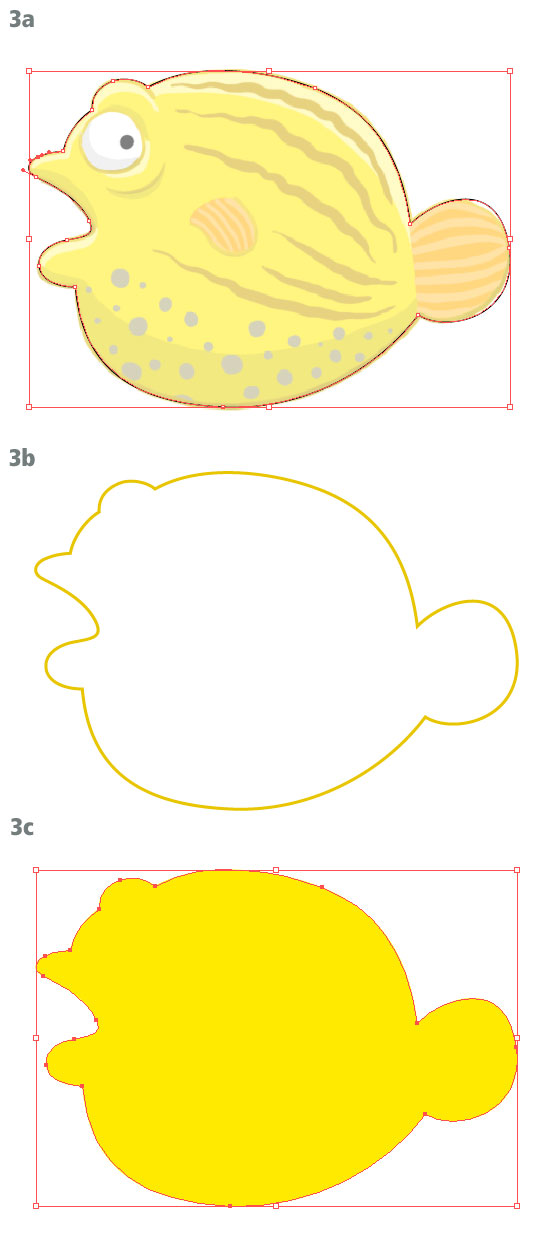
Place your drawing in a new document and set the layer to "Template", this setting will lock and set the contents to be half-transparent. Start by tracing the outline with the Pen Tool (P) (3a). Set the stroke to a dark yellow. Strokes can also be black, but using a darker shade of the base color will achieve a more realistic result (3b). Place a copy of the path under the stroke path and fill it with the yellow shade sampled from the sketch (this path has no stroke) (3c).
Step 4
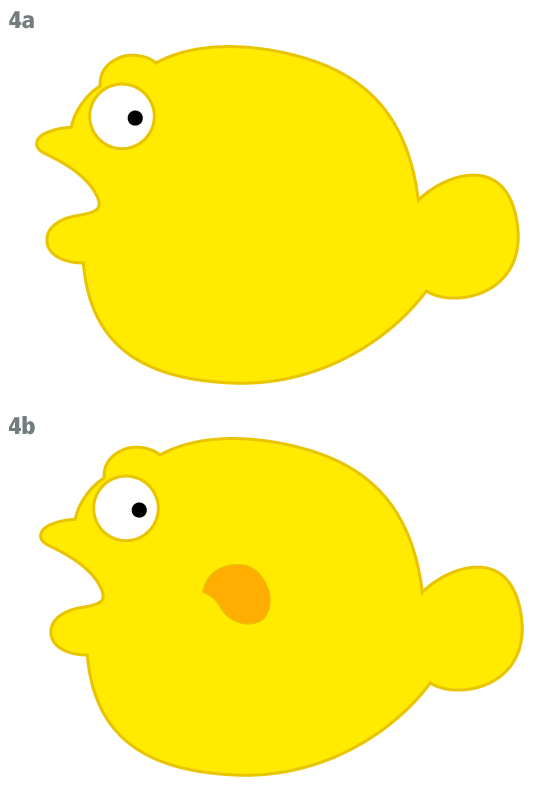
Trace the eye (4a) and the fin (4b) of the fish, keeping the same structure as the body (fill + stroke).
Step 5
The outlines of the body are finished. Now we can add the shading and the details, do this on separate layers sandwiched between the fills and the strokes. The strokes will be on top of everything and will give a "cell shading" look.
In order to add the highlights and the shadows you can either create them using the Pen Tool or you can paint them using a the Blob Brush and Eraser (this option is the best if you’re using a drawing tablet).
These tools allow you to paint and erase using a brush, the result is filled shape, rather than a path that you would draw using the Pen Tool. Pretty cool! I will be using the Blob Brush and Eraser technique.
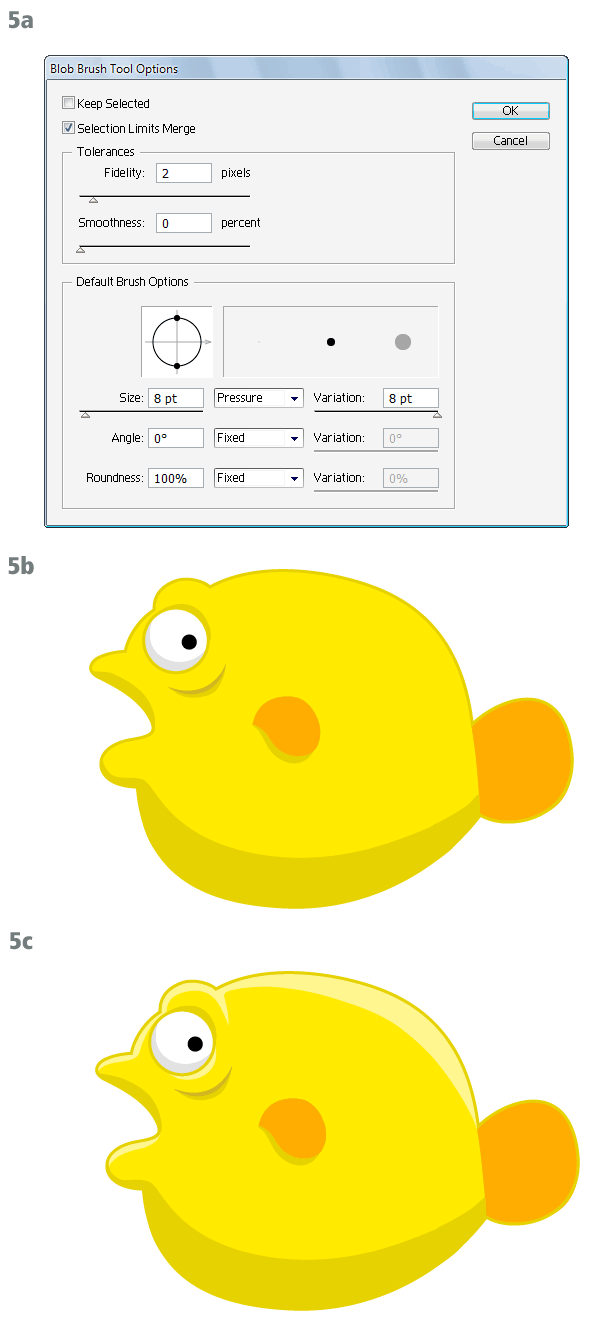
Double-click the Blob Brush icon in the toolbar to bring up the options window (5a). It’s important to make the Variation setting the same value as the Size setting so you can vary the line weight from super thin to full thickness.
Pick a dark yellow color and paint a shadow all along the belly of the blowfish. Add shadows to the lower part of every feature, including the lips, the eye and the fin (5b). Now pick a light yellow color and paint the highlights along the top edge of all the features (5c). Use the Eraser to refine the messy edges that can occur when your brush strokes are less than perfect.
Step 6
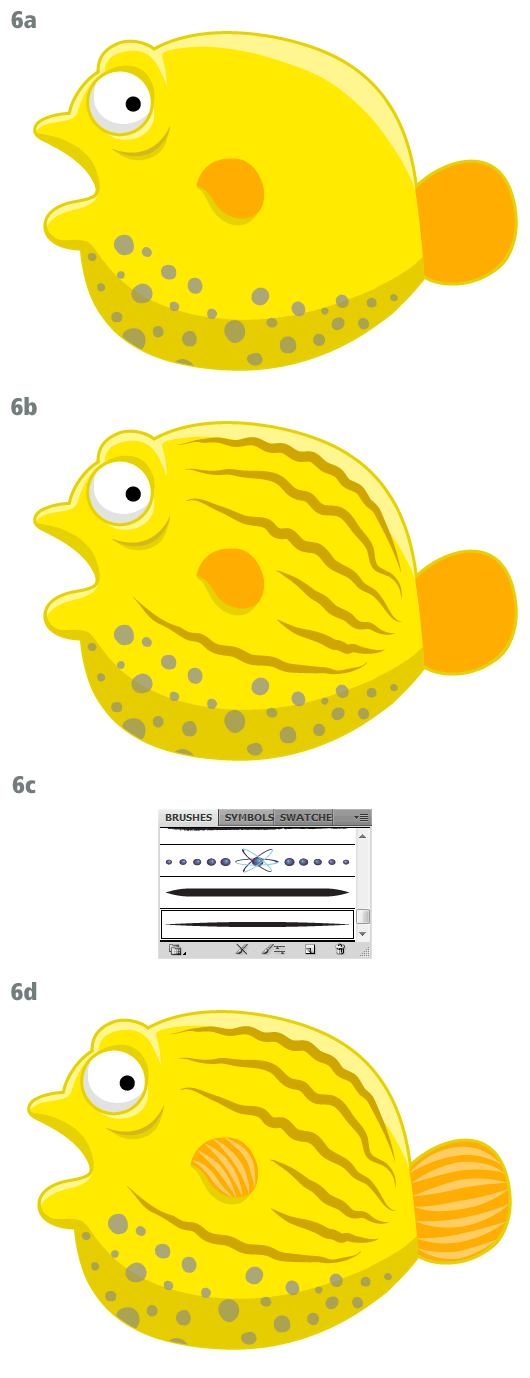
Cover the belly of the blowfish with dots of varying size. Make sure to paint them on a separate layer and make the distribution as random as possible to avoid the appearance of a pattern (6a). Along the “back” of the fish paint wavy stripes, tapering them at the ends by progressively diminishing the pressure on the tablet (6b). It’s actually very hard to make the lines come to a perfect point using a tablet so take your time and experiment until you get it right. Alternately draw the stripes as wavy paths and apply a tapered brush (6c). Load the tapered brush from the Brushes palette (Open Brush Library > Artistic > Artist ic_Ink). Finally draw lines in the fins (6d). The blowfish is complete so group all the objects together and name the group "Blowfish".
Step 7
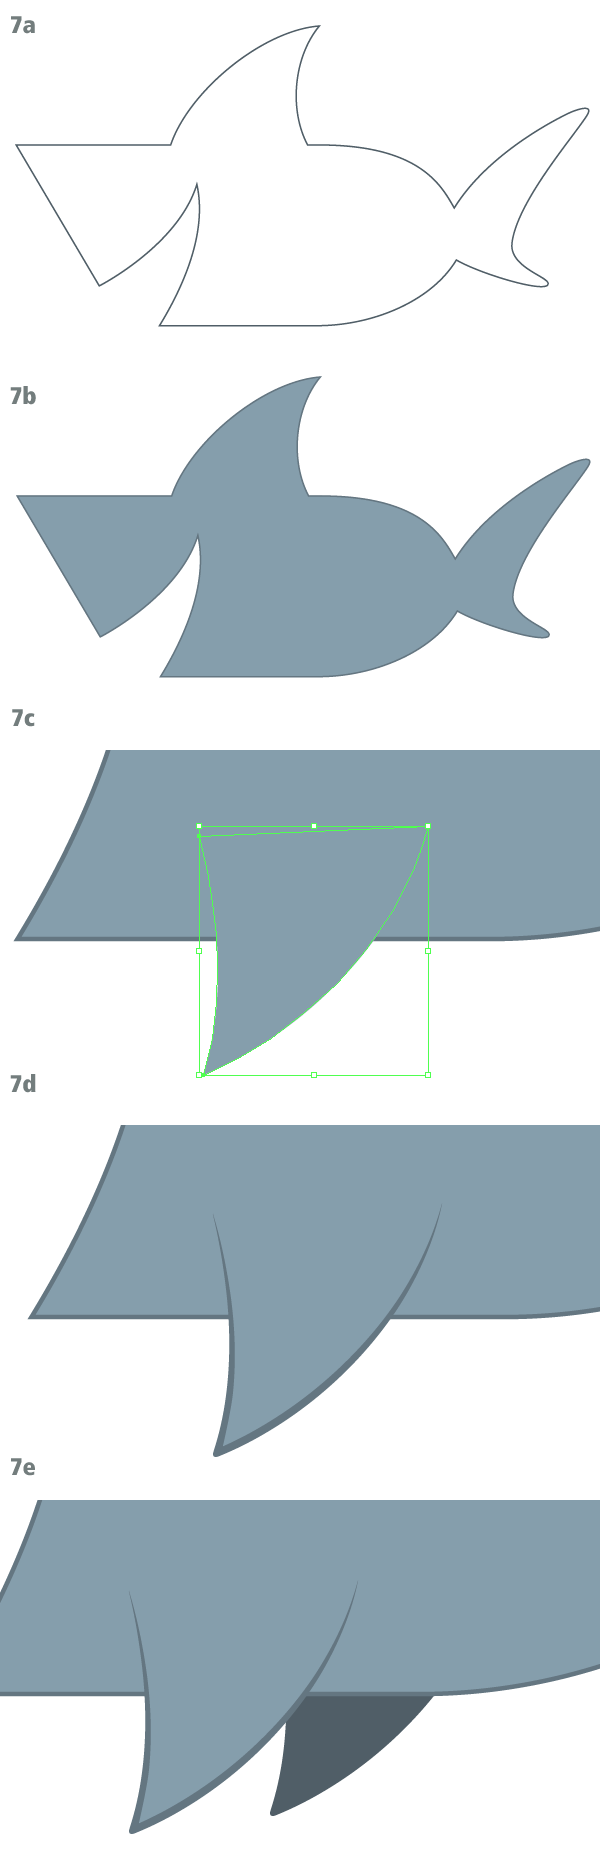
Place the sketch of the shark into another document and follow the same steps as before.
First trace the outline (7a) then duplicate the path and create the body. Fill the body with a blue-gray base color (7b) and draw the fins as separate objects (7c, 7d, 7e).
Step 8
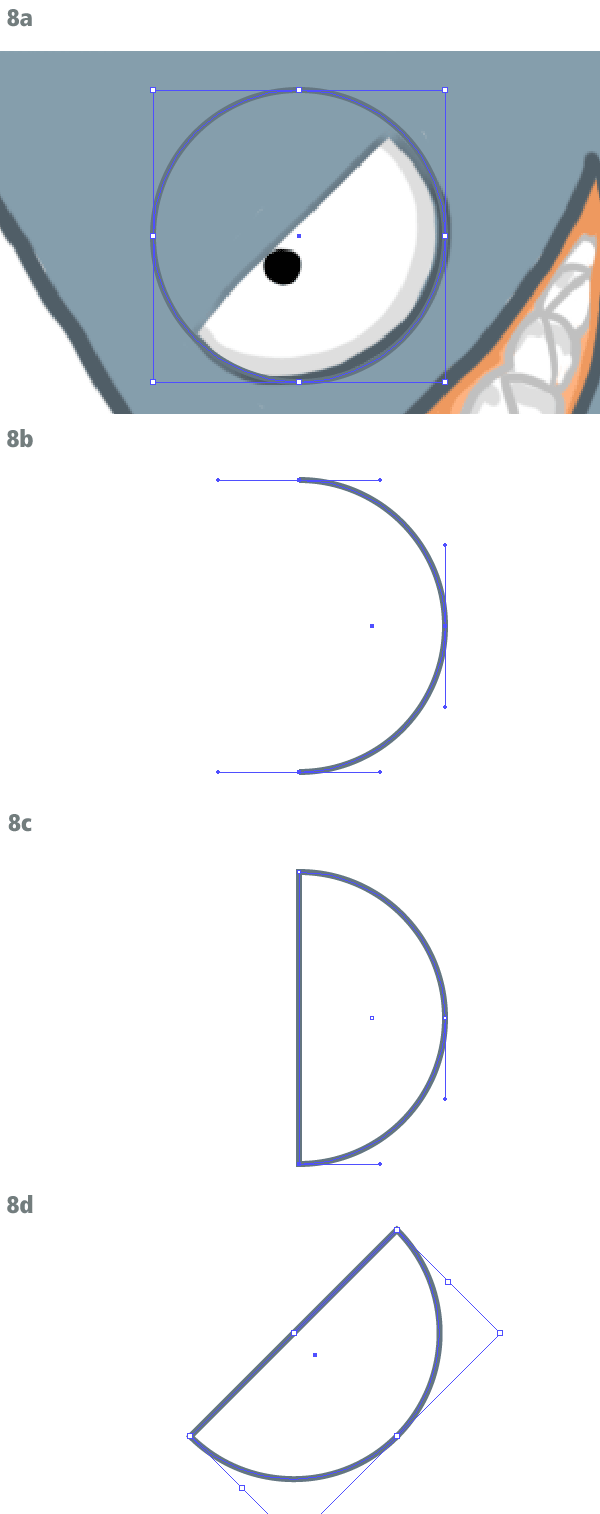
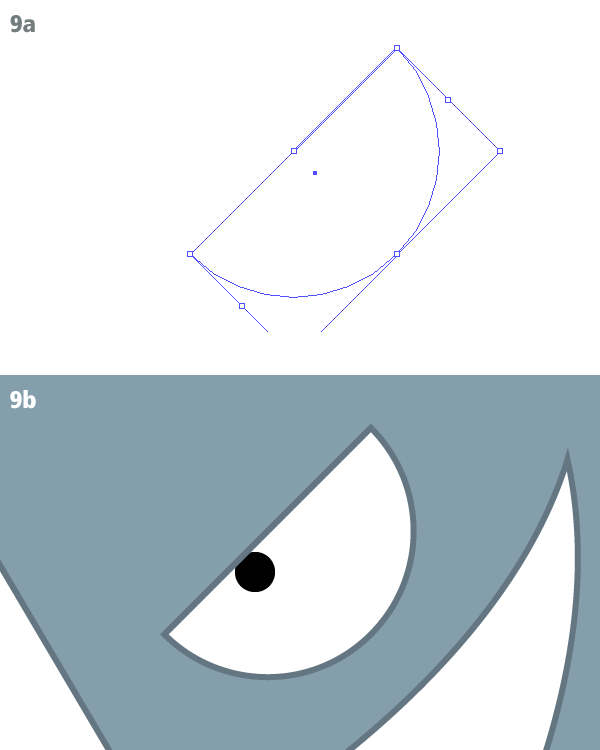
The eye of the shark is a perfect half-circle. To make this create a perfect circle using the Ellipse Tool (L) while holding down Shift key at the same time (8a). With the Direct Selection Tool (A) select the leftmost point and delete it (8b). Close the path by drawing a straight segment with the Pen Tool (8c) and finally rotate the shape 45 degrees clockwise (8d).
Step 9
The eye is made of two shapes, one is a stroked path and the other is a path filled with white (9a). Place the filled path under the stroked path. Make the pupil using a small black circle and position it so it touches the outline of the eyeball (9b).
Step 10
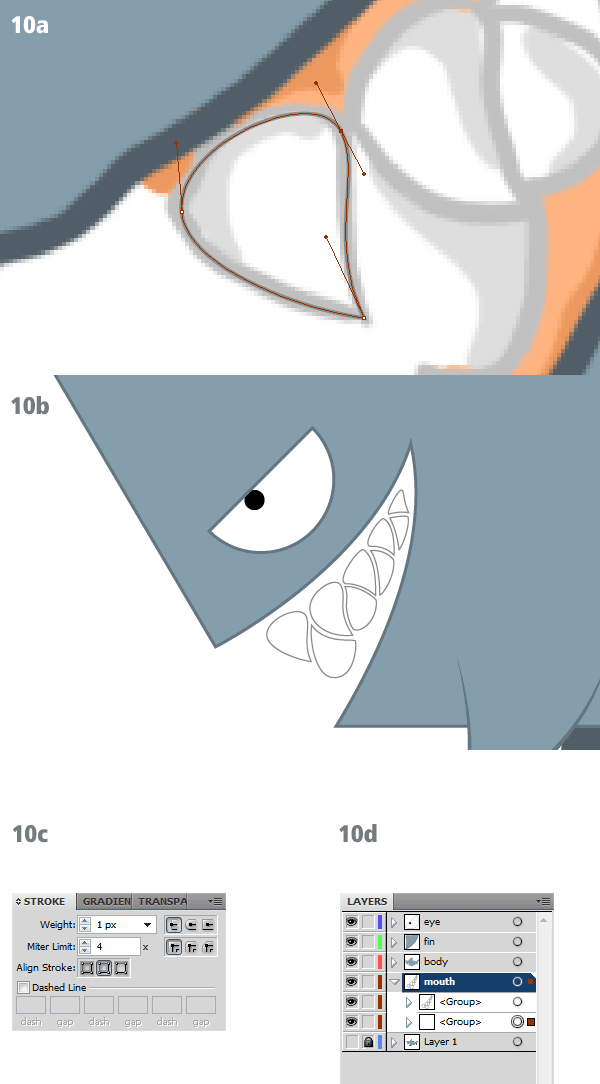
The teeth have to be traced individually (10a, 10b). Each tooth has a 1px stroke aligned to the inside (10c) and a second path filled with white (10d).
Step 11
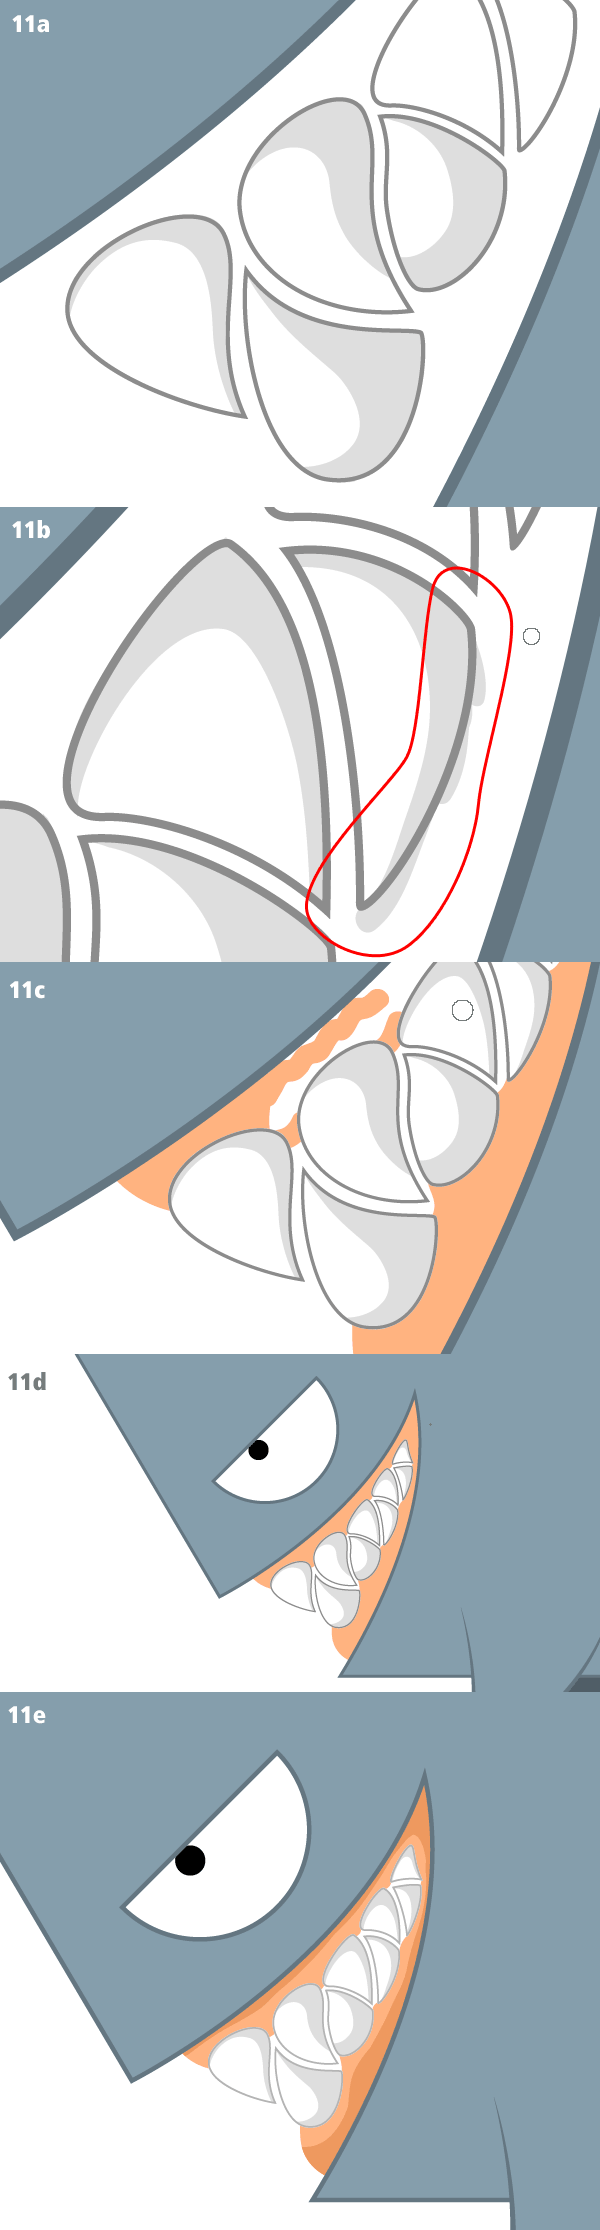
We can now paint shadows on the teeth keeping between the white fills and the gray outlines (11a). When you paint with the Blob Brush your strokes may bleed outside the lines, if this happens clean them up using the Eraser Tool (11b). Paint in the gums (11c, 11d) and add a shade layer to simulate the shadows (11e).
Step 12
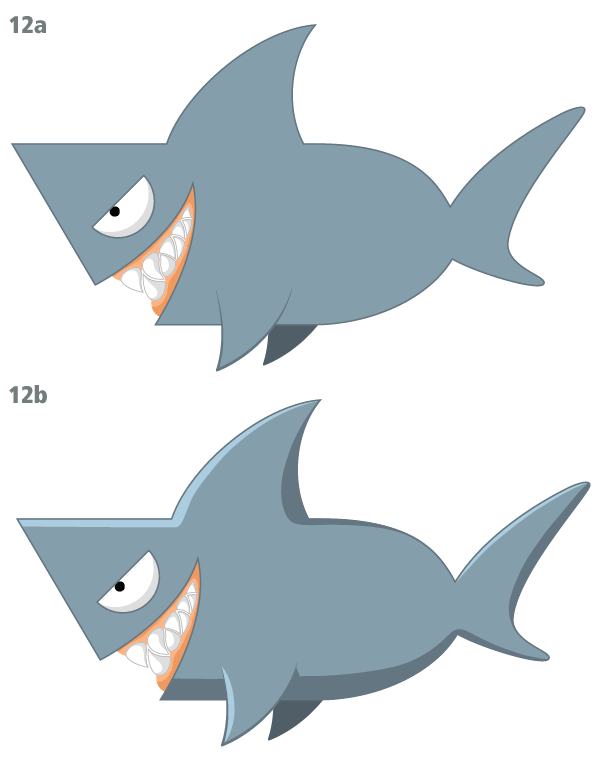
The eyeball needs a crescent shadow around the bottom edge (12a). To complete the shark, add shadows and highlights to the body using the same techniques applied to the blowfish. (12b). Group all the objects together and name the group "Shark".
Step 13
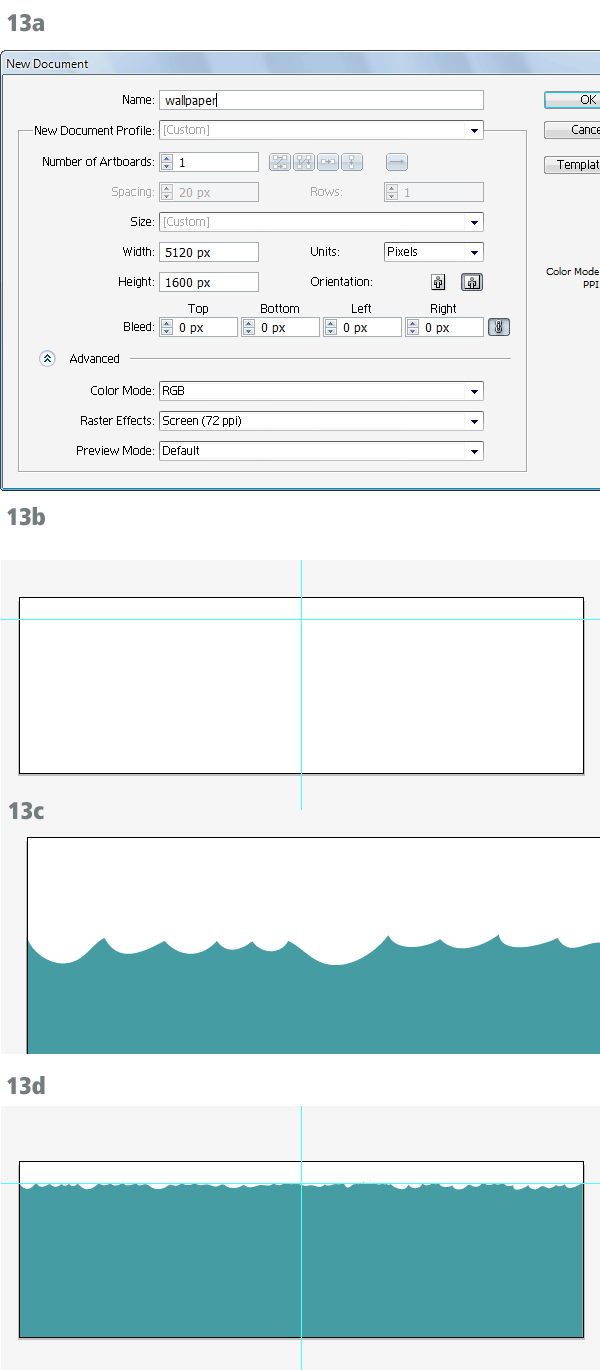
We will now create a full resolution desktop wallpaper (13a). Place a horizontal guide to mark the water level and a vertical guide down the middle to mark where the wallpaper splits into two screens (13b). Using the Pencil Tool (N) pick a blue-green color and draw the water surface. Remember to keep the waves irregular (13c). Complete the path by drawing remaining three sides as straight lines (13d).
Step 14
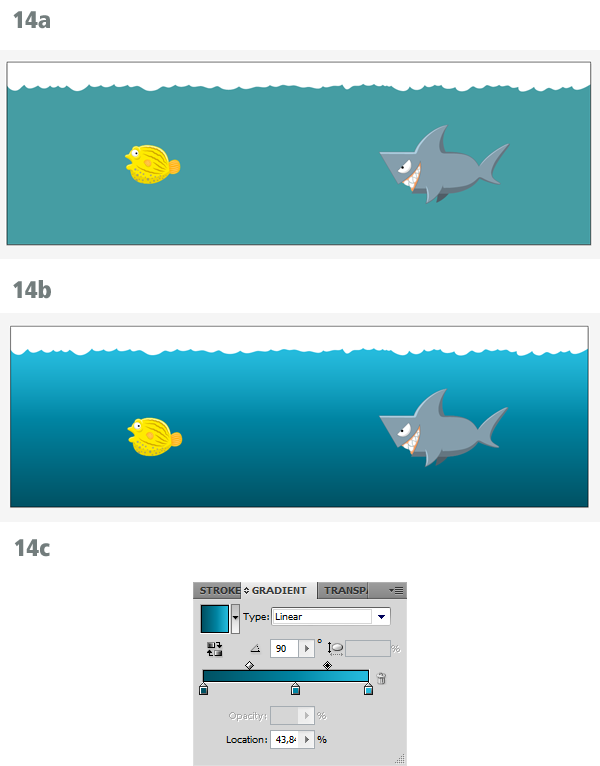
Place the fish in the ocean. Position the fish on the water with the shark on the right screen and the fish on the left screen (14a). To give the ocean some depth, change the fill from a flat color to a gradient (14b, 14c). Gradients are not used in cel-shading but in this case we can make an exception.
Step 15
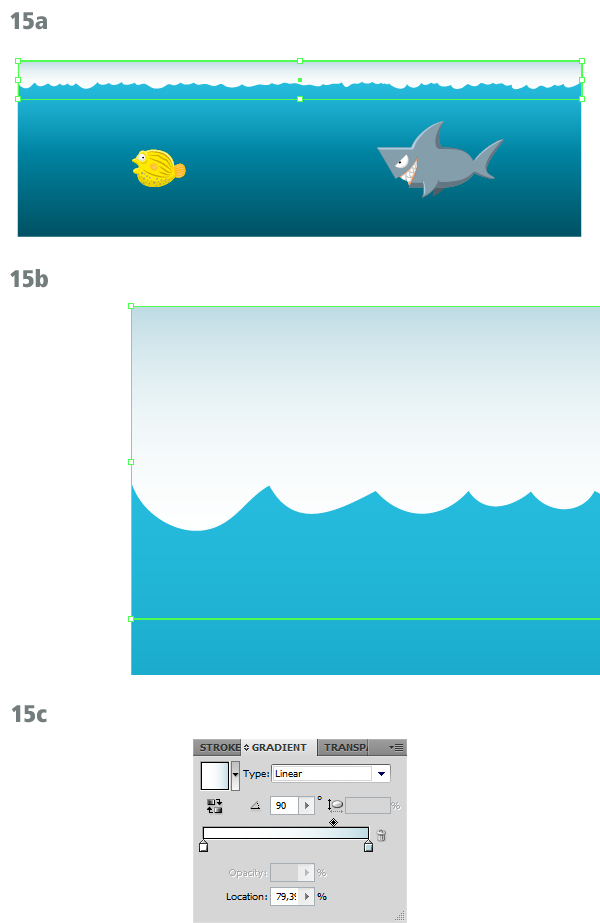
Draw a simple rectangle filled with a vertical gradient from light blue to white (15a, 15b, 15c), this will make the sky.
Step 16
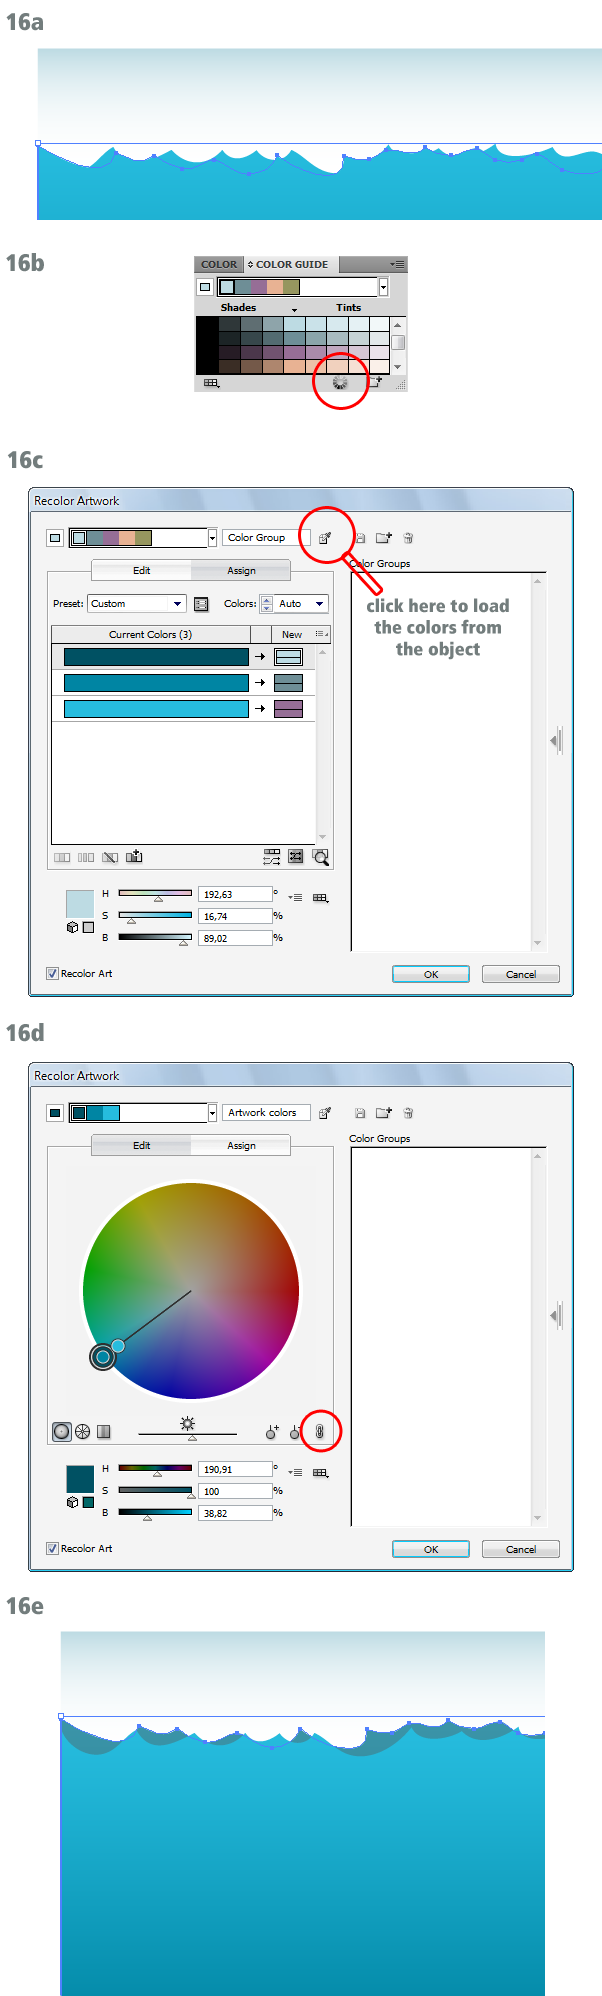
Duplicate the ocean and flip the copy horizontally (16a). Click on the Edit Colors icon (16b) to bring up the Recolor Artwork window (16c). Lock the colors together by clicking the chain icon and use the sliders to darken the fill (16d, 16e).
Step 17
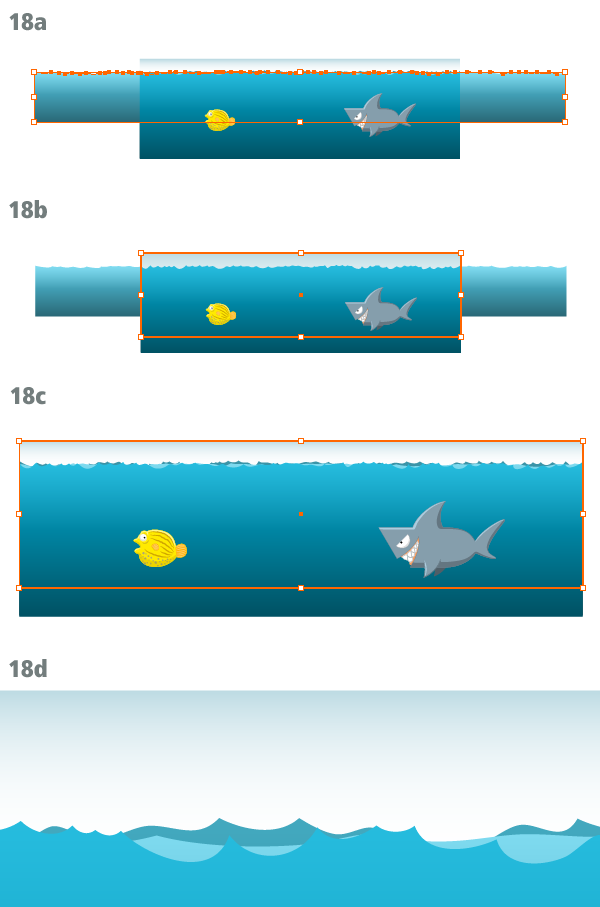
Duplicate the darker ocean shape and scale it vertically (17a). Use the Recolor Artwork tool to make it lighter (17b, 17c).

Step 18
Scale the lighter ocean shape horizontally (18a). Draw a rectangle as wide as the artboard, making sure it fully contains the ocean vertically (18b). With the rectangle above the ocean shape, select both objects and hit Command+7 to create a clipping mask. The ocean is now cropped to the artboard (18c). Here’s a detail of the three ocean shapes and how they add a little variation to an otherwise boring water surface (18d).
Step 19
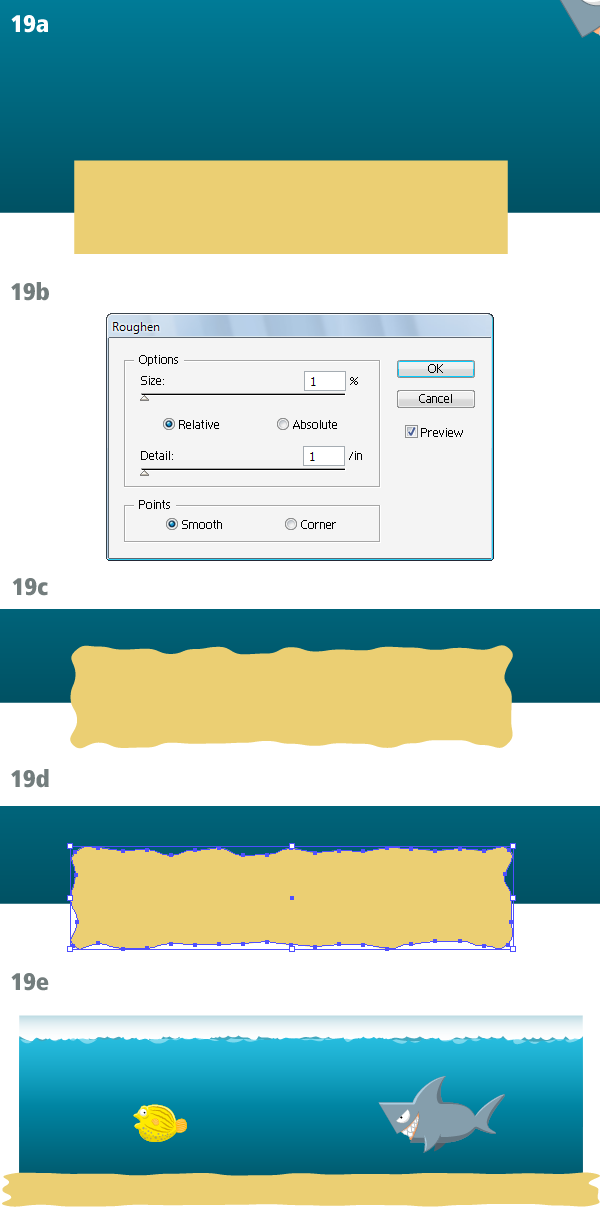
Let’s create the sandy sea bottom.
Draw a beige rectangle (19a) then go to Effect > Distort & Transform > Roughen. Choose the appropriate settings (19b) to make the rectangle wavy (19c). Go to Object > Expand Appearance to turn the effect into a path (19d) and scale the sand horizontally until it covers the entire width of the wallpaper (19e).
Step 20
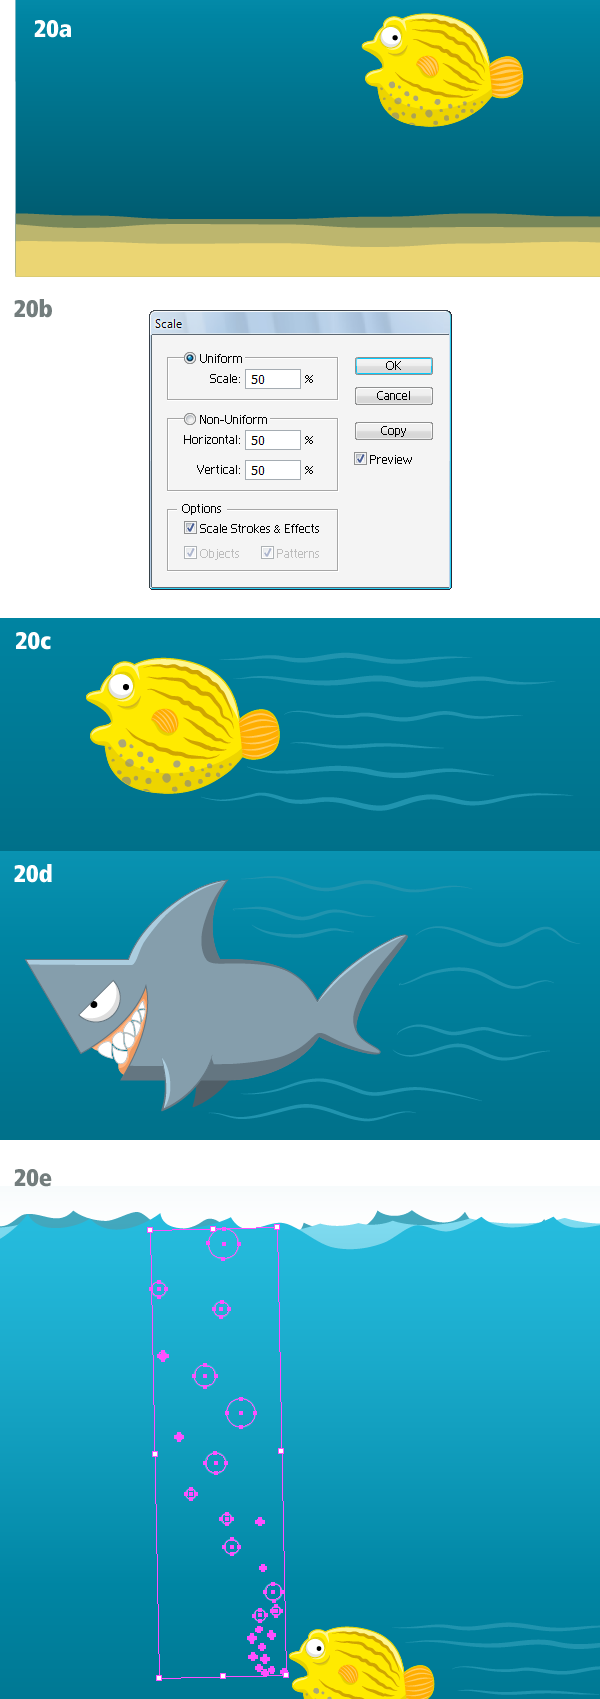
Make two other shapes of sand, changing their color so they progressively blend into the ocean. Use a clipping mask to crop the sand to the artboard (20a).
The fish look a bit too big, let’s scale them down by 50% (20b). Draw wakes behind each fish to show that they’re moving. You can either use a pressure-sensitive brush or a tapered brush (20c, 20d). Finally let’s show that the poor blowfish is gasping for help with bubbles that escape to the surface, you can draw this with some randomly placed circles (20e).
Step 21
We want to keep the illustration clean so we’ll add decorative objects at each end of the wallpaper.
At the far right we’ll draw a cavern surrounded by algae. Use the pencil tool to create the main shape of the cavern (21a). Duplicate the shape. Clear the fill and add a dark stroke (21b). Now we can add the shadows, highlights and a hole in the rock. Do this gradually, trying to suggest the surface of the rock (21c, 21d, 21e, 21f).

Step 22
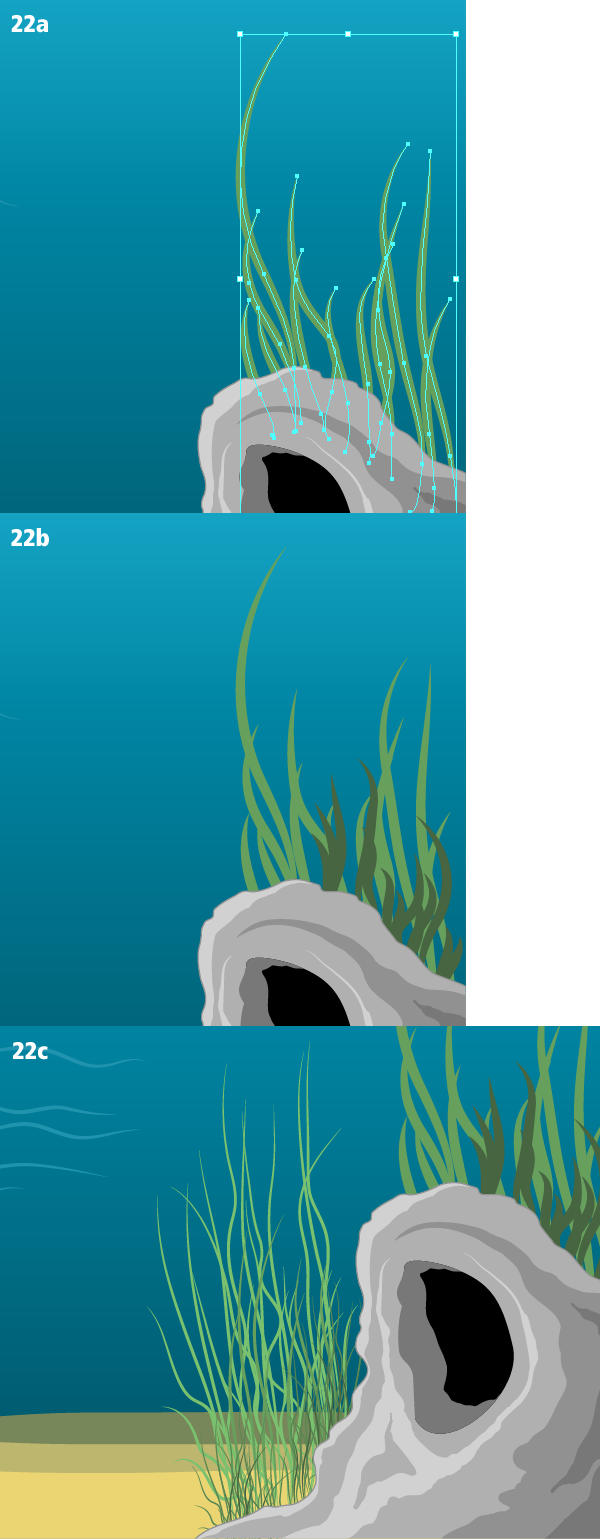
Draw a bunch of algae blades behind the cavern (22a) using simple paths a tapered brush, you can add variation with shorter, darker blades (22b). Using a similar method create a different type of algae with slender, longer blades. Again use different shades of green to add depth and variation (22c).
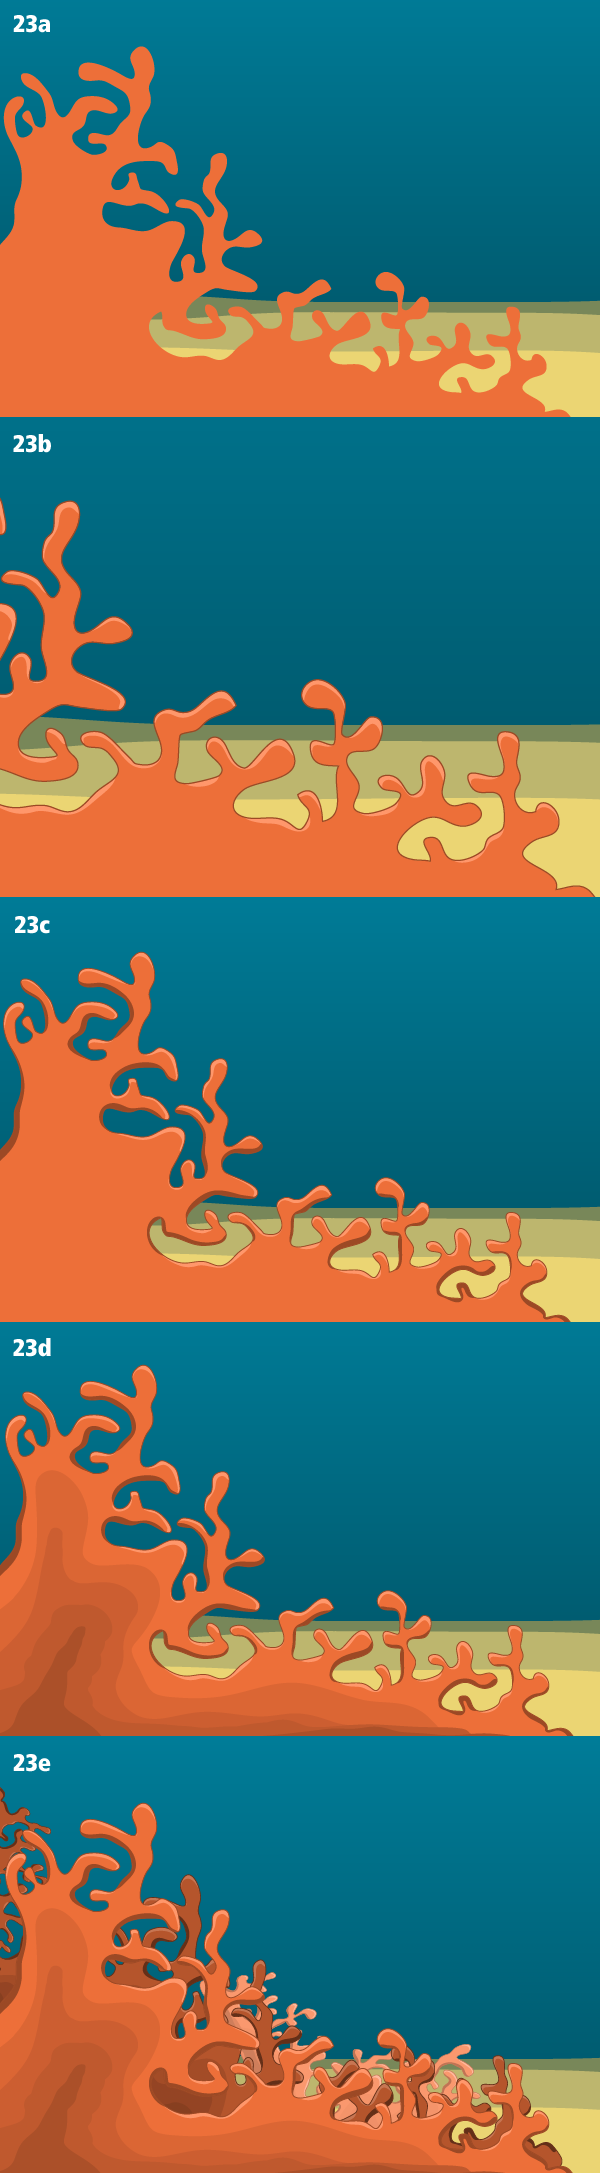
Step 23
At the far left draw a coral formation. Grab the Pencil Tool (N) and draw the outline (23a). Copy and paste the shape in front, remove the fill and add a dark outline. Between these two objects paint the highlights along the top edges (23b). Add the shadows (23c) and a series of darker shapes (23d). Make each highlight and shadow with the Blob Brush, use the Eraser to refine the edges and correct any mistakes. Finally make a couple of copies of the finished coral illustration, change their colors with the Recolor tool and put them together to make a nice formation (23e).
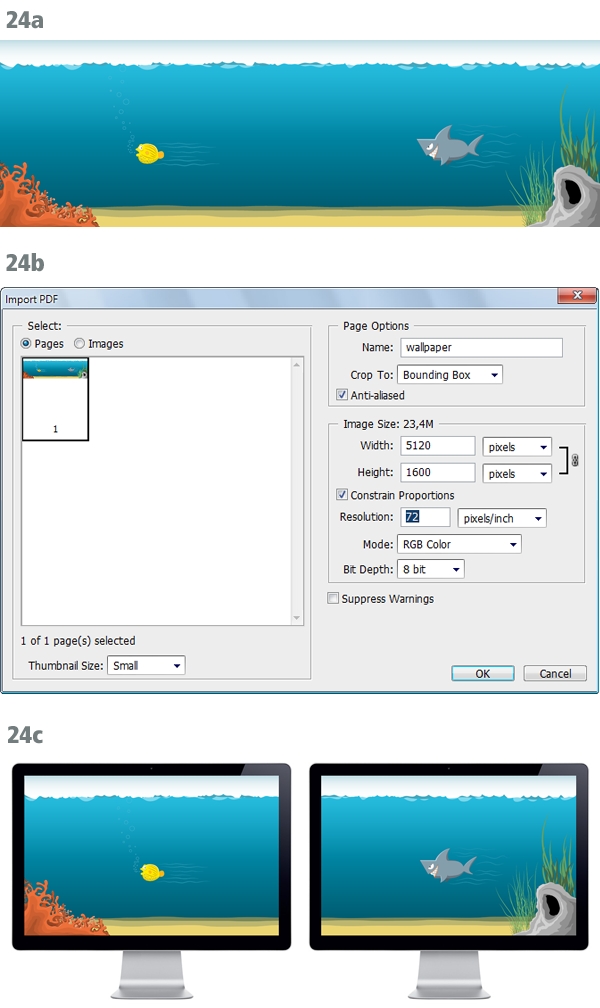
Step 24
Now the wallpaper is finished (24a). All we have to do is open the file in Photoshop, with a resolution of 72 pixels per inch. The image size should be 5120×1600 pixels (24b). When you apply the wallpaper to a dual screen setup you will see a shark on one screen and a fish on the other – the water surface and the sea bottom will continue seamlessly (24c).
Conclusion
You don’t need fancy paths, gradient meshes and effects to create illustrated wallpapers, provided you have a solid sketch and color studies to trace. After that it’s only a matter of patiently tracing your artwork, adjusting the colors and outputting the required sizes. If you come from a traditional art background you might have trouble drawing with Bezier curves. Luckily Illustrator offers tools like the Blob Brush and the Eraser, which allow you to color art in a natural way.
If you liked the idea of an undersea fish chase why not create a similar wallpaper with different characters? If you visit my website you can download the finished wallpaper in many screen sizes, including the iPhone and the iPad. I hope you enjoyed this tut.
