Sound effector is a tool of the Mograph module in Cinema 4D that you can use to create animations which are perfectly matched to a sound or musical score. Through this tutorial you are going to learn how to use sound effector as well as its fine-tune function. We will also use Adobe After Effects to blend the animation that was exported from Cinema 4D with the sound track to make our final composition.
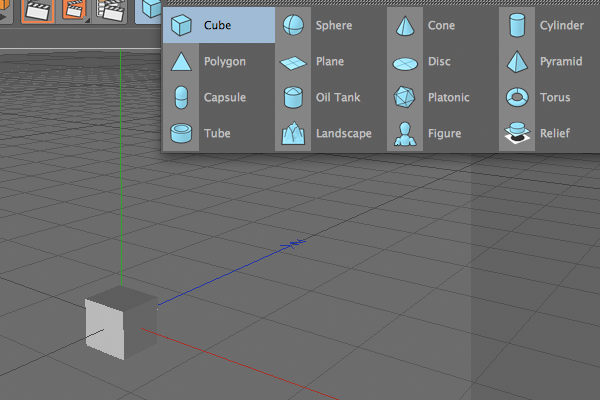
Step 1
Create a 50×50×50 Cube object.
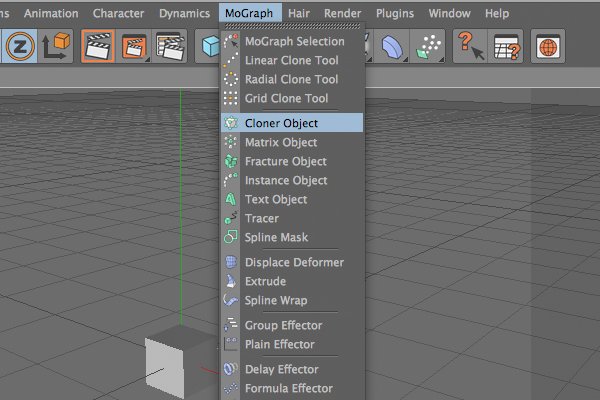
Step 2
Add Cloner Object to the scene.
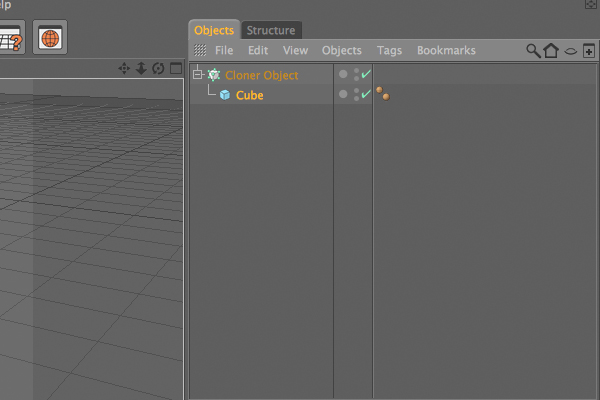
Step 3
Make the Cube a child of that Cloner object.
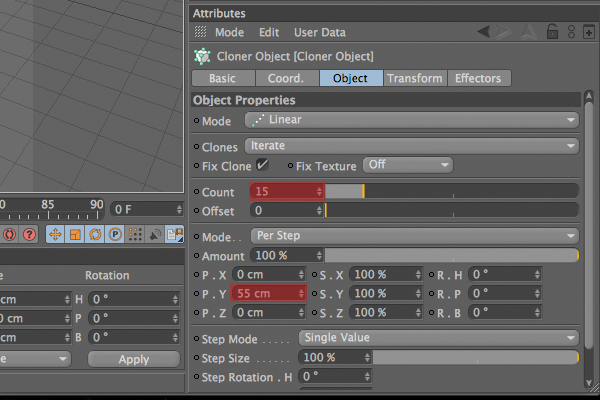
Step 4
Select the Cloner object, and under the Object tab, set the Count value to 15 and the P.Y value to 55.
Step 5
Add Sound Effector to scene.
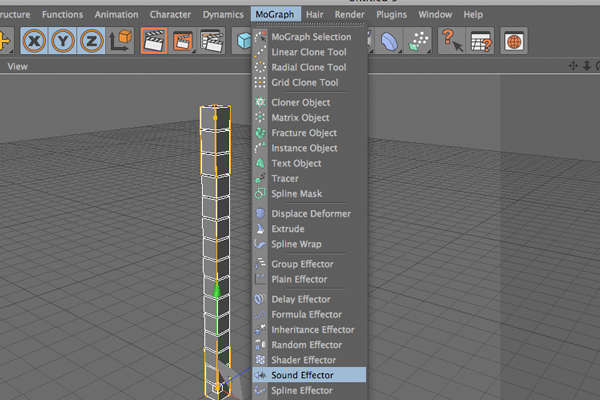
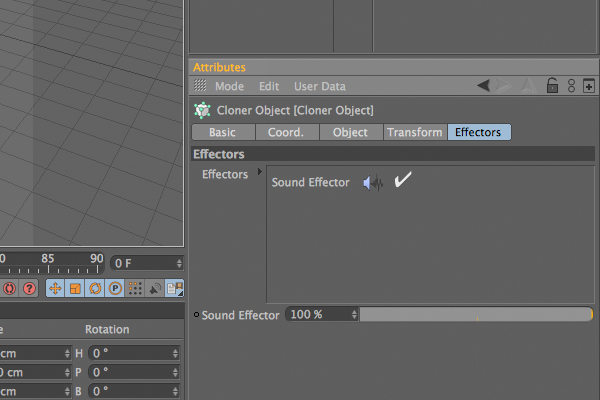
Step 6
Be sure that that Sound Effector is enabled under the “Effectors” tab of Cloner object. If not, drag and drop the Sound Effector over that box.
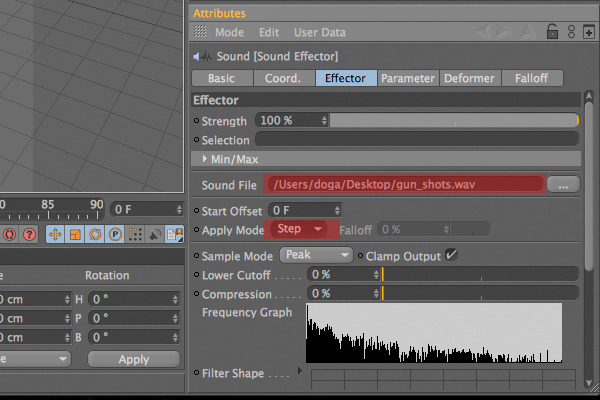
Step 7
Select the Sound Effector object, and under the Effector tab, select a sound file to use. That file must be .wav file, otherwise it won’t work. Again under that tab select “Step” for “Apply mode”.
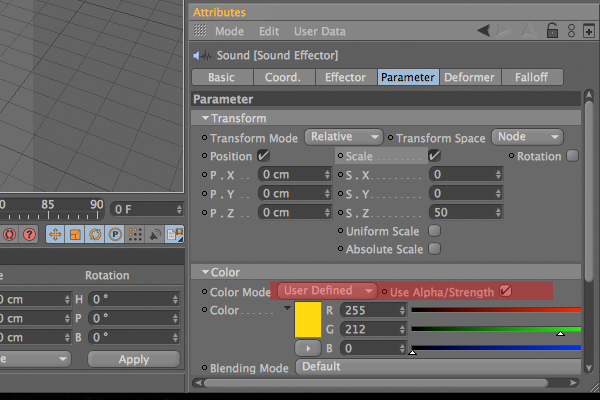
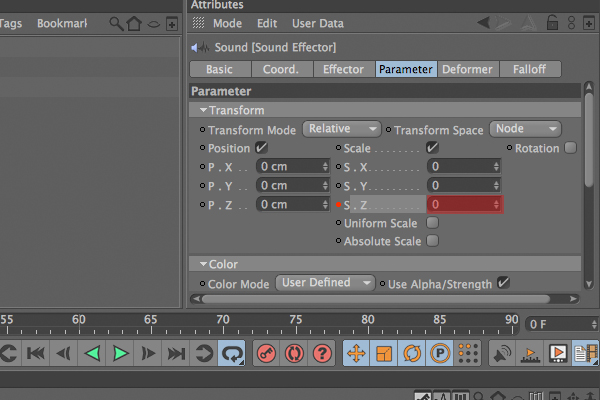
Step 8
Go to the “Parameter” tab. Under the Transform section, turn on the “Scale” option. Now enter 50 for the S.Z value and delete the P.Y value, which is set to default.
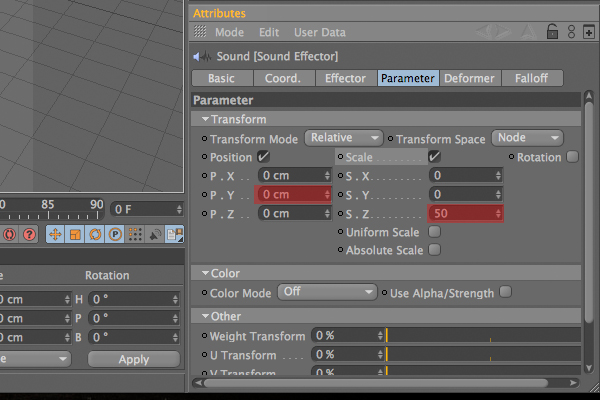
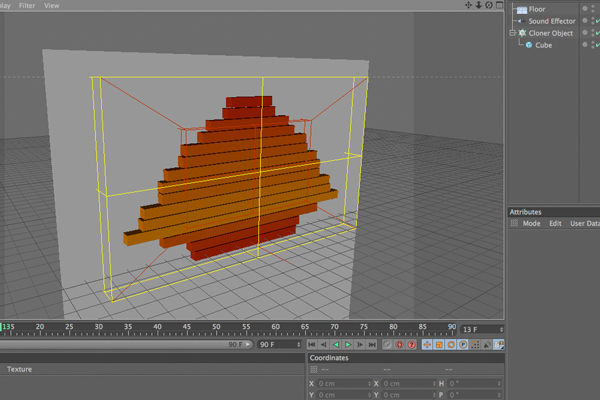
Step 9
Under same tab, go to the Color section and choose “User defined” for the Color Mode. Choose any color you wish. I prefer yellow. Then turn on the “Use Alpha/Strength” option.
Step 10
Select the Cloner object, and under the “Transform” tab, select another color to blend with previous color.

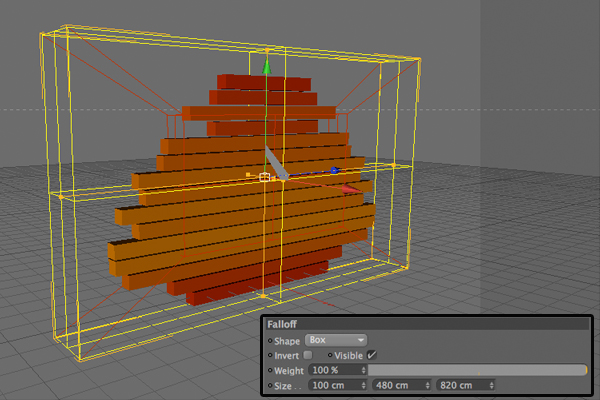
Step 11
Select the “Effector” object, and under the “Falloff” tab, choose “Box” as the “Shape”.
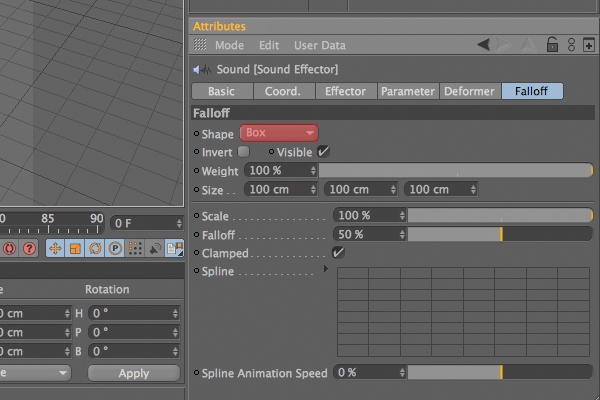
Step 12
Now you can edit that box anyway you like to get best result. I used 100x 480 x 820 for mine.
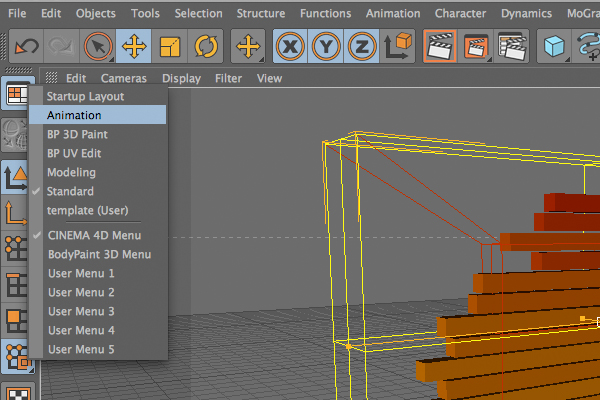
Step 13
Select the “Animation” layout.
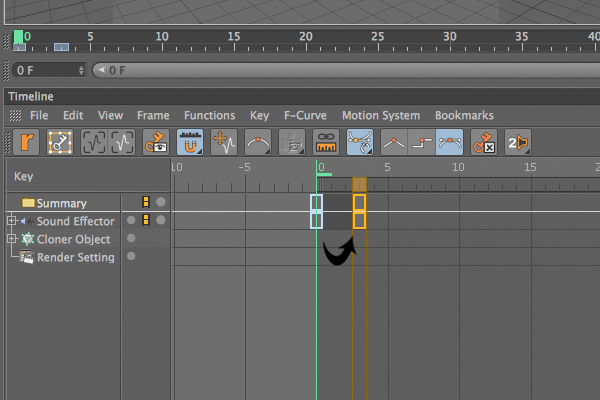
Step 14
Go to the “Parameter” tab of “Sound Effector” and delete the value of S.Z which you had assigned before as 50. Press and hold to control key on your keyboard and click to little dot right near the S.Z section. It must turn to red.
Step 15
There should now be a key on timeline. Click over it and while pressing control key, and drag it to right side. This will copy it.
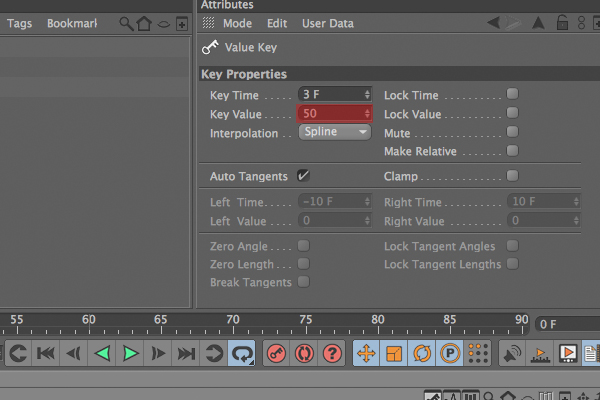
Step 16
Click over the new key, and under key properties, set the “Key Value” to 50.
Step 17
Return to standard layout. Add a “Floor object” (Object > Scene > Floor) to the scene, and rotate it by 90 degrees to create a wall.
Step 18
Create a new material. Choose a color, and turn on the “Reflection” channel. Now reduce the Brightness to 15% and set the “Blurriness” to 20%. Use that material on the “Floor” object.
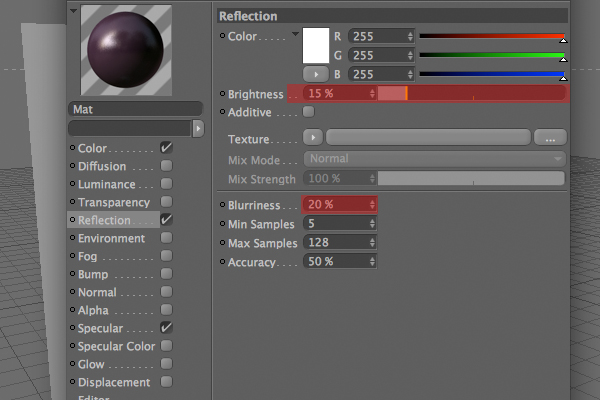
Step 19
Add a Camera object and to set it as main camera. Click the little symbol right next to it.

Step 20
Right click the camera object and select the “vibrate” tag.
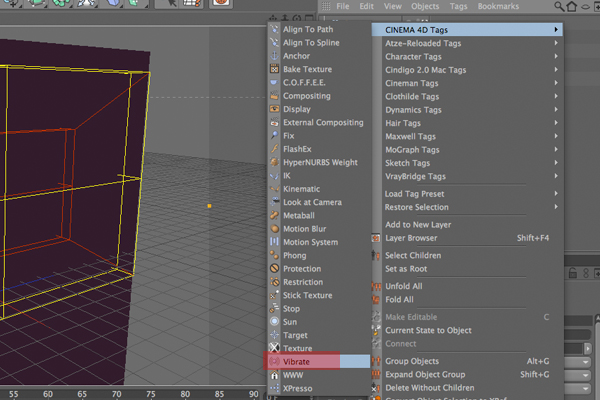
Step 21
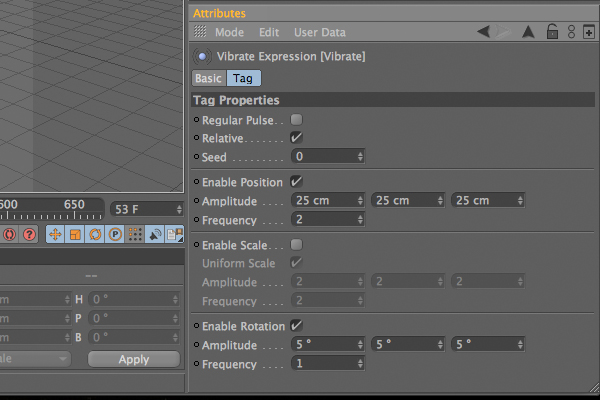
Turn on the “Enable Position” and “Enable Rotation” options. Then set the Frequency of Position to 2, and choose “25 x 25 x 25″ for Amplitude. Set the Frequency of Rotation to 1, and choose “5 x 5 x 5″ for Amplitude.
Step 22
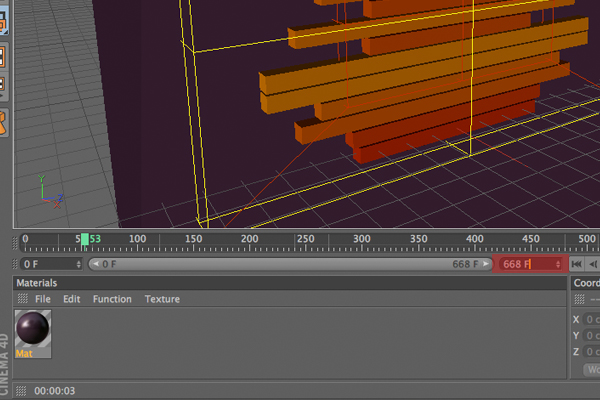
The sound track is approximately 668 frames long, so set the last frame to 668 on the timeline.
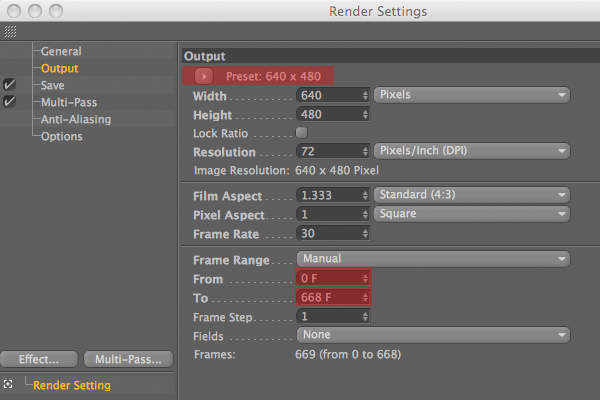
Step 23
Go to the Render Settings (Cmd + B), and navigate to the “Output” section. Here you can set the size of your video. At the bottom, set the range to “from” as “0 F” and “to” as “668 F”.
Step 24
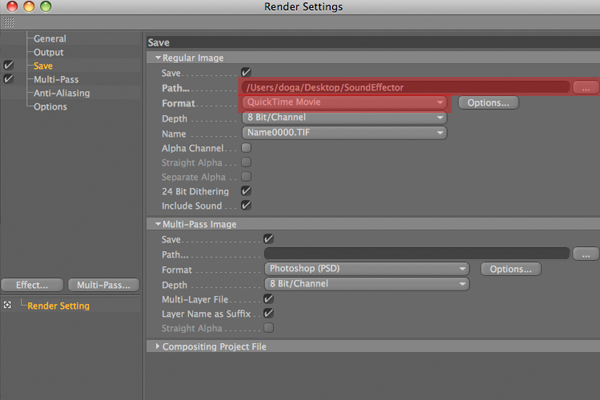
Go to the “Save” section. Select “Quicktime movie” as the format, and choose the location and name to save the video as.
Step 25
Click the “Render in Picture View” button and wait for the render. It may take a while depending on your computer.
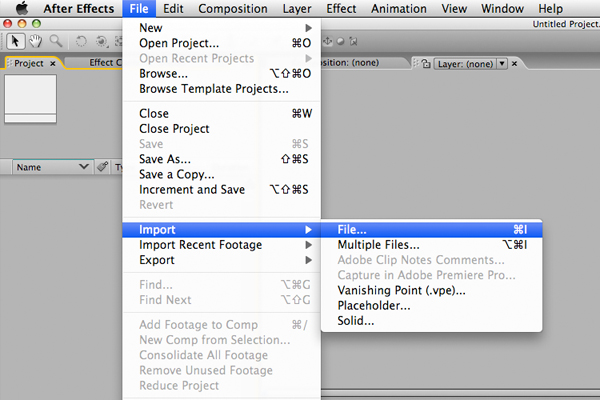
Step 26
Now open After Effects to combine the exported video with the sound. Go to (File > import > file) and then select the video file. Do the same thing for sound file.
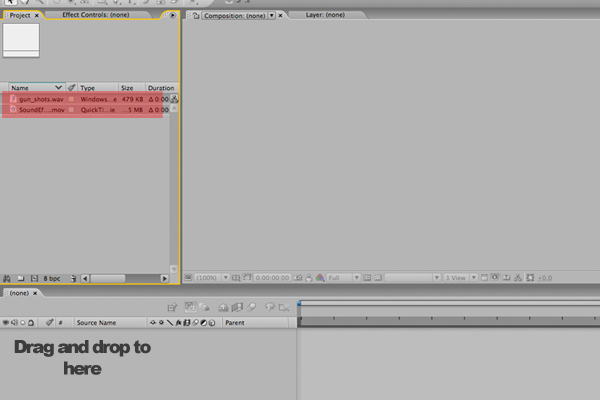
Step 27
Select those two object, and drag and drop them onto the workflow beneath.
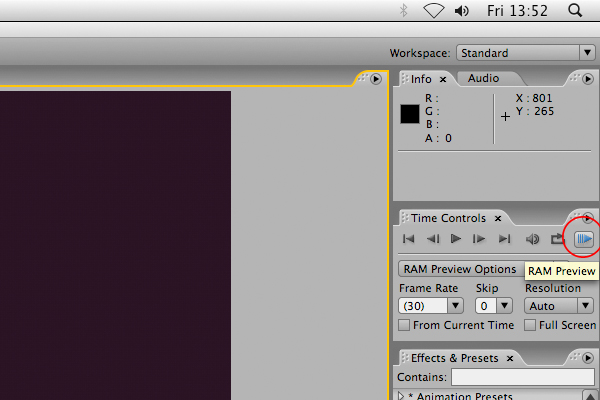
Step 28
Click the RAM Preview button, and you will see the combined result.
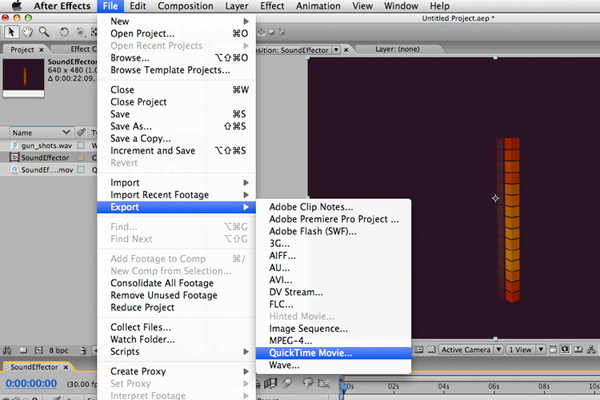
Step 29
Go to (File > Export) and select any file format you want your final video to be!. That’s it. You have successfully used Sound Effector. Now let’s see what you can make it do to!!
Don’t miss more CG tutorials and guides, published daily – subscribe to Cgtuts+ by RSS.