In this tutorial you’ll learn how to use levels in Photoshop to add a spark of life to an otherwise dull photograph. We’ll divide the image into different zones in order to process them independently, achieving an interesting look. Let’s get to work!
Watch the Video
Step 1
The first step is to open the image to pre-process it with Camera Raw. If you have a raw file (like .CR2 files on Canon cameras) just open it in Photoshop. If you are using a JPEG image to start, go to File > Open As, choose “Camera Raw” as the file type and open your file. Then the Camera Raw dialog will appear.
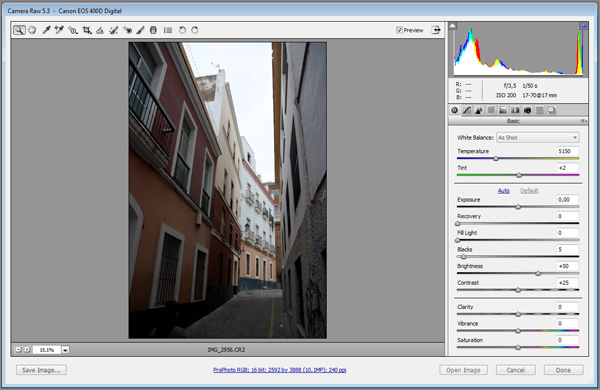
This is the original image:
Step 2
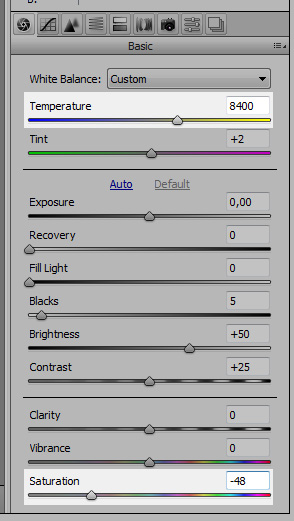
Increase the temperature using the first slider. We’re looking for a warm look, so choose a value close to 8000k. Also, decrease the saturation to give it an older look. Do not change Contrast or Blacks as we will be changing them later using levels and curves.
Step 3
Go to Lens Correction and add some Lens Vignetting by moving the Amount slider down to -21. Then hold Shift and the “Open Image” button will change to “Open Object”. Click it.

Step 4
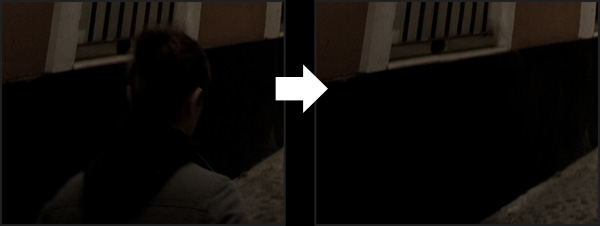
Before starting to tweak levels and curves, remove anything you don’t want in your final image. In the example image there was a girl in the bottom left corner that I had to remove using the Clone Stamp Tool (S). Right-Click the layer and select Duplicate Layer, click OK and then Right-Click the new layer and select Rasterize Layer.
This way you will keep a copy of the original raw file that you can edit in Camera Raw just Double-Clicking on the layer’s thumbnail. Do your cloning and healing process in the new layer.
Step 5
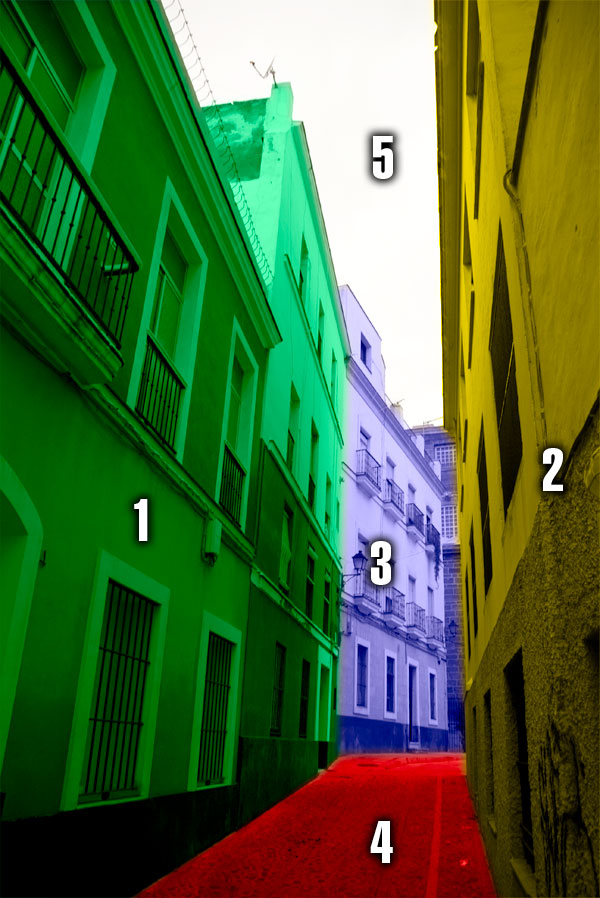
Now we will start working with the different zones of the image. We can divide our image in 5 sections:
- The left walls in the foreground.
- The right walls in the foreground.
- The white building in the background.
- The road.
- The sky.
Step 6
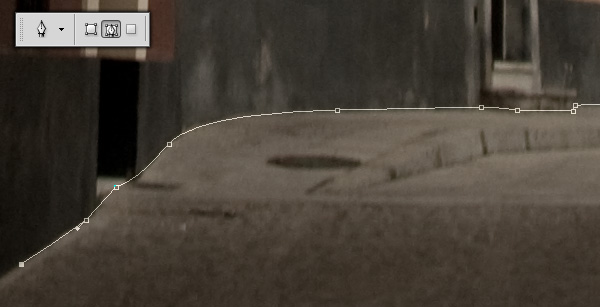
We will start with the 4th zone: the road. Choose the Pen Tool (P) and select the Paths option (second button) in the upper toolbar. Now draw the shape of the road.
Step 7
Once you finish with the Pen Tool, Right-Click the newly created shape and select Make Selection. Make sure Anti-Aliased is ticked and Feather Radius is set to 0px, then click OK. Now go to Layers > New Adjustment Layer > Levels and create a new levels layer called “Road”.

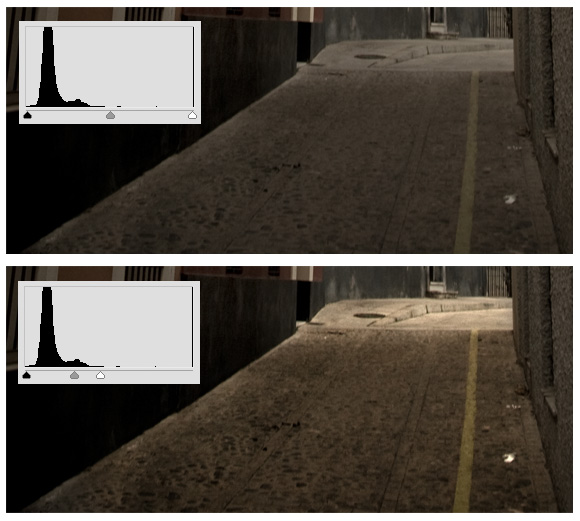
Now let’s adjust the levels. Double-Click on the Road Levels layer and the Levels Adjustment window will appear. Now move the black handle to the beginning of the histogram, and the white handle to the end of the histogram.
This increases the contrast of the area, as the white point of the histogram matches the white point of the area, and the same with the black point. However, you have to be careful because the smaller the area between the black and white handles, the less information you leave on that area. Move the middle handle to the right until it looks good.
Step 8
Now repeat the process with the first, second and third sections (refer to Step 5). Use the Pen Tool (P) (or any other selection tool you prefer) to select the area, make a new Levels Adjustment Layer and move the handles to match the histogram.
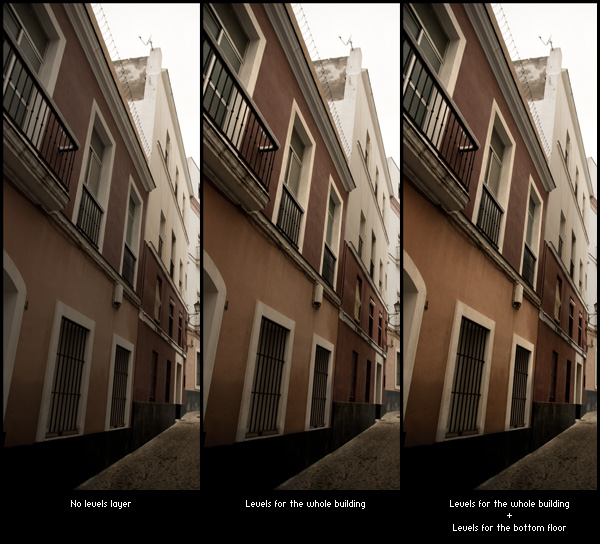
Sometimes, like with the left wall, it’s good to make more than one adjustment layer: one for the whole area, and another one for a smaller area within. For instance, for the left wall I used a layer for the whole building, and then another layer for bottom floor of the first building.
Step 9
Once the road and all the buildings have their own Levels Adjustment Layer, let’s work with the sky. Right-Click on the first layer (the original image, not the rasterized one) and select New Smart Object via Copy. Rename the layer to “Sky Layer” and move it to the foreground. Double-Click it to edit it in Camera Raw and use the following settings:
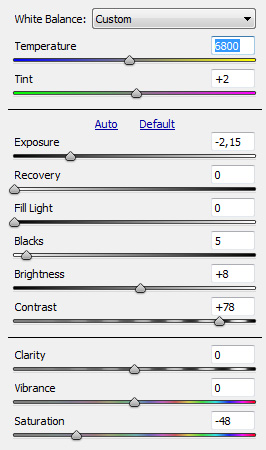
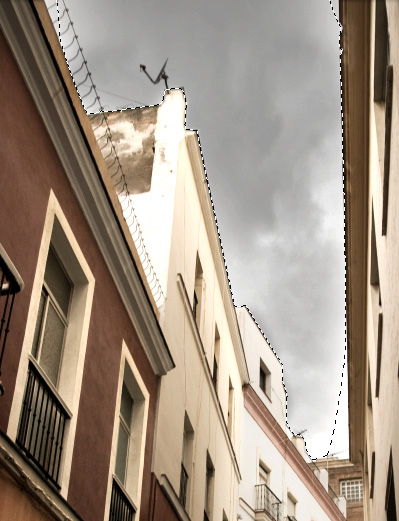
Notice that we have decreased the temperature, in order to cool the sky a little bit. Also we have decreased the exposure and increased the contrast in order to get some details in the clouds. Now use the Pen Tool (P) to select the sky, bordered by the buildings’ roofs.
Right click the new path and choose Make Selection, and use the selection as a mask for the Sky layer. It’s good to feather after having set the mask rather than before, as you can see how the different values for the feather work in real time, using the Masks panel.
Step 10
The buildings are very bright, and the sky is quite dark, so let’s ease that difference a bit. Create a New Smart Object via copy from the original one and use these adjustments in Camera Raw:
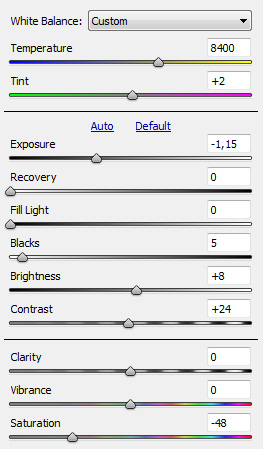
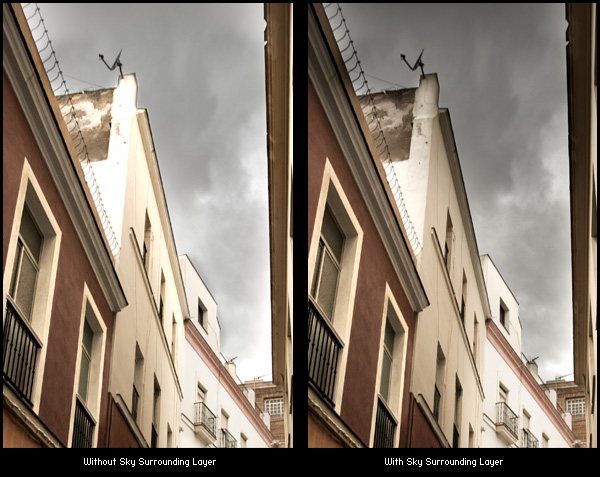
Rename the layer to “Sky surroundings” and Ctrl-Click on the mask of the Sky layer. Go to Select > Modify > Expand and use a value of 100px. Choose the Sky Surroundings layer and then click on Layer > Layer Mask > Reveal Selection. Now it’s time to feather the mask a little bit using Select > Refine Edge. A Feather value about 70px is OK, but experimenting is key.
Step 11
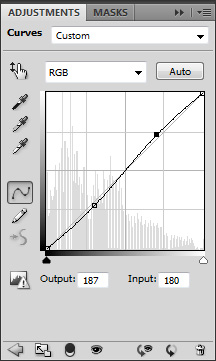
To end up, make a loose selection of the sky and make a new Levels Adjustment Layer to tweak it a bit. Optionally you can add a global levels layer. Now go to Layer > New Adjustment Layer > Curves, name it “General Curves”, and choose Linear Contrast from the dropdown menu on the Adjustments Panel. It will increase the general contrast a little.
Finally, let’s add a black border: Go to Image > Canvas Size, disable Relative, and use 50px as width and height. Click OK, create a new background layer and fill it with black. We’re done!
Conclusion
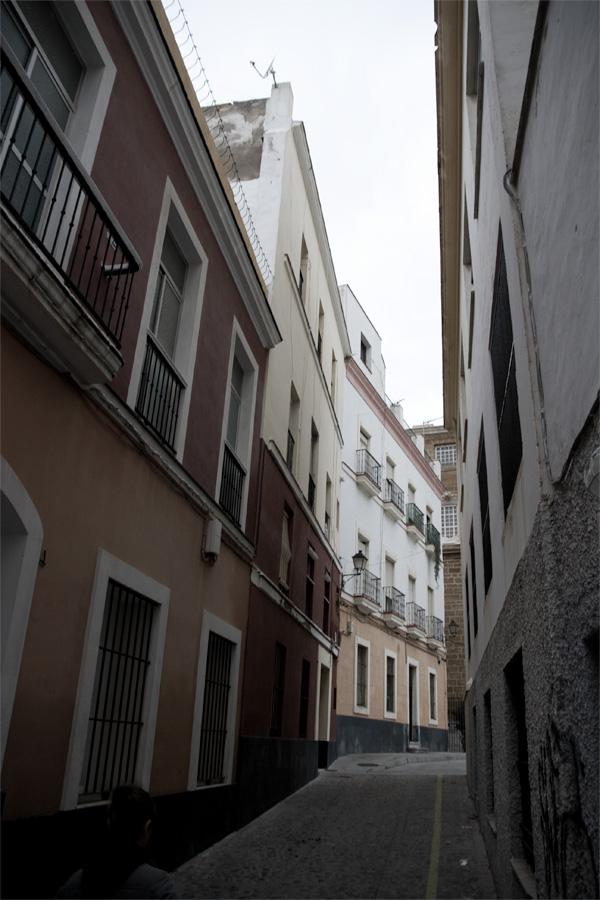
Although the process is pretty simple, the results are quite impressive. Here you can compare the original image and the final one.
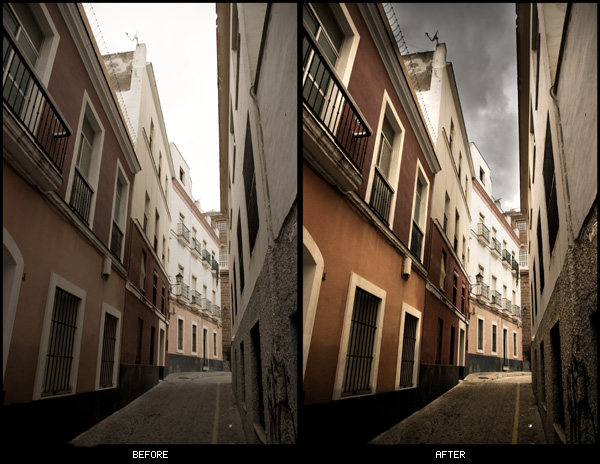
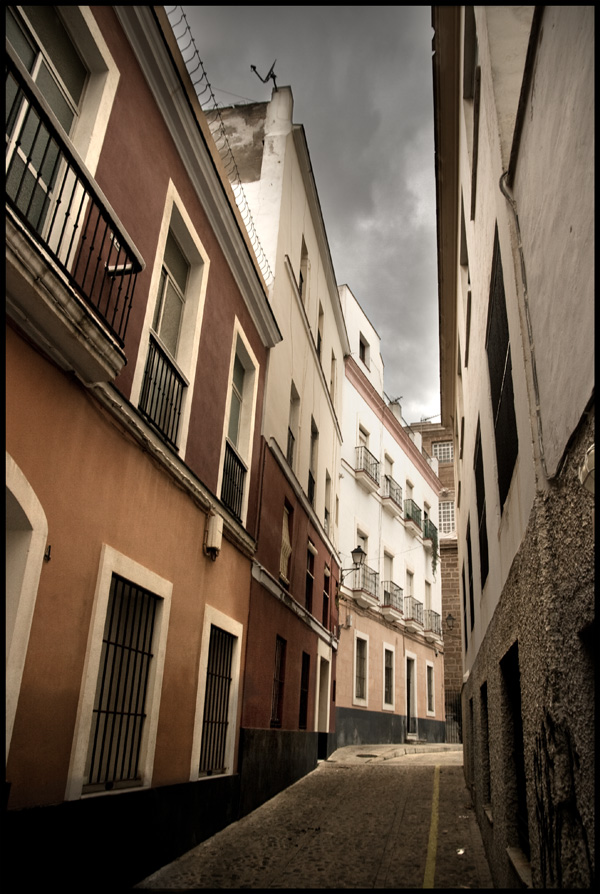
And the final result:
Thanks for reading, and let us know whether you feel this effect is useful for any of your own images!