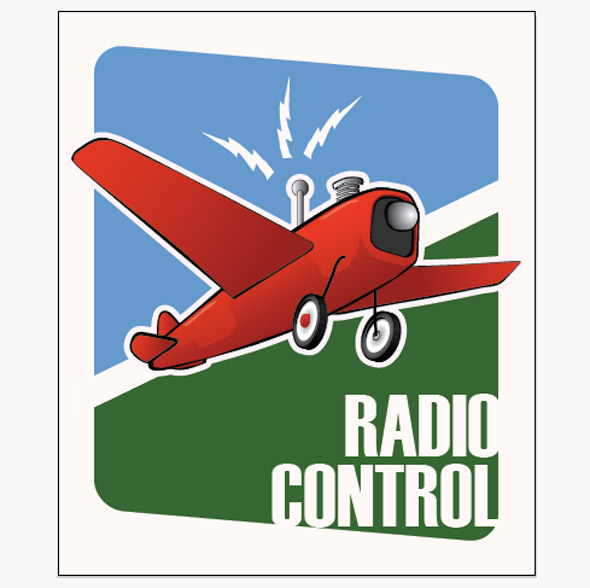
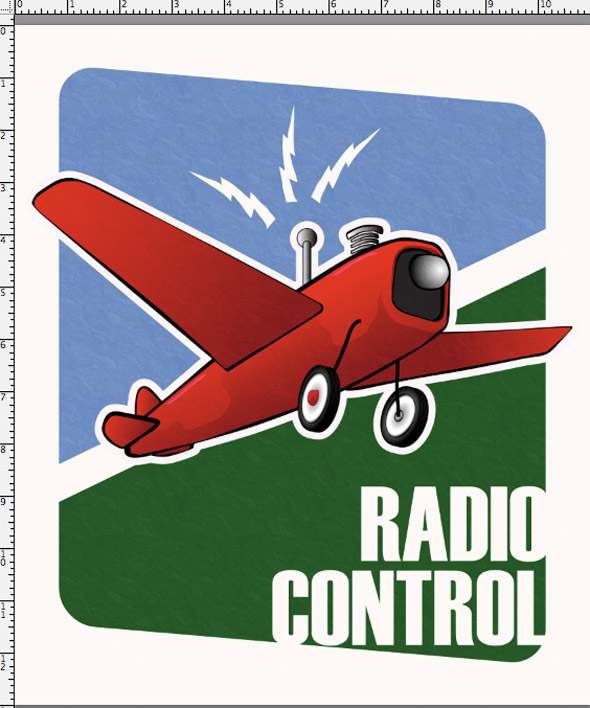
This is an exercise in digital drawing using Adobe Illustrator. In this tutorial, we’ll predominantly be using the Pen, Pencil and Gradient tools to create a fun retro remote-control airplane illustration. It takes quite a bit of work with the Pen, so make sure you’re familiar with the Pen Tool before beginning. Don’t worry if you’re a beginner, this tut is not too difficult, so let’s get on with it!
Step 1
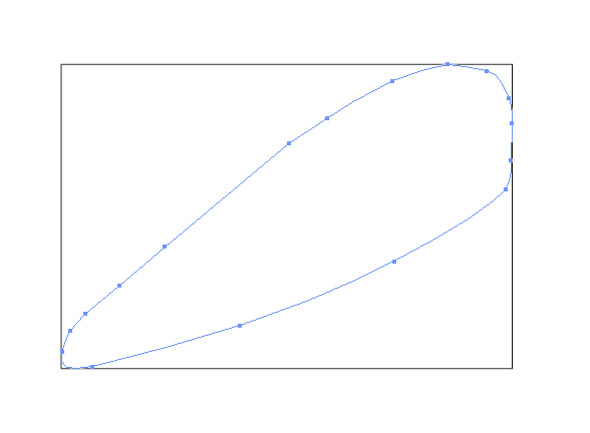
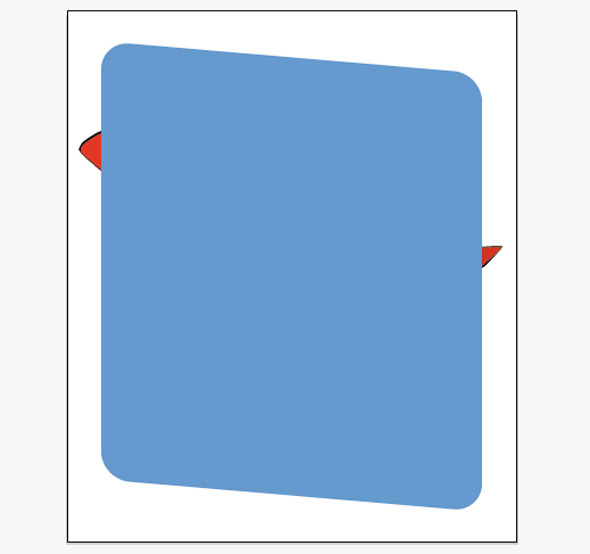
OK, let’s begin by creating a new Illustrator document with an artboard size of 800×950 pixels, or 11×13 inches. In the centre of the canvas, draw a rectangle that is about 450×300 pixels. This is our guide for the airplane’s fuselage, or body. Grab your pen tool and begin drawing the fuselage (body) of the airplane, using the rectangle we just drew as a guide for the size and angle of the shape. It should be pretty thick at the nose. When it’s finished, fill it black with no stroke. Here’s what mine looks like, before it’s black, so you can see the path more easily:
Step 2
Now we draw another shape for the fuselage that’s very similar to the first one. This one is slightly smaller than the first shape and fits inside it. The other shape serves as a thick outline to the body, but doing them as separate shapes gives it a much more natural look than simply adding a stroke to a single shape because there is some variation in the thickness of the black layer. We’ll continue to use this technique for the major shapes in this illustration. You can go ahead and delete the guide rectangle.

Step 3
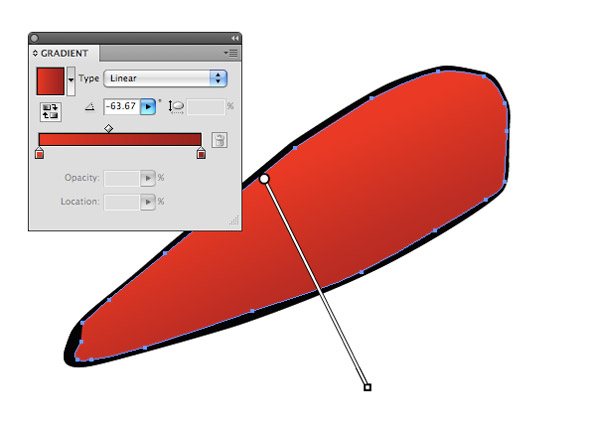
This shape needs a gradient. So, open up your gradients panel. Pick a gradient with two color stops, and proceed to modify it. Put the stops at opposite ends of the track and put the midpoint slider to about 40%. Double-click the first stop, on the left, choose the Swatches option, and choose the Red swatch. Set the second color stop to Mars Red. In the gradients menu in the upper left of the panel, hit the Save button. We’ll be using this gradient throughout the airplane’s body. Now, apply the gradient as shown to the shape you drew in Step 2.
Step 4
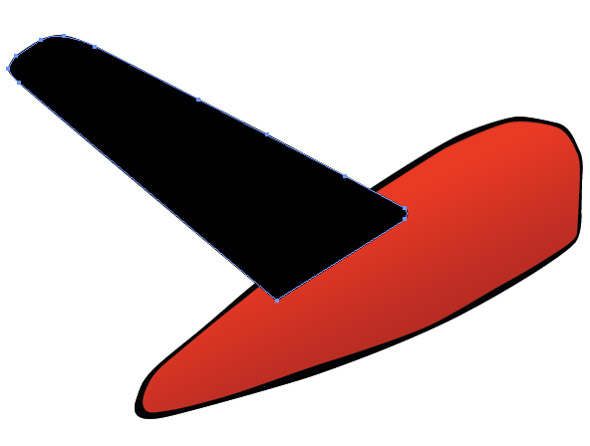
Now, we can begin the wings. Draw a wing shape on the near side of the airplane. Make the tip squareish, like the one shown.
Step 5
As we did for the fuselage, the wing will be composed of an outer shape and an inner shape. Draw the inner shape, leaving a very thin line of the outer shape showing along the front edge. Then, grab the red gradient that we saved in Step 3 and apply it to the wing as demonstrated.
Step 6
For the second wing, we go through the same process. Draw a black outer wing shape with the pen tool and then an inner wing. Apply the Red/Mars Red gradient to the wing so that it gets darker near the body of the airplane. Begin the gradient off the end of the wing and drag left, ending the gradient about two-thirds down the wing. Move these two objects behind the fuselage.
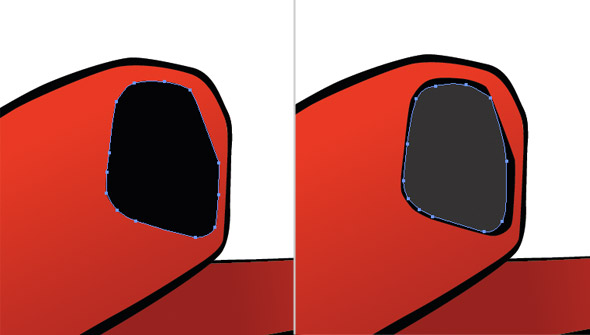
Step 7
The mouth of the plane comes next. This part is quite simple, but it has three parts to it. The first two are easy, we’ve been doing them for every part of the plane so far: an outer shape and an inner shape. Draw the outer shape and fill it black. Next, the inner shape. This time, fill it #333, or another very dark gray. This is how they should look. You can see that I left a part flat, because this is where the propeller is going to go. You can make it curved or leave it flat as you choose.
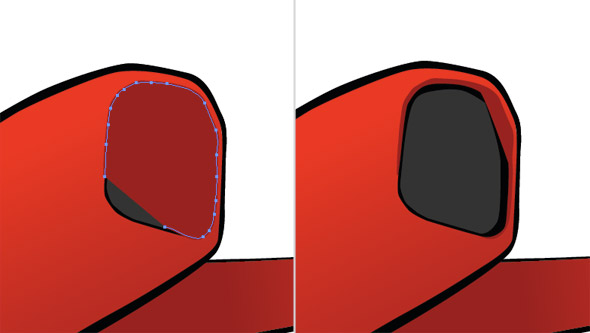
Step 8
We get to add a fun detail to the mouth now, another style of shadow. Draw a shape that is just a little larger than the black outer shape, so that it overlays the shape on the top and right, and just slightly on the left. Fill it Mars Red and move it backward twice to put it behind the other mouth layers.
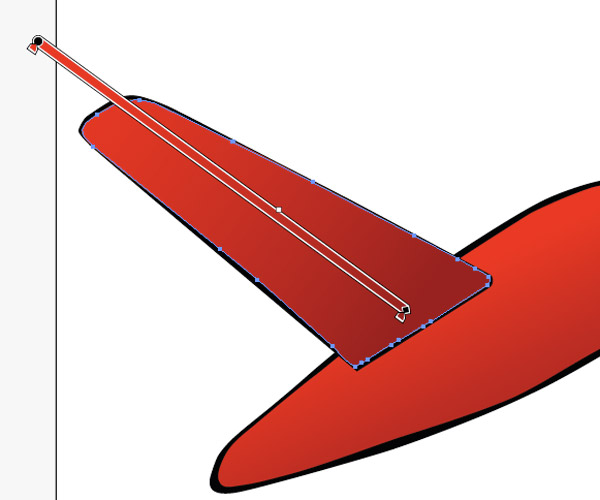
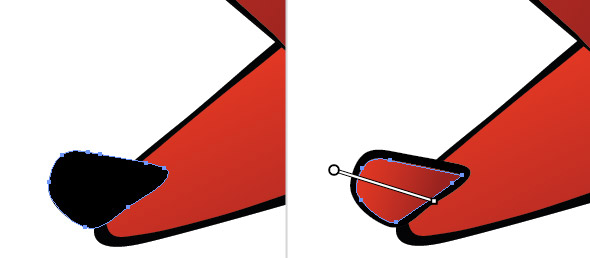
Step 9
Let’s begin the tail now. Pan over to the tail by holding the spacebar and dragging. Grab the pen tool once again and draw the shape for the part of the tail nearest you. Then, draw the inner shape as well. Leave a thick outline on this one. Apply the Red/Mars Red gradient to the tail.
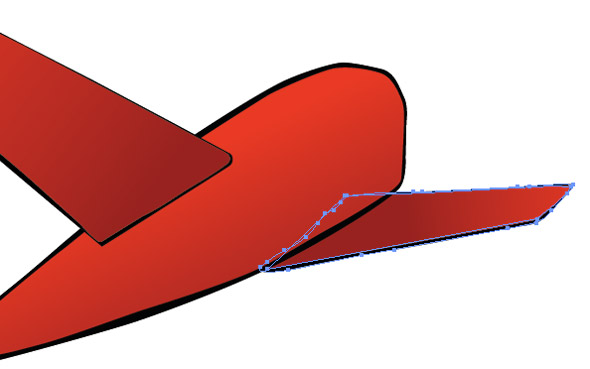
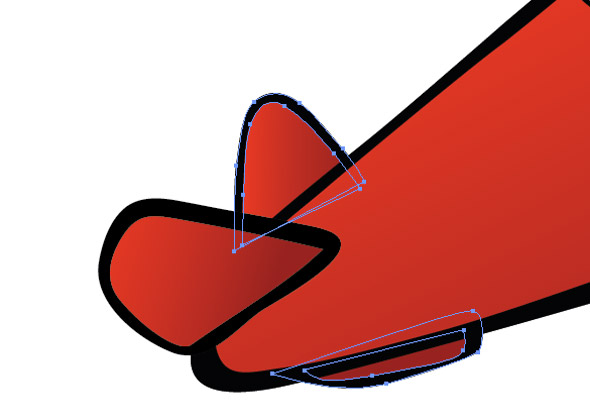
Step 10
Repeat the process for the upright tail fin and the little that you can see of the second tail fin. Since the second horizontal fin is barely peeking out from behind the plane, make it very stubby. Apply the gradient to the upright fin and fill the stubby fin with Mars Red. Move these four objects behind the fuselage.
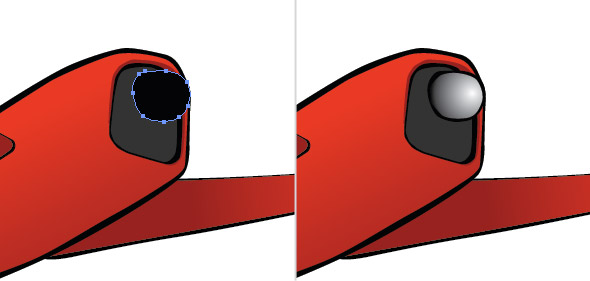
Step 11
Pan over to the nose again. With the Pen Tool, draw a sort of blob here for the propeller. Make it blunt and rounded on the end. Fill it black, then make an inner shape. Open the gradients panel once again, and this time we get to use a different gradient! Select the White to Black gradient and set it to radial rather than linear. Apply it to the propeller head as shown.
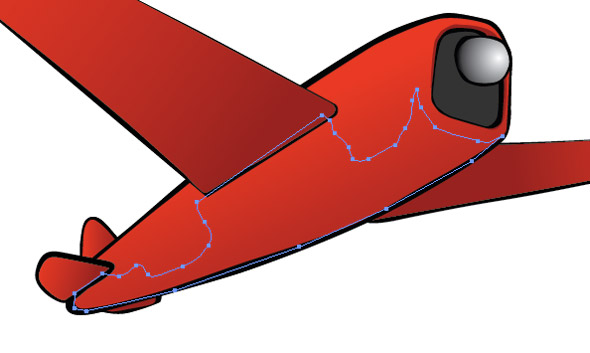
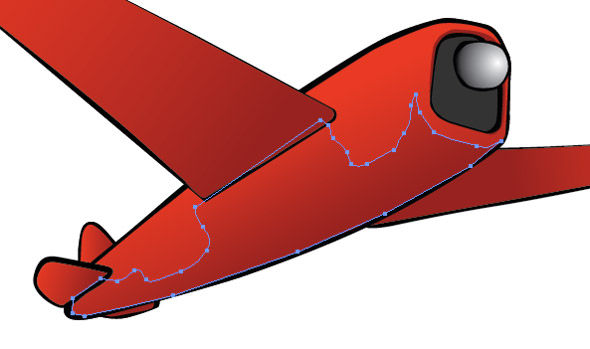
Step 12
Now we get to add some interest to the body of the airplane with a shadow. Select the inner layer of the fuselage, copy it and go to Edit > Paste In Front to put it directly on top of the first one. Grab your Pencil Tool and start reshaping the top of it so it follows the contour of the plane the way a shadow would. It can take a while to get it just right. Use mine as a reference. When you’re done shaping the shadow, apply the Red to Mars Red gradient so the bottom is significantly darker.
Step 13
Select everything on your Artboard and group it. Then open up your layers panel and lock this group. Now, zoom out and take a look at your airplane. We’ve made some progress, and it’s looking good! Save your file before continuing. Unfortunately, we have quite a few details yet to go, and the details take quite some time! So, let’s get started with the accessories.
Step 14
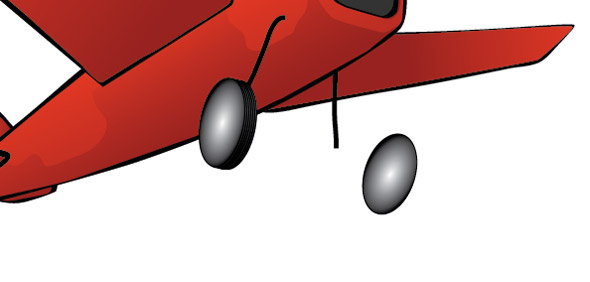
One of the most necessary accoutrements to an airplane is its landing gear. We wouldn’t want anything to happen to this plane of ours, so let’s give it wheels. Start by taking the pencil tool and setting it to a 5pt, black basic stroke. Make two strokes just in front of the wings for our wheels to hang onto. Since there’s a thick outline on the fuselage we can start the stroke for the further wheel in the outline so it looks as though it’s behind the airplane. Also, note that the stroke on the left is very short.
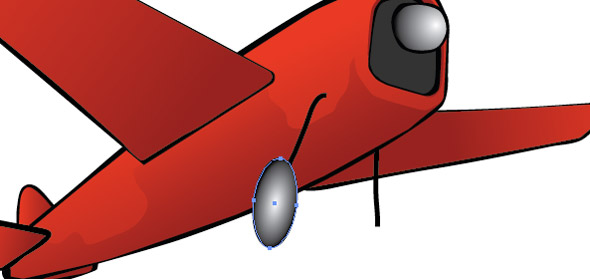
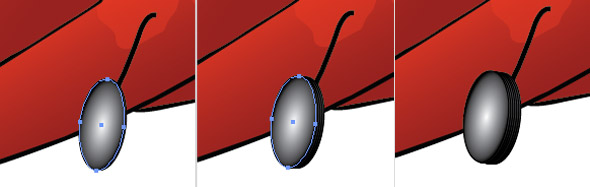
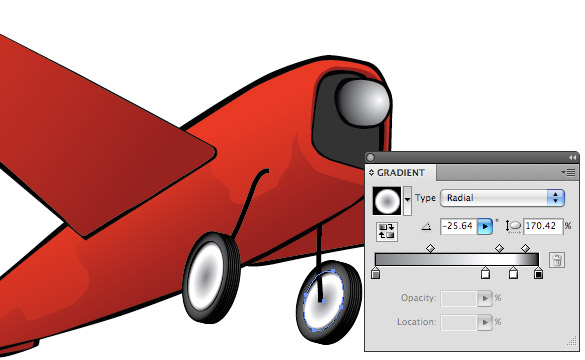
Step 15
Now we get to start the wheels. This is a bit of a process, but it’s actually quite easy. Grab your EllipseTool. Make an Ellipse that is 45×90px and give it a 1 point black stroke. Grab the gradient tool and apply the White to Black radial gradient that we used for the propeller head. Using the gradient tool, squish the gradient into an ellipse so it fits the shape. Rotate the ellipse about -3 degrees.
Step 16
Holding down the Option key, hit the left arrow key to copy the shape and move it 1 point left. Then release the Option key and hit the left arrow key again so the second ellipse is 2 points away from the first one. Repeat this process with the second ellipse, copying it and moving it so the next shape is 2 points from the previous one. As you go, move every third ellipse up 1 point. Keep going until you have about 8 to 10 total ellipses. Select these ellipses and group them.
Step 17
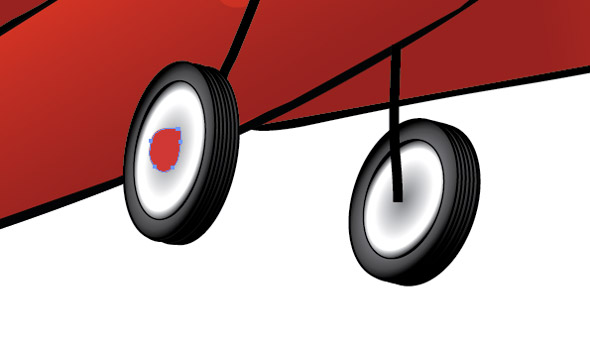
The second wheel is similar, but it has a few differences. First of all, we start with an ellipse that is 50px wide and 83px tall. Then, rotate it about -18 degrees. Apply the White to Black radial gradient so it fits the shape and add a 1 point black stroke.
Step 18
Repeat step 16, but apply it to this wheel instead. Select this set of ellipses, group them, and move them so the centre of the top ellipse is at the point of the leg. You have now created your airplane’s tires!
Step 19
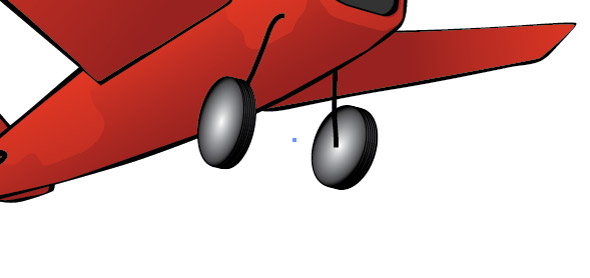
Go back to the first set of ellipses that you made. Copy the ellipse on the top of the stack using the method that we used for making the stack: hold down Option and hit the left arrow key. Keeping the proportions steady, resize this ellipse to about 80% of its original size. This is going to be the wheel, so centre it inside the next ellipse in the stack of tires. Do the same for the second wheel. This is what it should look like:
Step 20
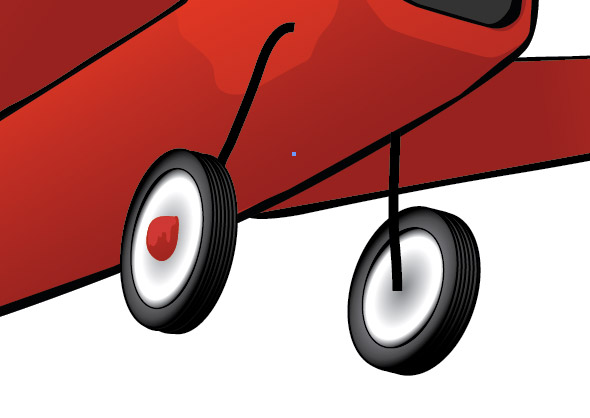
Now we get to have some more fun with gradients. Open up your gradient panel and select the White to Black radial gradient. Put a white color stop at 55% and 85%. Leave the color stop on the far right black, and make the color stop on the far left Graphite. Hit the Save button in the gradient menu in the upper left corner of the panel. Select both of the ellipses you made in the previous step and select your new gradient from the gradient menu to apply it at the correct angles to these ellipses. Now your wheels are made, and we just need the hubs.
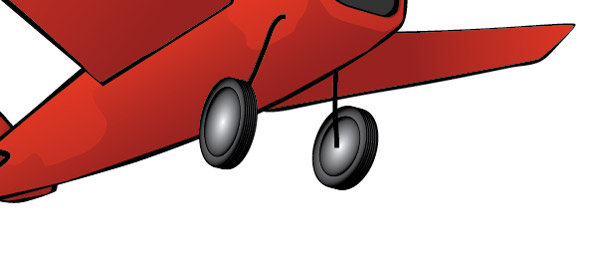
Step 21
With the pencil or pen tool, draw a blob-like shape to be the hub of the wheel. Fill it with Red. Hold down Option and hit the left arrow key to make a copy of this shape, release the Option key and hit the right arrow key to move it back on top of the first shape. With the Pencil Tool, reshape this hub to be a shadow for the first hub shape, similar to what we did with the airplane body. Make this shape Mars Red.
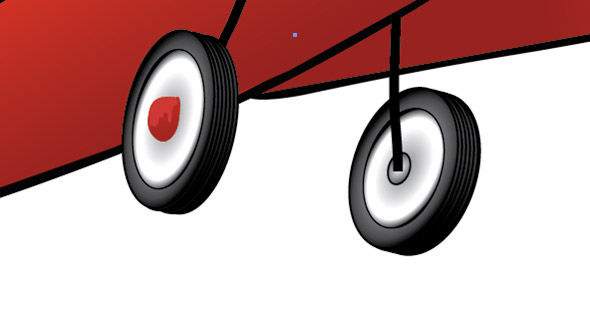
Step 22
For the other hub, simply make a small ellipse with a 1 point black stroke and rotate it about -18 degrees. Apply the White to Black radial gradient and put it behind the airplane’s leg. In your layers panel, select all the parts having to do with the wheels, hubs, tires and legs. Group the items.
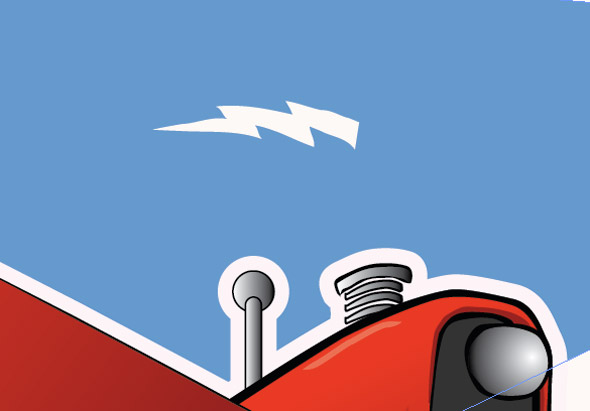
Step 23
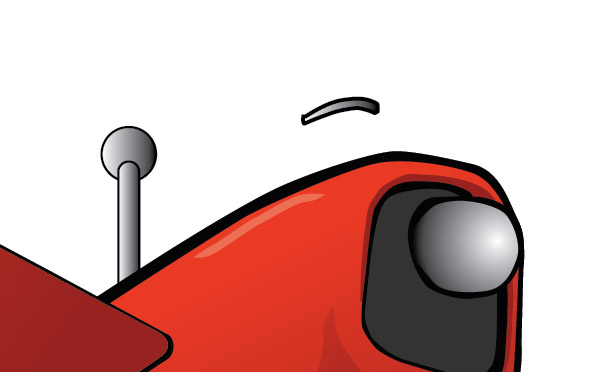
Now we need to make the antenna. Pan up to the top of the airplane. Grab your rounded rectangle tool and make a rectangle that is about 10 pixels wide and 80 pixels tall. Find a good corner radius by hitting the up and down arrow keys while holding the shape. Make the ends round like the one in the picture below. Apply the White to Black linear gradient to it.
Make a circle to sit on top of the antenna. It should be about 25 pixels in diameter. Give it a 1 point stroke and apply the same gradient to the circle.
Step 24
Make the engine comes next. With the pencil tool, draw a shape like the edge of a thick disk. Give it a 1.5 point black stroke and apply the White to Black linear gradient. Copy this shape twice by holding down the Option key and hitting the up arrow key. Align the shapes vertically, leaving a pixel or two of space in between the shapes. Select the three shapes and move them behind the fuselage so they look natural, as shown.

Step 25
To complete the engine, we need to cap it off with a larger shape. For this one, we’ll do an outer and inner shape, as we’ve done with all the major shapes. Start by making the outer shape with the pen tool and filling it black. Then, make the inner shape, also with the pen tool, and apply the White to Black linear gradient to it. As you can see, mine looks a little wobbly. That’s OK, because it fits in with the uneven style of the illustration. Select all the parts of the engine and antenna and group them.

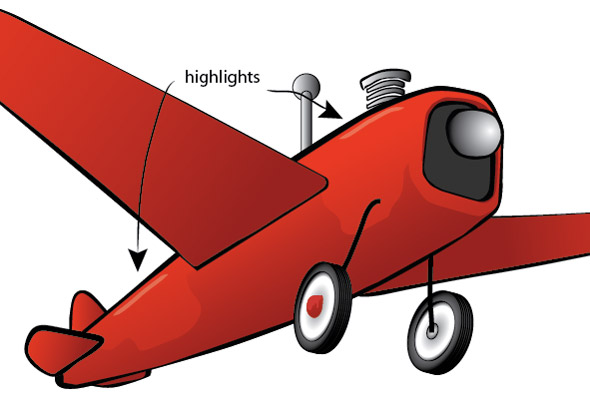
Step 26
Zoom out and grab your brush tool. We’re going to put a couple highlights on the fuselage. Set the stroke color to white, the stroke opacity to 30%, and the stroke size to 0.5 pt. In the Artistic Ink brush library, choose the Tapered Stroke that’s tapered on both ends. Put a quick stroke near the nose and the tail as shown. Add these strokes to the wheels group in your Layers panel.
Step 27
In your Layers panel, unlock the airplane group. Select everything that’s on the canvas, group it, and lock the group. Name the groups as you like. Save your illustration before going on to the final section. We’re getting close to the finish!
Step 28
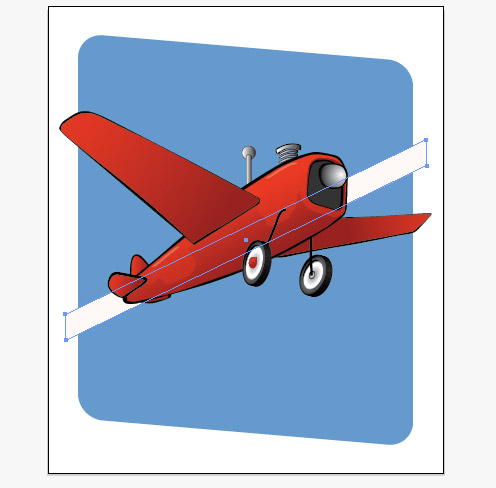
Now we can finally start the background! Grab your Rounded Rectangle tool and make a rectangle that’s 670px wide, 770 px tall and with a corner radius of 50px. Fill it with #6699CC and no stroke. Then, take the Shear tool and shear it to -170 degrees. Be sure to hold down the Shift key as you shear it so it only shears vertically.
Step 29
Select the large blue shape and move it to the back. Now, make a normal rectangle (no rounded corners) that’s about 750px wide and 50px tall and fill it #FDF6F2. Shear this one -25 degrees. Again, hold the Shift key while shearing. Move it behind the airplane but in front of the blue background shape.
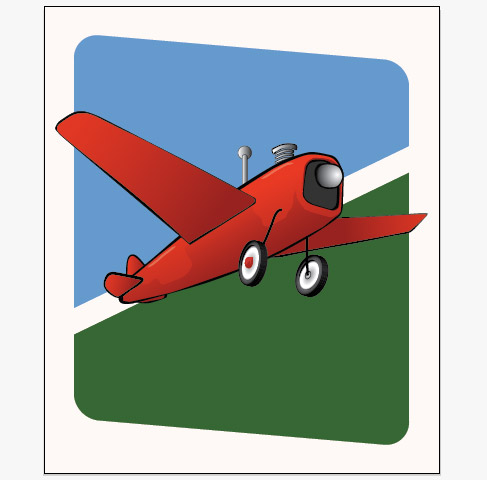
Step 30
Make a large rectangle of the same color (#FDF6F2) that fills the canvas and move it to the back. Select the three shapes. In the Pathfinder panel, select Divide. Go into the group that this creates and fill the lower of the two blue shapes #336633. Exit the group.
Step 31
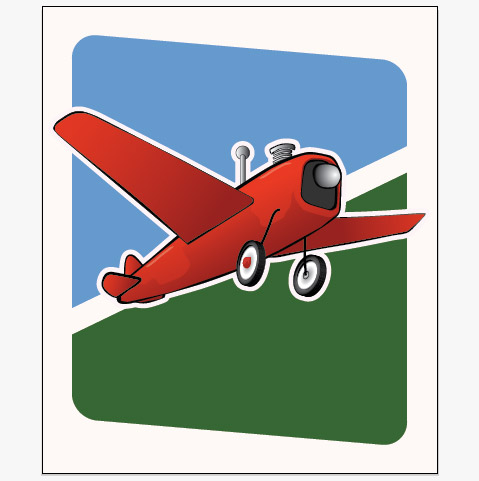
Open up the layers panel and unlock the airplane group. Copy the group, and lock the original, leaving the copy unlocked.
With the copy of the group selected, open the Pathfinder panel again. Hit Unite to make it a single shape. Set it to default color (black basic outline, white fill). Set the stroke to the same color as the background (#FDF2F6) and set it to 20 points. Move it behind the first airplane group.
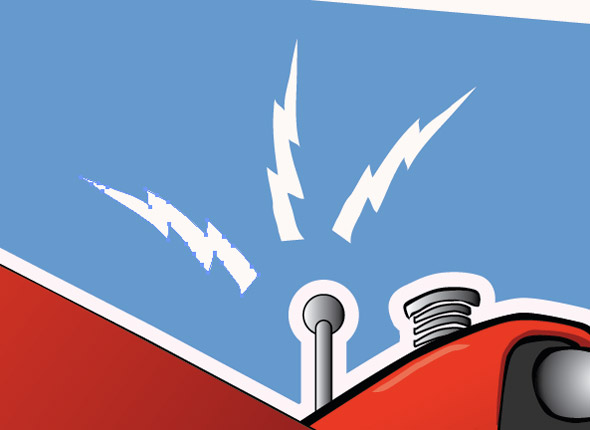
Step 32
Now we get to have some fun. With the Pencil Tool, draw a little bolt of lightning like this. Copy the bolt of electricity twice and arrange them around the antenna like so.
Step 33
Make a text box in the lower right corner. Type Radio Control in all caps and set the font to Haettenschweiler. Make the font size 145 point and set the line height in the Type panel to 115. Make the text color #FDF2F6 and align it as shown.
Step 34
OK, you’re almost done. For the final effect, we have to take this over to Photoshop. Save your project. Now, save it as an Adobe PDF file and open it in Photoshop.
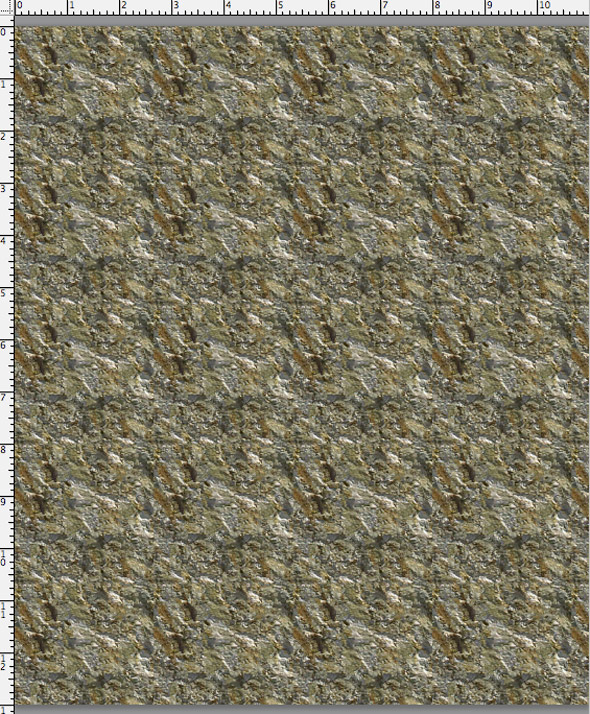
Once you’re in Photoshop, go to your Layers panel > Adjustments Menu and create a new pattern fill. In the pattern fill dialog box, open the Rock Patterns pattern library and choose the Rock Wall pattern. Set the Scale to 400% and hit OK. Looks great, right? Now you notice that this doesn’t look like an airplane; it just looks like an ugly texture. Let’s fix that. In your Layers panel, set the Blend Mode (Layer Mode) of the pattern to Overlay. This has a pretty shocking result, so fix that in turn by putting the layer opacity down to 10%. Now it looks much better.
Step 35
It still looks like something is missing. However, we can add a lot of impact with just a small step. In the Layers panel, right-click the pattern layer and duplicate it to this document. Then set the Blend Mode (Layer Mode) for this pattern layer copy back to Normal. This adds the texture in the light-colored parts and enhances the texture in the darker colors.
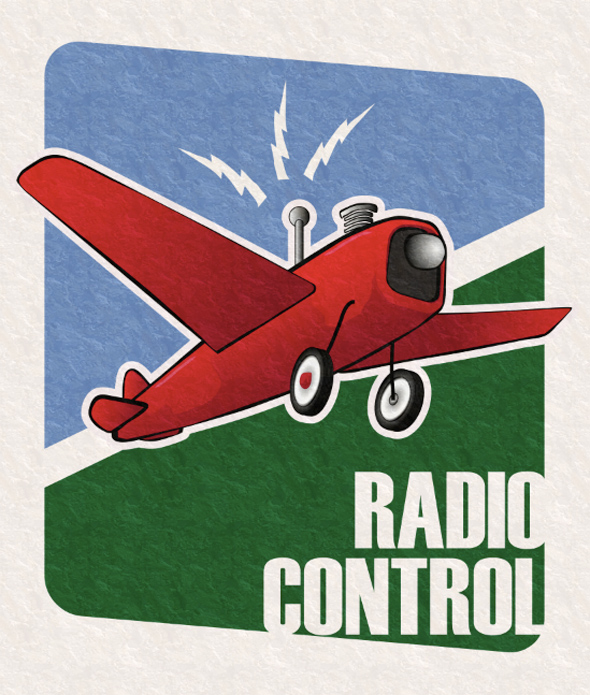
Conclusion
Save your file as a PDF. Believe it or not, we’re finally done! Congratulations! You have here a quality vector Retro RC Airplane poster with raster textures. Now that you’ve completed the tut using the set colors, why not try and make the poster sepia tone or black and white. Have fun!