The racks introduced in Live 6 give you unique tools for creating effects, synths, and drum machines. This very simple interface offers very complex processing for any kind of data. We will learn to use it to create complex morphing multi-effects using racks concepts like Chain, Macro Control, Zone and Fade.
Step 1
For this tutorial take a clip from Ableton. I chose addSnare located in library/clips/drums/destructo97/1-Kit-largeness. Remove few notes to get a simple loop and you can also delete or switch off the Beat Repeat and the PingPong Delay which we don’t use here.

Download audio file (MP3a step 1 original sample.mp3)
Step 2
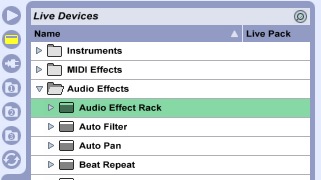
Insert an Audio Effect Rack on the track.
You can find it in Live Device / Audio Effect / Audio Effect Rack.
Step 3
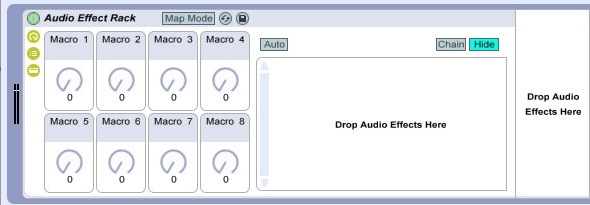
Highlight the three shortcuts on the left to see the Macro Control and the Chain List.
Step 4
In most DAWs the insert channel effects works in serial – the effects output goes to the input of the next effect. The Audio Effect Rack introduces another concept: it works in parallel. Each band is called a Chain . All chains receive the same input signal at the same time. You can insert into a chain as many FX as you want. You can insert into a rack as many chains as you want. You can also insert a rack into a chain. For this tut we’re going to need five chains.
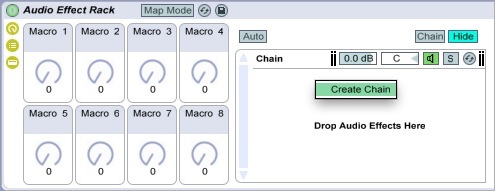
Create a chain by right clicking on the chain list and selecting Create Chain.
Step 5
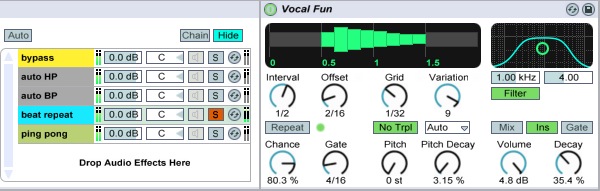
Now it’s time to add the effects. For this tut I’m only using Live’s effects, though many plugins are available.
The first chain will be used to keep the signal dry, or in other words to bypass the FX. So just rename it (cmd/ctr R) to Bypass. You can also change the color.
Select the second chain and drag an Auto filter on it. Solo the chain to edit the filter, rename, color.
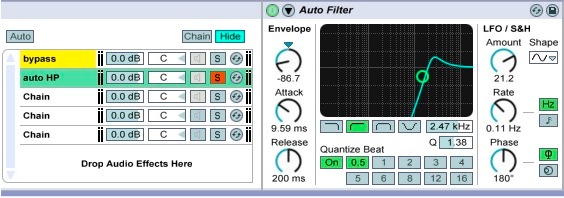
On the third chain drag another Auto Filter. Tweak it and rename…
On the fourth chain drag a Beat Repeat…
On the last chain drag a PingPong Delay…
Now we have four FX and one bypass chain. You can switch them with the solos buttons.
Download audio file (MP3b step 5 switch with solo button.mp3)
Step 6
It will be better to have another way to listen the chains individually. You can do that by creating a Zone.
First: show the chain select editor. Click the green chain button.
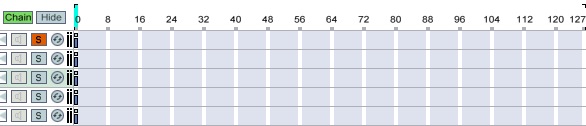
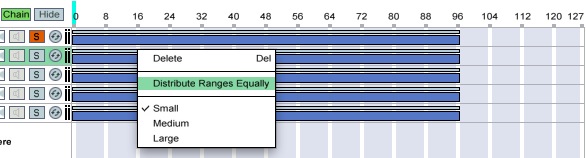
Select all chains (cmd/ctr A). Drag the zone edges to 96, right-click and choose Distribute Ranges Equally.
Now you can select your FX with the little blue sky bar: The Chain Select Ruler. Don’t forget to unsolo the chains.

Step 7
To make things easy we are going to map The Chain Ruler to macro 1. To do that, right-click the Chain Ruler and choose Map to macro 1.
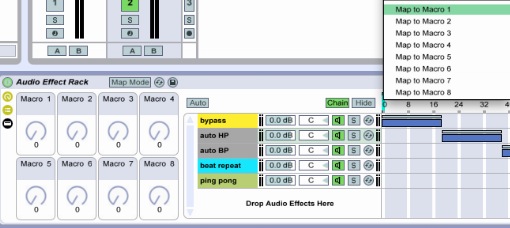
You can rename and color macro 1.
If you have a MIDI controller it’s a good idea to assign it to one knob. Press cmd/ctr M, select the macro, move your knob, and press cmd/ctr M again.
Download audio file (MP3c step 7 chain play.mp3)
Step 8
As you can hear, the transition between the FX is a little bit brutal. So let’s add some fades and morphing.
Each zone is split in two sections: The Zone Range (the big dark blue part used for resizing and moving the zone), and The Fade Range (the little blue sky upper section). To edit them just drag the left or the right edges.
First, expand the Zones Ranges. Then drag the right and left Fade Range edges to create fades.

Start playback and play with the Chain Ruler. You can hear a smoother transition between the FX.
Download audio file (MP3d step 8 smooth.mp3)
Step 9
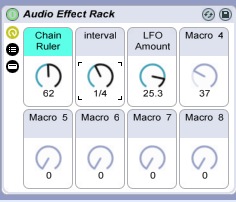
Tweak your Rack with the Macro Control.
Assign the Interval knob of the Beat Repeat FX and the LFO amount of the second Auto Filter to the macro controls 2 and 3 by right-clicking like we mapped The Chain Ruler in Step 7.
Download audio file (MP3e step 9 macro play.mp3)
Step 10
Save your work. You can save your rack setting as a Preset to use anywhere you want, as an insert, in a return track, on the master bus, or like a chain in a rack. We will save it as an insert.
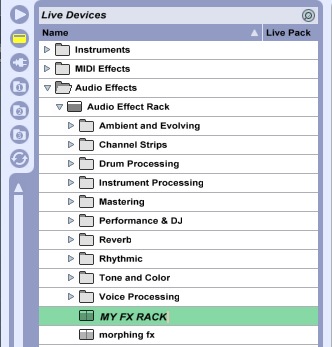
Click the little green floppy disk icon on the right.
Rename it to My FX Rack in the Live Devices browser.
Step 11
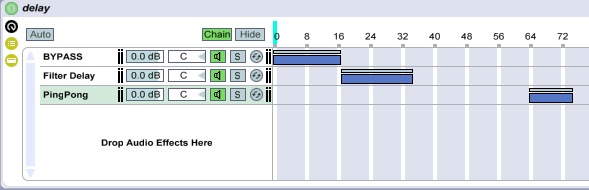
As you can see in Step 8, the PingPong Delay zone range stops at 112. This allows you to hear the tails of the delay without the dry signal when you go over 112 with the Chain Selector.
Let s try this effect in detail with another simple rack composed with one bypass and two different delays and some blank zone.
Download audio file (MP3f step 11 delay fx.mp3)
Step 12
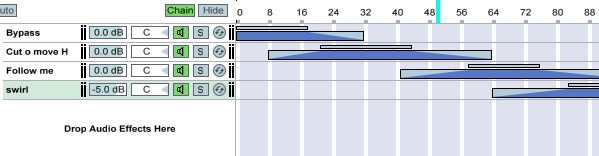
We’re going to build another rack for create a morphing FX. As we did in the earlier steps, create a rack with four chains, the first as the Bypass, the next three as Auto Filters with three different presets. I’ve used Cut o Move H, Follow Me and Swirl, which you can find in Live Devices / Audio Effect / Auto Filter. Draw some fades and play with the Chain Ruler to listen the morph.
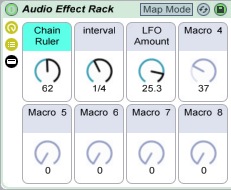
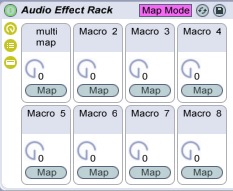
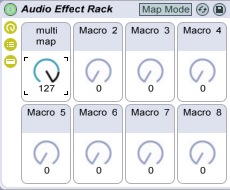
Now we will map different parameters to the same macro control to create a complex assignation controlled with only one knob. Rename Macro 1 to Multi Map, and switch on the Map Mode
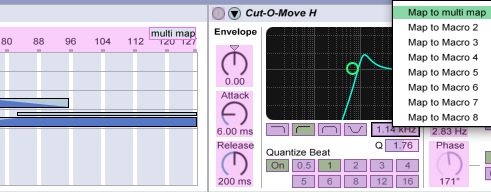
Right-click the Chain Ruler and Cutoff of each Auto Filter, and select Multi Map.
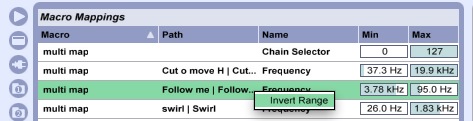
And in the Macro Mappings pool try differently ranges values. You can also invert the range with a right click.
Download audio file (MP3g step 12 Morphing Filter.mp3)
Step 13
We’ve left the best till the end. We will Automate the control with the Clip Envelope Editor. Turn the Multi Map Macro command knob to 127 (remember the clip envelope works with relative values).
Duplicate the Add Snare clip (cmd/ctr D), color the new clip and double-click on it.

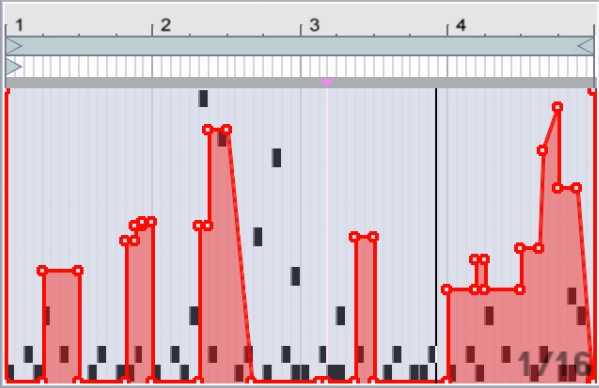
Show the Envelope Editor by clicking the little green arrow on the right. In the device chooser (the first box), select your audio FX rack, and in the second box (the control chooser) select multi map.

Draw an envelope in the Envelope Editor.
Download audio file (MP3h step 13 enveloped.mp3)
Step 14
Now it’s time to experiment with differents settings for the plugins, macros, and all you can imagine. Don’t forgot to have a look to the others racks like the Instrument Rack. You can do the same things, but with MIDI instruments instead.
To keep this tutorial simple, I’ve only used Live effects, but I strongly recommend you use third-party VST/AU instruments and effects inside the rack to obtain an higher quality sound.