In this tutorial we are going to create an unusual, but very cool kind of clock: a binary clock.
Final Result Preview
Let’s take a look at the final result we will be working towards:
Step 1: What Does Binary Mean?
Everyone knows how to count, but not everyone knows there are so many different ways to do so. We are used to a special way of counting named the decimal system, but we could also use the hexadecimal, octal or binary system, among others.
In our decimal system, we assign 10 to represent the total number of fingers and thumbs that we each have, and count up and down from there. But in binary, 10 represents just the total number of thumbs — so 10 in binary is equal to 2 in decimal; 11 in binary is 3 in decimal; 100 in binary is 4 in decimal, and so on. So rather than each column representing units, tens, hundreds, thousands, … (counting from right to left), they represent units, twos, fours, eights, …, doubling each time.
So the number 10 we normally see, can be represented in diferent ways:

The binary system is based on the number two, that’s why it is called binary, as opposed to the decimal system which we normally use and which has a base of 10. The binary system is the one used by computers to work, because we can use it to represent any number using a series of switches “on” (1) and “off” (0).
With this knowledge, can you figure out how to read the clock in the SWF?
If you want to learn more about this you can Google binary numeral system and check the info about it =)
Step 2: Create the Flash File
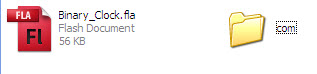
Create a new AS3 Flash file and name it “Binary_Clock.fla”.

Step 3: Set up the Stage
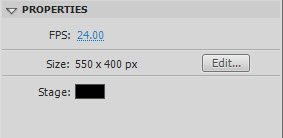
Go to the properties and change the size to 550×400 and the background color to #222222.
Step 4: Get TweenMax
Go to the TweenMax project webpage and download the library for AS3.

Step 5: Extract TweenMax
Unrar the file and copy the folder named “com” to the folder where you have your Binary_Clock.fla file.
Step 6: Create a Bit
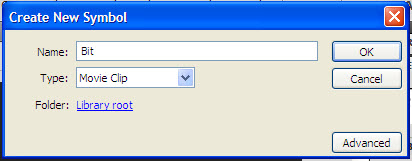
Now, go to Insert > New Symbol and name it “Bit” with type Movie Clip.
This “Bit”” will represent a single digit of a number. It will have two states, in two different colors: one will represent 0 and the other will represent 1.
Step 7: Draw a Bit
Next, in the symbol you just created, make a new square of 50×50px.
Step 8: Modify the Bit
Change the color of the square to #00CBFF and center it.
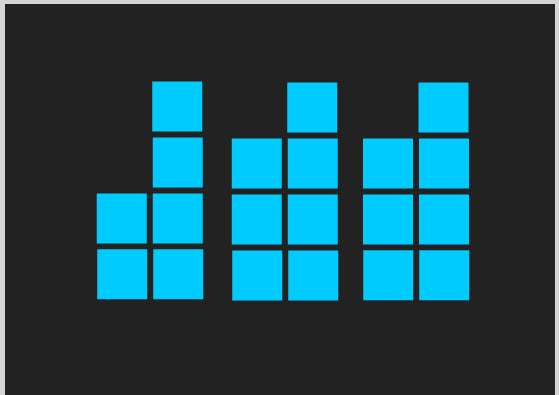
Step 9: Create the Columns
Back on the stage, take some bits from the library panel and arrange them to create the columns we will use. You should end with something like this:
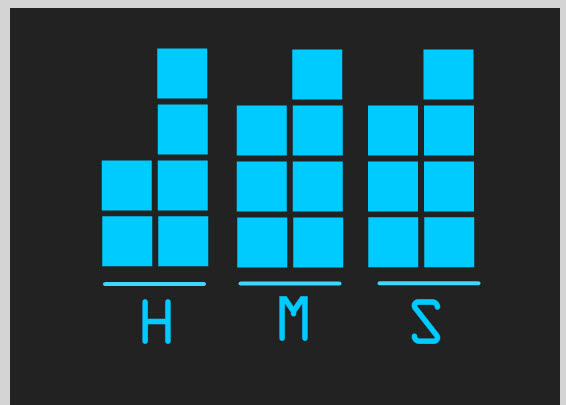
Step 10: Add Some Elements
If you want, you can add text labels and lines to make it more understandable:
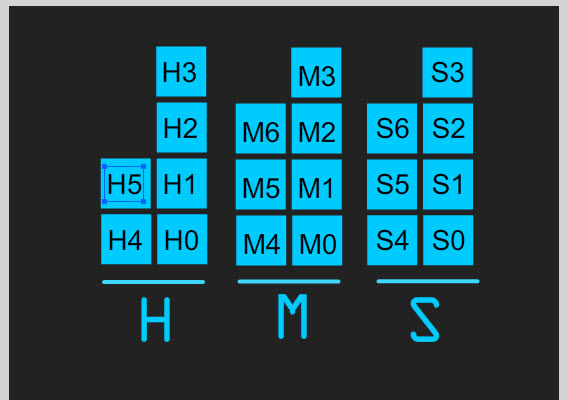
Step 11: Assign Instance Names
For each bit, change the instance name on its properties panel. Give them the names such as the image below demonstrates:
Step 12: Link the FLA to a Document Class
Go to the properties panel and set the class field to “Main”, this is the name of the class we are going to create in the next step.

(Not sure what we’re doing here? Read this quick introduction to document classes.)
Step 13: Create the Document Class
With the stage completed, we can now start coding. First create a new ActionScript 3.0 file and save it as “Main.as”.
Add this code to the file:
package{
	import flash.display.MovieClip;

	public class Main extends MovieClip
	{
		public function Main()
		{

		}
	}
}
Step 14: Add the Imports Needed
We’ll begin by importing the necessary classes. Add this below the package declaration:
import flash.display.MovieClip;
import flash.utils.Timer;
import flash.events.TimerEvent;
import com.greensock.*;
import com.greensock.easing.*;
Step 15: Declare Variables
Next, we’ll declare some public variables. Add this below the class declaration:
public var clock:Timer=new Timer(1000);
public var date:Date=new Date();
public var hr:int;
public var min:int;
public var sec:int;
public var bits:Array;
Creating a new Date object automatically sets it to the current time.
Step 16: Assign Values
OK so now let’s add the code that will start the clock. This goes inside the Main() function:
//With this we assign the actual values for the clock to each variable
sec=date.getSeconds();
min=date.getMinutes();
hr=date.getHours();
clock.start();
clock.addEventListener(TimerEvent.TIMER, setTime);
Step 17: Create the setTime() Function
This is the function that will be called every second.
private function setTime(e:TimerEvent):void
{
	date=new Date();
	sec=date.getSeconds();
	min=date.getMinutes();
	hr=date.getHours();
}
Step 18: Convert Decimal to Binary
This function will change a decimal number to a binary array, which will be used later.
private function dec2bin(dec:int, length:int):Array
{
	var bin:Array = new Array();
	while((dec/2)>0)	//note this has the same effect as "while((dec/2)>=1)"
	{
		bin.push(dec%2);	//dec%2 is the *remainder* when dec is divided by two. 3%2=1; 4%2=0; 5%2=1; 6%2=0; etc.
							//in other words, dec%2 is 1 if dec is odd and 0 if dec is even.
		dec=dec/2;			//because dec is an int, it will be rounded
	}
	while(bin.length<length) bin.push(0);	//this is just padding the array with extra zeroes
	return bin;
}
So, dec2bin(13, 4) gives [1,1,0,1].
Step 19: Create the converter() Function
This function takes a decimal number and uses dec2bin() to convert it to the 2-column array we have in the display.
private function converter(num:int):Array
{
	var st:String=String(num);
	if (st.length==1) st='0'+st;
	var fDigit:int=int(st.charAt(1));
	var sDigit:int=int(st.charAt(0));
	var fColumn:Array=dec2bin(fDigit,4);
	var sColumn:Array=dec2bin(sDigit,3);
	var result:Array=fColumn.concat(sColumn);
	return result;
}
Step 20: Turning Bits On and Off
Now we need to add something that will turn the bits on and off; that’s what this function does:
//newBits is the 2-column array we get from converter(), target is "H" "M" or "S" to indicate which column to use
private function turnBits(newBits:Array, target:String):void
{
	//Loops through the 2-column array to change the state of the bit
	for(var a:int=0; a<newBits.length; a++)
	{
	   //This checks if you are now trying to access element 6 of the hour columns; remember that the H col only has 5 bits
		if((a!=6)||(target!="H"))
		{
			//if it is 0, get the instance named for example "S0" which will be the first bit then "S1" and so on
			if(newBits[a]==0) this.getChildByName(target+String(a)).alpha=.2;
			//it it is 1, change the alpha to 1 (Turn it on)
			else this.getChildByName(target+String(a)).alpha=1;
		}
	}
}
Step 21: Modify the Functions
A couple of modifications to the Main() and the setTime() Functions: we just need to call the function so the changes are made each second and at the start:
public function Main()
{
	sec=date.getSeconds();
	min=date.getMinutes();
	hr=date.getHours();
	turnBits(converter(sec),'S');
	turnBits(converter(min),'M');
	turnBits(converter(hr),'H');
	clock.start();
	clock.addEventListener(TimerEvent.TIMER, setTime);
}

private function setTime(e:TimerEvent):void
{
	date=new Date();
	sec=date.getSeconds();
	min=date.getMinutes();
	hr=date.getHours();
	turnBits(converter(sec),'S');
	turnBits(converter(min),'M');
	turnBits(converter(hr),'H');
}
Try it out, and you’ll see it correctly display the time. But we can do better…
Step 22: A Little Bit of Style
This is where TweenMax comes in. We will add glow and ease to give a better look to the clock. Modify your turnBits() function like so:
private function turnBits(newBits:Array, target:String):void
{
	for(var a:int=0;a<newBits.length;a++)
	{
		if((a!=6)||(target!="H"))
		{
			if(newBits[a]==0) TweenMax.to(this.getChildByName(target+String(a)), 1, {glowFilter:{color:0x00cbff, alpha:0, blurX:15, blurY:15,strength:1},alpha:.1});
			else TweenMax.to(this.getChildByName(target+String(a)), 1, {glowFilter:{color:0x00cbff, alpha:1, blurX:20, blurY:20,strength:.8},alpha:1});
		}
	}
}
And that’s it! We’ve finished our tutorial =)
Conclusion
Now we have an attractive clock which we could use as our screensaver or add to a webpage.
This is my first tutorial so I hope you liked it. Thanks for reading!