Today, I can assure you that Gradient Mesh has become absolutely manageable, it became possible thanks to Mesh Tormentor, which was developed by a great programmer Yemz. This plugin has features that make your work with Gradient Mesh enjoyable and can save you a lot of time.
In this tutorial we will take a look at its basic commands: removal of unnecessary knots of the gradient mesh, the creation of the Art Brush of the Gradient Mesh, joining of two or more Gradient Meshes, Gradient Mesh color cloning, and mastering a lot of interesting techniques. It is quite a gift for those who work with Gradient Mesh, because Mesh Tormentor is an absolutely free plugin.
Step 1
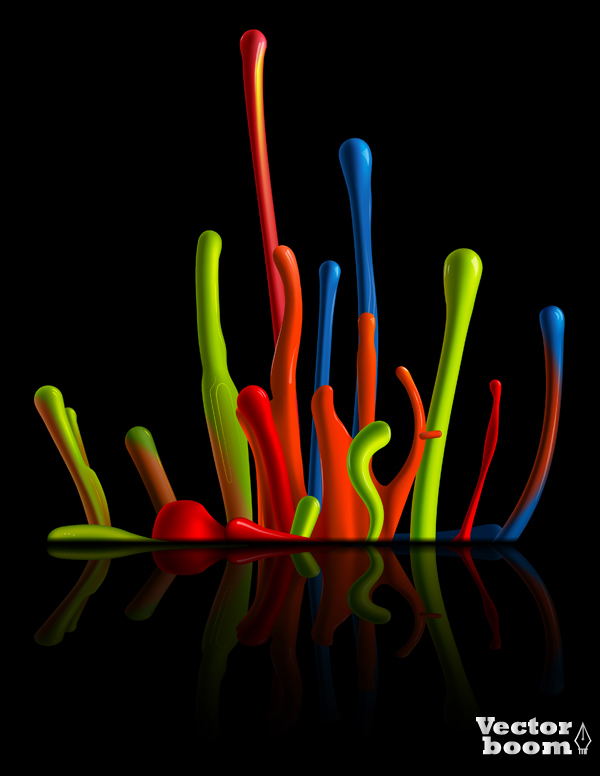
We will use the Art Brush from the Gradient Mesh object to create multi-colored drops of paint. You will say it’s impossible and you will be right. It had been impossible until the Mesh Tormentor came into being. Let’s see how this can be done. Take the Ellipse Tool (L) and create a circle filled with a dark blue color.
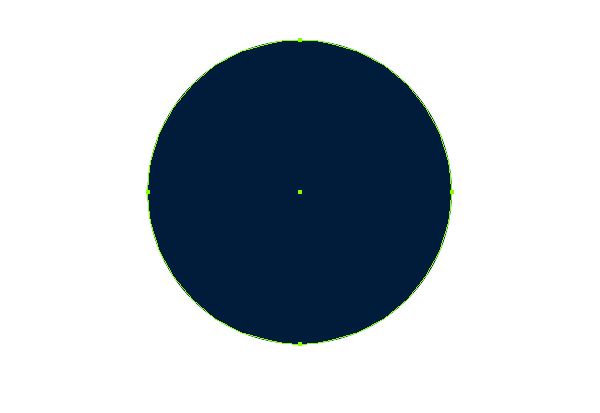
Now take the Gradient Mesh Tool (U) and create a gradient mesh node slightly above and to the left of the center of the circle, then fill it with a blue color.
Step 2
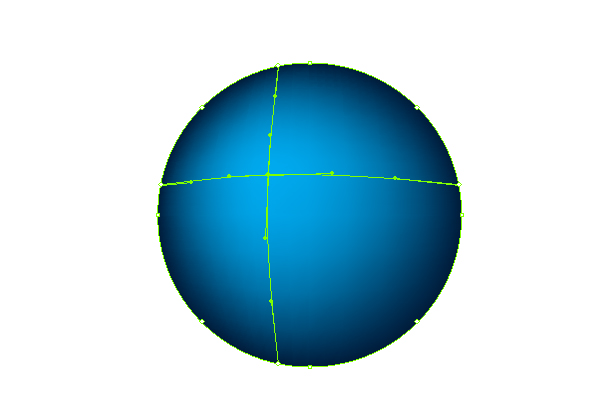
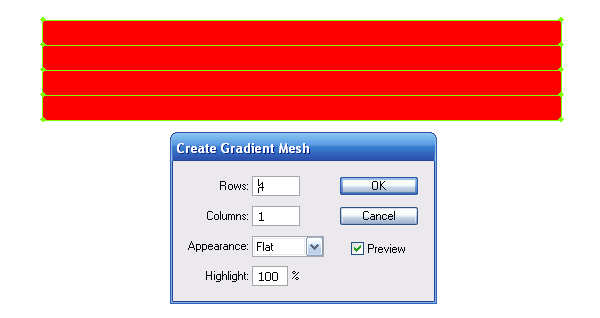
Take the Rectangle Tool (M) and draw a rectangle filled with dark blue.

Keep the rectangle selected, go to Object > Create Gradient Mesh… and set the number of rows and columns in the dialog window.

Now with the help of the Direct Selection Tool (A) select nodes and recolor them in different shades of blue. You should get a resemblance of a linear gradient.
Step 3
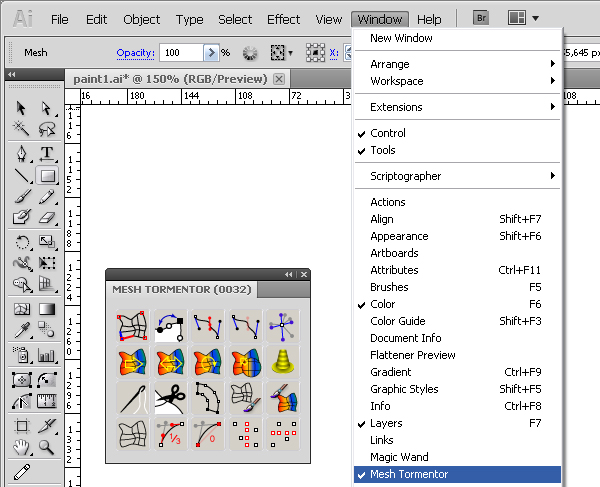
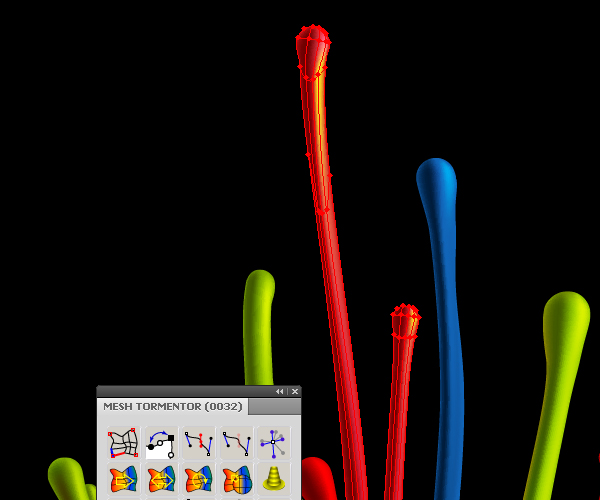
It’s time to use the Gradient Mesh Plugin. After installing the plugin to your computer, a menu item with its name will appear in the Window’s menu.
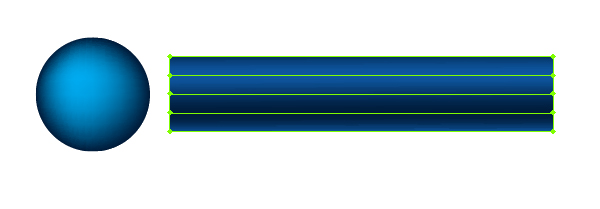
Sewing Gradient Meshes together will be the first feature of this plugin that we will be using. Select both of the created objects and click on the Sew together button from the Mesh Tormentor palette.
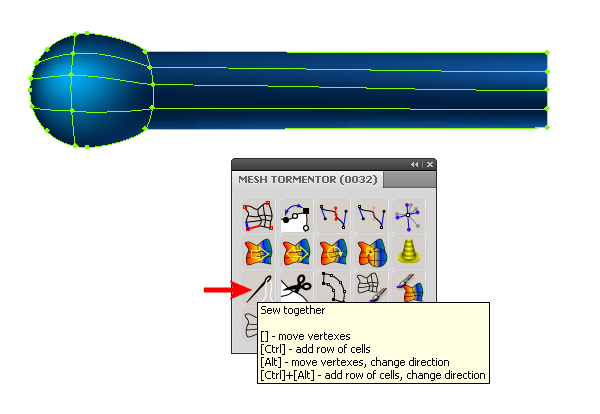
There is no other ways to sew mesh objects! Mesh Tormentor has 4 types of objects sewing, you can find out more about them here.
Step 4
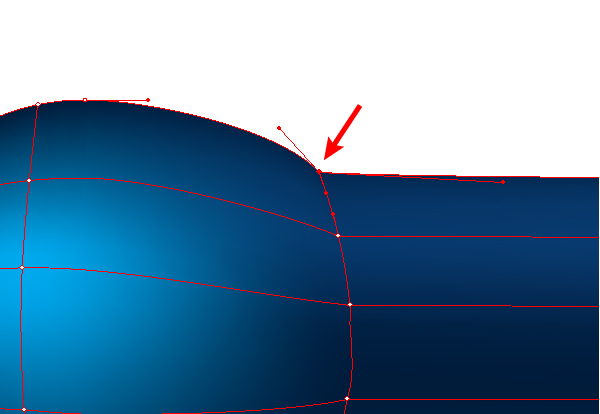
Now we can edit the results. Anyone who has worked with Gradient Mesh knows that there are corner nodes which are impossible to convert into smooth ones. One of these nodes at the place of the connection of the rectangle and ellipse is shown in the figure below.
However, this operation is possible with the Mesh Tormentor. Select the node using the Direct Selection Tool (A) and click on the Smooth button from the Mesh Tormentor palette.
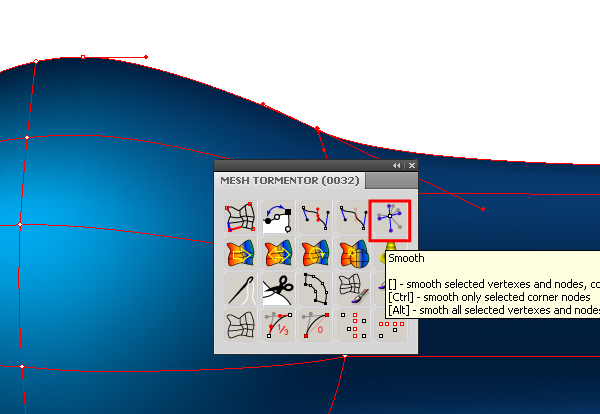
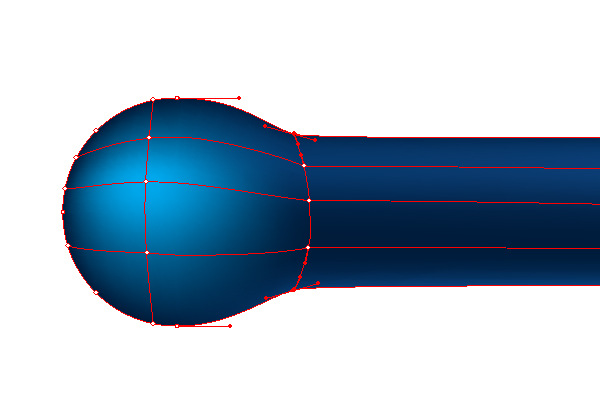
The Smooth command has three modes, you can find out more about them here. Now, controlling the handles of these nodes, smooth down the place of connection.
Step 5
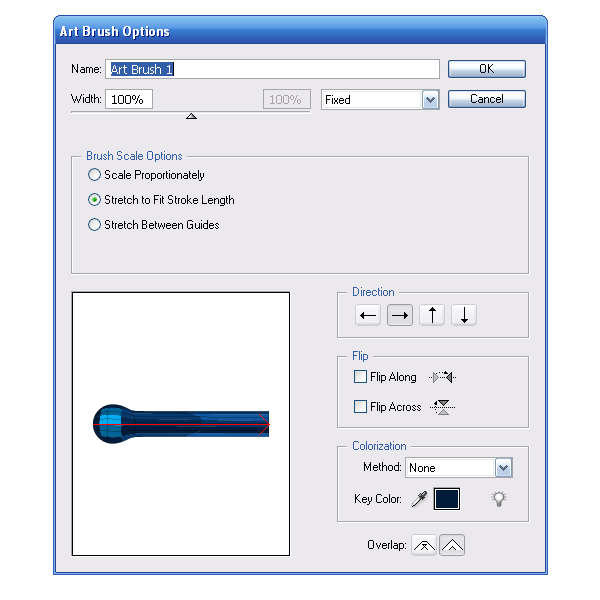
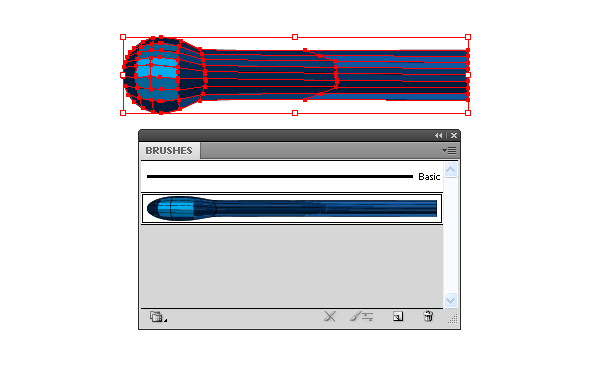
Create an Art Brush from this object. You won’t be able to do it directly, let’s check this out. Drag the object to the Brushes palette.

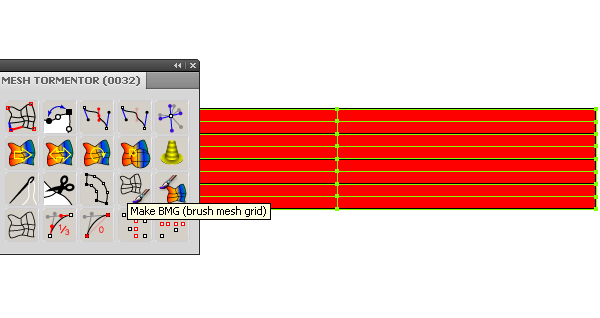
Now create the Art Brush with Mesh Tormentor. Select the mesh object and click on Make BMG from the Mesh Tormentor palette.
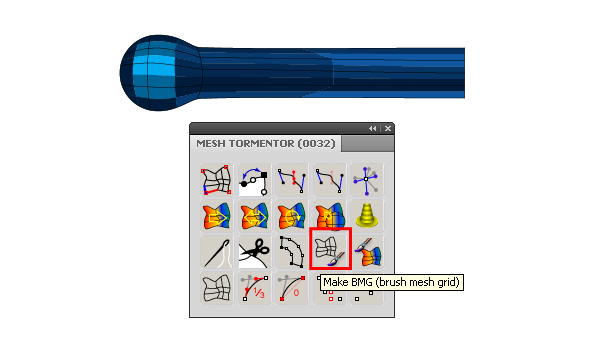
This operation transforms mesh object into a group of simple vector objects, which maintain the geometry and the color of the original object.
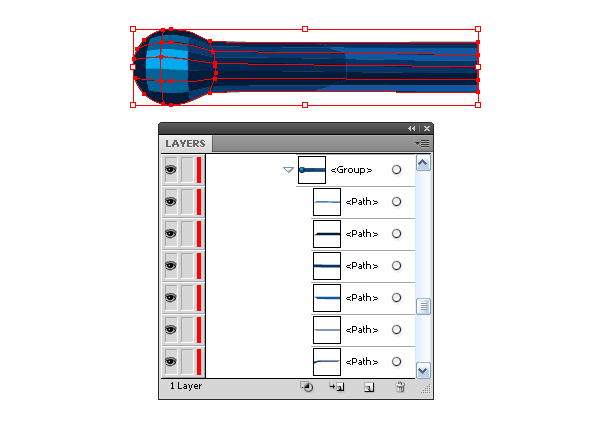
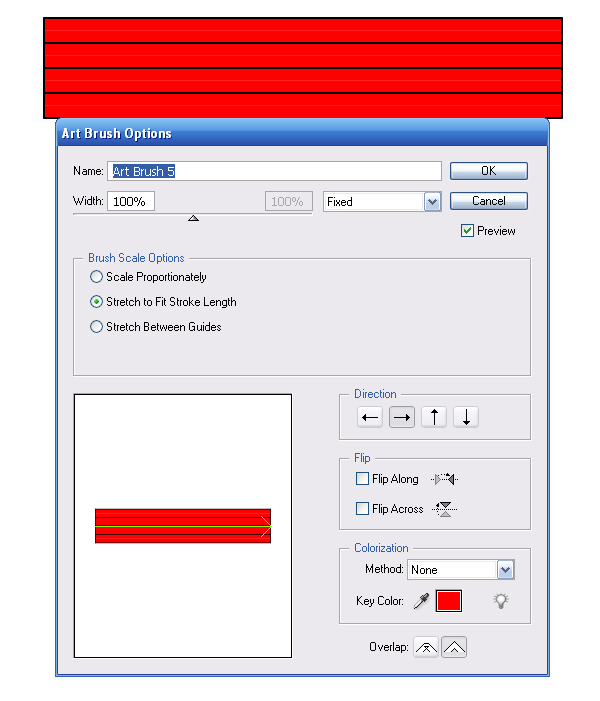
Now select the obtained group and transfer it to the Brushes palette, now it is possible to save such an object as an Art Brush.
Step 6
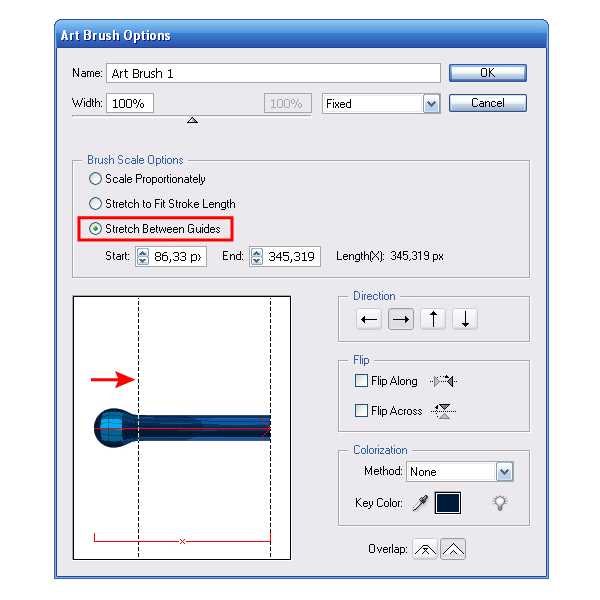
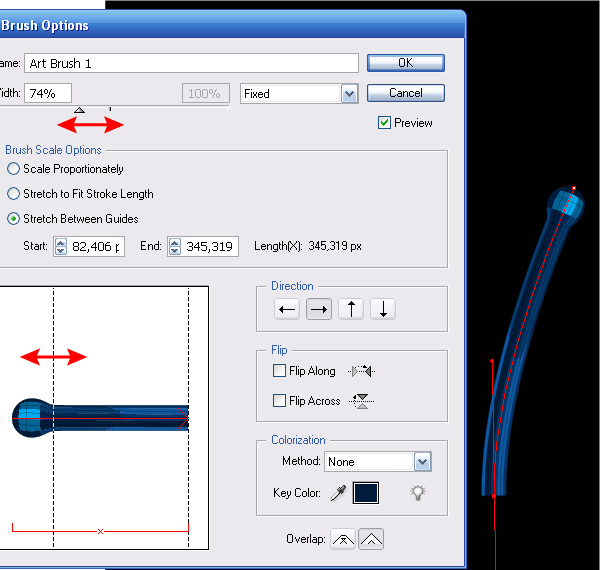
In the Art Brush window, select the Stretch Between Guides option and move the left guide so that the spherical part of the drop is not stretched during the application of the brush.
Step 7
Before applying the brush, create a background. Take the Rectangle Tool (M) and draw a rectangle filled with black.

Take the Pen Tool (P), create a curved line and apply the created brush to it.
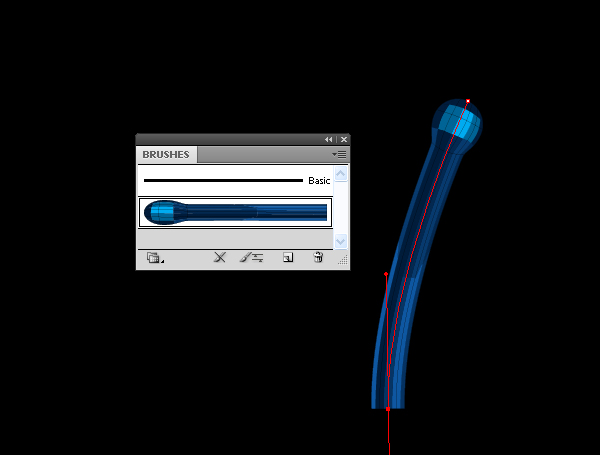
As in the case with any brush you can change its settings by double-clicking on the icons of the brush in the Brushes palette.
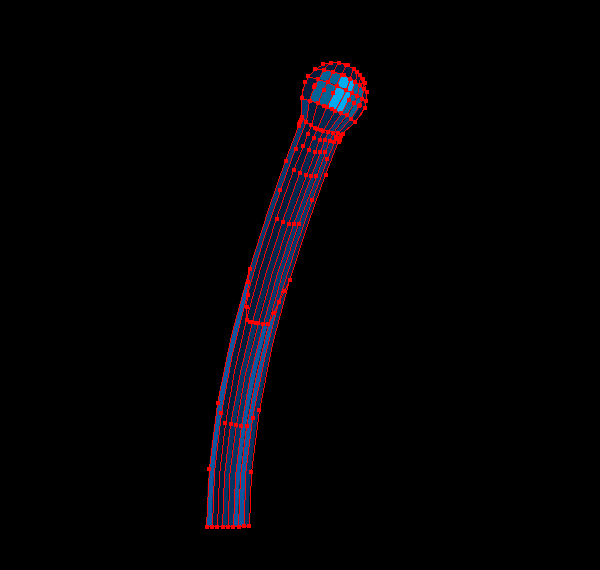
Now that the shape of the drop is edited, keeping the curve selected, go to Object > Expand Appearance.
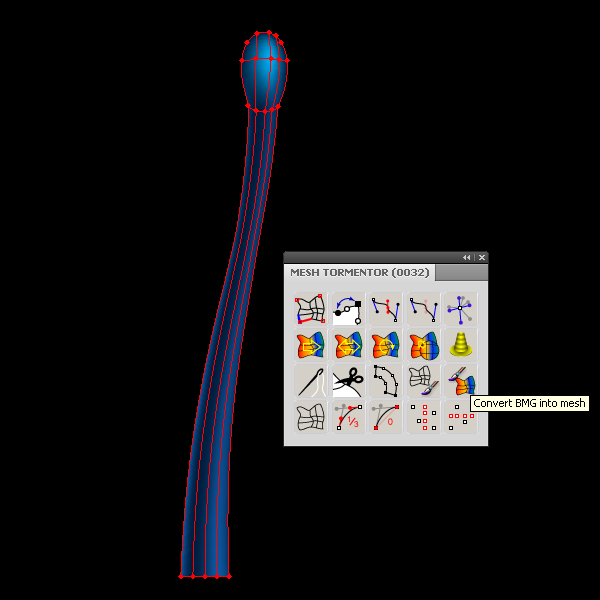
Step 8
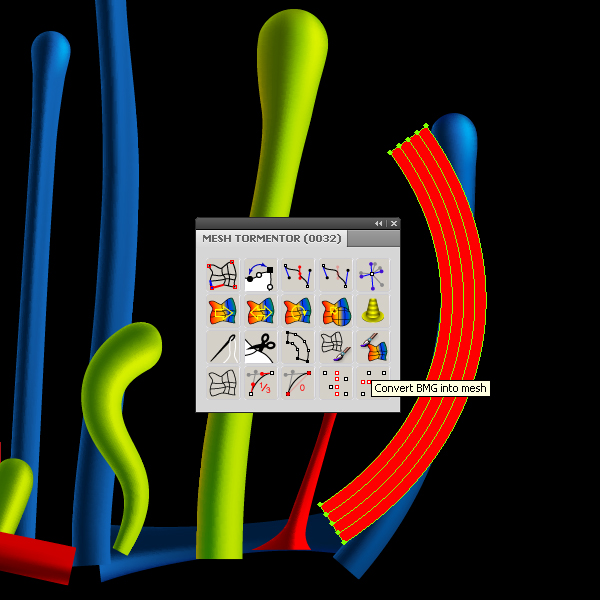
We just have to transform a group of vector objects back into the Gradient Mesh. Push the button Convert BMG into Mesh.
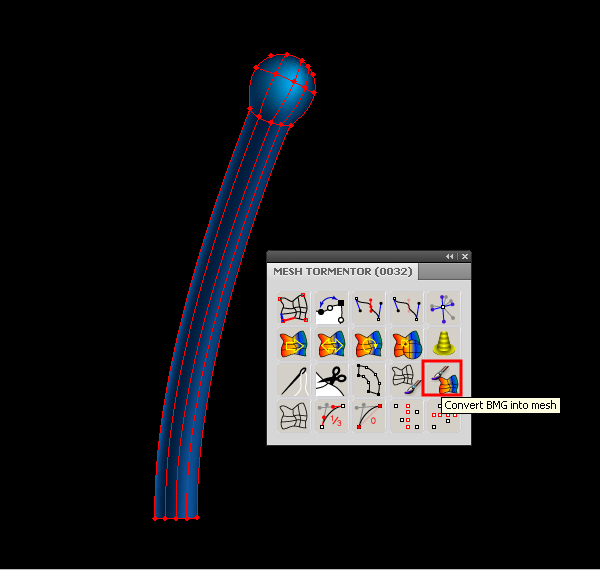
Now we can edit the obtained drop: add new nodes with the help of the Gradient Mesh Tool (U), change their color and edit the shape. Let’s talk a little bit more about the process of shape editing.
Step 9
You’ve probably noticed that when modifying the shapes of mesh objects Bezier curves change in a wrong way, not how it happens to other vector objects.
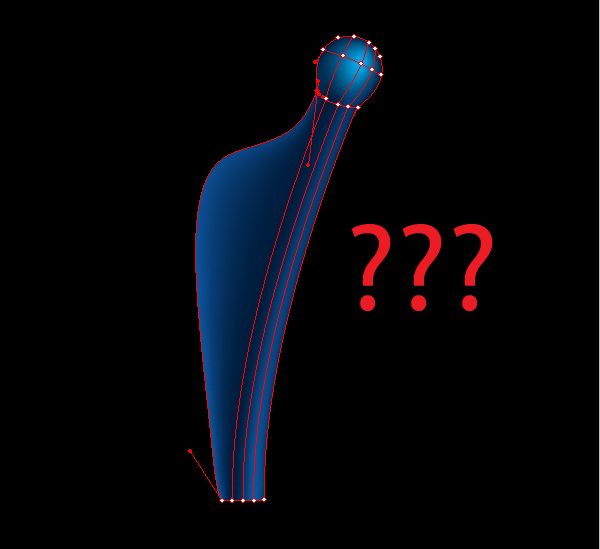
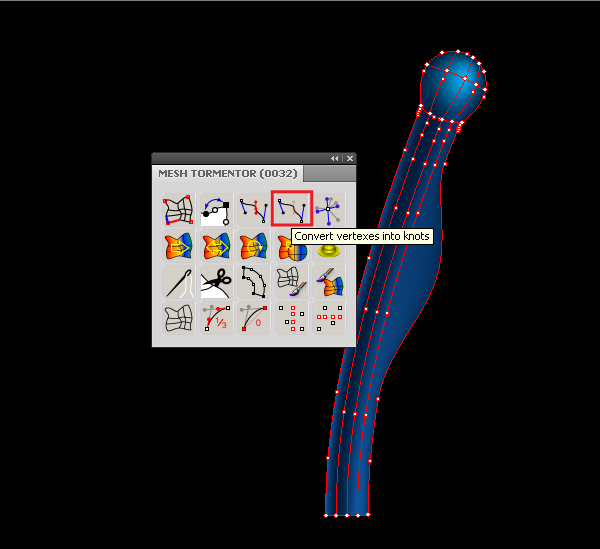
What is the reason for that? The thing is that mesh objects contain invisible points that affect the transformation of curves. These invisible dots are called Knots. With the help of the Mesh Tormentor you can make the knots visible, manage them and even delete them. Select mesh object and click on Convert knots into vertexes.
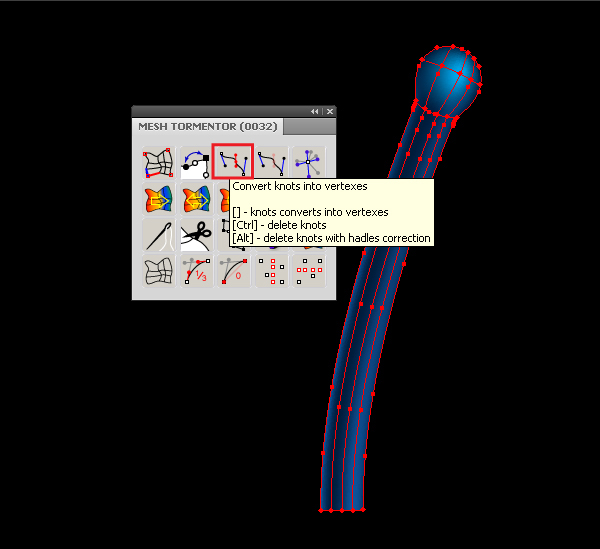
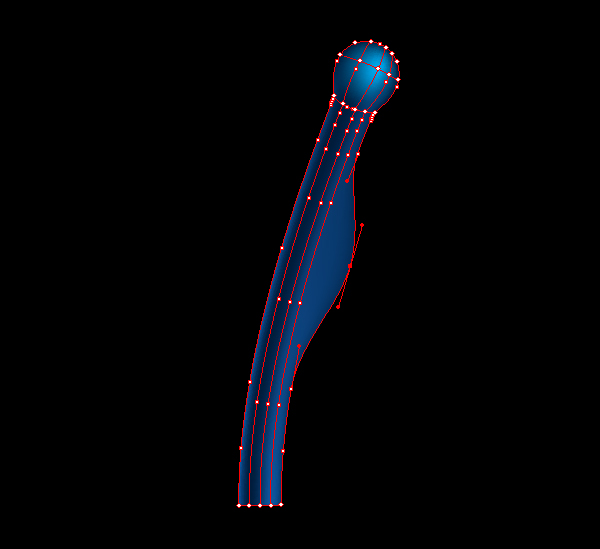
Vertex – is an additional point on the grid lines. It also has handles that define the shape of the segment and the color transition, but do not assign color. Now we can control the shape of a mesh object, like anything else consisting of Bezier curves.
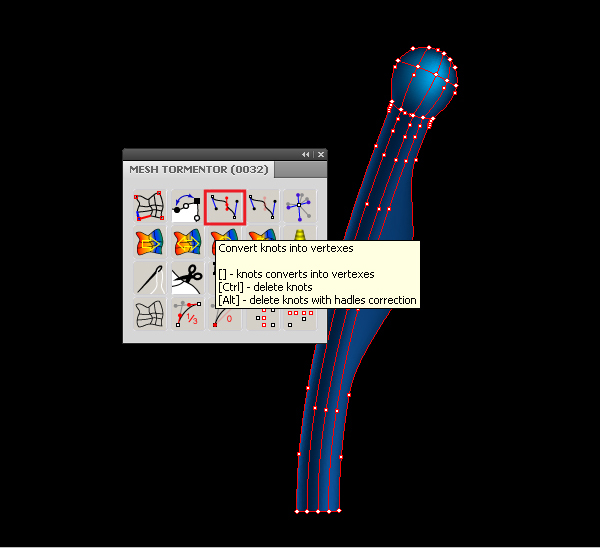
To delete a vertex, you must do the following: 1. Select a vertex with the help of the Direct Selection Tool (A); 2. Click on Convert vertexes into knots;
3. Click on Convert knots into vertexes, while holding down Command.
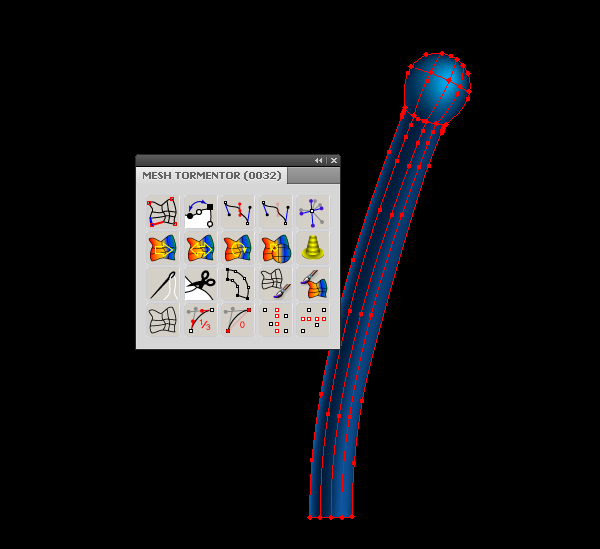
You can learn additional information on knots and vertexes, as well as their transformation here.
Step 10
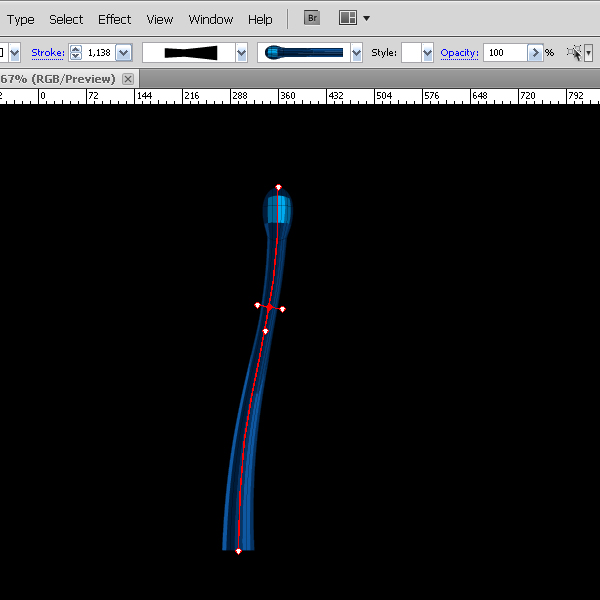
Now let’s learn about another technique for creation of a drop shape. With the help of the Pen Tool (P) create a path and apply the brush that was created in steps 5-6 to it.

Take the Width Tool and change the thickness of the outline to whatever you want.
When the desired result is achieved, go to Object > Expand Appearance and click on Convert BMG into Mesh from the Mesh Tormentor palette.
Step 11
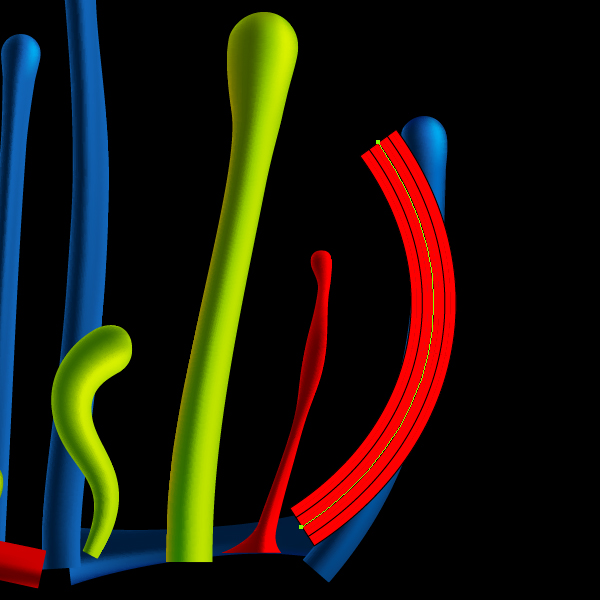
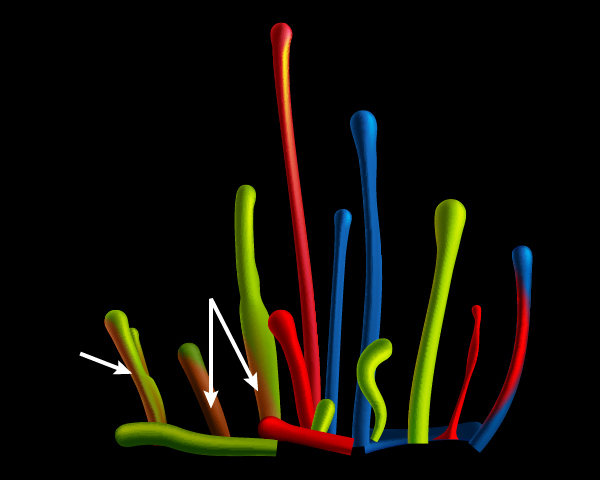
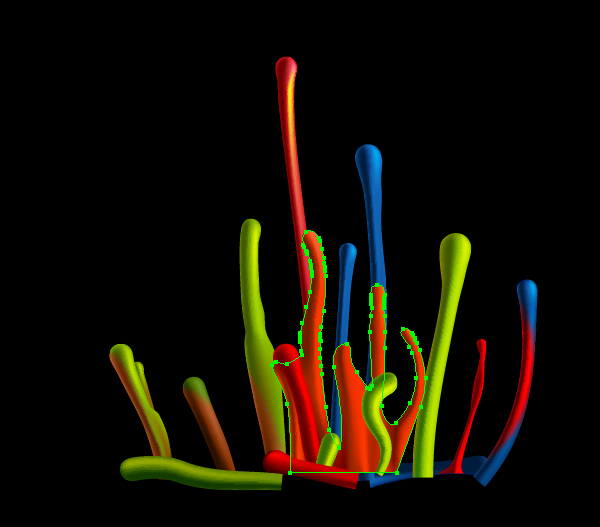
Using the techniques described above, create a variety of drops of paint.
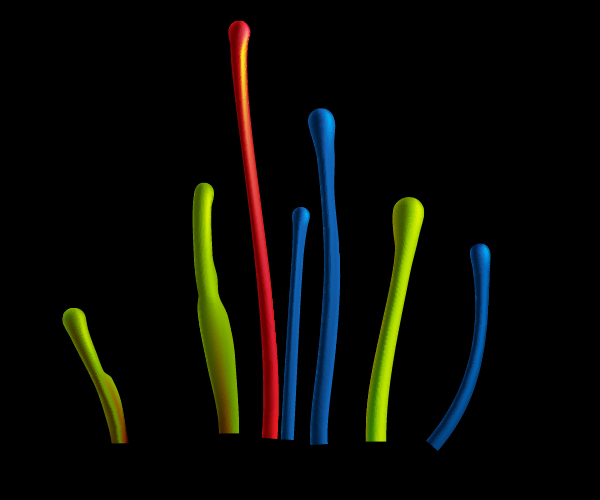
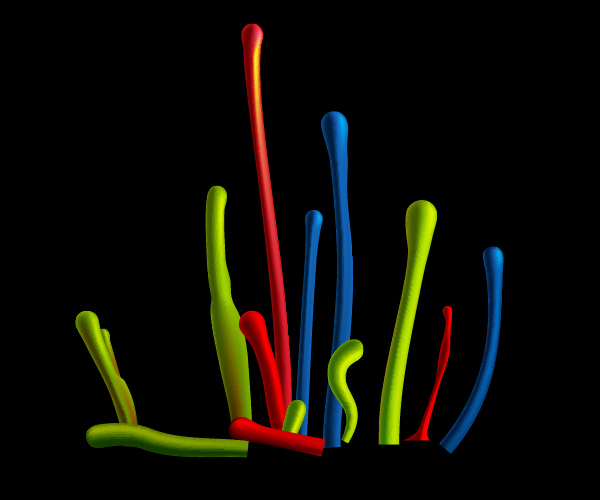
To create them I used brushes with different colors in order to achieve the brightness of the splash. Here I would like to mention one more feature of the Mesh Tormentor plugin. You can use it to clone the colors from one mesh object to another. Select two mesh objects using the Selection Tool (V) and click the Clone colors from the Mesh Tormentor palette.
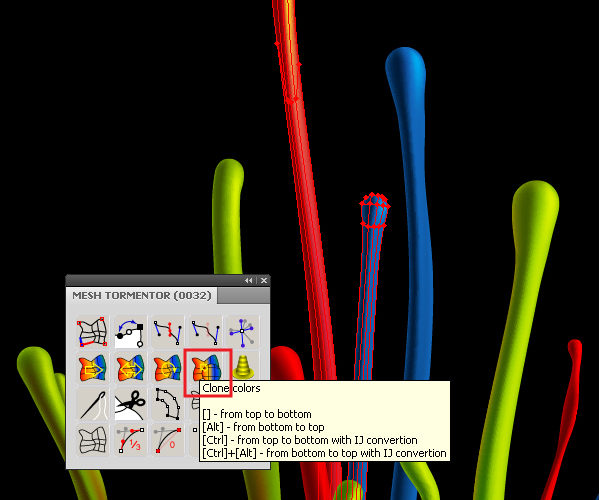
The colors will be cloned from an object that is located upper in the layers palette to the lower object. You can read about different types of cloning here.
Step 12
Now take a look at the technique of multi-colored dashes in the drops of paint. Take the Rectangle Tool (M) and create a red rectangle.

Keeping it selected, go to Object > Create Gradient Mesh… and set the number of rows and columns in the dialog window.
Now click on the Make BMG button from the Mesh Tormentor palette.
Move the obtained group of objects to the Brushes palette and save the new brush as an Art Brush.
Step 13
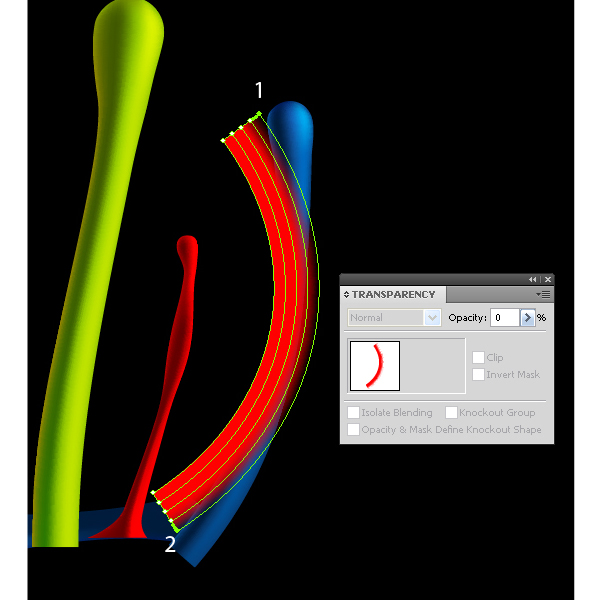
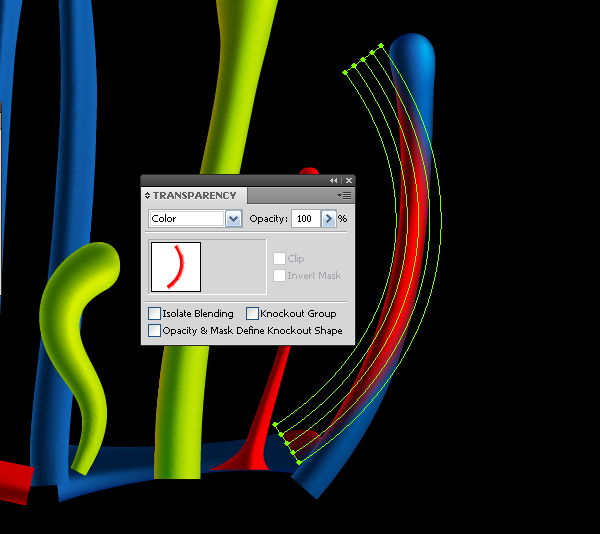
Take the Pen Tool (P) and create a curve to which you can apply the created brush, as shown in the figure below.
Go to Object > Expand Appearance and click on Convert BMG into Mesh from the Mesh Tormentor palette.
With the Direct Selection Tool (A) select nodes 1 and 2 and set 0% Opacity to them in the Transparency palette.
Now select node 3 and set 50% Opacity to it in the Transparency palette.
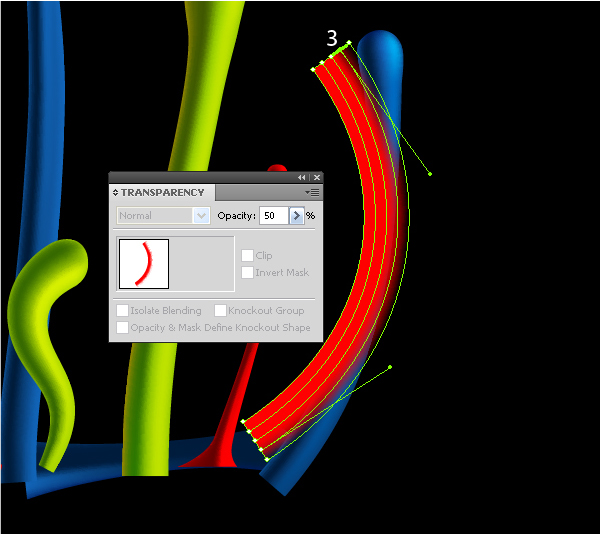
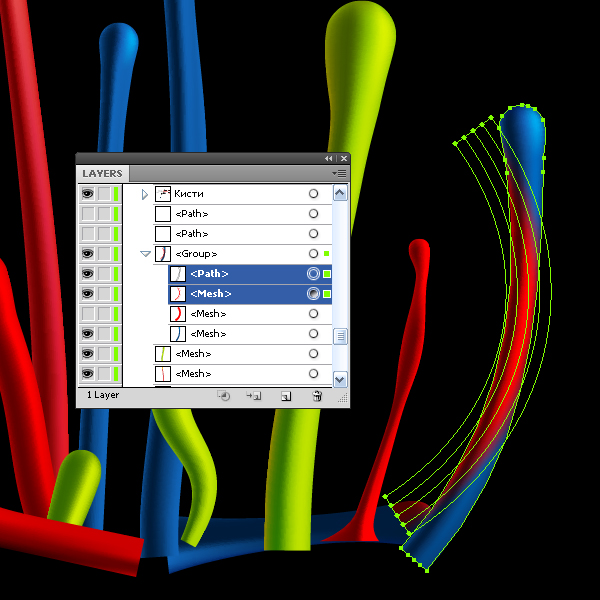
Select the whole mesh object using the Selection Tool (V) and set the Color Blending Mode in the Transparency palette.
Step 14
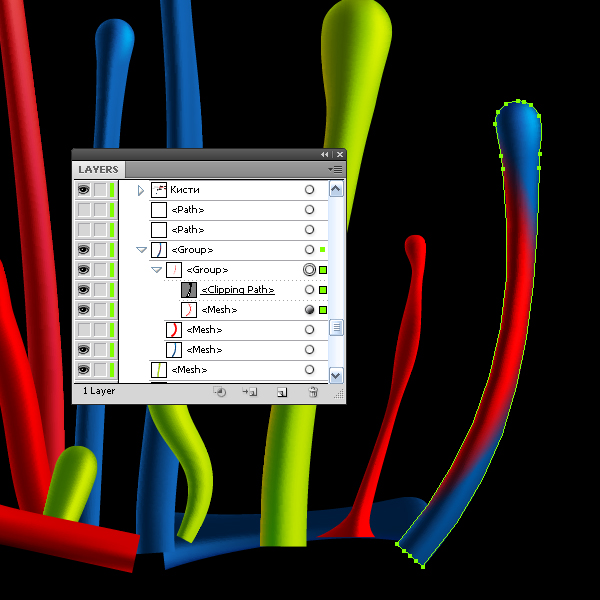
Now we need to hide parts of the red mesh object that go beyond the outline of the drop. Create the outline of the drop. Select the drop with the Selection Tool (V), and go to Object > Path > Offset Path and set the offset value equal to 0px.
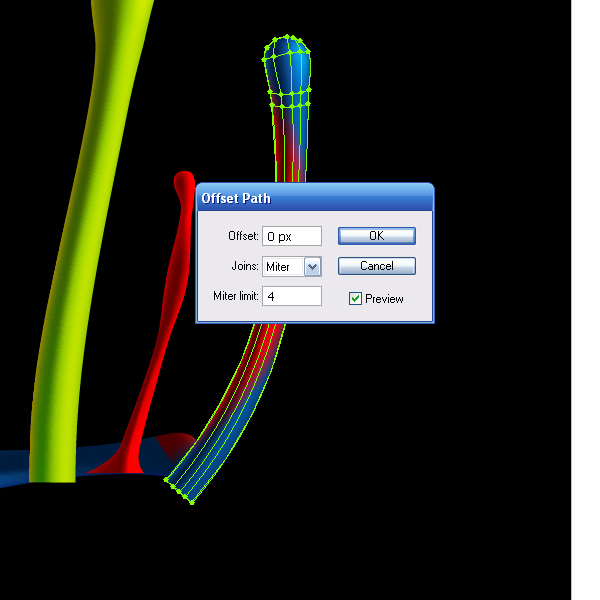
Move the created outline above the red mesh object in the Layers palette. Select the outline and this mesh object, then press the keyboard shortcut Command + 7, creating a Clipping Mask.
Using a similar technique, I created color dashes for a few other drops.
Step 15
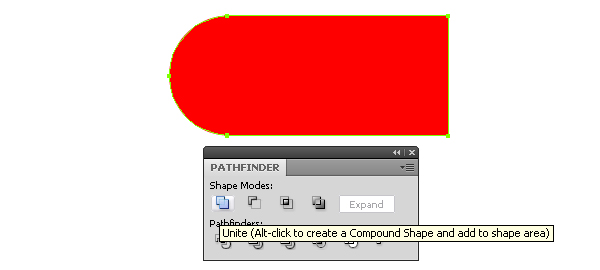
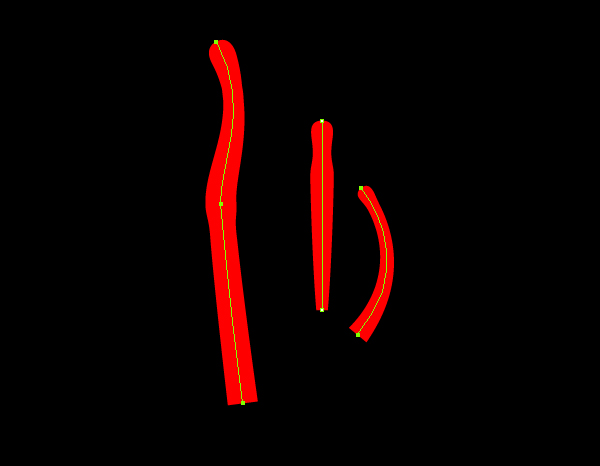
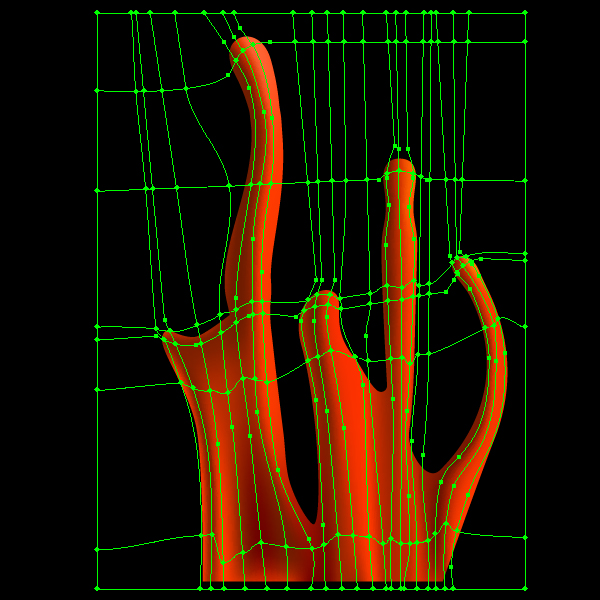
Let’s take a look at the technique of creating complex mesh objects using the Mesh Tormentor. Looking ahead, I will say that you can create outline and lines of the gradient mesh previously, using the tools of creating shapes and painting tools, such as the Pen Tool (P). First, create the shape of the brush. Take the Ellipse Tool (L) and create a circle, then take the Rectangle Tool (M) and draw a rectangle with the same height as the circle, and locate it as shown in the figure below.
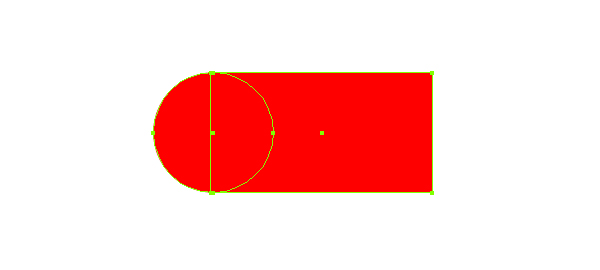
Select both shapes and unite them pressing the Unite button from the Pathfinder palette.
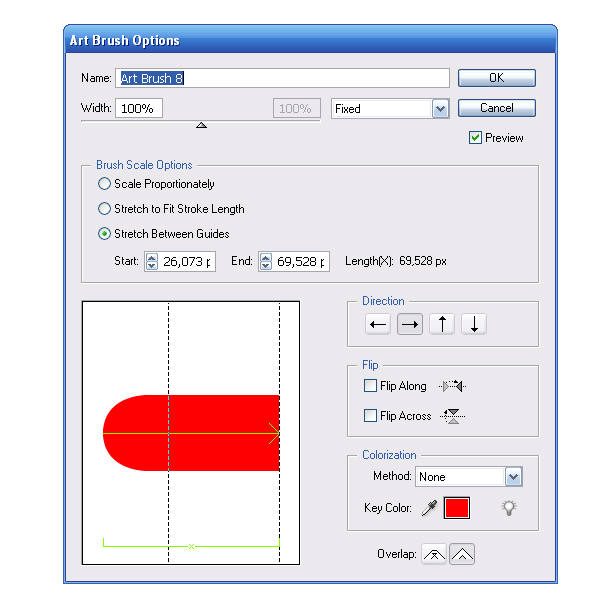
Move the created brush to the Brushes palette and save the new brush as Art Brush with the parameters specified below.
With the help of the Pen Tool (P) create 3 lines and apply the created brush to them. Change the shape of the obtained drops by using the Width Tool.
Select all the created drops and go to Object > Expand Appearance.
Step 16
Take the Pen Tool (P) and create another outline.
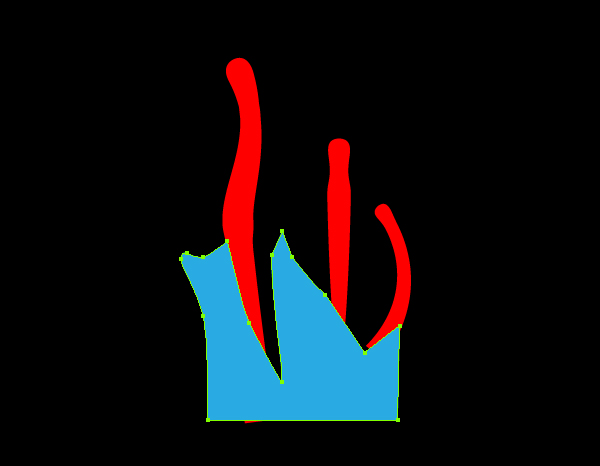
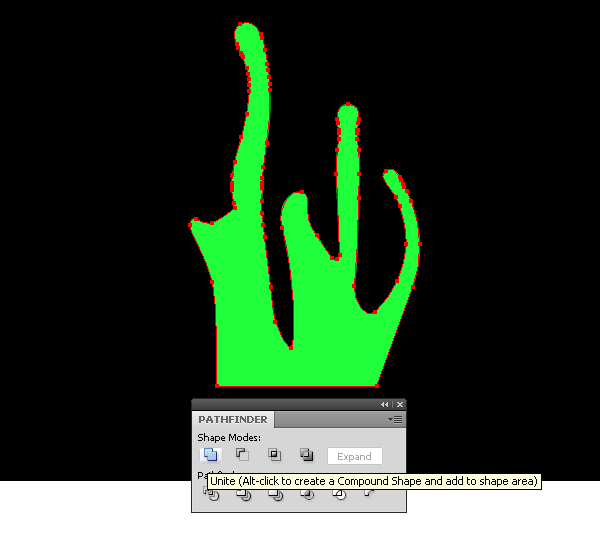
Select all the created elements and click on the Unite button from the Pathfinder box.
For this complex object we will have to create a gradient mesh. Let’s see what will happen if we try to create it in a traditional way, go to Object > Create Gradient Mesh…
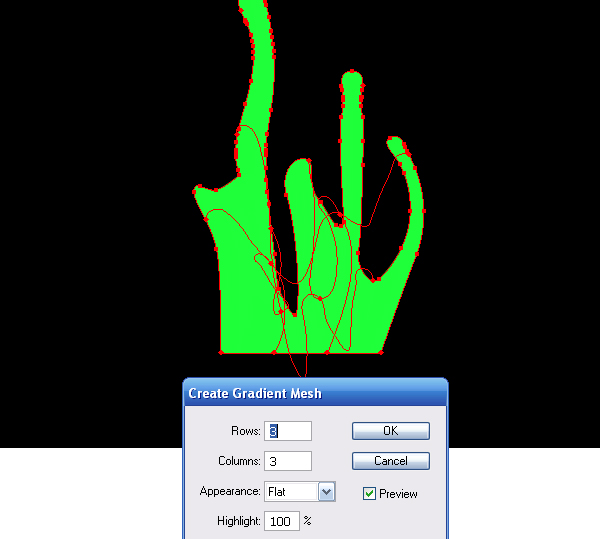
Crazy! You will never be able to untangle these nodes. Of course, click Cancel.
Step 17
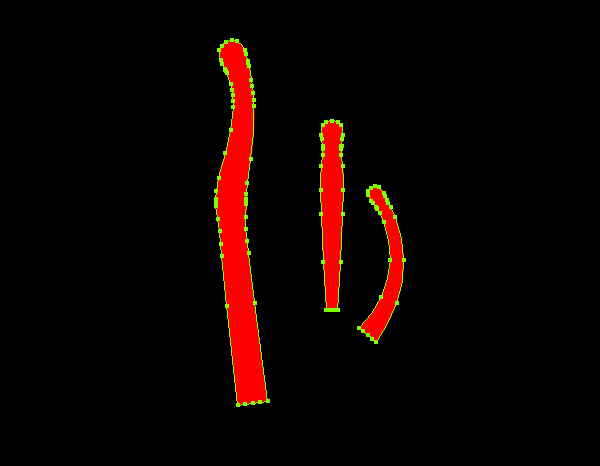
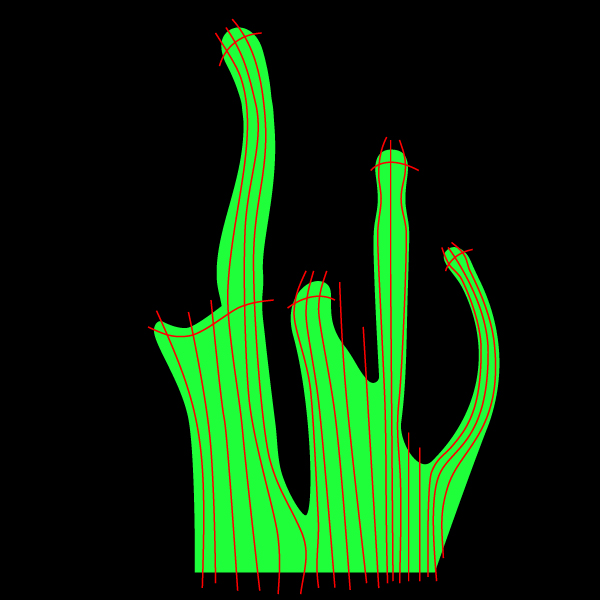
Now we are able to create the gradient mesh lines whatever we want them to be. Take the Pen Tool (P) and create a series of lines, which in the future will be the gradient mesh lines.
Take the Rectangle Tool (M) and draw a rectangle so that its size is larger than our shape and place it under it.
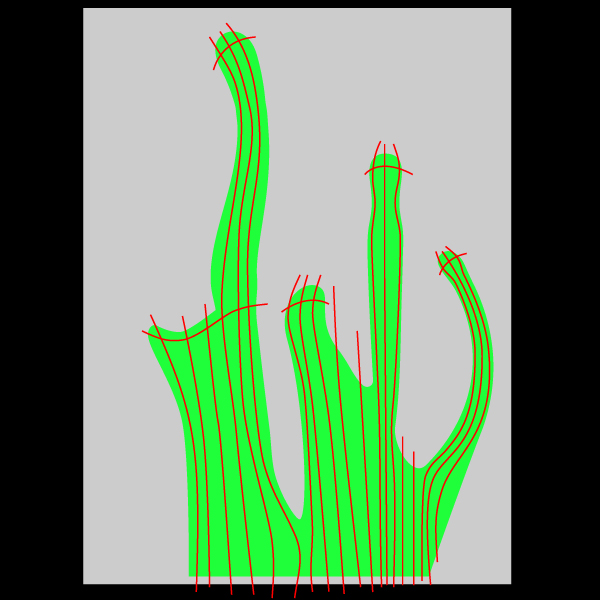
Take the Pen Tool (P) and extend the lines that we have created in this step so that their ends go beyond the gray rectangle.
Step 18
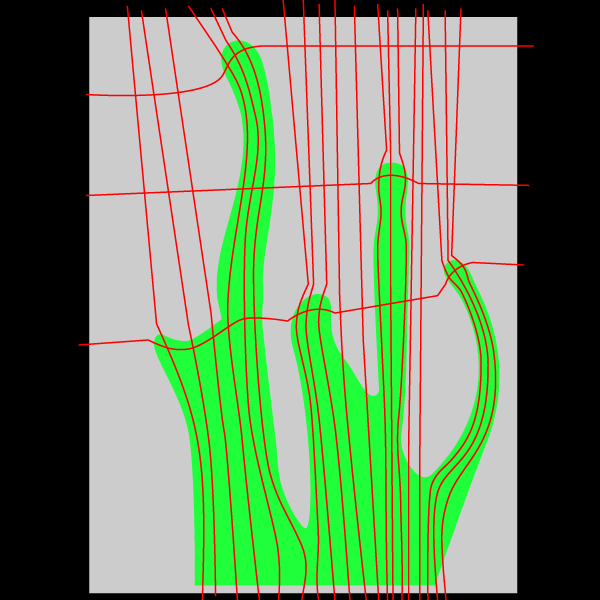
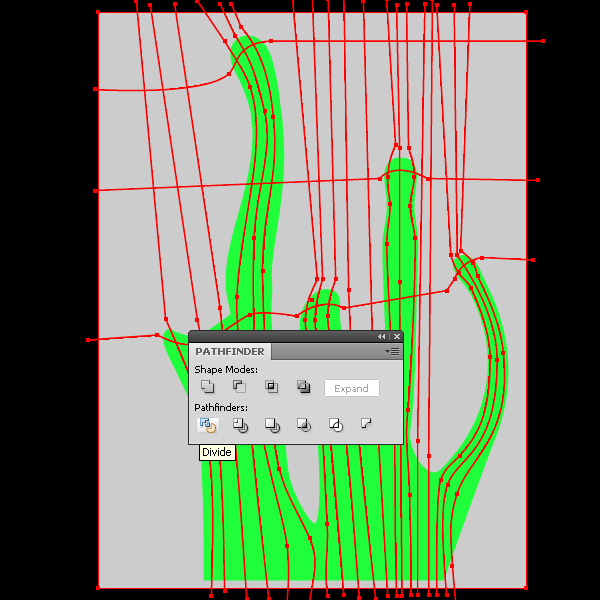
Lock the green shape in the layers palette and select all the lines and a gray rectangle. Now click on the Divide button from the Pathfinder palette.
Proceed to the Mesh Tormentor palette and click on the Create One Cell Mesh button.
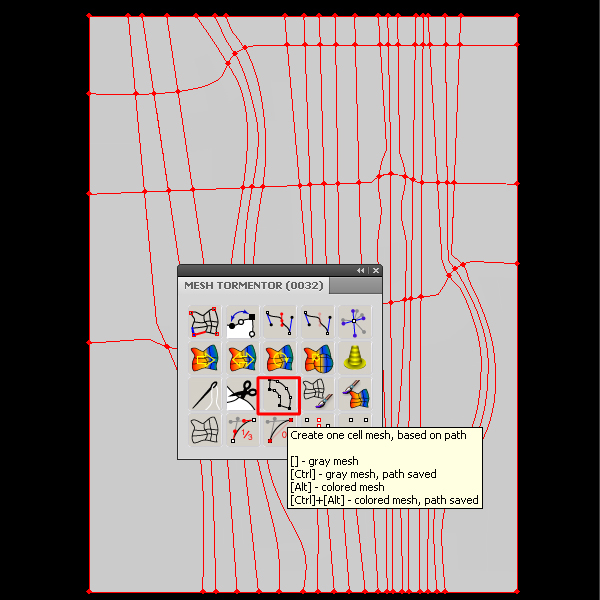
This operation transforms all the pieces of the rectangle into separate mesh objects.
Step 19
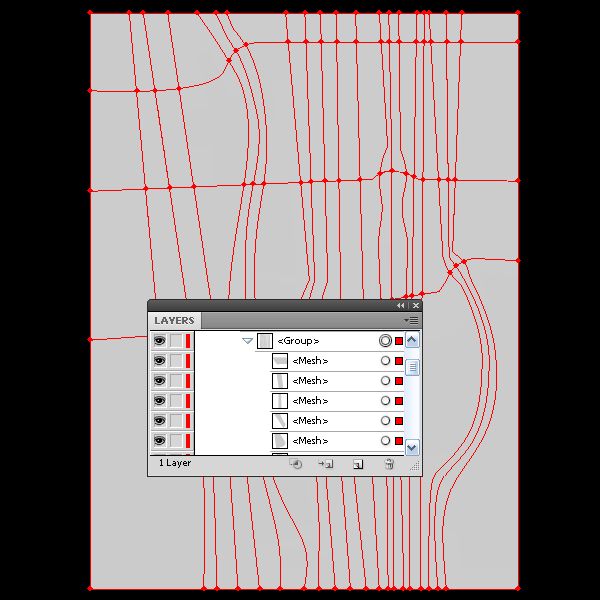
Keep the group of mesh objects selected, click the Sew together button.

This action sew together the group of mesh objects, turns them into one object. Unlock the green shape in the layers palette, select it and the gray mesh object, then press the key combination Command + 7, creating a Clipping Mask.
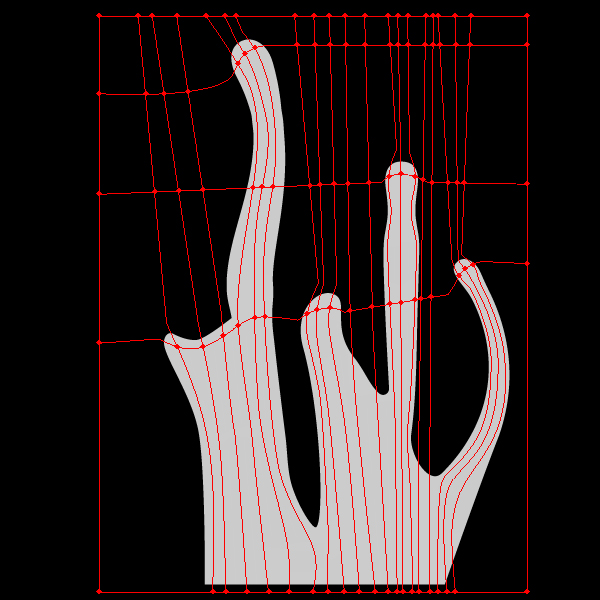
Now select the gradient mesh nodes and color them in different shades of orange.
Of course, you can add new lines to the gradient mesh using the Gradient Mesh Tool (U). This is how the created shape looks like in combination with other drops.
Step 20
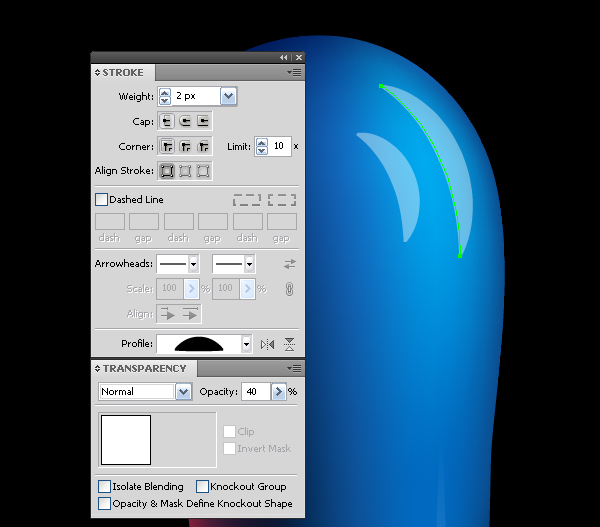
Now add glare on the drops of paint. Take the Pen Tool (P) and create a curved line of white color, select the appropriate profile from the Stroke palette, and set 40% Opacity in the Transparency palette.
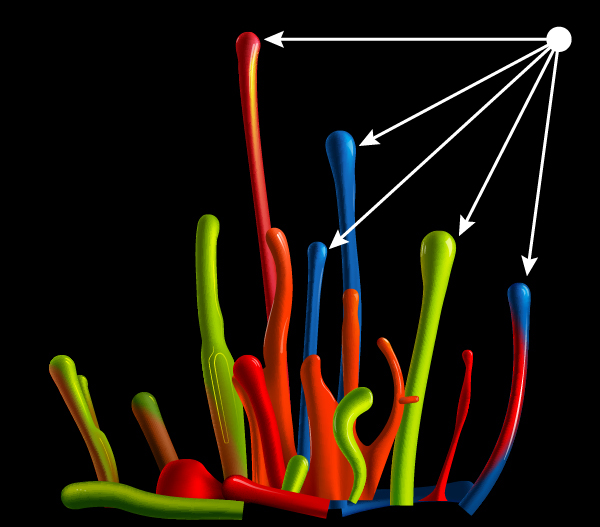
Create glare on all the drops, in agreement with the light source in the composition. I think it is obvious that it is located to the right of the viewer.
Step 21
Hide the lower parts of the drops. Take the Rectangle Tool (M) and draw a rectangle so that its size could limit our composition.
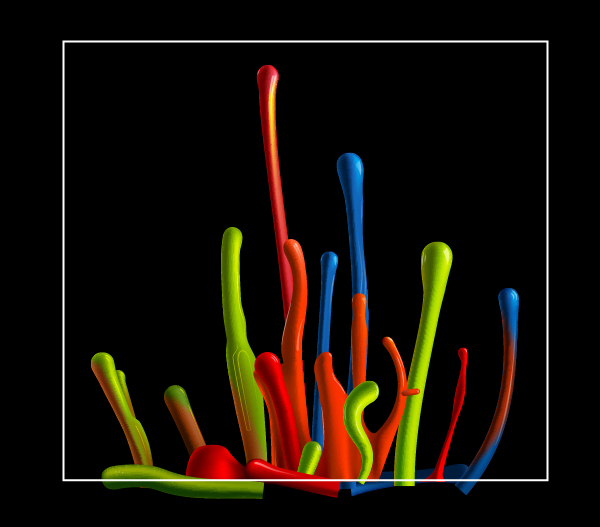
Select all the elements of the composition and the top rectangle, then click on the shortcut Command + 7, creating a Clipping Mask.

Step 22
Now let’s create a reflection. Select all objects except for the background and go to Object > Transform > Reflect…, select the Horizontal option in the dialog box and click on Copy.
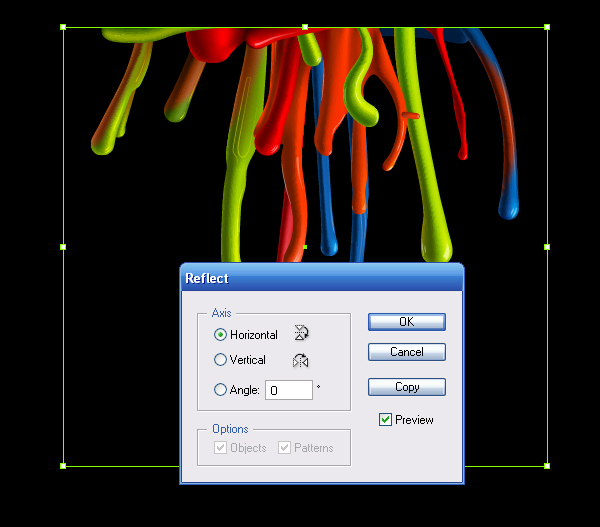
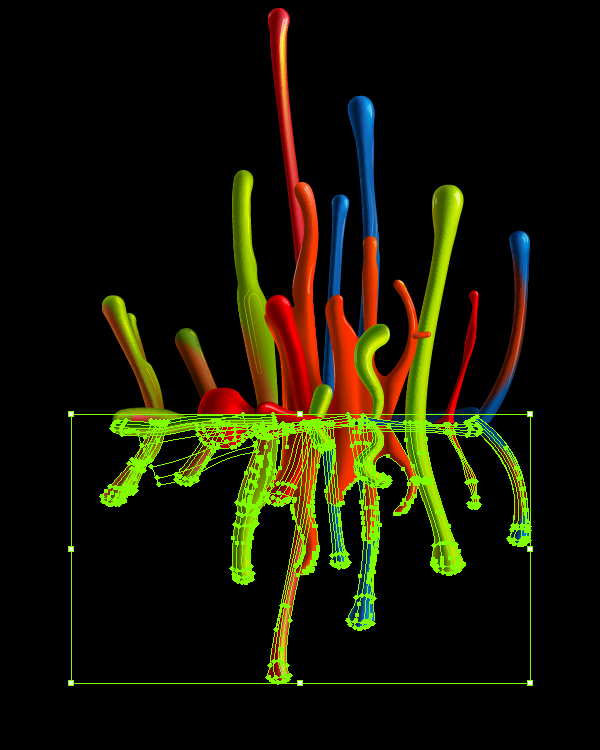
Move the reflection vertically down and reduce its height. The reflection is usually shorter than the original.
Step 23
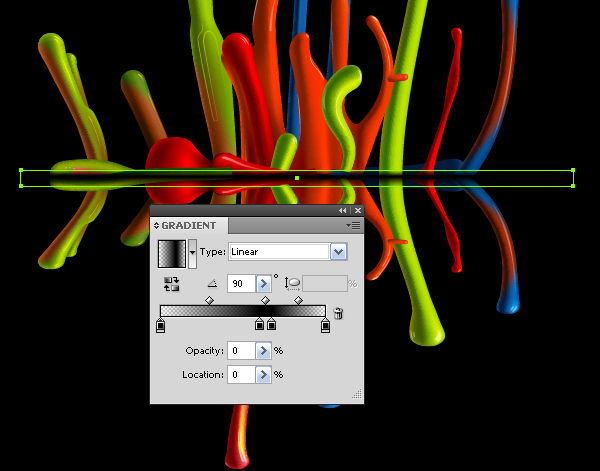
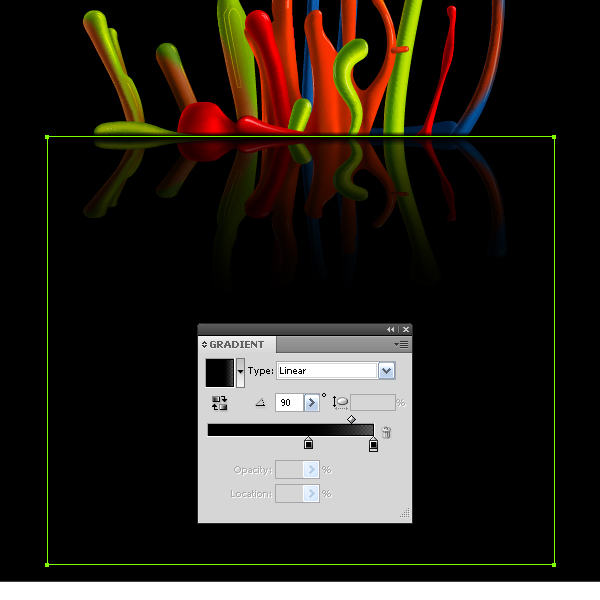
At the place where paint drops, touch the reflection and create a rectangle, then fill it with a vertical linear gradient, consisting of black, two outer sliders that have 0% Opacity.
Step 24
The reflection is always less bright than the object, that’s why we create another rectangle covering all the reflection, and fill it with a linear gradient that goes from black to black with 60% Opacity.
Conclusion
In any tutorial, it’s impossible to describe all the features of this wonderful Mesh Tormentor plugin. You can learn more about it in this complete guide to the Mesh Tormentor. You can also Download it for free here: Mesh Tormentor – Free Gradient Mesh plugin
{excerpt}
Read More